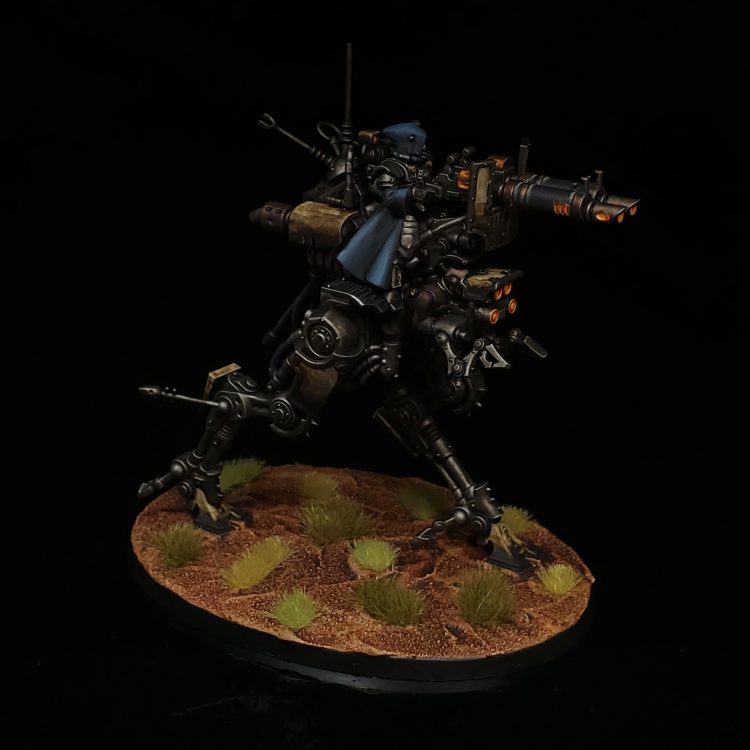
In our How to Paint Everything series, we take a look at different armies of the Warhammer universe, examine their history and heraldry, and look at several different methods for painting them. With their upcoming codex we are looking back at our favorite flesh-machine abominations in the forces of Adeptus Mechanicus to add another possible scheme.
Matthew “Rockfish” Herrington’s Adeptus Mechanicus Scheme
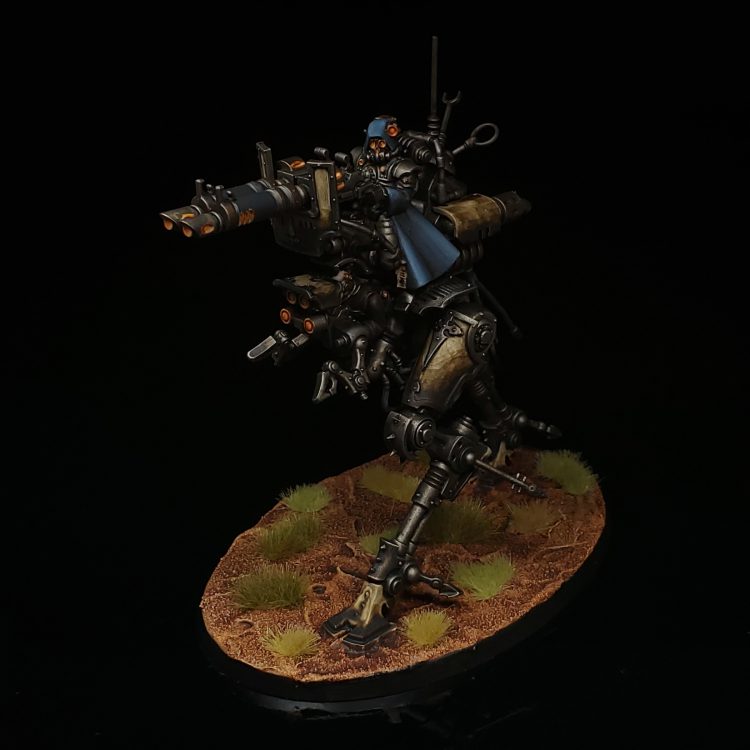
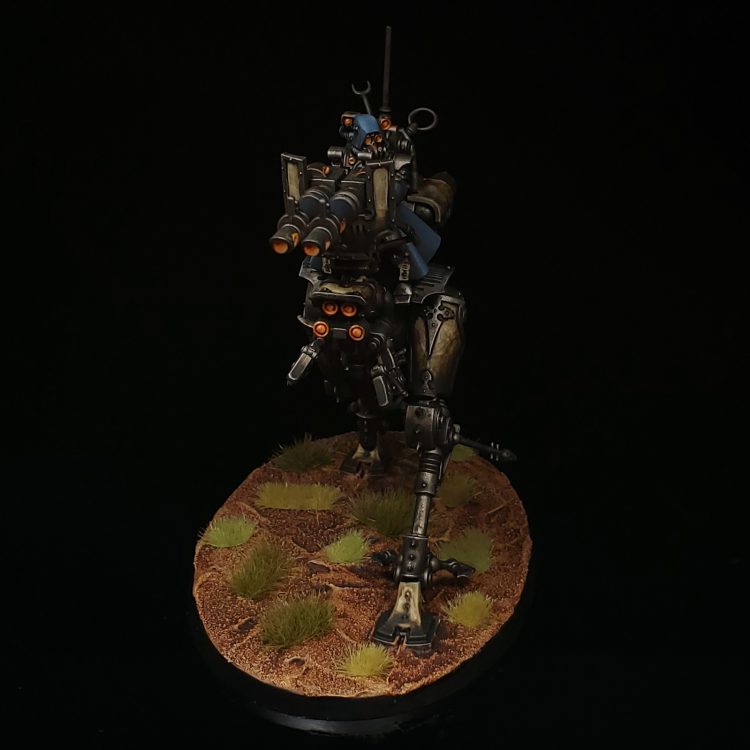
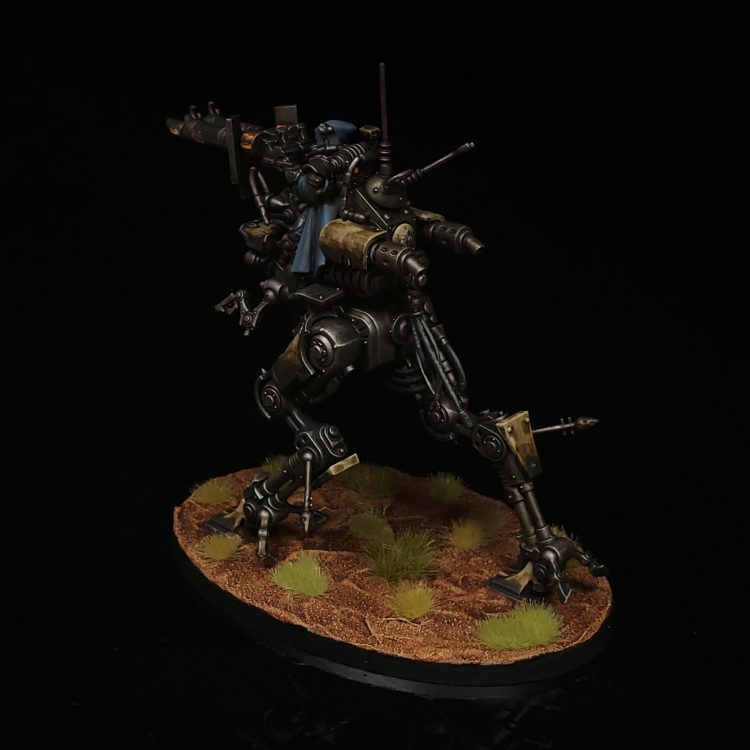
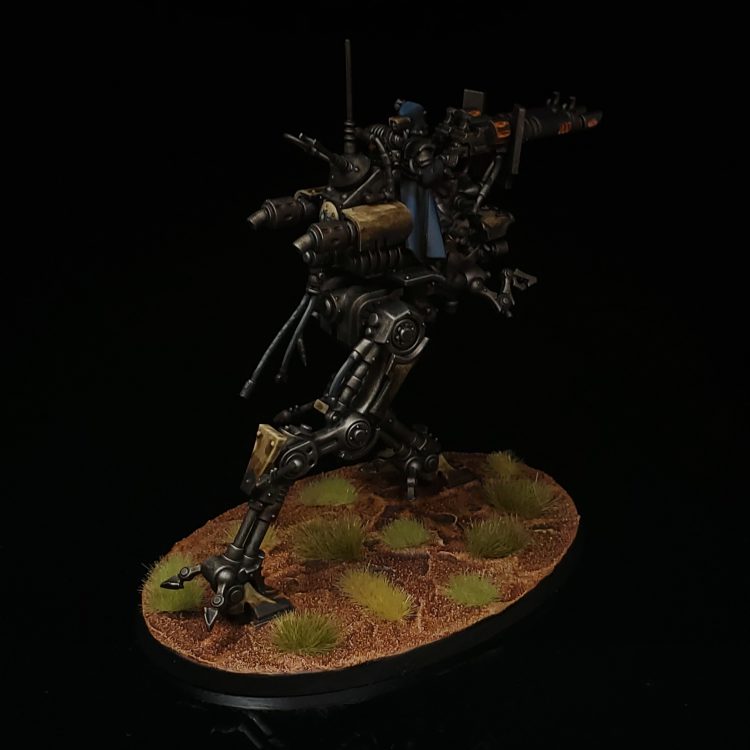
Admech are yet another army I started on a whim while stuck at home with nothing else to do, at this point in lock down that’s like the third time I have done this after I started Necrons and Craftworld Eldar for the sane reason. Yet another common feature with those other armies is that I am continuing to experiment with where I can cheat or otherwise speed up the painting process without losing quality to a degree that would offend me. To that end, this scheme has very few edge highlights and minimum number of different base coats, take a look at this Skorpius for example:
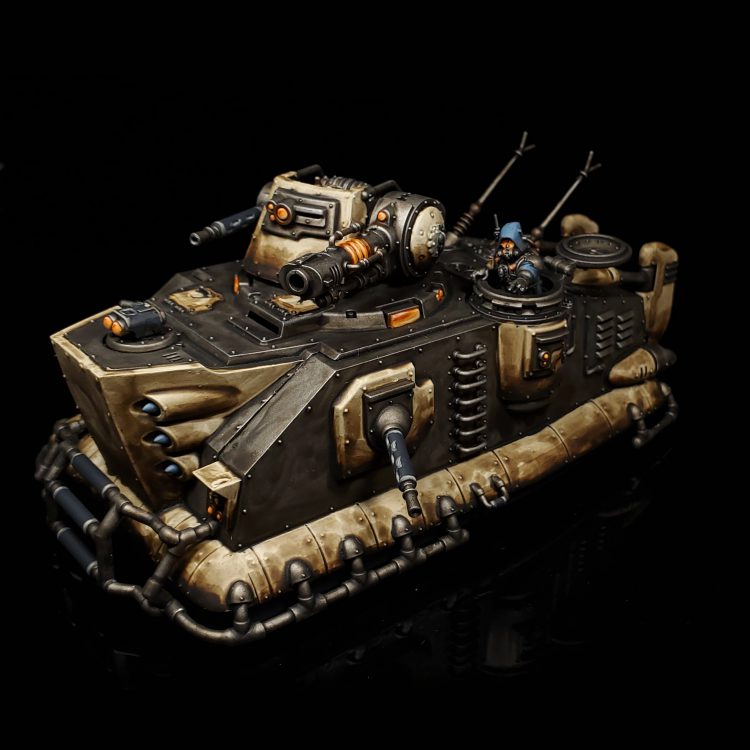
The only edge highlights on this model are in the iconography and the black weapon shrouds, for all everything else I have used a few other ways of getting the different colour shades. The most obvious is the cloaks and cloth which I glazed in the brighter colours in a quick and dirty fashion, where as for the painted armor panels I took a bright initial base coat and used successive washes to selectively darken the ivory.
I do often try to reinvest some of the saved time from the boring bits to getting a bunch of nice little details and lots of glowing lights and weaponry, I find that putting the work in such small things can have a far more compelling final result then going overboard with colours in the core of a scheme.
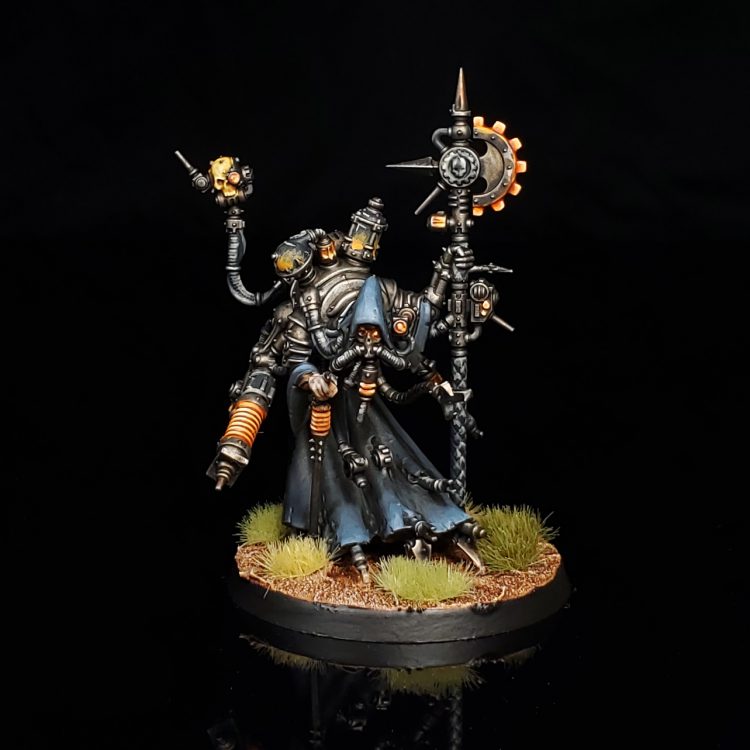
So in this army you can see that I have a couple of main colours in the blue and dirty ivory, but I don’t necessarily have each colour represented evenly across each model. Compare the Skorpius above to the Skitarii Rangers below as examples of polar opposites, there is only a hint of blue from the commander but there are plenty of armor panels in ivory. The Rangers only have the barest hint of ivory on their shoulder lens shroud, instead each has a coat with a hood resulting in a abundance of blue.
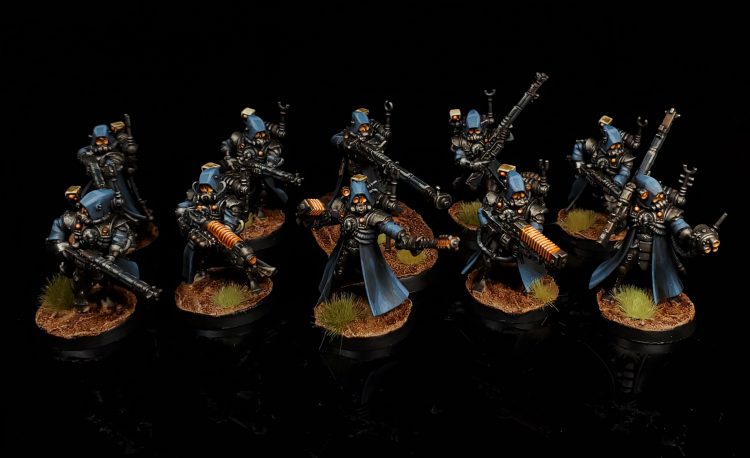
This scheme is one where the army is cohesive as a whole, whenever a colour is missed on one unit it is balanced out in another!
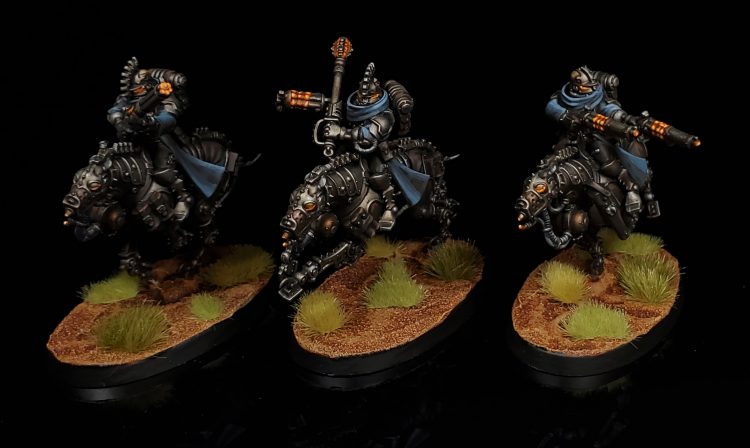
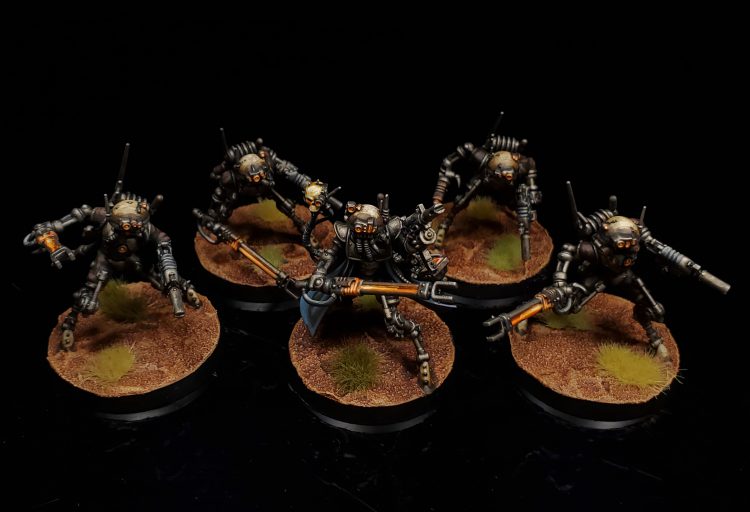
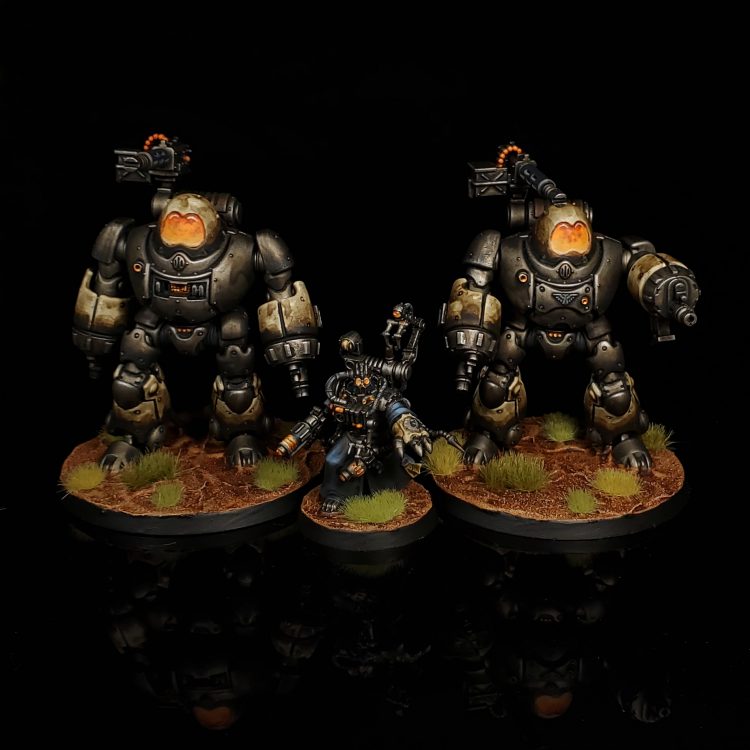
As for the lore of this army that’s my biggest failing with these sorts of things, I have never really been good at either coming up with names or lore for my armies. At some point I will force myself to sit down and come up with something interesting, but in the mean time I might let some sort of narrative form from crusade games or something. As for on the table top, the scheme is not a match for any of the existing forge worlds that I know of, so I can run it as whatever but with the Metalica supplement giving me a option to potentially throw some knights in to get myself a plastic lord of war or three they are pretty tempting possibility!
Clearly I have spent too much time waffling on about the army, so its time to get to the scheme itself!
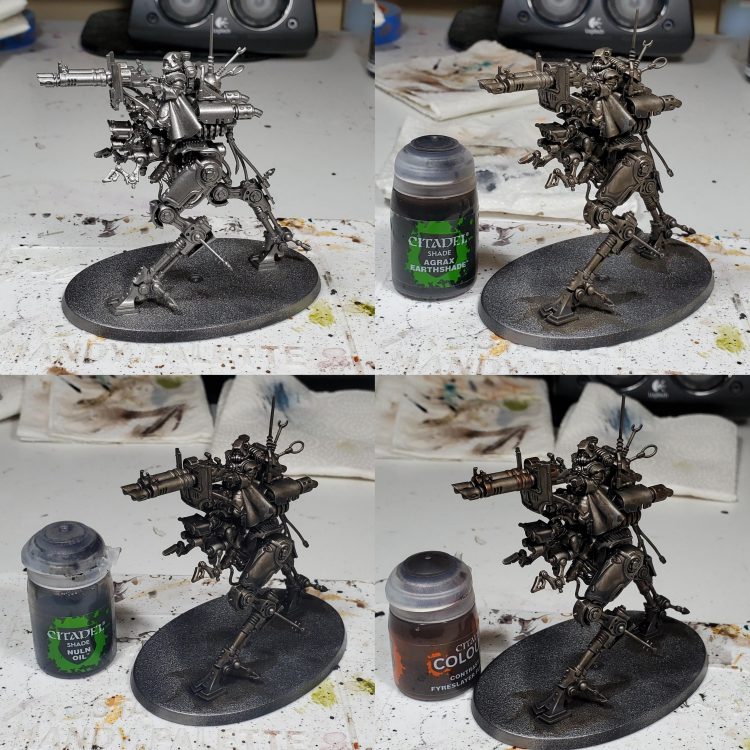
I began by airbrushing Iron Hands Steel over black primer, with Admechs heavy emphasis on mechanical contraptions its far more preferable to me to base coat a minority of the model by hand even if one of the main colours is ivory! After the base coat I threw on a sequence of washes with the intent of making a nice rich steel, while you could skip the Agrax I find that the browns make the metal feel far more real as it has more complexity then just being a flat metallic grey. One of the nice bonuses that starting with a neutral steel is that we can use washes to diversify the types of metal without having to do more base coats, in this case I used Fyreslayer to add some copper/bronze details. If you wanted brass snake bite can look good too!
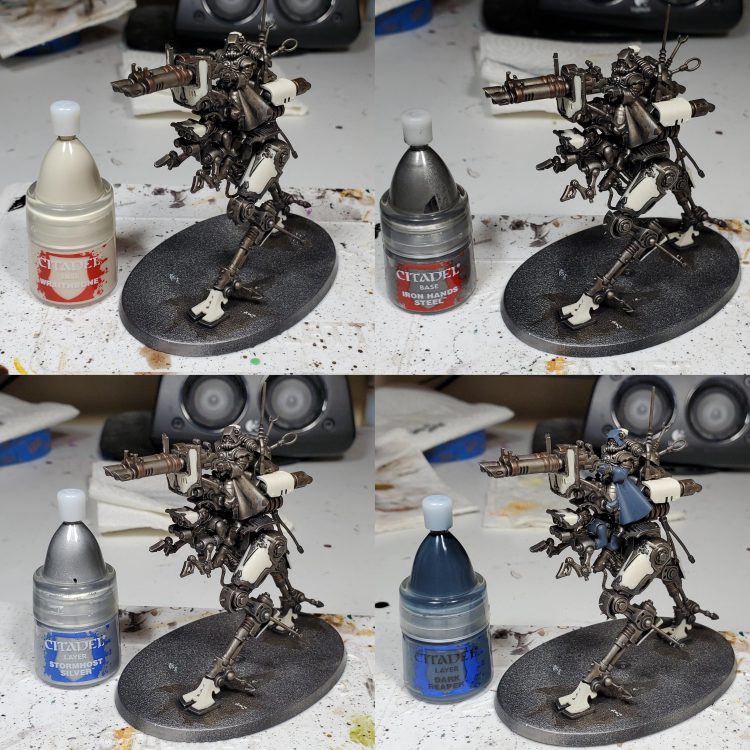
I made a mistake here and started base coating the ivory before doing the metal drybrush, but thankfully the panels are recessed so there was little to no negative consequences. At this point we are actually done the metals, while you could go through and do some edge highlights or fine targeted drybrushing but I am lazy so I will leave that for my marines or necrons.
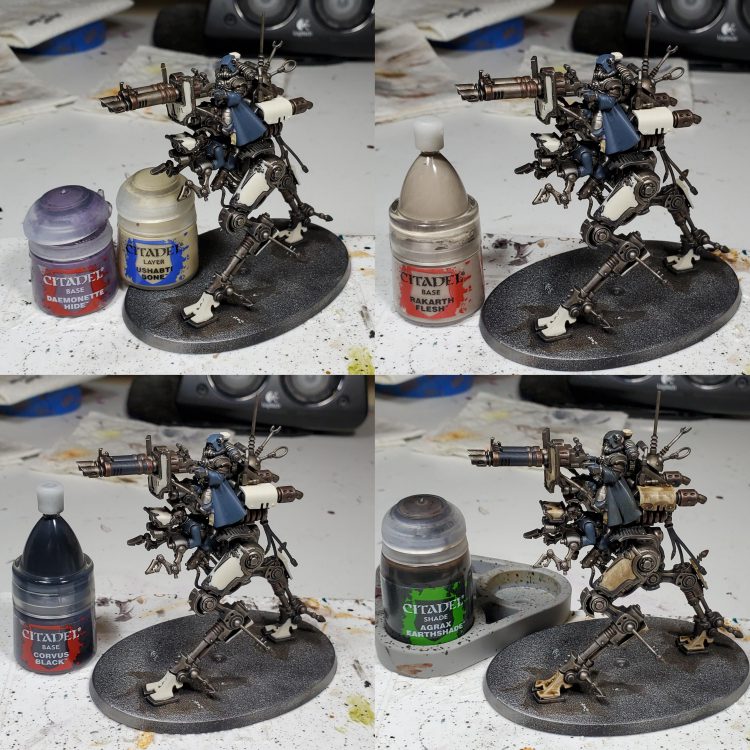
Since its not super obvious the Ushabti and Daemonette are for the seals, while Rakarth is for flesh. I used Corvus to blacken cables and some parts of guns to pick them out, in another area you can cheat I often find on small cables a single coat is sufficient. With that we are done all the non glow base coats and can get to highlights and washes!
I start with drowning the coats and armor panels with agrax, you really don’t need to worry about pooling or getting a little overflow with this as we will either glaze it back up or be pushing it darker anyway so just slap that shit on.
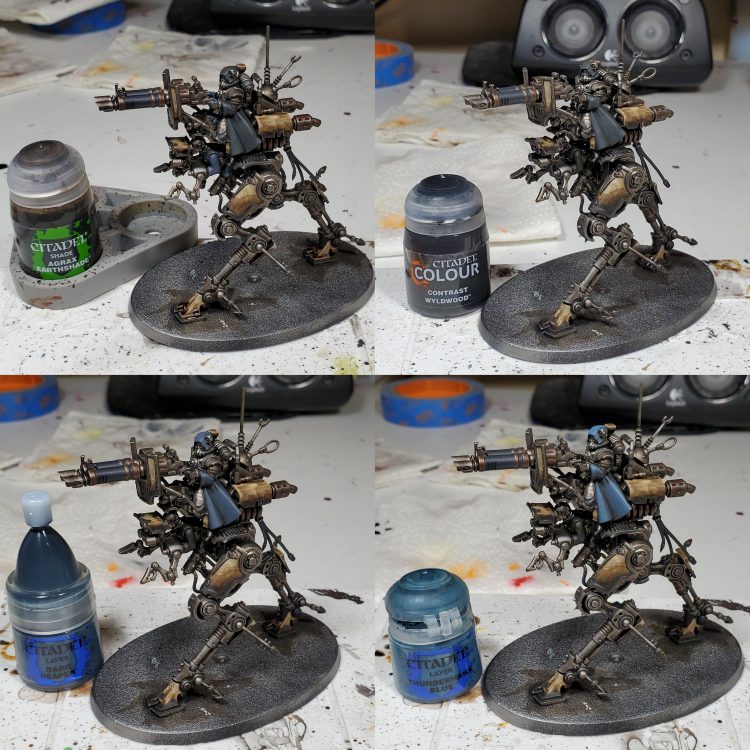
On small things I do maybe one additional coat of Agrax further down the panels, but on something big like this don’t be afraid to do as many as needed to get a semi smooth transition. For the Wyldwood I would suggest doing at least one coat of thinned before going to the straight, I think I did ~3 thinned coats on this model. I also used pure wyld wood to make the leathery underarmor look more appropriate, you probably could use a different undercoat for them but it works out ok over the blue and saves a bunch of time particularly on models with both cloth and leather.
We can also start to glaze the robes, this is still a technique I am working on practicing so don’t mind the imperfections! You can typically get away with not trying to reach the opaque colour that is being glazed on as most of it would get covered by the next colour anyway.
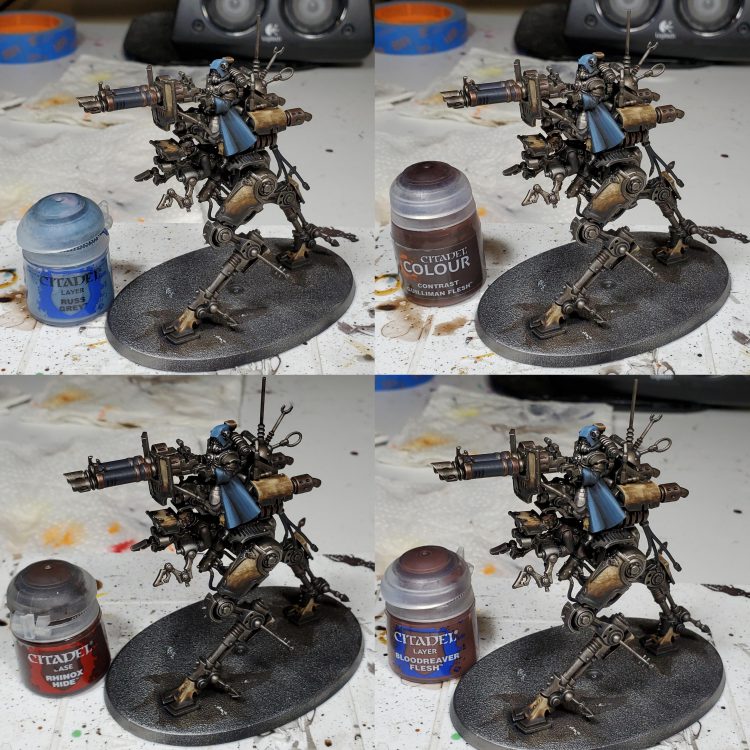
Continuing from the last group of pictures, I finished off the glazing of the coat with Russ be careful that you only go far enough to get a extreme highlight as it is easy to overwhelm the existing blue.
I also realized I had forgotten to wash the skin on servitor, so I did that followed by the simple highlights on the soft underarmor. You could glaze the highlights there too, but I have mostly found it unnecessary as its not really supposed to draw the eye anyway, so some quick and simple strokes on upper surfaces is enough to get the idea across.
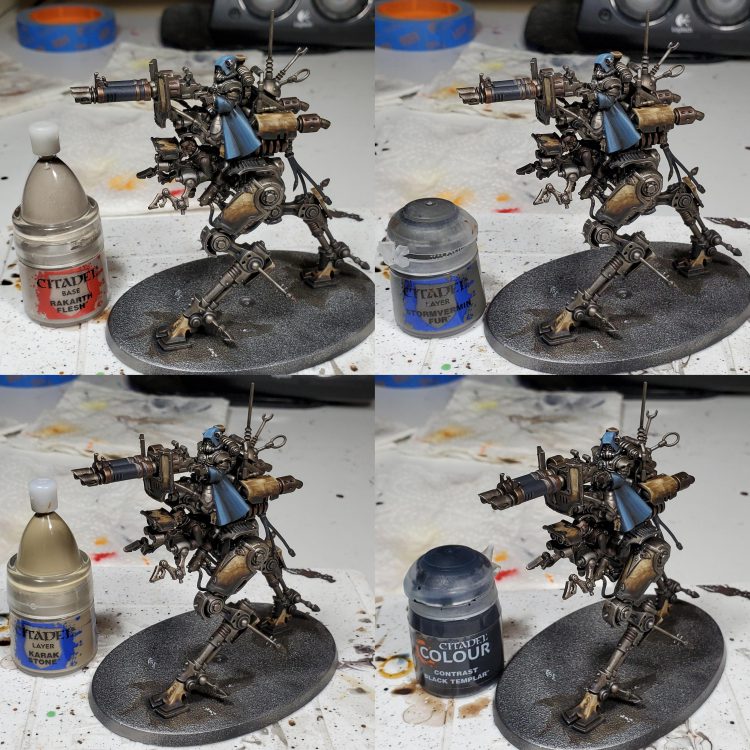
Looks like I missed a picture of the while highlighting the skin here, I did a little bit of flayed one after the Rakarth. Its worth noting that for both I essentially just did a quick glaze, anything more pigment dense can lose the weird dead flesh look we have going on.
Cables and the gun shrouds got highlights of Stormvermin (also used to base coat the iconography!) and Karak, then I used Black Templar to divide the two sides of the iconography.
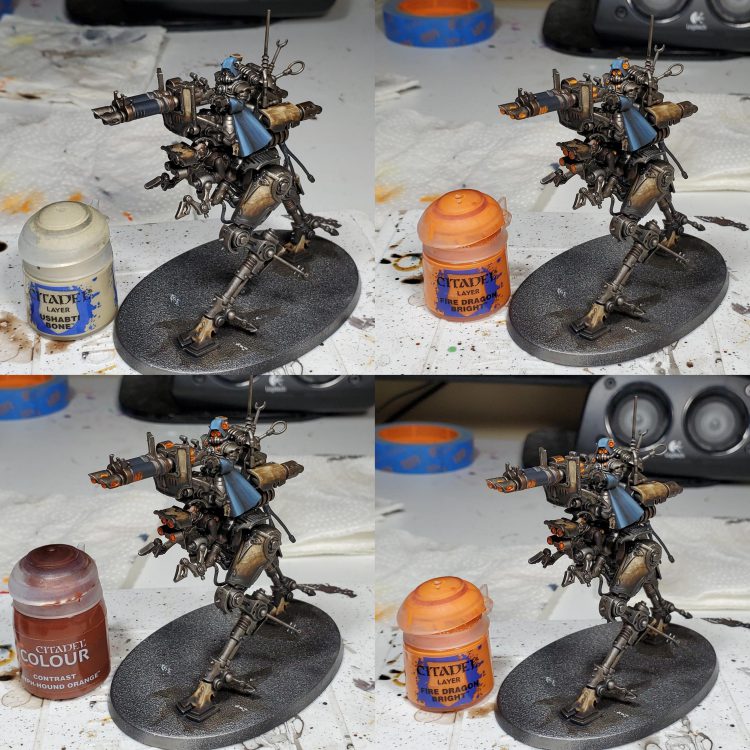
The first highlight of the black part of the iconography is pure Stormvermin, after that I work both sides up by mixing in some Ushabti to each step and only using pure Ushabiti on the ‘white’ parts of the icon. You could glaze this as well, but I am lazy and doing a quick mix on the palette for this kind of thing is fast once both colours are already out.
Now we are onto the last parts of the model itself with the glow/lenses, often on other schemes I try to differentiate those two concepts but I enjoy the cohesive look on admech and it follows the lazy theme I have going on. You can be pretty sloppy with the Fire Dragon base coat, between the wash of contrast and the generally dirty colours of the scheme mistakes can go unnoticed.
Normally for a glow I would not use a wash, but for admech they have a lot of lenses and panels with indentation or other unevenness to the surface, so it helps define those areas as darker and we end up with some good complexity before we even start sketching in the highlights. You can even get a little bit crude OSL by letting the wash overflow a little or placing it where the light would land.
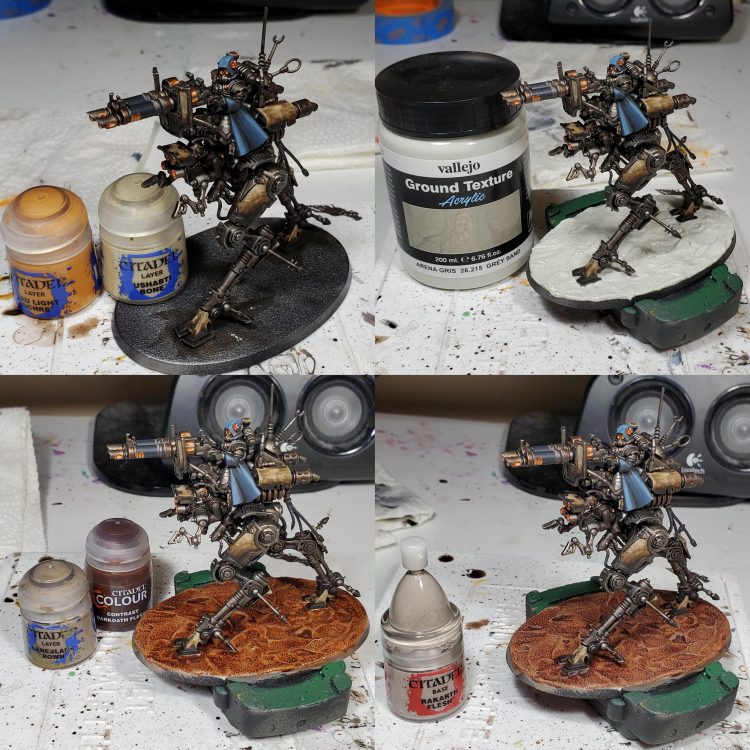
I forgot another intermediate step photo for the lenses, but the idea is mostly clear in that I continued to do finer layers of Tau Light Ochre and Ushabti for the glowing bits. Most of the time just doing a normal opaque highlight/lense effect works just fine, but if you look at the Kastelan Robots up at the top, you might notice that I glazed in the colours on the face plates so it would not be too stark.
On the bases after waiting for the paste to dry, I painted the whole thing with Baneblade Brown before slopping on Darkoath Flesh followed by a quick drybrush of Rakarth. After that I varnished the model with Vallejo Mecha Matte, then cleaned up the rims with Abaddon Black and finished off the model by sticking some tufts from Gamers Grass on. I prefer the following but feel free to deviate:
- 6mm Dry Green
- 4mm Beige
- 4mm Light Green
With that you are done!
