OSL, Oh Es Ell?
Object Source Lighting, or if you’re like me and didn’t learn art and its proper terminology, painting something to look like it emits light, glows etc..
I originally wrote a quick article last year about how to use Baharroth Blue (Barry) that takes an existing painted model and adds a relatively effective glow effect with minimal effort. Since then, like with most things I do, I’ve decided to go overboard and OSL all the things and I’ve also branched out from my dear beloved blue.
The original post can be summarised thus:
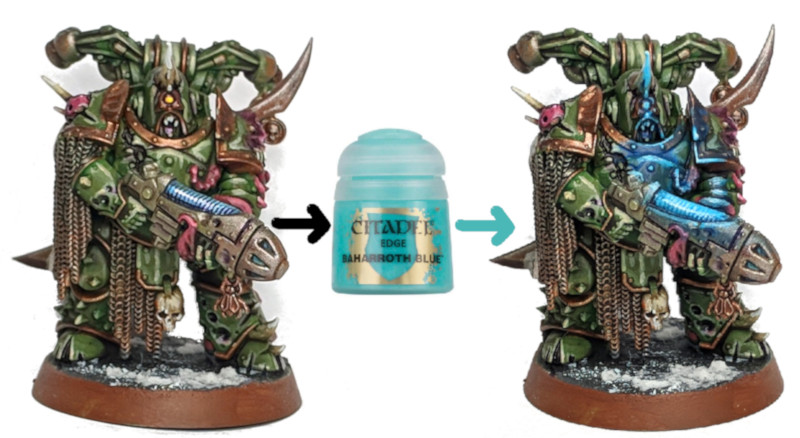
A slightly longer description would be:
- Take a finished model
- Cover the area around the source with a really washed out dark tone of the glow colour, so for blue Incubi Darkness thinned down a lot works well.
- After that you add lighter tones of the colour on the raised edges in the area of effect, and finally a near white version of the colour at the source itself (Blue Horror for blue, Ulthuan works well too and for almost every colour).
Don’t worry about the vagueness of the previous example, as further down in this post I’ll have a few step-by-step ways of doing it, but first here’s some more finished examples of the same approach, some blue, some not so blue, all done more or less using the same method.
If you want to skip to the step-by-step versions further down then use these:
- OSL without Contrast paints (the original version)
- OSL with Contrast paints (the newer version)
- OSL Eye Lenses with Contrast Paints (because it’s all the rage)
Examples (Jumping the shark)
Here’s a few models that I’ve painted over the last 12 months that have featured some form of glowing or reflected light
Yellow Glow
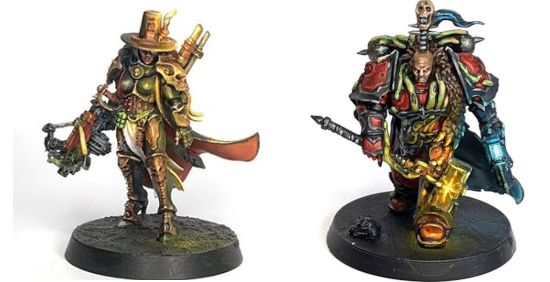
- Wash the glow area in thinned Mournfang Brown
- Layer on some very thin Troll Slayer Orange
- Edge highlight with Flash Gitz Yellow
- Paint the Light Source in Dorn Yellow
- [optional] Tidy recesses with a thin wash of Mournfang again
Green Glow
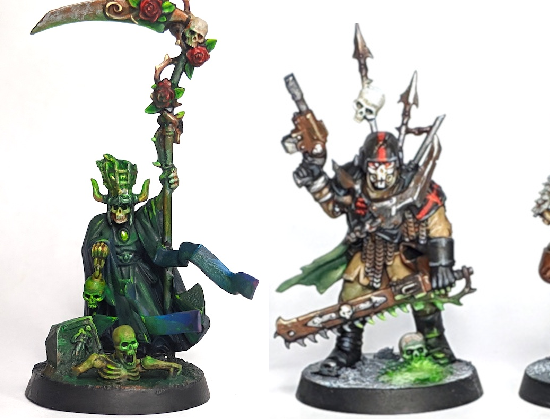
- Wash the areas around the glowing sources (in the case the skulls and the hat) in thinned Intermediate Green (Vallejo), any dark green should work.
- Layer on the same colour on the flat surfaces
- Highlight the edges in thinned Moot Green
- Paint the light sources in Flash Gitz Yellow
- Wash recesses with Biel Tan Green
Red Glow
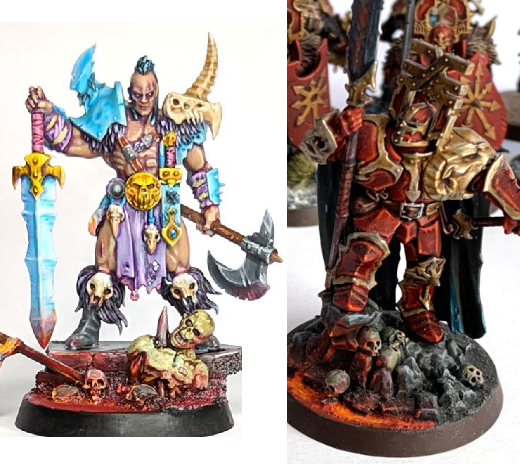
- Paint the lava in Mephiston Red, then use the same red but thinned on the edges of the reflection.
- Glaze over everything in Bloodletter, wash the same areas in Carroburg Crimson.
- While the Carroburg Crimson is still wet on the base, drop some Flash Gitz Yellow in to the edges so that it bleeds into the wash giving you a cheap gradient.
- On the most extreme edges of the reflections, paint some Troll Slayer Orange.
- [optional] If you want to go brighter, paint/bleed Dorn Yellow into the wet wash, and add a dot of it to the closest areas to the lava (see the skull and underside of the pole on the Darkoath Chieftain for an example).
Blue Glow
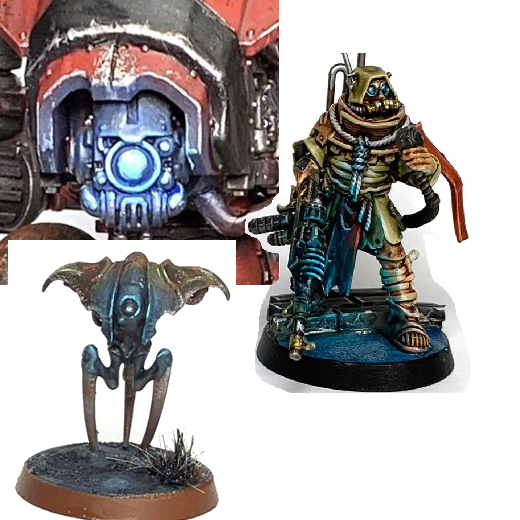
This is the method from the original article; in the case of the the Spindle Drone and the Ad Mech guy I used Incubi darkness and Drakenhof as the the washes for the darker areas, with Baharroth and Blue Horror as the lightest points.
For the step by step of this approach scroll down a bit, for a newer faster (and slightly more teal) version for today’s Contrast generation scroll down a bit more for that instead.
Painting Blue OSL without Contrast Paints
Stage 1 – Minute 0
First things first, go and find a suitable candidate, or paint one and come back here to stage 1. I chose a Plague Marine I painted a while ago, because he has a plasma gun and they get real hot apparently.

Here he is, all lacking in glow and wonder. Let’s fix that…
Stage 2 – Minute 0 – 3ish
Ok, the first two stages will cause panic as they don’t look good at all and you’ll regret starting on the path to en-“lighten”-ment (hurr). Take your bright tone, in my case that was the Baharroth Blue and thin it as normal. Now apply it over the light source (the plasma coil), on the edges of any raised plates, armour, spikes, rims etc… that would face the light source, not too much but enough that it looks something like this:

(I told you it would look bad at this point, even on stage 2 it’ll look worryingly like a bad idea).
Stage 2 – Minute 3-5ish
Apply your wash over the areas where the light would hit the model, and especially in the recesses in those places (even though technically it wouldn’t hit there). Also apply it over the edges of the light source.

Notice the shade over the chest area, around the plasma and over the metals on the gun and shoulder pad/neck/face etc.. It still looks sketchy I know, but trust me the next step is the best bit. Use a hairdryer now to save time.
Stage 3 – Minute 5-10ish
Make sure stage 1 is dry before doing this bit (hairdryer is legit a pro hobby purchase). This is the trickiest bit now as you run the risk of flooding the model. Make a super thin mixture of water and your intermediate shade (VMC Intermediate blue in my case) eyeballing it i’d say about 5:1/6:1 water to paint. Now get some on your brush, but wipe off excess so it doesn’t run and apply it all over the areas where the light hits, including over the previous colour.

Holy cow, magic right? The intermediate glaze will tint the areas where the colour hits but keeps some of the original colours showing through, it’s why we started with the lightest colour and worked backwards, it also makes it look nice and fuzzy just like a glow.
You can see the glaze best on the chest, face and on the metal parts of the gun nearest the light source.
Stage 4 – Minute 10-15
Now go back to your original colour/bright tone (Baharroth Blue for me, always) and do a few highlights in the centre of your original ones for instant stage 2 highlights. Only do this on the bits that would reflect the best, (metals and hard edges such as shoulder pad trims). Also do it on the edges and the inner ridges of the plasma coil or whatever light source you’re using.

Notice the brighter bits have a slightly lighter tint now (most clear on the arm and edge of plasma coil in this picture)
Stage 5 / Final Stage – Minute 15-20
The only colour we haven’t used yet is Ulthuan Grey, let’s rectify that. Repeat the last step but ONLY apply it to the light source and maybe on the tiniest part of the shiniest surfaces (shoulder pad and the very centre of the edges of the gun metal bits). Don’t over do this bit, the more you use, the LESS light the glow will look.

Here Ulthuan Grey was only used on the plasma coil rim, and the lower corner of the shoulder pad closest to the light source (also a single dot on tentacle as it’s almost touching the gun, and in the centre of each of the 3 ridges of the arm.
Painting Blue OSL with Contrast Paints
Step 0

After painting most (if not all the model) make sure that the source of the glow is painted or primed in Wraithbone. Also say hi to the completed one in the background. I painted a majority of the rest of the models as I wanted to add an OSL glow around the surrounding areas, and with Contrast paint working like a glaze having the colours underneath tint is a massive bonus.
Step 1

Next up, I painted the weapons I wanted to be “power weapons” in Aethermatic Blue (the bows and the long swords). Behold the power of Contrast(™); when applying the Contrast paint be sure to pull the paint away from the middle of the weapons towards the lower and upper parts as this will give you a lighter middle section making it look even brighter there. To be honest they look pretty power weapony already, but I’m known for going OTT on many things so why stop there…
Step 2

Next up I painted some of the Aethermatic Blue on parts of the model that are close to the weapons to give a reflected light effect. On the faces and cloth only apply small amounts, whereas on the metal areas you can go overboard and add a couple layers.
Step 3

Apply some white paint to the centre of the brightest reflected areas e.g. uppermost raised creases in the cloth a line parallel to the arrow etc..
Step 4 / Final Stage
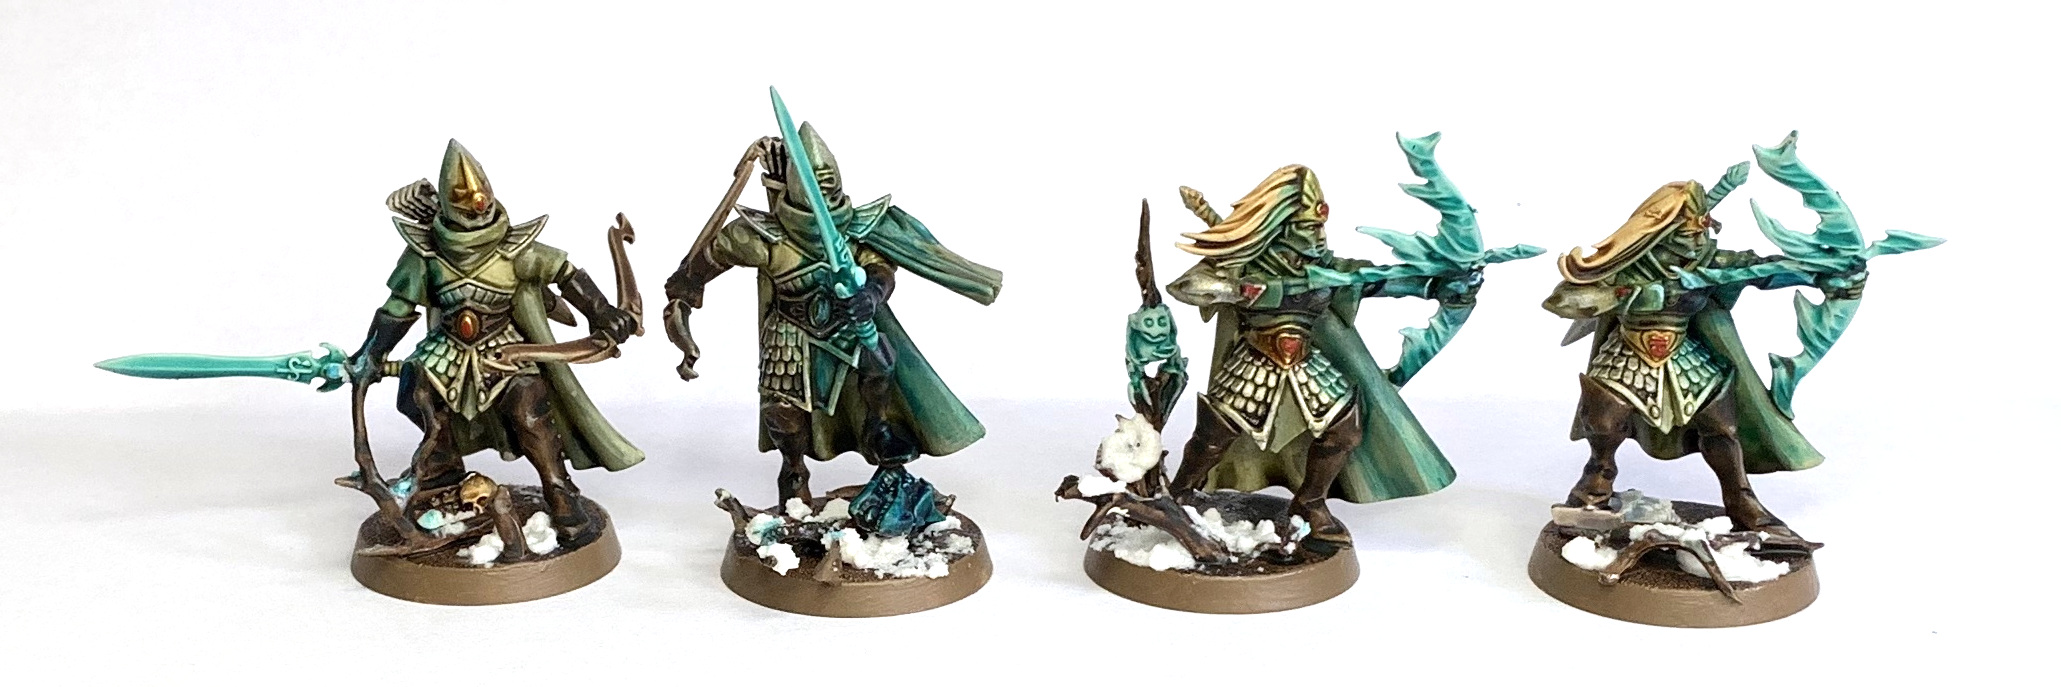
Finally cover the white areas in thinned Aethermatic Blue, and add some Arkhelian Green to the deepest recesses of the reflected light for the full effect.
Here’s a bonus of a full unit of 10 in all their glowy Power Weapon glory..

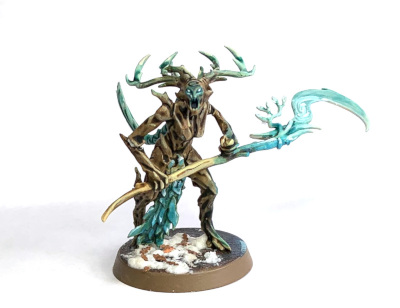
And a Branchwych done the same way but with some pure white added over the Aethermatic for a more blue-white effect:
Bonus 2 Stage Glowing Eye Lenses
Step 0
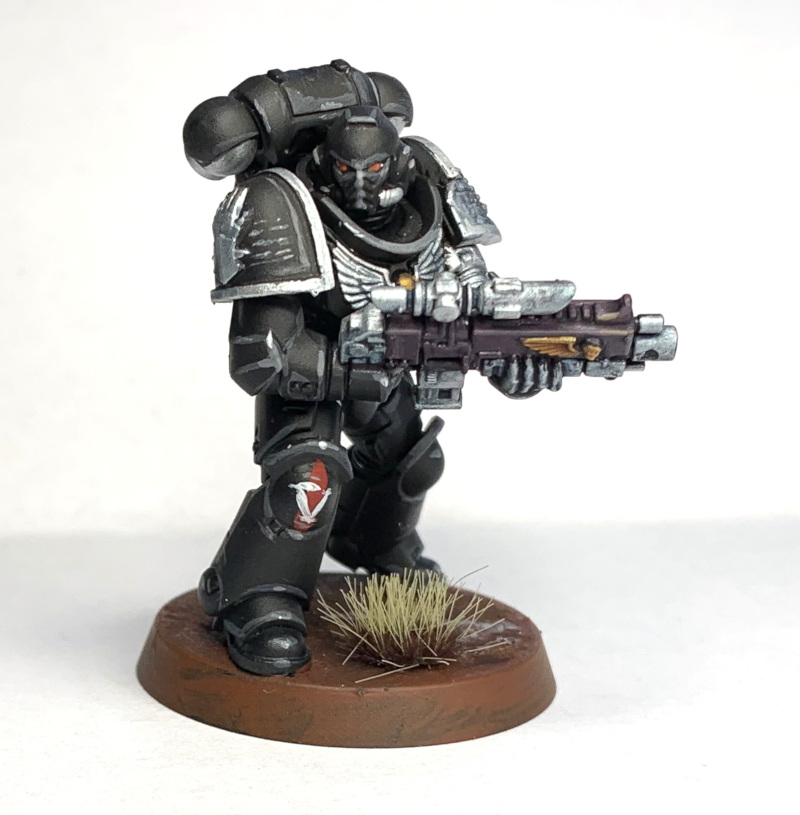
Take a painted Space Marine or suitable candidate for glowy eyes. If you haven’t done an edge highlight under and around the eyes you’ll need to do it at this stage so that the Contrast paint can tint it. For green paint the lenses moot green or something bright.
Step 1
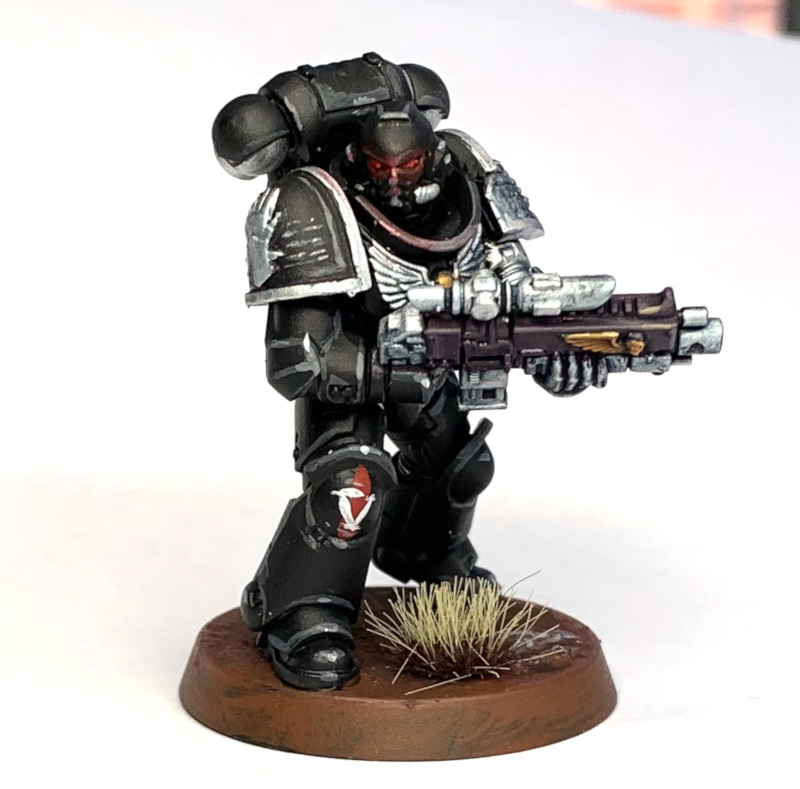
Cover the eyes and the reflected areas in Blood Angels Red, for green I’d use Warp Lightning, and blue Arkhelian Green (I know).
Step 2
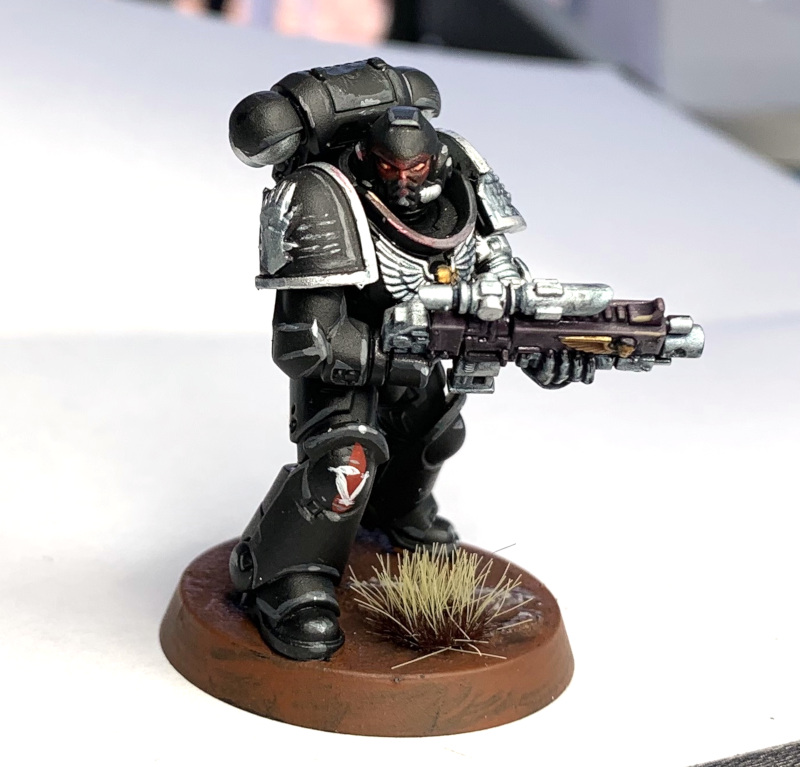
Paint Lugganath Orange into the centre of the lenses and on the extreme edges of the reflection. Note you may need to break the seal on the paint as it’s probably never been used before. If you don’t have Lugganath, then any orange with a bit of Ulthuan to desaturate it would work fine.


