In our How to Paint Everything series, we take a look at different armies of the Warhammer universe, examine their history and heraldry, and look at several different methods for painting them. Today we take a look at Perturabo, Hammer of Olympia and Primarch of the Iron Warriors!

The Khan is flashy. Night Haunter is cruel. Corax is obsessed. But Perturabo? Perturabo gets the job done. Primarch of the IVth Legion, his first act as leader was to decimate the Legion for not meeting his high, high standards. Grim and unrelenting, Magnus the Red was one of the few he grew close to, preferring generally to remain locked away with his mechanisms and devices. Never seeking glory, he nonetheless grew bitter as his Legion was sent on various forelorn hope missions and garrison duties across the galaxy, never gaining the acclaim he felt he was deserved. Though he threw his lot in with the Warmaster following his destruction of his home planet, Olympia, Perturabo did not see himself as a servant of Chaos, resisting that siren song for long years. Insteaad, he fought with his Legion the same way they always had, his implacability landing him command of the Siege of Terra until one fateful day…
Covered in this Article
- How to paint Perturabo, Primarch of the Iron Warriors Legion
- Notes on assembling Perturabo and painting his modeled base
Paints Used in This Project
Paints used - Click to Expand
Painting Perturabo
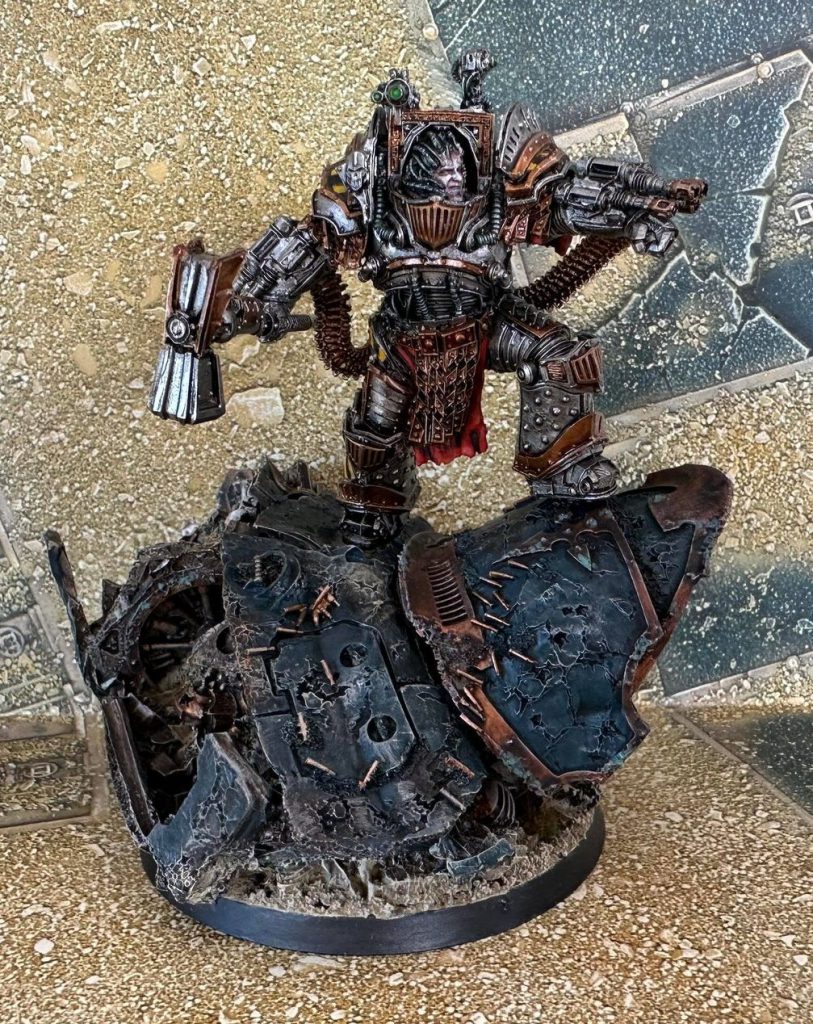
I am an army painter, not an artist; my talents lie in pumping out a lot of pretty damn decent quality models in high volume. I know my limits, and Perturabo was going to push them. This guide won’t help you win any Golden Demons, but it’ll help you get your Primarch on the table and look good doing it.
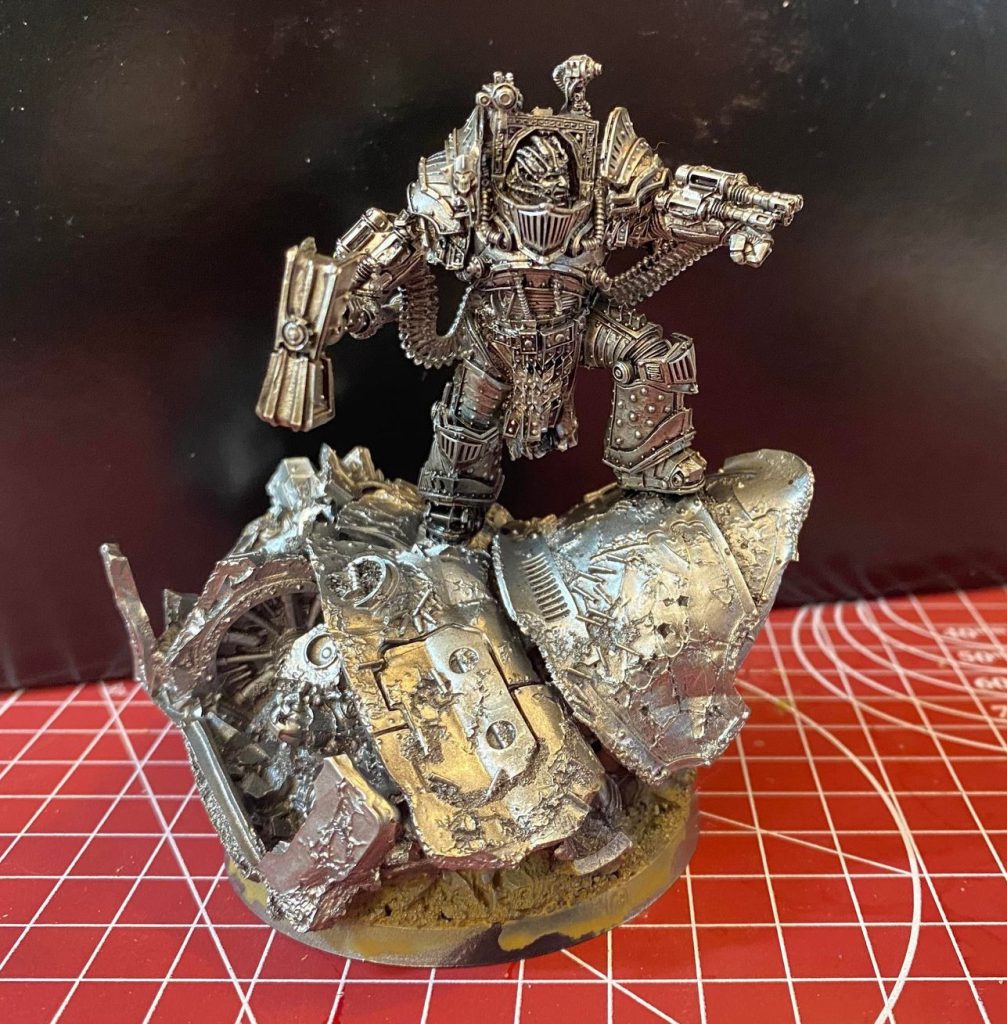
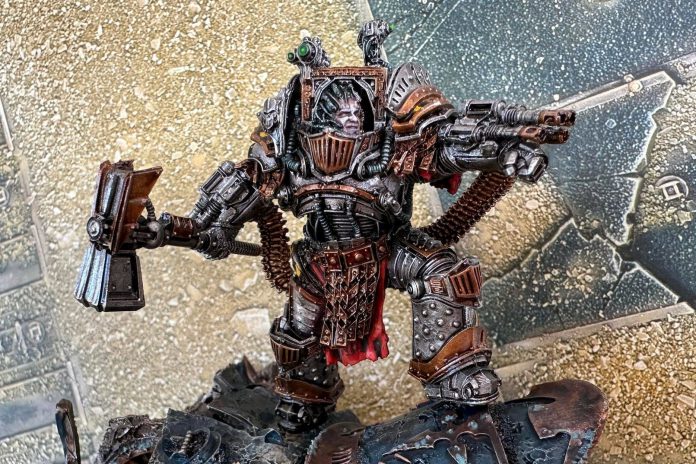
The steel is the most important part, and while a lot of people go with a very grimy look for this most grimdustrial of Legions, I wanted to go with something a bit brighter after the heavily weathered look I went with for my Mechanicum. To get this gleam, I primed Badger Stynelrez (black) before getting a nice even coat of Vallejo Metal Dark Aluminium with my airbrush. I don’t normally paint with an airbrush, and only used it here to ensure this layer was as smooth as possible so the next step works. You could use Ironbreaker, or even a rattlecan of Leadbelcher if you wanted a darker look, but I prefer the more true metallic finish of the excellent Vallejo Metal range. This may take a few coats, and you really need it to be even and smooth across the model, but the next step is simple: slather the model in Nuln Oil Gloss. Make sure it doesn’t pool too heavily anywhere, but after that you’re basically done done. The natural glint of the Dark Aluminium combined with the gloss of Nuln Oil, particularly flowing into and around all those cracks and crevasses, gives a finish that looks way better than it has any right to for how little work you just put in.
The brass trim and spot colouring is pretty similar: basecoat with Brass Scorpion, then wash with Agrax Earthshade Gloss. You’ll probably want to highlight the brass (I used Runelord Brass), and if you want to pick out a few shinier spots on the steel, try Vallejo Metal Silver; I don’t use it as a line highlight, rather almost a smudge on high points where the light may hit. Sadly, Nuln Oil Gloss and Agrax Earthshade Gloss are both extinct in the wild, but there are a few alternatives I’m yet to check out. Vallejo’s Gloss Medium is a frontrunner, but I’d also like to try just a simple black wash using Windsor & Newton ink.
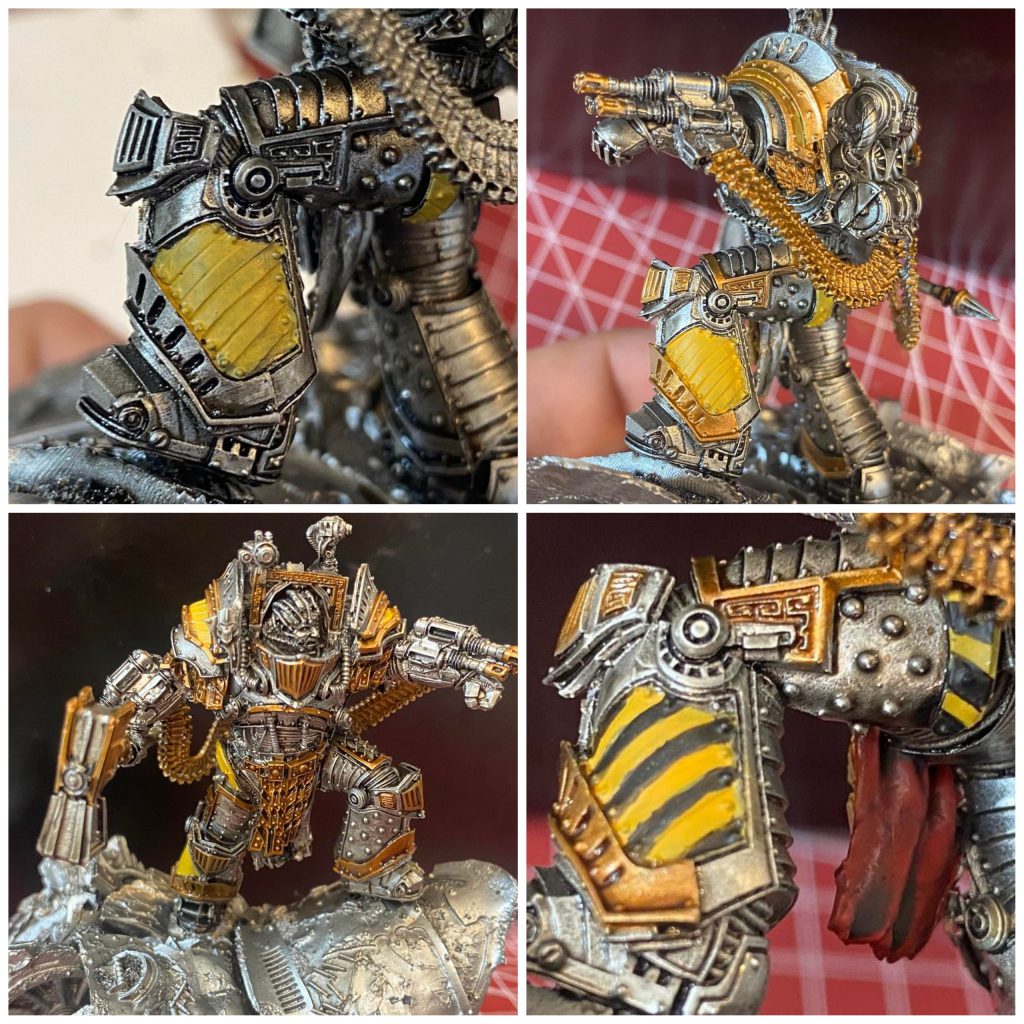
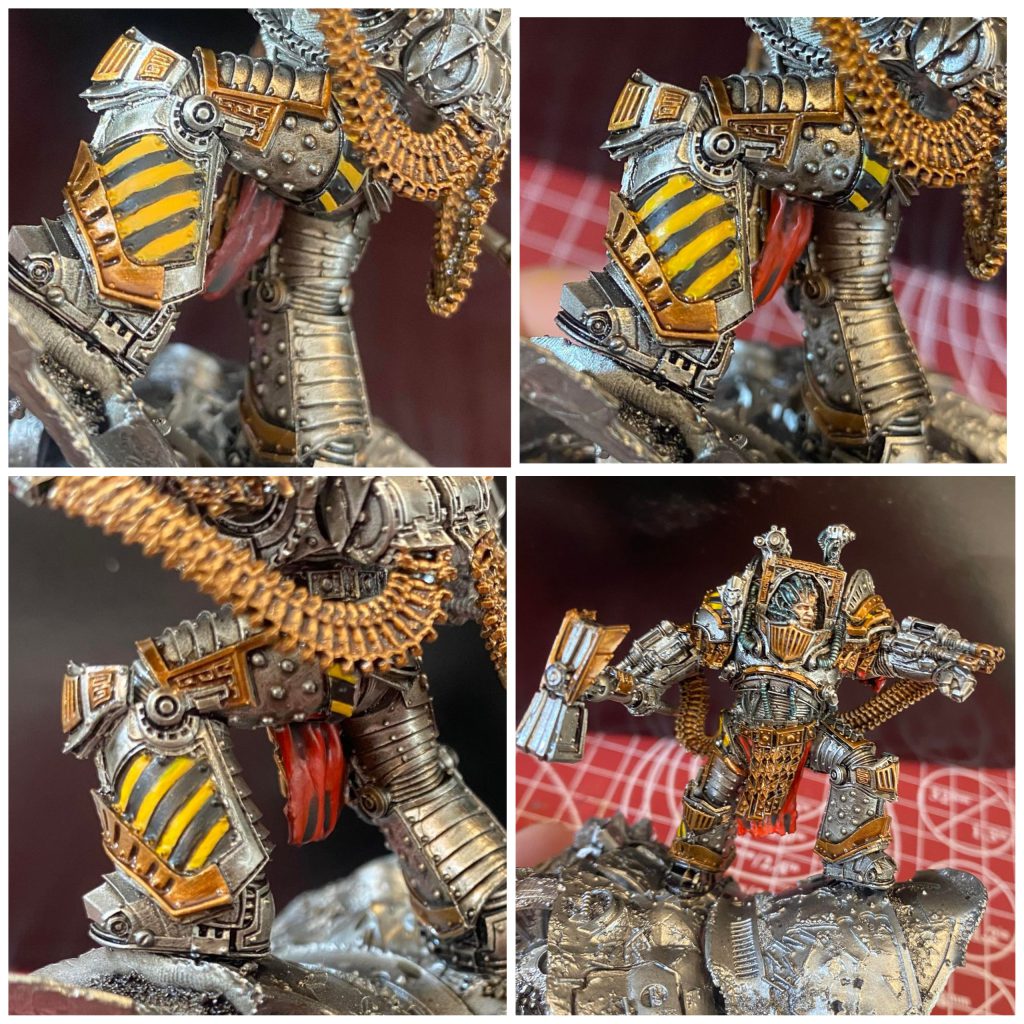
Hazard stripes aren’t… well, they’re not complex, but they’re not exactly easy either. I’ve found that after a certain point you’re losing a lot more time than you’re gaining results, and for me the aim was an army that looked good across the table and in a cabinet, not one that was going to win a painting prize. I used Zamesi Desert as a base, being a very yellowy brown, as it covers over whatever you’ve got there much, much easier than any yellow I’ve found. Some people stop there, just neatining up with Abaddon Black. I wanted somethin a bit brighter, so the next step was a thinner layer of Averland Sunset, which covers just fine over Zamesi. At this point I did all the neatening I could, including drawing a thin line with a micron pen around all the edges of the black, doing an almost black-on-black highlight. Finally, a heavily thinned Yriel Yellow was applied down the middle of the yellow stripes, making the whole thing pop a little more.
The red, used here for the loincloth, was simply Mephiston Red washed with Carroburg Crimson, then relayered (not just highlighted) with Evil Suns Scarlet. Green, used for lenses and screens, is Moot Green washed with Biel-Tan Green, then with spots of Moot Green taking up less of the lens. You may find that the Moot Green doesn’t cover the now much darker base layer; this is fine, and you should lean into it. Do your next spot of Moot Green much smaller inside, so you’ll have a focused, bright spot of Moot Green in the centre, fading outwards. Another option is to draw a slight cross down the lens, if its large enough. Cables were simply washed with Coelia Greenshade, while Fyreslayer Flesh carefully applied over a Grey Seer base gave his face the swarthy look, lightly highlighted with Pallid Wych Flesh before, as an experiment I think worked well, a very light wash of Druchii Violet.
For his gaming base, I glued a couple of pieces of slate together for his Tactical Rock(tm). I drilled a piece of paperclip sticking out of both his diorama base and the slate, and a matching hole in his foot, so the model can be stored lookin’ all purtty like, while also being useful on the tabletop. Be careful here, as slate can shatter if you’re too rough with it. For the rest of the base, a sand mixture was placed down and painted Tallarn Sand before being drybrushed with Tyrant Skull and then Terminatus Stone. Tufts were whatever I had lying around and, finally, stones were painted with Dawnstone before a rough drybrush of Celestra Grey, and a lighter drybrush (or line highlight where possible) of Ulthuan Grey. Big shout out to DeathWatch Studios for this trick, taken from their MCP bases painting guide.
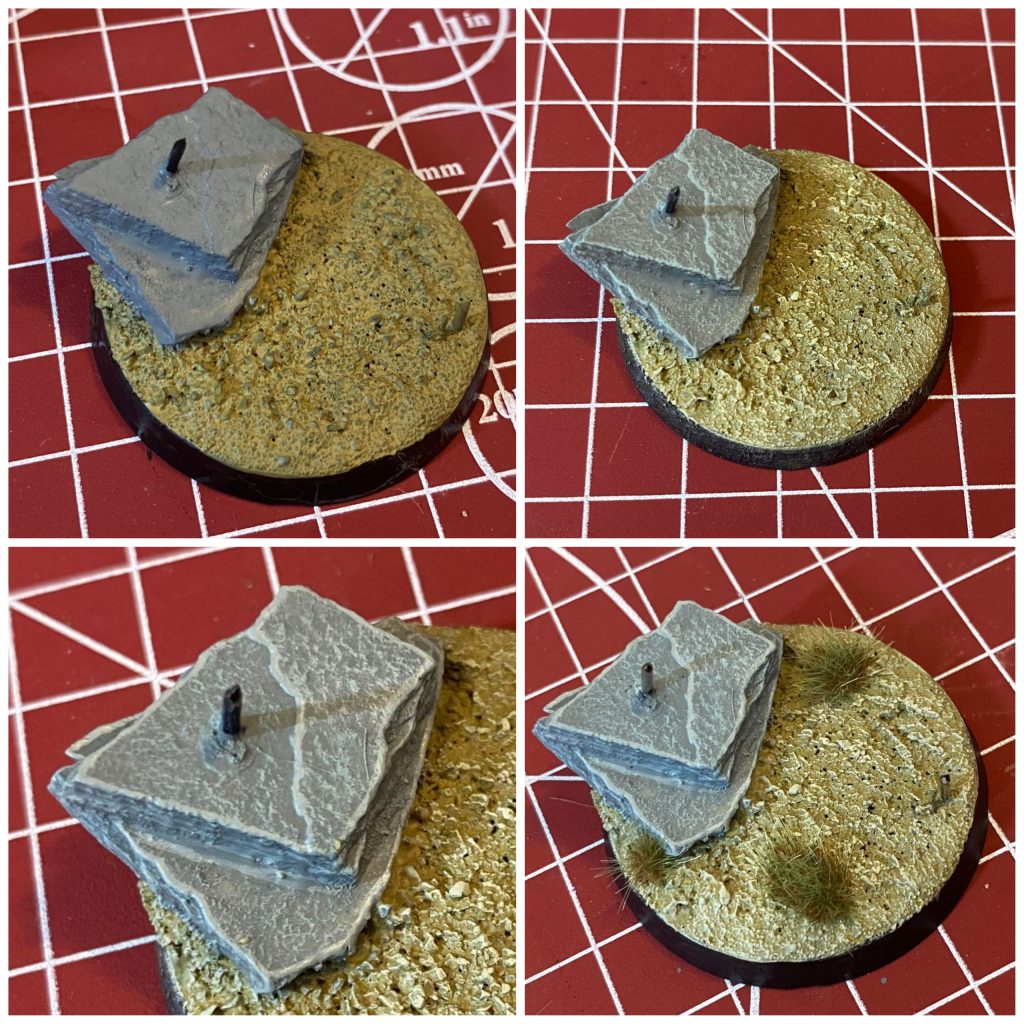
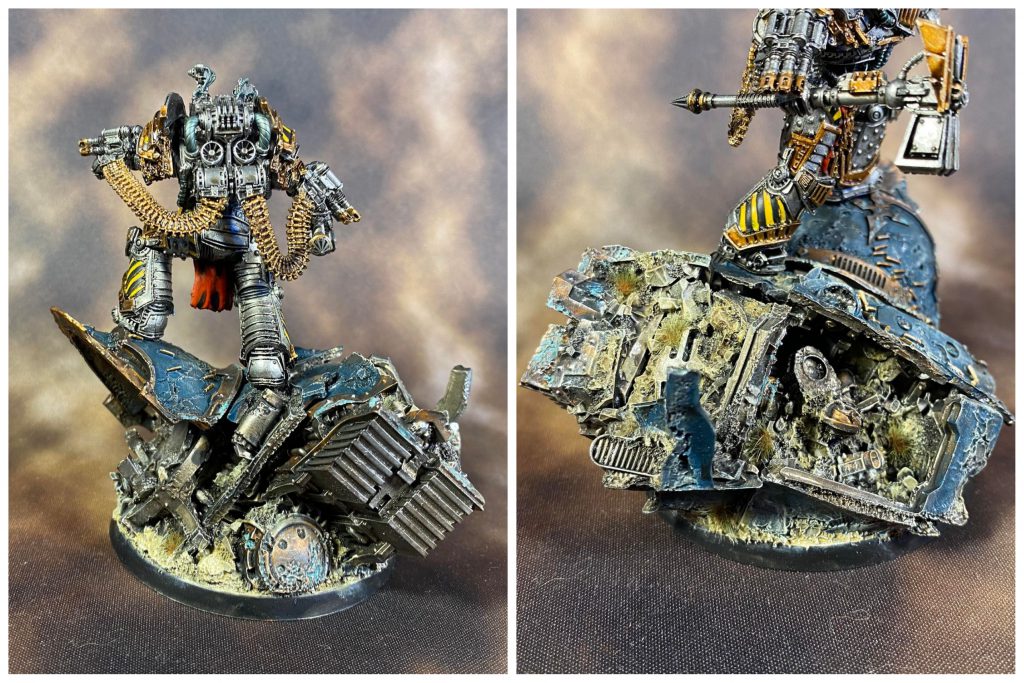
Perturabo’s gaming base. Credit: Magos Sockbert.The diorama base I made a lot less detailed, because I didn’t want the larger object to draw away from the Primarch. The point here is that this knight was already dead before Perty decided to stand on it – there’s sand and rocks in the cockpit, for starters, so I didn’t want to give him too much credit, hence the tufts you’ll see growing inside!
The main colours were Stegadon Scale Green for the carapace, Brass Scorpion for the trim and spot colours on the body, and Vallejo Dark Aluminium for the body. Two layers of Nuln Oil went over the carapace and body, with two layers of Agrax Earthshade over the brass. The whole model was then given a light drybrush of Necron Compound with a soft makeup brush in a circular pattern, trying to catch every edge in every direciton (just like a shark!) before the bullet casings were simply painted with Gehenna Gold – I didn’t think that detailing them added anything more. Nilakh Oxide was used to give the knight a heavily weathered, aged look.
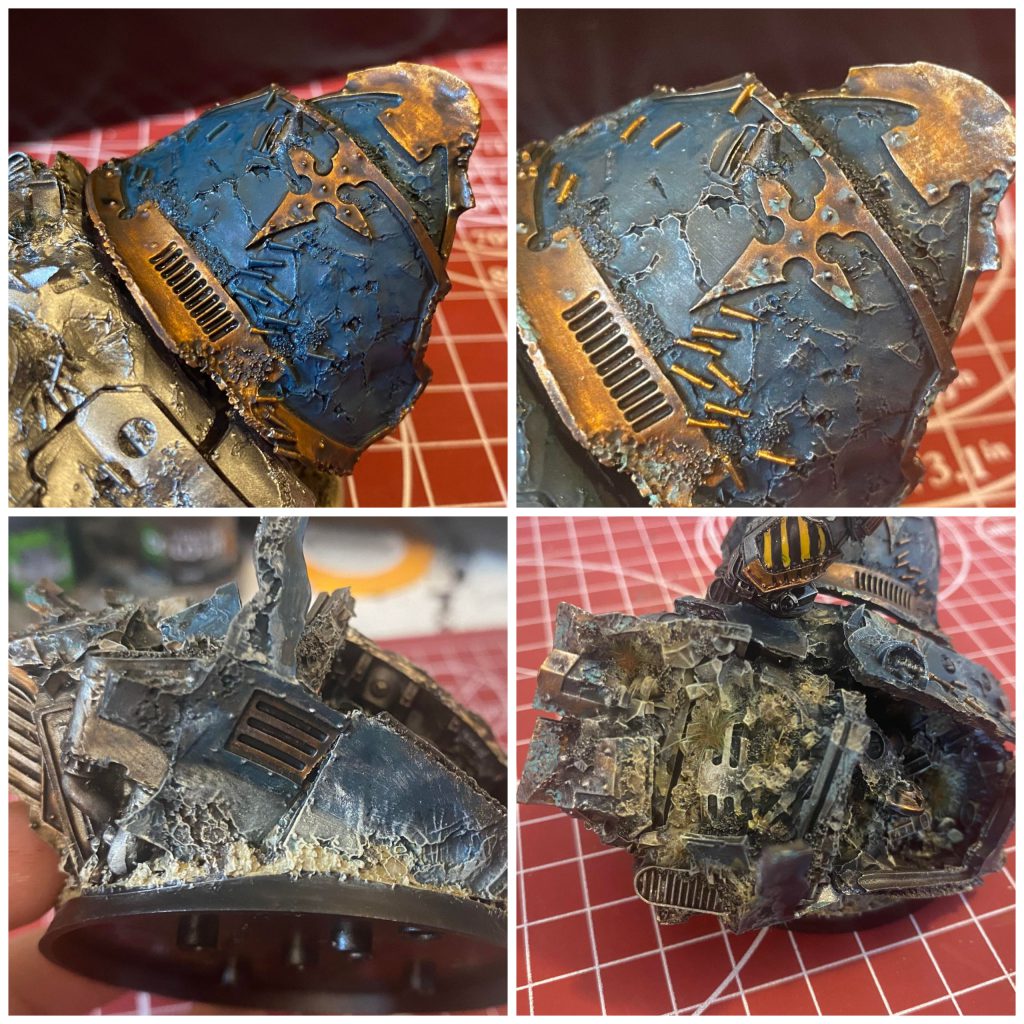
I drybrushed Tyrant Skull and Terminatus Stone around the model wherever appropriate, to push the point that this is a battlefield fought over many times before. In hindsight I probably would’ve assembled it with the cockpit canopy closed, because the inside was a right pain to balance between ‘detailed’ and ‘not going to drive me insane’ – if you’re a pro with an airbrush, the transitions here of a man wearing fabric buried in stone, dirt and metal might be a good place to test your skills.
Final Thoughts
We hope you enjoyed this guide to painting Perturabo. Primarchs are great to paint – the models are so beautiful that you can use them both as amazing gaming pieces, or as art projects in themselves. We’ll be dropping more HTPE: Primarchs over the coming months, and as always, if you have any questions, feedback, or models of your own to share, feel free to drop a note in the comments below or email us at contact@goonhammer.com.

