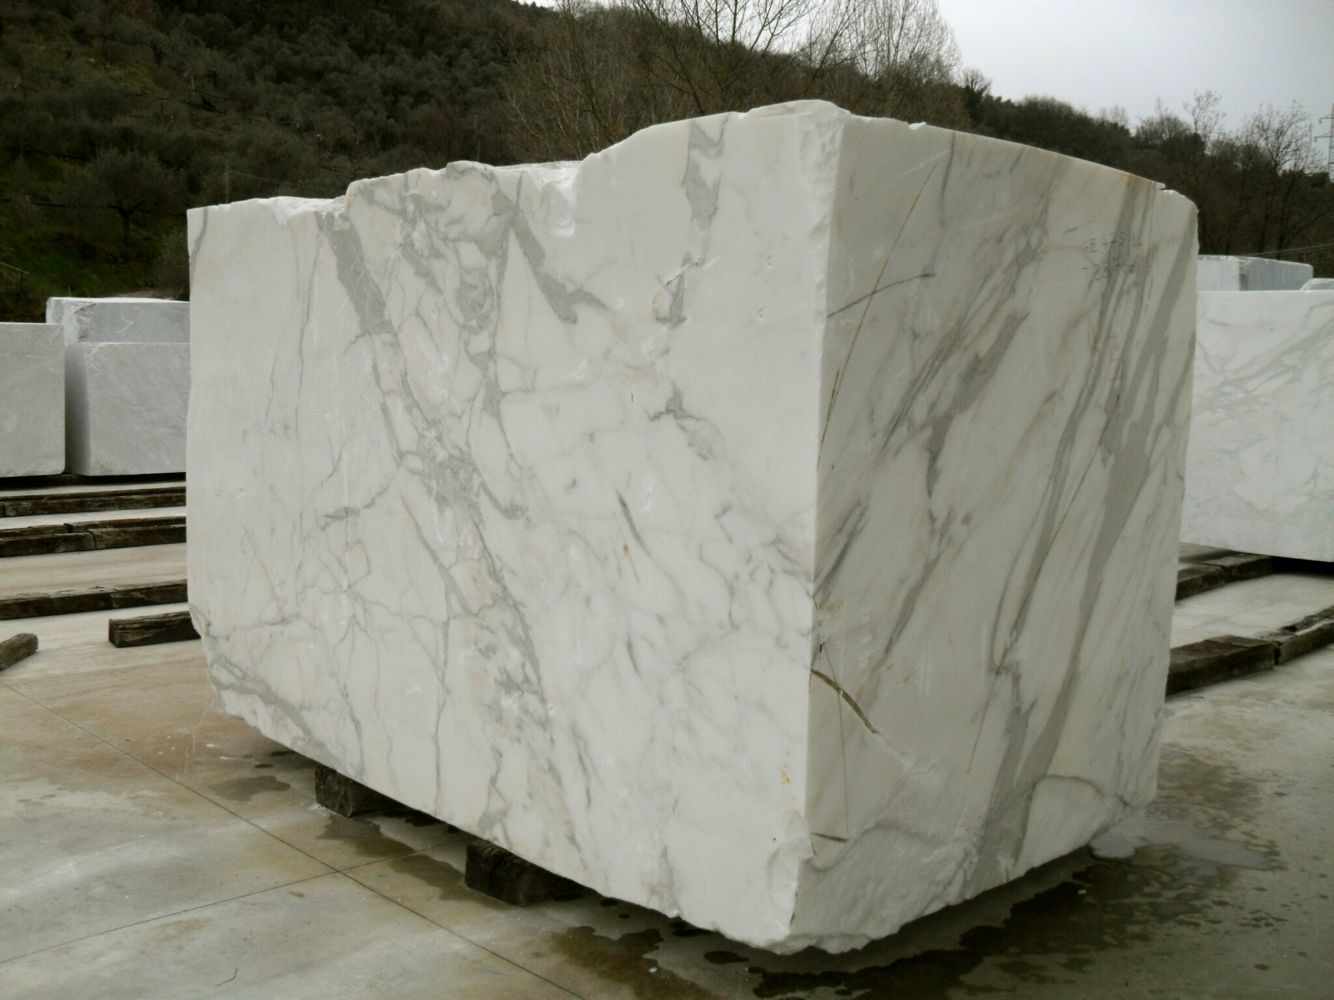
In our How to Paint Everything series, we take a look at how to paint different models, armies, and materials, and different approaches to painting them. In this article, we’re exploring how to paint marble surfaces.
An Introduction to Marble
Marble is a type of rock formed when limestone is exposed to high temperatures and pressures. During this time, the calcite (rock-forming material made of calcium rather than silicates) that forms the limestone recrystallizes into a denser rock. The crystals in the rock are what give marble its characteristic appearance. Impurities in the rock, such as quartz, graphite, pyrite, and other materials, cause the marble to take on other colors (that’s how you get pink marble, for example).
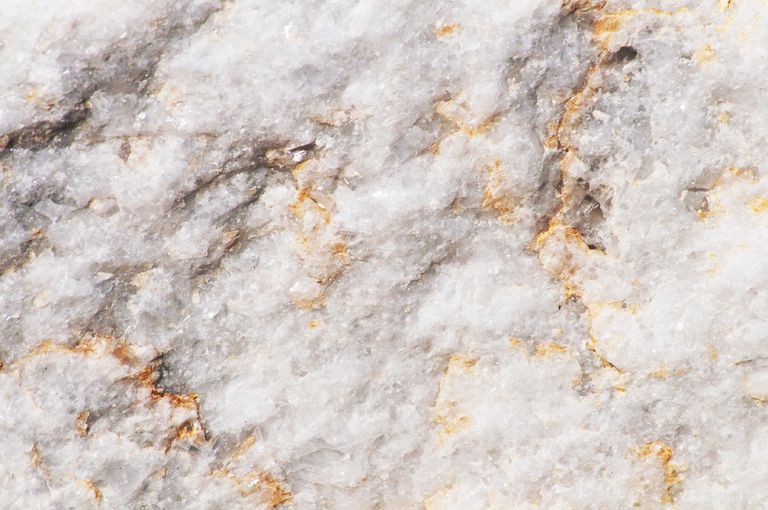
As a building material, marble has been in use for thousands of years. Because of the way marble forms, it occurs commonly and there are large deposits of the material worldwide, making it relatively cheap and easy to mine. Although crushed marble is used to build everything from roads to railroad beds, the material is prized for its beauty and used in architecture and sculpture around the world. The Taj Mahal was constructed entirely from white Makrana marble, while the statue of Abraham Lincoln was constructed from white Marble mined in Georgia. Michaelangelo’s famous statue of David in Florence was constructed from white marble mined in Tuscany.
Marble that has been cut into blocks and polished will typically have the trademark veined texture that people associate with marble, though marble can come in many colors and variations.
Weathering Marble
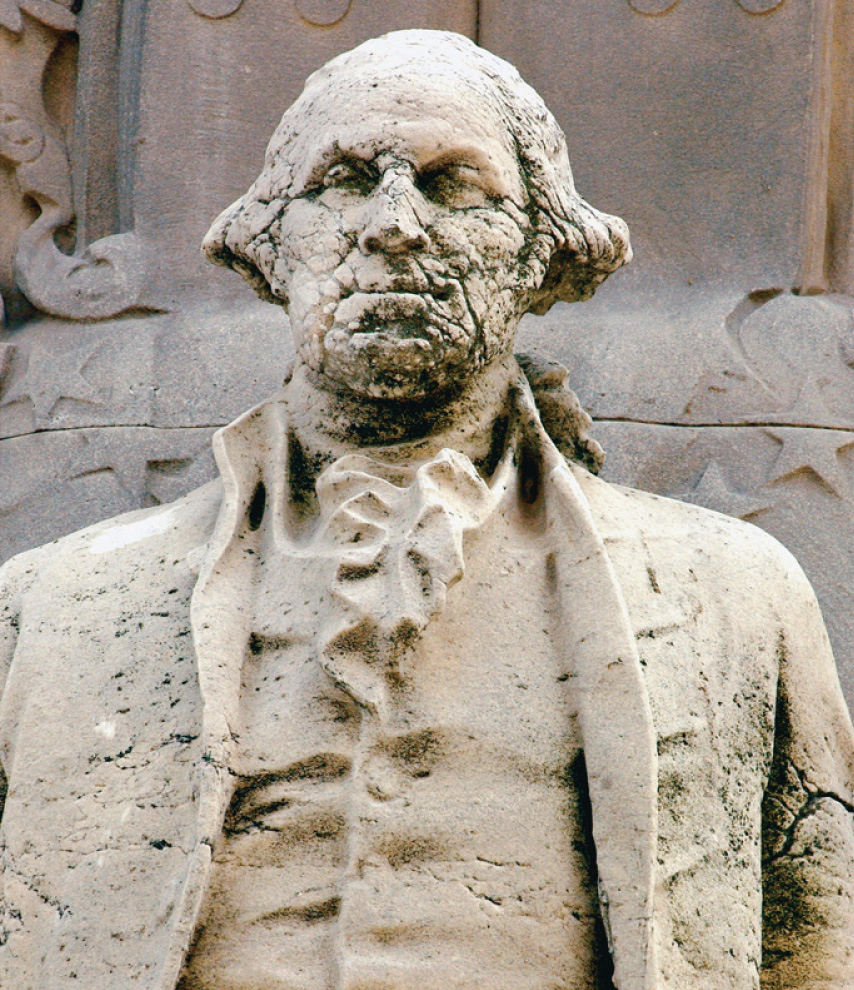
Marble is particularly susceptible to acid rain and weathering, and wears down over time. Anyone who has visited Florence to see the aforementioned statue of David may recall that the statue on display outdoors in the Piazza della Signora is not the original statue – the original was moved indoors to the Accademia Gallery in 1873 to prevent damage from the weather and uneven ground beneath the statue. The most common ways that marble will be affected by weather and outdoor conditions are cracking and erosion from acid rain.
Acid Rain
Marble is a porous material (moreso than granite) and is particularly susceptible to acid rain. Sulfurous, Sulfuric, and Nitric acids in the air that get into the rain react with the calcite in marble, producing soluble salts that dissolve in the water. The effect causes streaking and erosion as parts of the statues are washed away — sharp edges and carving details eventually become rounded and dulled. Sheltered areas are more likely to develop blackened crusts that peel off over time and reveal crumbled stone underneath. This crust is made of gypsum, a mineral that forms when you mix calcite, sulfuric acid, and water. It’s water soluble and usually washed away, but protected areas like those under overhangs will develop a black crust over time.
Cracking
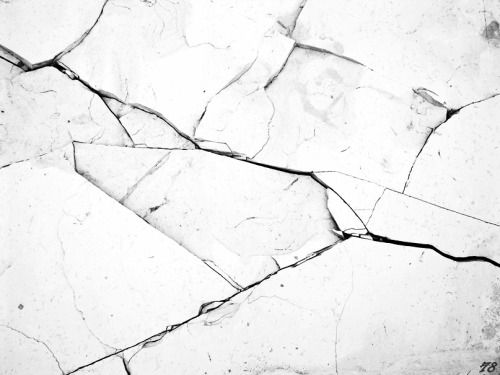
Although stone, marble is a relatively soft material that can be scratched, scraped, and chipped rather easily. Marble plates that have too much weight placed on them will crack, typically breaking into smaller plates.
Skails’ Method
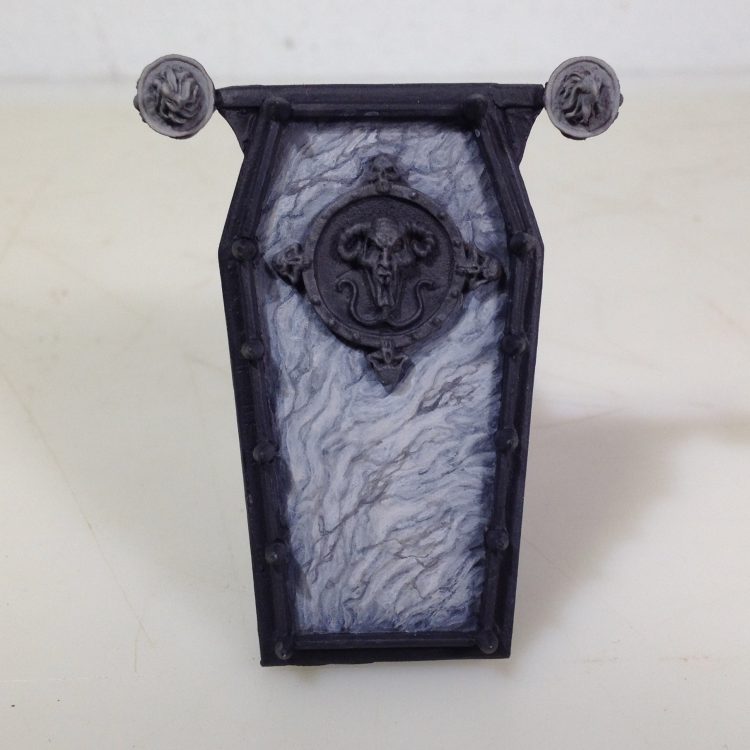
The example I’m using here is the top of the original Vampire Counts black coach. It’s a nice big flat piece begging for some added interest. Thematically I wanted the materials to be wrought iron and marble to give it a victorian cemetery vibe. The ratios of paint I use here are rough estimates, and my process is largely done by feel. Marble has a wide variety of textures and hues, I’m building up a densely textured surface, however for a lighter, smoother marble you could do the final step over a light grey base coat and selectively apply other steps as you see fit.
Materials: Rafael 8404 brush (size 1), Wet Palette, Visual Reference (GIS)
A wet palette will make this process easier, allowing shades to be mixed without drying out. If you don’t have one check out this guide to easily build a wet palette. I’m using a kolinsky sable brush with a very nice point, which allows for painting fine lines with paint of the right consistency.
Paints used: Vallejo Game Colors- Dead White, Stonewall Grey, Black, Vallejo Matt Medium
To begin with, this piece was primed with a mix of stylenrez ebon flesh, and white, hit with a top down angled burst of pure white. I wouldn’t say this is necessary, but a solid grey or white prime would be good. Black would be too dark to start, unless you were doing black marble, in which case you could just inverse the process I have here.
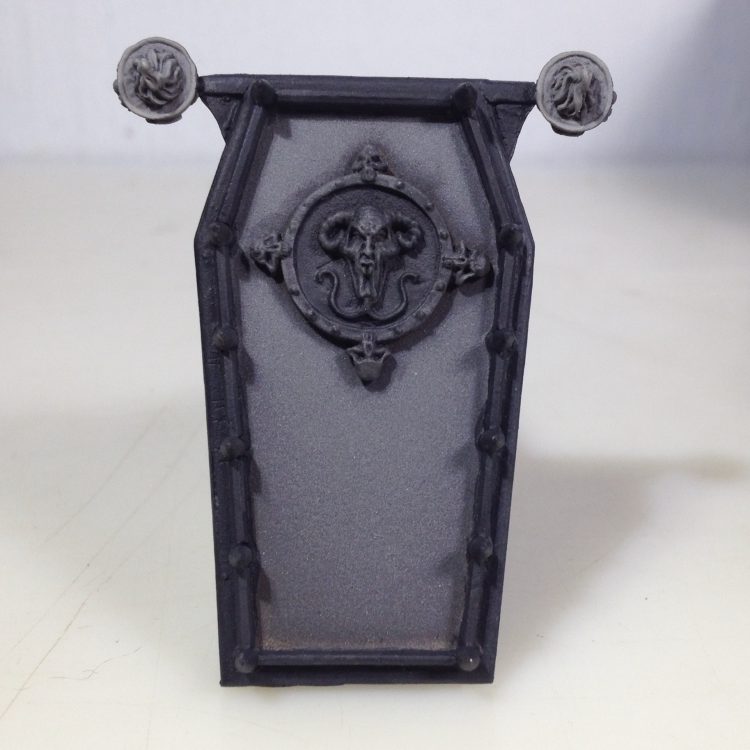
Base layer is a mix of stonewall grey and black, mostly a mix of about 2:1. Mix was loose and varied a bit over first layer to add some initial texture.
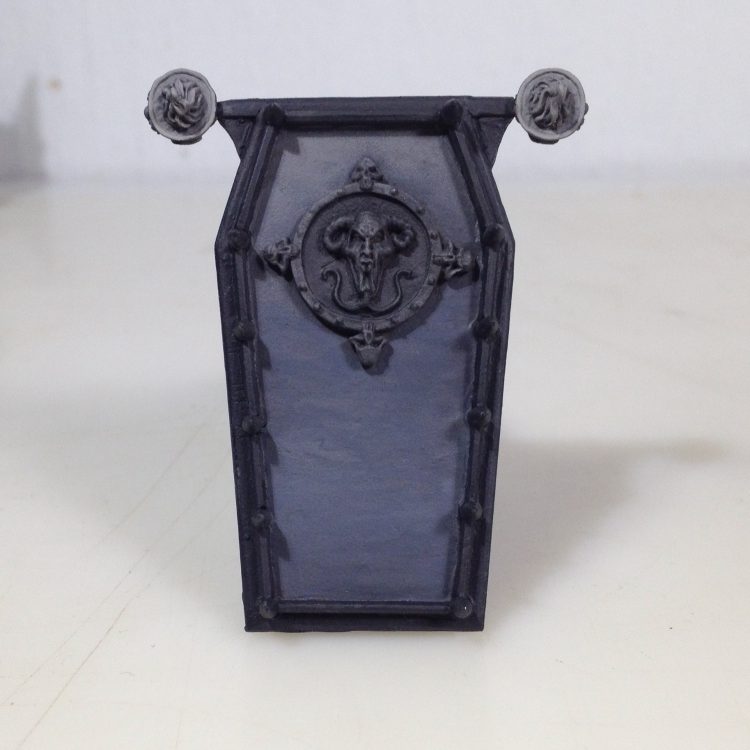
Now the veins are painted in with a mix of grey and black, about a 1:2 ratio. I decided to paint the veins generally going from bottom left to top right. Lightly pull the brush across the surface and add little squiggles. The marble I looked at tended to have a variation in vein sizes, definition, and density. I tried to capture some of that by having more smaller lines in some areas, and the bigger lines will be broken up later on. As the lines were being painted the paint would get thinner, making some of the lines lighter. I washed in a few of the smaller open spaces with this thinned paint before reloading the brush. This all adds some natural variation which will add the the effect.
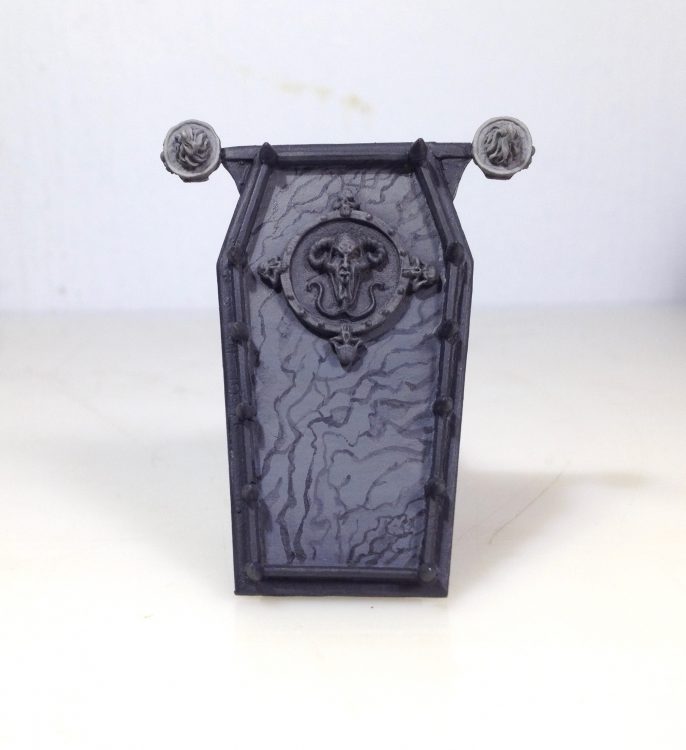
Next I mixed a tone lighter than the base coat, the exact mix isn’t too important at this point. Pure stonewall grey would be close to this. The spaces between the veins are filled in with this lighter grey. The thicker veins can be made thinner now, and in some spots I just added a small dot or streak of lighter grey to break up the thicker dark grey parts. I tended to focus more of the paint towards the top right corner of the shapes. Again, the paint thinned out some and got more watery as I worked. This is annoying when trying to make a clean solid surface, but in this case it adds to the variation of something derived from natural processes.
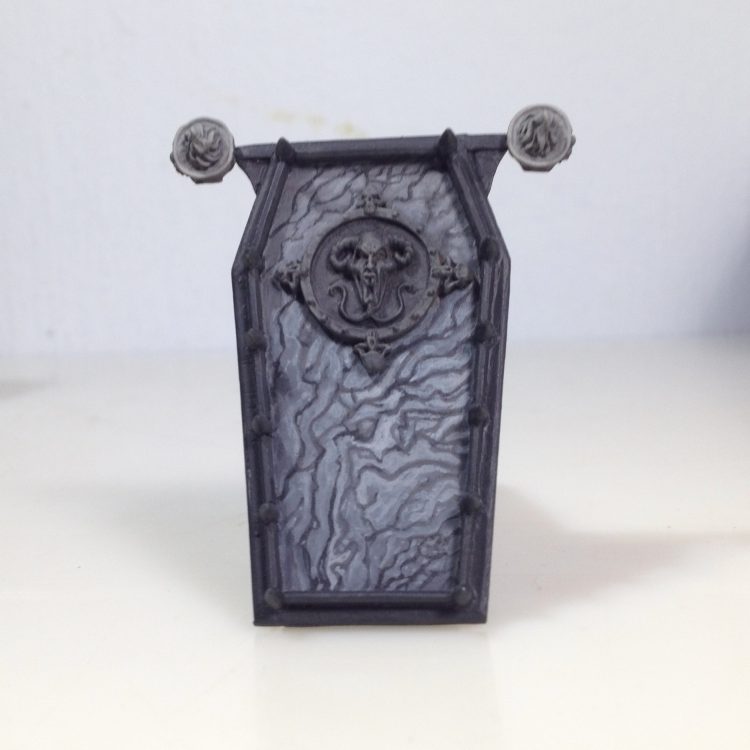
For this step I came back with a shade slightly darker than the base layer and lighter than the veins. A mix of grey and black leaning towards black. This was used to blur some of the darker areas and veins. This step also defined some of the texture within the lighter areas by tracing along edges of tonal differences.
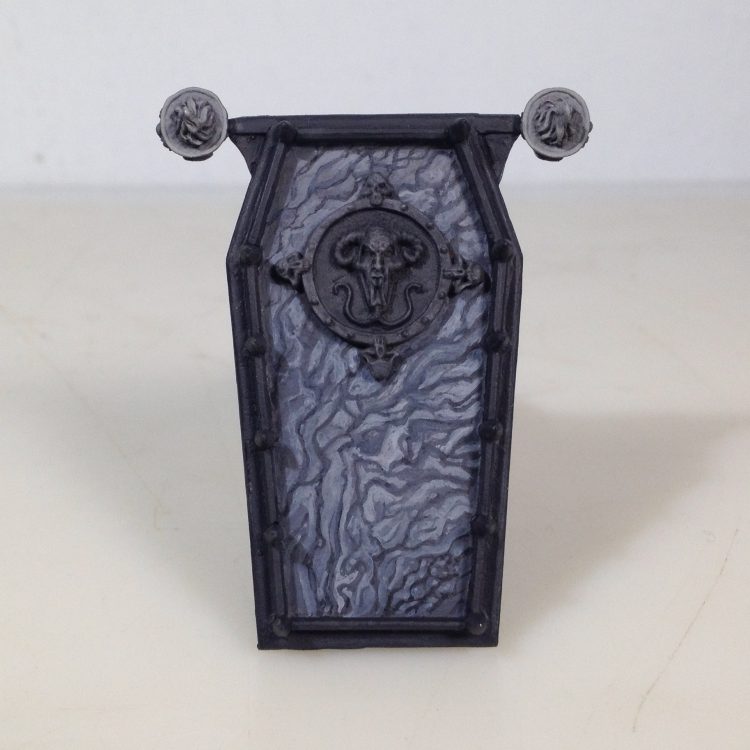
Here I came back with a mix of grey and white. Something like a 2:1 ratio. Lighter areas were hit again and also reduced some of the black lines some more and made some of the light areas bigger. This is mostly by feel at this point, and to match the tone of the rest of the coach. The next few steps continue this process.
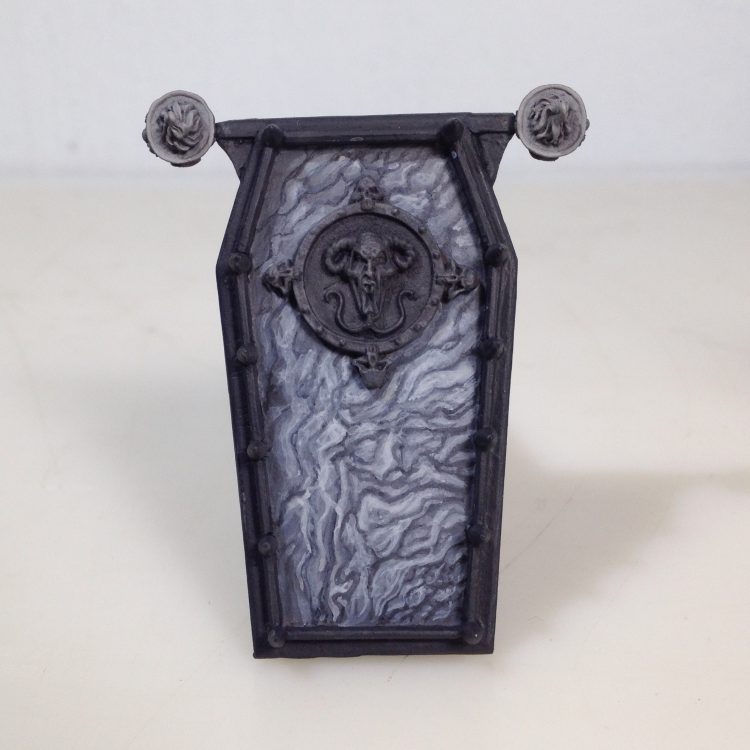
The body of the coach already has already been painted a lighter marble, so I want to tone down the dark lines and create some larger white areas. I have worked over most of the surface with stonewall grey mixed with a bit of matt medium, at least a 1:1 ratio. Matt medium is simply paint binder without pigment, added to paint it increases transparency without reducing body. Much of the focus was on making the dark veins thinner and lighter.
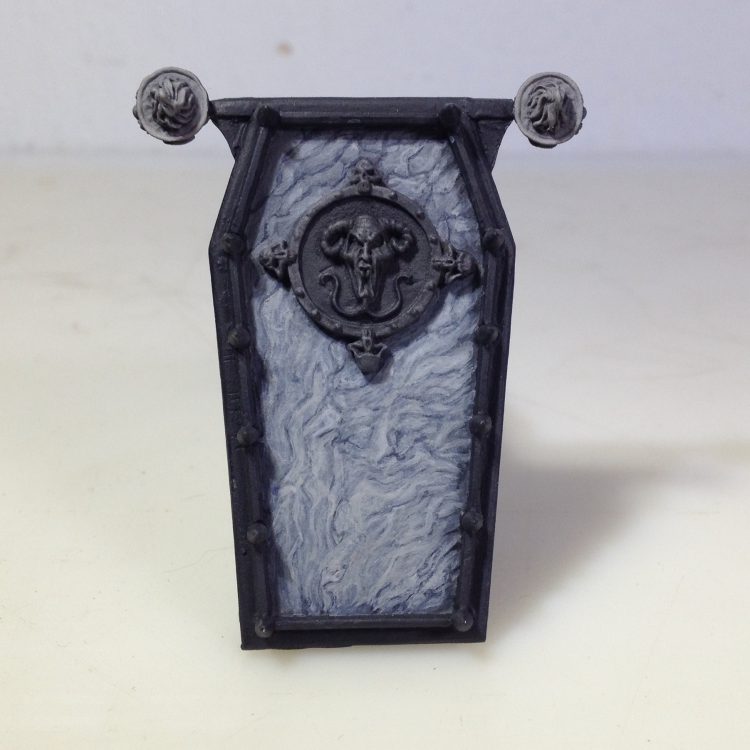
In this step stonewall grey was mixed with white and matt medium 1:1:1. It was used to open up and lighten some of the white areas.
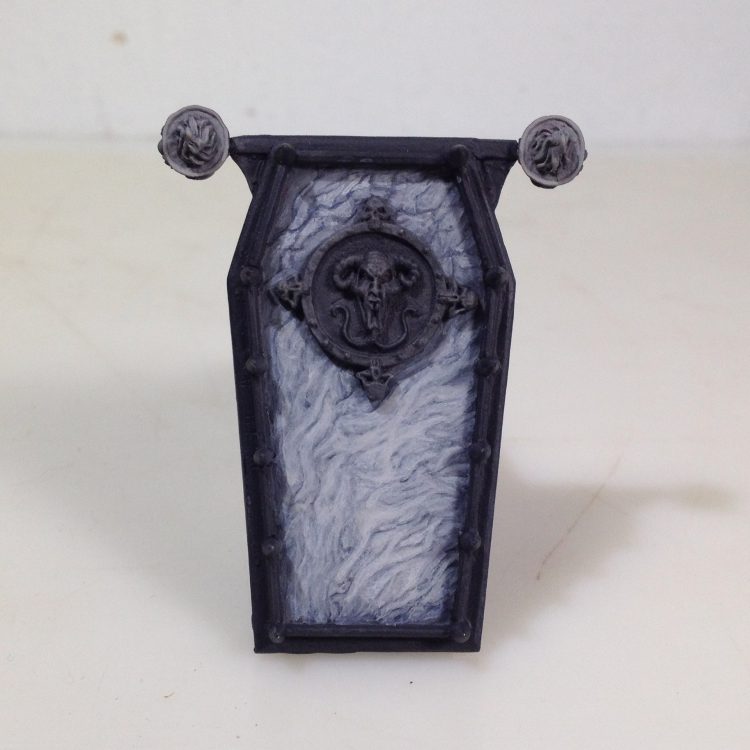
Now a mix of stonewall grey and medium mixed about a 1:1 ratio is used to continue smoothing out the contrast between the darker lines and lighter open areas.
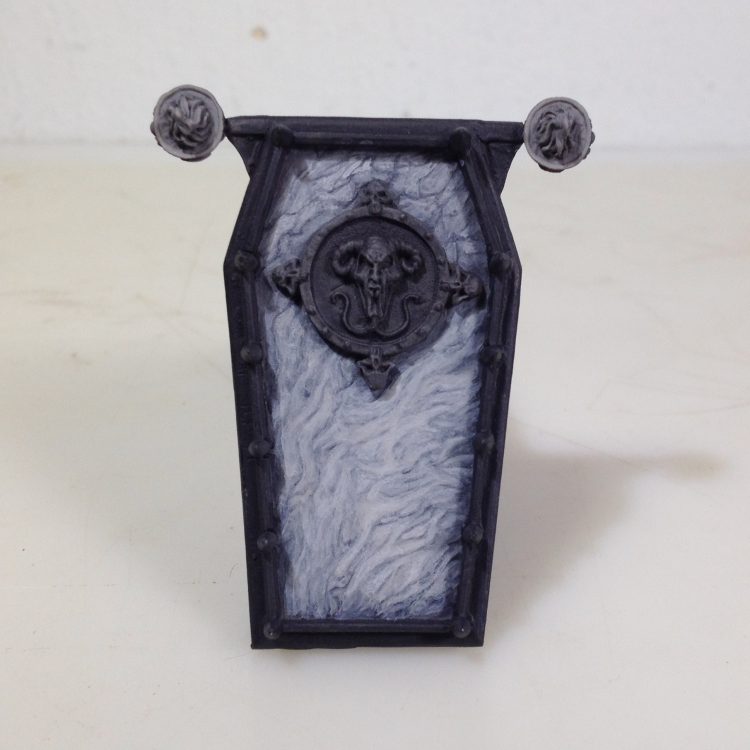
To finish the marble texture a mix of 3:1 stonewall to black + a bit of medium was used to redefined parts of the vein structure and tie some of them together. This created little pockets of white that is a common feature of marble.
JD Reynolds’ Method
This method is one I have been using for almost as long as I have been painting my Ultramarines and is great for scenic bases and if you don’t have access to an airbrush, which admittedly is the best and quickest way to achieve a marble effect. That being said this method is also rather simple, and easy to learn with a bit of practice. For reference,
I use Dragonforge Design Studio bases, Sanctuary Line, which are perfect for players looking to paint the new Sisters of Battle.
Step 1: First you will want to use a spray to undercoat your bases. I personally use an army painter grey, but honestly anything will do. A lighter color such as mechanicus standard grey or corax white is recommended as we will be using very light grey colors in very thin layers meaning if you start with chaos black you can expect to find yourself adding significantly more layers before you have a strong base color.

Step 2: Apply a base coat of Celestra Grey. As mentioned before this will take several thin coats to fully cover the undercoat. I recommend a minimum of three keeping the layers thin so you don’t lose any detail.
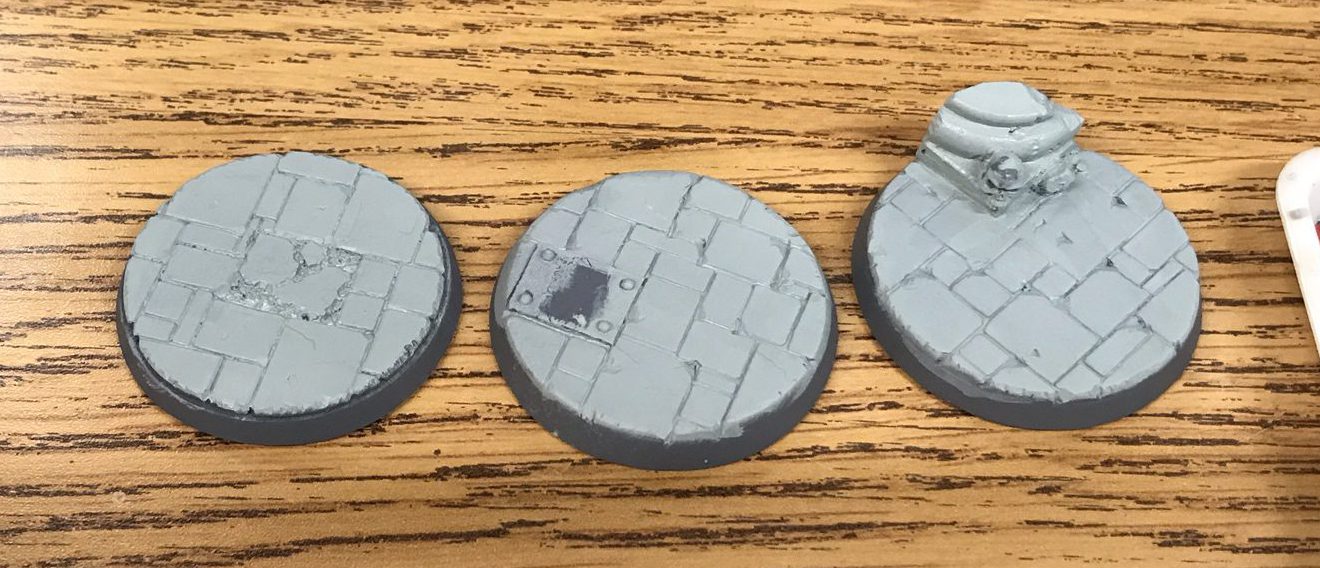
Step 3: Apply a coat of Ulthuan Grey. This is a very light grey and once again you will want to apply a minimum of three layers.
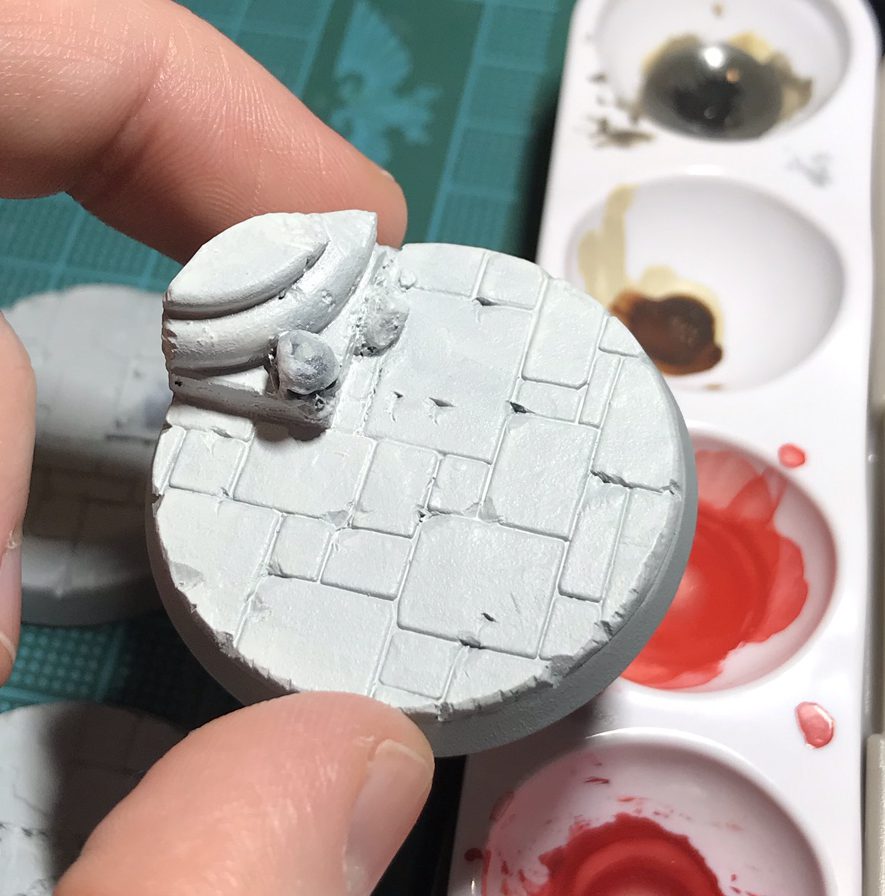
Step 4: Apply a shade of Agrax Earthshade to all the recesses. I personally use a glaze brush instead of a standard wash brush to ensure my shade doesn’t spill over outside of the recesses on to the flat areas. If you’re trying to paint a standard GW base with no further details then you can simply skip this step.

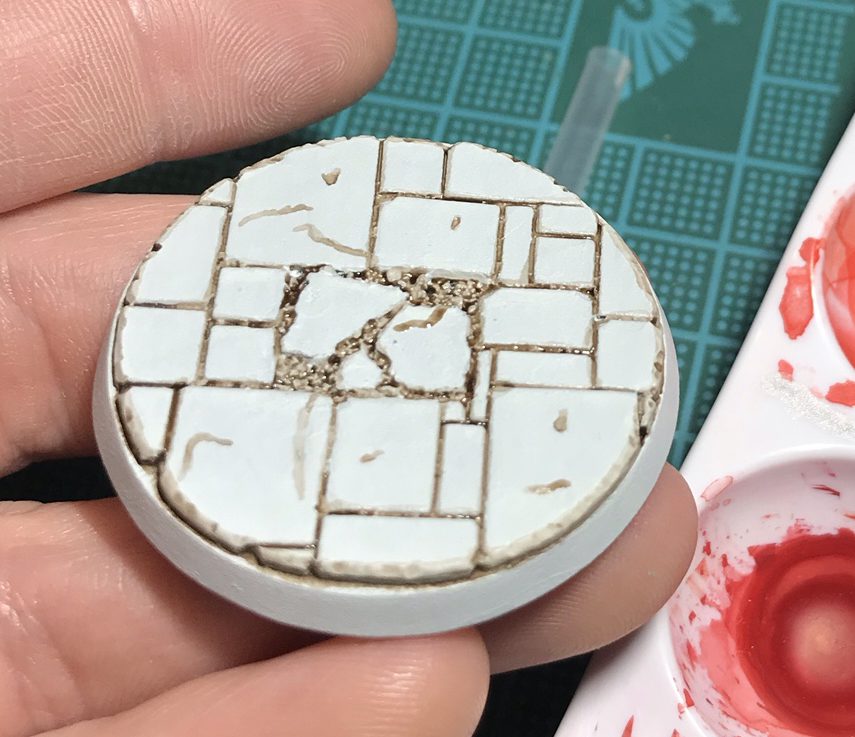
Step 5: Apply a heavy dryrbush of Praxeti White. This is perhaps the most important step as this will really bring out the details on a scenic base, or allow the rough surface on a GW base to actually pop out and be noticed. Remember it is important to not have too much paint on your brush for this phase otherwise you may get the paint on the flat areas covering the Ulthuan grey and obscuring the minor imperfections on the surface entirely.

Step 6: Apply glaze lines of 50/50 Administratum Grey and Lahmian Medium moving in roughly the same direction across the surface of the base. These lines should be roughly 1mm in width and very translucent, with some looking slightly thicker than others. Feel free to look at pictures of actual marble for inspiration, but there should be an element of randomness to it. Some lines should only have a single glaze layer, while others might have 3-4 to make them stand out more.
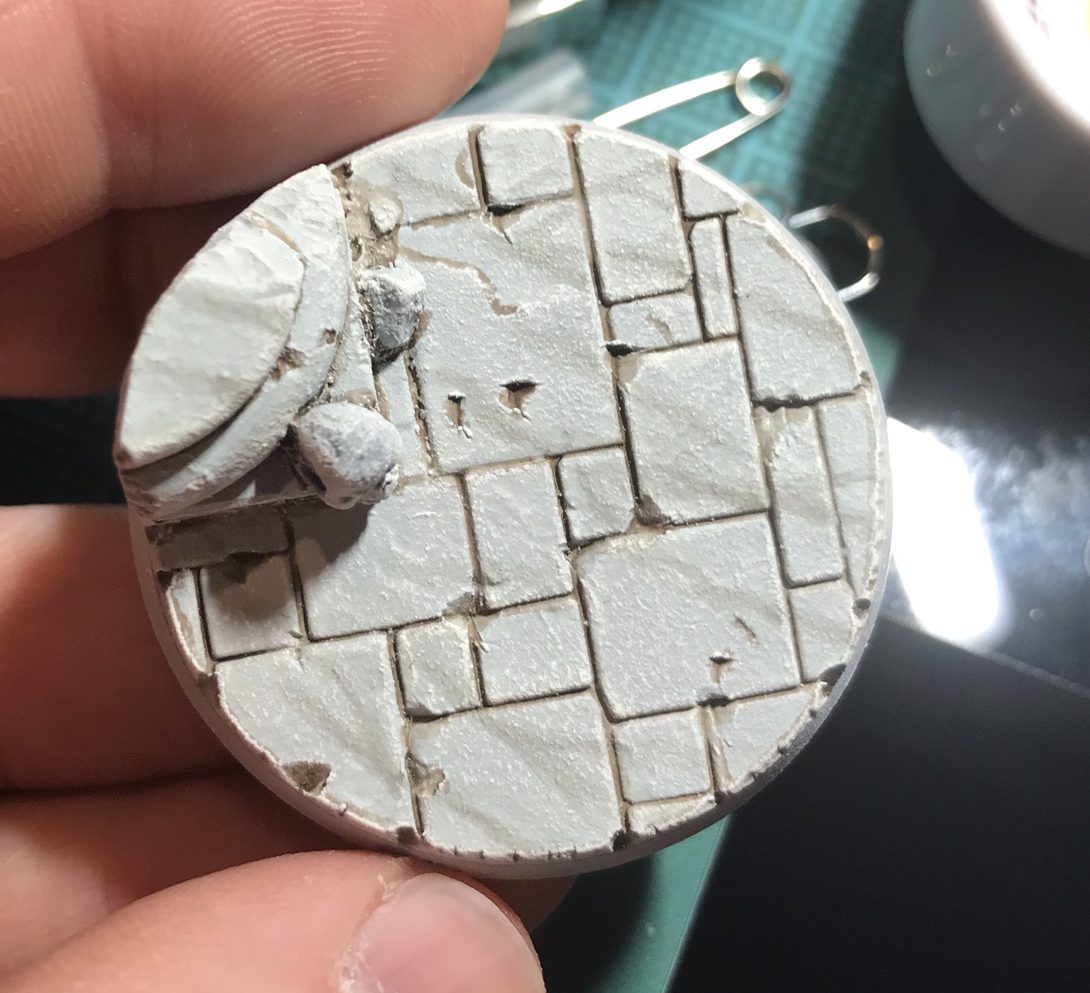
Step 7: Apply glaze lines of 50/50 Dawnstone and Lahmian Medium. These once again need to be a thin glaze, but also thin in the sense that they fit within the previous Administratum grey lines. Once again an element of randomness needs to be at play, but you’re looking to cover something like 60% of the previous lines. At this point you can see that you are trying to create the vein effect that marble is known for. How good this will look ultimately depends on how much time you want to devote to perfecting this technique.
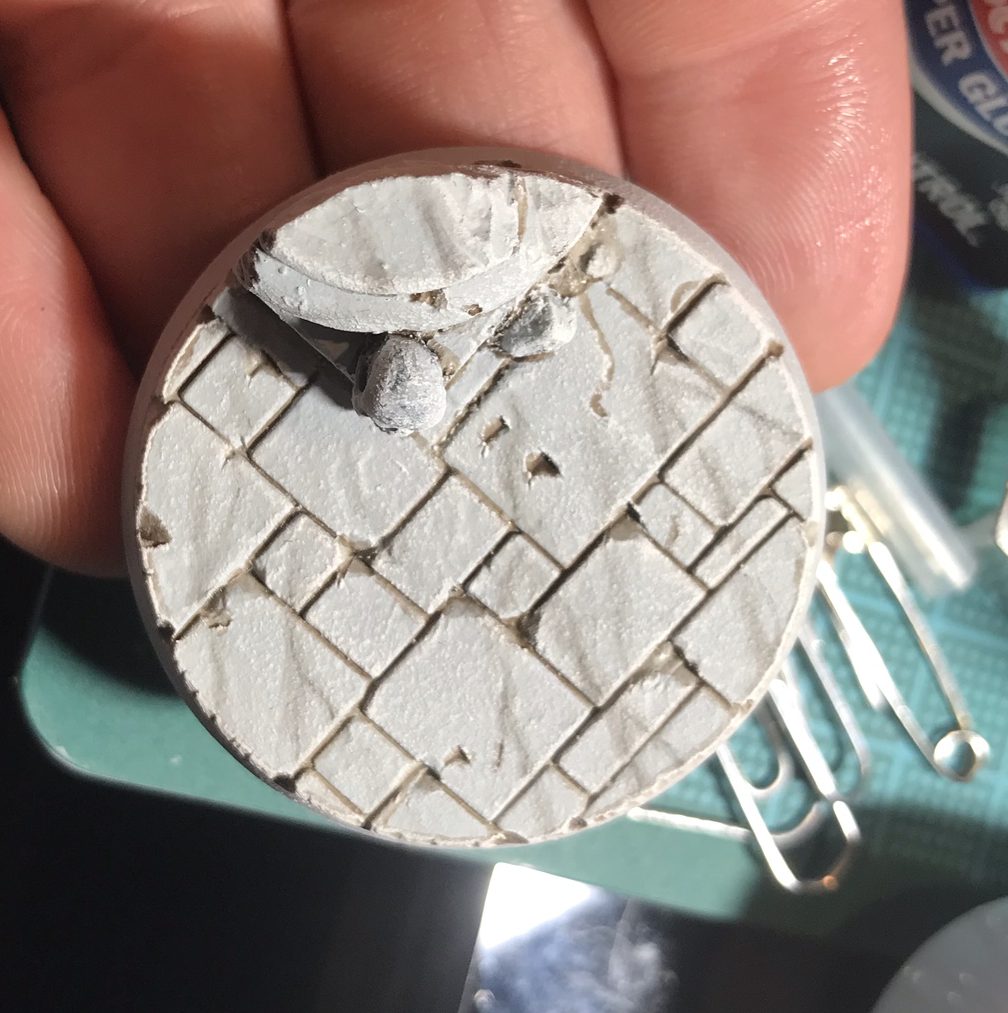
Step 8: Apply glaze lines of 50/50 Mechanicus Standard Grey and Lahmian Medium. These should only be at the center of the thickest lines you have created so far. As before they should be even thinner and less numerous than the previous step.
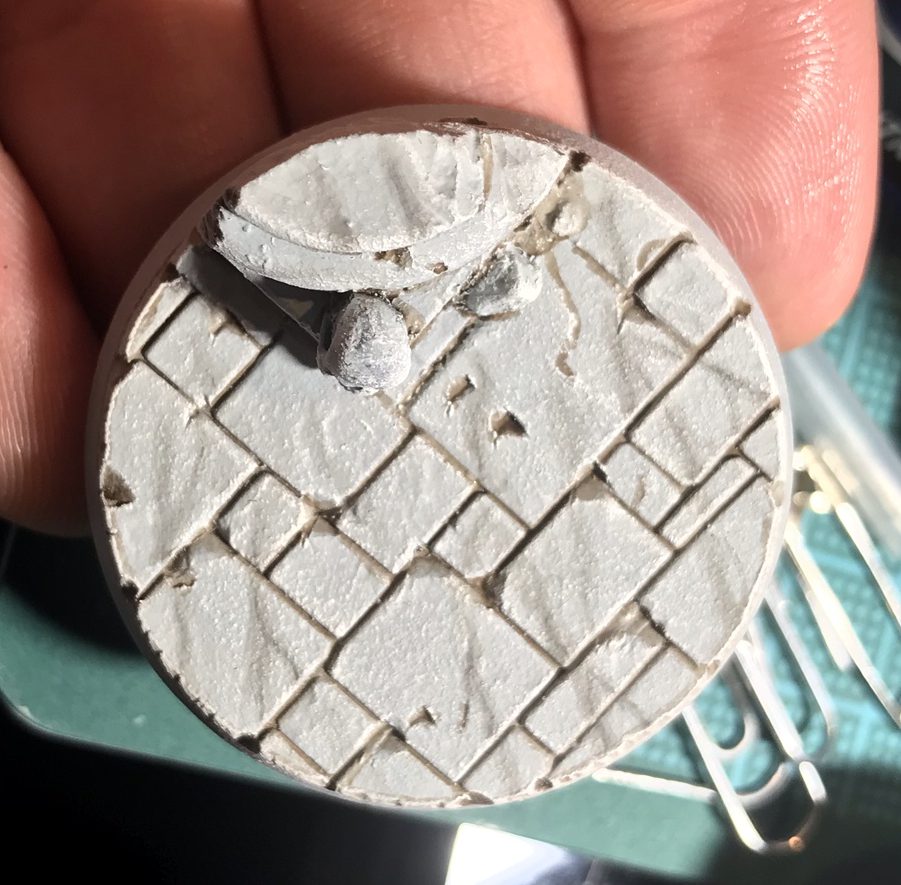
As you can see the effect is very subtle and I am by no means a master at it, but it is something you can perform quickly on a large number of bases. One final step would be to use a gloss spray to give the marble a nice polished look to it.
Parting Thoughts
Hopefully these approaches have inspired you to conduct your own research and work out your own method for painting marble, or they’ve given you what you need to achieve the visual effects you were going for. As always, if you have any questions of feedback, feel free to drop us a comment in the comments section below. Or email us at contact@goonhammer.com.

