So you’ve seen the movie and now you know with absolute certainty where Napoleon went wrong. You can, and will, do better. It’s time to get into real wargaming. Welcome to Napoleonics.
This article is part of our Getting Started: Napoleonics guide.

Your Generals are blessed by God, your soldiers are the toughest infantry in Europe, and you’re determined to form the bulwark upon which the upstart French will break. You’re playing the blessed Rossiyskaya Imperiya and if you’re going to pull it off, you’ll need a lot of green coated infantry.
While there was variation in Russian infantry uniform, the majority of the models you can buy come from the Third Coalition (1805) and onwards, so expect solid ranks of dark green jackets and white trousers. Glittering cavalry, Cossacks and Tartars will provide bright spots of occasionally wildly varying colour as well as devastating charges.
Napoleonic Russians look extremely striking, a strongly uniform and highly contrasting basic colour scheme set off well with giant black plumes. As in all of our Napoleonics painting guides, we’re going to recommend picking up a Uniform guide from Osprey. Different units had different colours, facings and details, so if you’re aiming for historical accuracy, get a reference book for your army first!
I’ve painted this Russian Grenadier following Osprey’s Russian Army of the Napoleonic Wars (1). From start to finish this was about ten minutes of painting time (excluding drying), and I think would work extremely well as a batch painting scheme in order to do battalions in record time. This is a “typical” Russian line regiment Grenadier – White Trousers and Gaiters down to a black shoe, with black shako and plume, green jacket with red cuffs, collar and turnbacks with white straps.
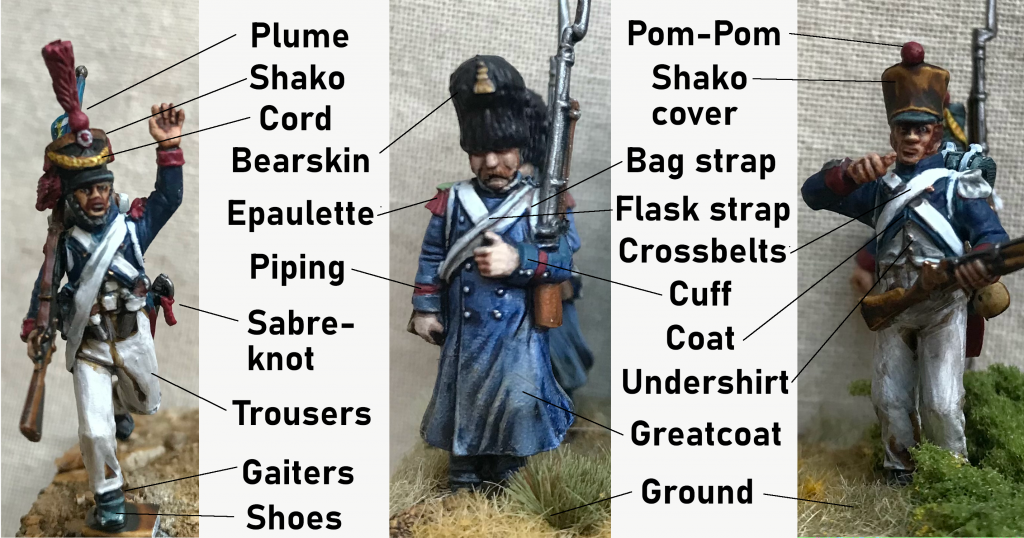
We will use a little Napoleonic uniform terminology in this article, so here’s our handy French Uniform reference card for guidance:
Step 1. Basecoats
I primed my examples with Citadel Wraithbone. This provides a good light primer colour for basecoats, but it also provides our base colour for cotton, wool and white areas on the model. Blocking in the colours is fairly easy – if you work inside out (lowest layer of clothing first) you don’t have to be too neat at this stage.
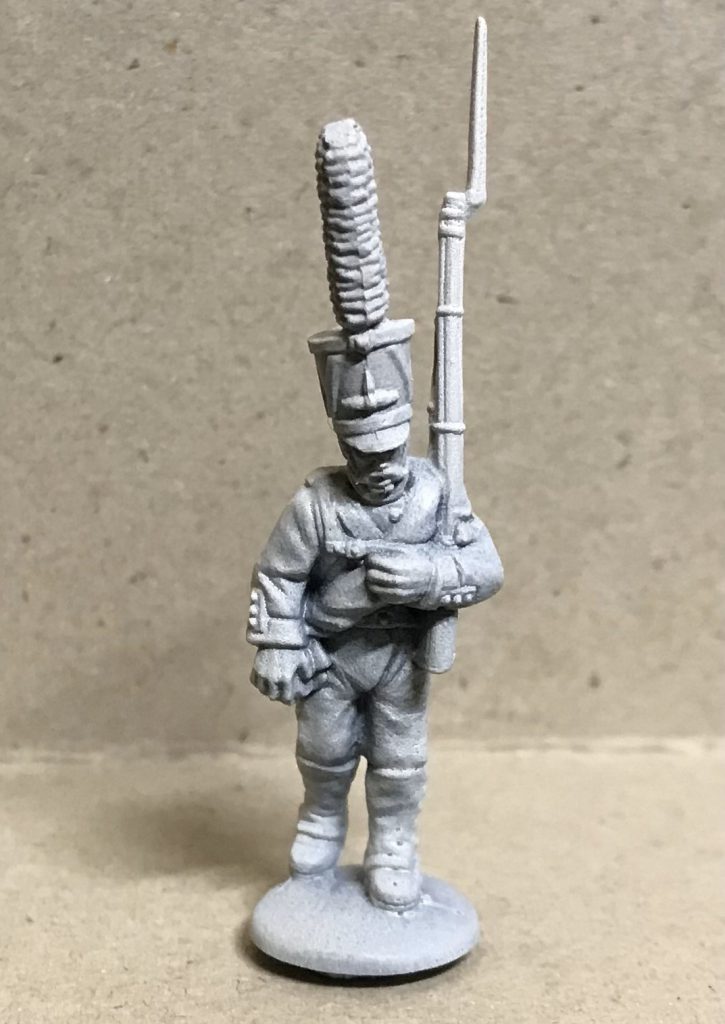
Jacket – Vallejo Russian Uniform Green
Greatcoat (wound around body) – Army painter Uniform Grey
Trousers and Gaiters – Citadel White Scar
Red cuffs, collar and turnbacks – Citadel Word Bearers Red
Black (Shako) – Citadel Contrast Black Templar
Black (Leather) – Abaddon Black
Musket – Vallejo Beastly Brown
Skin – Citadel Bugman’s glow
I use Contrast when painting Shakos to give it a slightly faded felt/fabric look easily, while shoes, plume and metal areas of the musket get the deeper Abaddon black.
Step 2. Large Area Colour
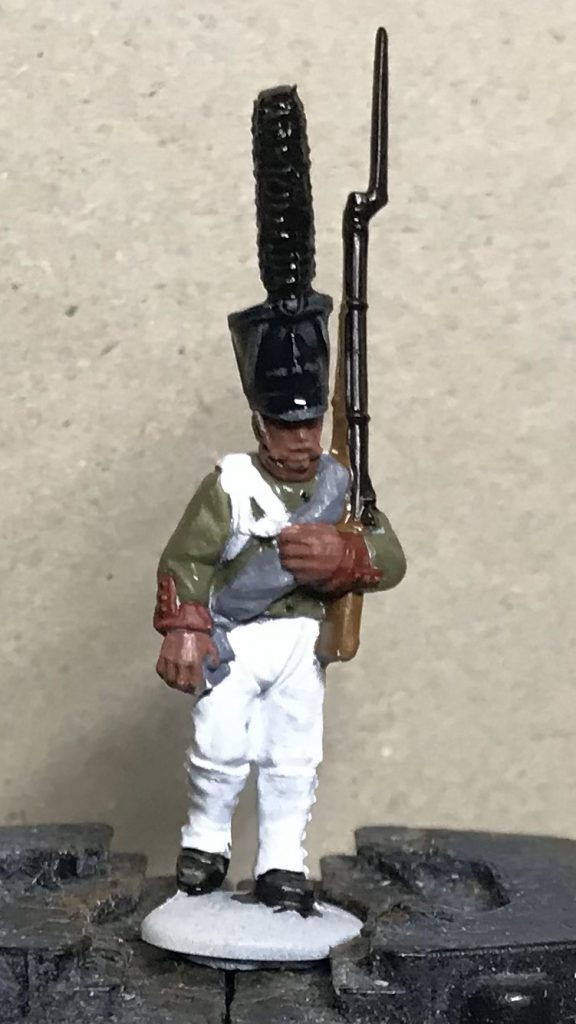
Returning to the largest block colours with a Contrast coat makes them a little more intense and provides highlight and shade in one. Let each coat dry before adding the next – detail on cloth is often shallow, especially between areas like the Jacket and Greatcoat. Applying washes quickly will soon create a muddy mess.
Jacket – Contrast Militarum Green
Trousers – Contrast Apothecary White
Greatcoat – Contrast Basilicanum Grey
If I was batch painting, the trousers, jacket and greatcoat could be finished here, perfectly fine for a single model in a unit of 20-30.
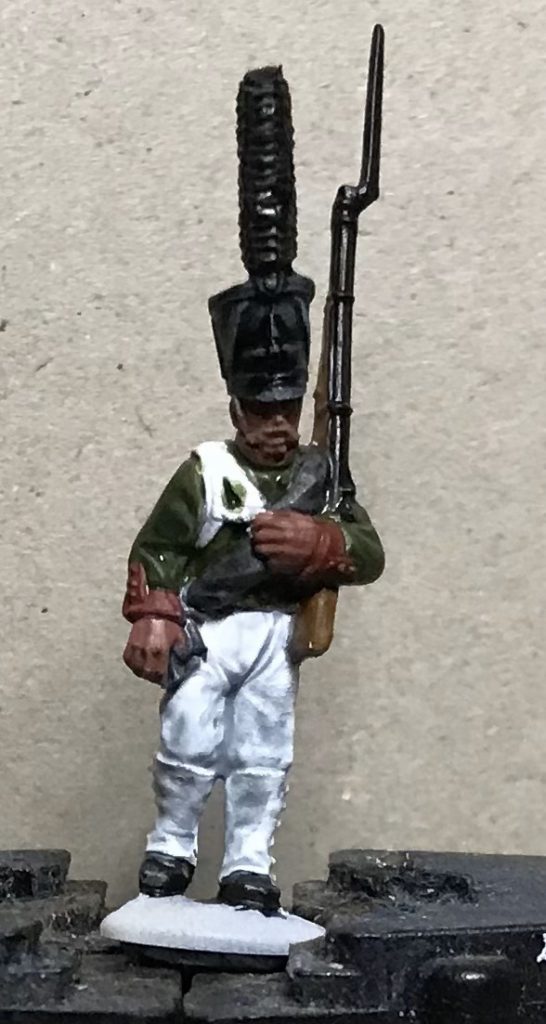
Step 3. Detail Colour
This is the second coat for smaller blocks of colour. Here, you want to try and preserve the shadows between areas created by Step 2, so neatness counts. If you don’t manage it, water down some Fireslayer Flesh contrast and place the brush on the line you want to mark – capillary action should do the rest.
Red areas – Evil Suns scarlet with a very light wash of Fireslayer Flesh
White Cross belts – Nuln Oil
Skin – 1:1 Water and Army Painter Barbarian Flesh
Shako Side Chevrons – White Scar
Shako Plate – Fulgurite Copper
Facial Hair – Beastly Brown
Gun Metal – Boltgun Metal
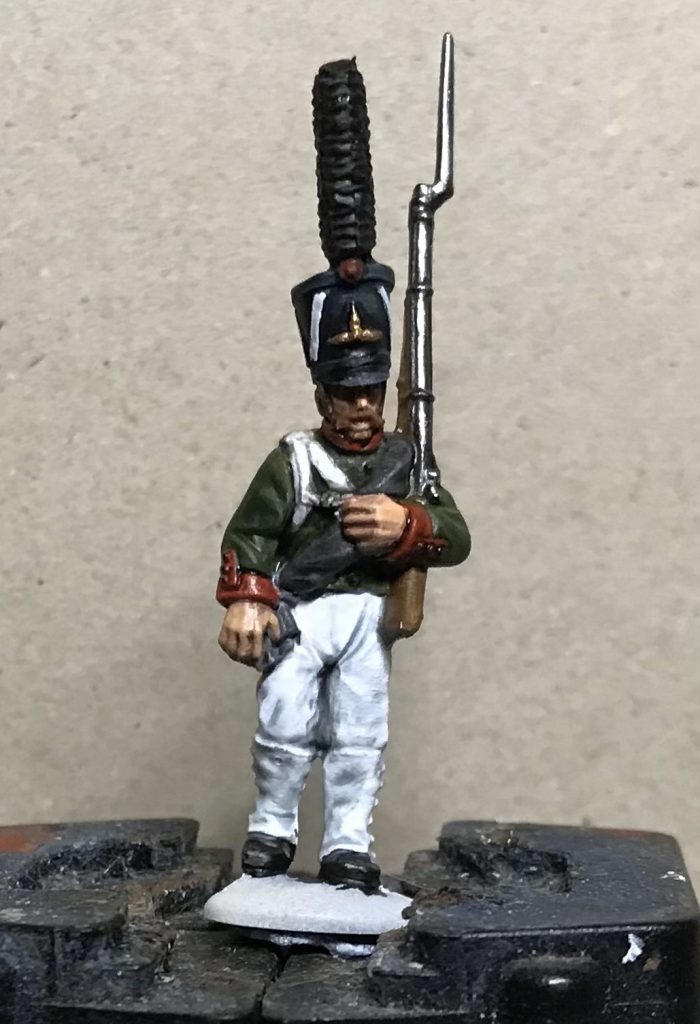
Step 4. Fine detail
Final highlights to make whites, cuffs and collar stand out.
Red – Evil Suns Scarlet
White straps – White Scar
White Trousers – very sparing highlights of White Scar
Skin – final lightest tone highlight – in this case 1:1 Barbarian Flesh and Citadel Kislev Flesh
Musket – Wash with Army Painter Dark Tone
Now, you really could be done, but there’s a few final bits to finish off…
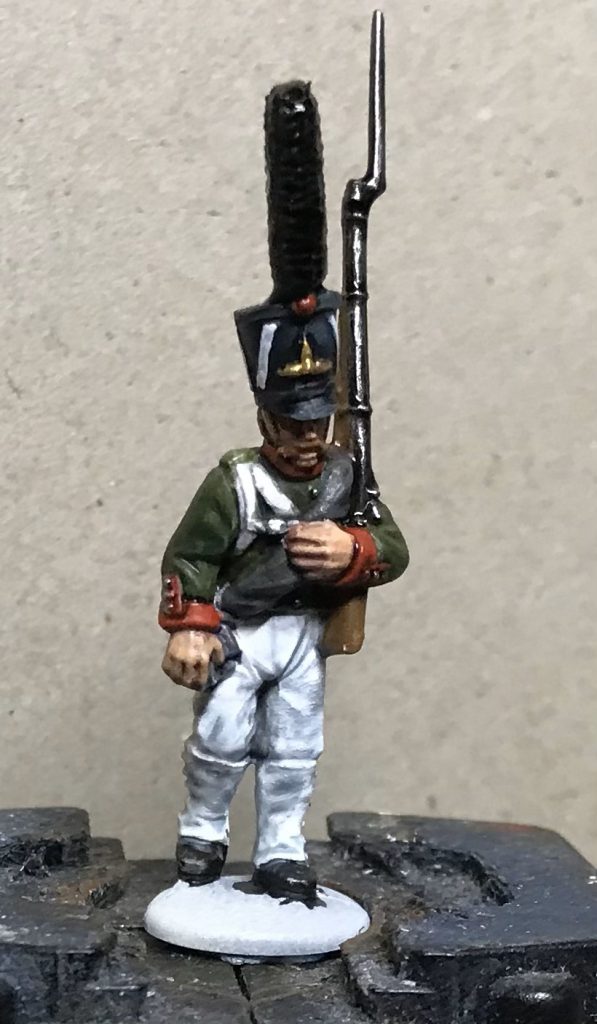
Step 5. Final Touches
The main thing here is to use the Dark Tone to give the massive Grenadier plume a slightly glossy look, as if it’s many fibres catching the light, rather than a mass of drab texture. Painting buttons, clasps, buckles and other small metal detail is not always necessary, but it does really and clearly finish off the model.
Buttons – dot each button with Abaddon Black, then a tiny dot of Stormhost Silver
Shako plume – Army Painter Dark Tone
Musket – sparing highlights with Stormhost Silver
Chin Strap – Fulgurite Copper
Shako Plate – Sycorax Bronze
Eyes – Wraithbone followed by Abaddon Black.
and Finally, paint the strap cover on the right shoulder with Militarum Green and tidy up any errant white from the straps that’s ended up on the jacket.
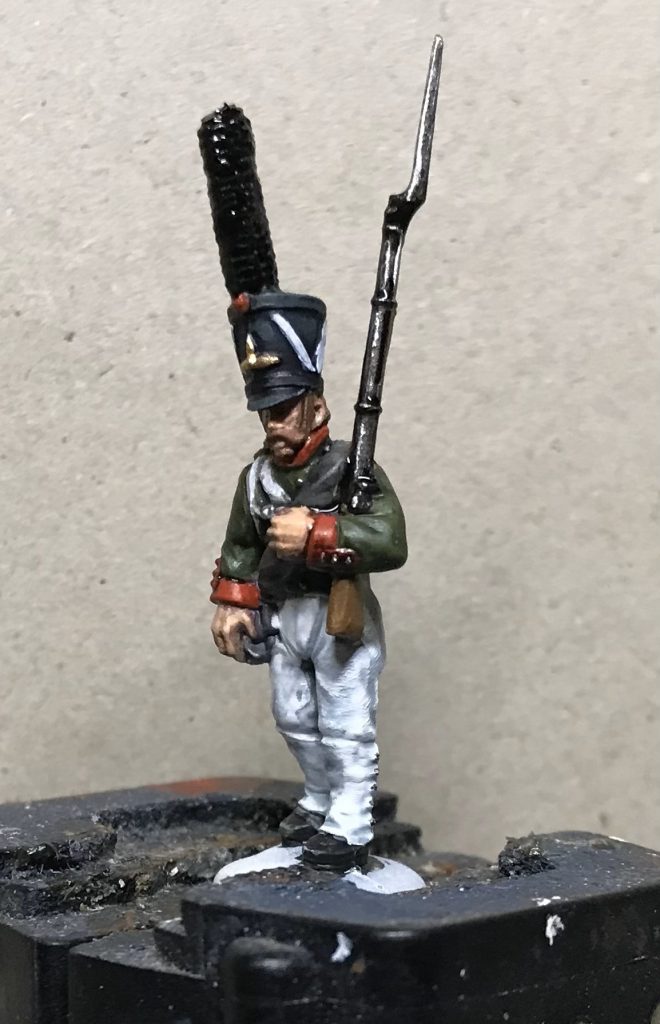
With that, we’re done! The first Grenadier of the Polk is ready for muster. This scheme shouldn’t take too long, especially once you’ve got your eye in for the detail of the models, and will help you batch paint a battalion in no time – and if you’re up against Napoleon’s Grand Armee, you’re going to need a few!
Have any questions or feedback? Drop us a note in the comments below or email us at contact@goonhammer.com.
