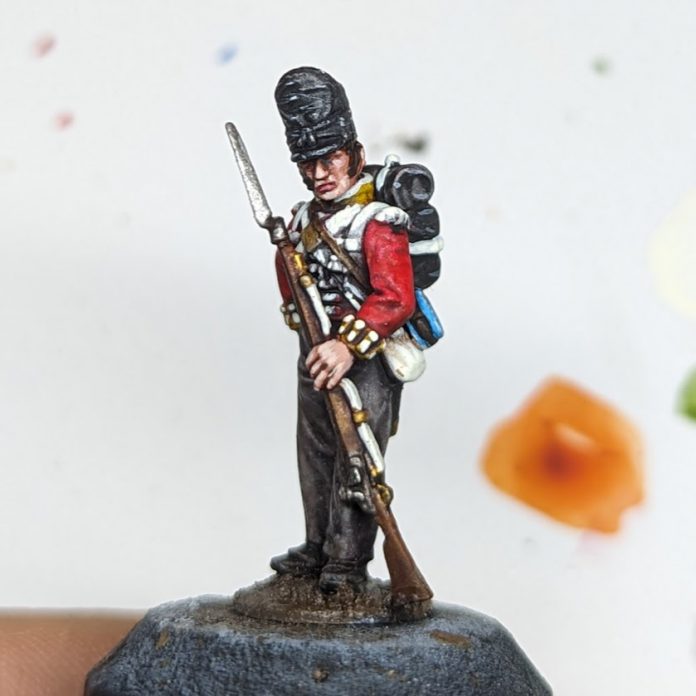
So you’ve seen the movie and now you know with absolute certainty where Napoleon went wrong. You can, and will, do better. It’s time to get into real wargaming. Welcome to Napoleonics.
This article is part of our Getting Started: Napoleonics guide.

Ready to paint Wellington’s scum of the earth to a good tabletop standard in a reasonable timeframe? Look no further. This guide is aimed at army painting. It is certainly possible to get a better result. What I present here is my most efficient speed paint method that is designed for a batch painting workflow that balances good results with speed, at about 30-40 mins per figure, assuming you paint at least a dozen at once.
Step 1: Zenithal Prime
Prime the model with black primer. Any will do. An airbrush is ideal but a rattle-can or brush is fine. Apply a zenithal coat of Liquitex white acrylic ink at 45 degrees from above using an airbrush. The consistency of the ink is very fine and this cuts down on micro-dotting, but you can use thinned white acrylic paint if you prefer. Then apply a second zenithal layer at 80-90 degrees from above using an opaque white acrylic, I used Pro Acryl titanium white as it’s very matte and non-chalky. Tamiya flat white would also work very well.

Step 2: Basecoats
Basecoat the main areas of the figure. I use a lot of contrast paints for this step as this approach to painting is all about leveraging underpainting and transparency – any similar paint range will work. Try not to let the Contrasts pool as this spoils the effect. The actual shades of the colours themselves are not that important – this era is pre-industrial and fabric dye and manufacturing varied greatly.
- Tunic: Citadel Contrast baal red.
- Bayonet scabbard, shako, cartridge pouch, shoes and gaiters: Citadel Contrast black legion.
- Facings (collar and tunic cuffs): Citadel Contrast imperial fist.
- Flesh and hair: Pro Acryl basic skin tone (using a contrast here won’t end up looking right, long experience teaches me this!)
- Musket woodwork: Vallejo Speedpaint copper brown.
- Musket metalwork: Vallejo metal colour steel.
- Water bottle: Vallejo deep sky blue.
- Trousers: Citadel Contrast basilicanum grey.
- Brasswork (cross-belt centre buckle, trigger-guard, buttstock, sling fixings, ramrod fixings, bayonet scabbard hardware): Vallejo Model Colour old gold.
- Breadbag: Citadel Contrast skeleton horde.
- Cross-belts, epaulets, lace, backpack straps: leave the white showing through.

Step 3: Acrylic Washes
Thin Reikland Fleshade 1:1 with contrast medium and apply it to the flesh, hair and brass areas.

Step 4: Gloss Varnish
Now we’ve set the midtones, give the model a coat of gloss varnish all over. Any will do. Let it touch dry, I usually leave it 20-30 mins, or hairdryer it. This is not really to protect the model from the next step but to make cleanup easier (although acrylic inks can be quite fragile compared to acrylic paints/contrasts).
Step 5: Oil Washes
Ok, buckle-up. Oils are fantastic and I won’t hear it any other way. Oils are at the core of this approach to army painting, and you owe it to yourself to try them out. I’ve provided some notes on working with oils, including making washes, at the end of this article for those who are new to these materials, as they can be intimidating. The key to this stage is DO NOT APPLY A SINGLE OIL WASH COLOUR TO THE WHOLE MODEL. If you do, you will end up with something that looks like it should be gracing the battlefields of the 31st or 41st millennium – lovely in its rightful place, but not here.
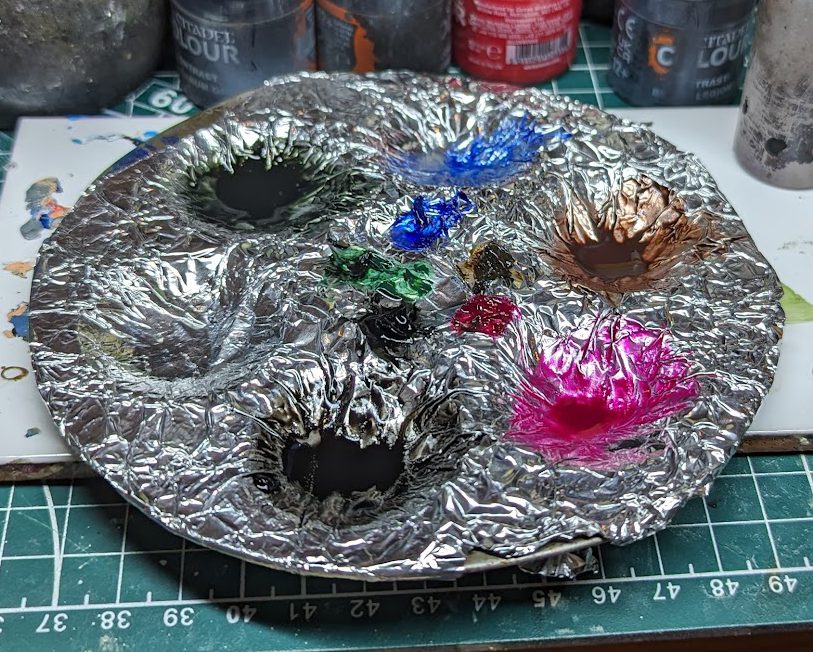
Mix five (yes five) oil washes and apply them to the following areas. The washes can be quite rough and should go on quite thick, a bit of overspill really will not matter at all (and can actually help). Some of these you can even mix on the model itself if you’re feeling confident. The precise shades do not really matter, close enough is good enough.
- Red areas and flesh – quinacridone magenta 1:1 raw umber
- White, black and brown areas – raw umber 1:1 ivory black
- Trousers – as above, but I added a hint of Q. magenta (in situ on the model) to warm up the grey. Grey is quite boring and this gives it a more sympathetic tone to the red tunic. This is one of the advantages of oils – they have a long work time so you can adjust on the fly.
- Yellow areas: Q. magenta
- Blue areas: french ultramarine (yes it’s a real paint, not just a GW thing!)

Step 6: Clean-up
Leave the oils to dry for 45 mins or so, or get out your trusty hairdryer. You want the thinner to have evaporated or this step won’t work right. Now you reap the rewards of the gloss varnish step. Using cotton buds and/or makeup sponges (I steal mine from my partner; she loves it), polish off the oils from the raised areas of the model. Imagine you are highlighting the model and focus on getting the upper areas exposed to light nicely cleaned up, and leave the recesses. Don’t take all the oil off mid-tone areas if you can help it. You can work quite quickly, this should only take a couple of minutes for a model. This step should do several important things:
- It will add the definition – you have essentially just panel lined the whole model with appropriate shade tones in one step – nice!
- It will reinforce the mid-tones and add vibrancy to the yellow and red.
- It will provide a nice blend between your existing layers.
- It will help to counter any micro-dotting from the zenithal stage (this effect is enhanced if you don’t apply the gloss varnish, but for Napoleonics I prefer the cleaner look gloss varnish gives you).
- It will add tonal variation and interest
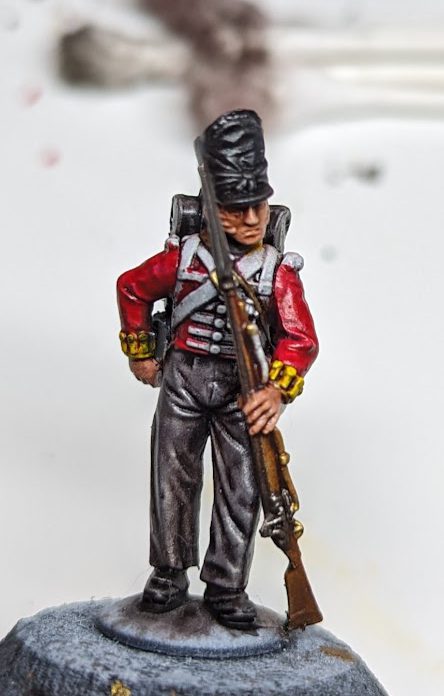
Step 7: Matte Varnish
Time to get rid of that horrible ‘toy soldier’ shine. I use an ultra-matte varnish from Lucky. Testors and Tamiya are also good but the former is very smelly. I have also heard very good things about VMS. Other matte varnishes are ok but in my experience tend to be a bit satin despite their claims otherwise.
Step 8: Highlights
I usually do highlights after I varnish. This is because I mostly use Pro Acryl for highlights, which are very matte anyway, and matte varnishes have a ‘flattening’ effect on all preceding colours that compresses the value range (brightness) together, removing vibrancy. They also ruin the shine of metallics. Don’t spend long on this step, a slightly impressionistic, painterly approach will work fine – you have a whole army to paint! Using a decent sized sable brush with a good point make this a doddle. I use a size 2 Rosemary and Co. but Windsor and Newton are also excellent.
- White areas – a fairly bright off-white thinned 1:1 with water or glaze medium, I used Pro Acryl Ivory as that paint range takes thinning with water very well. It’s really worth going for a second or even third pass on the most exposed areas to build opacity. Keeping the paint thin helps to avoid chalkiness (as does using a good paint brand in the first place)
- Black and grey areas – use the same mix as above but add a bit more water or glaze medium. This time, keep it subtle at one, perhaps two, quick passes. I overdid it on the trousers and shako and the material started to look too ‘glossy’, so I applied a very thinned down wash of basilicanum grey with some matte varnish to mute things down.
- Water bottle – using the mix above, ‘draw’ some wood grain on the bottle. The transparency means you don’t need to bother adding any blue. (Sometimes I paint wood-grain on muskets using a thinned buff colour but I didn’t here to save time).
- Breadbag – the same as above, but this time, reinforces the folds and seams of the cloth.
- Metalwork – highlight the musket, bayonet, cooking pan and water bottle cap with Vallejo Metal Colour dark aluminum.
- You don’t need to highlight the red or yellow as we already used super-punchy Contrasts to start, but you can if you want!

Step 9: Flesh
I spend a bit longer on the face, partly because I like painting them and partly because they are the focal point of the model. Put the mid-tone back in with basic skin tone mixed 1:1 with water, picking out the anatomy of the face. Then mix a highlight colour by adding your off-white tone 1:1 and apply this to the more prominent features. Give the nose and chin another pass to add opacity. As with the white areas, aim to keep your paints quite thin to prevent chalkiness or obscuring fine detail, and work in layers. Don’t paint the eyes; life is too short.

Step 10: Finishing Touches
The best bit baby!
- Using Citadel carroburg crimson, put a spot wash on the model’s lower lip (don’t do both lips, it’ll look like lipstick!).
- Apply a ‘natural’ Contrast colour of your choice to the hair/facial hair – I used cygor brown on this model. The shiny finish works well here for hair, so leave that be for once.
- If you like freehand, add the regiment number to the backpack or cartridge pouch using your thinned off white.
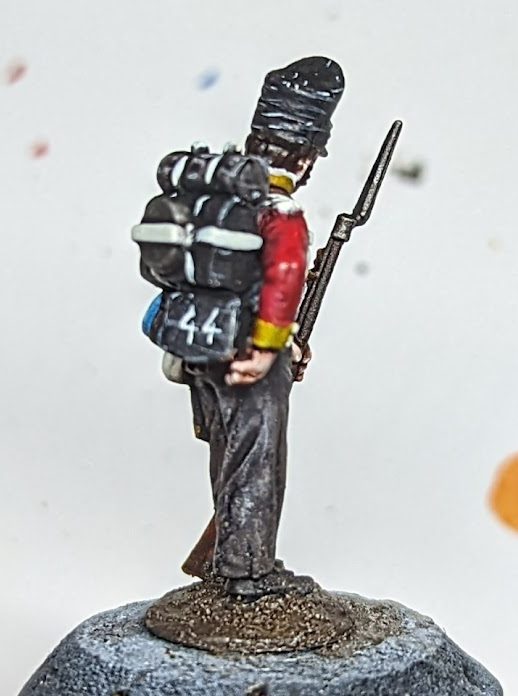
Step 11: Base
Add basing to your taste. Often you will be multi-basing your Napoleonic miniatures so this step can wait until the unit is ready.
Step 12: Weathering
This is very optional. I like a campaign style look so did some light weathering on these models. I would normally reach for pigments, but I wanted a wet, muddy look given these models are for the Hundred Days in 1815 and the night before Waterloo was infamously soggy. I used some enamel mud effects, a dark one for wet mud and an off-white one for dried mud. There are various scale model brands that offer these types of products.You could use thinned oil paint or acrylic washes, but with the latter you’re stuck with the splatter if it goes wrong. Apply by loading an old brush, aligning it with the model’s feet and legs, and then giving it a bit of air from an empty airbrush. Voila, splatters. You could perhaps try blowing it if you don’t have an airbrush!? If it goes in the wrong place, erase it with a cotton bud.
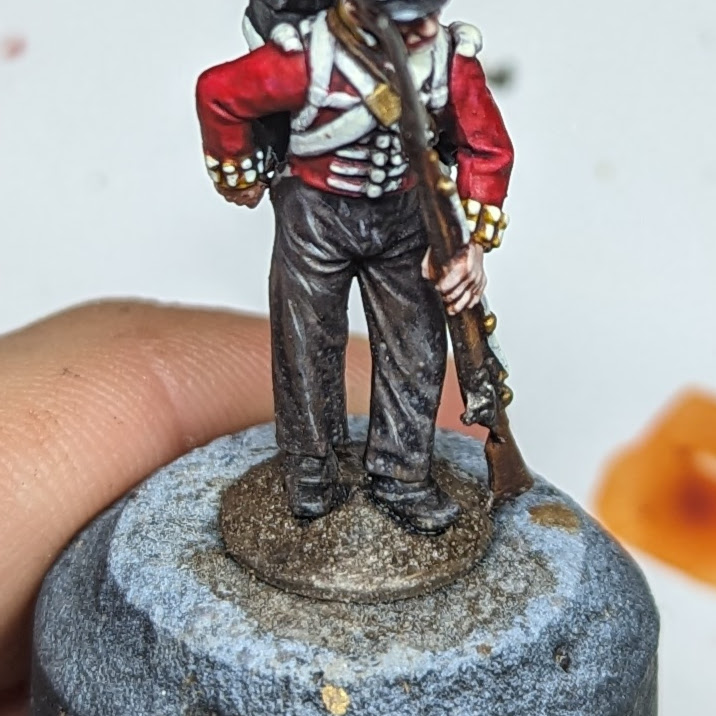
With that, you’re done! Time to rank ‘em up and march ‘em off to the fight! I don’t varnish my figures at the end as it spoils all the lovely material finishes we’ve spent time cultivating. Invest in some good magnetized storage instead!
Quick-Start Guide to Oil Washes:
- Oil paints come in two main types, cheap graduate paints and masters series. The main difference is how finely the pigment is ground-up. You will want masters series for painting figures ideally. Graduates are good for weathering, vehicles and terrain. I use Windsor and Newton for figures as they’re good quality and you can get them in any art shop. Other brands are available.
- You thin oil paints with mineral spirits to make a wash. Use low /no odor mineral spirits from an art shop – the stuff from a hardware shop stinks and will give you a headache. Don’t buy it in tiny quantities from some model shop, a litre bottle should cost you about a fiver from your local art shop.
- Mix your washes in a palette with little cups, or some other container. Oils dry really tough (all that art that is still about from centuries ago) so line it with aluminum foil to make clean-up easier.
- When making the washes, squeeze a little paint from the tube (a little goes a long way) onto your palette, add a few drops of thinner to the cup and then mix some of the oil paint in. Adjust the quantities until you have something that will flow down the side of the cup, but still has some decent viscosity and opacity to it. For panel lining washes you will want a thinner consistency for capillary action, but that’s not what we’re doing here.
- Use an old synthetic brush for mixing and applying the washes. The thinners will ruin natural hair brushes very quickly.
- The more thinners in it the faster the wash will set in place. Oil paint can take a while to dry fully – like up to 24 hours depending on the pigment colour. If you want more work time, put them in the fridge overnight. If you want to speed up the process, use a hairdryer – this evaporates the thinners quickly.
- Clean your brushes with thinners and then a bit of brush soap (or normal human hair conditioner) to put some moisture back in them. Or just abuse them to destruction. I do either depending on my view of the world at the time.
- That’s all you need for this painting guide!
Questions, Comments, Suggestions? Got a really good way of painting British Red to share? Get in touch at contact@goonhammer.com or leave a comment below.
