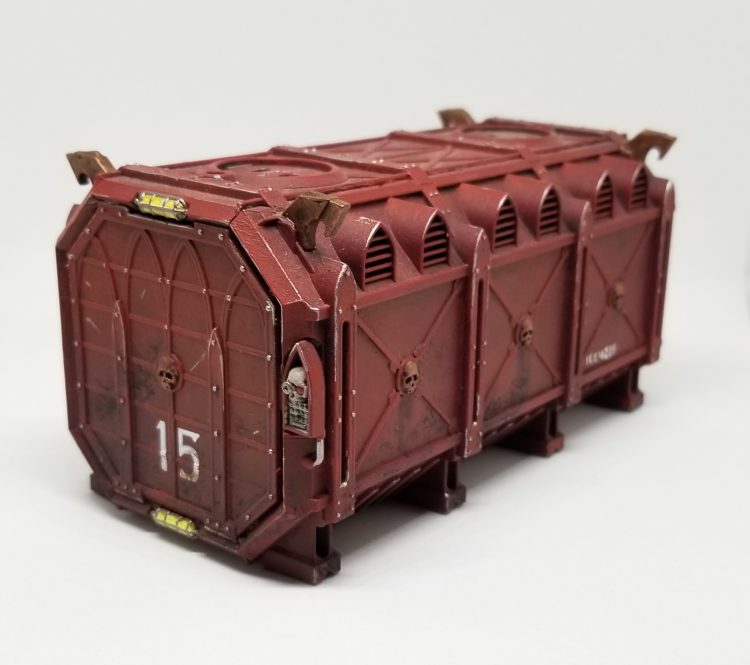
In our How to Paint Everything series, we take a look at how to paint different models, armies, and materials, and different approaches to painting them. In this article, Evan “Felime” Siefring is exploring how to paint Munitorum Armored Containers, the shipping mainstays of the 41st millennium and a wonderful addition to any grimdark battlefield.
Munitorum Armored Containers

Shipping Containers are one of my favorite pieces of terrain. They are flexible, line of sight blocking, and look both good and appropriate tossed down pretty much anywhere on a table. This means they are prefect for blocking up roads in a city fight that would otherwise have inconveniently long sight lines. You can build a fort out of them, or just have a stack of three or four of them as a small line of sight blocker. Models stand on them easily and they’re easier to work around than trying to cram your hands into ruins covered in spikes. Visually, they can add a splash of interest and color to an otherwise drab battle ground, and your models look fantastic fighting around them. You can create tables entirely out of shipping containers, and I have. They are the perfect piece of terrain.
Games Workshop, recognizing this inherent truth, have put out the excellent Munitorum Armored Containers set, along with some limited edition bundles containing them at a discount. They aren’t the cheapest source of shipping containers, but I’d argue they’re among the best looking. I’d better think that, because I am now the proud owner of 22 of them. Because I have no desire to lovingly pin wash and edge highlight every rivet and corner on 22 shipping containers, I had to come up with an easy way to make them look nice without driving myself insane.
Felime’s Method for Painting Munitorum Armored Containers
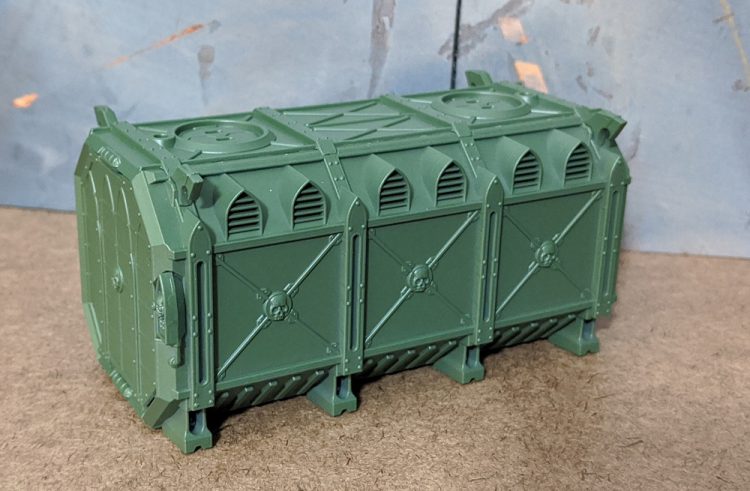
Assemble your containers. Then spray paint them. You do not need fancy spray paint. I would recommend a satin or gloss spray paint, as this will help slightly with later steps, especially if you don’t want to varnish things. This container is spray painted with Krylon Satin Itialian Olive:
If you’re feeling a little frisky, you can spray paint your containers one color, wait a day or two for the paint to dry fully, then mask out certain panels or a pattern and spray over it.
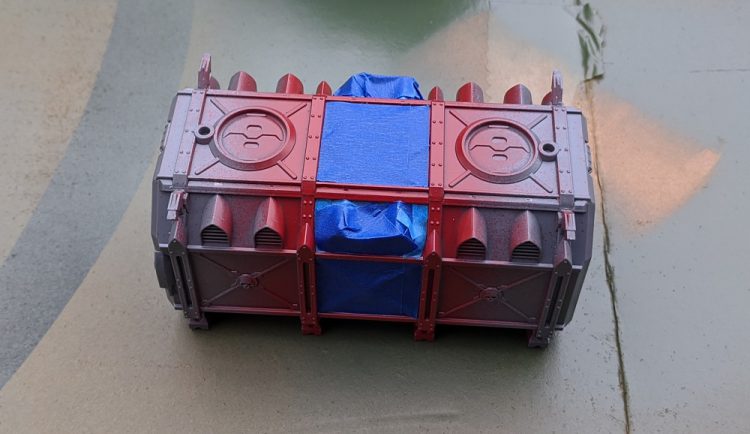
This gives you something similar to the following (Rustoleum Winter Gray and Ink Blue):
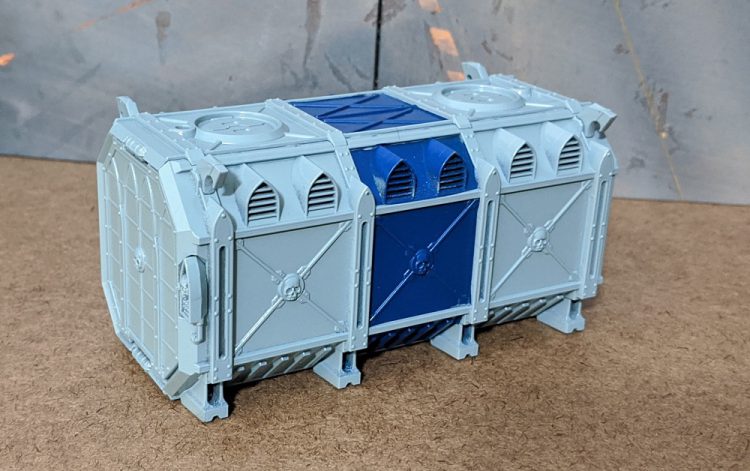
They may take 1-3 days to dry to the point the paint is hard and no longer tacky. We’re going to get rough with these, so you should wait until they’re fully dry.
At this point, they’re a bit flat, featureless and boring. Slapping on some transfers is the first thing we can do to fix that. Vehicle transfer kits are excellent sources of these. Most of the transfers used here came from the Imperial Guard Vehicle, Space Marine Vehicle, and Cadian transfer kits. If you play any of those armies, you will probably have a lot of spare transfers bouncing around. Just slap ’em on in some nice spots that look good and make sense. I try to keep in mind that these are things that in universe some poor schmuck has to find these by sight, so I tried to add some identification numbers to things so he could keep them straight.
Before you continue, paint varnish over top of your transfers. They are fairly fragile, and the next step can knock them off.
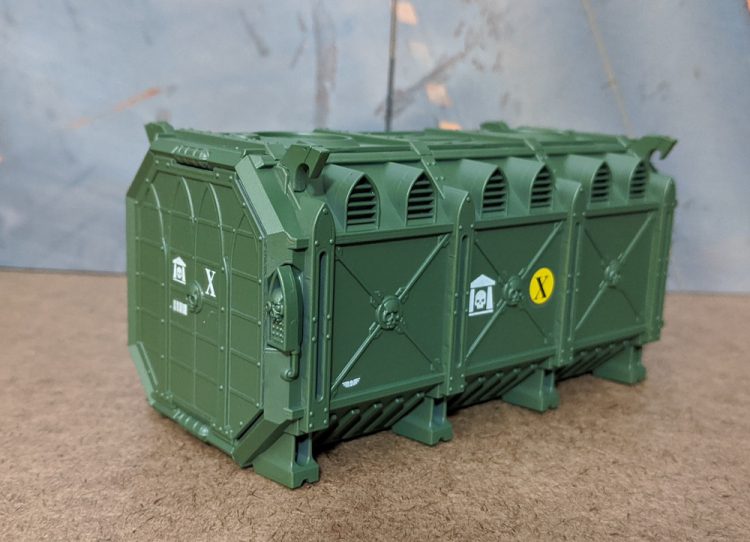
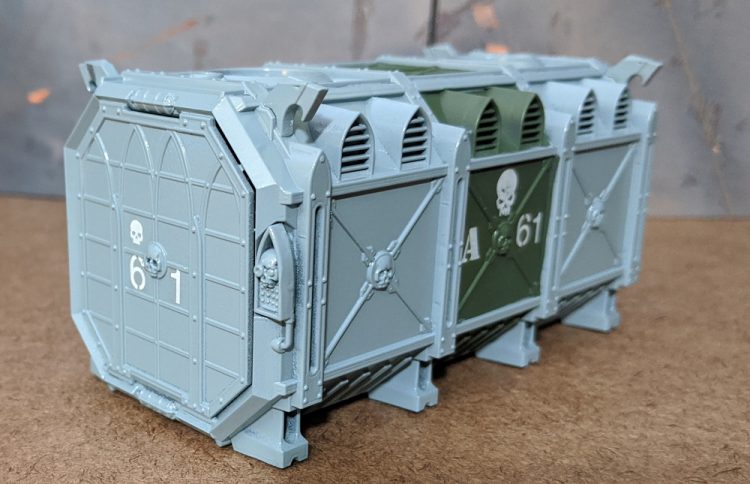
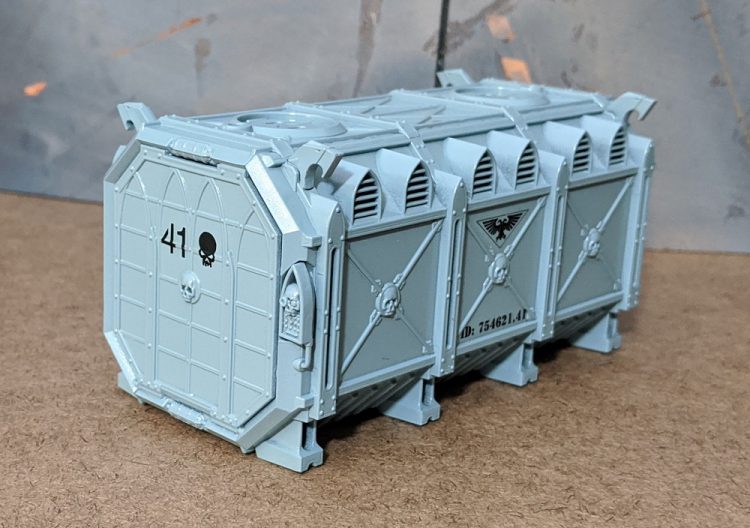
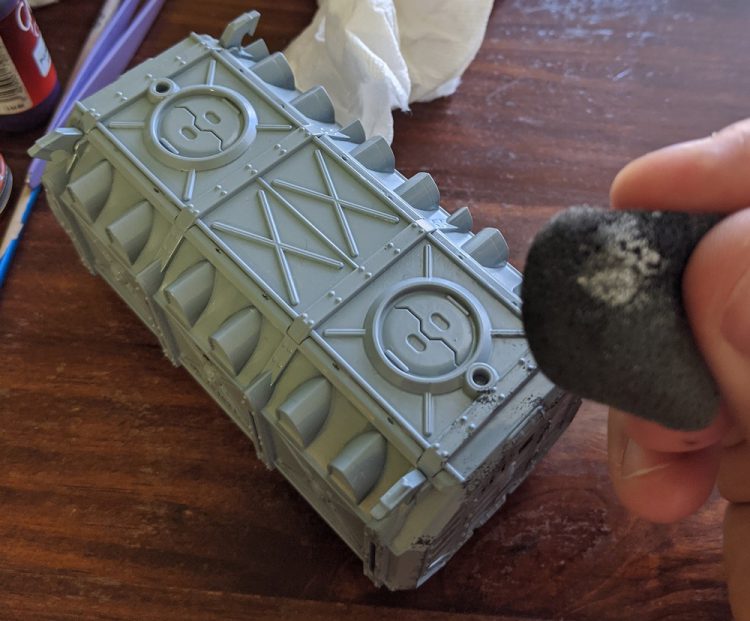
Better, but they’re looking a little clean. Time for some sponge chipping. This is pretty easy. Just take a piece of blister foam or similar material such as pluck foam from a figure case, and roll it back into a little ball. Then just jab it into a little bit of paint and blot some off on a palette until you’re leaving a good pattern of little scattered dots, then just jab it onto your. It’s a pretty standard technique, so I won’t go into too much detail here. Chip them up to your satisfaction. This is also an excellent chance to hide any spots you’ve screwed up with the transfers, masking, etc on your containers. I used GW Skavenblight Dinge on the darker colors, and Vallejo Model Air Sea Grey for the darker colors to provide more contrast. You likely have some perfectly good greys in your arsenal that will work just as well.
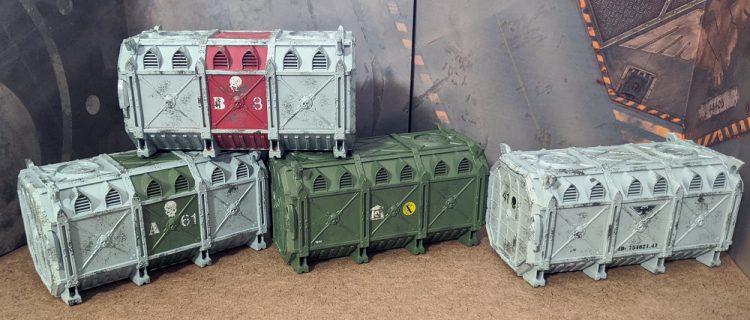
Now just paint the metal bits in your metal color of choice. I used Vallejo Mecha Color Steel, which is a very similar color to GW Ironbreaker.
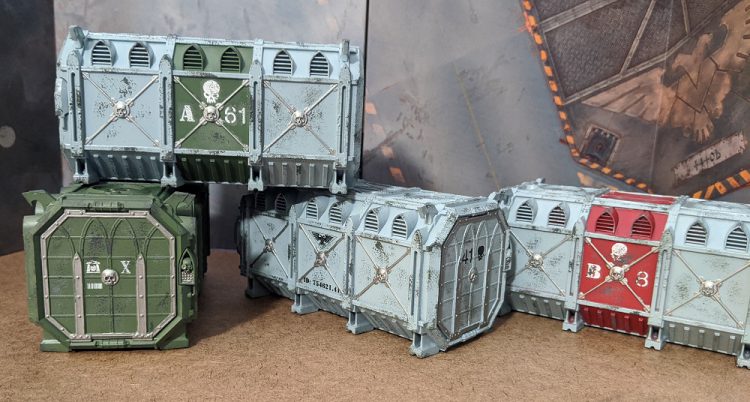
Now, a this point, if you put on any transfers, and varnished over them if you knew what was good for you, the surfaces of your container are uneven, and this can impact the next step. We’re going to get fairly rough here anyways, so it’s a good idea to varnish. If you didn’t use transfers, or used a varnish that matches your spray paint’s finish exactly, you might be able to skip this, but it’s still a good idea if you don’t want to retouch the metal bits.
With that disclaimer out of the way, it’s time to introduce the secret sauce.
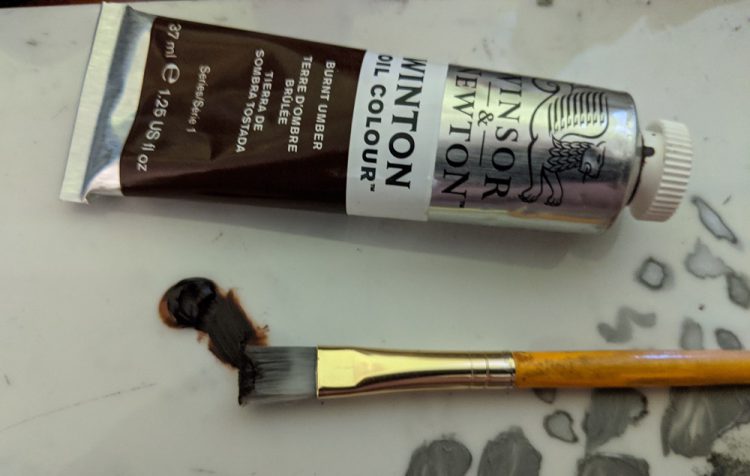
Burnt Umber Oil Paint. This is literally dirt mixed with linseed oil. I’m using Windsor and Newton. It works well, gives a smooth fade, smells nice, and isn’t too expensive. This tube is enough to do approximately infinite shipping containers. You’ll also need a cheap brush that you never intend to use for acrylics ever again. We’re going to beat the absolute hell out of this brush, and it’s really hard to get all the oil paint out of it. (Soap and water will get enough of it out that you can use the brush a number of times)
A quick note on oil paint. It takes days to weeks to dry fully. Wash your hands with soap and water after using it, unless you want to rub it off on the next white shirt you touch, where it will never ever come out.
Now, get some paper towels and Q-tips ready. You’re going to take your cheap brush and get this secret sauce everywhere. Into every nook and cranny of the shipping container. It helps to work in sections so your hands aren’t getting too dirty. It doesn’t need to be particularly thick, but it does need to be everywhere.
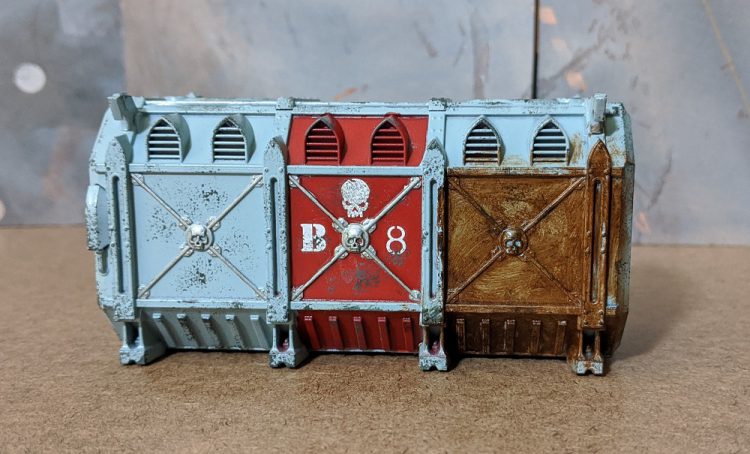
Now, wipe it off with a paper towel, and the magic occurs.The thin glaze of oil paint unifies everything together into a grimy, dirty container.
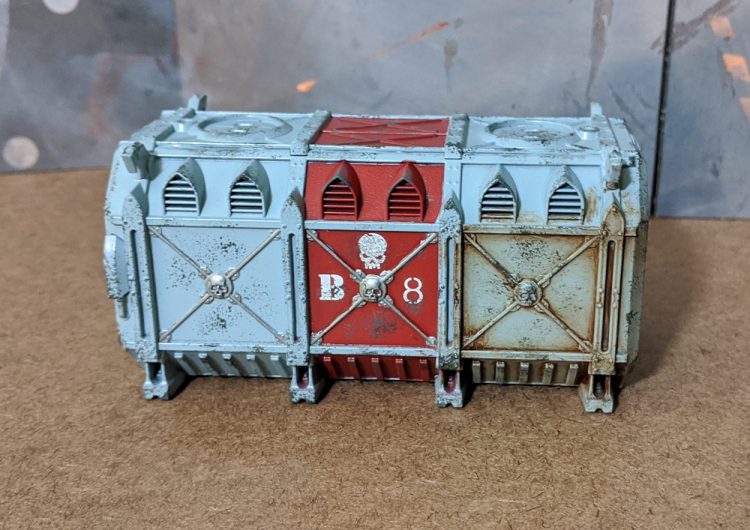
Continue that over the entire container, and you end up with your finished containers. Use the Q-tips to get into the littlest crevices between the arches. The oil paint will stay workable for several hours, so you have plenty of time to experiment and get things right.
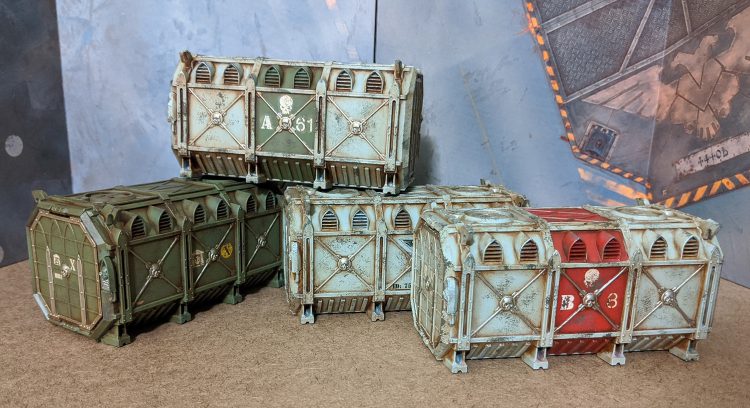
Now, put these somewhere they can’t get dust or cat hair on them for 3 days to dry. At this point you can varnish them and call them done. I like to paint in the little details like the skulls above the keypad, as well as go over the metal bits and tidy up any spots I missed with some agrax earthshade. The oil paint is great at giving you a nice grimy fade, but doesn’t really do a great job of getting areas like the eye sockets of the skulls, etc. You probably also missed a few crevices, and it’s nice to fill those in as well. For maximum grime, you can also add some drip marks using thinned down wash.
This technique does have some downsides. The thick oil paint doesn’t look as good as a traditional wash over very fine detail, and it also leaves a brown filter over everything, so you can’t really achieve a color such as white with this technique. I tried going over white with black oil paint, but it just isn’t the same. Black is a much stronger color and it just doesn’t look white. I did a white container by replacing the oil rubdown with a traditional recess shade with watered down nuln oil.
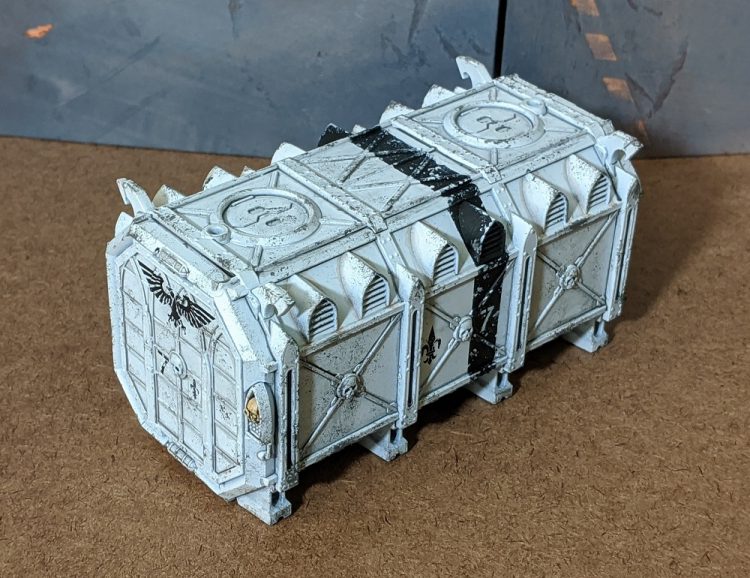
This technique can be applied to other terrain with similar large smooth surfaces, such as the panels on the sector mechanicus terrain, or the boxes and barrels that come with the munitorum armored containers.
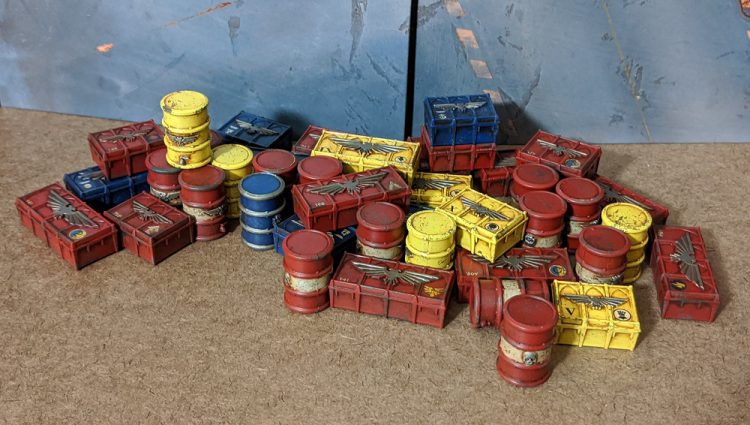
And there you go. This produces a great looking container with relatively little effort, and almost no skill required. None of the steps need to be done with much precision, as the oil paint and chipping will hide a multitude of sins. Now, go forth, and populate your battlefields with the greatest of all terrain features! I still have 11 more of these to paint.
Other Methods
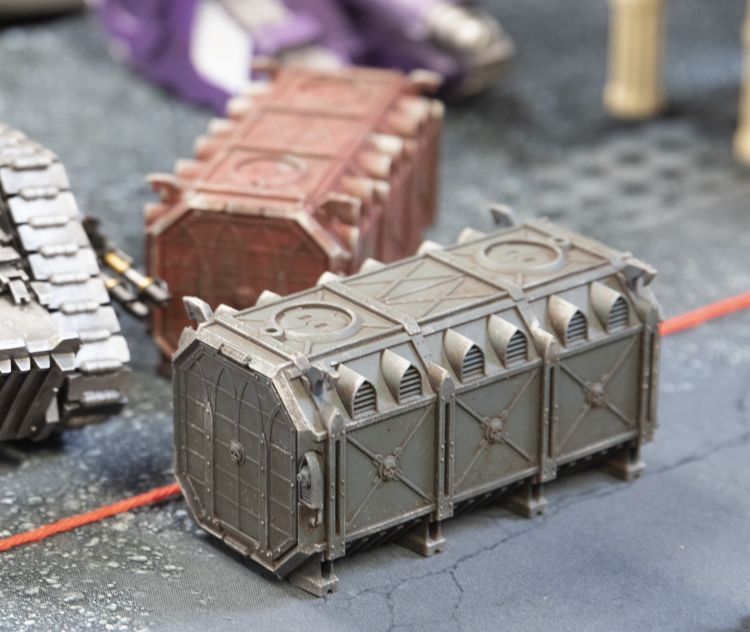
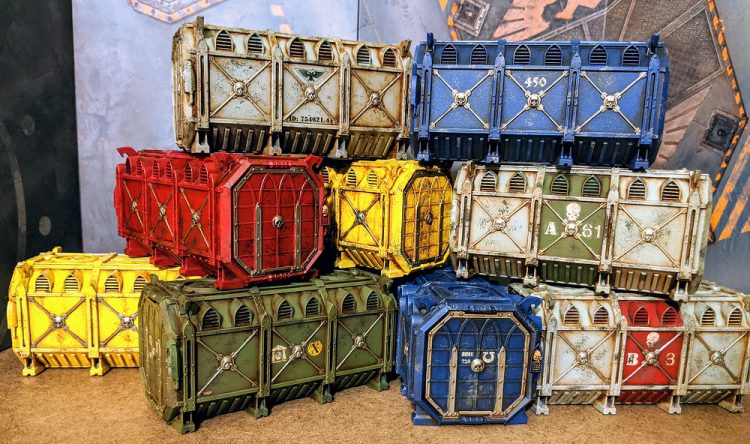
If you’re interested in doing less work with weathering, you’ve got options. The key thing is to remember that the containers are metal underneath that paint, and so will chip accordingly. These containers have been primed black and basecoated a specific color, then washed with Agrax Earthshade, Nuln Oil, and edged with Leacbelcher or Runefang Silver to give them a worn look around the edges. There are a bunch of different ways to go with this, and munitorum containers aren’t exactly centerpieces, so don’t be afraid to experiment! And as always, if you have any questions, comments, or feedback, drop us a note in the comments below or email us at contact@goonhammer.com.
