
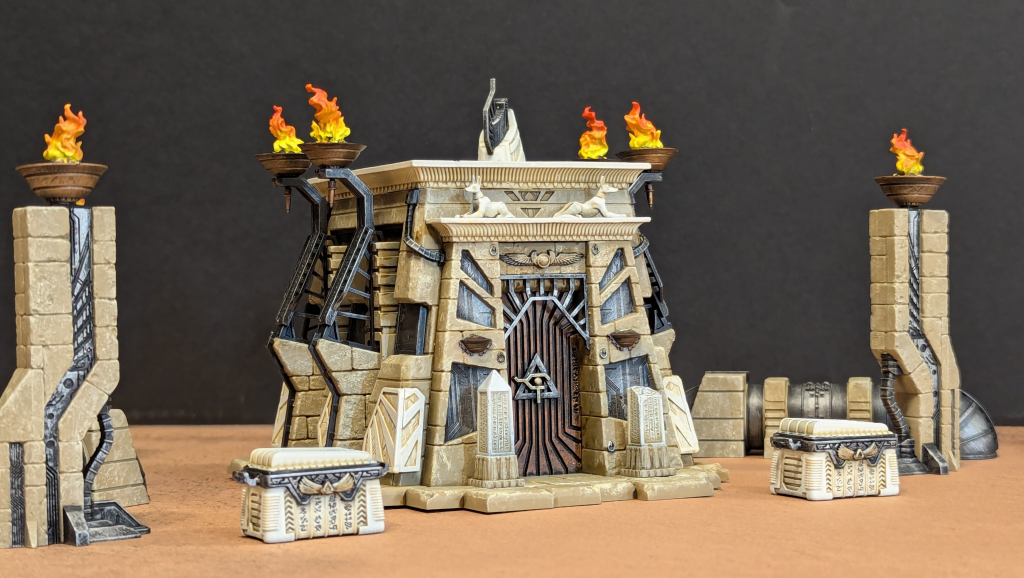
In today’s How to Paint Everything: Marvel Crisis Protocol we are covering the new Shrine of En Sabah Nur terrain set that is releasing alongside Apocalypse. This set features a Size 4 building and two smaller treasure chests, continuing on the techno-Egyptian theme, which a nice departure from the much more common cityscape terrain we usually see for Marvel: Crisis Protocol.
Since I don’t have access to an airbrush set up at home, all of the basecoats have been painted using Citadel spray primers and working in as many sub-assemblies as possible. I started by spraying all of the pieces with Chaos Black spray and then I would tape off any areas that would remain black and sprayed the sandstone areas with Zandri Dust. If I needed areas to be a lighter stone color, I’d tape off the darker stone areas and spray those areas with Wraithbone.
Here is a notated diagram of which colors were used for each type of material, followed by descriptions of how each section was painted.

Painting the Sandstone
All of the areas that are sandstone were painted with Zandri Dust spray primer. I then painted a recess wash of Skeleton Horde Contrast paint into all the of recesses and shadowed areas. Once the wash was dry, I used a sponge and Ushabti Bone to add a bit of texture to the surface and finished it off with a drybrush of Screaming Skull to highlight it.
- Basecoat: Citadel Zandri Dust Spray Primer
- Recess Wash: Citadel Contrast Skeleton Horde
- Sponge: Citadel Ushabti Bone
- Drybrush: Citadel Screaming Skull
Painting the White Stone
The white stone areas were painted in a similar way to the sandstone. This time I started with Wraithbone as a base, a Skeleton Horde recess wash, a quick sponging of Ulthuan Grey and finally I drybrushed the entire area with White.
- Basecoat: Citadel Wraithbone Spray Primer
- Recess Wash: Citadel Contrast Skeleton Horde
- Sponge: Citadel Ulthuan Grey
- Drybrush: Vallejo Model Color White
Painting the Metals
Silver
I wanted a very dark silver for the metal areas, since it would contrast nicely with the brighter gold and copper colors. For the silver areas I started with a black basecoat, this was either Citadel Chaos Black spray primer or Vallejo Model Color Black depending on if I needed to do touch up work from overspray or accidentally hitting it with the drybrushed colors. I then drybrushed the surface with Iron Warriors, Leadbelcher and Stormhost Silver for easy metallic silver.
- Basecoat: Citadel Chaos Black Spray Primer – or – Vallejo Model Color Black
- Drybrush: Citadel Iron Warriors
- Drybrush: Citadel Leadbelcher
- Drybrush: Citadel Stormhost Silver
Gold
The gold areas also started with a black base coat and then given a quick and easy drybrush of Retributor Armor and Stormhost Silver.
- Basecoat: Citadel Chaos Black – or – Vallejo Model Color Black
- Drybrush: Citadel Retributor Armor
- Drybrush: Stormhost Silver
Painting the Braziers
Brazier Metal
The copper color of the braziers were painted by drybrushing Screaming Bell over black primer and then highlighting it with a drybrush of Hashut Copper.
- Basecoat: Citadel Chaos Black Spray Primer
- Drybrush: Citadel Screaming Bell
- Drybrush: Citadel Hashut Copper
Burning Coals
For the burning coals effect, I started with a basecoat of White, I then painted three rings of color starting with Phalanx Yellow in the center, Fire Dragon Bright for the 2nd ring and Khorne Red for the outer ring. Once they were dry, I drybrushed the surface with Black and Mechanicus Standard Grey for give the coals their crispy texture.
- Basecoat: Vallejo Model Color White
- Layer: Citadel Phalanx Yellow
- Layer: Citadel Fire Dragon Bright
- Layer: Citadel Khorne Red
- Drybrush: Vallejo Model Color Black
- Drybrush: Citadel Mechanicus Standard Grey
Flames
I tend to paint all of my flames as lazy as possible. for 90% of my Marvel: Crisis Protocol miniatures my fire and explosion effects follow something like this. From a White Basecoat, add a layer of Phalanx Yellow. While the yellow is still wet, paint on Fire Dragon Bright, starting at the top and letting the two paint mix together as you work. Finally, while the orange paint is still wet, paint Evil Sunz Scarlet from the top down and let it mix with the orange a bit. Touch up as necessary while its all still wet.
- Basecoat: Citadel Skull White
- Layer: Citadel Phalanx Yellow
- Layer: Citadel Fire Dragon Bright
- Layer: Citadel Evil Sunz Scarlet
I very much enjoyed painting the Shine of En Sabah Nur, it was very easy to assemble and it lended itself well to taping off the various areas that needed to be sprayed different colors. I made a slight tactical error by gluing the base to the building before painting and needed to snap the brazier pillars into place, but that wasn’t a huge deal.
Special thanks to Atomic Mass Games for providing Goonhammer with these terrain sets. Apocalypse and his terrain are slated for release in September, ask your friendly local game store for availability or they are also available for pre-order on the Asmodee web shop now. Will you be picking this up? If you do, hit me up on Twitter/X (brushwizard), Instagram (brushwizardry), or if you’re a member of the Goonhammer Discord server share them on the dedicated Marvel: Crisis Protocol channel.
Next time, I’ll be covering the final Apocalypse terrain set, the massive Rejuvenation Chamber!
Have any questions or feedback? Drop us a note in the comments below or email us at contact@goonhammer.com. Want articles like this linked in your inbox every Monday morning? Sign up for our newsletter. And don’t forget that you can support us on Patreon for backer rewards like early video content, Administratum access, an ad-free experience on our website and more.
