
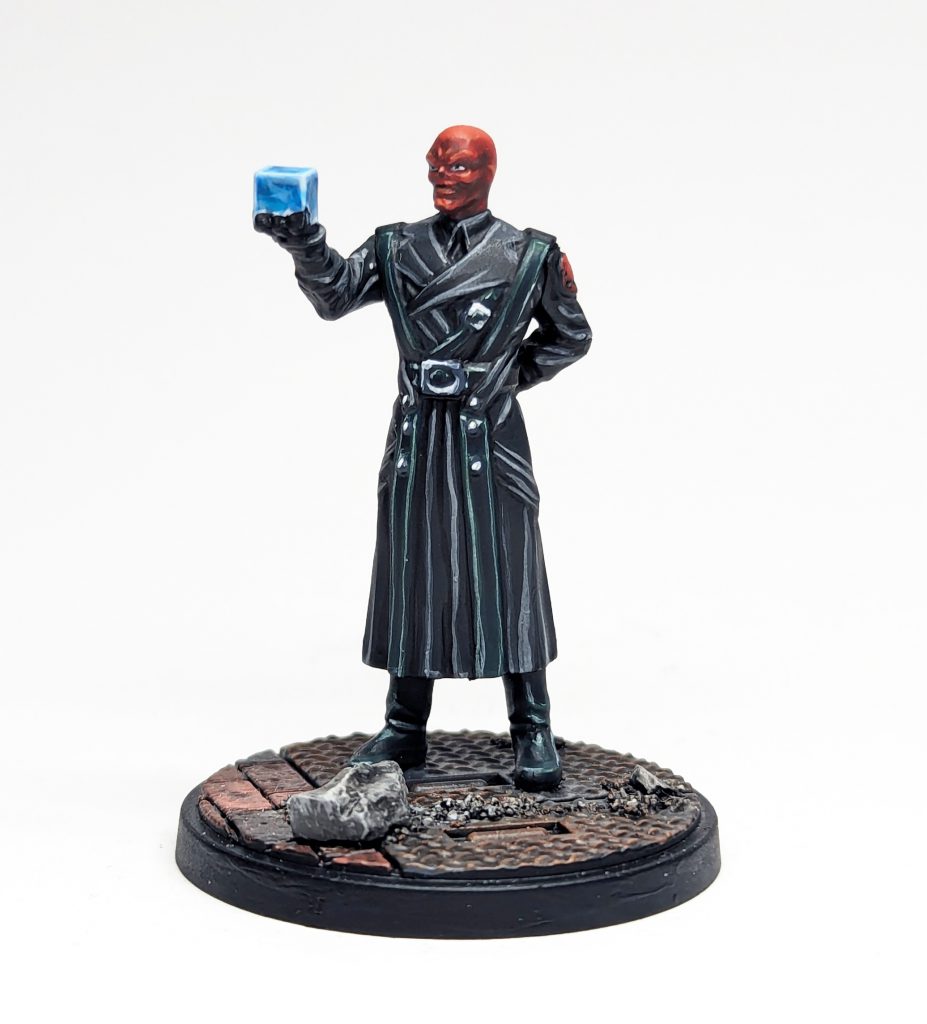
Johann Schmidt, the diabolical arch nemesis of Captain America known as the Red Skull, sees a rerelease thanks to the new Cabal Affiliation box for Marvel: Crisis Protocol. This version of the skeletal faced fascist is a leader for the Cabal affiliation with aims to bring the world to its knees, reshaping it how he sees fit with the power of the Cosmic Cube. He’s a fairly simple miniature in general, with a static pose and mostly black wardrobe. We’ll try to make him a bit more interesting by breaking up the black coat and leather by using a different set of colors for each type of material. I tend to shy away from object source lighting effects on my Crisis Protocol miniatures, but we will still be attempting to make the Cosmic Cube look as glowy as possible, thanks to some fluorescent paint trickery.
Painting His Head
Let’s get started with that character-defining red noggin of his. This can be a little intimidating to paint since it’s all red tones, but we’ll give it some definition with the help of some color theory shenanigans. When it comes to painting the shadows of the head, we’ll mix in a bit of green into the red to create a darker shade of red, rather than trying to mix in black or using a darker red.

1. Basecoat: Citadel Mephiston Red
Paint the entire head a nice even coat of Mephiston Red, use thin coats until you have even coverage.
2. Shadows: Citadel Mephiston Red: Citadel Warpstone Glow
Mix a small amount of Warpstone Glow into the Mephiston Red and paint it into any recesses or areas that would be in shadow.
3. Layer: Citadel Mephiston Red
Repaint any areas that are going to be highlighted Mephiston Red and do any necessary clean up to help blend the shadows.
4. Highlight: Citadel Evil Sunz Scarlet
Start highlighting the areas around the face and the top of the head with Evil Sunz Scarlet
5. Highlight 2: Citadel Evil Sunz Scarlet: Citadel Fire Dragon Bright
Mix a bit of Fire Dragon Bright into Evil Sunz Scarlet and do another pass of highlights around the face and the top of the head and ears.
6. Spot Highlight: Citadel Fire Dragon Bright
Highlight the eyebrows, cheekbones and chin with a very small amount of Fire Dragon Bright. You can also do some small highlights on the top of the head, but be careful not to do too much.
7. Final Details
Paint the eyes with some White and Black. I also did a very thin line of Black between the lips to help break them up a bit.
Painting His Coat
Red Skull has an all-black ensemble and if we aren’t careful it will all blend together at table top distance. So to help combat this we are going to split his black clothing into two separate color palettes, one for his coat and another for all of the leather areas. We’ll start with his coat and we’ll use a mix of black and gray tones for it, without going too bright on the highlights.
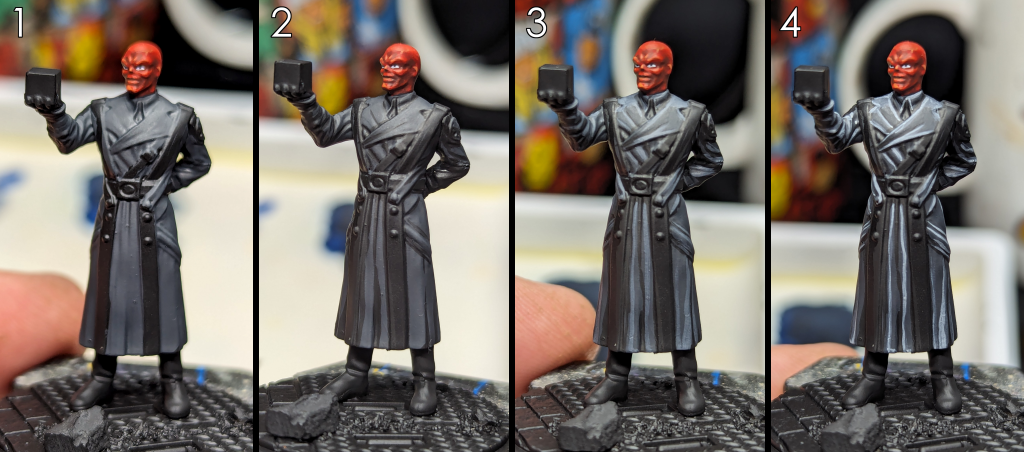
1. Basecoat: Vallejo Model Color Black Grey
We’ll start with a layer of Black Grey on the trenchcoat, use thin coats until you have even coverage.
2. Shadows: Vallejo Model Color Black
I’ve painted the recesses between the folds in the fabric with Black. I could have tried to leave the recesses black during the previous step, but I feel doing it this way gives me more control over things. I also painted the areas under his arms and the underside of the sleeves black as well.
3. Highlight: Citadel Mechanicus Standard Grey
Next up, we highlight the ridges of the folds with Mechanicus Standard Grey, you can also highlight the larger smooth surfaces.
4. Edge Highlight: Citadel Administratum Grey
Finally I do a thin line and edge highlight with Administratum Grey to make the tops of and ridges in the cloth pop.
Painting the Black Leather
Black leather can be tricky; it’s usually best to inject a bit of color to it in order to give it some character. Usually I’ll do this with a dash of blue or green mixed into the black. This time around I’ve decided to go with Citadel’s Incubi Darkness, which is a powerhouse of a color for this kind of thing and a nice dark teal green. Doing the black leather in this way will help separate the black tones between the coat and leather and make things more visually interesting and compliment the red of his skull.
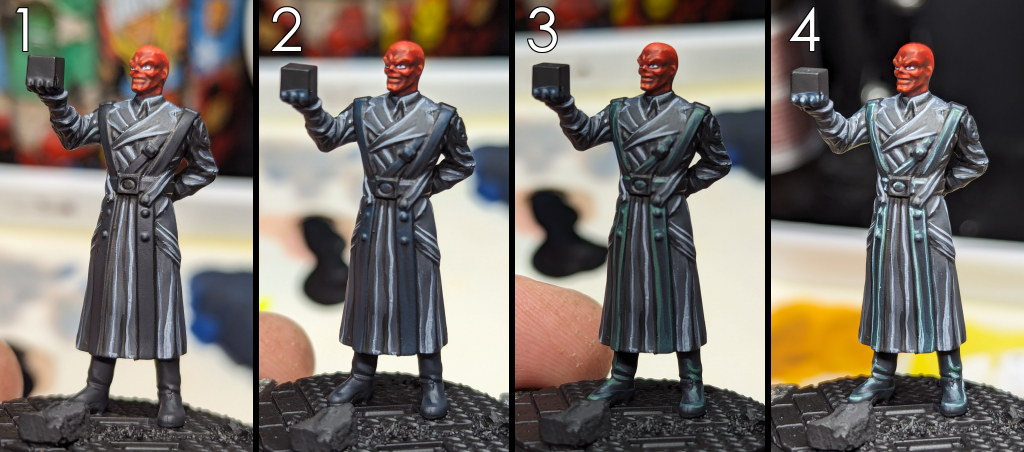
1. Basecoat: Citadel Incubi Darkness:Vallejo Model Color Black
Base coat all of the areas you want to be black leather with a rough 3:1 mix of Incubi Darkness to Black. We want the mix to be darker than Incubi Darkness alone, but not so dark that the black overpowers it.
2. Layer: Citadel Incubi Darkness
Layer in Incubi Darkness on the edges and high points, such as the tops of the shoulders and fingers. It might take a couple coats to get it where you want it, but you should def see the color starting to build up on top of the previous step.
3. Highlight: Citadel Incubi Darkness: Citadel Phalanx Yellow
We’ll next mix in a tiny amount of Phalanx Yellow to the Incubi Darkness to lighten it up. Start highlighting the edges with this mix. Give it a few passes if needed.
4. Edge Highlight: Citadel Uthuan Grey
Finally we’ll do a few spot and edge highlights with Uthuan Grey.
Painting the Cosmic Cube
A.K.A. the Tesseract for all of you Marvel Cinematic Universe fans out there. This thing is supposed to glow a nice bright blue, and in the films it has a translucent quality with a swirl of a nebula or something inside it. So we are going to try to replicate that with a few streaky brush strokes and a bit of Citadel Contrast paint and fluorescent paint.
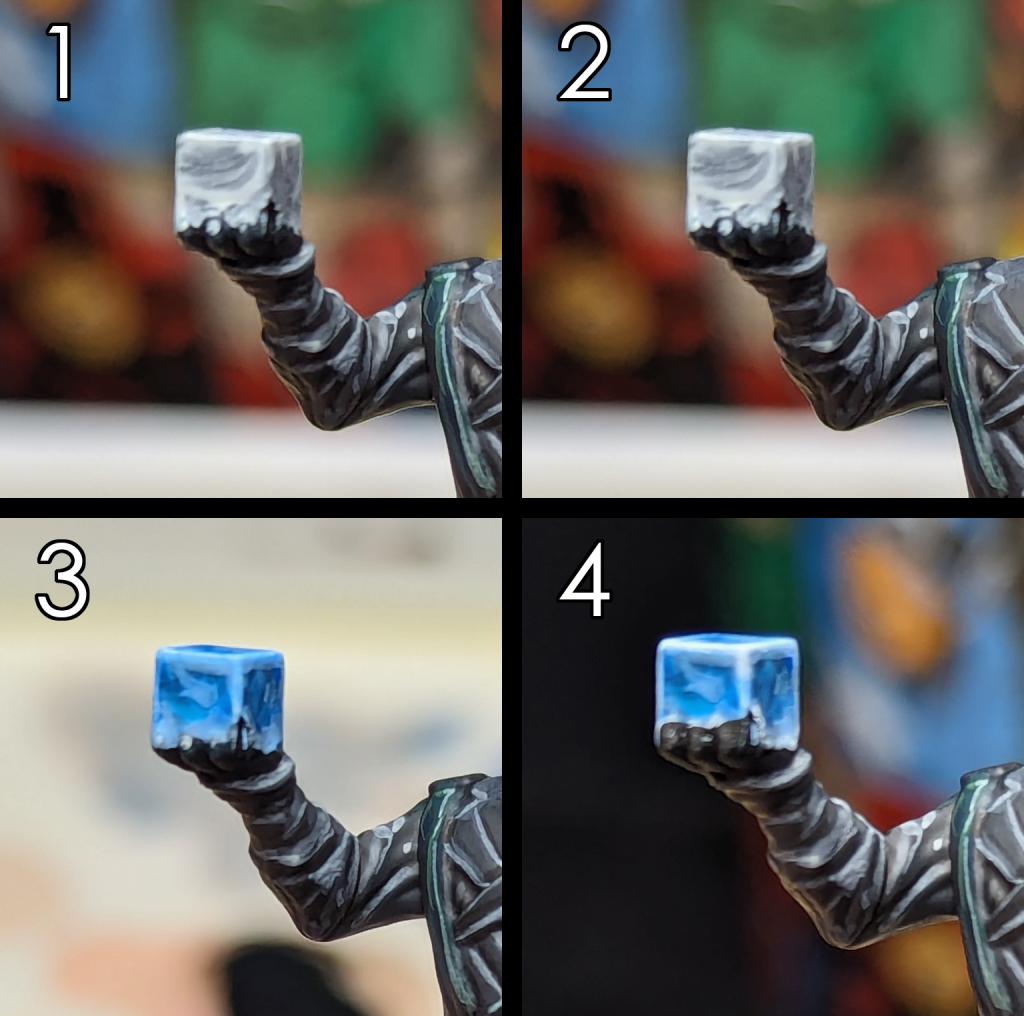
1. Basecoat: Citadel Uthuan Grey
The first step will be to give the cube a slightly streaky coat of Uthuan Grey over the black primer we’ve already painted. It doesn’t need to be anything special, but random coverage is nice.
2. Layer and Edge Highlight: Vallejo Model Color White
With this layer, I added a few more streaks of White to the sides and top and then did a nice chunky edge highlight to brighten up the cube’s edges.
3. Layer and Edge Highlight: AK Interactive Fluorescent Blue: Vallejo Model Color White
Mix in a bit of white into the fluorescent blue and paint thin layers on the cube, feel free to vary the coverage a bit too and add a few more swirls onto the sides of the cube. I also used some straight Fluorescent Blue in the middle because I wasn’t super happy with coverage
4. Edge Highlight: Vallejo Model Color White
finally paint the edges white and around the base of the cube where the hand is touching.
Final Details Buttons, Belt Buckle and Hydra Crests
We’ve basically done with Red Skull at this point, all that is left to do are the metal studs, buckles and the Hydra emblems on his shoulders. Without getting too in depth on Non-Metallic Metal, we are going to do some quick and dirty NMM for all of his buckles and studs.
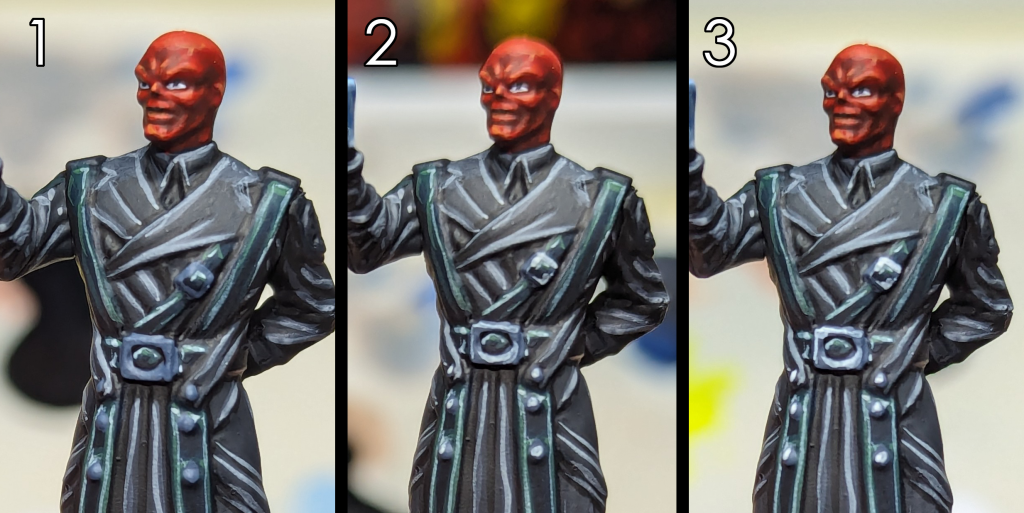
1. Basecoat: Vallejo Model Color Luftwaffe Uniform WWII
Basecoat all of the metal bits with Luftwaffe Uniform WWII, which is a pretty nice blue-gray color.
2. Highlight: Citadel Uthuan Grey
Hit the high points of the buttons and top facing edges with Uthuan Grey.
3. Spot Highlight: Vallejo Model Color White
Finally give the same areas a spot highlight of white to push the contrast a bit more.
The Hydra symbols on his shoulders don’t have much to them, they are so small there’s not really any detail on them. I forgot to take pictures as I was painting them too.
1. Basecoat: Citadel Evil Sunz Scarlet
2. Layer: Citadel Evil Sunz Scarlet: Fire Dragon Bright
With that, the Red Skull is basically finished! Paint up his base and get him on the game table or in the display cabinet. Next time we’ll be working on the merciless merc himself, Crossbones! If you’re on social media, hit me up on Twitter/X (@brushwizard) or Instagram (@brushwizardry) and share your work, I’m always interested to see what the MCP community has been working on. Use the hashtag #MCPFriday on Fridays to share with the Crisis Protocol community too!
Have any questions or feedback? Drop us a note in the comments below or email us at contact@goonhammer.com.
