
Black Panther is one of the most important characters in Marvel Comics. I am currently reading the Ta-Nehisi Coates run of the character, and it is some of the best storytelling I have experienced, in any medium, period. I will cover the lore in a separate Who Is? article, but let’s just say in my current run of playing Avengers in Marvel: Crisis Protocol, finally having the original Black Panther painted and available for my roster made me a very happy person. Here is how I made it happen.
- Like always, I primed my model black. It’s not always ideal for certain color combos, but I know how paints react to a black primer, and most importantly it plays well with my airbrush. I have never been able to get white primer to work in my airbrush.
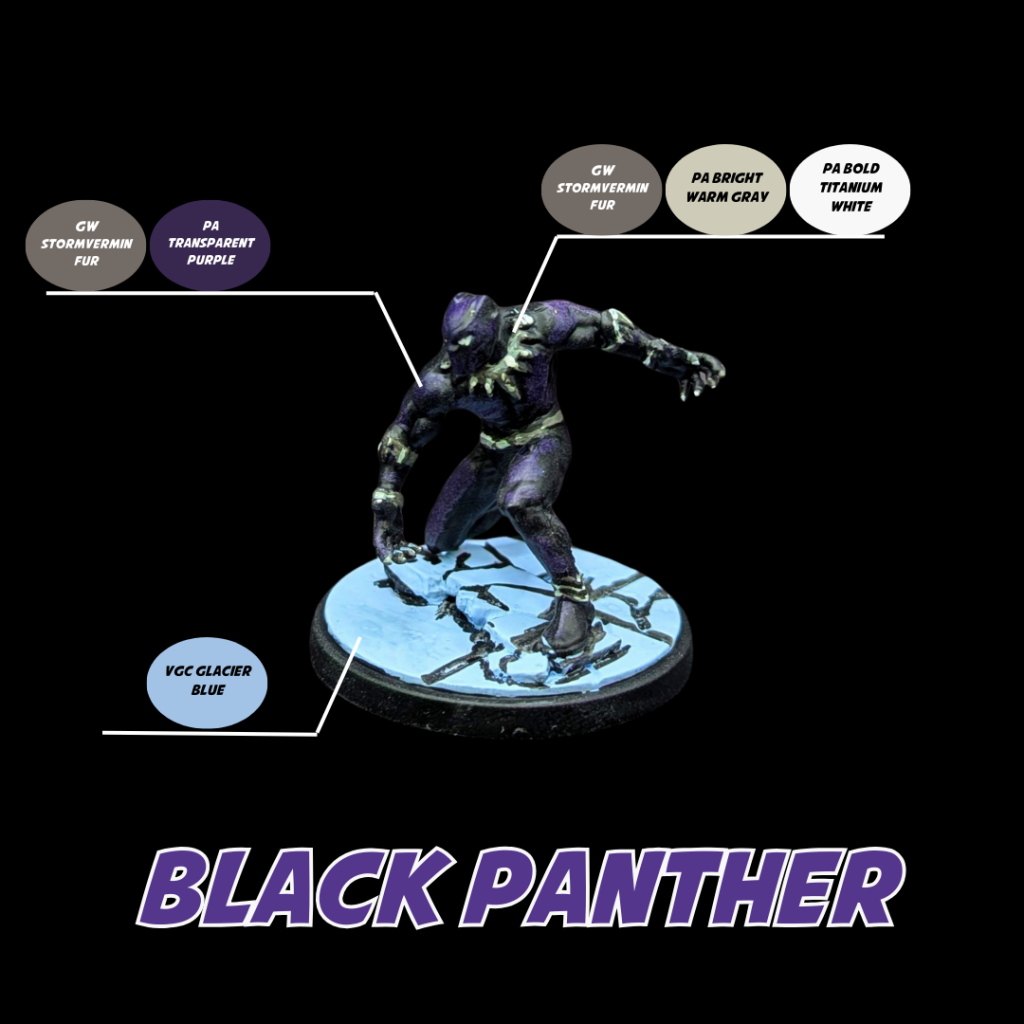
- After this primer coat, I sketched in some highlights with GW Stormvermin Fur. It looks really stark at this point, but I will tone it down in the next step.
- To bring things back to a better tone, I loaded up my airbrush with Pro Acryl Transparent Purple. I am in the process of replacing all of my paints with the Pro Acryl line. I love them. Their transparent line is a really great glaze/filter to put over layers underneath them.
- The last little bit I had to do was all of the metallic bits. To achieve an pseudo-NMM look, I painted them with GW Stormvermin Fur, Pro Acryl Bright Warm Gray, and Pro Acryl Bold Titanium White. I lean more into the “it looks like a comic book” than “it looks like metal” when I’m doing this.
- I finished up T’Challa by painting his base with Vallejo Game Color Glacier Blue and using Black Ink to line both the base and the model.
If you want to see these steps in action, I made an Instagram Reel about it that you can find below. Comments? Feedback? Let me know in the comments!
