This article is part of a larger series on how to paint Dark Angels space marines. For more on painting Dark Angels, you can return to that series by clicking this link.
After ten millennia spent wandering ethereal forests, battling Chaos monsters, the Lion finally returned to the 41st Millennium, just in time to end an edition and see Abaddon and Vashtorr’s plan come to fruition. The Lion’s return came with an incredible new model, one which builds on the aesthetics of his Heresy model with some more modern sensibilities.

Assembly
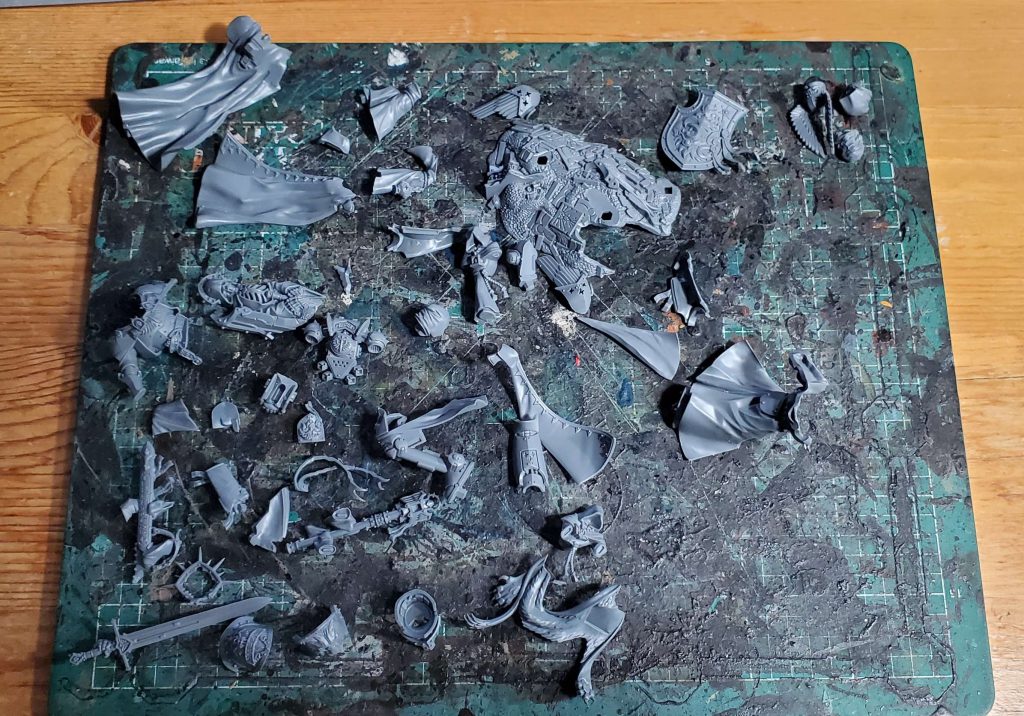
There are a lot of parts to the Lion. This isn’t too surprising since they broke the model down quite well so as to maximize the level of detail, everything has a pretty good level of greebling so as to make him feel suitably important.
Now, I am a complete freak, so I fully built the model but I am sure that for 90% of people subassemblies would be way preferable. This dude has a million layers of things going on, which will probably make it a bit tricky to get to everything perfectly, so if that’s a priority you should probably accept doing the model in a lot of chunks. I ended up just doing him fully assembled, and I found it a really quick and easy build, but your experiences may vary.
Basecoating
There are a bunch of different directions you could take this model, 30k colours, the green black of the official scheme, and probably a bunch of other directions with the modern schemes for DA. In my case I kinda just winged it while stealing from my current salamanders scheme as much as possible to avoid recreating the wheel.
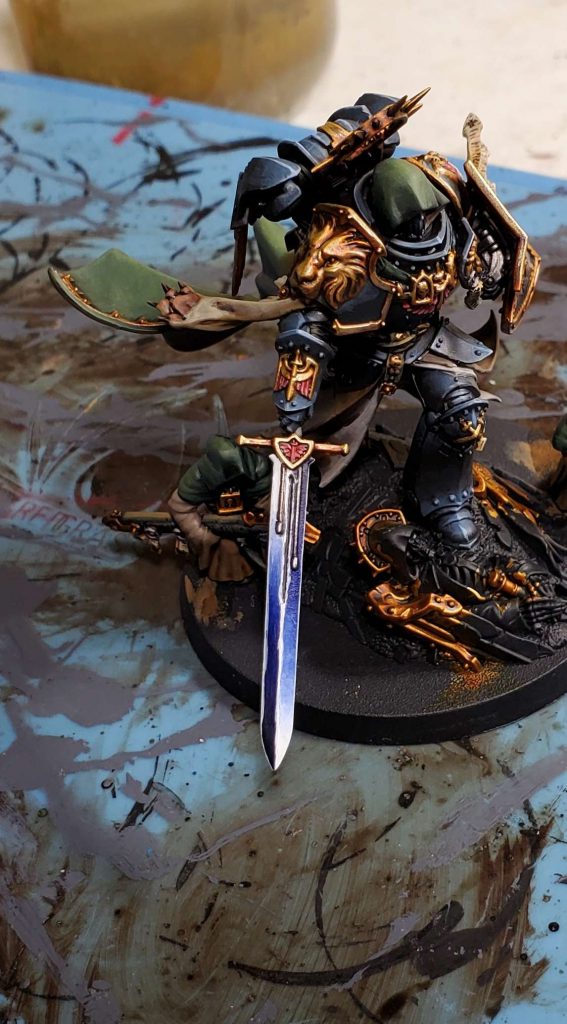
I started by blinging the crap out of him with the basecoats, there is a lot of Retributor Armour on this model in my scheme. Beyond that I left the armor in black primer and glazed on Thunderhawk Blue to get the initial colors for it done, then it was Steel Legion and Rakarth Flesh on the remaining detail robes and Caliban Green for the cloak. The lion pelt got a basecoat of Zandri Dust, the small steel bits are Iron Hands, the scrolls are Morghast Bone and the red is Mephiston Red.
Washes
Washes help fill things out a bit. I hit the gold with Snakebite Leather Contrast paint, the cloak with Coelia Greenshade, and the rest of the robes with thinned Agrax Earthshade.
As for the details, I washed the red parts with Druchii Violet, the scrolls with Seraphim Sepia, and then the steel is washed down with turbo strength nuln aka Basilicanum Grey Contrast paint. Those of you with particularly keen eyes for detail might notice the wax of the seals were washed with Shyish Purple over the scroll base coat.
Highlights
The the non-metallic highlights flew by pretty quick. I defined the black armor a bit more by picking out edges in Russ Grey and Fenrisian Grey for the top edges, then I went HAM on the cloak – it was like thirty minutes of sorta slapping on quick glazes of Waaagh Flesh followed with Loren Forest as a brightest highlight.
The darker robes were glazed by up with Steel Legion then Baneblade Brown, while the light inner robes where Rakarth Flesh and highlighted with Pallid Wych Flesh. The scrolls followed similarly with the base coat of Morghast being brought back in then Screaming Skull for highlights, which I also used on the lion pelt.
The red parts were highlighted with Mephistion Red in layers where I slowly mixed in greater amounts of Kislev Flesh rather then anything more traditional like orange or yellow. I didn’t really have a specific reason for that so if you want something more traditional use Flash Gitz or something similar instead. The wax on the seals was highlighted with Dechala Lilac, which also had a bit of kislev mixed in for a sequence of brighter highlights.

The sword was a bit quick and dirty; it’s just pro acryl white with ultramarines blue glazed onto it until I got a rough transition, then edge highlighted with white again. You can find more on my method for painting power weapons in our article on painting power weapons here.

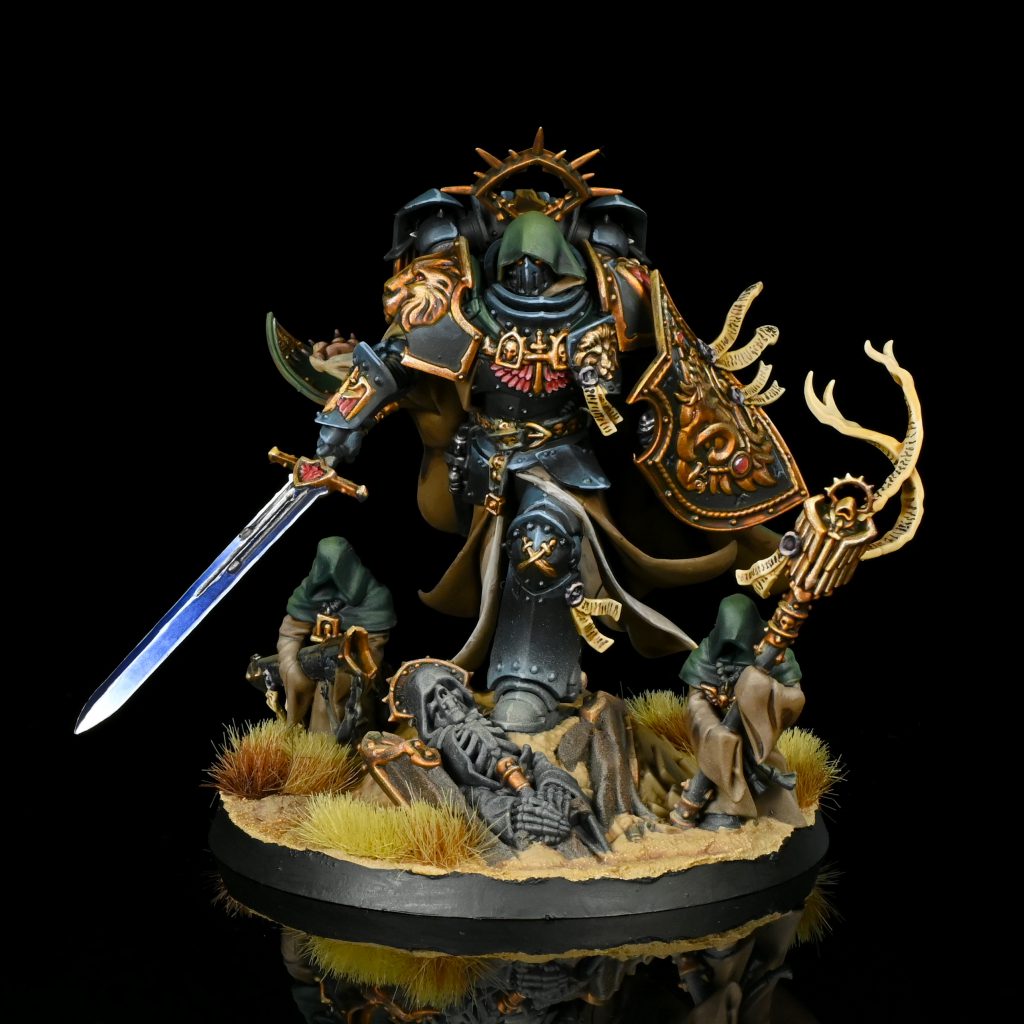
Things get a little “Paint the rest of the owl” after that as I did the remainder in one sitting and didn’t take any more progress shots. The gold is layer highlighted in Liberator Gold then Stormhost Silver, which is also used on the metal, then I did the lenses in our normal technique using Khorne Red, Wazdakka Red, Wild Rider Red, Fire Dragon Bright, Flash Gitz Yellow, and white. I will warn you that there’s no way around this head being a little awkward when it comes to painting the lenses just because of the modeled-on hood.
After basing it’s a varnish of vallejo premium air matte, followed by tying all the basing bits and the feet together with a soft application of model air yellow brown with the airbrush and throwing on an assortment of gamers grass tufts and you are done!
This article is part of a larger series on how to paint Dark Angels space marines. For more on painting Dark Angels, you can return to that series by clicking this link.


