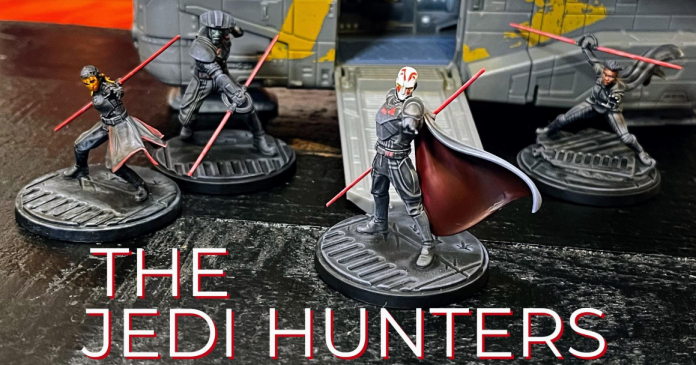
The Inquisitorious make their presence felt in Rebels, Obi-Wan Kenobi, Fallen Order, and Ahsoka. While each Inquisitor possesses distinctive traits, they all share a dark undercurrent. Whether it’s their demeanor, combat tactics, intense aversion to Jedi, or, in this instance, their color palette, there’s a unifying theme. While their overall style leans heavily towards darkness, introducing a nice touch of color can make your creations stand out amidst the shadows.
As discussed previously, the Star Wars Shatterpoint Jedi Hunters Squad Pack features the formidable quartet of the Grand Inquisitor, Reva, Fifth Brother, and Fourth Sister. With this squad, you’ll have the power to assert dominance in the game, embodying the ruthless essence of the Inquisitorium and immersing yourself in a gameplay style as relentless as the dark side itself. But before you embark on your gaming journey, make sure your paint job is as exceptional as your gameplay style.
Prepping and Pinning
After encountering issues with characters falling off their bases while assembling the starter set, I started pinning all my Shatterpoint heroes to ensure their sturdiness. This was especially important because I knew I’d be using them frequently, and I also wanted to make sure they could withstand the handling of my twelve-year-old.
Inquisitorius Program
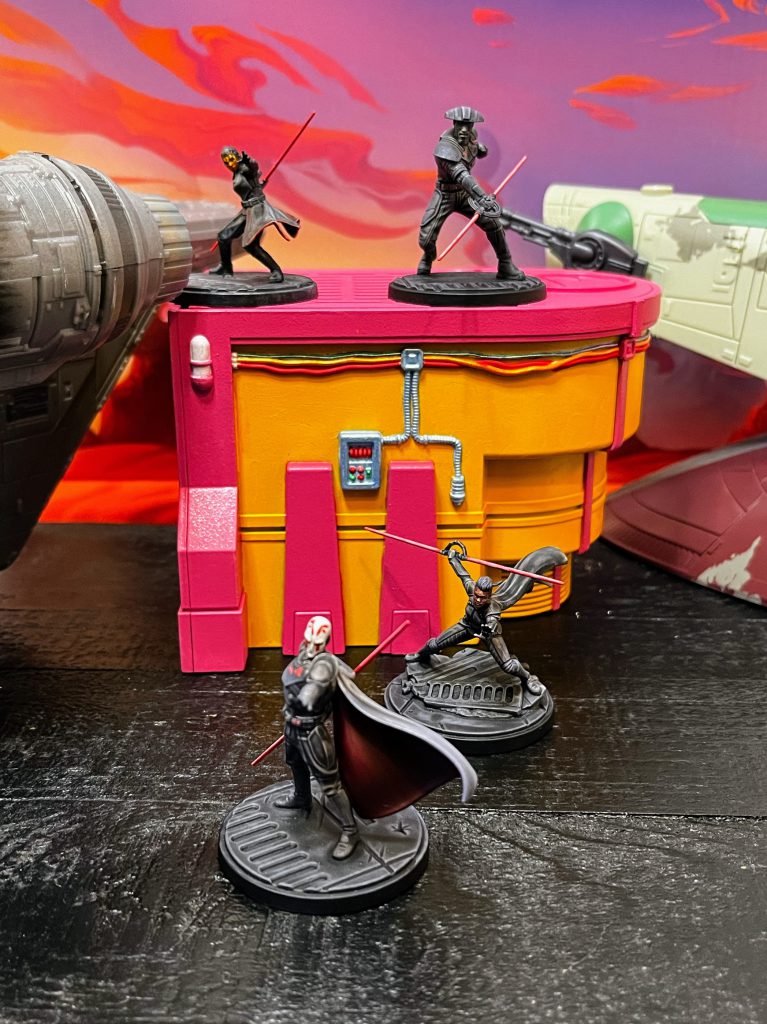
Since this is a single-squad, I wanted to be consistent. First, I applied a layer of Citadel Colour Chaos Black primer, let that dry, and then hit it with Citadel Colour White Scar primer to create a zenithal effect. I wanted to make sure the faces and sabers popped color, so I went in with brush-on white primer to ensure consistency and thorough coverage.
Colors used on every Inquisitor:
- Army Painter Speed Paint – Slaughter Red
- Citadel Colour Contrast – Basilicanum Grey
- Citadel Paint: Base – Leadbelcher
- Vallejo Model Color – Dark Vermillion
- Vallejo Model Color – Black
- Vallejo Model Color – Black
- Vallejo Game Color – Gris Sombra Shadow Gray
Slather it on
I applied Basilicanum Grey to every model, creating a consistent base. It’s not pure black, allowing for some color variation and adding contrast to the overall dark color scheme. This was the most extensive paint since approximately 90% of the models featured this dark color. I allowed these coats to dry overnight to prevent movement/stress on the pooling, especially in the deep recesses. The larger applications tend to pool and can be drawn into adjacent areas; you must be more careful when applying other colors. My best practice is to avoid two contrasts in one sitting until one is dried.
*Be cautious about pooling near the base and in the middle of large recesses, but work swiftly. Moving too slowly with the speed paints can result in an uneven outer dry ring around previously pooled areas.
“only the lightsaber can inspire such extremes of hope or fear.”
Once the Grey had dried thoroughly, I worked into the silvers. Like the grey paint, silver is on every Inquisitor, with just little pops of details and bits and bobs on their outfits. Using the character cards and images from media for reference, adding the details on each character.
I then focused on batch-painting the lightsabers. Using a wet palette, I prepared Dark Vermillion and White paints. I mixed these two paints to create an intermediate color and dampened my brush.
Starting with the red, I coated the lightsaber for all four Inquisitors. After letting it partially dry, I switched to a smaller brush (size 0) and applied a 25% mix of red/white to the fully visible ‘top’ of the saber. Once partially dried, I applied a 50% mix of red/white, a bit thinner on the top. After allowing everything to dry, I used a size 00 brush to apply a 75% red/white mix, lightly touching the uppermost part of the saber and occasionally lifting the brush to create the effect of an unpredictable and malevolent blade.
I then went in with my final highlight. This was a bit of red, a bit of white, and spot-lined any edge that would be in the extreme light and give it a bit more shine and pop.
While having my brushes already dipped in red, I started hitting the small details. The Grand Inquisitor has chest icons, the fourth sister has her cloak outline, and all have little buttons and clasps that are red. I utilized both the cartoon and shows as references.
The Grand Inquisitor and Reva have a very faint dark red under their cloaks/capes. This is a single coat of a Slaughter Red now. Let that dry thoroughly, as it is a large, wavy surface and is prone to those pooling rings mentioned before.
Grand Inquisitor
“There Are Some Things Far More Frightening Than Death.”
Grand Inquisitor Unique Colors Used:
- Army Painter Speed Paint – Maize Yellow
The Grand Details
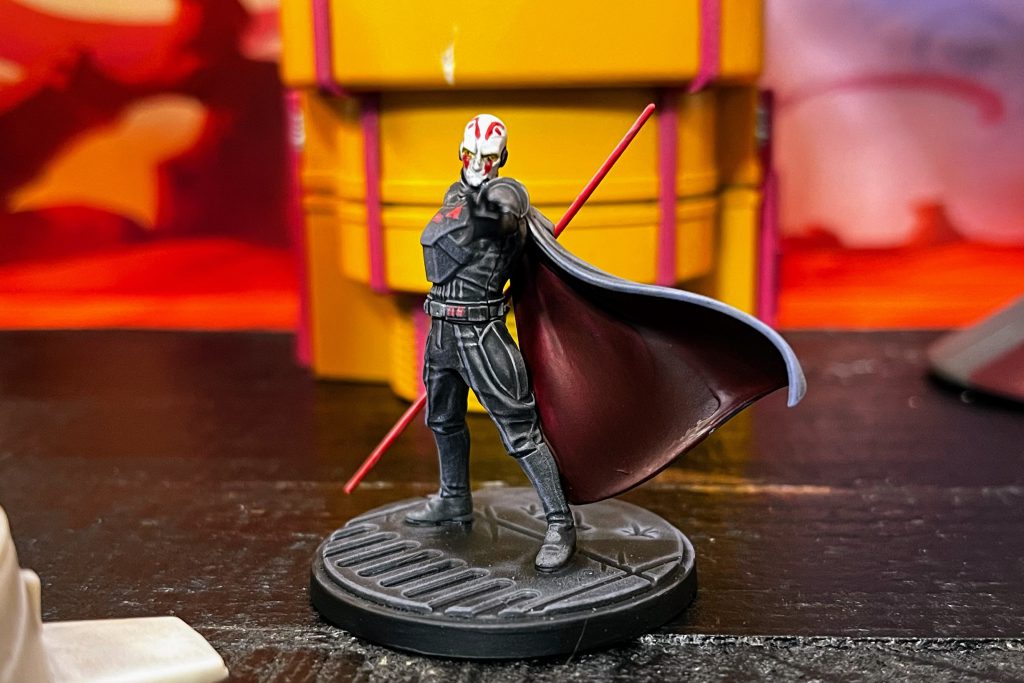
The Grand Inquisitor stands out from the rest of the squad with his pure white head and red facial details. Due to the miniature’s size, some finer details in his head and body (like his racial features) can be challenging to discern, but there’s still enough detail to highlight the red markings.
To achieve this, apply the red markings with a light touch, using the Red Vermillion mix on the wet palette. You can delicately brush the paint under his eyes, allowing it to transfer onto the headpiece naturally. The area under the Grand Inquisitor’s eyes is meant to resemble war paint more than traditional head markings, so it should have a makeup appearance.
After working on the red markings, I cleaned the brush and addressed the very edges of the white details that the primer spray didn’t cover adequately. This was also an opportunity to correct any accidental splatters or brush strokes that might have introduced grey shading or red highlights where it wasn’t intended. I also utilized the Slaughter Red under the cloak.
I utilized Maize Yellow in his eye recess and let that dry; I then came in with a bit of Nuln Oil mixed with 50% water and dirtied his eye sockets. Giving him a heavy eyeshadow look.
Reva, aka Third Sister
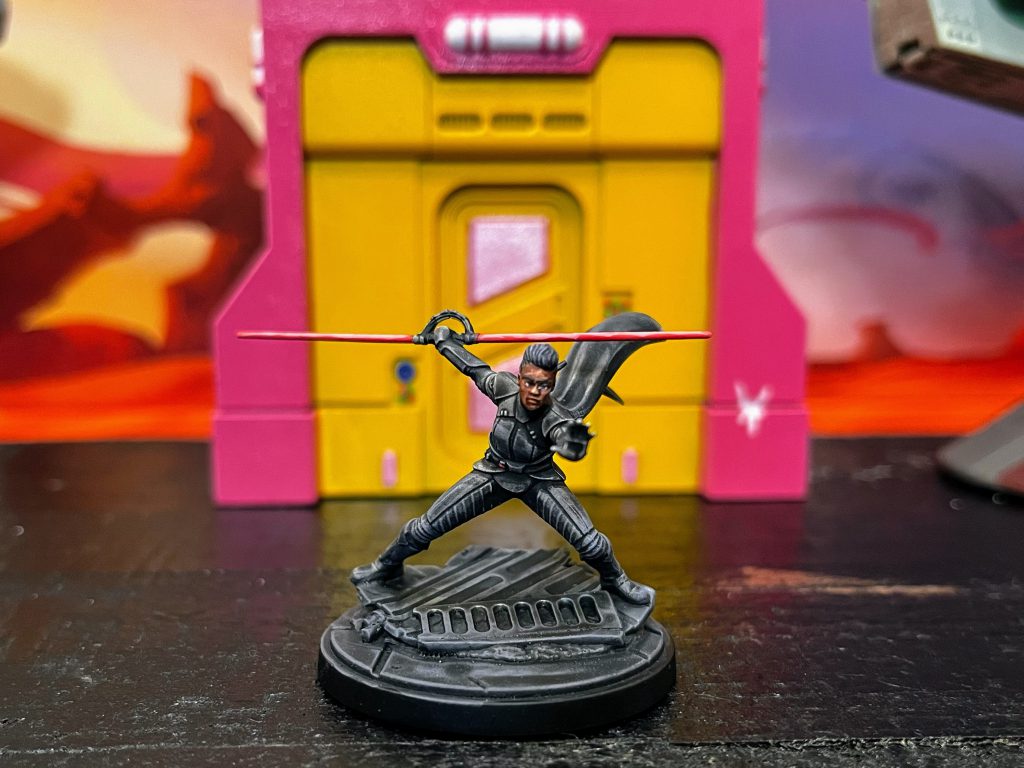
“You have no idea what I’ve done alone.”
Reva Unique Colors Used:
- Army Painter Speed Paint – Occultist Cloak
- Army Painter Speed Paint – Warrior Skin
Reva joins the ranks of the supporting units, fitting she has the second most color utilized. Her hair was a single layer of Occultist cloak while using the Warrior Skin to give her that nice brown tone.
Fourth Sister
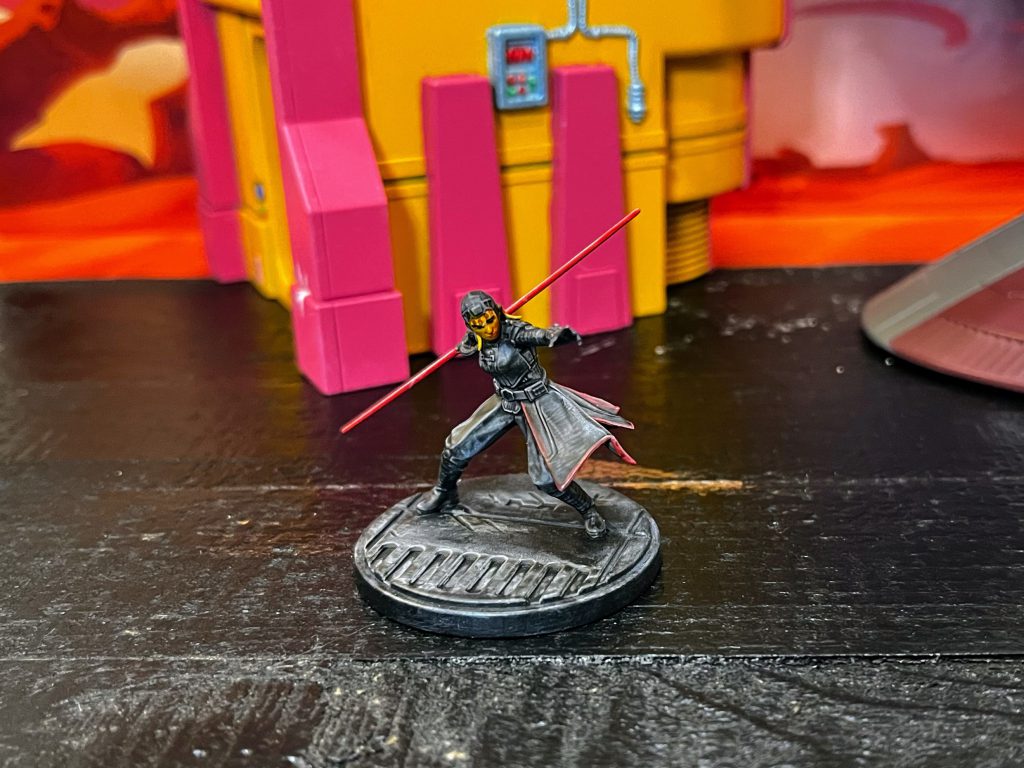
“Many were Jedi who turned to the dark side. Now, they hunt their own kind.”
Fourth Sister Unique Colors Used:
- Citadel Colour Contrast – Nazdreg Yellow
The Fourth Sister’s face is a single layer of Nazdreg Yellow contrast paint with a thinned Nazdreg Yellow for her facial markings. I let the first coat of full application dry; then I would apply the markings, then go over and over them till I would get the desired color. Using the Nazdreg Yellow in a thinned coat over the heavier application gave it more of a glaze effect, creating deeper colors.
Fifth Brother
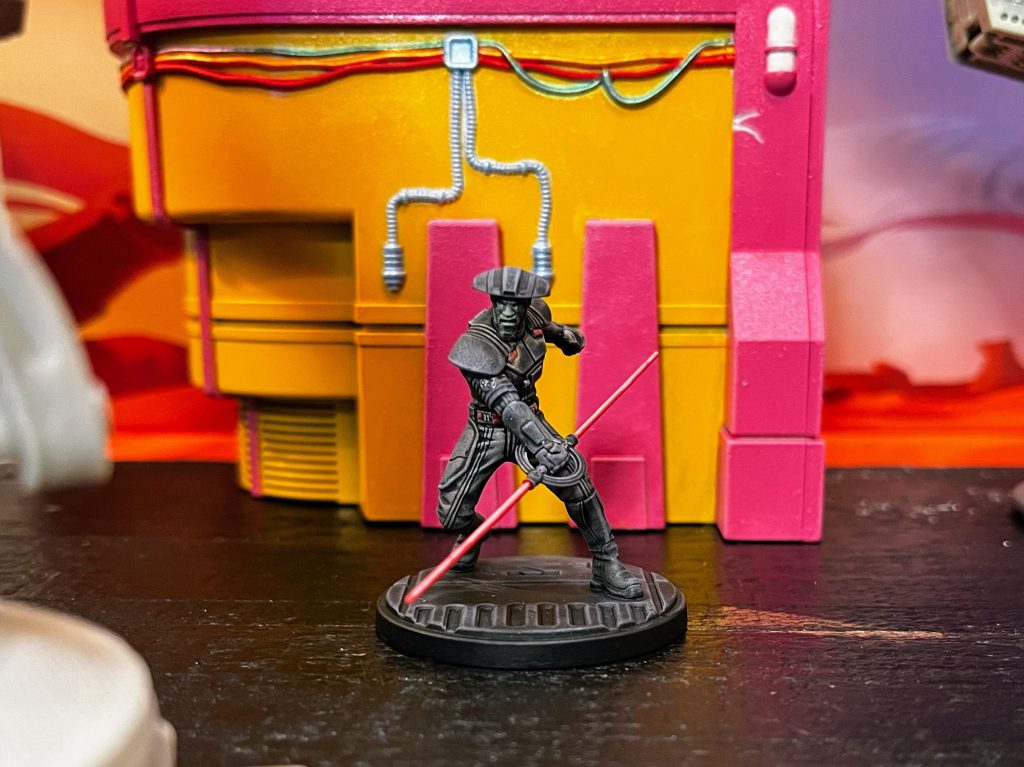
“I Will Get What I Deserve, Third Sister. And So Will You!”
Fifth Brother Unique Colors Used:
- Army Painter Speed Paint – Burnt Moss
Fifth Brothers’ face turned out a bit dirtier than I would have preferred with the single coat of Burnt Moss. This is the most fitting color since his face is gaunt and ashy green/blue.
Final Touches
Dry brush of Shadow Gray mixed with some Basilicanum grey to begin across any areas I wanted to pop on the armor. Then, it moved to just Shadow Gray, then lightened the Shadow Gray with a bit of Vallejo white mixed in. A few dry brushing techniques are popular right now; I utilized a wet dry brush, then used a dry brush pallet to knock off 98% of the paint, which came in on the parts I wanted dry brushed. You can check out the professional stuff here.
Star Wars Miniatures
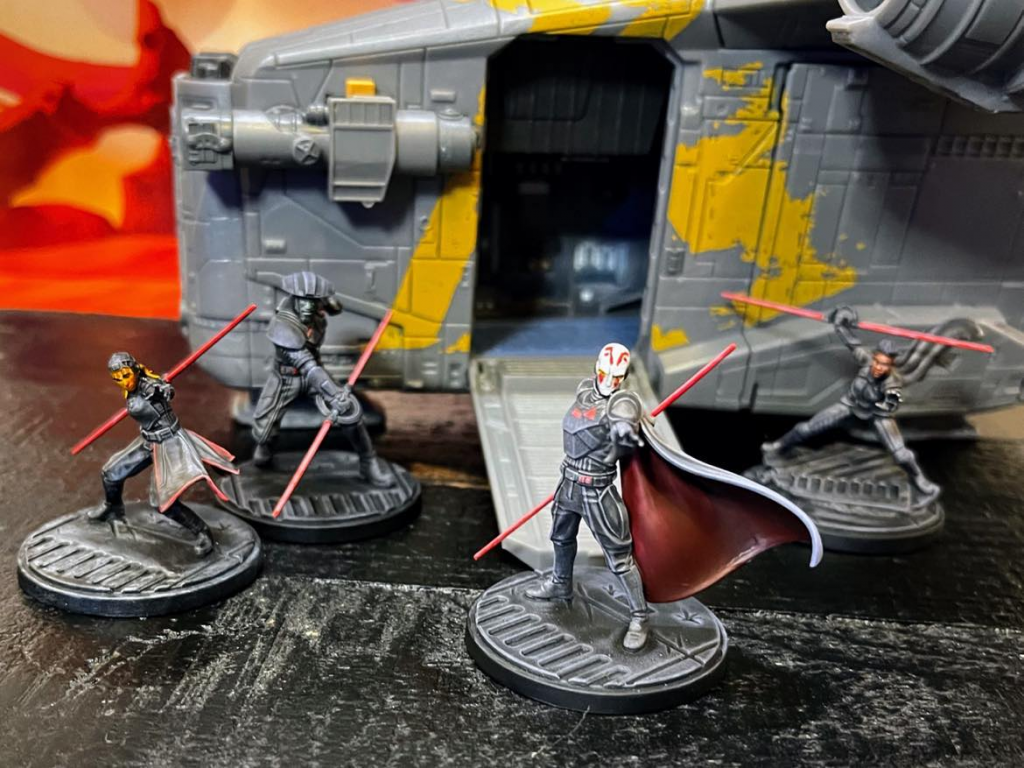
My approach to miniature painting falls somewhere between ‘table ready’ and aficionado. I’ve tackled various projects, including Imperial Assault, Mice and Mystics, Shadows over Camelot, Shadows of Brimstone, and a complete Twilight Imperium set (2, 3). Painting, for me, has always been for pleasure, relaxation, and fun. I lean towards offering encouragement rather than critique when evaluating my art and others.
Faces and eyes have consistently posed challenges for me, and achieving perfection in these areas has been rare. Likewise, Point-of-light, aka POL, which demands painstaking precision, is a style I seldom attempt due to the effort involved.
Your miniature painting style should reflect your unique approach. While learning and replicating techniques is beneficial, you should feel free to do only some things simultaneously. Starting small and gradually incorporating new techniques and abilities into each project is the best way to progress and enhance your skills.
The Jedi Hunters squad pack looks stunning when placed on the gaming table. However, it’s worth mentioning that photographs tend to magnify imperfections and sometimes reveal details (or the lack thereof) that the naked eye might not discern. It’s important to remember this, especially when you think, “I can’t do this.” Remember always to thin your paints; shades can elevate any paint job to the next level.
