In our How to Paint Everything series, we take a look at different armies of the Warhammer universe, examine their history and heraldry, and look at several different methods for painting them. This week we’re going down to 6mm scale, looking at the teeny tiny planes of Aeronautica Imperialis. After featuring the Orks on Wednesday, it’s the turn of the Imperial Navy!
Skies of Fire releases tomorrow, and we’re excited for more tiny planes to join the fray, with reinforcements for the Imperial Navy and the T’au Air Caste joining the battle. The Navy were one of the two original factions in the re-released Aeronautica Imperialis, fighting against Orks in the Rynn’s World starter set. The Navy are a great opportunity to paint something similar to a “real world” plane and get very detailed with your squadron markings and gritty, real-world film. Or you can paint them purple, you do you. The Imperium cares not from where the blood… wait. Anyway, here’s some painted planes.
Raf
Unlike my Ork squadron, I decided to go really outside the box for my Imperials. I’ve been working on a scheme and story for a custom Space Marine Chapter that includes other Imperial factions, so I decided I’d test the scheme and have some fun with it. I was inspired at the time by Dana Howl’s general vaporwave aesthetic as well.
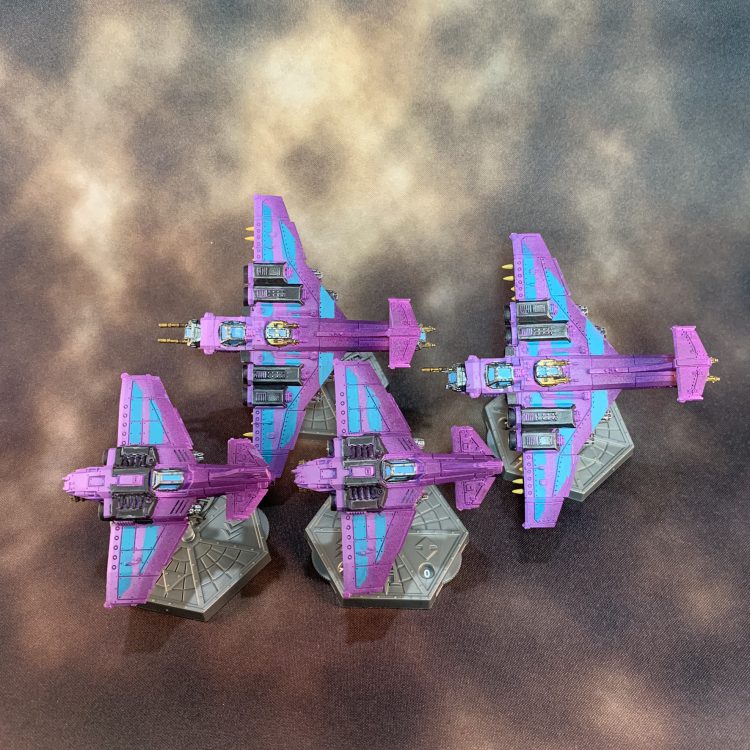
For the base purple color, I started with white primer and painted the whole plane in with Genestealer Purple via airbrush. I kept it thin and light to maintain a light purple. For the dark fade I used Druchii Violet, again through the airbrush. With each subsequent pass I moved further and further along the back of the plane to deepen the shade.
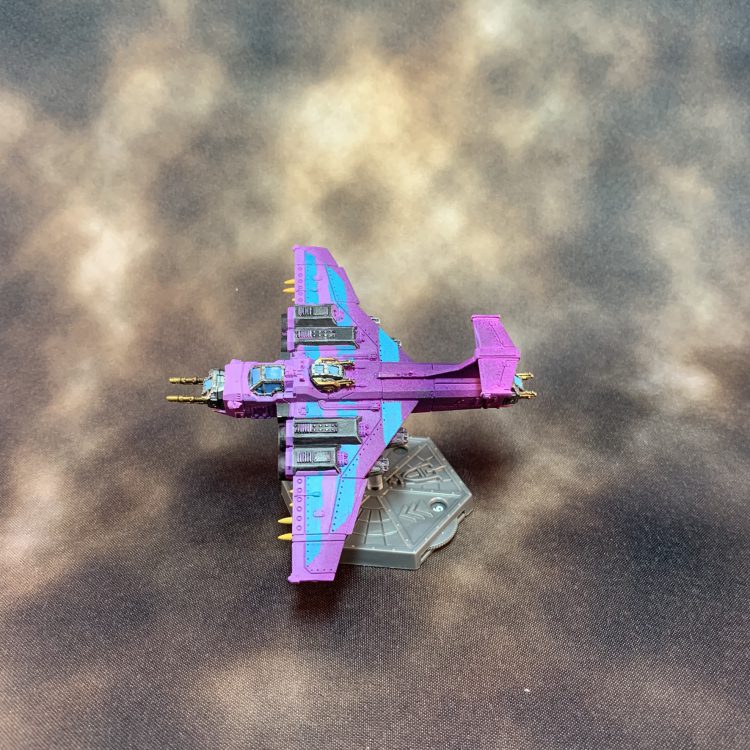
Once that was done, I painted the engines and manifolds black, with a quick grey edge highlight. I can’t remember for sure but I think it was Abaddon Black and Eshin Grey.
The stripes were done with a P3 Teal colored paint, attempting to follow some natural panel lines but it’s pretty clear that they got away from me in a few points. I have no idea how I’d begin to touch up something when the base color was faded with an airbrush so I’m leaving it.
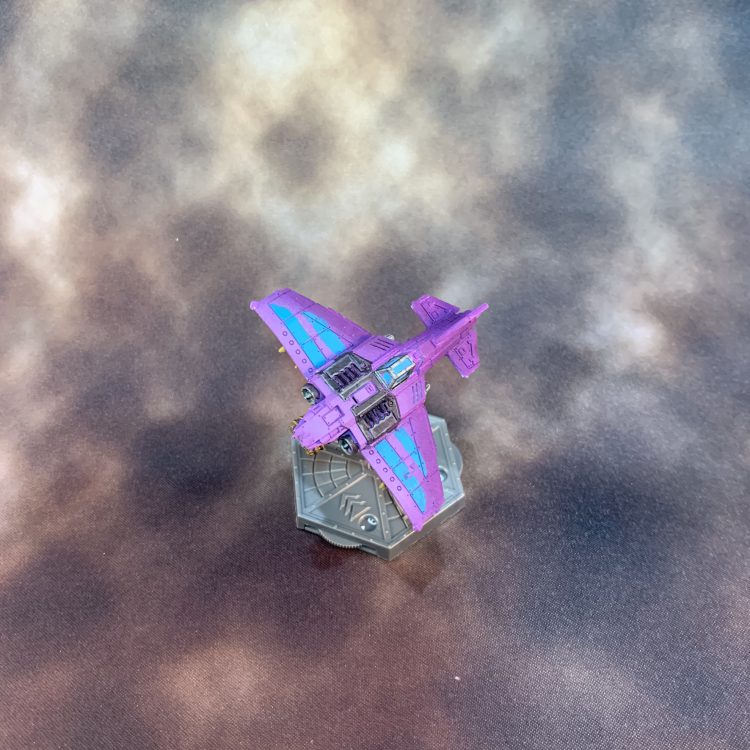
Some quick metallics, and yellow rockets for contrast and they’re done. This was a very fast paint job that should be easy to return to when I buy more. I am planning to continue the weird colors with the upcoming Astra Militarum planes, but it’ll likely be something different. Orange and teal camo maybe?
Chris “whiteshark12” Cowie
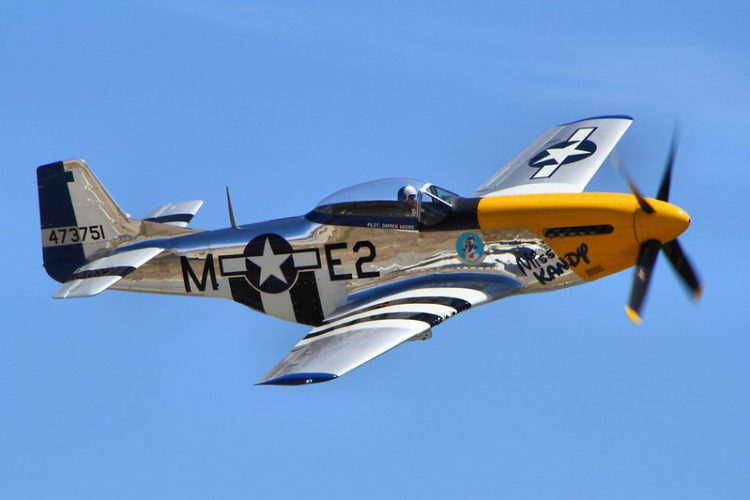
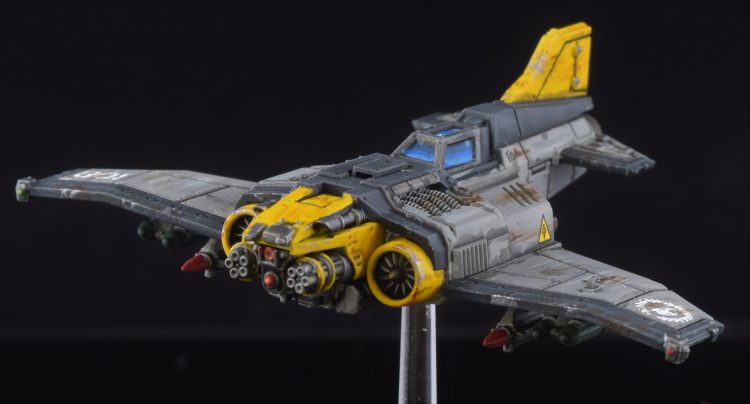
As with most of my projects, I started by trawling Pinterest and Google Images for inspiration, looking at both real-life aircraft and other people’s Aeronautica Imperialis schemes. I settled on a design that was based on the classic WWII P51 aluminium and yellow, with the metallics replaced by 2-tone greys.
Basecoat
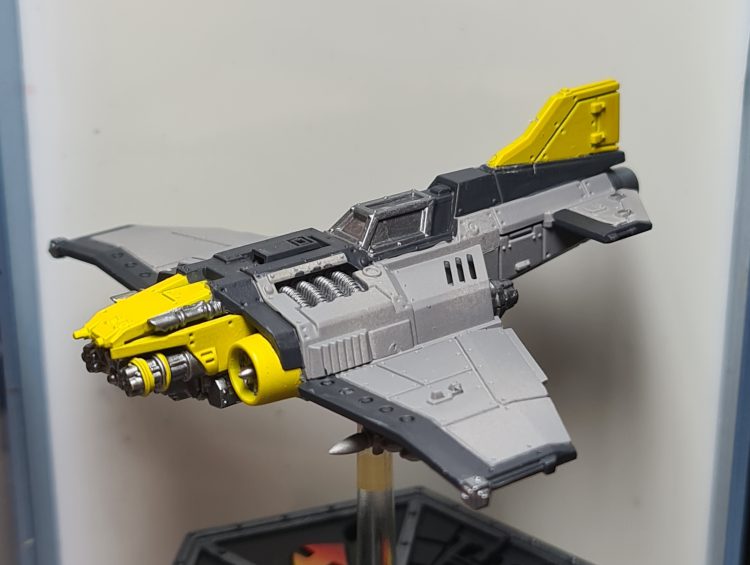
- Prime with a light grey.
- Airbrush VGA Sun yellow on the nacelles, nose and tail (if you’re smart, you can leave these bits off as sub-assemblies. If you’re dumb like me, you’ll need to spray these first then put painter tape over them).
- Airbrush VMC Dark Sea Grey over the rest of the model.
- Paint VMC Black Grey on some of the leading edges and centre stripe.
- Paint the metallics with VMA Gunmetal – this colour has fantastic coverage, if you use GW Leadbelcher I highly recommend you try it.
Shading
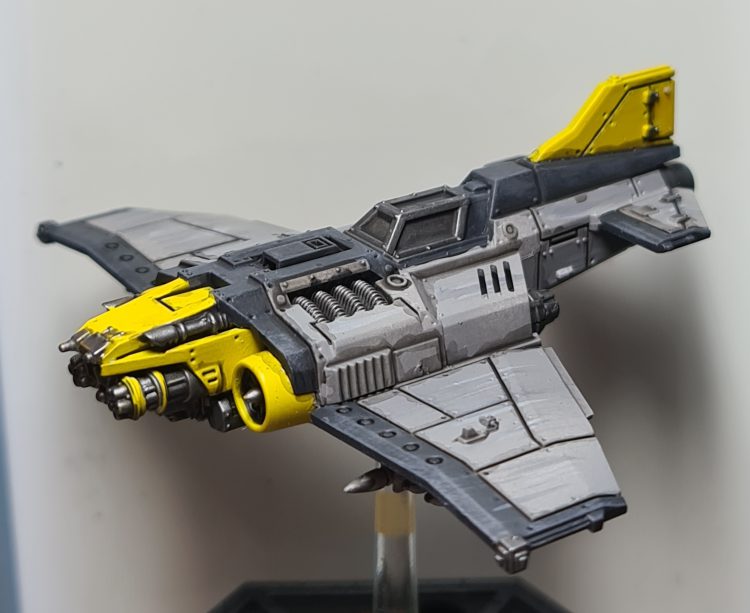
As always, add a Nuln Oil wash over all of the metallics and a pinwash in the panel lines and crevasses.
I’ve added depth and texture to the previously flat armour panels with streaks of a shade lighter and darker grey (here VMC Silver Grey & VMC London Grey) mixed at least 1:10 with Lahmian Medium. It may take a few tries to get right (practice under the wings where it’s less visible!) but this adds a lot to an otherwise flat surface. The dark grey sections were drybrushed with VMC Basalt Grey.
Weathering
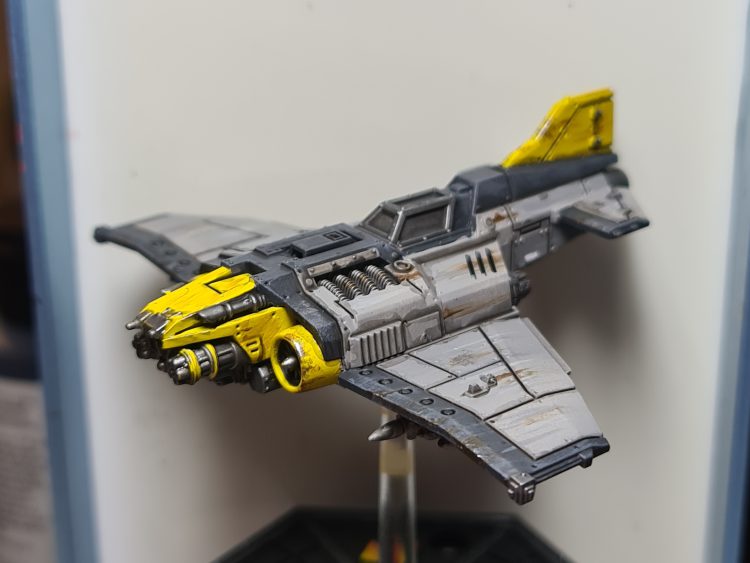
While not necessary, I wanted to do more with the flat armour panels. Adding a bit of weathering tells a story of a fleet pushed to the edge (or maybe just a bit lazy!)
I used VMC Smoke, which has a texture halfway between a wash and standard paint and is absolutely perfect for this kind of oily streaking. I take 90% load off a stiff brush and do a couple strokes similar to drybrushing from rivets and other greebles to make them look like leaking oil. This colour also works as a complementary shade on the yellow. I also took a stiff brush with some bright silver on it and lightly brushed against the leading edges to look like chips exposing the bare metal.
Transfers & final details
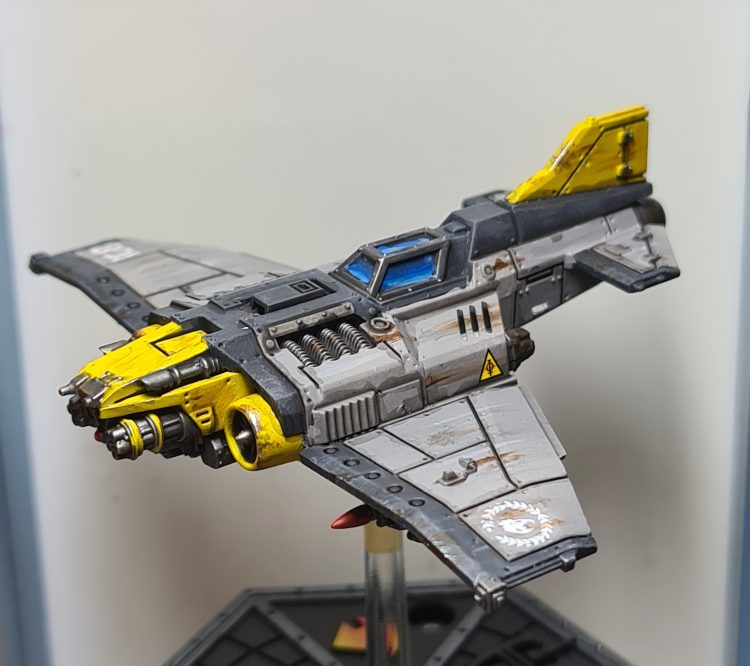
It’s easy to not bother with transfers, but they can add a lot to your miniatures. I like to add unique transfers to the wings so it’s easy to separate aircraft the tabletop. Here, i’ve put an identification number on the starboard wing and a crest on the port, and a generic warning symbol from the Imperial Knight kit under the cockpit. If you were smart you’d put the transfers on before weathering, but as previously noted I’m not, so I’ve gone back over them with some VMC Smoke and stippled a little bit of grey on them to make the edges look worn off.
When using transfers, remember to put a basecoat of Gloss Varnish down to get rid of the glossy look from the rim of the transfer.
Canopy
The canopy is a 3-4 stage process, wet blending from GW Caldor Sky to GW Baharroth Blue. This is a lot easier with a wet palette, which will keep your paints from drying while mixing. We have a tutorial on how to make one here.
- GW Caldor Sky as a basecoat
- Light Nuln Oil wash over all of the canopy
- Caldor Sky again, staying away from the top half
- 1:1 mix of GW Caldor Sky : GW Baharroth Blue
- 1:2 mix of Caldor : Baharroth on the bottom edges
Basing
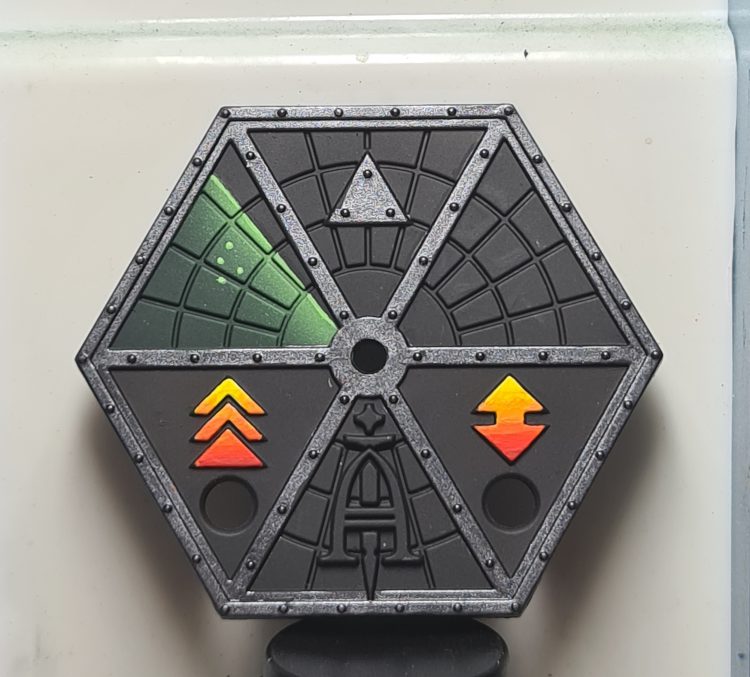
I followed SRM’s basing guide here to separate the top cover from the base and dials, then primed the top normally. The radar dial, based on everyone’s favourite film Top Gun, was done by sectioning off a part of the dial with painters tape and airbrushing the other part with VGC Dark Green and VGC Escorpenta Green. For the arrows, I followed a Yellow : light orange : dark orange : red wet blend sequence over a white undercoat. The base here is the third time I’ve ever done a wet blend like this, so it’s not actually as hard as it might look!
Bonus round: Magnetising
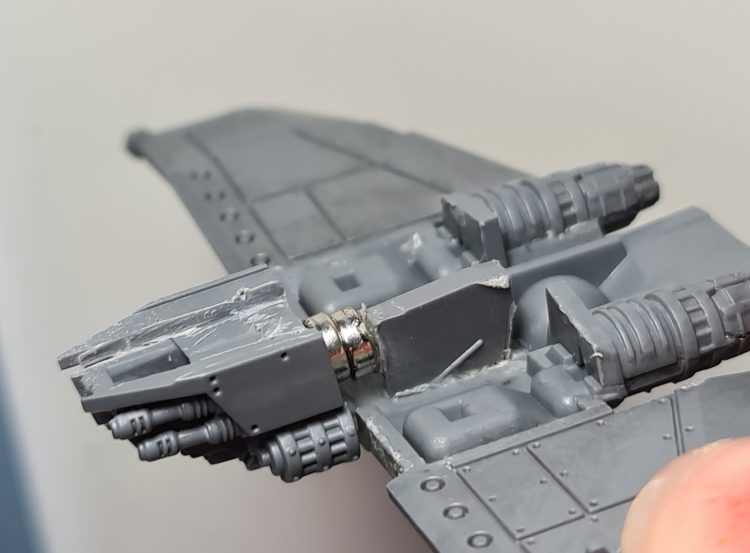
No one else will ever care if the nose gun is wrong on my thunderbolts, but i’d know. As the nose sections are completely separate magnetising them as shown was really simple, with a bit of filing so they slide past the nose top a bit easier. Again, this is not necessary but someone needs to know I did this, because they’ll spend the rest of their lives as Thunderbolt Furies anyway.
Have any questions or feedback? Drop a note in the comments below or email us at contact@goonhammer.com.


