This article is part of a larger series on how to paint Space Marines. To return to that series, click here.
The Howling Griffons are a storied chapter in Warhammer 40k, first showing up back in some of the earliest rulebooks for the game as a chapter of Space Marines (Warhammer 40,000: Compendium during the game’s first edition mentions them as participants in “The Badab War”). They’re particularly noteworthy for fighting in the Badab War and for having a larger than normal number of Librarians in their ranks.
With their quartered yellow-and-red color scheme and complicated chapter icon, the Howling Griffons are considered to be among the most daunting marine chapters to paint. But while they’re certainly a bit more complicated than most, painting them is easier than you’d think. In this tutorial we’re going to look at how to paint a Howling Griffons marine. note that this process will also work if you’re painting larger units like vehicles, though for those I’d recommend masking them off and using red and yellow primer/spray over doing quarters by hand.
Howling Griffons Heraldry - Click to Expand
Painting the Howling Griffons starts with either White or Wraithbone primer. I prefer Wraithbone, as it gives the models a richer color, and half of them is going to be yellow so having a yellow tint to the primer is good. You could also prime them pink if you want a very rich yellow, but we’re going to use Contrast Paints here so Wraithbone is ideal.
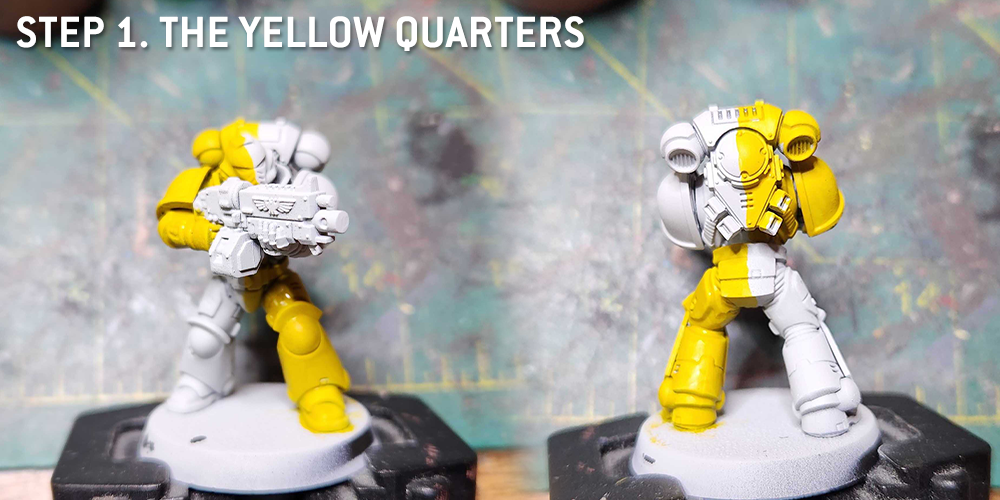
Step 1. The Yellow Quarters
The process starts with the yellow quarter of the model. I’m splitting the model at the waist, so the belt and everything below it is “the bottom half” of the model. In this case we’re doing the yellow first for one major reason: It’s easier to go over yellow with red than the other way around, so it makes sense to put the red on second.
In this step I paint the quarters of my model with Imperial Fist Contrast Paint. It has fantastic coverage and does the job pretty much in one coat. I tend to go over the ‘line” a bit here with my yellow – I want to overpaint a bit – to make sure there are no gaps when I paint my red. You could also just paint the whole model yellow at this point if you wanted.
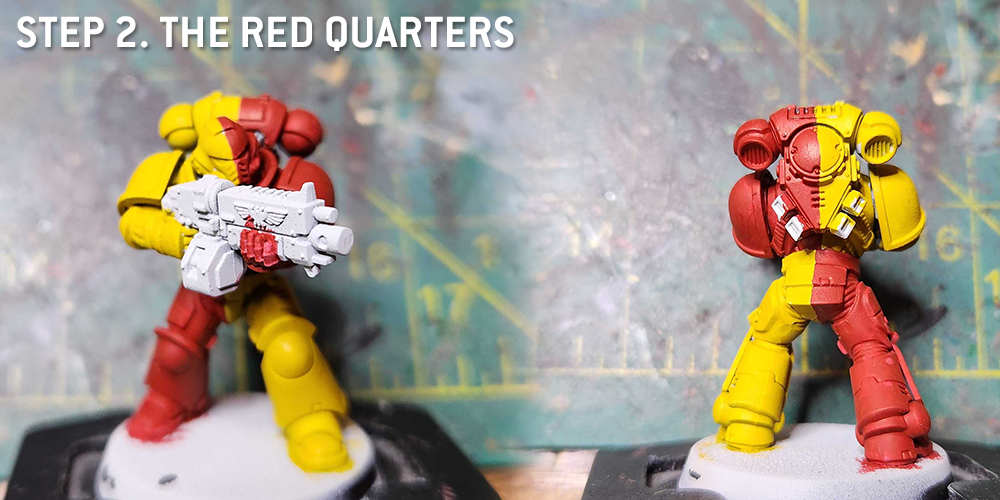
Step 2. The Red Quarters
Next comes the red. This was mostly done with Blood Angels Contrast paint, and then some touch-ups after the fact with Mephiston Red. if you mess up at this point and go over – which you can see I did on the backpack – you can correct using Yriel Yellow.
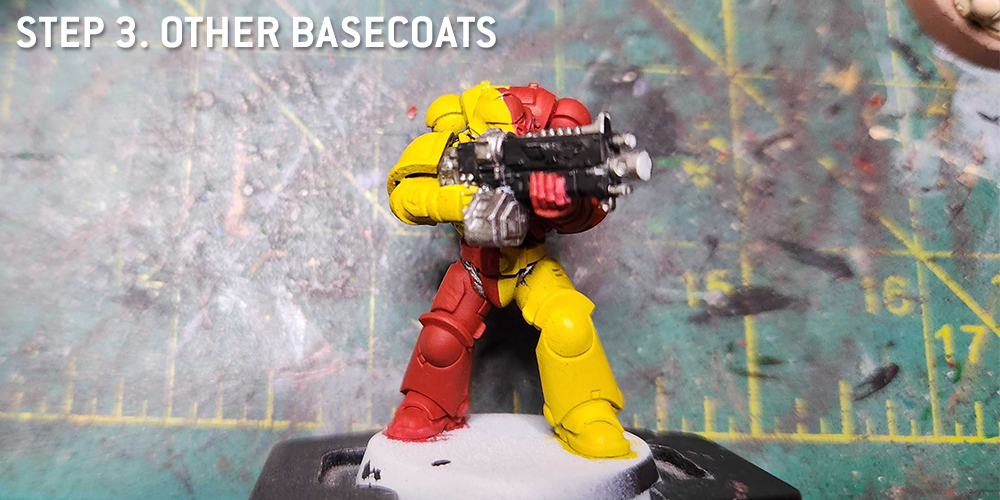
Step 3. Other Basecoats
The big parts are done, now it’s time to paint the other bits. The metal parts – underarmor and bolter – are done in Leadbelcher, while the bolter casing is done in Black Legion Contrast Paint. I’ll paint the eyes later.
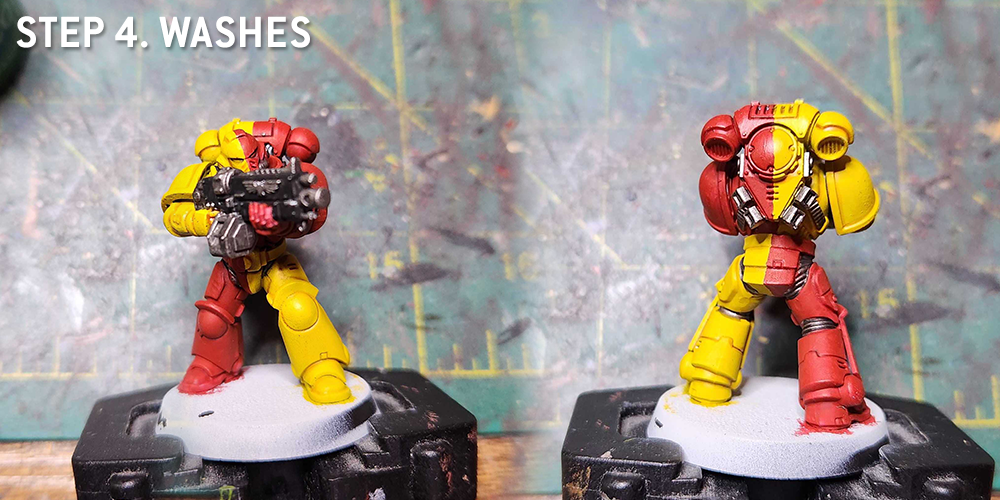
Step 4. Washes
Next is the washes and shading. I wash the metal parts with Nuln Oil, and then it’s on to the armor. This is less a process of washing and more about panel lining. I use a small brush and line the yellow parts of the model with Agrax Earthshade, and line the red parts of the model with Carroburg Crimson.
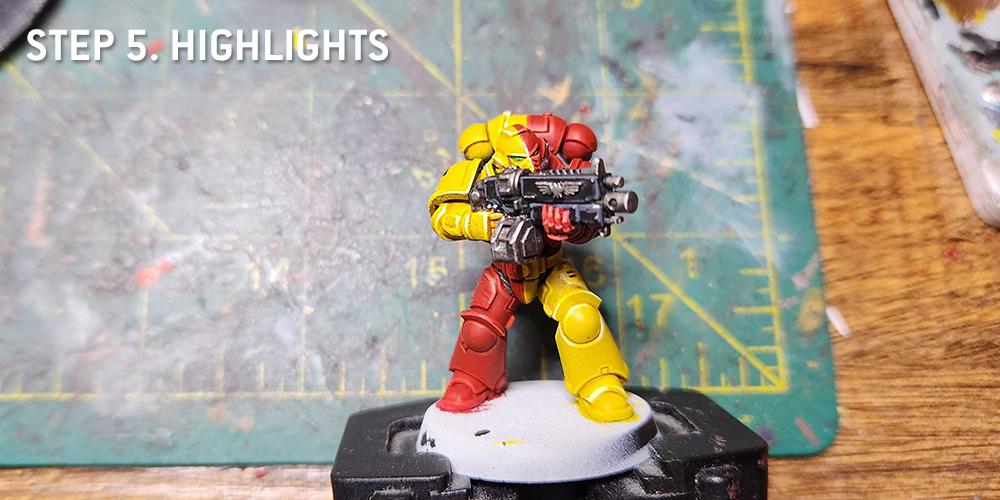
Step 5. Highlights
The final stage is when I do all my highlights and final details. The Red parts of the armor are edge highlighted with Evil Sunz Scarlet and the yellow parts are edge highlighted with Dorn Yellow. You can further highlight this on the corners/top edges with dots of Wazdakka Red and White if you want to go the extra mile. I paint the eyes here with Warpstone Glow and Moot Green, and edge highlight the casing on the bolter with Mechanicus Standard Grey. Some final edge highlights were done on the metal bits with Runefang Steel.
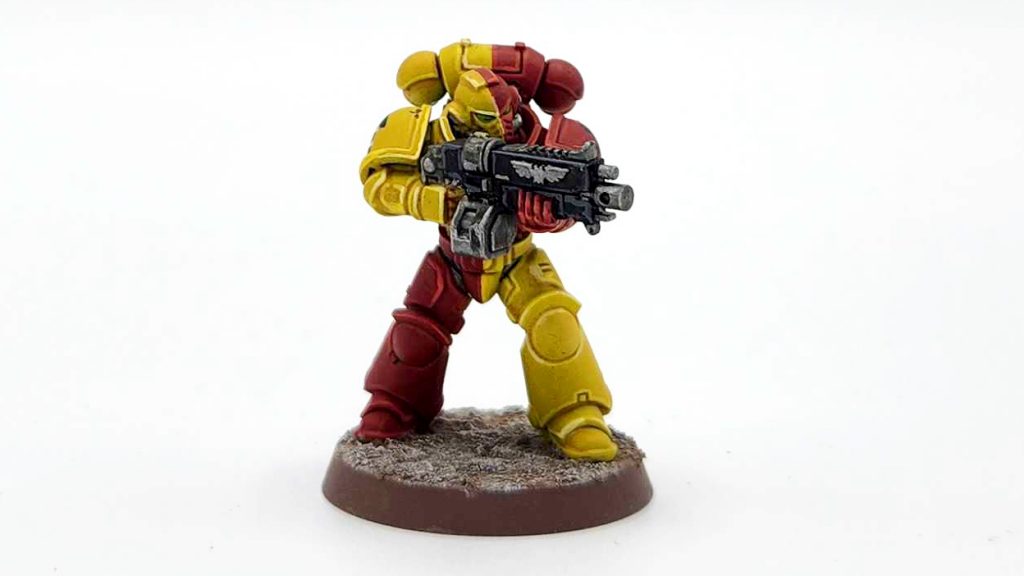
And that’s a wrap. It’s definitely more complicated than your average marine, taking a bit more thought and planning, but once you’ve got those basecoats down you’re pretty much just doing the same process as any other marine. It’s not nearly as complicated as it looks, just more time-consuming.
This article is part of a larger series on how to paint Space Marines. To return to that series, click here.


