
I’ve reviewed the Hextech terrain for Battletech (or other 6mm games like Hypersteel Nightmare) a few times, and one minor quibble is that if you’re working on a larger city having everything painted in the same two schemes can get repetitive. If you go wander around wherever you live, unless you’re in a soulless suburban development it’s likely that almost every building is a different color, both from a variety of accent colors and different materials used in the buildings. In miniature I don’t think you want every single building to be completely unique, as this is first and foremost for gaming and the variety will overwhelm your models, but they’re easy to repaint and add in a bit more variety. Beyond the prepainted options there are also STLs you can print and paint yourself, and all of this works equally well painting them. I do want to thank Thunderhead Studio and Gale Force Nine for providing me with this set of unpainted buildings.
I’m looking at three different (though related) paint schemes for this set of buildings. I’ve picked one color that will be my main structural color across all the buildings – this ties them all together and makes them feel like they’re part of one development, commercial campus, or similar. If you’re working on more than a handful of buildings at once, I’d suggest picking a couple different base colors. I’d keep them all in the neutral range – greys, whites, browns, and tans. After the main color I picked an accent color for each building. While you can reuse these colors, I’d make sure to use them in different ways on each building – it’s rare for any two real life buildings to be exactly identical.
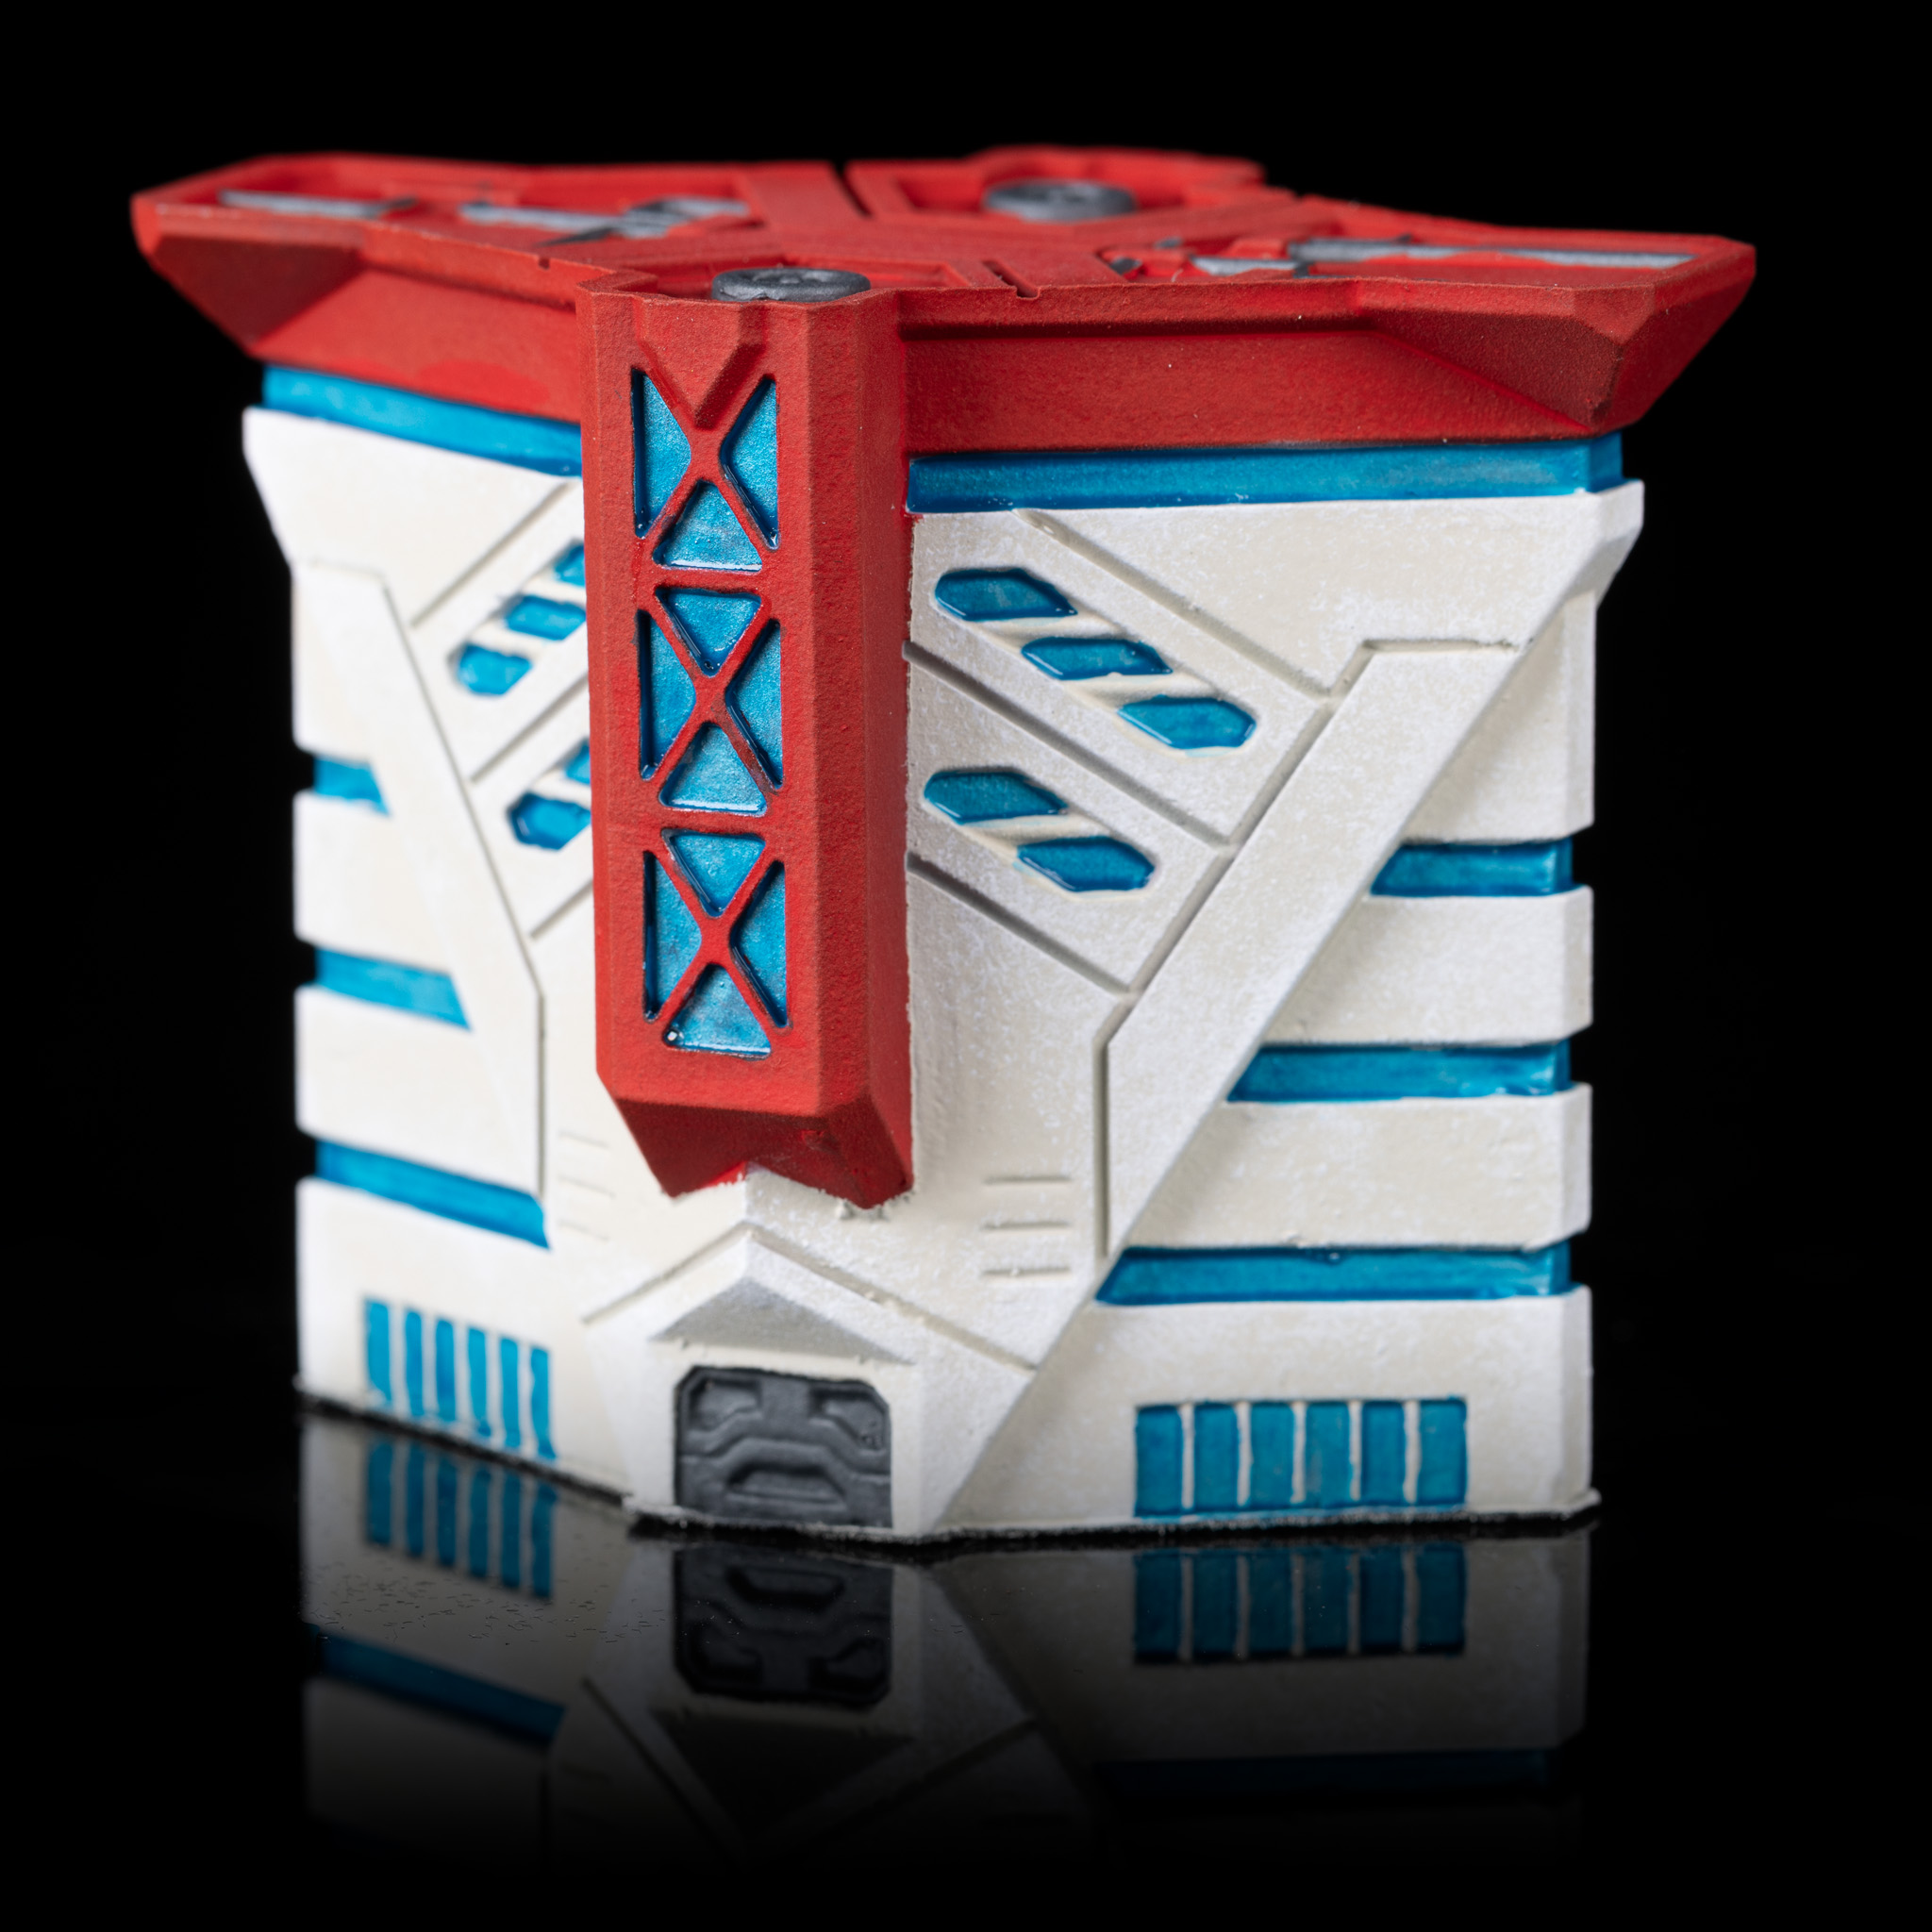
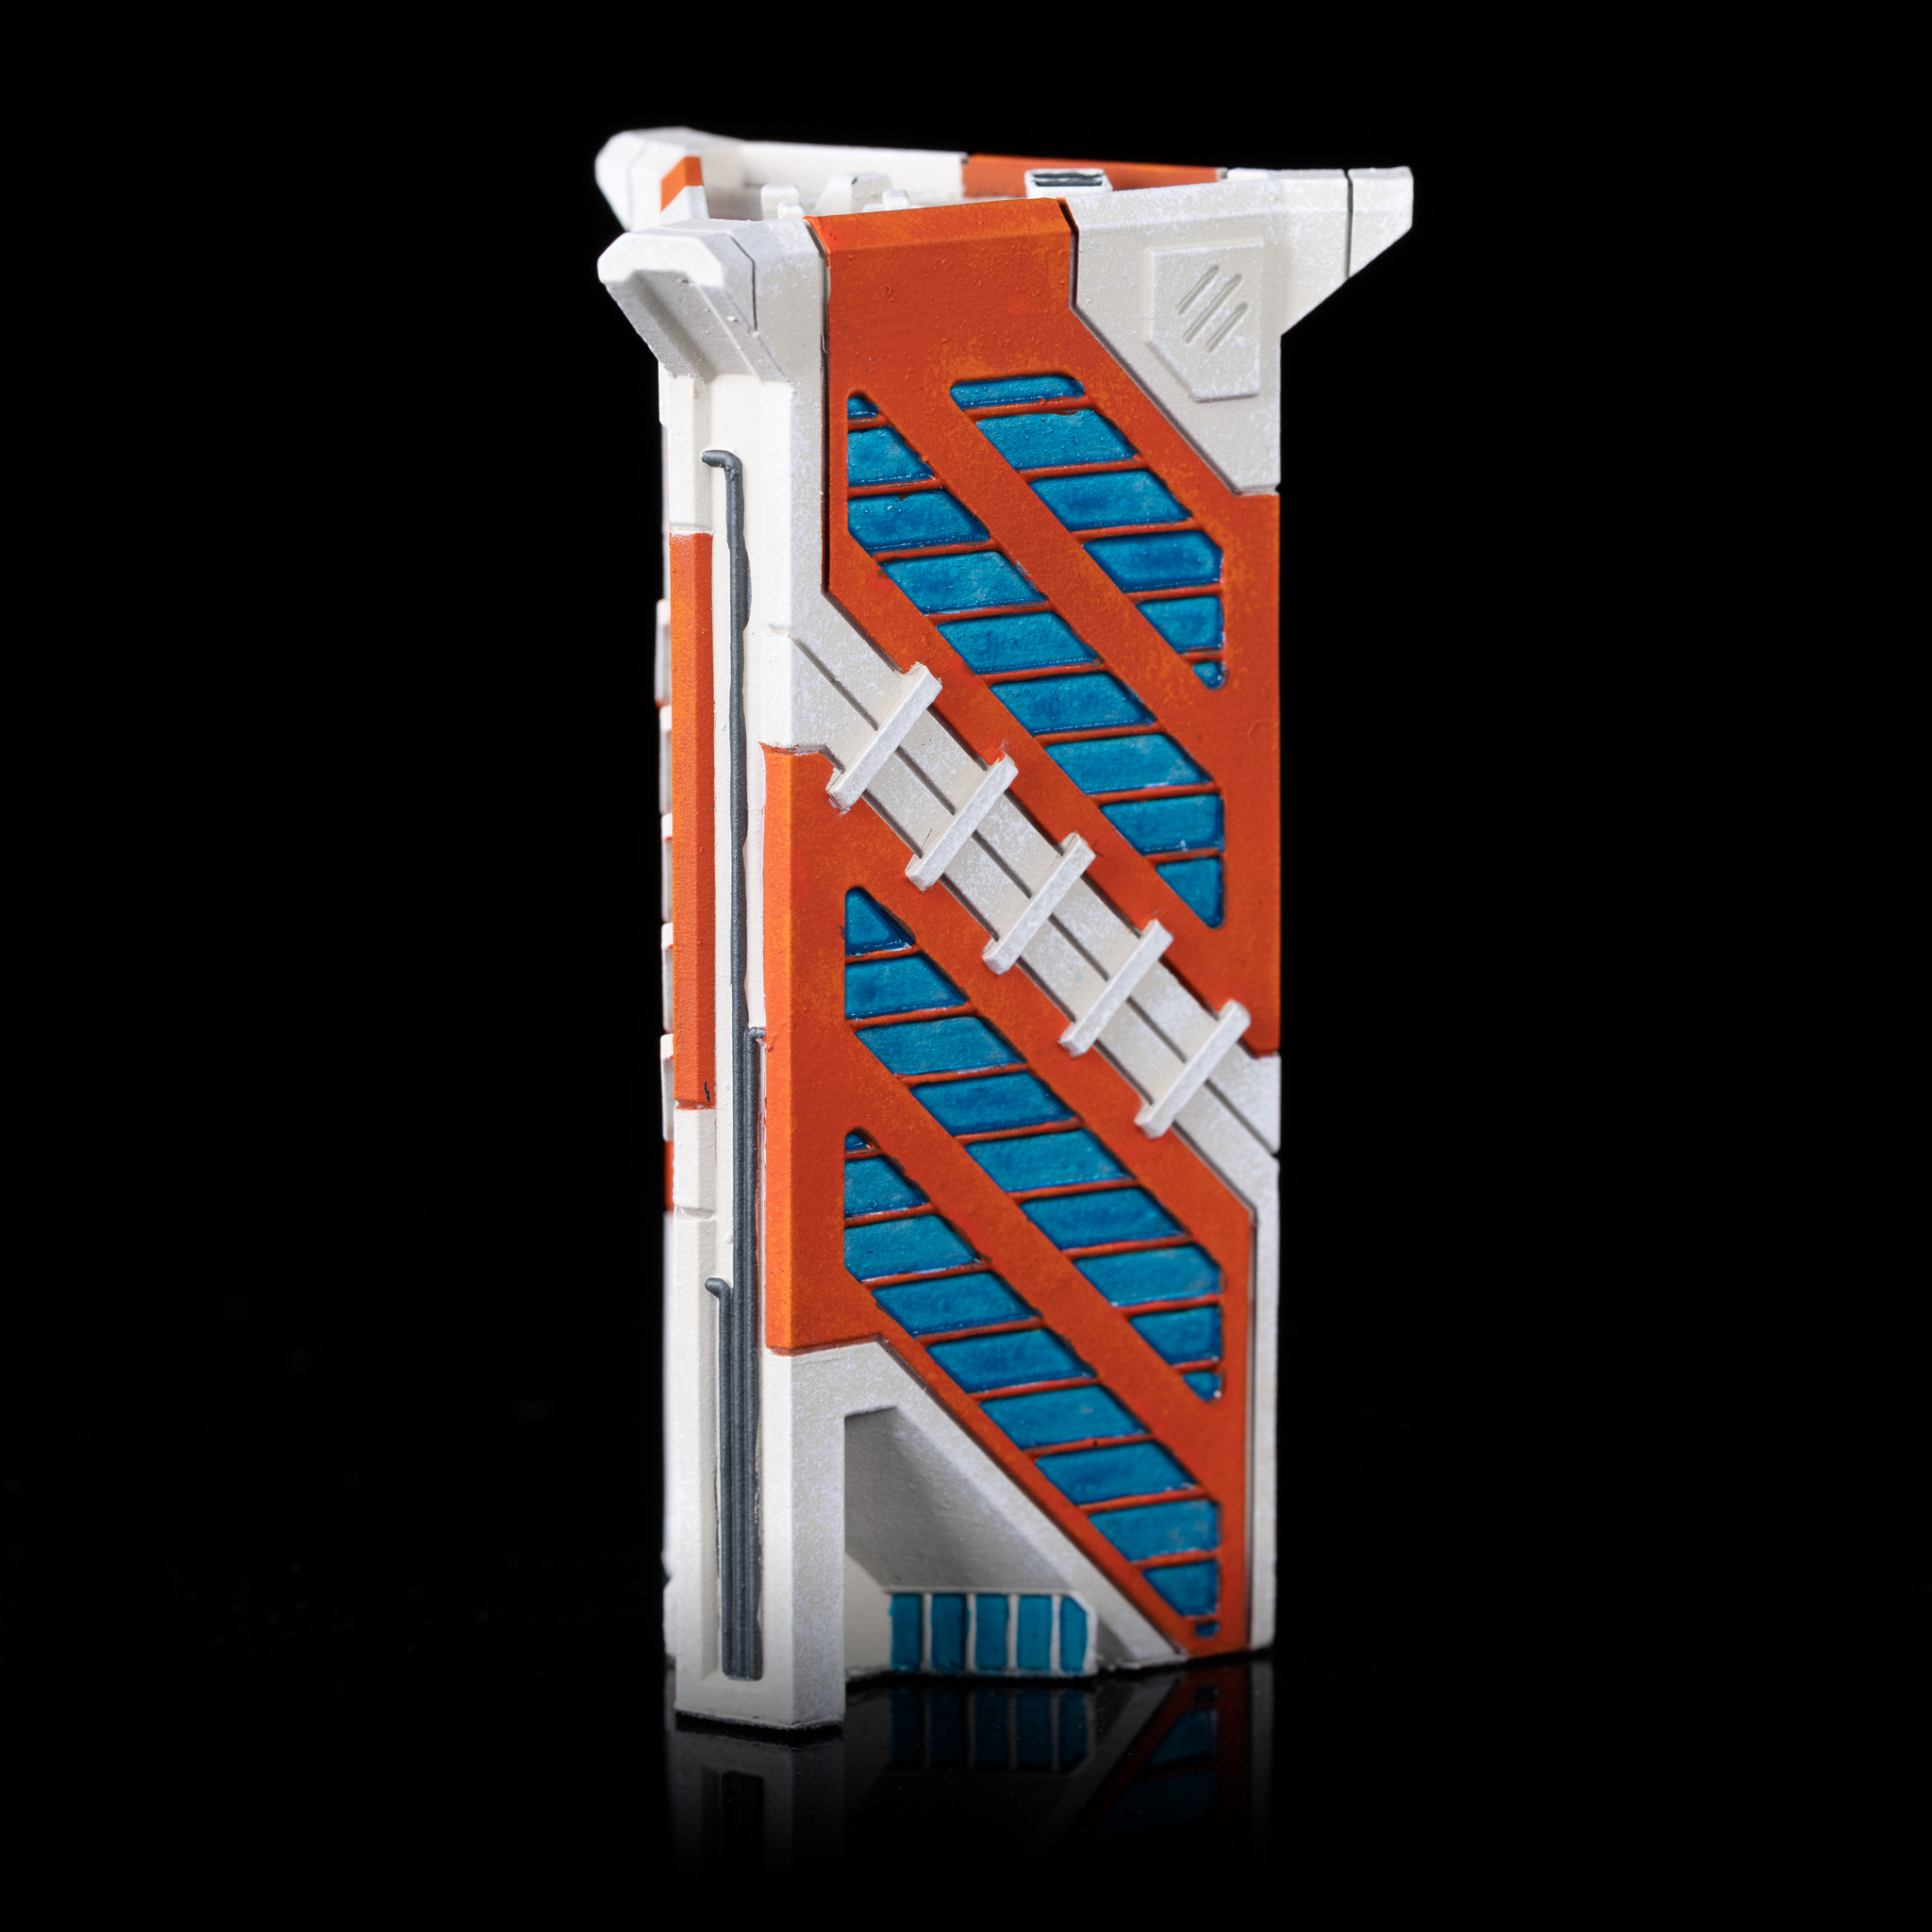
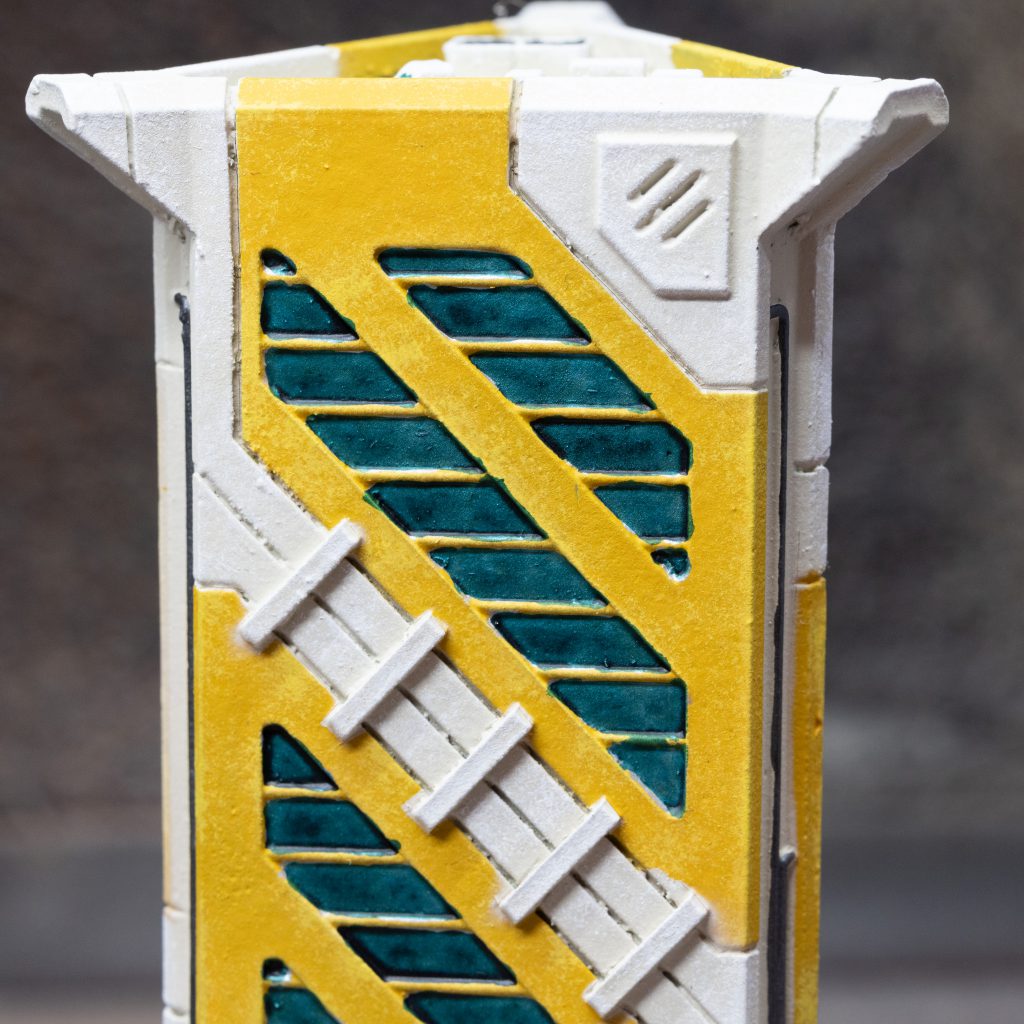
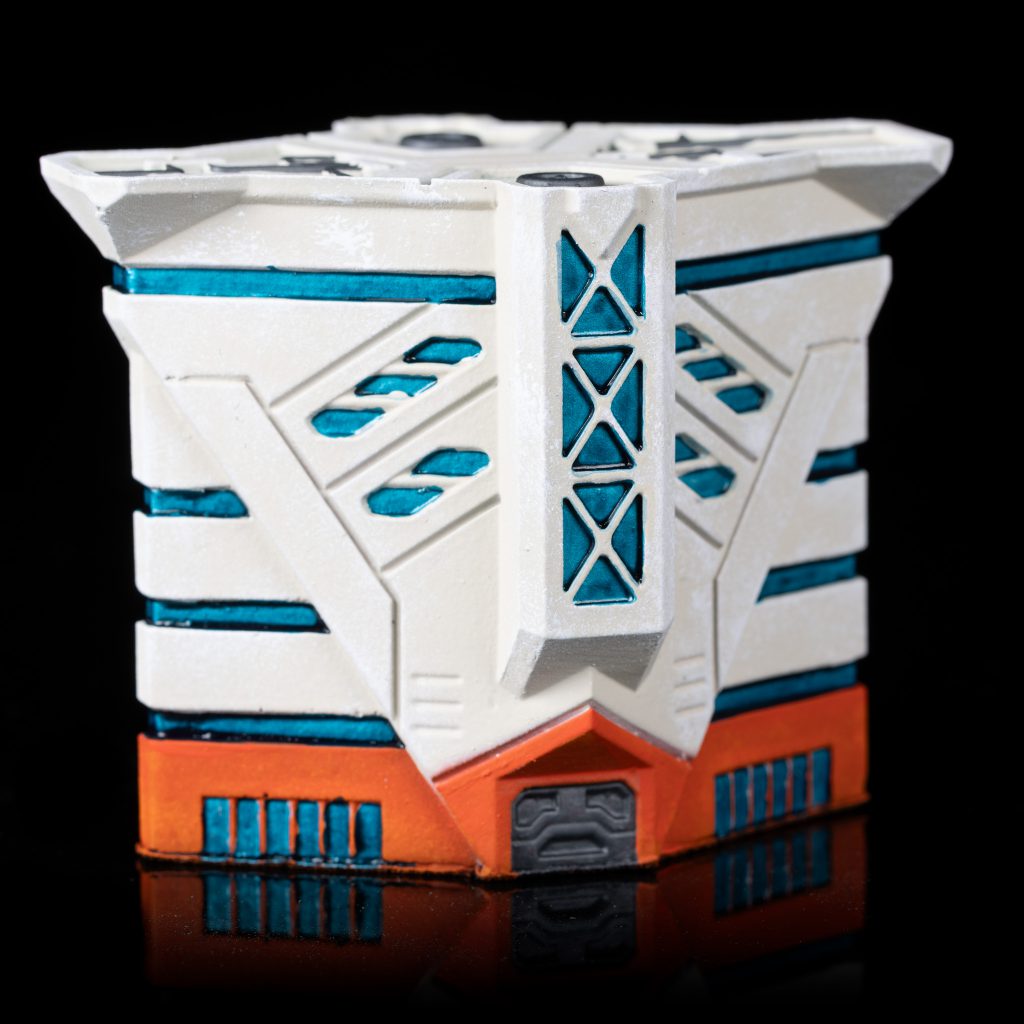
For this set of buildings I picked a light tan for the main structure, and am using red, orange, and yellow as accent colors.
Now that I’ve picked my colors, the first step is to airbrush the accent color onto each building.
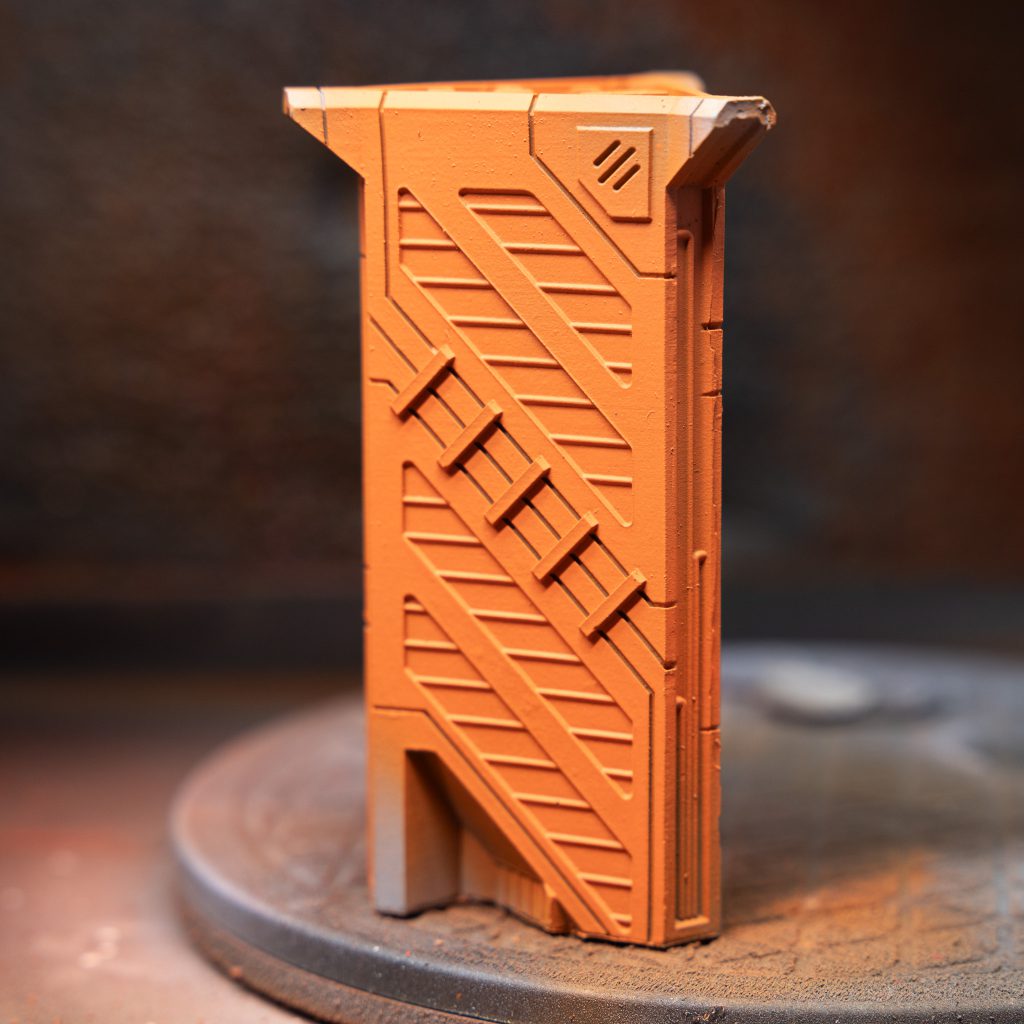
Orange: Vallejo Game Color Hot Orange
Yellow: Army Painter Warpaints Fanatic Fiendish Yellow
Red: Proacryl Bold Pyrrole Red
Next up I’m going to sponge my highlights on. I go pretty heavy with the sponge, and I’m not just trying to hit the raised edges – this is as much to create some surface variety as it is to highlight the edges. Just be careful not to press down so hard that you fill in any panel lines.

Orange: Vallejo Game Color Orange Fire
Yellow: Army Painter Warpaints Fanatic Warped Yellow
Red: Proacryl Orange Red
Once the highlights are sponged on, give it a bit of extra time to dry, then a real heavy coat of matte varnish. We’re about to mask this, and it really sucks to have your masking peel up the paint underneath. Once applied, let the varnish cure overnight.
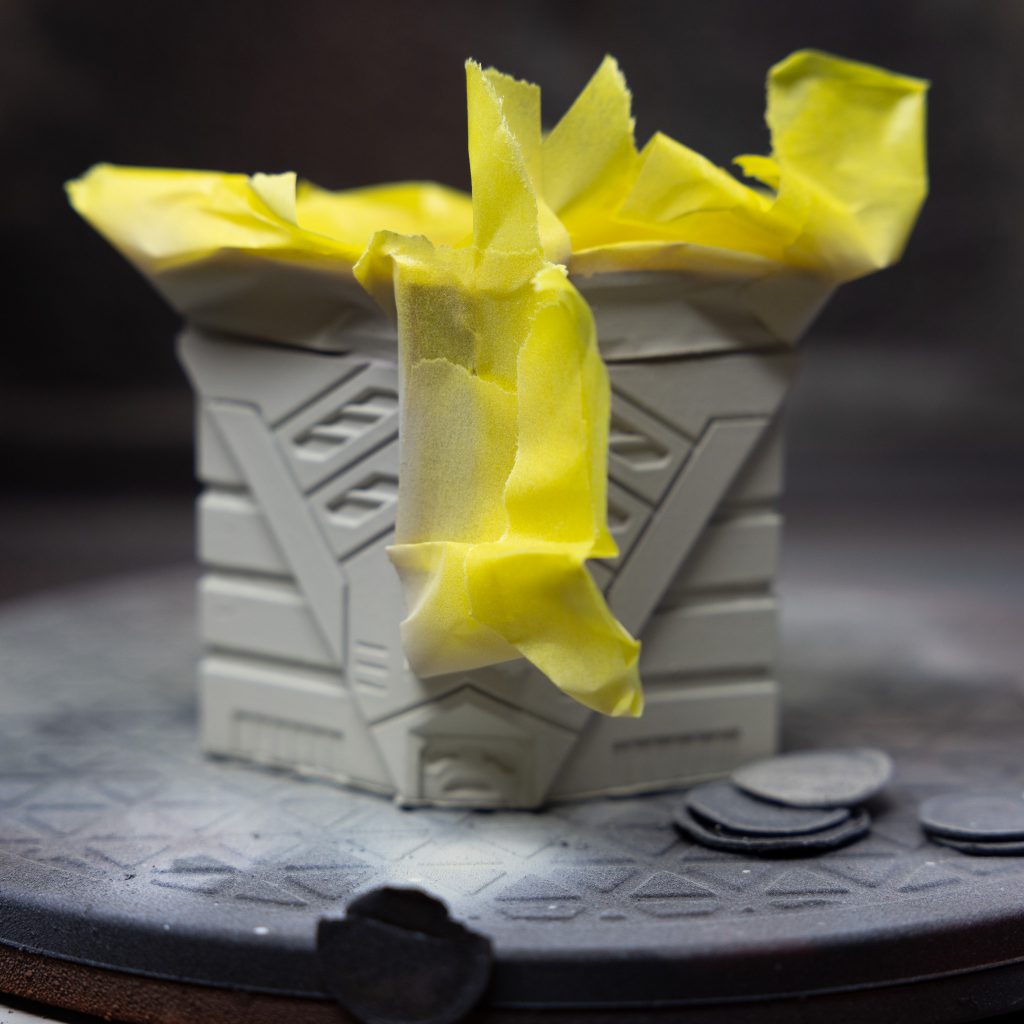
Tape over the areas you want to have remain your accent color. My preference for masking is to use Tamiya tape, but you can also use normal painters tape if you stick it to your pants first and reduce the tackiness a bit.
Once masked, I’ve painted everything else with Proacryl Ivory. As a very light color going on over some bright undercoats (particularly the orange), it took a couple coats.
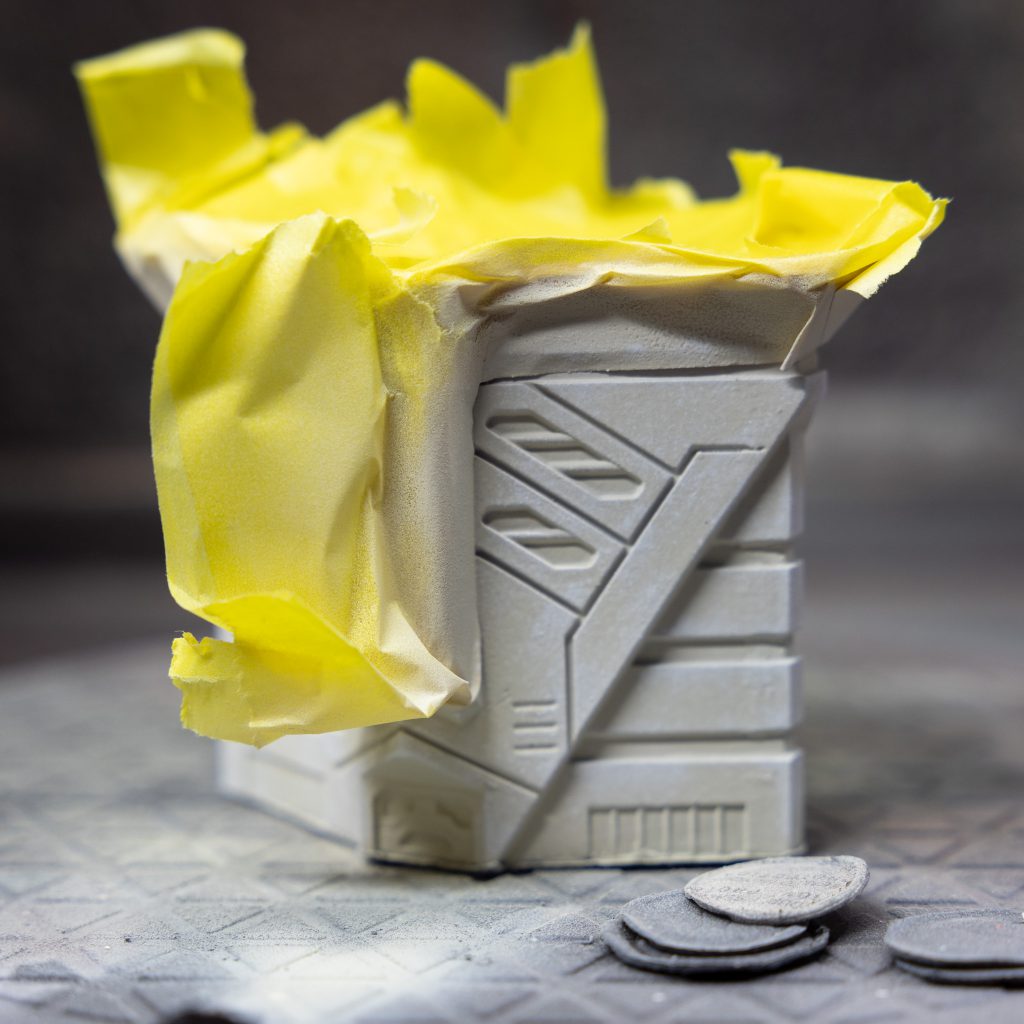
Going back to sponging to keep the texture the same, I’ve heavily gone back over the ivory with Proacryl Bold Titanium White. The ivory peeking through keeps this from full brightness and makes it look natural, and the white contrasts enough with it to define the shapes well.
I can now remove the masking, and go back in with my base colors to clean up any areas that the masking didn’t quite work right in. Don’t worry about it being absolutely perfect – this is terrain and we’ll be doing a bit more cleanup later.
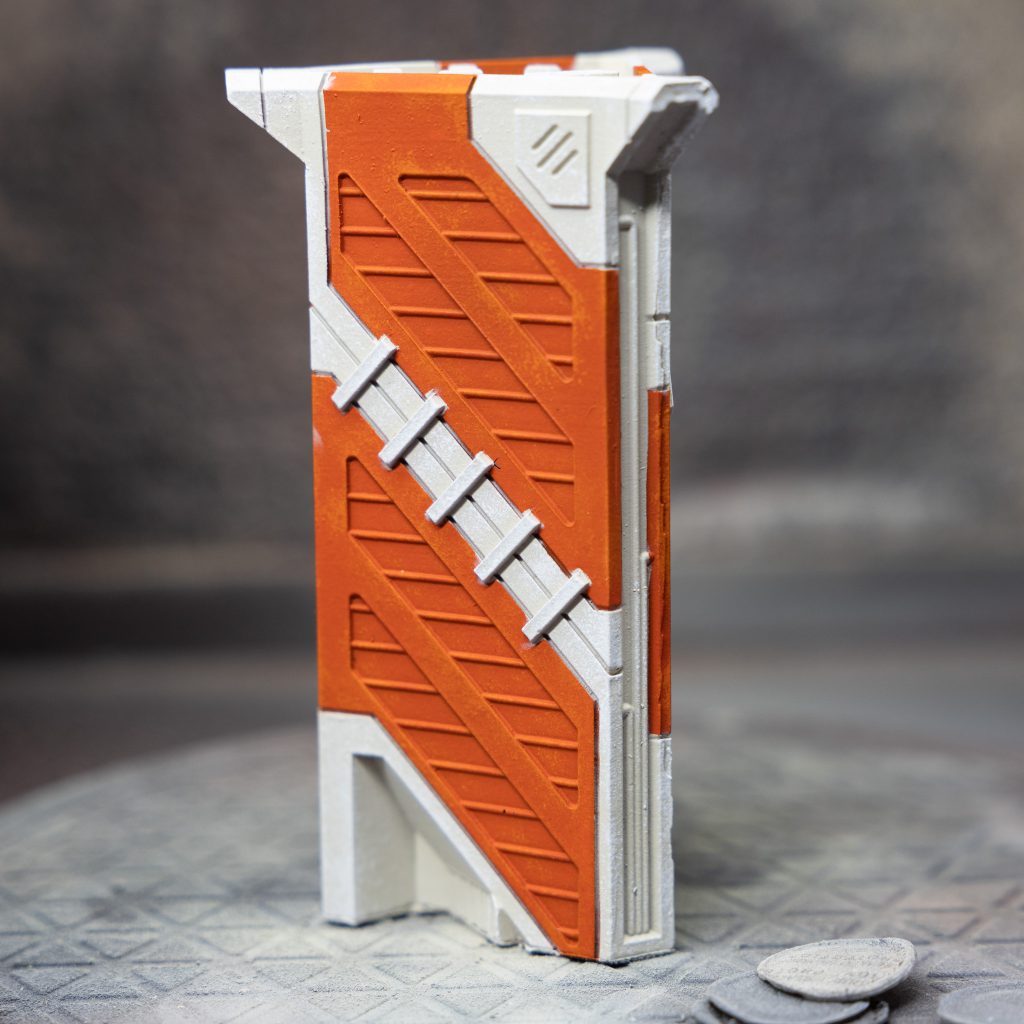
Optionally I’ve added a bit of detail with Proacryl Dark Silver. I’ve painted up various pipes, fans, and larger doors. This isn’t totally needed and is a break away from reality where most of those will have just been spraypainted the exact same color as the building, but I think it adds a bit of extra character and doesn’t take long to do.
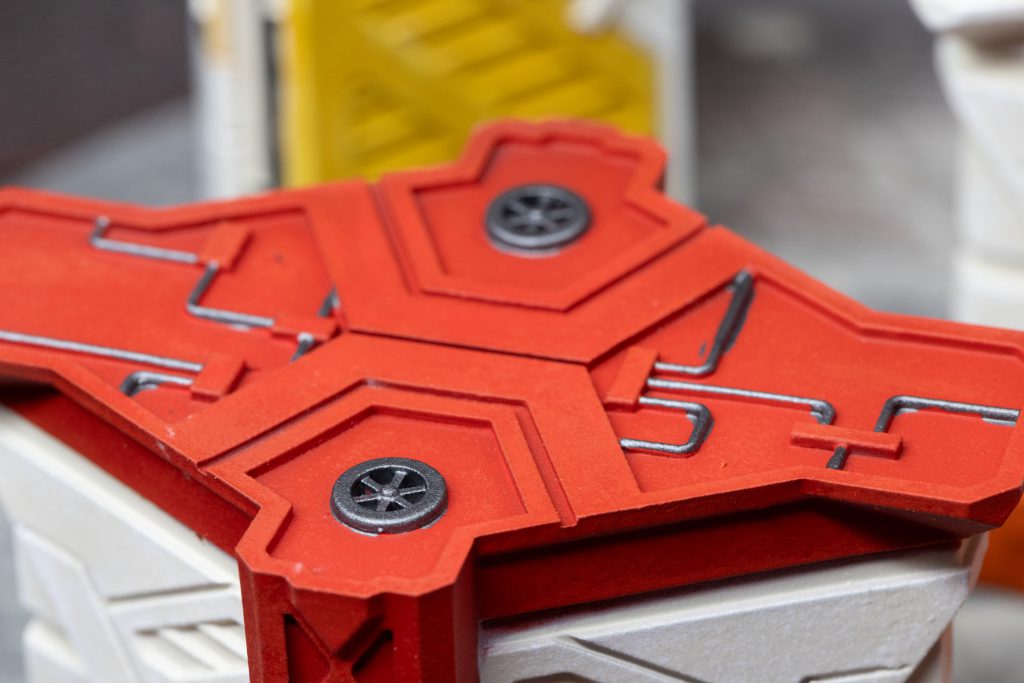
Now that the main colors of the building are finished, I’ve taken Proacryl Silver and painted in all the windows. Be as careful as you can when doing this, but not so careful you go crazy. You may need to do two coats, as you do want a pretty clean layer.
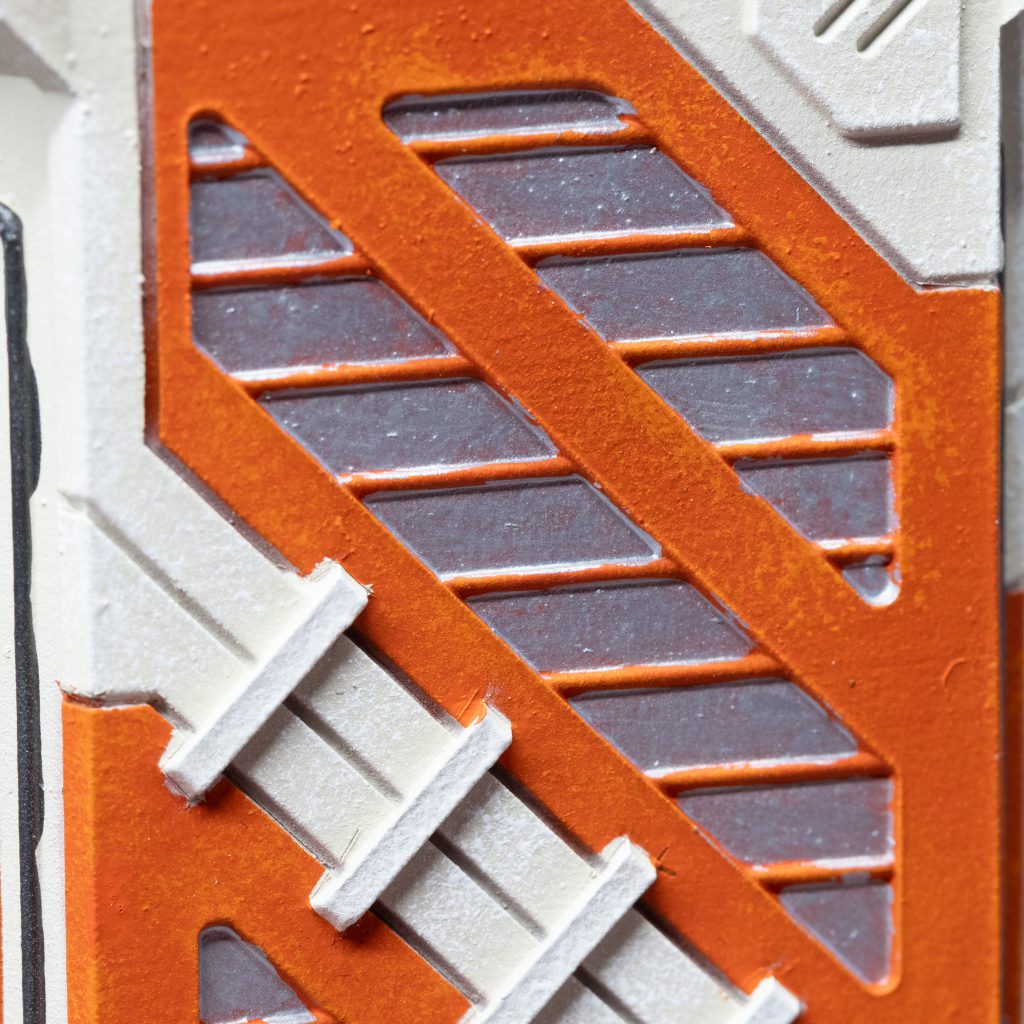
The last step before final cleanup is to cover all the silver windows with contrast paint. We’re using it more for the translucent nature than we are for how it does the contrast thing and self-highlights, as we want the reflectivity of the silver to shine through a bit. I stick to blues and greens when doing this, thinking that they’re reflecting a generally blue sky, and that different coatings on the glass will tint the colors slightly differently. That said, I’ve definitely seen building glass reflecting other colors, so don’t take this as something to strictly adhere to.
Tall orange building and short red building: Frostheart
Short orange building: Akhelian Green
Tall yellow building: Terradon Turquoise
Finally, go back in with your base coats and clean up any overspill from doing details and the window, give everything another good coat of matte varnish for protection, and then gloss varnish all the windows.
Have any questions or feedback? Drop us a note in the comments below or email us at contact@goonhammer.com. Want articles like this linked in your inbox every Monday morning? Sign up for our newsletter. And don’t forget that you can support us on Patreon for backer rewards like early video content, Administratum access, an ad-free experience on our website and more.
