


")


If you’re looking to add some extra colour to your games of Halo: Flashpoint, and really capture that multiplayer experience, then we’ve got you covered with a range of techniques catering to a variety of confidence levels.
I was really excited to get my hands on the Halo minis, but with a huge backlog and only so many hours in the day, I wanted to keep the schemes fairly simple. I’ve taken a variety of approaches, primarily centred around the GW Contrast range, with a true metallic metal armour scheme and a more involved approach for the final one. Lenoon takes a more traditional tack, offering some advice and thoughts on how to tackle those round armour panels with their sharp edges.
Mike’s Methods
While these are board game pieces, they still hold some great detail and I could tell an approach that leaned heavily on Games Workshop Contrast paints or their equivalents would give me some nice results without taking too long. I’ve taken a few different approaches, leaning on true metallic metals for two of my pieces, and a straight forward Contrast based method for the third. If you’d like to push yourself further we have a fantastic Hobby 101 series, covering a range of techniques which can be applied.
I’ve used an airbrush to prime my miniatures, but will list alternatives where appropriate that will give comparable results.
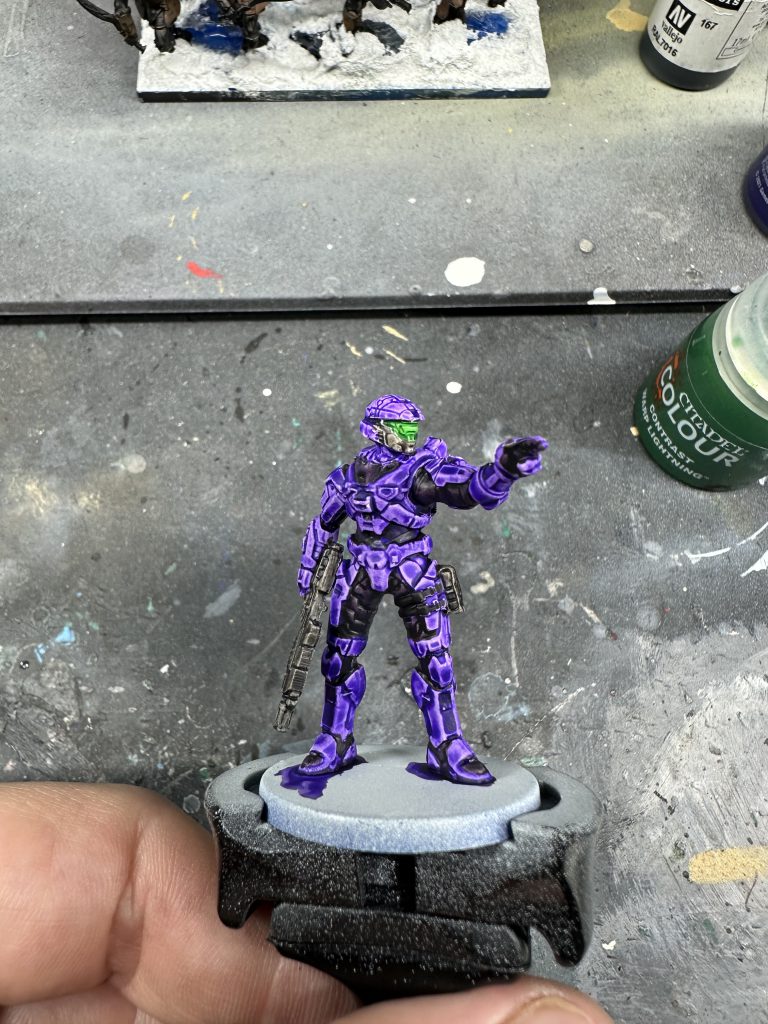
Method One – Contrast over Off-white, Spartan Mk VII
Paints used:
- Molotow One4All Nature White (229)
- Citadel Contrast Luxion Purple
- Citadel Contrast Basilicanum Grey
- Citadel Contrast Warp Lightning
You will begin by priming with Molotow One4All Nature White (229). Citadel Wraithbone primer or Colour Forge Wight Bone should give similar results.
Once the primer is dry, usually in 24 hours, you can now apply your Contrast. I picked Luxion Purple, a colour I’ve wanted to use for something for sometime after being disappointed by the initial releases of both Shyish Purple and Magos Purple. Luxion was exactly what I’d hoped it would be and I’m now thinking about where I could use it on a larger project. Apply the Luxion Purple everywhere except the visor and weapon. You should take care around the visor area, as it will save repainting it later.


Once the Contrast has dried, you can pick out the under suit areas and weapon using Basilicanum Grey. The purple applied in the previous coat will provide some additional depth to the under suit, allowing you to use a lighter colour than other methods.
Finally you can paint the visor with Warp Lightning.
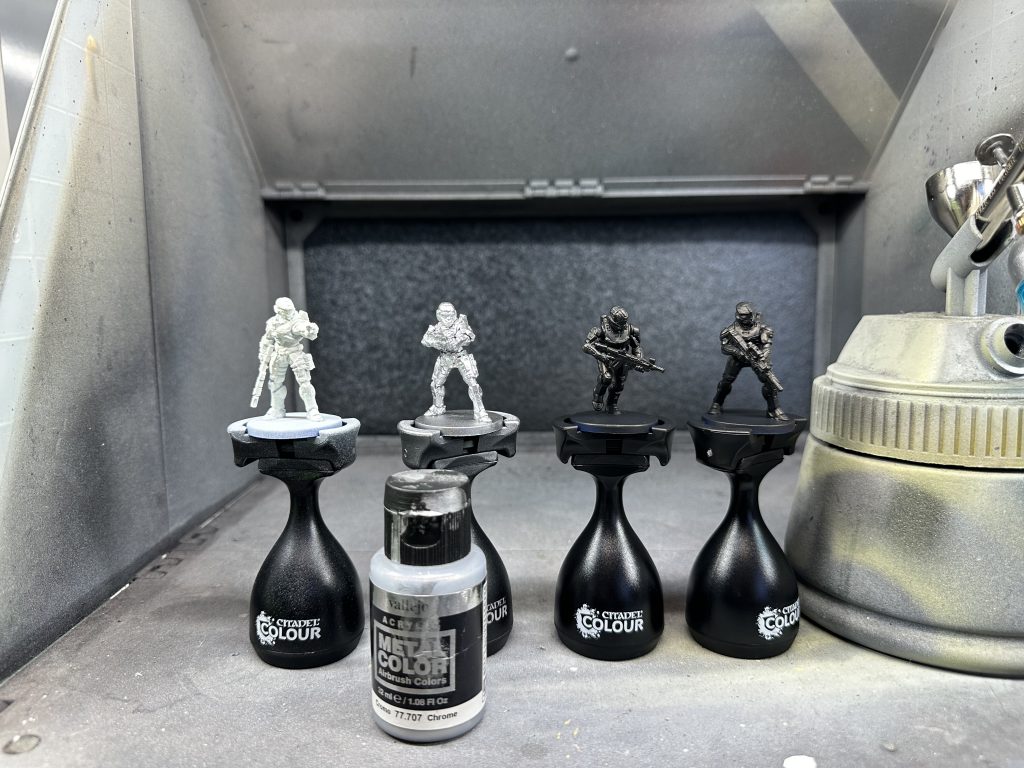
Method Two – Contrast over Chrome, Spartan Brawler
Paints used:
- Molotow One4All Signal Black (180)
- Vallejo Metal Color Chrome (77.707)
- Citadel Contrast Akhelian Green
- Citadel Contrast Black Legion
- Citadel Contrast Warp Lightning
You will begin by priming with Molotow Signal Black, Citadel Chaos Black or Colour Forge Matt Black. Once this has fully cured, you will then apply a coat Vallejo Metal Color Chrome. This is easiest with an airbrush, however Vallejo Metal Color can be brushed on if you don’t have access to an airbrush. It’s difficult to recommend a Games Workshop alternative here, but if you’re really stuck then something like Stormhost Silver will give a similar but less striking effect.


Once your chrome coat has dried, you can begin applying the Akhelian Green to the armour panels. Once this is dry you can apply the Black Legion to the under suit and weapon. Warp Lightning Green is once again used to finish the visor.
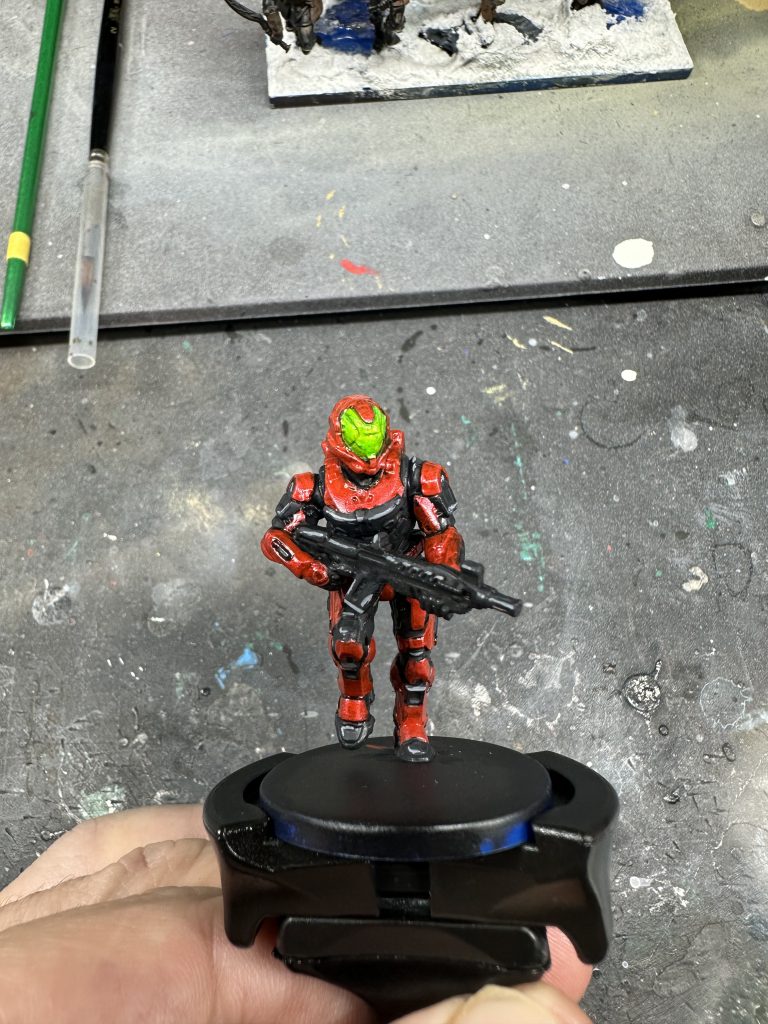
Method Three – True Metallic Metal, Spartan Svezda
Paints used:
- Molotow One4All Signal Black (180)
- Mig Ammo Metallic Red (ATOM-20174)
- Vallejo German Grey (70.995)
- Citadel Nuln Oil
- Scale 75 Scalecolor Nacar (SC-02)
- Vallejo Game Ink Yellow (70.825)
- Citadel Biel-Tan Green
- Vallejo Model Color Green Fluorescent (70.737)
Once again you start by priming matt black, allowing time for the primer to fully cure.
Next you will pick out the armour panels with the metallic red. While this has some self levelling qualities, it will still need a couple of coats for complete coverage. After you have picked out the armour panels you wish to be metallic red, it is time to paint the under suit.
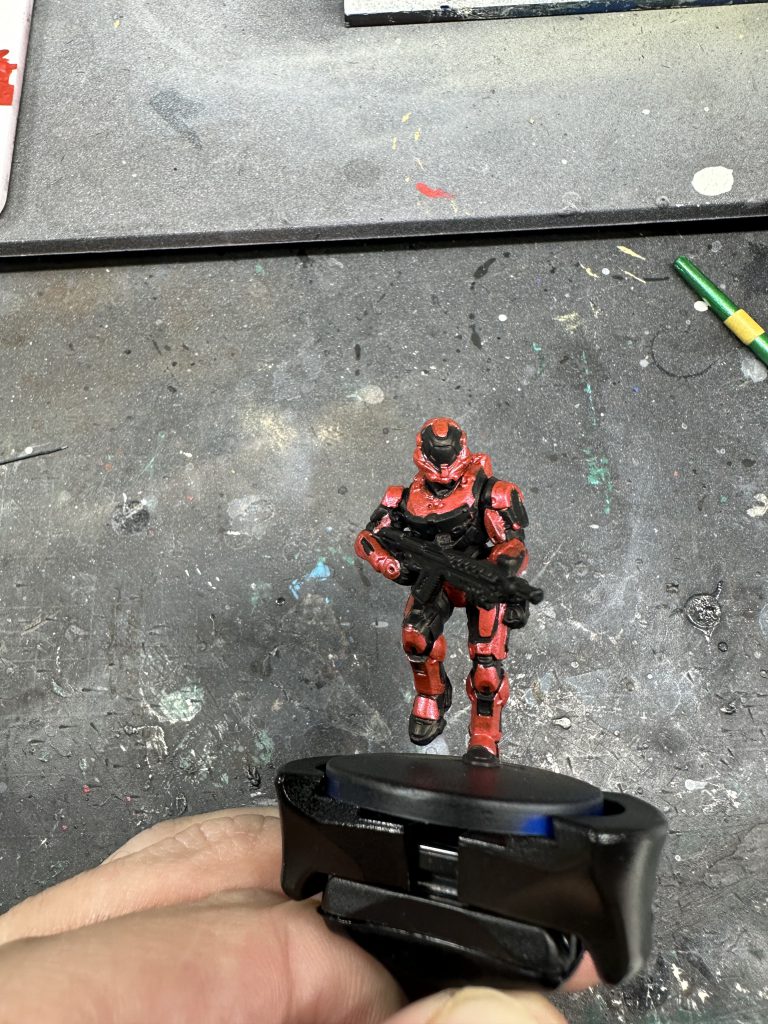
Paint the under suit and weapon with German Grey. I have found that it covers remarkably well, and a single coat should be sufficient over the black primer. Once you’re finished with the German Grey base coat, a wash of Nuln Oil should be applied to the under suit and weapon.
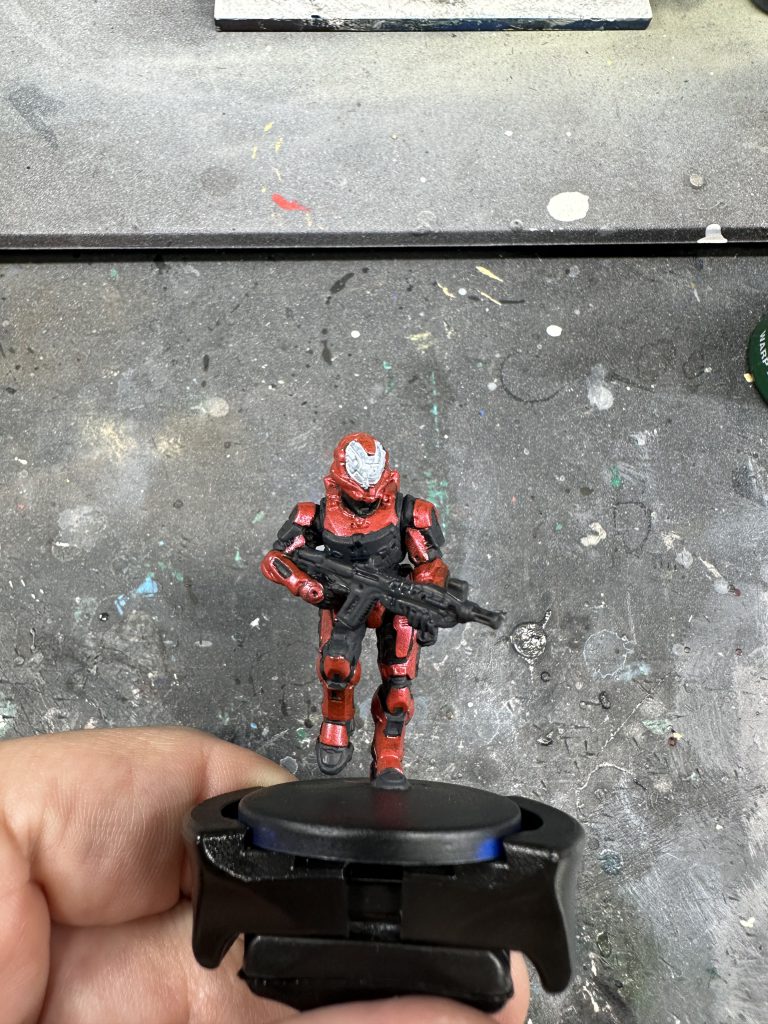
After the wash has dried, you should go back and pick out a number of hard edges on the weapon and under suit as highlights using Nacar. The front of the chest plate, shoulders, and right knee are all good candidates for this on the front. On the back of the model, the triceps area, boots and left leg armour panel edges are all good candidates.
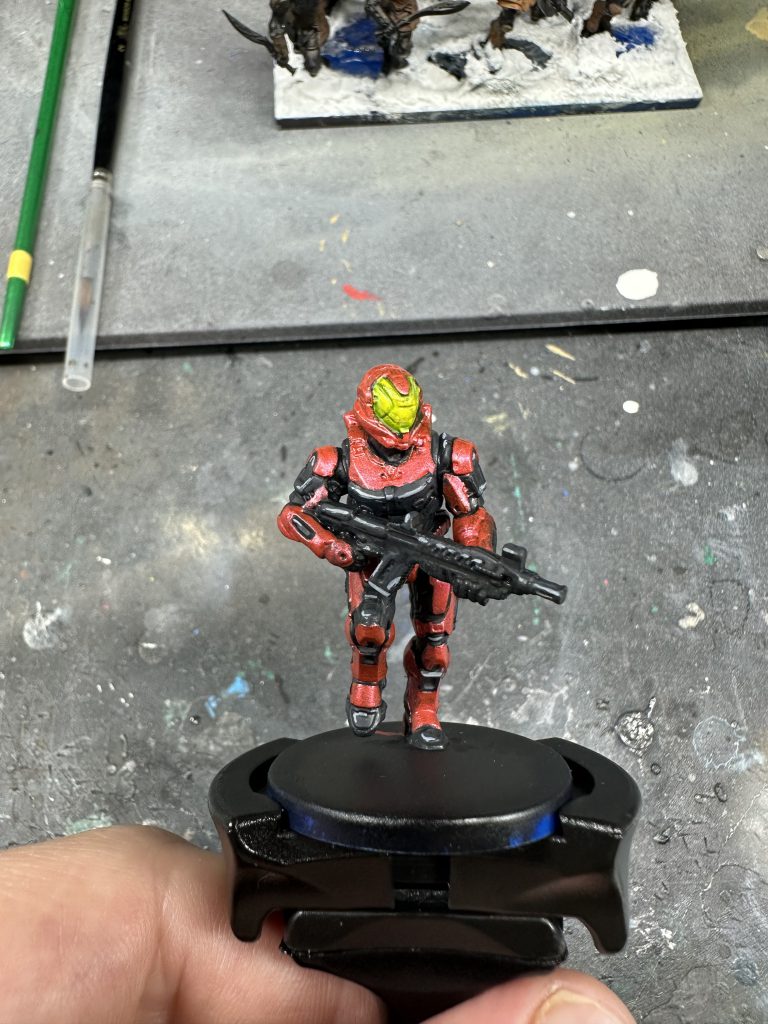
For the visor, begin by repainting the area white. Once the white has good coverage, which may take a couple of coats, cover the area with yellow ink. After the ink has dried, apply a wash of Citadel Biel-Tan Green, and then highlight with Vallejo Model Color Green Fluorescent.
If you’d like the red armour to really pop, you can apply a red glaze to the panels. For this I used Citadel Air Angron Red Clear, and you should be able to achieve a similar result with an appropriately thinned ink or heavily pigmented red.
Finishing Touches
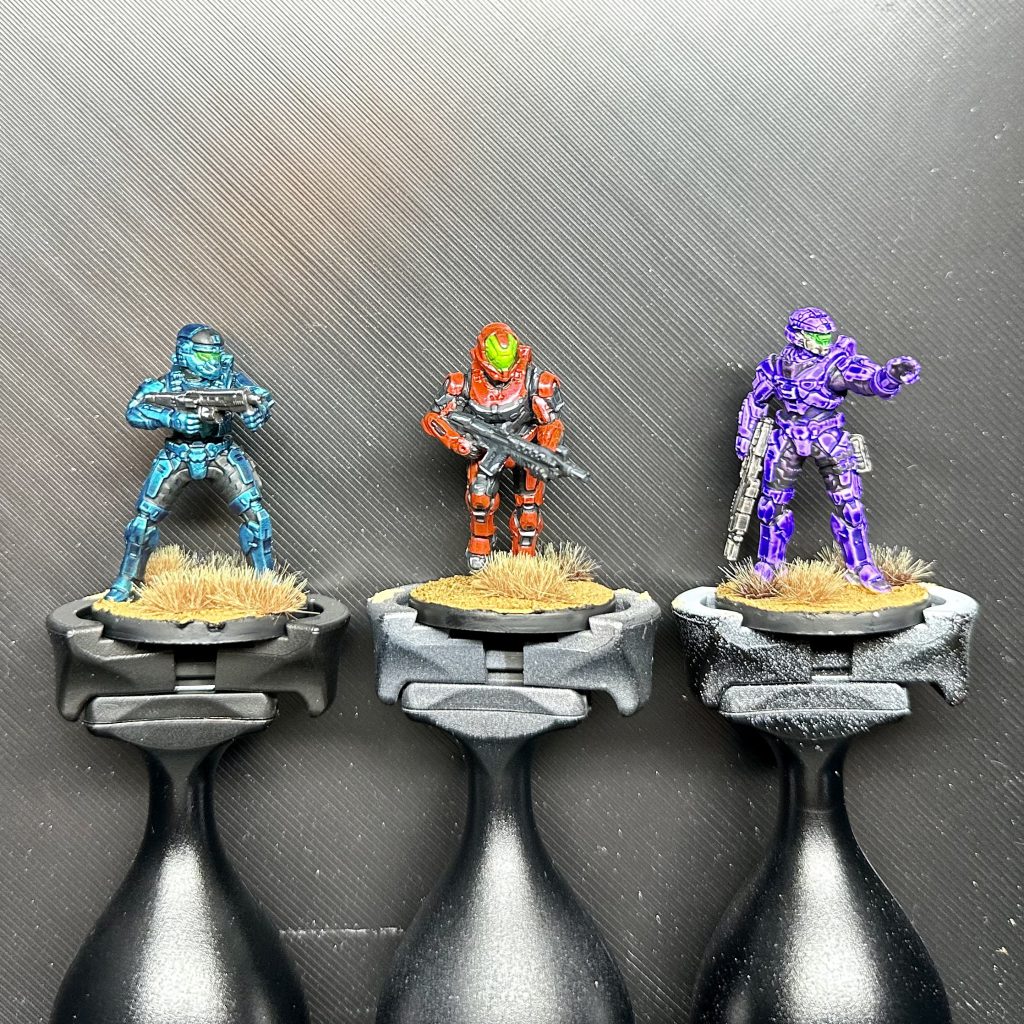
If you want to tie the disparate schemes together, a great way to do this is with a common basing scheme. It helps to ground the miniatures, and gives a visual cue that while they all may look very different, they’re fighting on the same battlefield.
Materials used:
- Mig Ammo Sand Ground (A.MIG-2156)
- Citadel Seraphim Sepia
- Gamer Grass Dry Tufts
Using an old paintbrush, PVA glue spreader, or a similar flat tool, avoiding the models feet, apply the Sand Ground paste to the base in an even layer. If you need to clean it from the model or thin the paste down, you can use water and an old paint brush to gently move it.
Once the basing paste has dried, apply a Seraphim Sepia wash to give the sand some depth. If you’d like to bring it back up to a light colour you can always dry-brush a highlight layer once the wash has dried.
After your wash has dried, you can now add some basing tufts. I’m personally a fan of the Gamer Grass tufts as they’re easy to apply and come in a huge variety of options.
Finally, you can paint your base rims black to help with a nice clean finish. If you’d like to make it easier to tell at a glance which team a Spartan belongs to, you could also paint your rims red or blue. I plan on 3D printing some base rim covers myself, so that I can mix and match teams in the future.
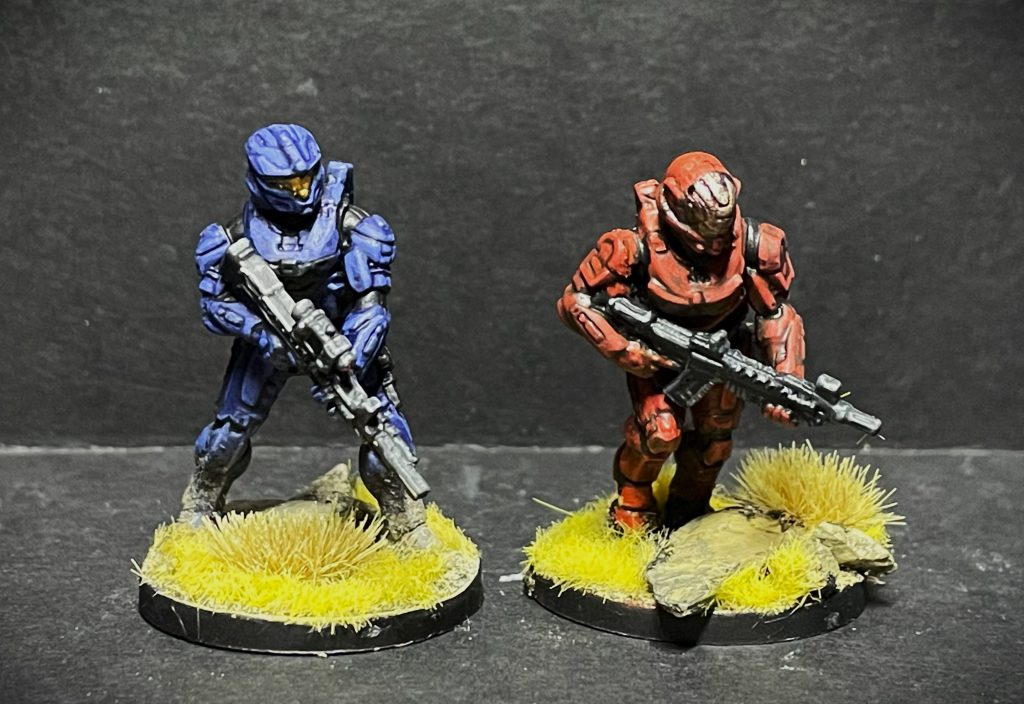
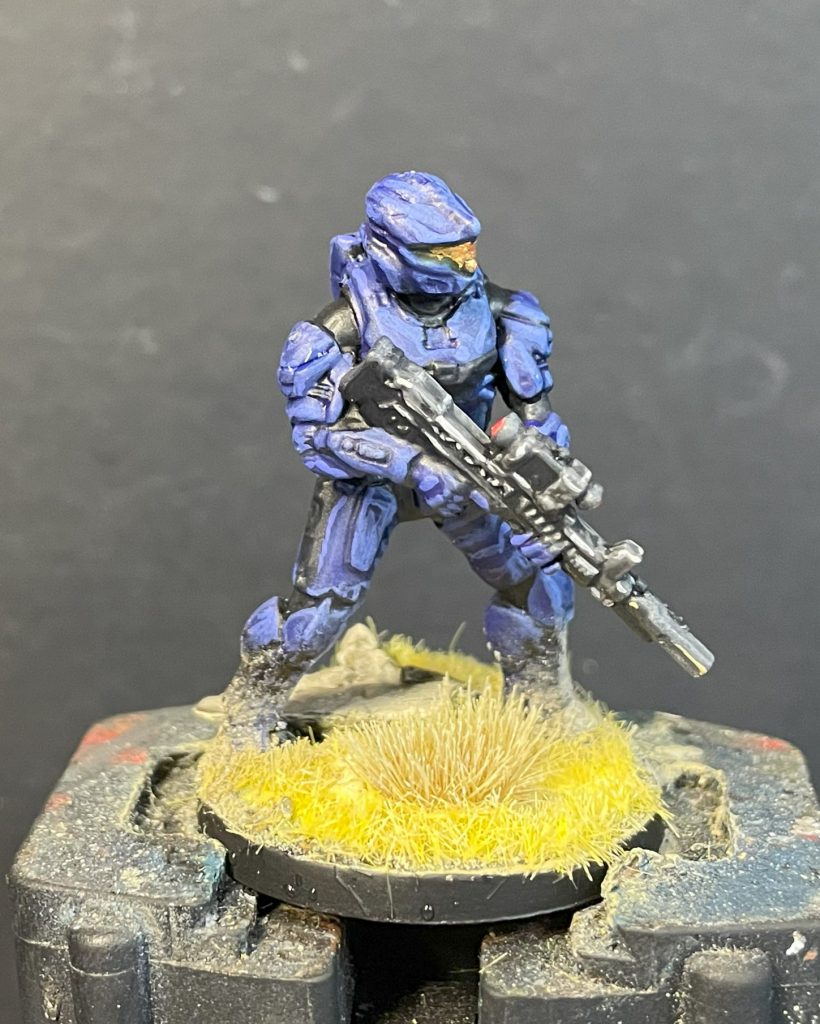
Lenoon’s Red V Blue
I spent a couple of days after receiving these fired up to recreate some of the more extreme colour schemes I’d used in various versions of Halo multiplayer, aiming to go as garish as humanly possible. After far too long thinking about it though, I wanted to go for what feels “most Halo” to me, stripping away a lot of the multi-coloured panelling and extraneous detail of MJOLNIR armour in the modern games. As Flashpoint is a Spartan firefight game, there was only one real choice. Red and, of course, Blue.
I also wanted to paint these up quickly, using simple layer and highlight methods to give a solid tabletop standard result in less than half an hour per Spartan. I’ll go step by step through Blue, with the corresponding Red colours applied in the same steps.
I primed my Spartans black with a rattlecan. Simple, but fair warning – if you’re someone who habitually really smacks the shit out of your models with spray primer, take it easy this time. While I’d say the Halo: Flashpoint models are at the top end of board game miniatures, they’re still board game miniatures, and too heavy a coat of primer will obliterate detail. A light spray is more than enough.
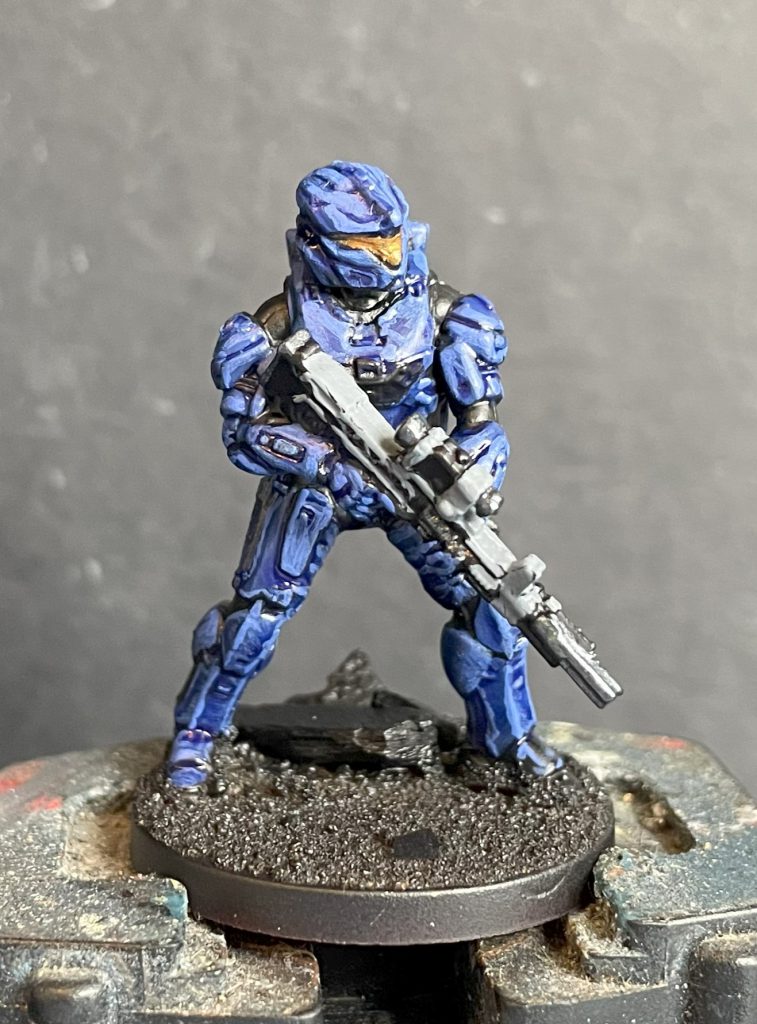
With the primer dry, I basecoated all armour areas with Army Painter Triumphant Navy, and for Red Citadel Word Bearers Red. Everything else is left primer black. Don’t worry about being too precise or attempting to delineate panels, just go for it in a nice thin coat.
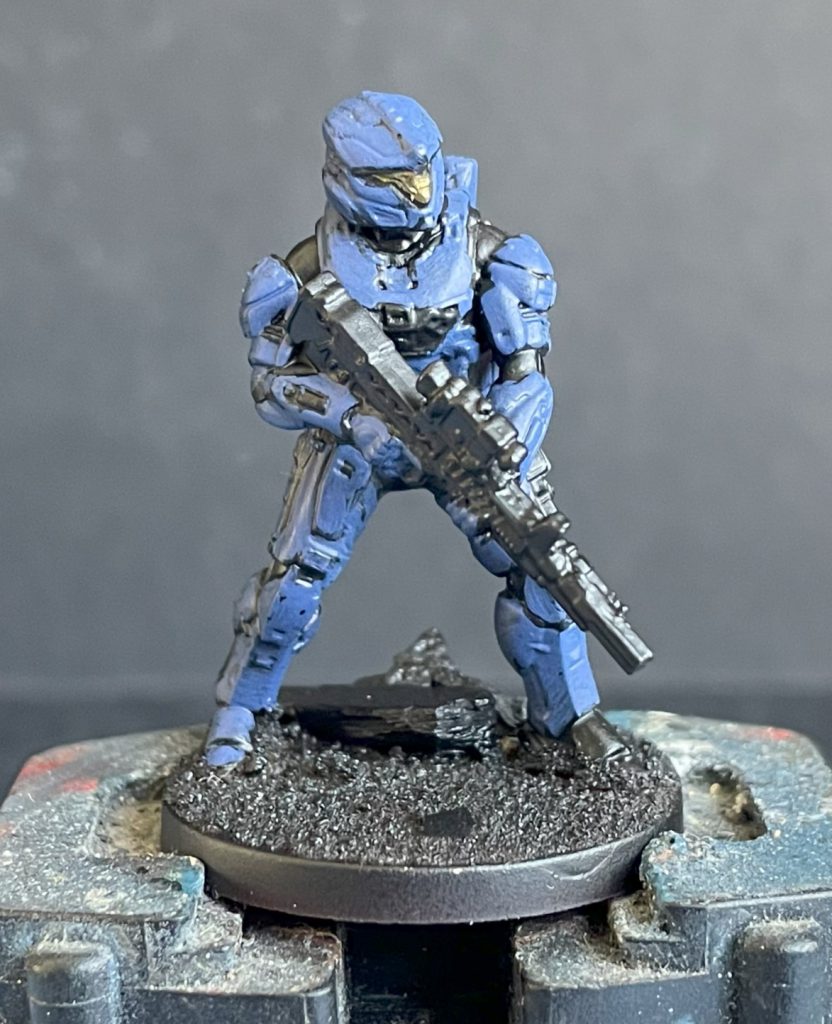
Apply a shadowing layer to bring out more richness of colour with a suitable shade for both schemes – I like to use a nice Contrast paint as a shade rather than an ink or wash, as they tend to give your colours a bit more depth. I used Citadel Contrast Ultramarines Blue and Fyreslayer Flesh on Blue and Red respectively.
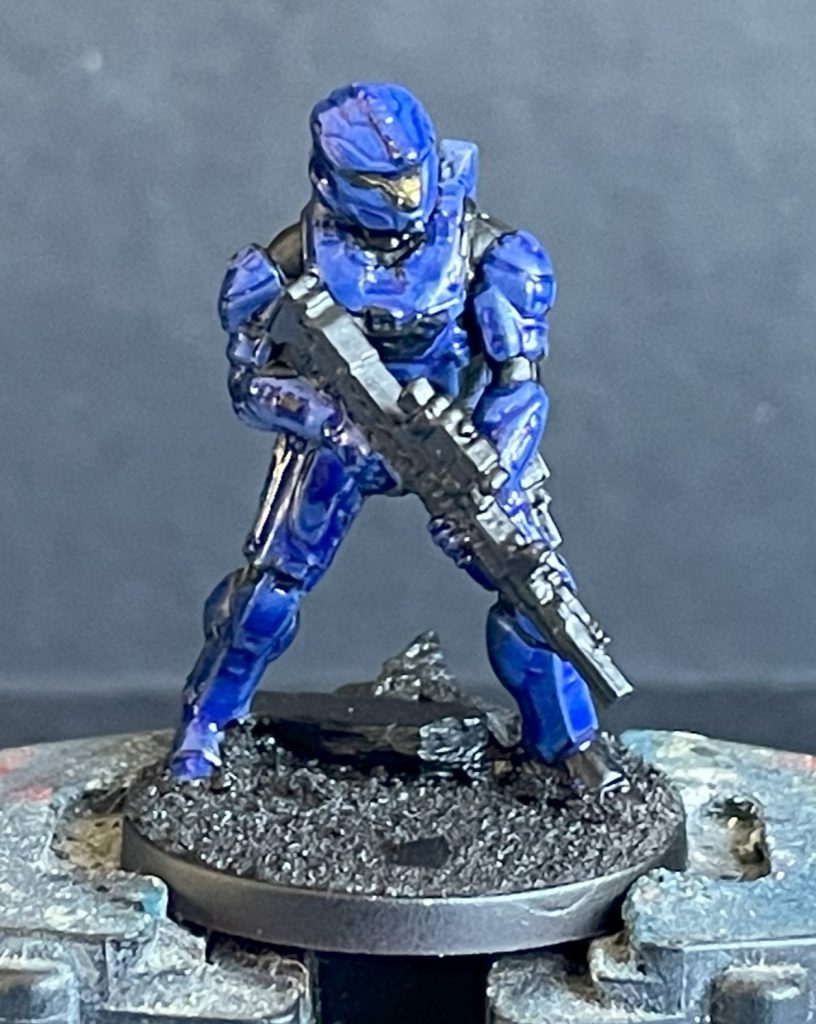
This looks pretty messy, shiny and dark, so move on to a really rough highlighting layer. Spartan armour is made up of a mix of sharp edges, highly delineated panels and curved surfaces, so neither wholly edge highlighting or wholly volumetric highlighting is ideal. Instead, I reverted back to an older way of painting, just slapping a highlight colour on and around the edges of each armour piece. This was quite a harsh highlight, using Army Painter Alpha Blue and Citadel Evil Sunz Scarlet. I was quite pleased with the blocky Halo-2-esque effect this produced (entirely accidental).
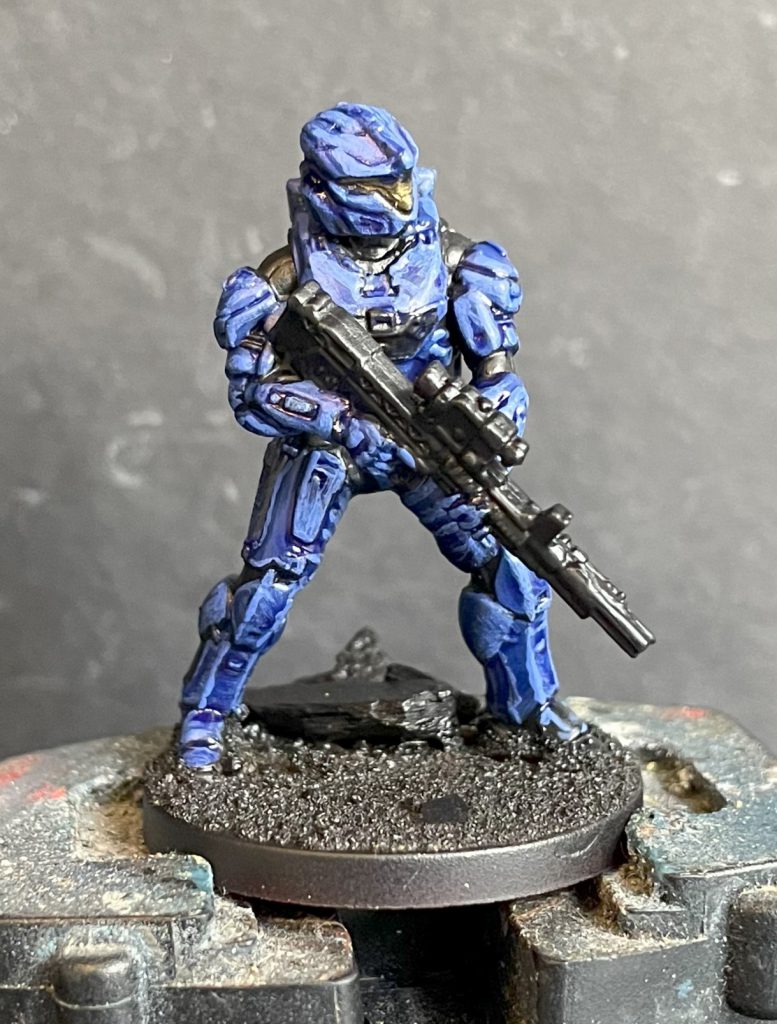
After the armour was done, I touched up any areas of the undersuit that had caught a little red or blue with black, and moved on to the weaponry. UNSC weapons in Halo don’t tend to be metallic in many places, so both guns were layered with Vallejo Model Colour Neutral Grey and an extreme highlight sparingly with Sky Grey.
The final bit of paint was some Contrast Basilicanum Grey on the guns to tie the layers together. Once all that was dry, everything was then given quite a heavy coat of Matte Acrylic varnish, which softened the transitions between the highlight layers and brought everything together quite nicely. With about 5 minutes left on the clock to finish these in half an hour, the Visors got a base of Vallejo Glorious Gold, a wash of Citadel Contrast Plaguebearer Flesh (Blue) and Citadel Druchii Violet (Red), and a final highlight of Citadel Sycorax Bronze as I desparately try and work out why I bought that particular paint.
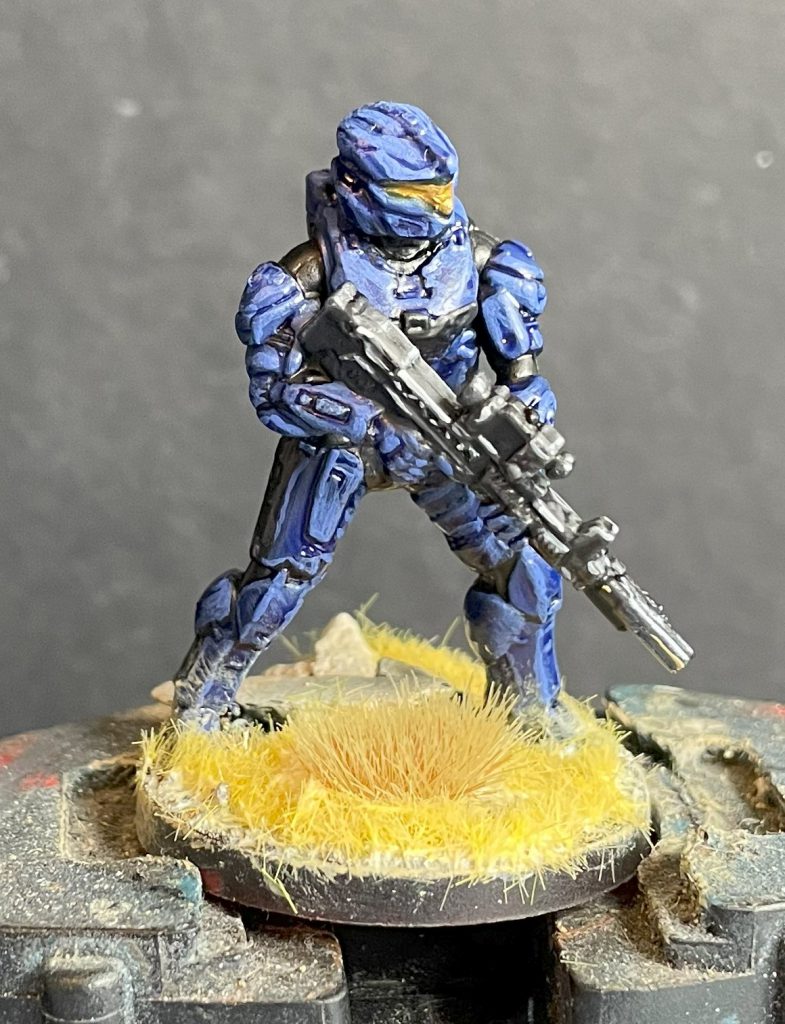
Based with some small slate pieces and a lot of bright yellow static grass, they looked almost but not quite finished at 30 minutes – a thin coat of Gloss Varnish on the visors and Citadel Blood for the Blood God on the scopes finished off the look, and they’re ready to hit the table!
That wraps up our painting guide for this release, but keep an eye out for more tutorials and coverage with the release of the Spartan edition!
Have any questions or feedback? Drop us a note in the comments below or email us at contact@goonhammer.com. Want articles like this linked in your inbox every Monday morning? Sign up for our newsletter. And don’t forget that you can support us on Patreon for backer rewards like early video content, Administratum access, an ad-free experience on our website and more.
