In our How to Paint Everything series, we take a look at different armies of the Warhammer universe, examine their history and heraldry, and look at several different methods for painting them. With Halloween fast approaching, we’re looking at how to paint the spookiest monsters around. In today’s HTPE, we’re looking at how to paint the spooky spirits that haunt the living – ghosts of all shapes and sizes.
Ghosts have been part of our collective fiction and consciousness for as long as we’ve been around. People have always imagined a life after death, and that otherworldy forces may be responsible for the odd bumps in the night and other noises. Our current fascination with ghost stories as tales of horror likely stems from the Romantic era and runs through the Victorian era that followed shortly afterward; Victorians loved to scare the piss out of each other and the Romantic period was all about gothic horror and scary stories. While some of the most famous horror stories of all time were written during this period, such as Frankenstein in 1818, it was an annual tradition for Victorians to sit around a fire and tell ghost stories during the winter months, notably at Christmas, when the ghost of Jesus roams the earth looking for naughty children to devour. So why isn’t this still a big annual tradition? Well, mostly because the Puritans were some of the shittiest, dullest people in history and when they left England they decided to leave those rad traditions behind.
Where to Read/Watch More
That’s not to say there weren’t great ghost stories in America afterward, though – America had some all-timers in the 19th century ghost story department, such as Edgar Allen Poe. But England had Charles Dickens, who wrote the ultimate Christmas ghost story with his A Christmas Carol in 1843, which saw the miserly Ebenezer Scrooge being visited by three ghosts on Christmas Eve who scare the shit out of him and cause him to give his single employee a marginal raise on the off-chance it spares him eternal torment.
In Age of Sigmar, Nighthaunts are the ghost faction and they have some pretty cool rules, plus a giant Skeleton leader in Nagash, the god of the dead.
Anyways, here are some other rad ghost stories and movies:
- Crimson Peak, a 2015 film from Guillermo Del Toro, is perfectly in this vein of Victorian horror themes, combining the time period with romance, mystery, and gothic horror. It’s a visually striking film with some great performances.
- The Haunting of Hill House, written in 1959 by Shirley Jackson, is a classic and an all-timer when it comes to gothic horror and ghost stories. The 2018 Netflix series adaptation is also pretty excellent.
- Stanley Kubrick’s adaptation of Stephen King’s The Shining is another all-timer and one of the greatest films ever made.
- There have been a ton of great ghost movies from the West over the last 10 years worth checking out. To name a few: The Conjuring, Insidious, The Orphanage, Mama, A Ghost Story, The Autopsy of Jane Doe, and The Others.
- The Japanese are also horror masters when it comes to ghosts, and there are some great movies coming out of Japan to check out. In particular, some classics to check out are Ringu, Ju-on: The Grudge, Pulse, and Hausu.
- If you’re looking for lighter ghost story fare, check out Beetlejuice or ParaNorman, both of which are solid but less scary.
Painting Ghosts
Painting ghosts is primarily about painting ethereal effects, and figuring out how you’re going to visualize whispy, transparent models. This can often mean lots of whites and off-whites, usually with blues and greens. The process can be intimidating if you’re new to painting, and there are multiple ways to tackle this challenge.
PierreTheMime – Nighthaunt
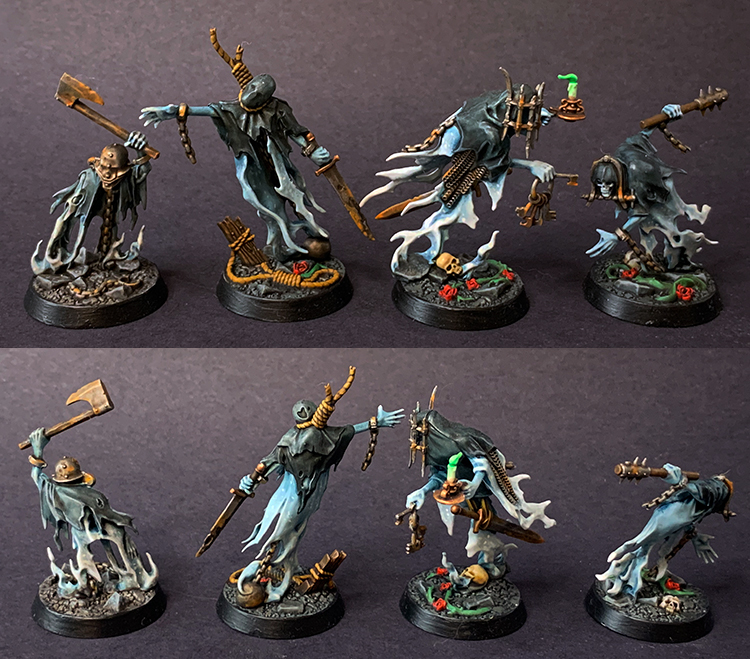
Ah, the Nighthaunt. I’ve always loved direction Games Workshop took with these spooky spectres and for years I have been looking for a reason to get into them. Eventually I was roped into trying out Warhammer: Underworlds and I took that as the perfect opportunity to pick up the models from the Nightvault set and eventually a few other ETB sets (such as the Glaivewraith below). Coming primarily from 40K, I found these models a refreshing change of pace and I’ve convinced myself that over time I’ll probably slow-build to a decently-sized AoS force. Unlike pretty much all of my 40K armies, however, I’m probably going to uncharacteristically paint what I like instead of what is good. This will probably upset future-me, but present-me is having a good deal with fun.
When it comes to ghosts you really can’t go wrong with the “classic” look. I decided I wanted their incorporeal form to be similar to the official paint scheme, with just a few tweaks to personalize it. Thankfully, a couple paints and techniques make this scheme quick and easy with pretty solid results.
Firstly, prime I primed the models in Wraithbone spray. Most of the models up to now I’ve fully assembled and painted, though there may be some of the larger ones like the Mortis Engine I might sub-assemble/paint
Hit all of the ghostly-bits with Nighthaunt Gloom, allow to dry, and then do a coat of Black Templar contrast over the cloth portions.

Paint any metallic surfaces with Leadbelcher and any wooden surfaces with Skrag Brown. Some models have other bitz that call for more color depending on the unit, so you can opt for whatever you feel fits best here. I’m a big fan of Balthasar Gold for a dark copper/gold tone for precious metals. Once the silver portions have dried, sparingly apply a 50/50 Fire Dragon Bright/Water mix to knicks, dents, and other places you’d like to see rusted. Apply a thin layer at first, then go over a few places to raise the rust-level more.
Start gently applying thin layers of a 40/40/20 mix of Nighthaunt Gloom, Wraithbone (the paint), and water to the central/lower part of the ghosts “body”. Make sure to keep the application thin and catch any pooling. Continue this for at least a few coats, moving slowly lower on the body with each. Apply the same technique to the models arms/hands and face (when not covered) but be careful not to overdo it, as those bits have a lot of detail you want the gloom to deepen. Once you feel you’ve reached a good saturation on the lower sections you can take a break there.

Apply Agrax Earthshade to the corporeal parts of the model, including the clothes and weaponry. DO NOT apply to the ghostly blue/white portion, as this will stain it pretty dark and you want your ghost to be unnaturally luminescent. Once the shade has dried, edge the wooden pieces with your base brown, and go back over the rust with a final layer of orange in places to bring out the color.
Next, brighten the raised/lower portions of the ghost and their hands/face with a 60/40 mix of Wraithbone/water. As before, continually draw the watery paint down the model to avoid pooling and make the transition smooth. Once the model has dried, I like to apply small “dots” of brighter color in places to give off the appearance of shimmering (or spectral dust or whatever you want to justify it as). This breaks up just a constant smooth surface and adds a little interested detail without much effort. Just be sure to make the dots small, mostly pin-prick sized.
Finally, do another round of brightening with a 40/20/40 mix of White Scar/Wraithbone/water on the edges of the ghost. Use any remaining paint to add additional dots.

Congratulations, your model is haunted! At this point you can proceed to do your base however you like (which I will not include here, because the ground is not a ghost and thus not the purview of this article).
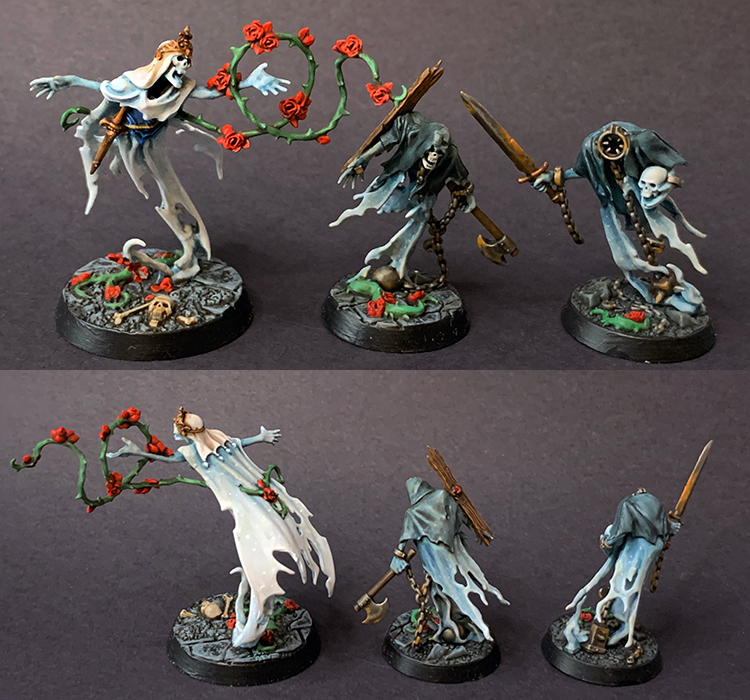
Here’s a finished set of The Thorns of the Briar Queen, which I swear I will use one day, but until then I enjoy them on the shelf.
Beanith’s Extra Spooky Ghost
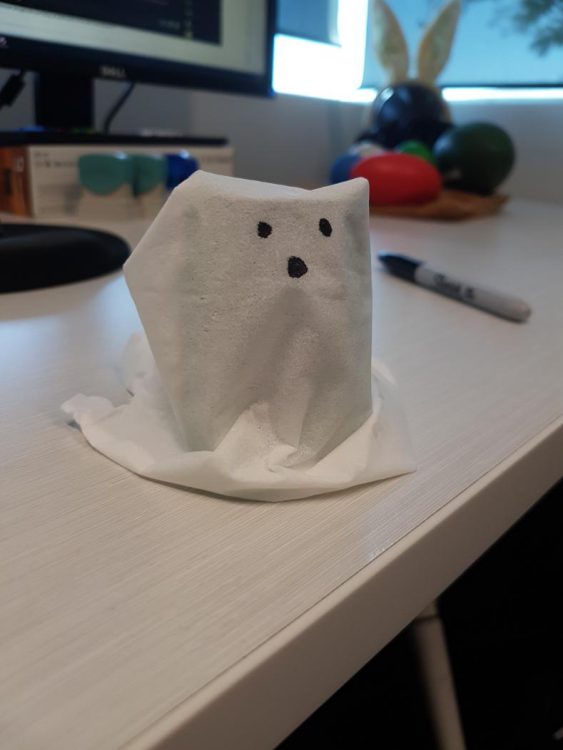
Step 1. Grab a tissue, a marker pen and a random miniature.
Step 2. Enjoy a hard earned nap after knocking this one out of the park.
Rob’s Note: God dammit, Beanith. We talked about this.
Beanith’s “Because the Editors made me redo this” Quick and Dirty Contrast Guide
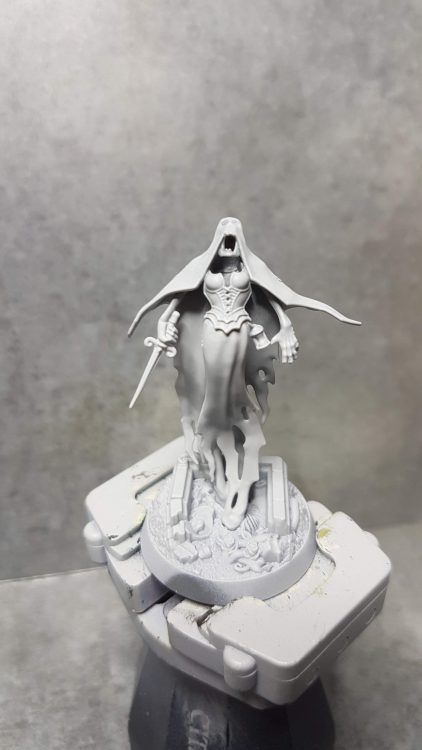
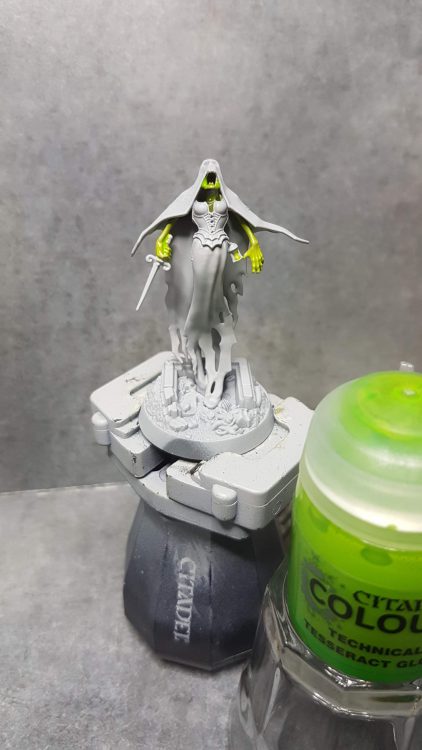
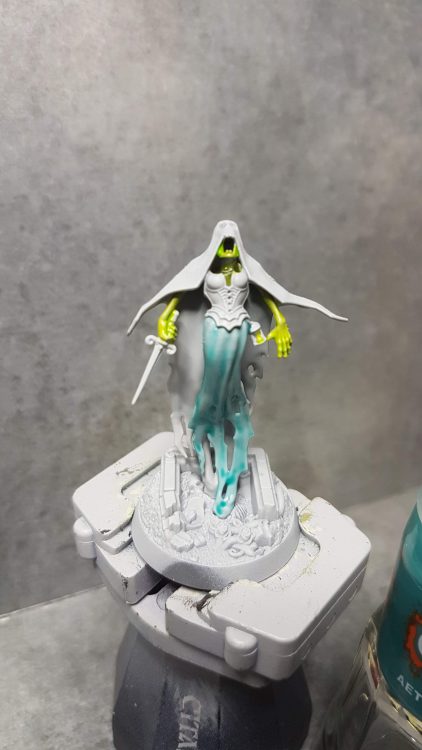
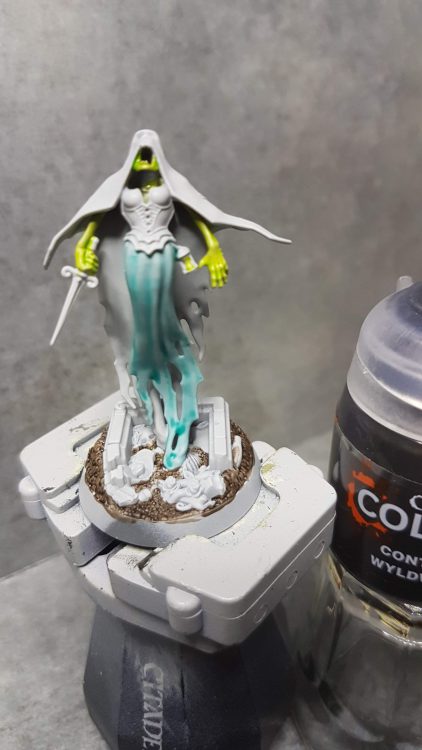
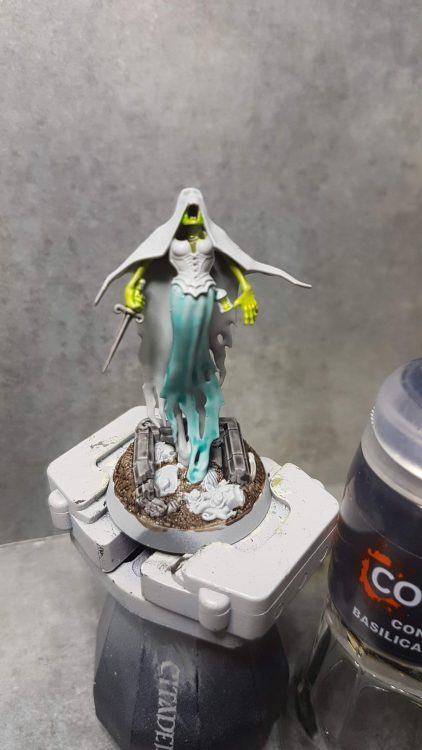
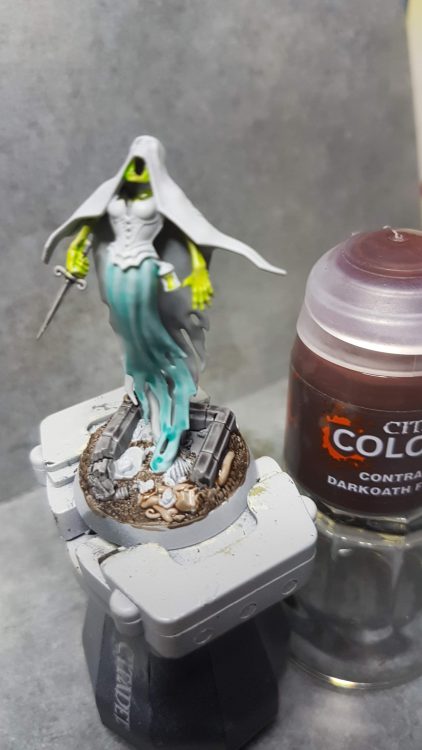
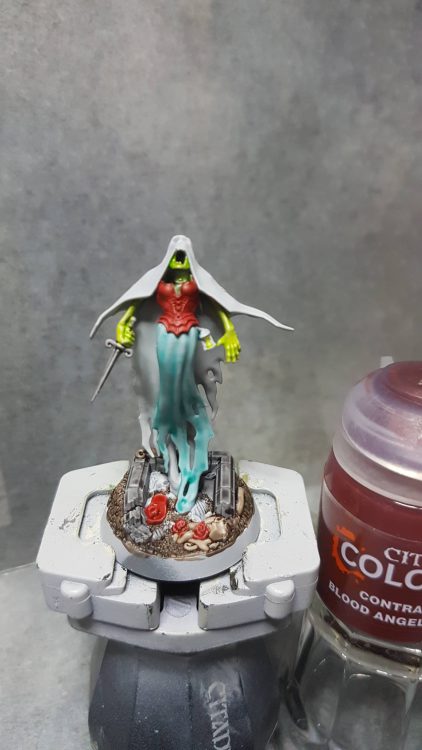
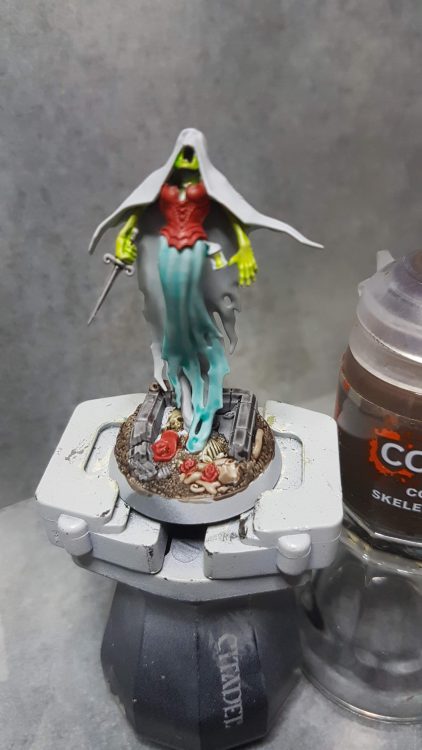
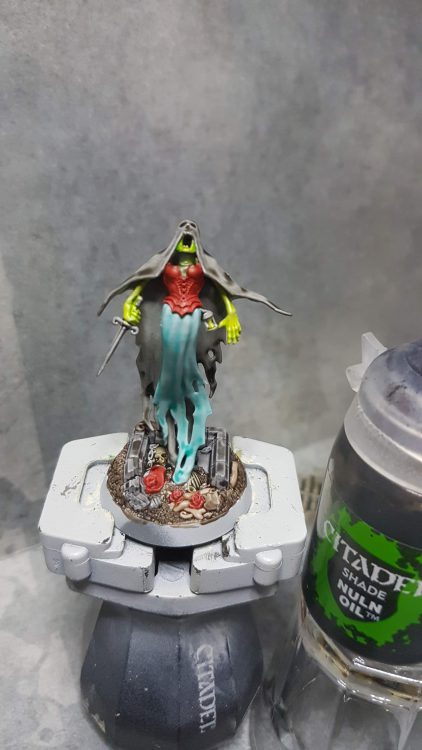
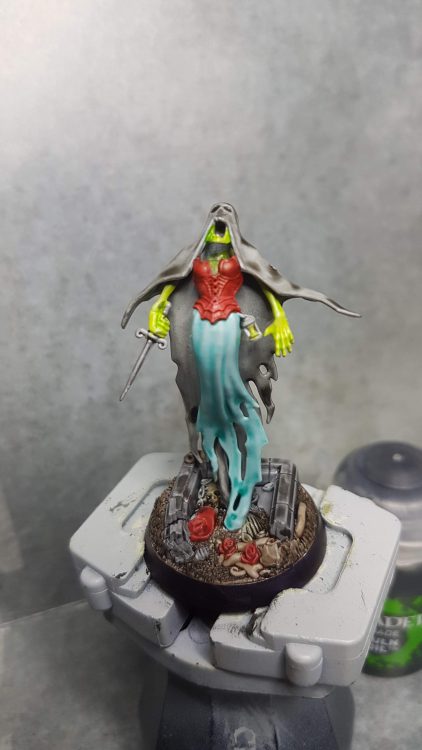
Bosh, job done son. Although I am tempted to go back and add some gold lines to the corset… one day…
Rockfish’s Method – Thorns of the Briar Queen
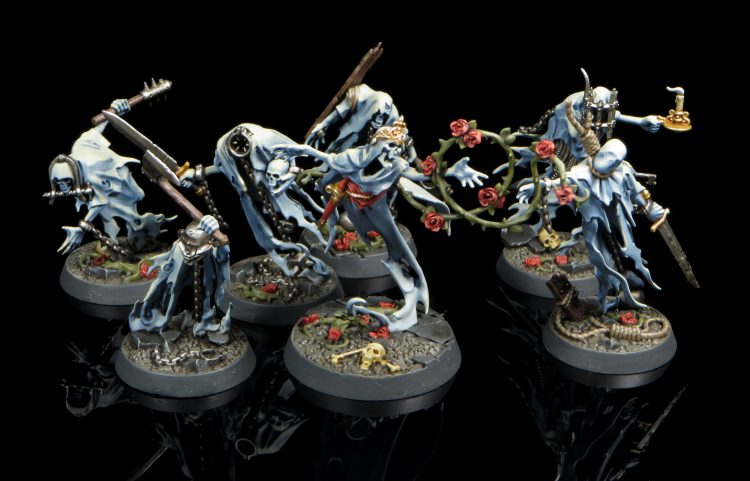
Unfortunately I don’t have step by step photos for these fellows, but they were pretty simple! I started by seeing how much I could cheat with the airbrush using it to set up the initial zenithal coat, beginning with pure Fenrisian Grey and slowly working in Flayed One Flesh until I was happy with the level of contrast. I then picked out the most extreme recesses with a bit of Drackenhof Nightshade, and then the extreme highlights with almost pure Flayed One Flesh.
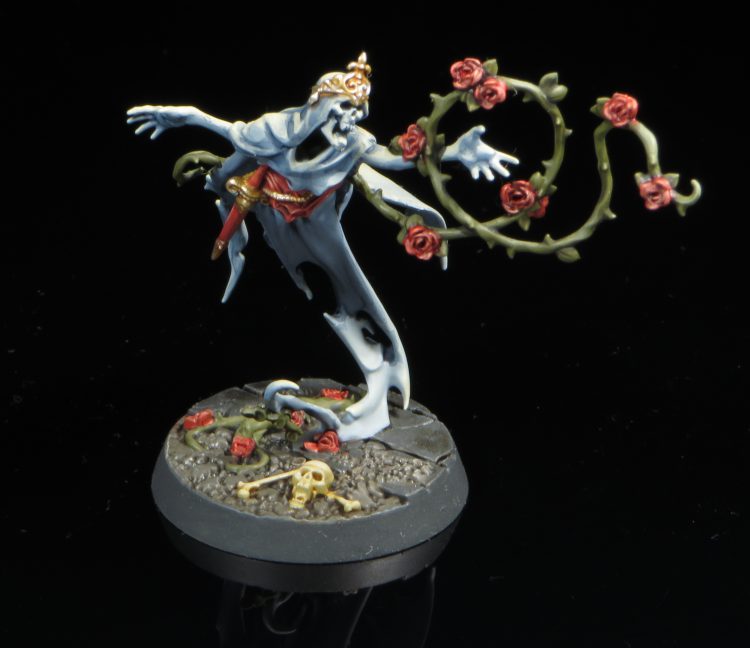
When I did these I was experimenting with using a single common colour to lighten the original base coat colour into a highlight, this would be Flayed One Flesh for everything but the metals. The vines were Death World Forest washed Athonian Camoshade, with the flowers being Wild Rider Red washed Carroburg and extreme recesses of Druchii Violet.
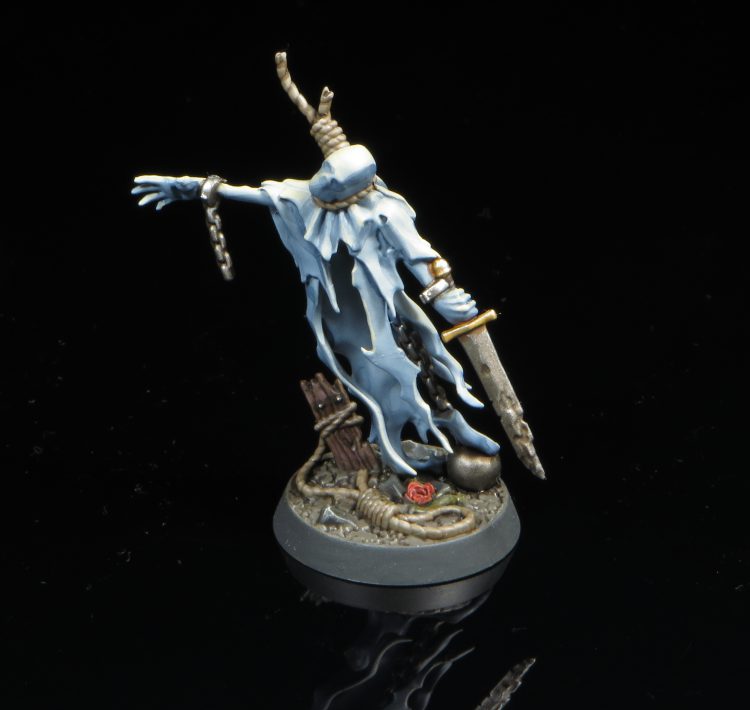
The rope was Baneblade Brown washed with Agrax at the same time as dryad bark for the wood. The gold was Retributer washed with Reikland Fleshshade before a highlight of Liberator, the rest of the metal was a fairly simple base coat of Leadbelcher, washed Agrax, and then highlighted Stormhost silver.
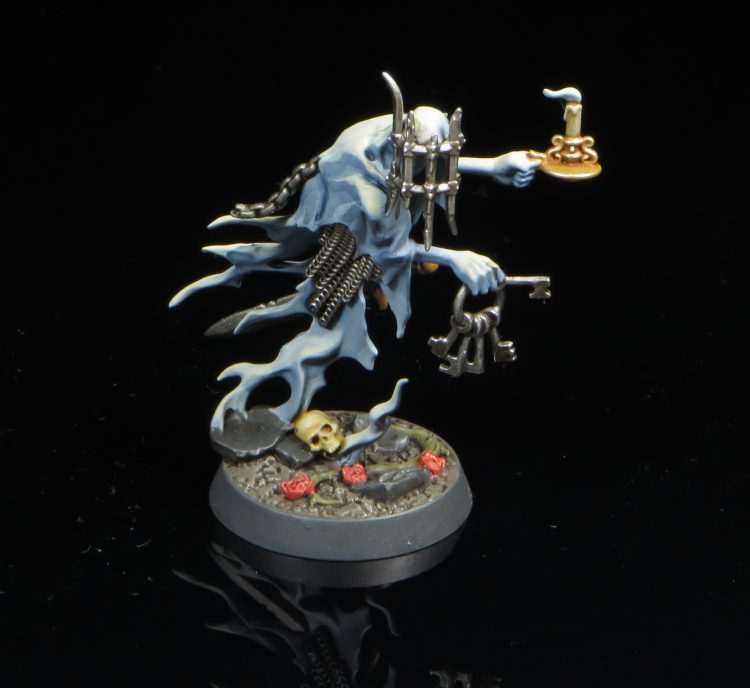
For the bases the stone was Skavenblight Dinge, the dirt Stormvermin Fur, and bone Ushabti, all with a wash of Agrax before the standard Flayed One slowly mixed into the base coats for highlights.
Skails’ Method
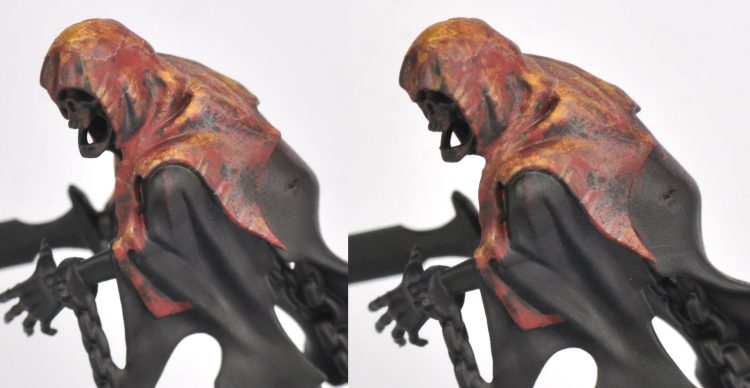
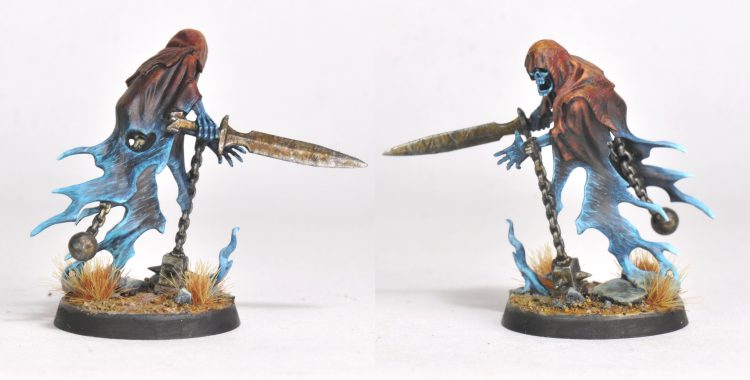
In this step by step I do a lot of stippling, streaking, and short slashes in place of the more typical layering. I’m building up transitions in the same way, but the process builds up more texture in each step. The steps I take are laid out in sequence for this description but any step can be followed by any other to fine tune and tweak the highlighting and shadow, and will in turn also make more interesting textured transitions. My two primary hues are a reddish brown and a light blue. Each hue is built up using a dark tone, a mid tone and a light tone. Mahogany, Burnt Umber, and Yellow for the reddish brown. Then Dark Blue Grey, Temple Guard Blue, and Turquoise for the light blue.
Paints used for hood:
Citadel Khorne Red
Pro Acryl Mahogany
Pro Acryl Burnt Orange
Vallejo Game Color Sun Yellow
Scale 75 Hyek Yellow
Pro Acryl Coal Black
Steps 1– Solid Khorne Red base coat. This takes two or more layers to get good coverage.
Step 2- Stipple Mahogany in the recesses and edges of the hood cloth.
Step 3- Burnt Orange stipple areas where light falls, upward and forward facing angles, highest creases.
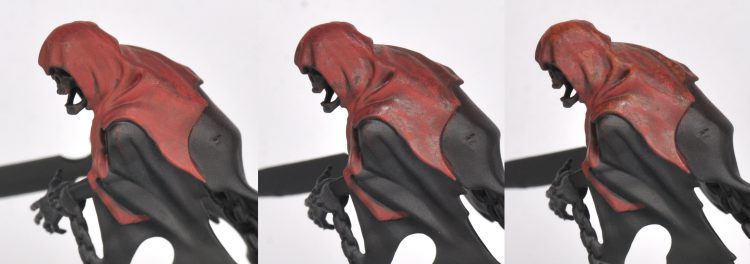
Step 4- Burnt Orange mixed 1:1 with Sun Yellow stippled over smaller area of last step.
Step 5- Mix 1 part Sun Yellow with previous mix and stipple over smaller portion of previous layer. Also in this picture is a stipple of Coal Black + Mahogany 1:1 mix stippled on downward and side facing angles.
Step 6- Coal black stippled in the recesses and shaded angles as before. Also thin slashes are drawn from the edges of the cloth toward the center

Step 7- Hyek Yellow mix 1:1 with Sun yellow spot highlights on previous yellow, and also used to underline the black slashes on edges of cloth. A saturated glaze of Hyek yellow was dropped on the top of head and on the most illuminated part of back. It left the tide marks of thin curvy lines.
Step8- The final step was a light drybrushing of Burnt Orange mix 1:2 with Hyek Yellow and a small bit of Sun Yellow. This was done mostly in the higher light areas.
Paints used for robes, skin and skull:
Citadel Khorne Red
Citadel Incubi Darkness
Pro Acryl Dark Blue Grey
Citadel Temple Guard Blue
Pro Acryl Turquoise
Vallejo Game Color Dead White
Pro Acryl Coal Black
Pro Acryl Burnt Orange
Step 1- Khorne Red mixed 1:1 with incubi darkness for the robes. A couple coats of this were put over most of the robe parts. The ectoplasm part was left black. A solid base coat of Dark Blue Grey was put on the skin and skull, along with a thick line tracing the edges of the robe below the arms, and all the ectoplasm.
Step 2- Dark Blue Grey mixed 1:1 with Temple Guard Blue along the smaller portion of the previous Dark Blue Grey layer, highlighting the edges and also streaking across the ectoplasm in a slash from top left to bottom right. Hit the broader highlights on the Skull and Skin with the same mix.
Step 3– Temple Guard Blue on a tighter edge highlight of the ectoplasm This was also used for short slashes and a bit of stippling in the same orientation as the previous streaking. Tighter highlight of skin and skull.
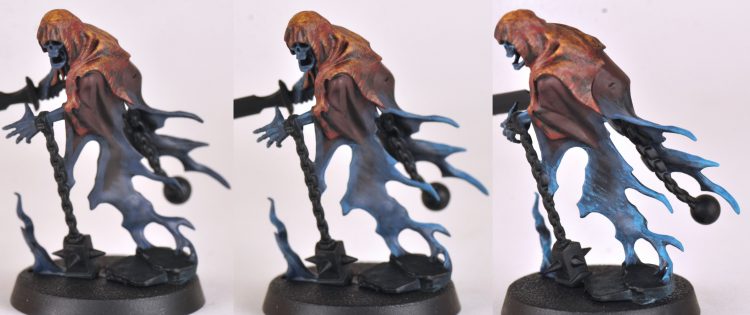
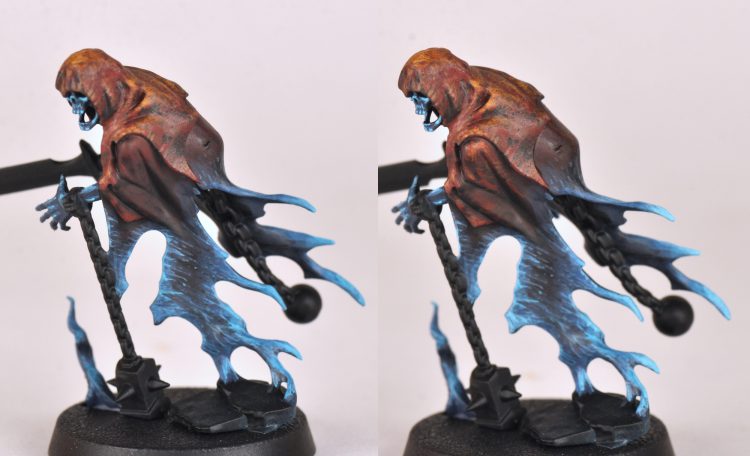
Step 4- Turquoise streaks & stippling across ectoplasm and finer edge highlight. Coal Black is then streaked across center of ectoplasm, used as a targeted recess shade between hood and robe, and streaked into the deepest creases in robe and shadows. Khorne red hitting the most raised creases and light facing angles. Finer highlight of skin and skull.
Step 5- Burnt Orange highlight on top of shoulder and arm as well as light facing angles. Turquoise mixed 1:1 with Dead White tighter edge highlight on ectoplasm, skin, and skull. Also painted heavier toward ends of ectoplasm.
What Lies Beyond
That wraps up our painting tutorial on ghosts and other spooky apparitions from beyond. As always, if you have any questions or feedback, feel free to drop us a note in the comments below or email us at contact@goonhammer.com.
