
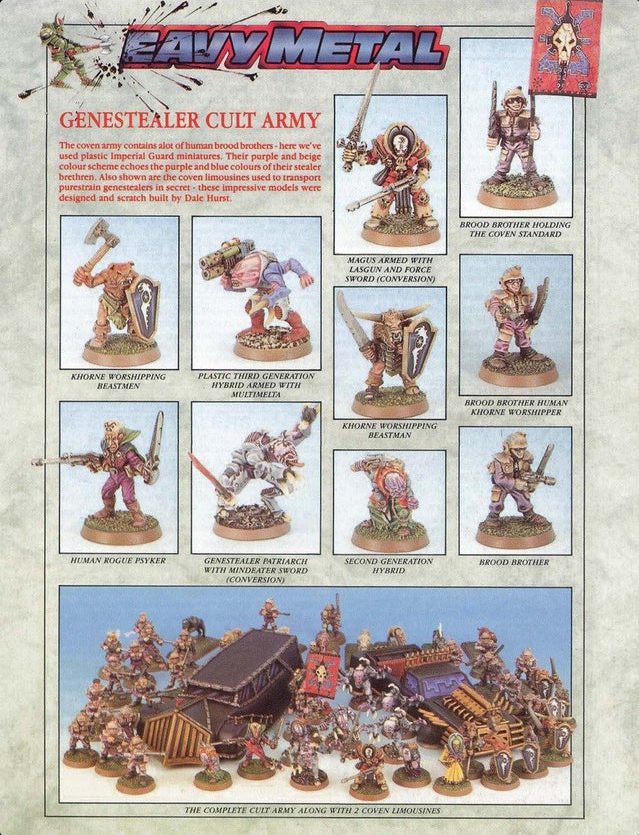
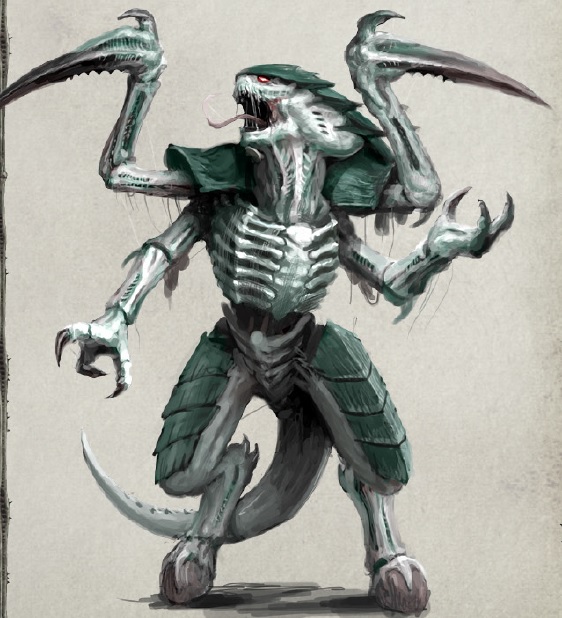
In our How to Paint Everything series, we take a look at different armies of the Warhammer universe, examine their history and heraldry, and look at several different methods for painting them. In this article we’re looking at how to paint one of the Imperium’s worst threats from within, the Genestealer Cults.  Despite being a recent army addition for most, the Genestealer Cults are one of the oldest factions in Warhammer 40,000, appearing in Rogue Trader as an insidious force resulting from infection by Genestealers. In their earliest incarnations, Genestealers were just another alien race, spreading form the moon of Ymgarl, completely separate and unconnected to the Tyranid threat (though they’d later be identified as the vanguard Hive Fleet Behemoth as the fluff was revised). Genestealers got a scarier (and decidedly alien-inspired) overhaul with the release of the Space Hulk board game, which also reintroduced them as a more sinister, widespread threat capable of infecting humans and other races. Old school Genestealer Cults had some incredibly funky models and relied a lot on conversions.
With the release of the 2nd Edition Warhammer 40,000 Codex: Tyranids, Genestealers were officially folded into the larger Tyranid grouping, becoming the vanguard of Tyranid hive fleets, infecting local populations and driving them to sabotage local infrastructure in preparation for the fleet’s arrival. Genestealer Cults received their first full army list under these rules, giving them access to Patriarchs, Magoses, and Cultists of various generations, signifying how close or far they are from the purestrain Genestealer DNA that births the cult. After receiving no model support in 2nd edition Warhammer 40,000, Genestealer Cults vanished when 3rd rolled around, and didn’t show back up until the end of 7th edition, when they were re-released as an entirely new army, focused on a mix of cultists and infected Astra Militarum Imperial Guardsmen to create powerful insurgent forces.
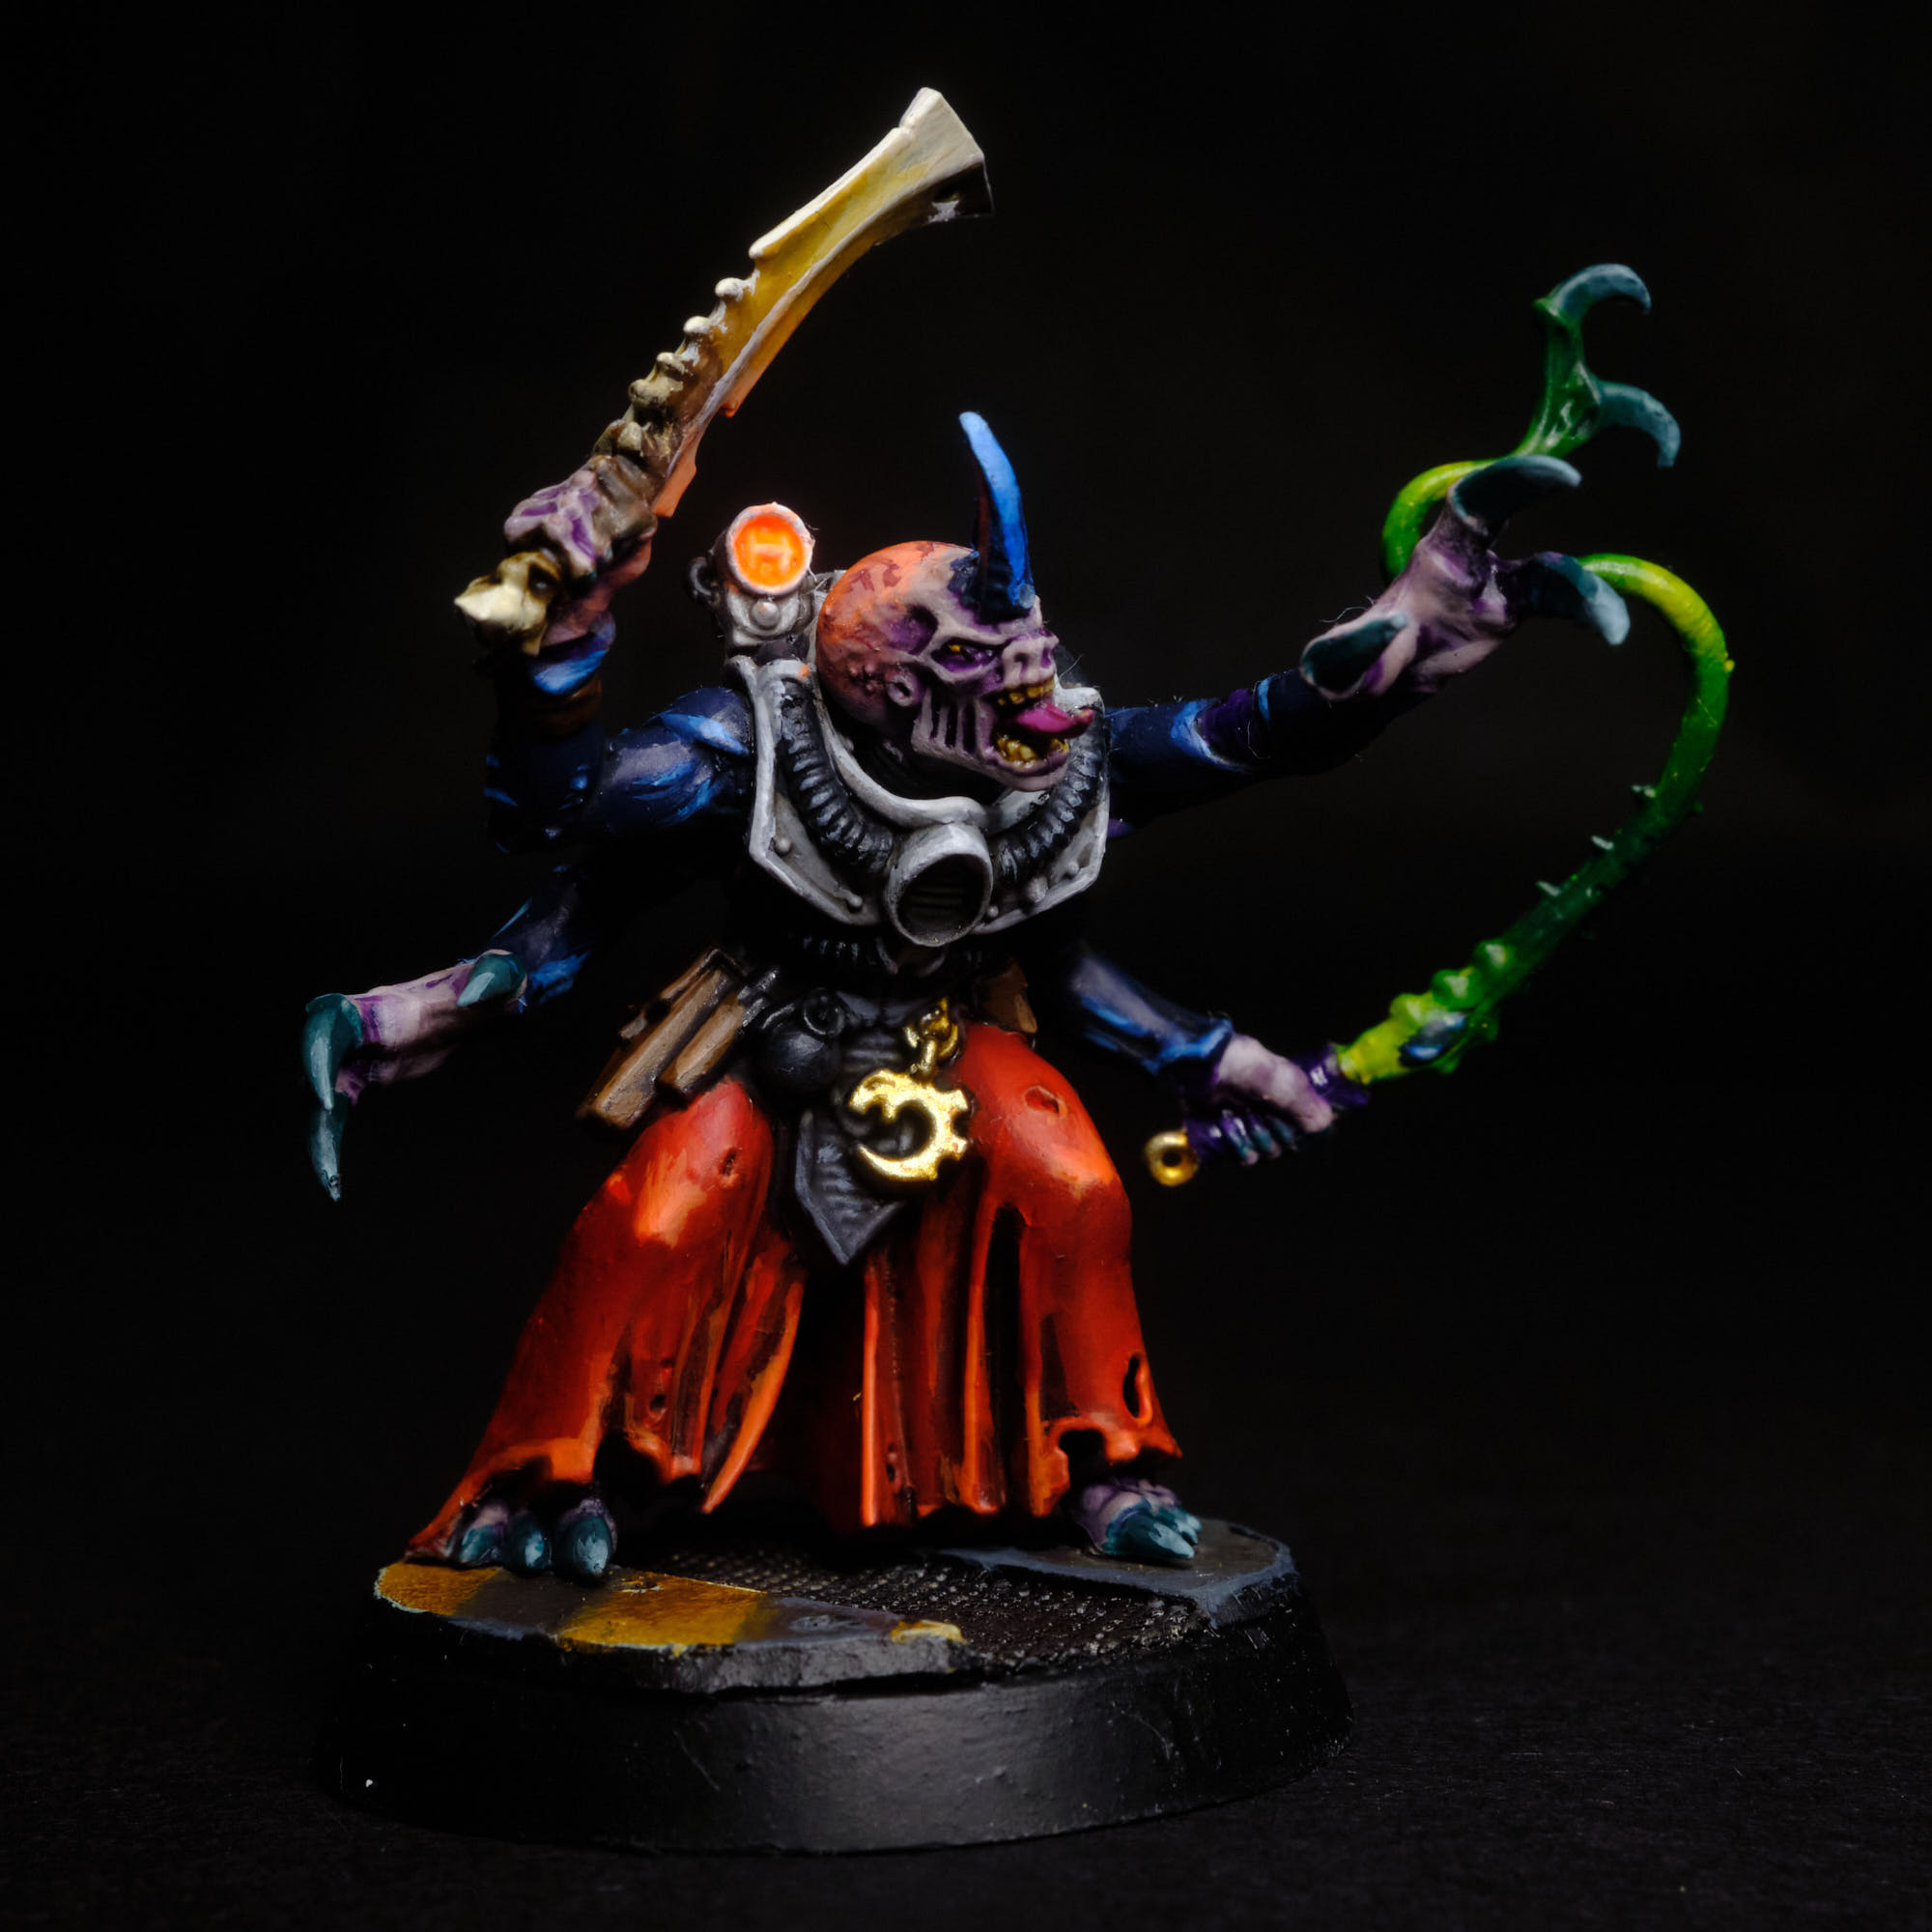
It took Games Workshop a while to get Genestealer Cults right – as an insurgent force, they’re lore-wise not particularly suited to the Warhammer 40,000 universe, where it doesn’t make a ton of sense to have a handful untrained workers with rock saws facing down Space Marines. But with the release of 8th edition and its Keywords system and the addition of the Brood Brothers rules, players are now able to make forces that combine Genestealer cults, Tyranid Hive Fleets, and corrupted Imperial Guard to represent Cult forces at the height of their powers, while also giving Genestealer Cults players a wide variety of options without having to create units for the army that don’t make sense. Unlike most Tyranids, Genestealers possess a high level of intelligence and are able to think and act for themselves. The largest and most advanced of these are Genestealer Patriarchs, powerful psychic entities with a connection to the Hive Mind that allows them to maintain control over its brood. As they increase in power and age, they become powerful psychic beacons for the Hive Mind, drawing them to the most vulnerable worlds. A Genestealer Patriarch will usually be assisted by a Cult Magus, a powerful psychic Genestealer 4th-generation Hybrid capable of infiltrating society proper and representing the cult as a public spokesperson, something a big gross alien monster can’t really do.
Genestealers infect a host using the “Genestealer’s Kiss,” where they use ovipositors to implant a “seed” into the host body, mixing the host’s DNA with that of the Tyranid genome, altering the host on both a physical and mental level. They become subservient to the Genestealer’s brood and become driven to procreate, giving birth to hybrid monstrosities that are further driven to procreate. These offspring are also subservient to the brood and its Patriarch, and will dedicate themselves to spreading the brood’s practices of worship. As the cycle continues, future generations will more progressively resemble the host’s original species, allowing the cult to infiltrate human society at every level. They frequently do so via a mix of physical infection and psychological operations, creating propaganda and messaging designed to undermine the planet’s existing infrastructure. When the Tyranid Hive Fleets arrive, the planet suddenly finds itself unprepared and unable to fight back as its own forces turn on it and submit themselves in worship to the arrival of the “sky gods,” who inevitably consume them all while the Genestealer Patriarch escapes to repeat the cycle once more.
Where to Read More
Genestealer Cults are some particularly interesting antagonists in the 40k fiction. They haven’t really had a chance to shine as protagonists in their own right, but show up in various roles in other books as threats of varying levels. I haven’t read these, but if you’re interested in reading more, I’ve generally heard good things about the following books:
- Cult of the Warmason by CL Werner is primarily about the Sisters of Battle going up against a Genestealer Cults infestation on the shrine world of Lubentina.
- Cult of the Spiral Dawn by Peter Fehervari that looks at just how sinister and insidious the Genestealer Cults can be, following the story of some pilgrims who quickly discover some secrets that were better left hidden as they return to their Imperial Sect’s world of origin.
- The Alien Beast Within by Ian Watson follows the Callidus Assassin Meh’Lindi as she infiltrates a Genestealer Cult.
Covered in this Article:
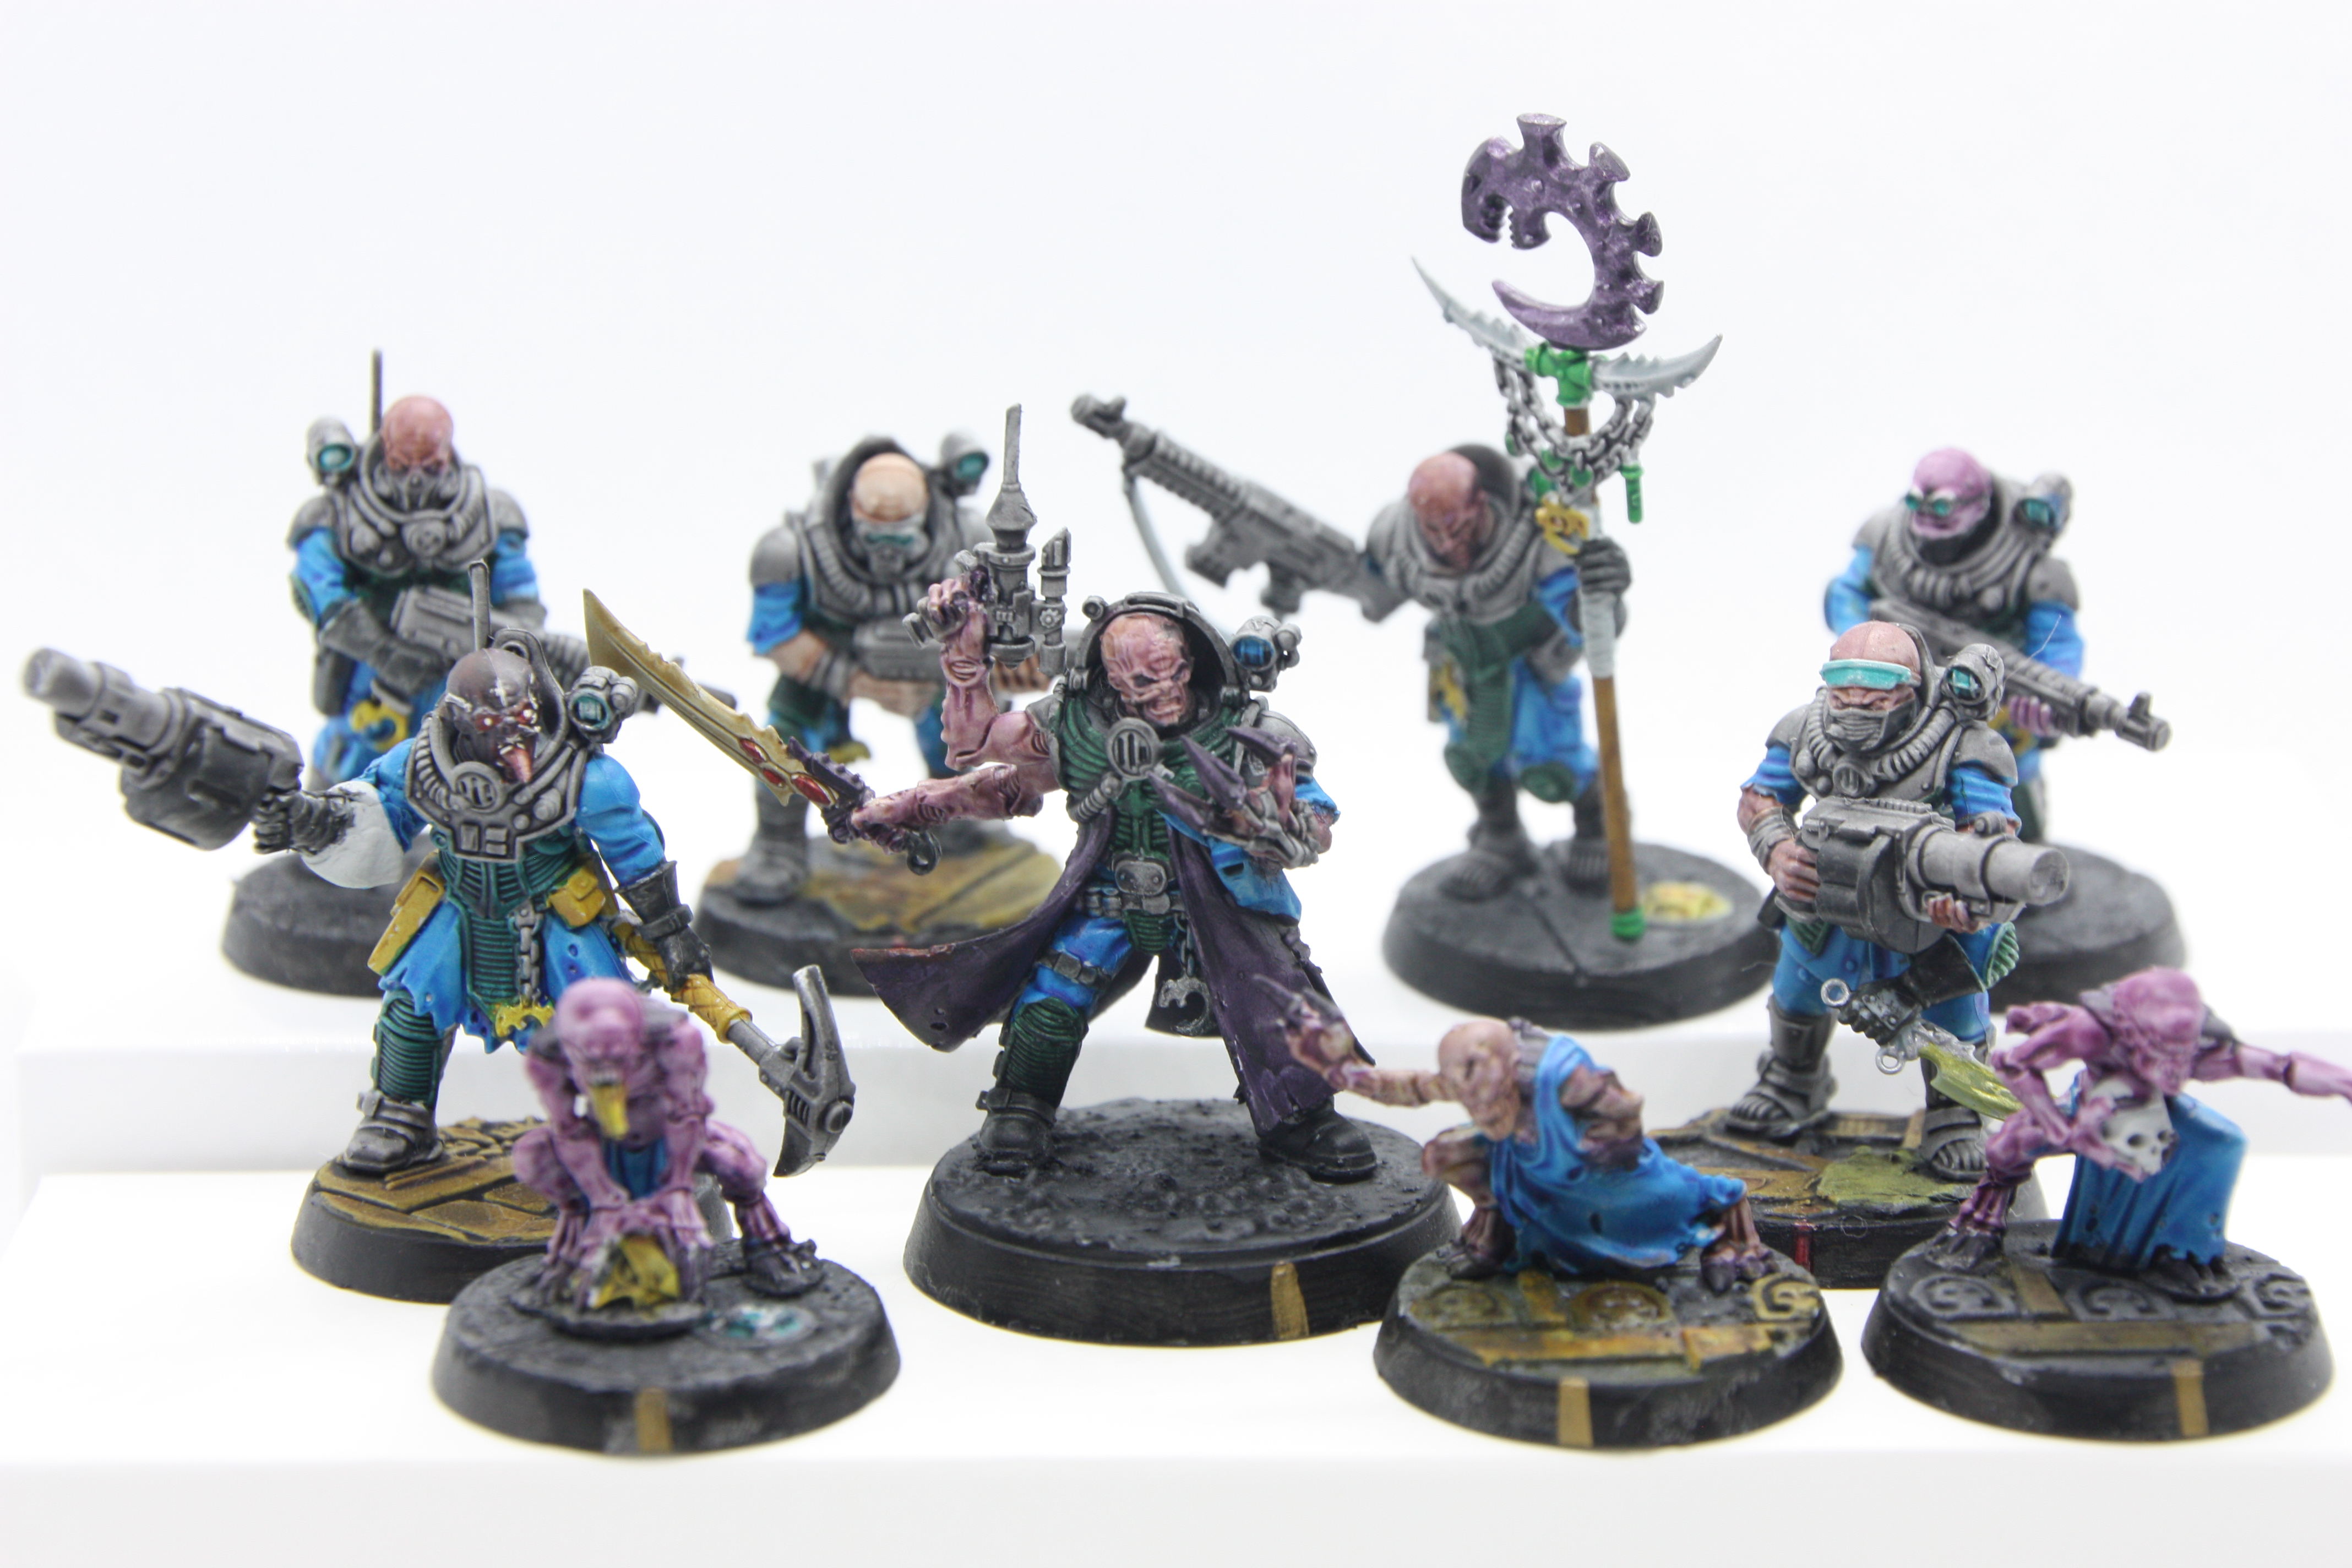
- How to paint the core units of the Genestealer Cults – from neophytes to hybrids
- Different techniques for tackling Genestealer Cultist skin and Tyranid parts
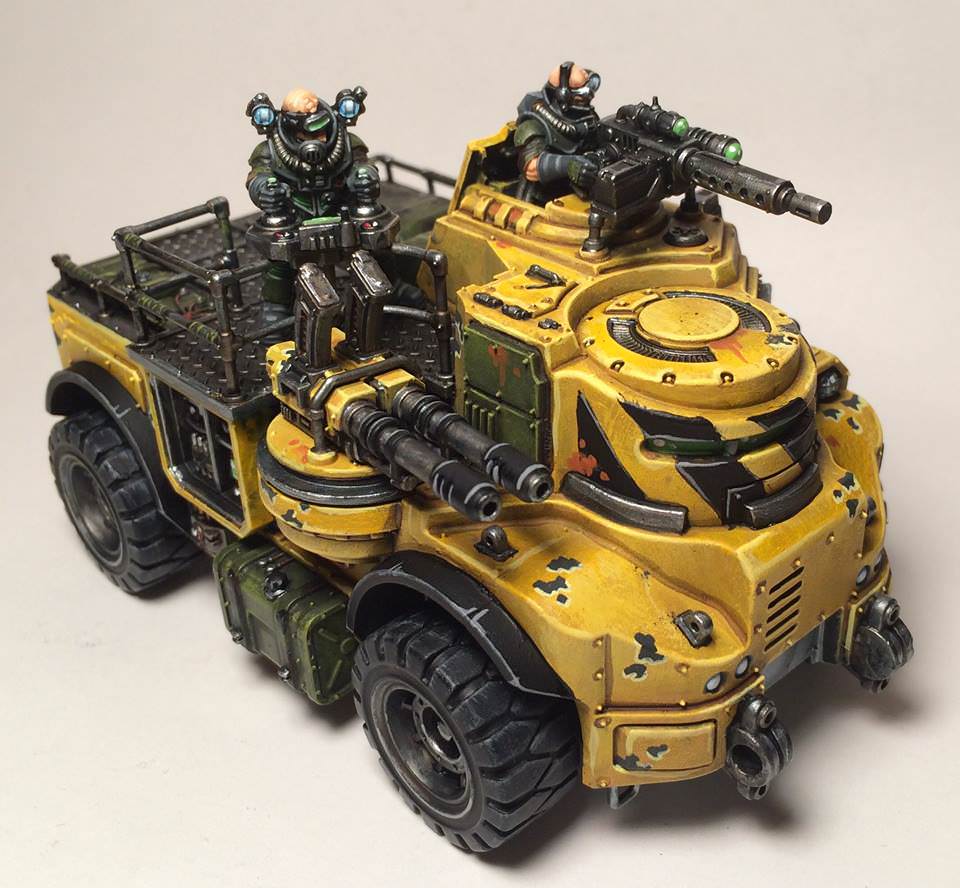
- Techniques for painting Genestealer Cult vehicles and some of the faction’s special characters
Painting Genestealer Cults
There’s a lot to cover when it comes to “Genestealer Cults,” with Neophytes, Genestealers, Characters, Aberrants, Metamoph Hybrids, and vehicles like the Achilles Ridgerunner and the Goliath Rockgrinder. We may cover individual models in greater detail in the future, but in the meantime, we’ve got a few different methods for you to consider here that cover different paint schemes and methods for achieving certain looks.  BuffaloChicken's Method - Click to Expand
Genestealer Cults Infantry
Painting Cult Vehicles

– Prime black.

Beanith's Method - Click to Expand
- Undercoat with a Greyseer rattle can
- Smoosh on some Talassar Blue on the cloth.
- Splash on some totally loyal Dark Angels Green on the armor.
- Basilicanum Grey and Black Templar on the weapons, chains, tubes and backpacks.
- Runefang Steel on the shoulder lamps and goggles etc. Then add a layer of Aethermatic Blue on top of that for a nice and simple lense effect.
- Snakebite Leather and Iyanden Yellow on the pouches and icons.
- Guilliman Flesh
- Magos Purple
- Guilliman base, Magos layer
- Magos base, Guilliman layer.

Soggy's Method - Click to Expand
- Prime Mechanicus Standard Grey
- DrybrushLongbeard Grey everywhere
- Ulthuan grey on the shoulder pads and edges of the armour\
- Bugmans glow on all skin/Orange bits
- Jokaro Orange onto all orange bits
- Highlight with Fyreslayer orange
- Reikland fleshshade on the skin
- Highlight with Kislev flesh
- Basecoat Xereus Purple
- Pick out raised bits with Genestealer purple
- Edge highlight Daemonette hide
- Druchii Violet wash
- Base with Macragge blue
- Pick out raised bits with Teclis blue
- Pick out even less with Temple guard blue
- Edge highlight extremes with Baharroth blue
- Mix of Rakarth Flesh and Ubshanti bone base
- Druchii Violet wash mixed with medium
- Reikland Fleshade wash mixed with medium
- Pick out raised details with a mix of Rakarth Flesh again
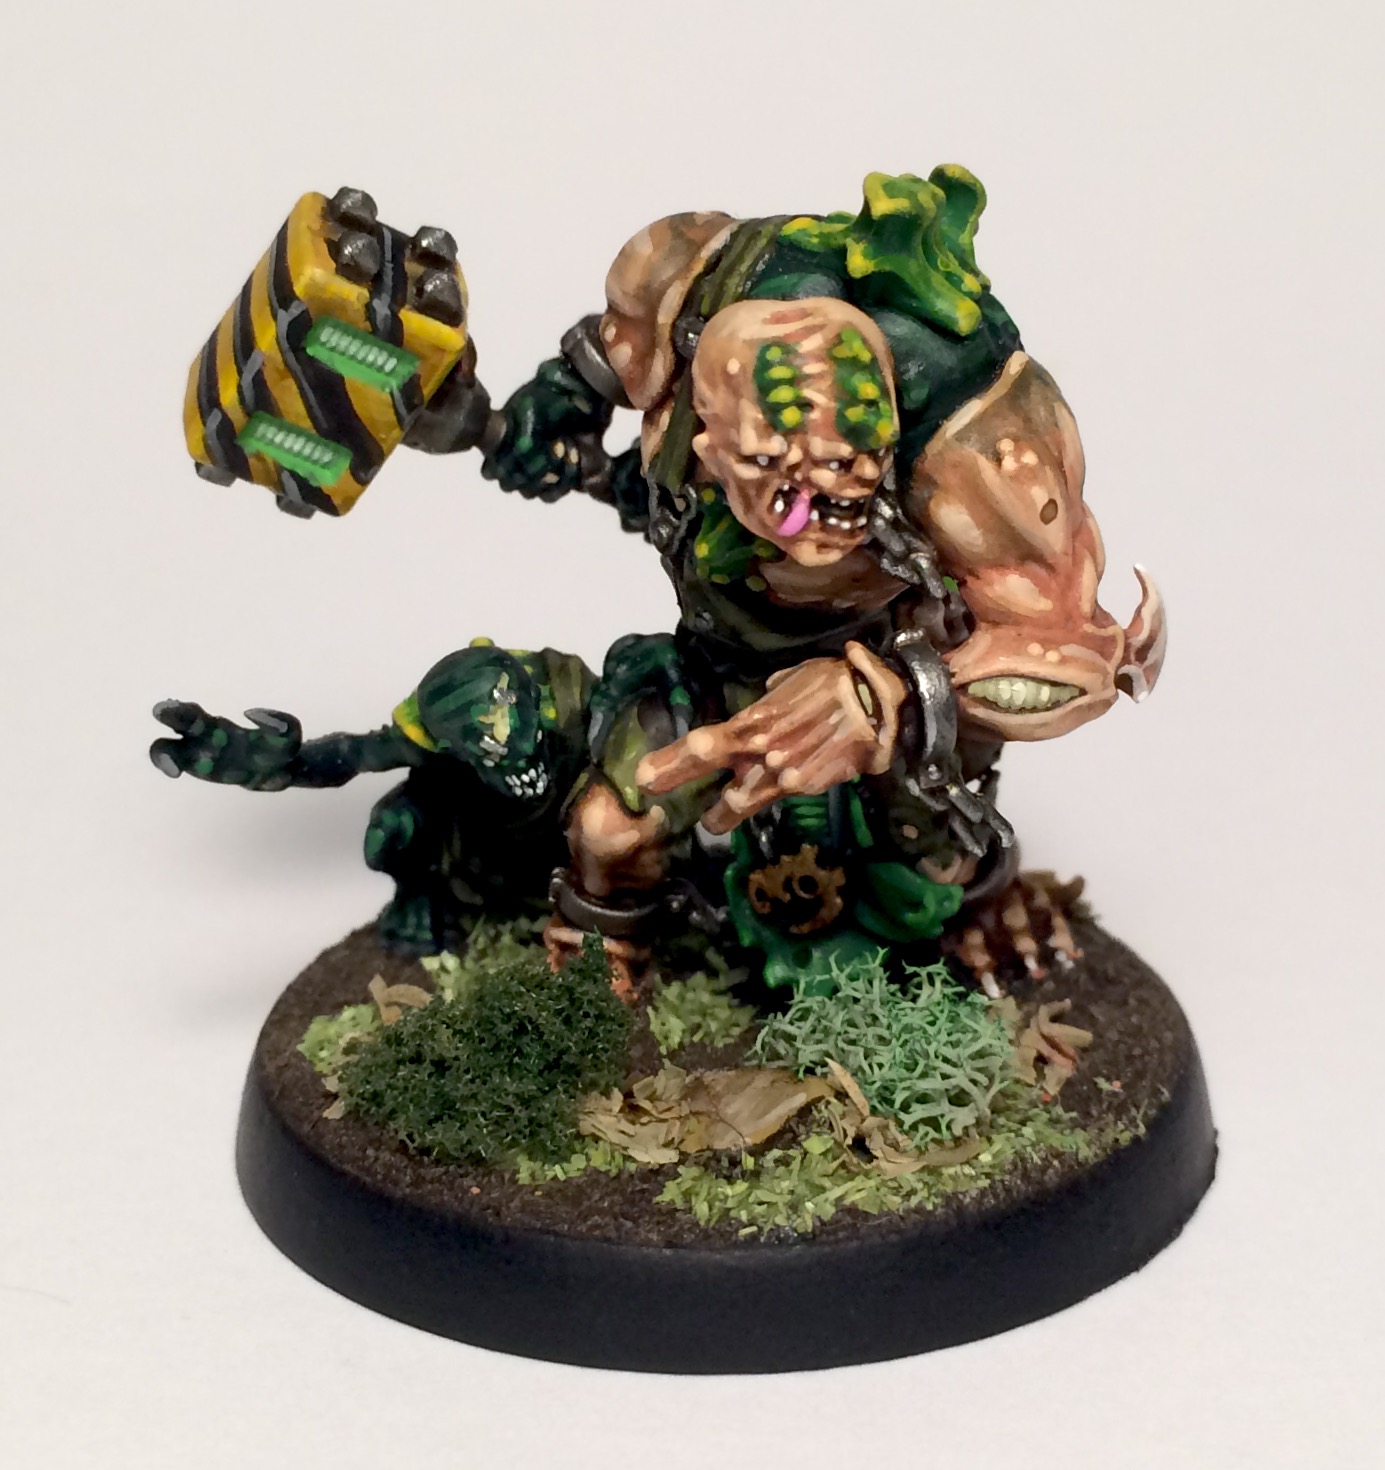
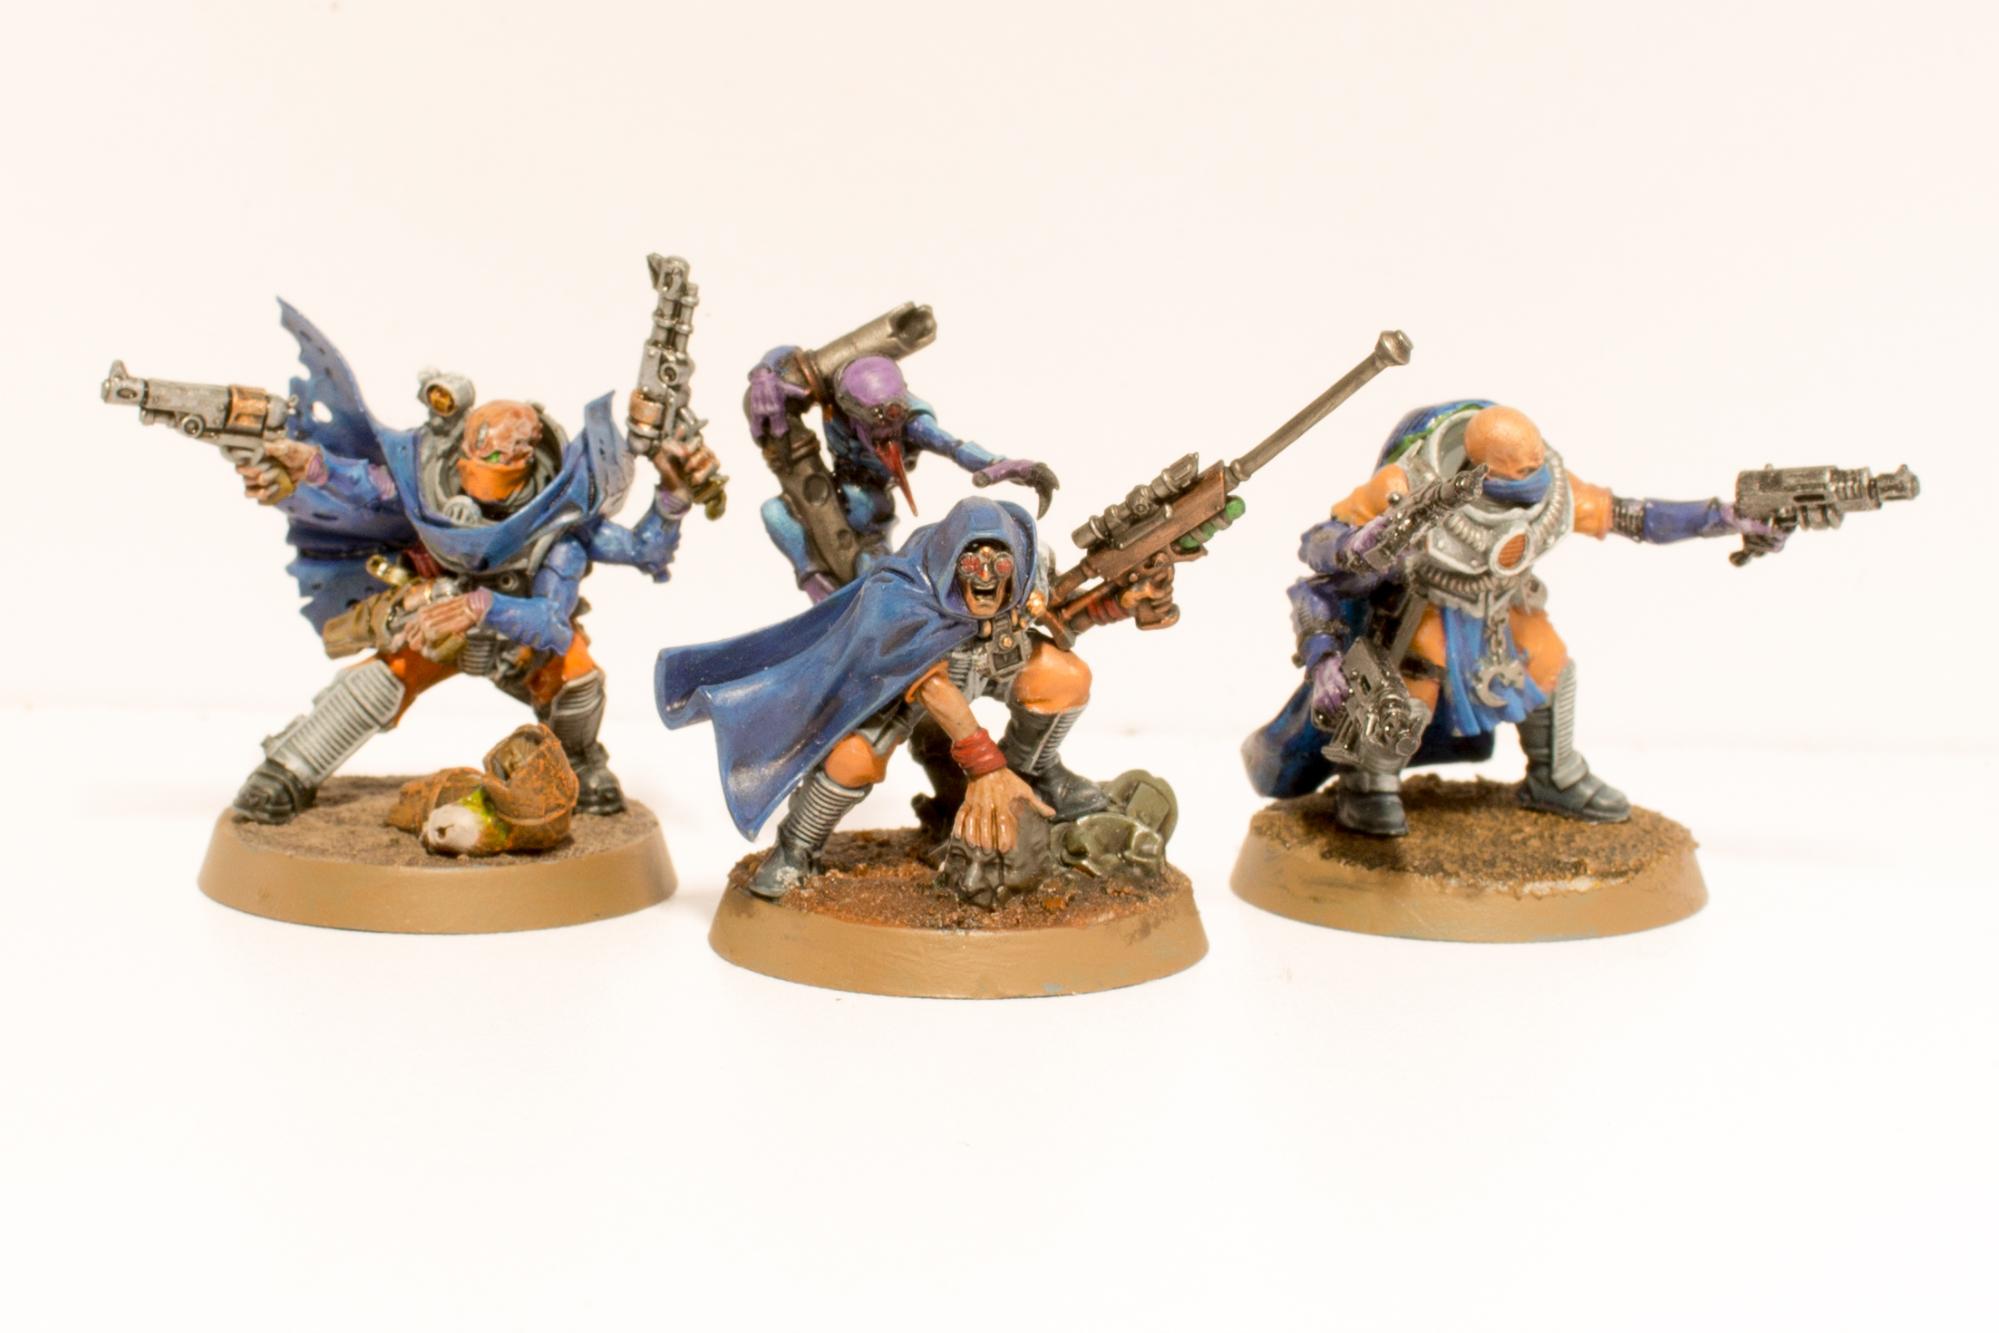
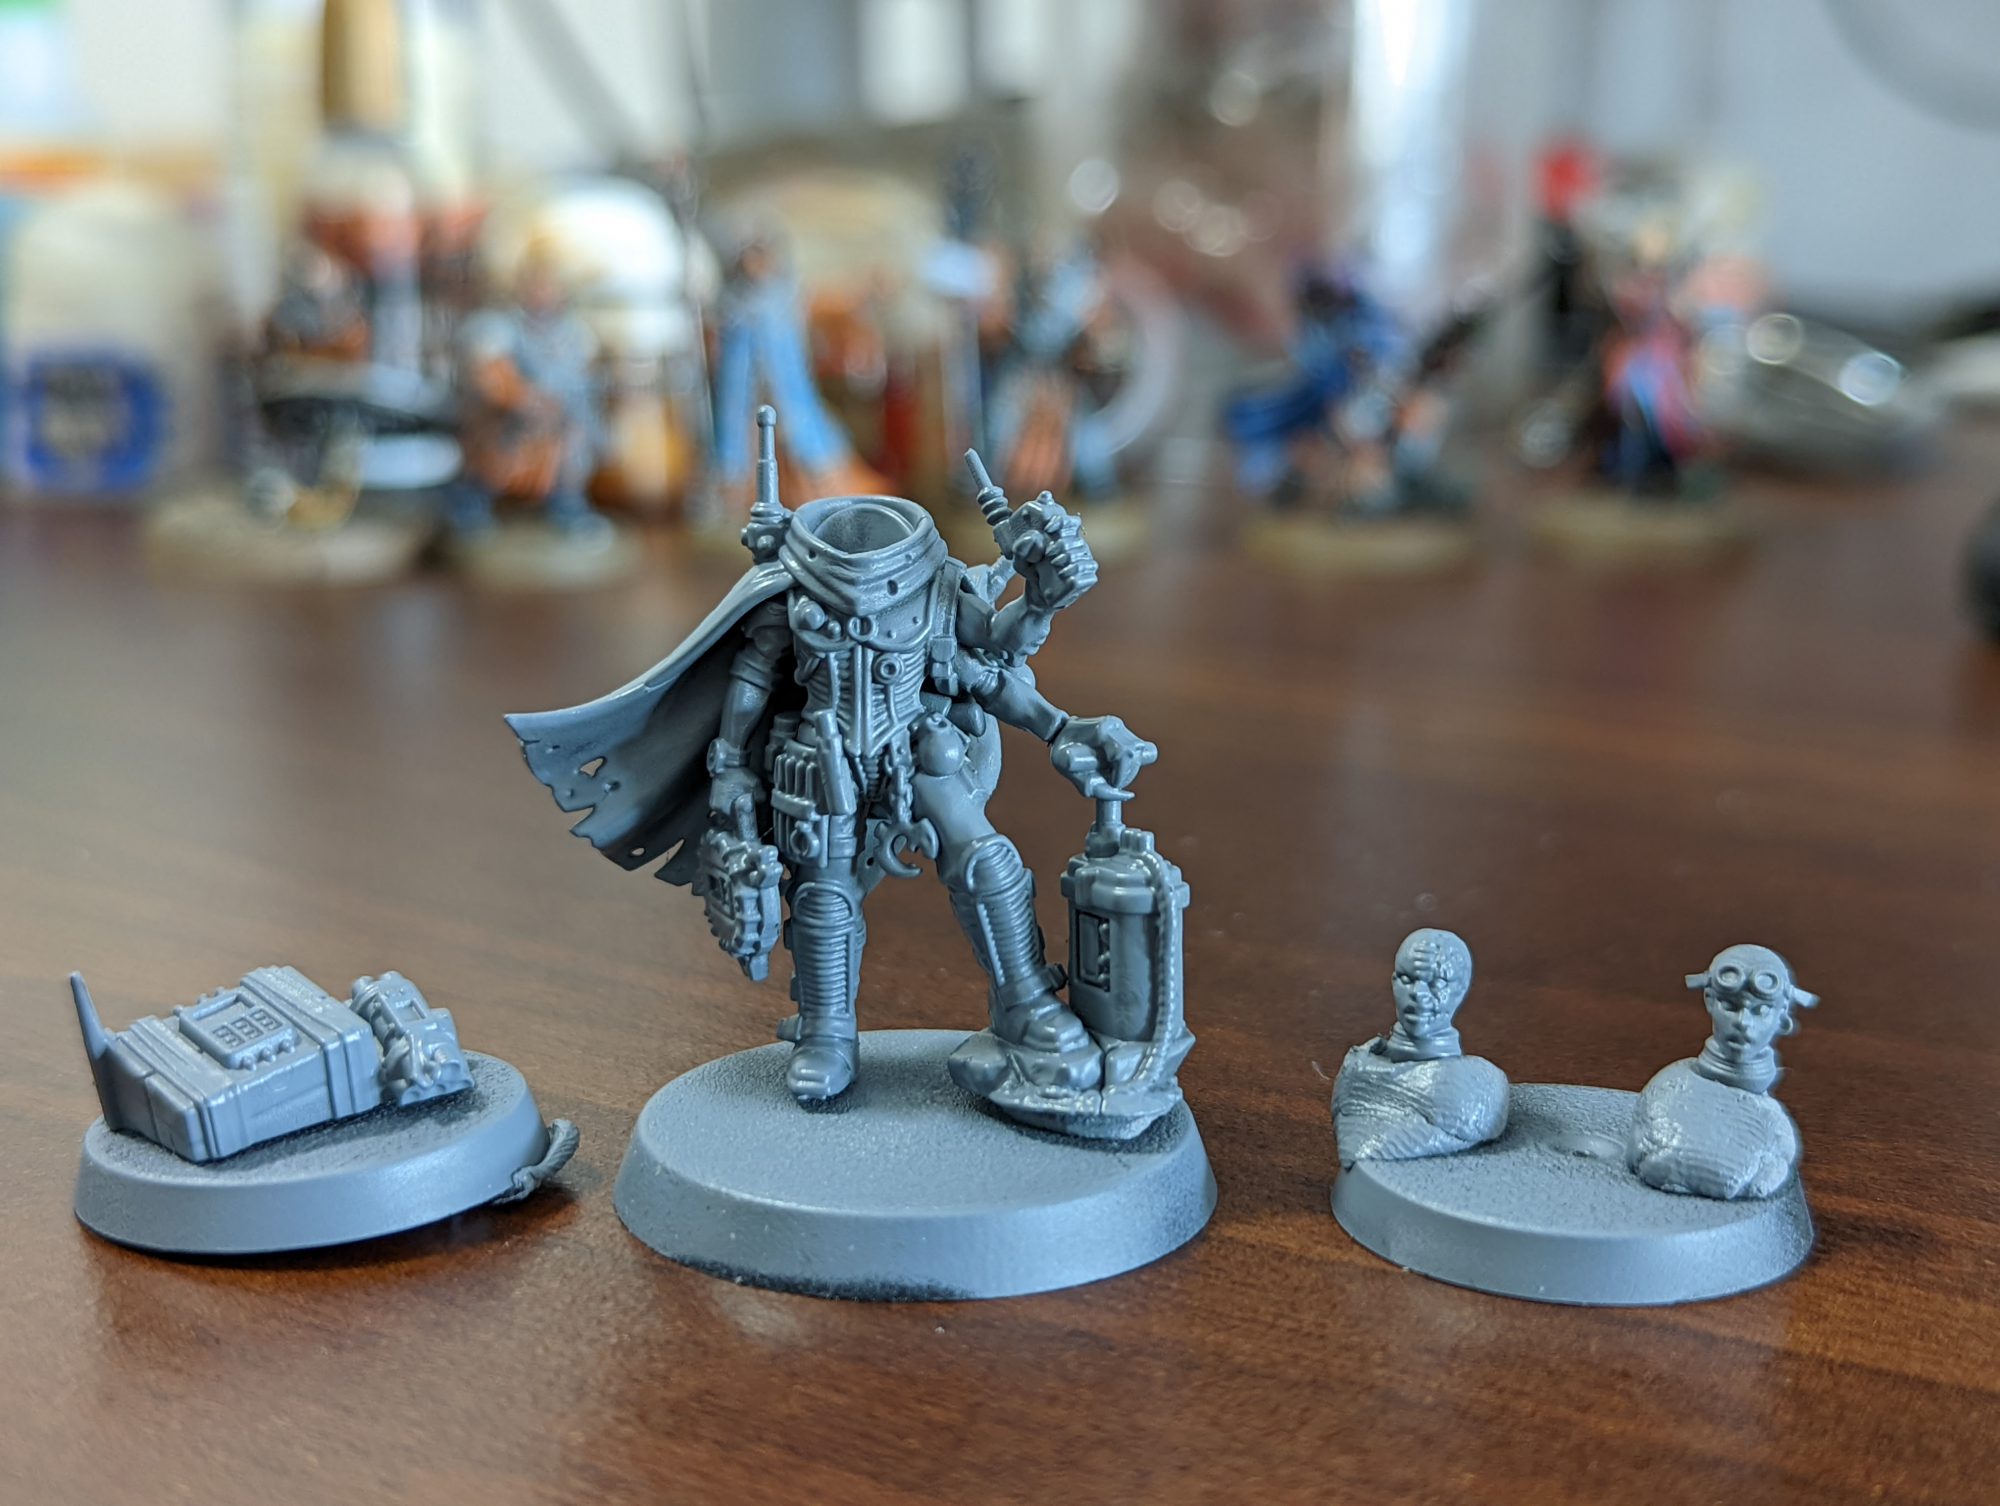
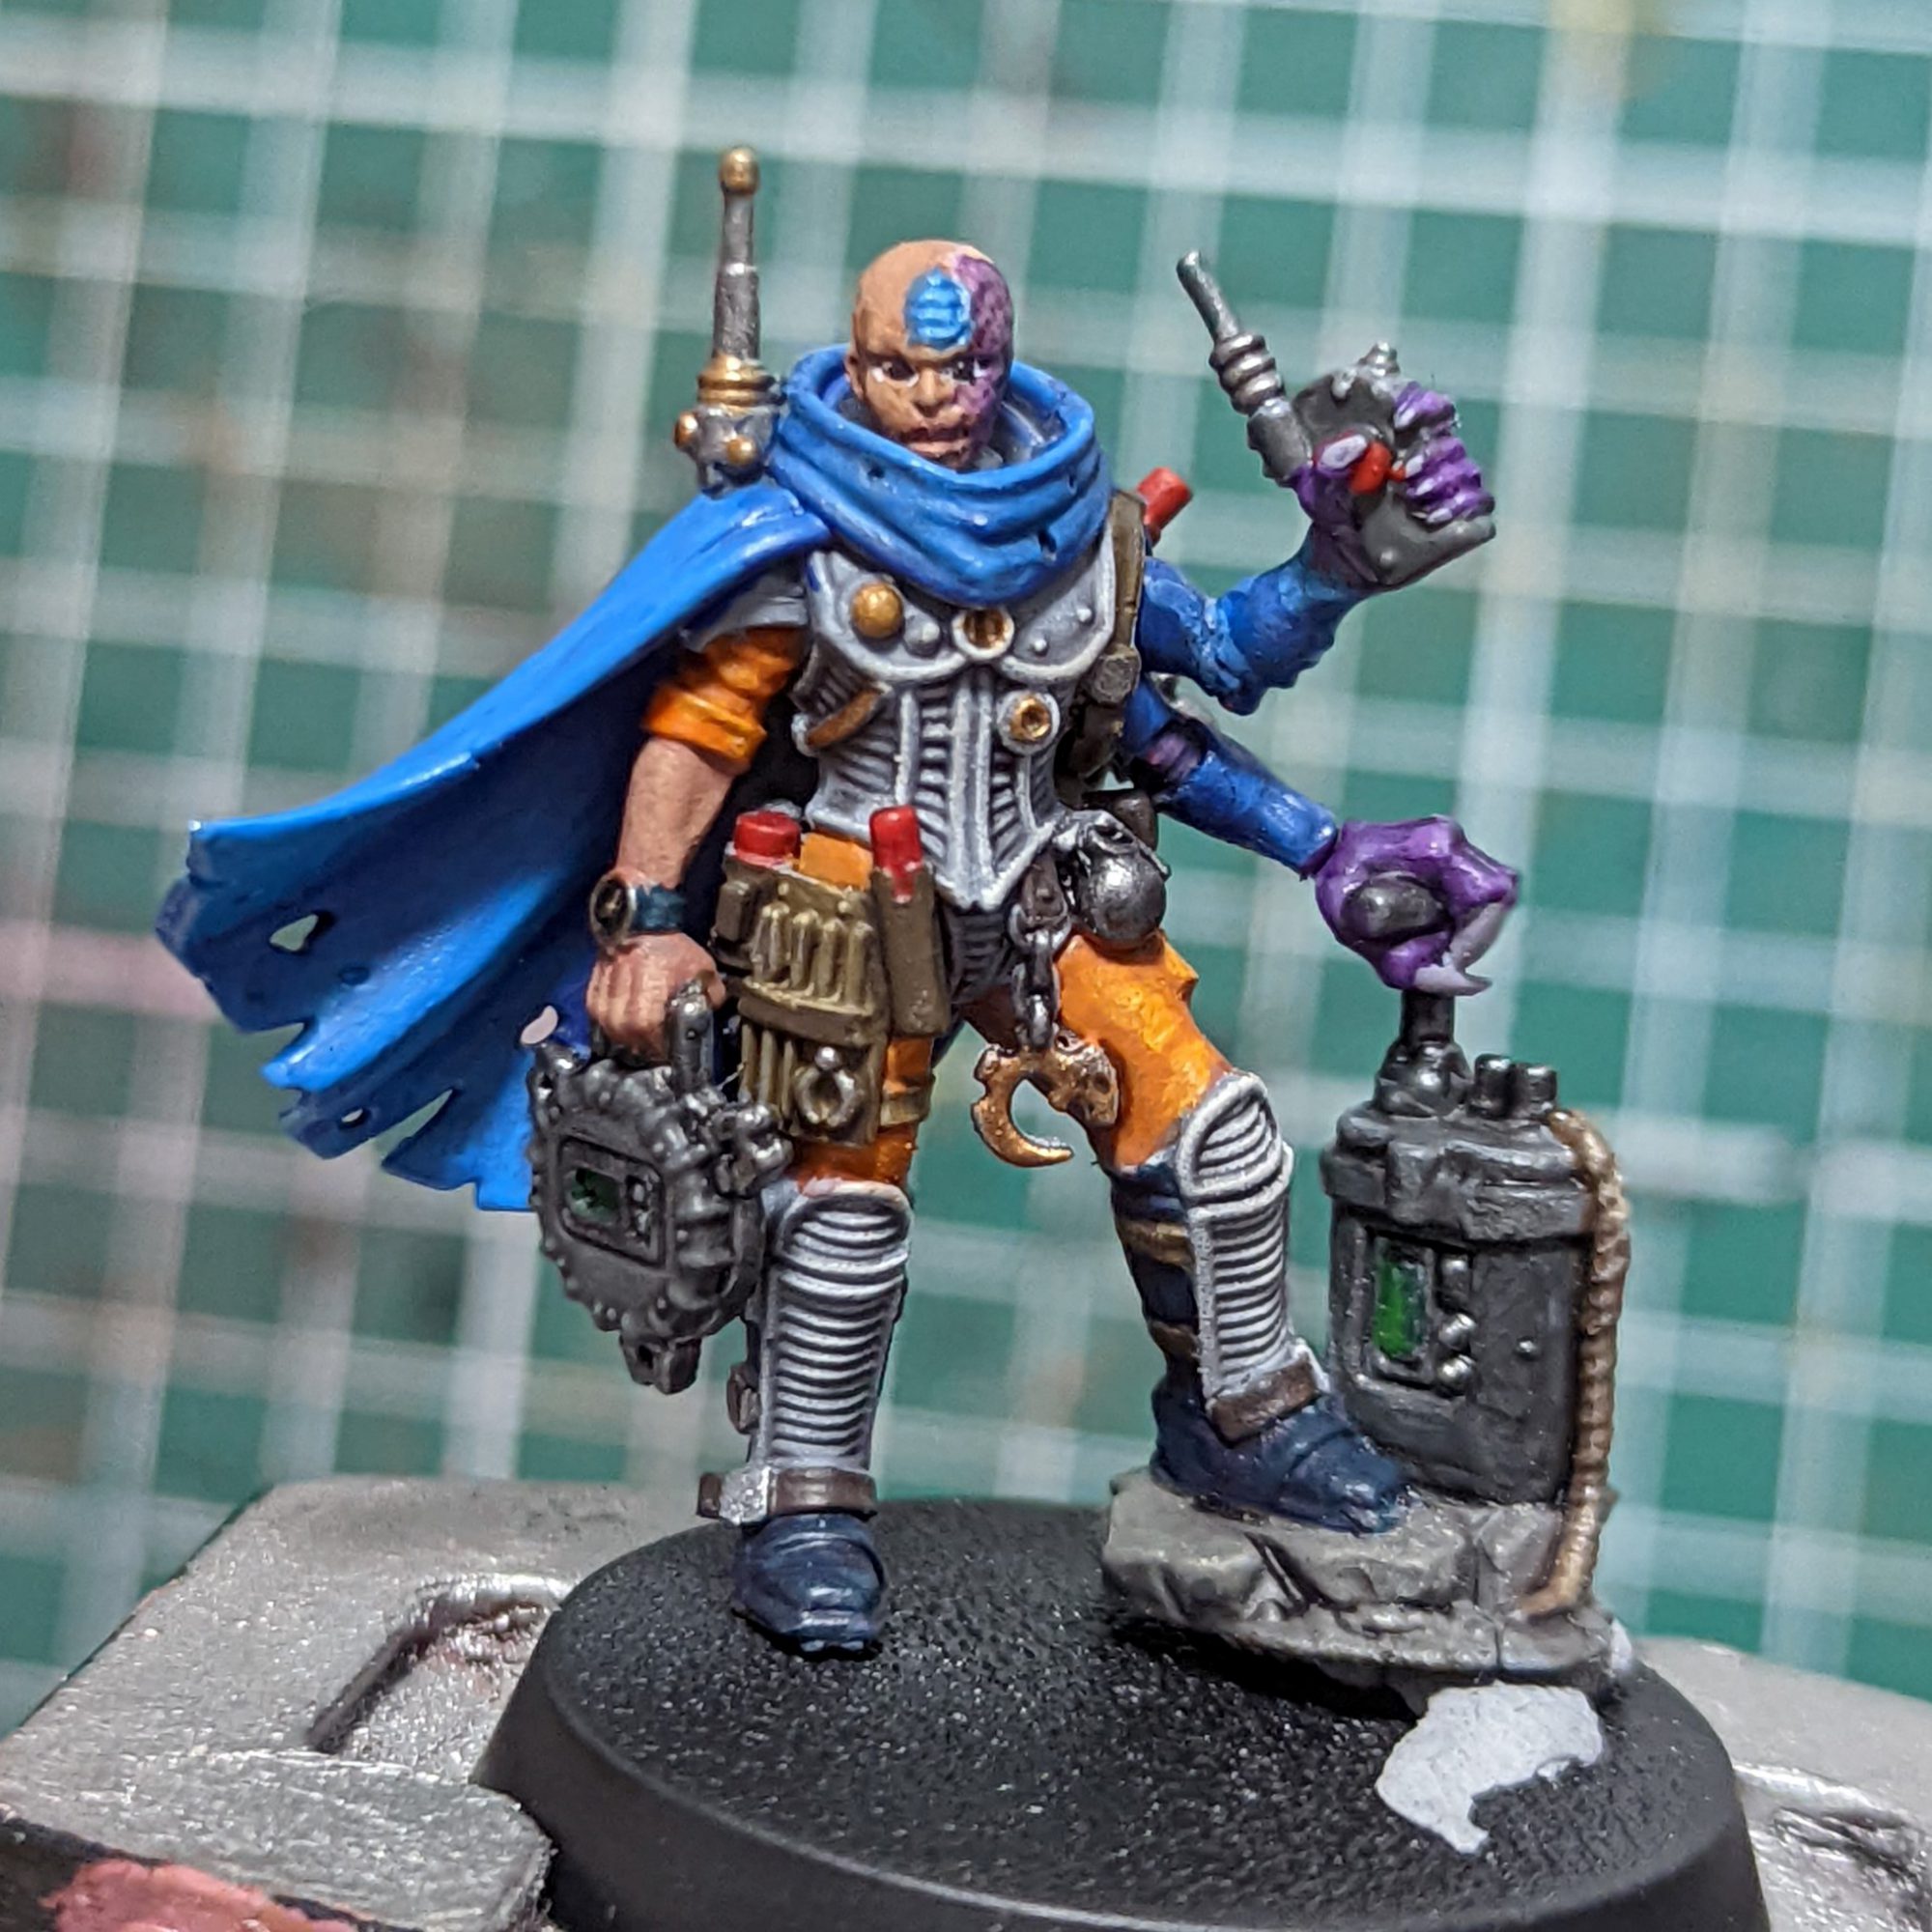
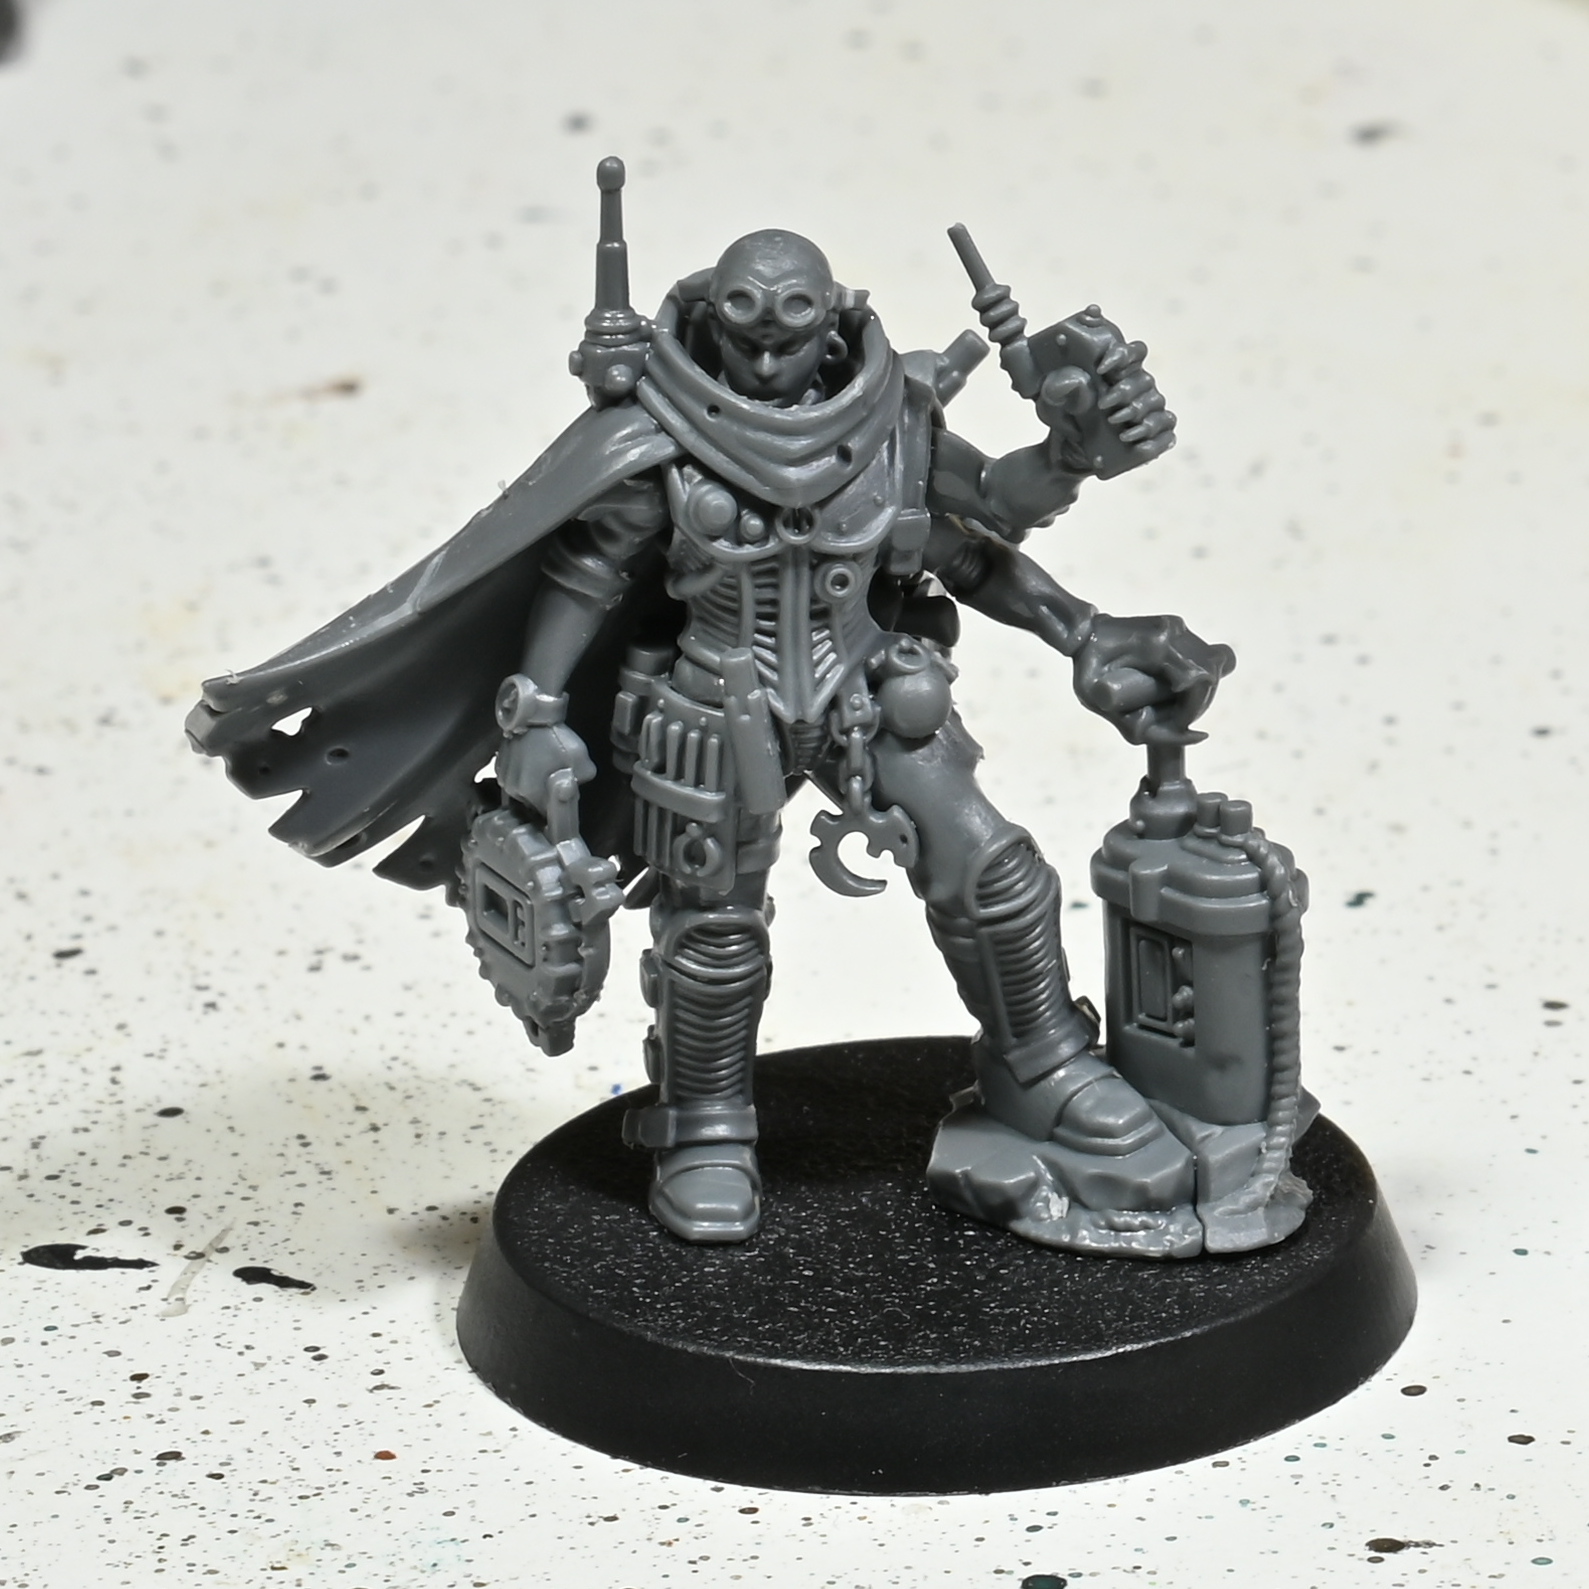
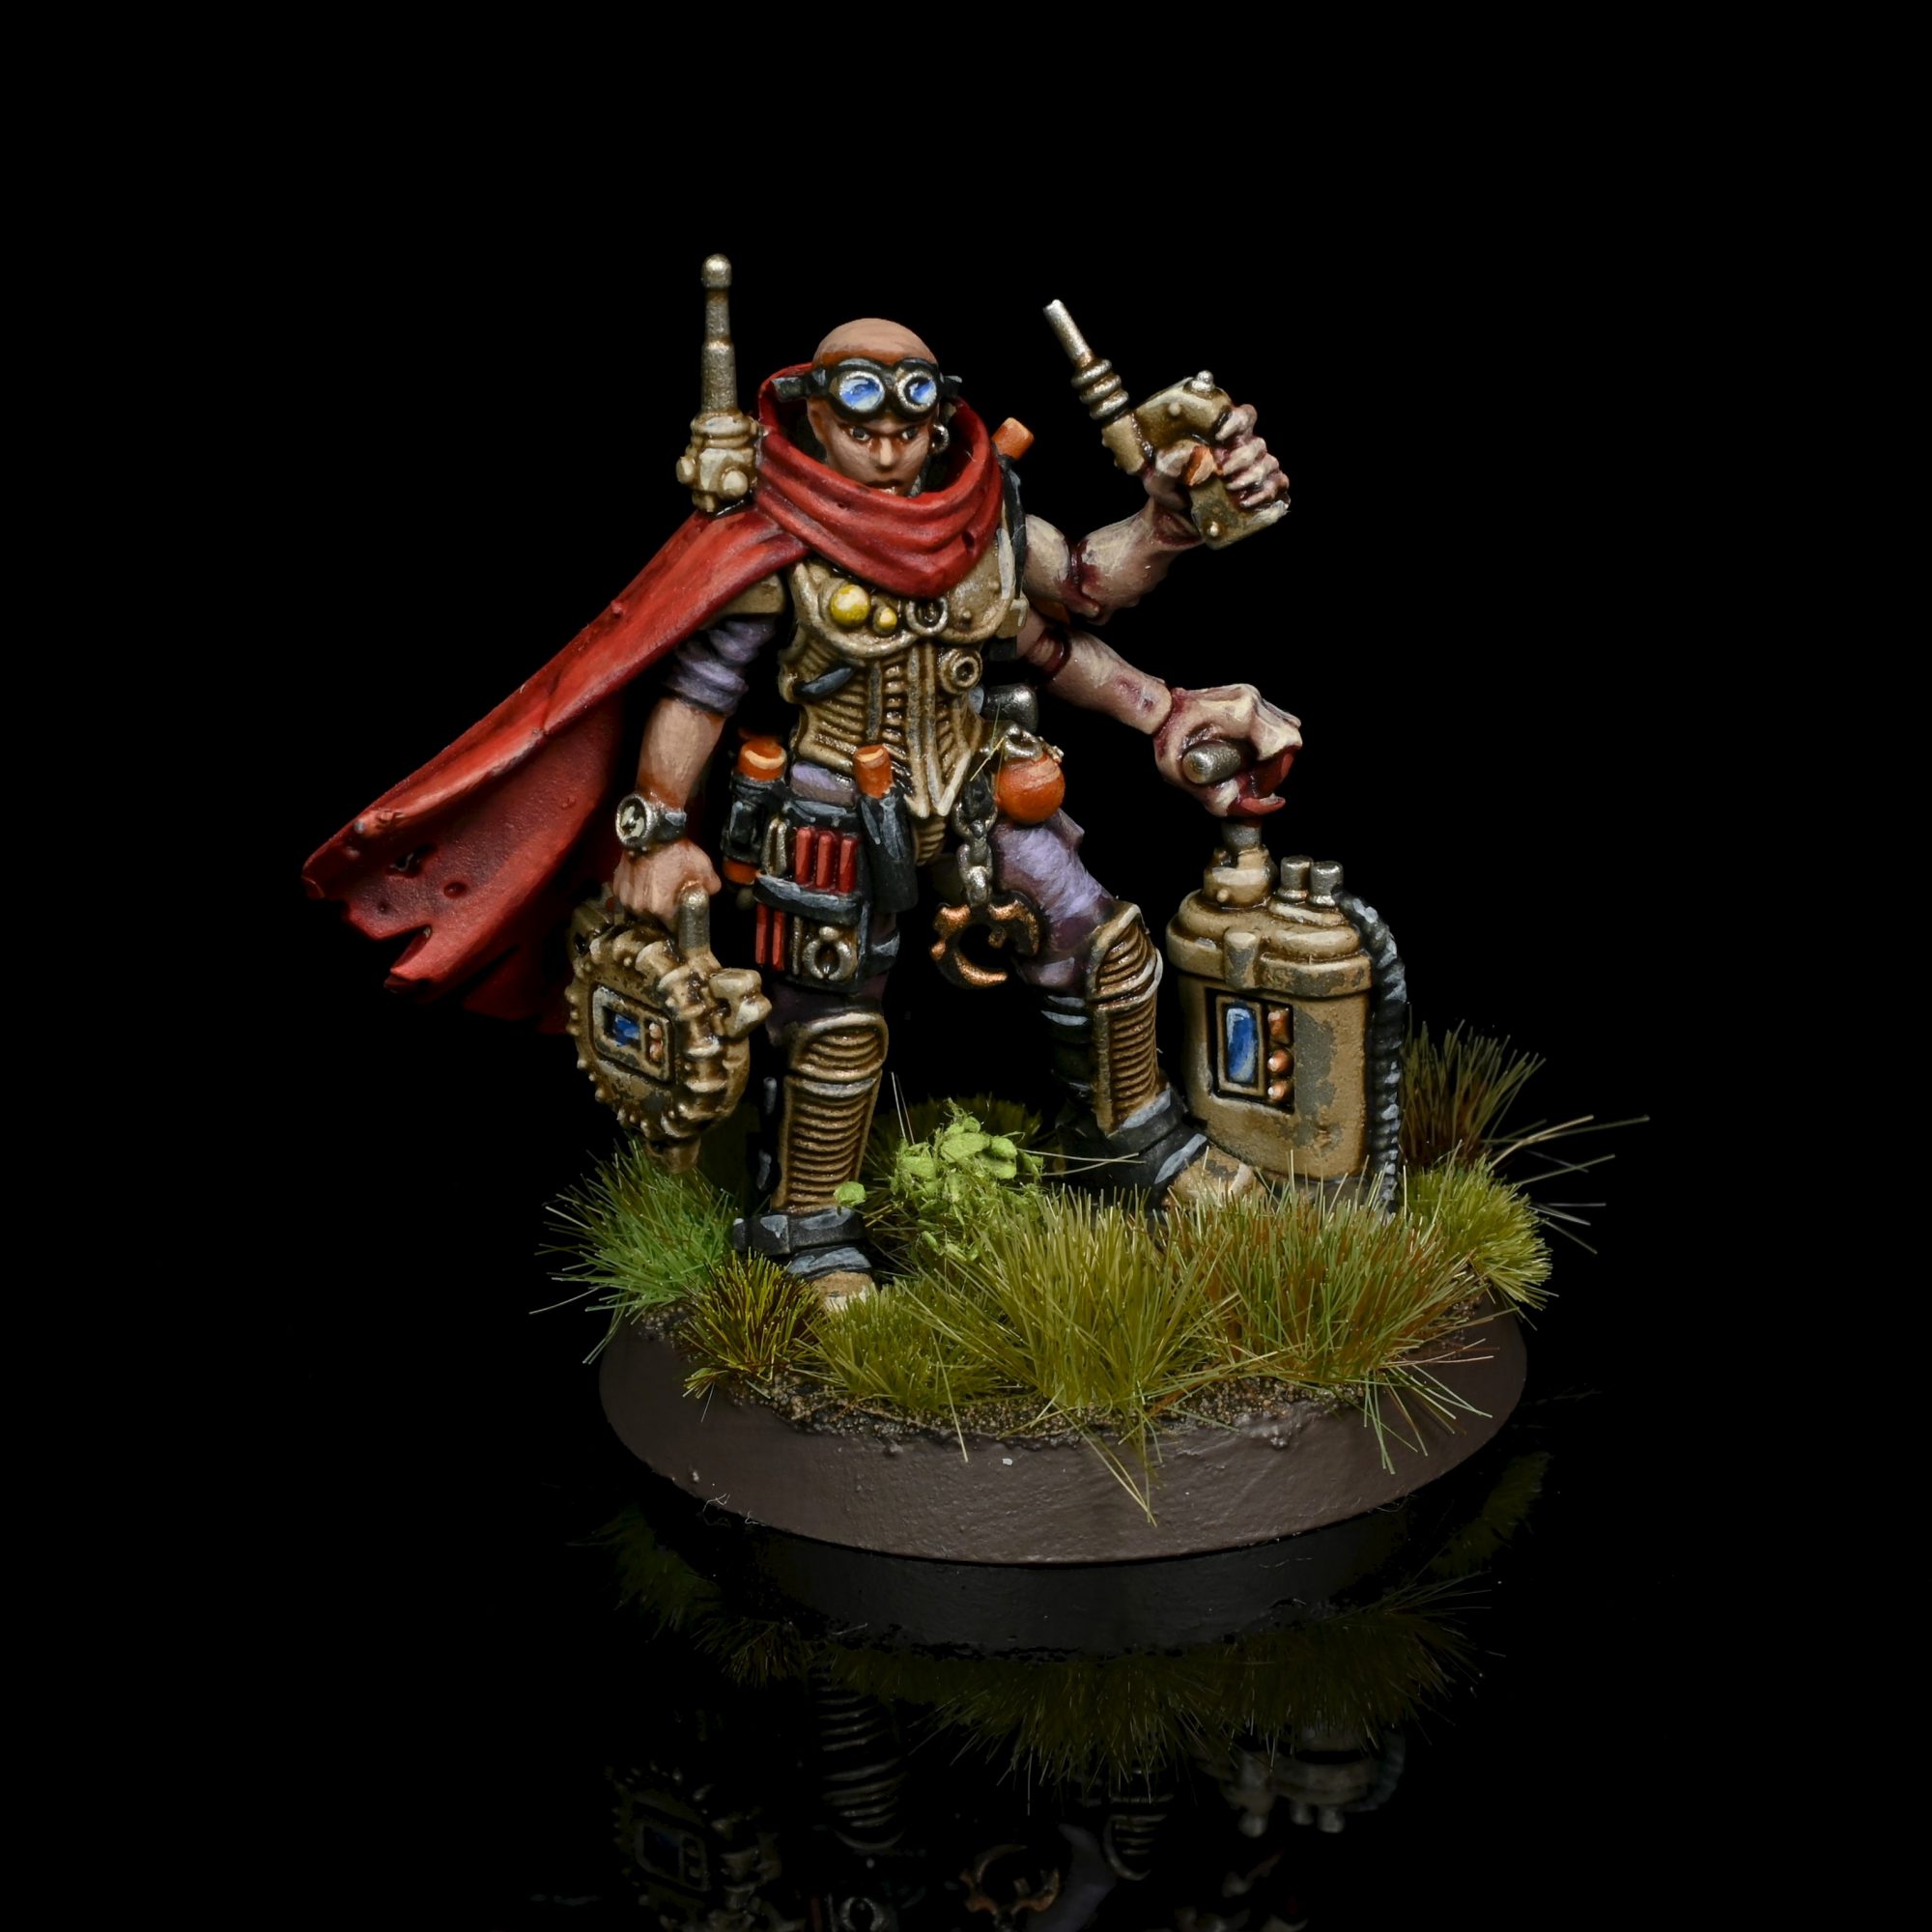
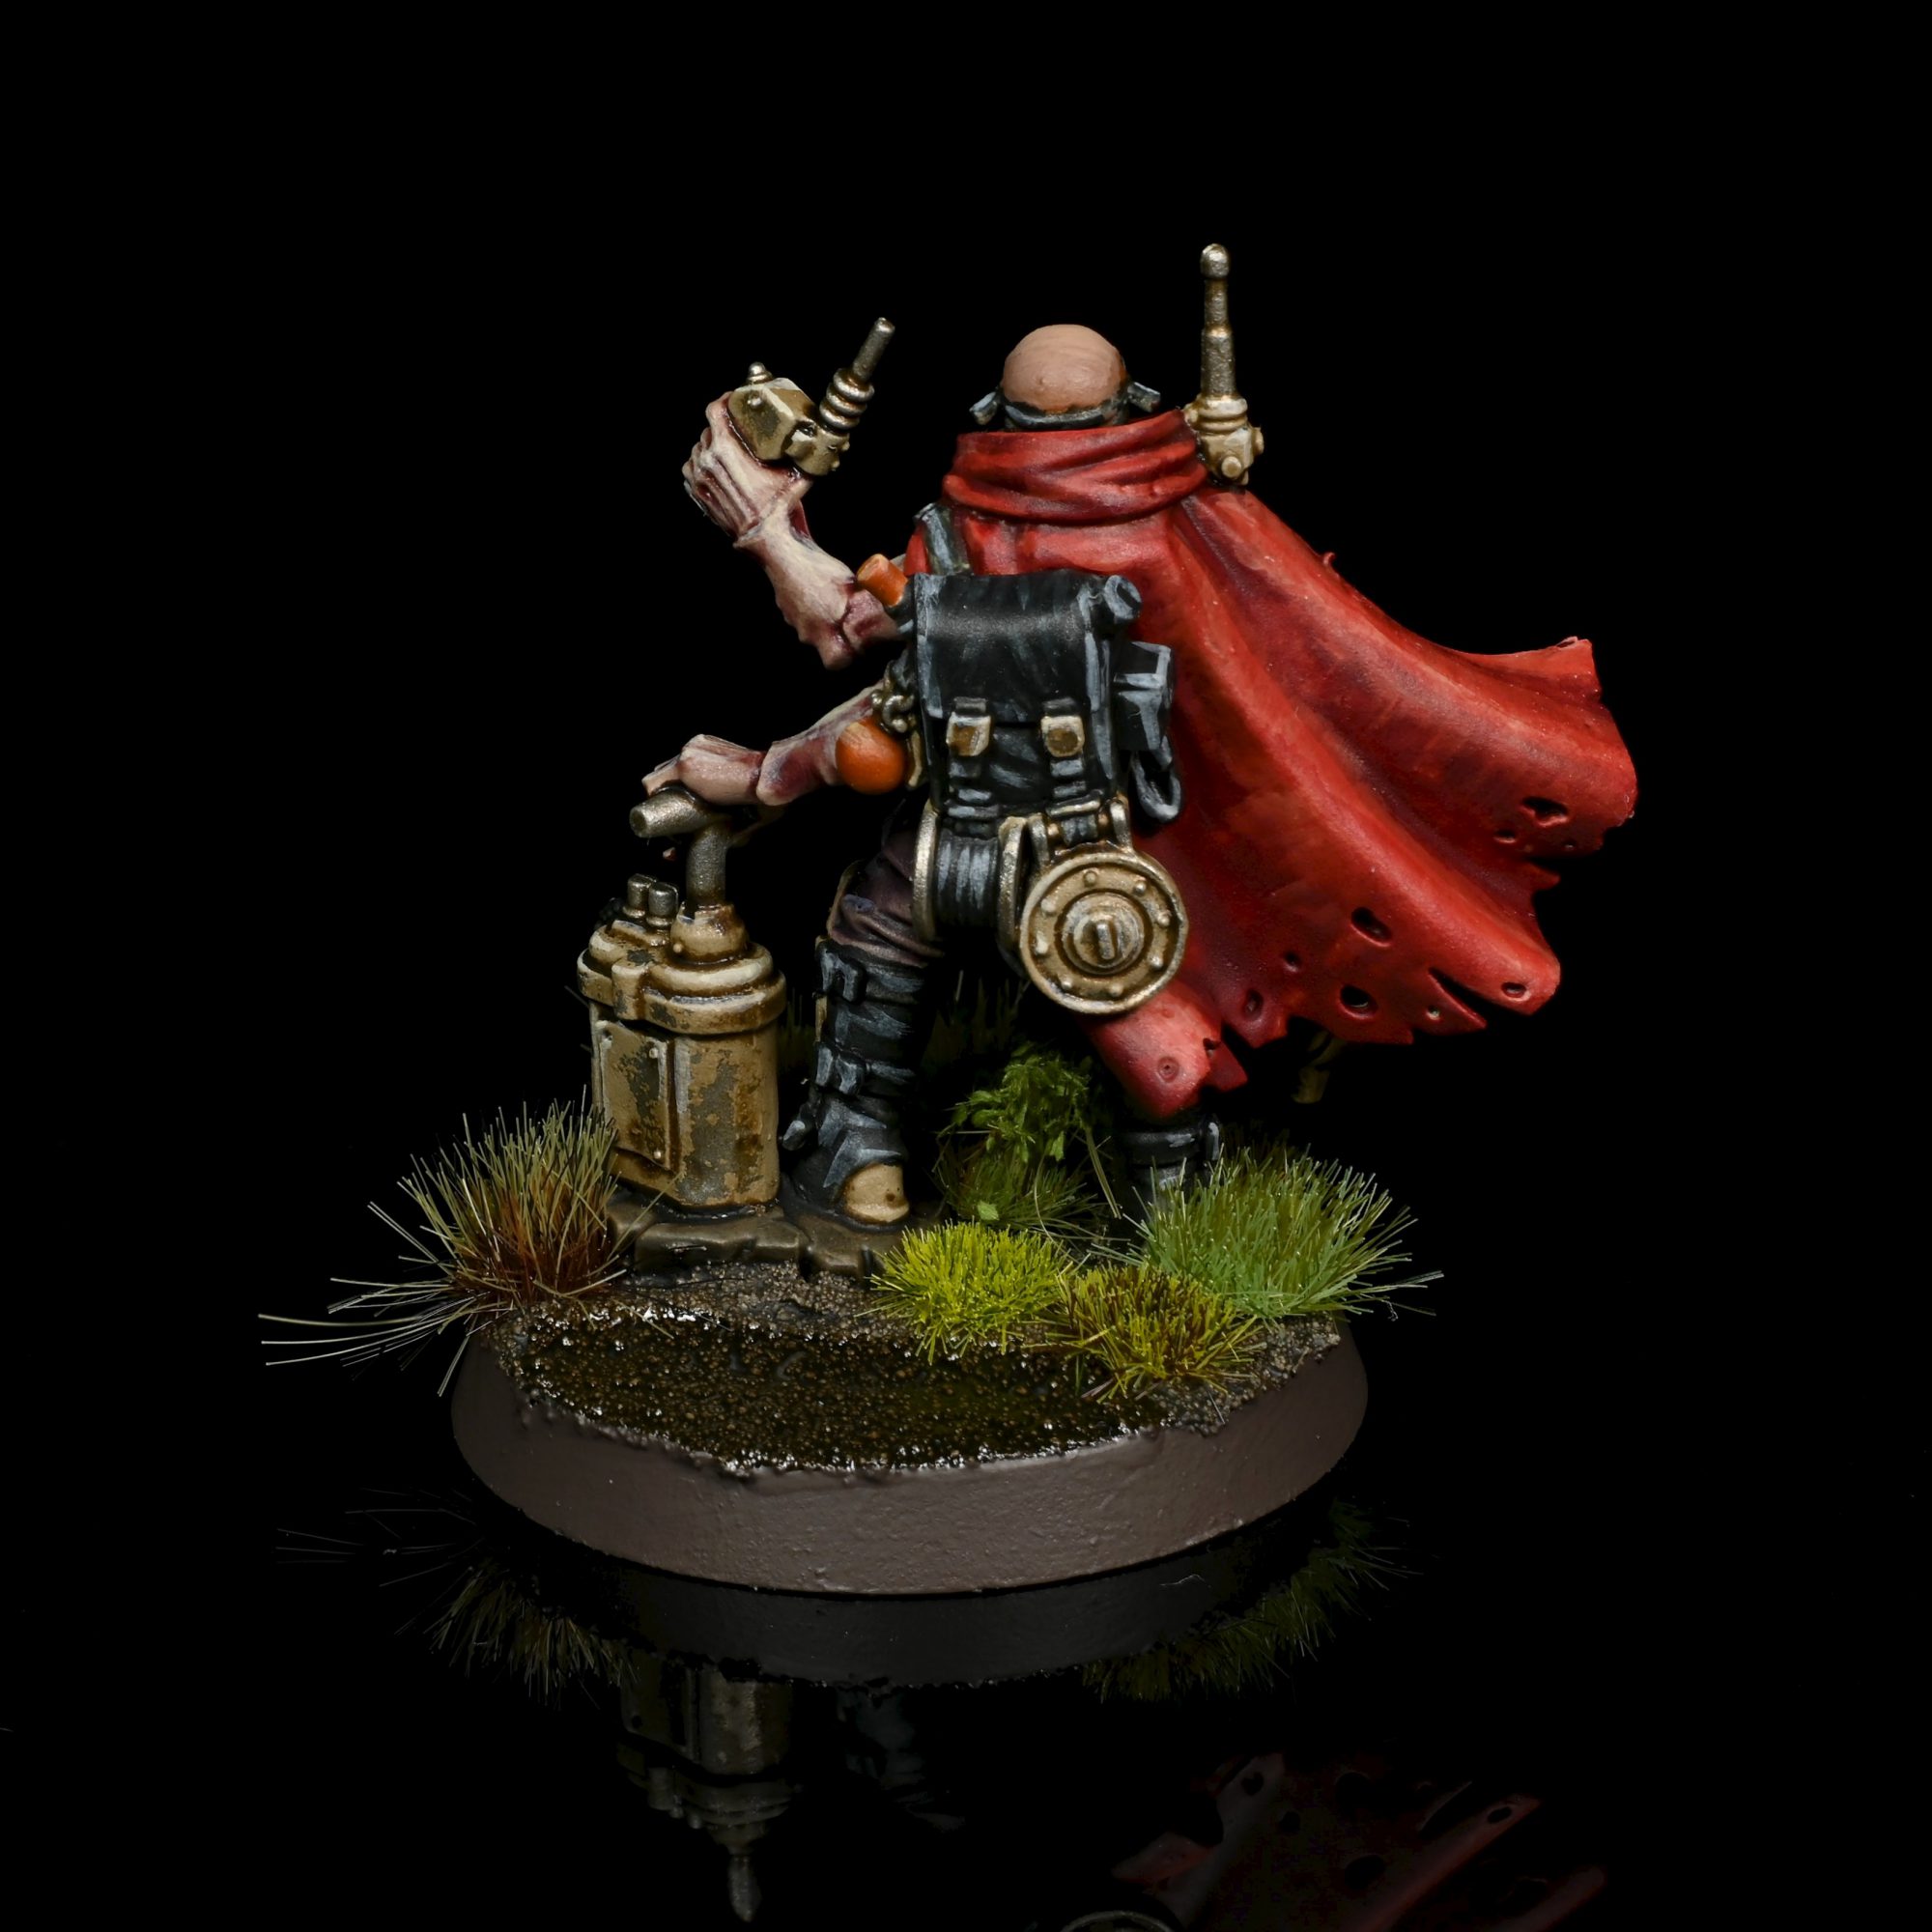
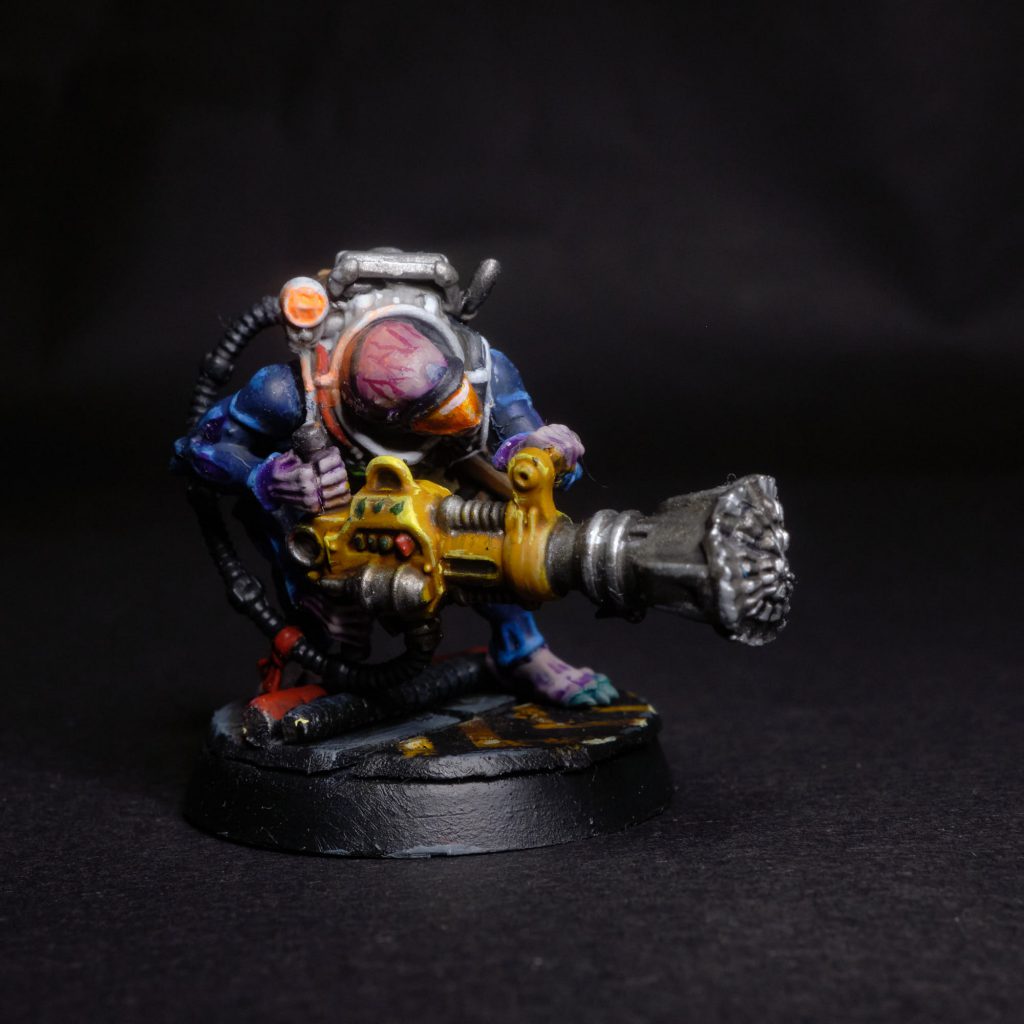
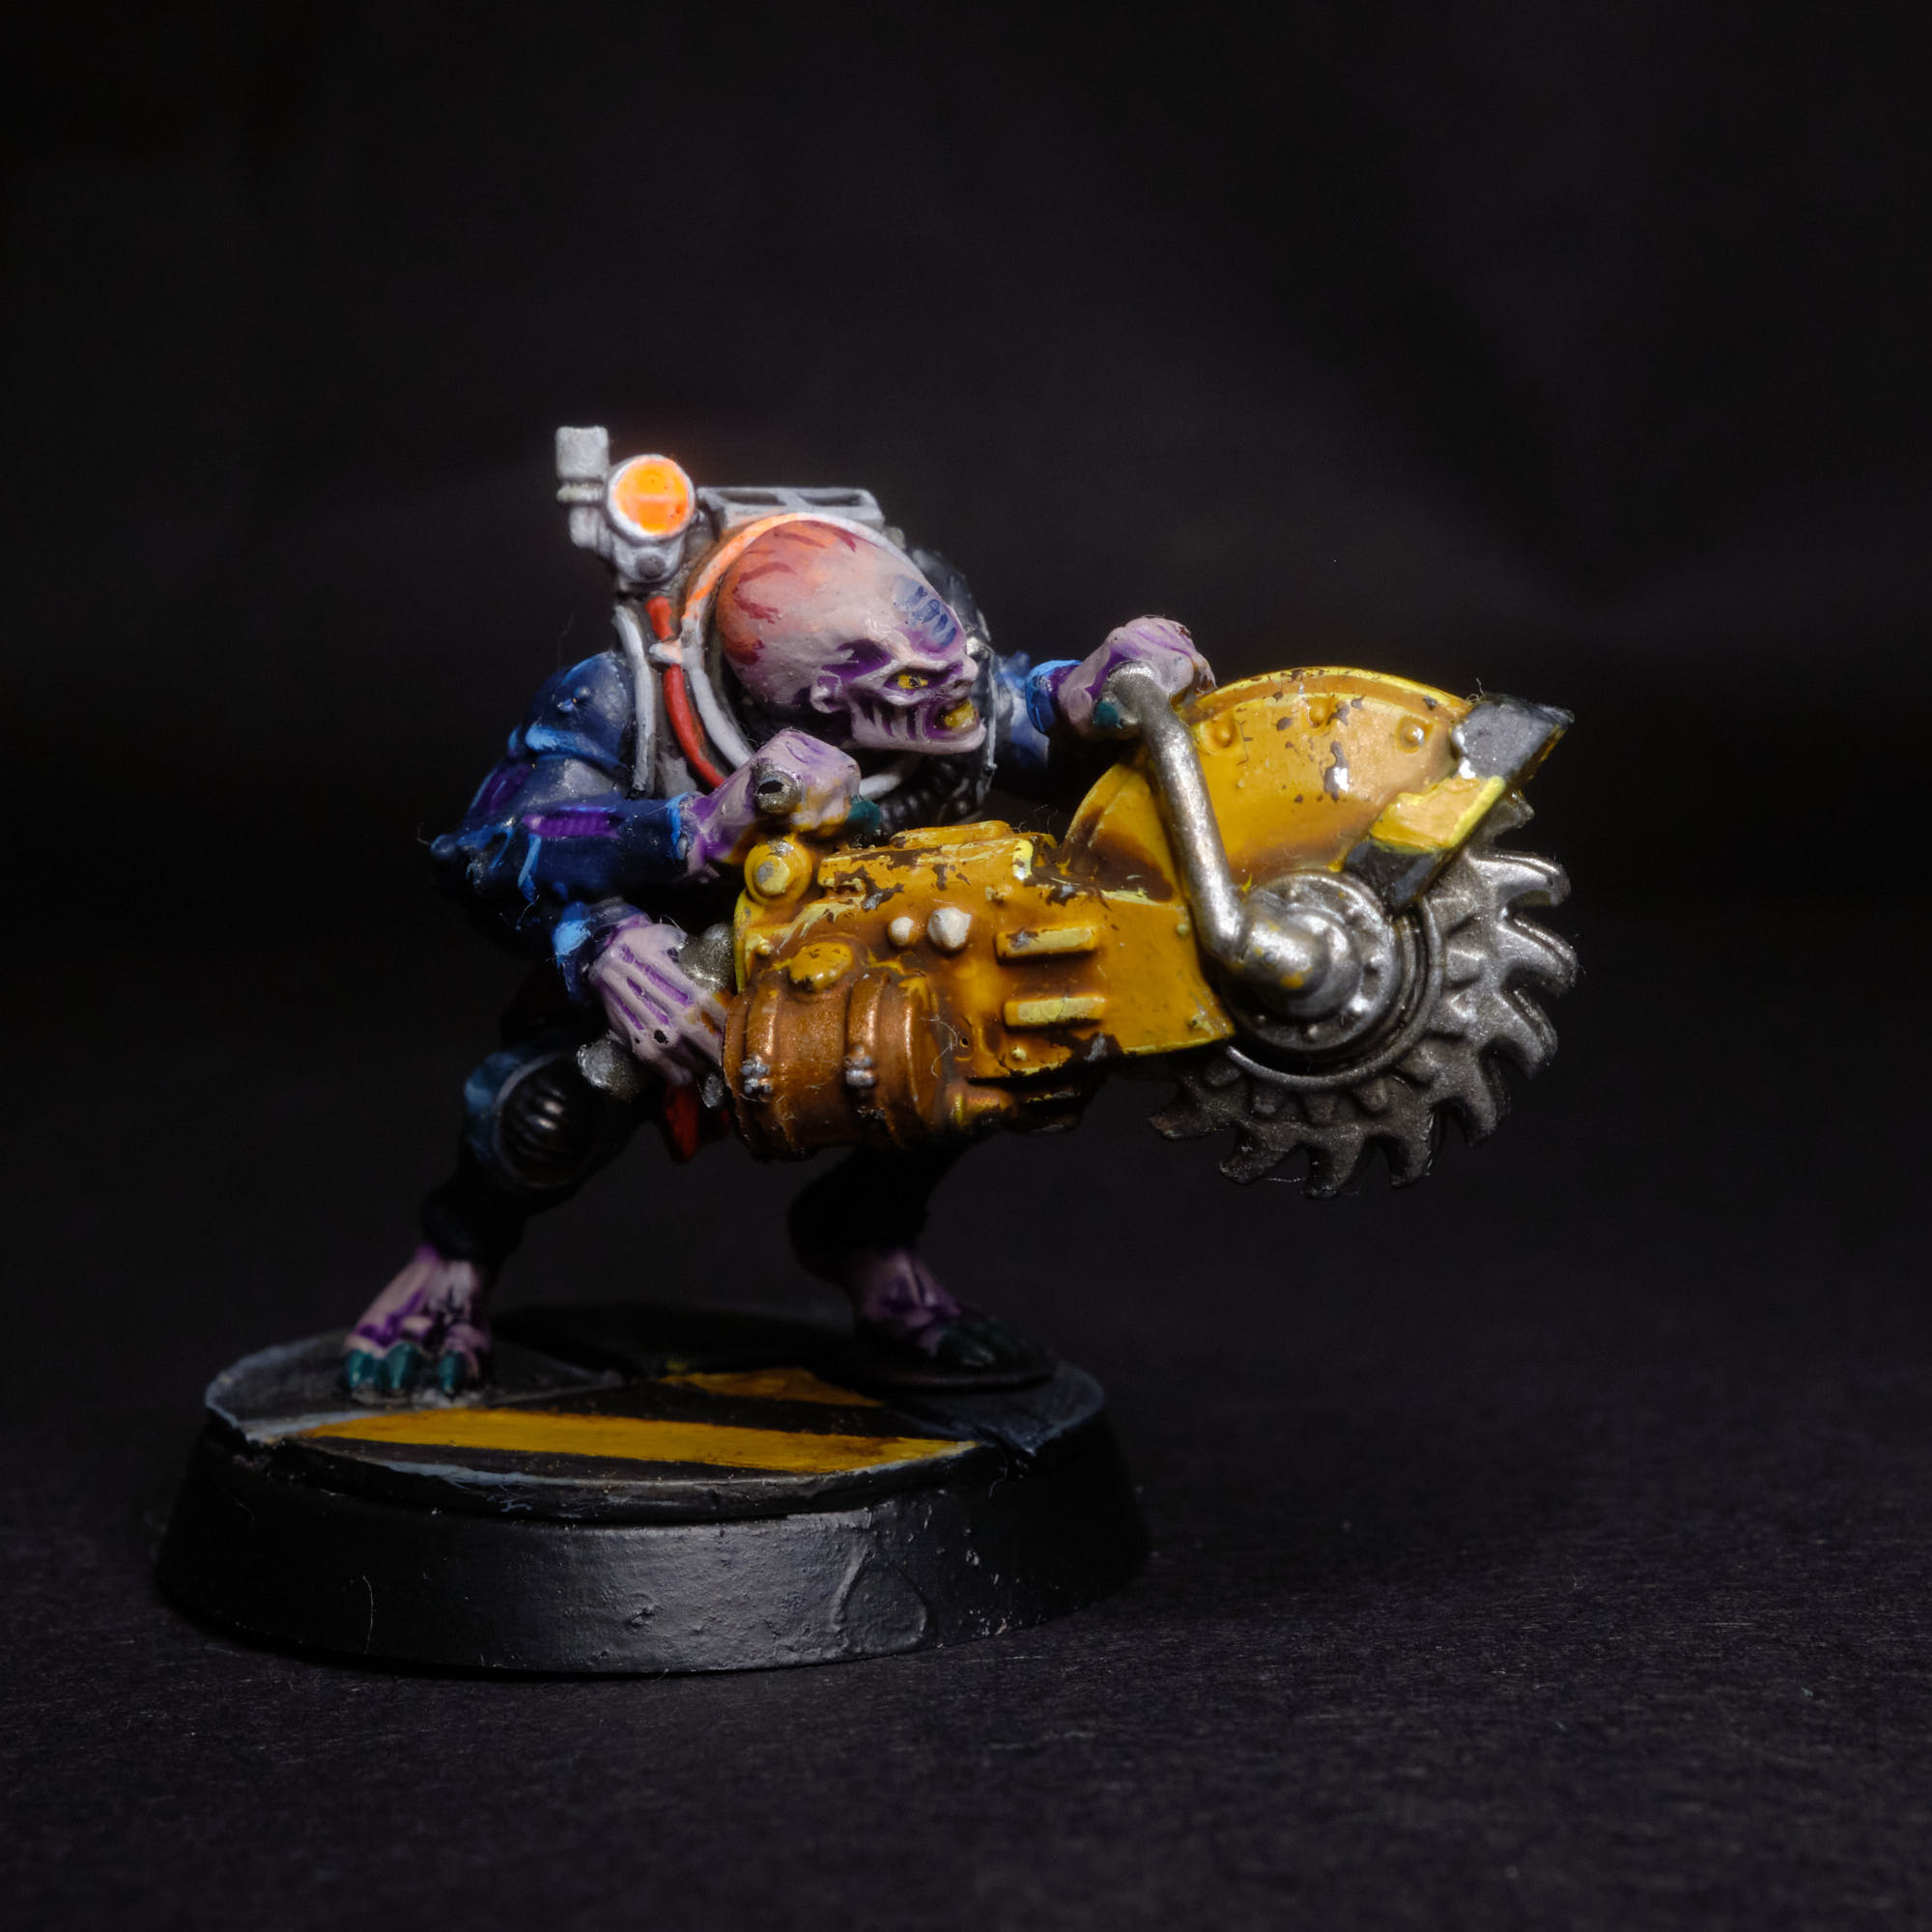
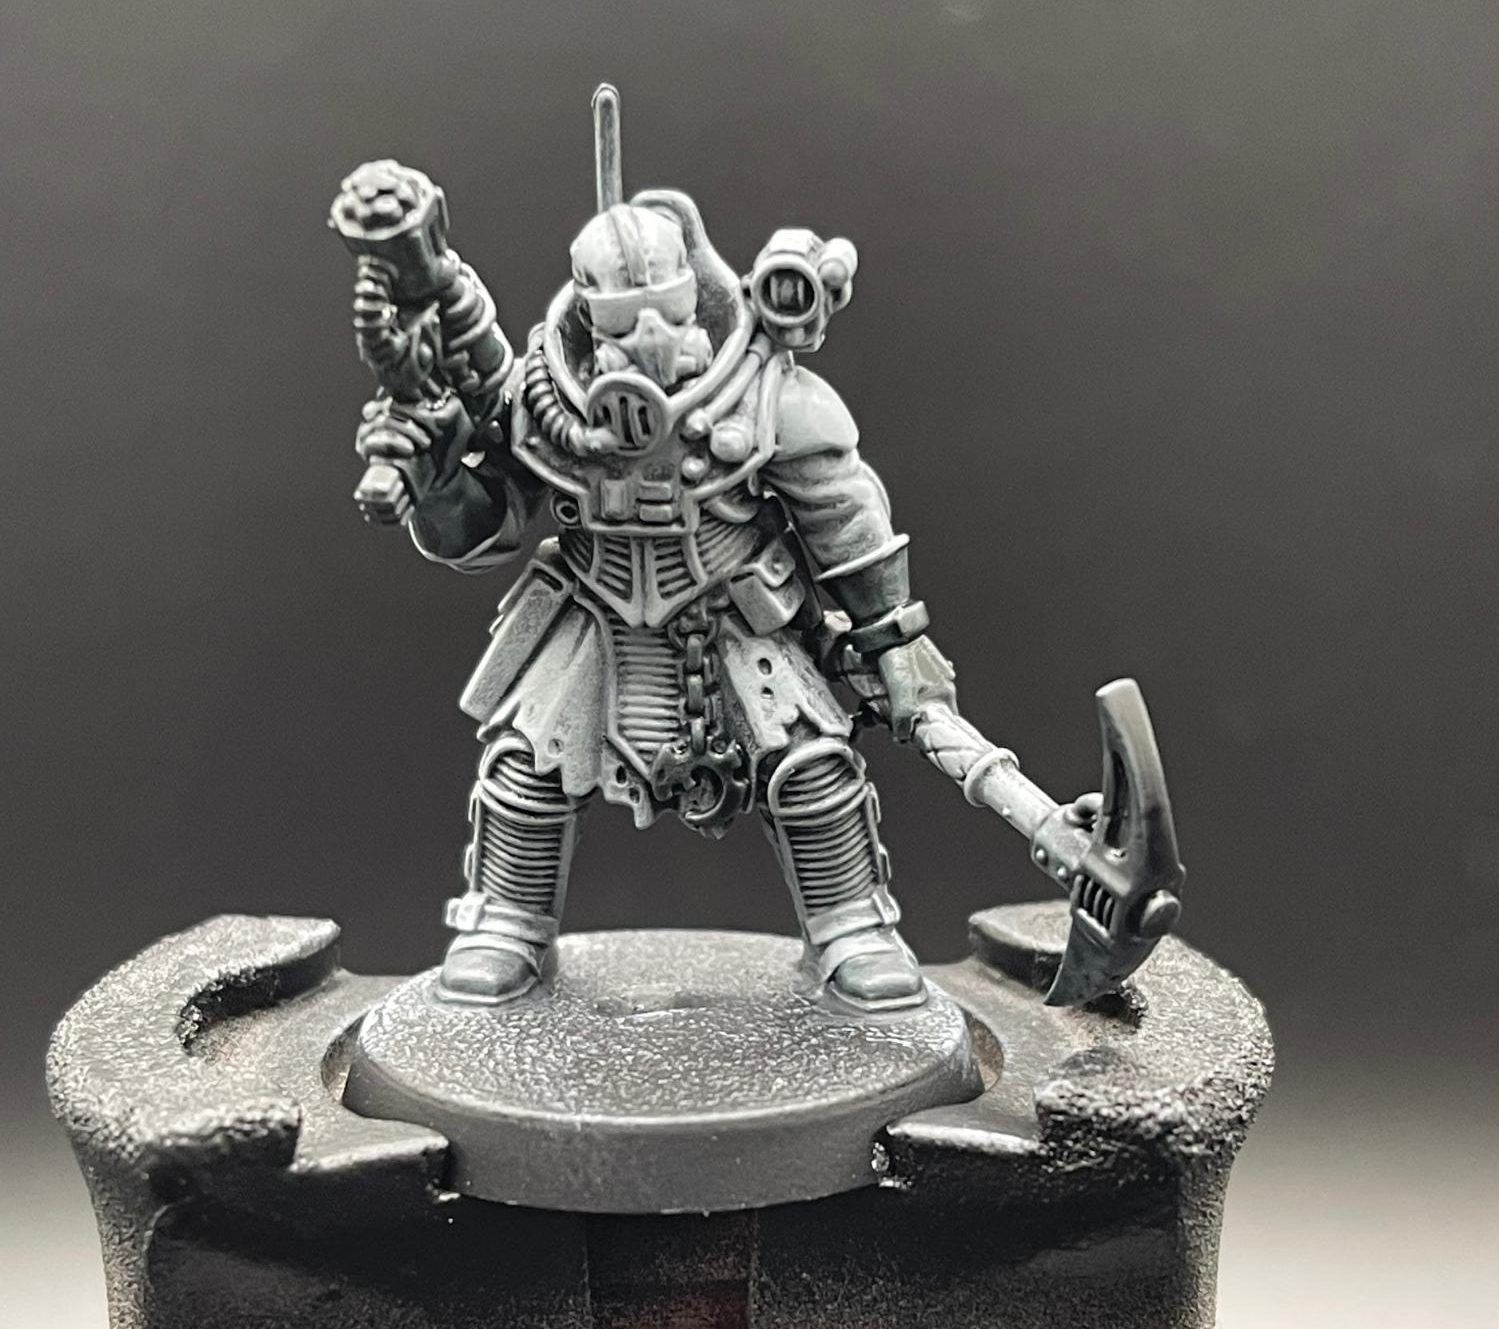
The Reductus Saboteur - Click to Expand
Because I tend to figure out things as I go along sometimes and am easily distracted, my process is a bit non-linear compared to Rockfish’s and a result, my photos are a bit “Now paint the rest of the owl”, sorry!
Prime time
Basecoating/ The Basics
-


<3 Drybrushing after so many years -
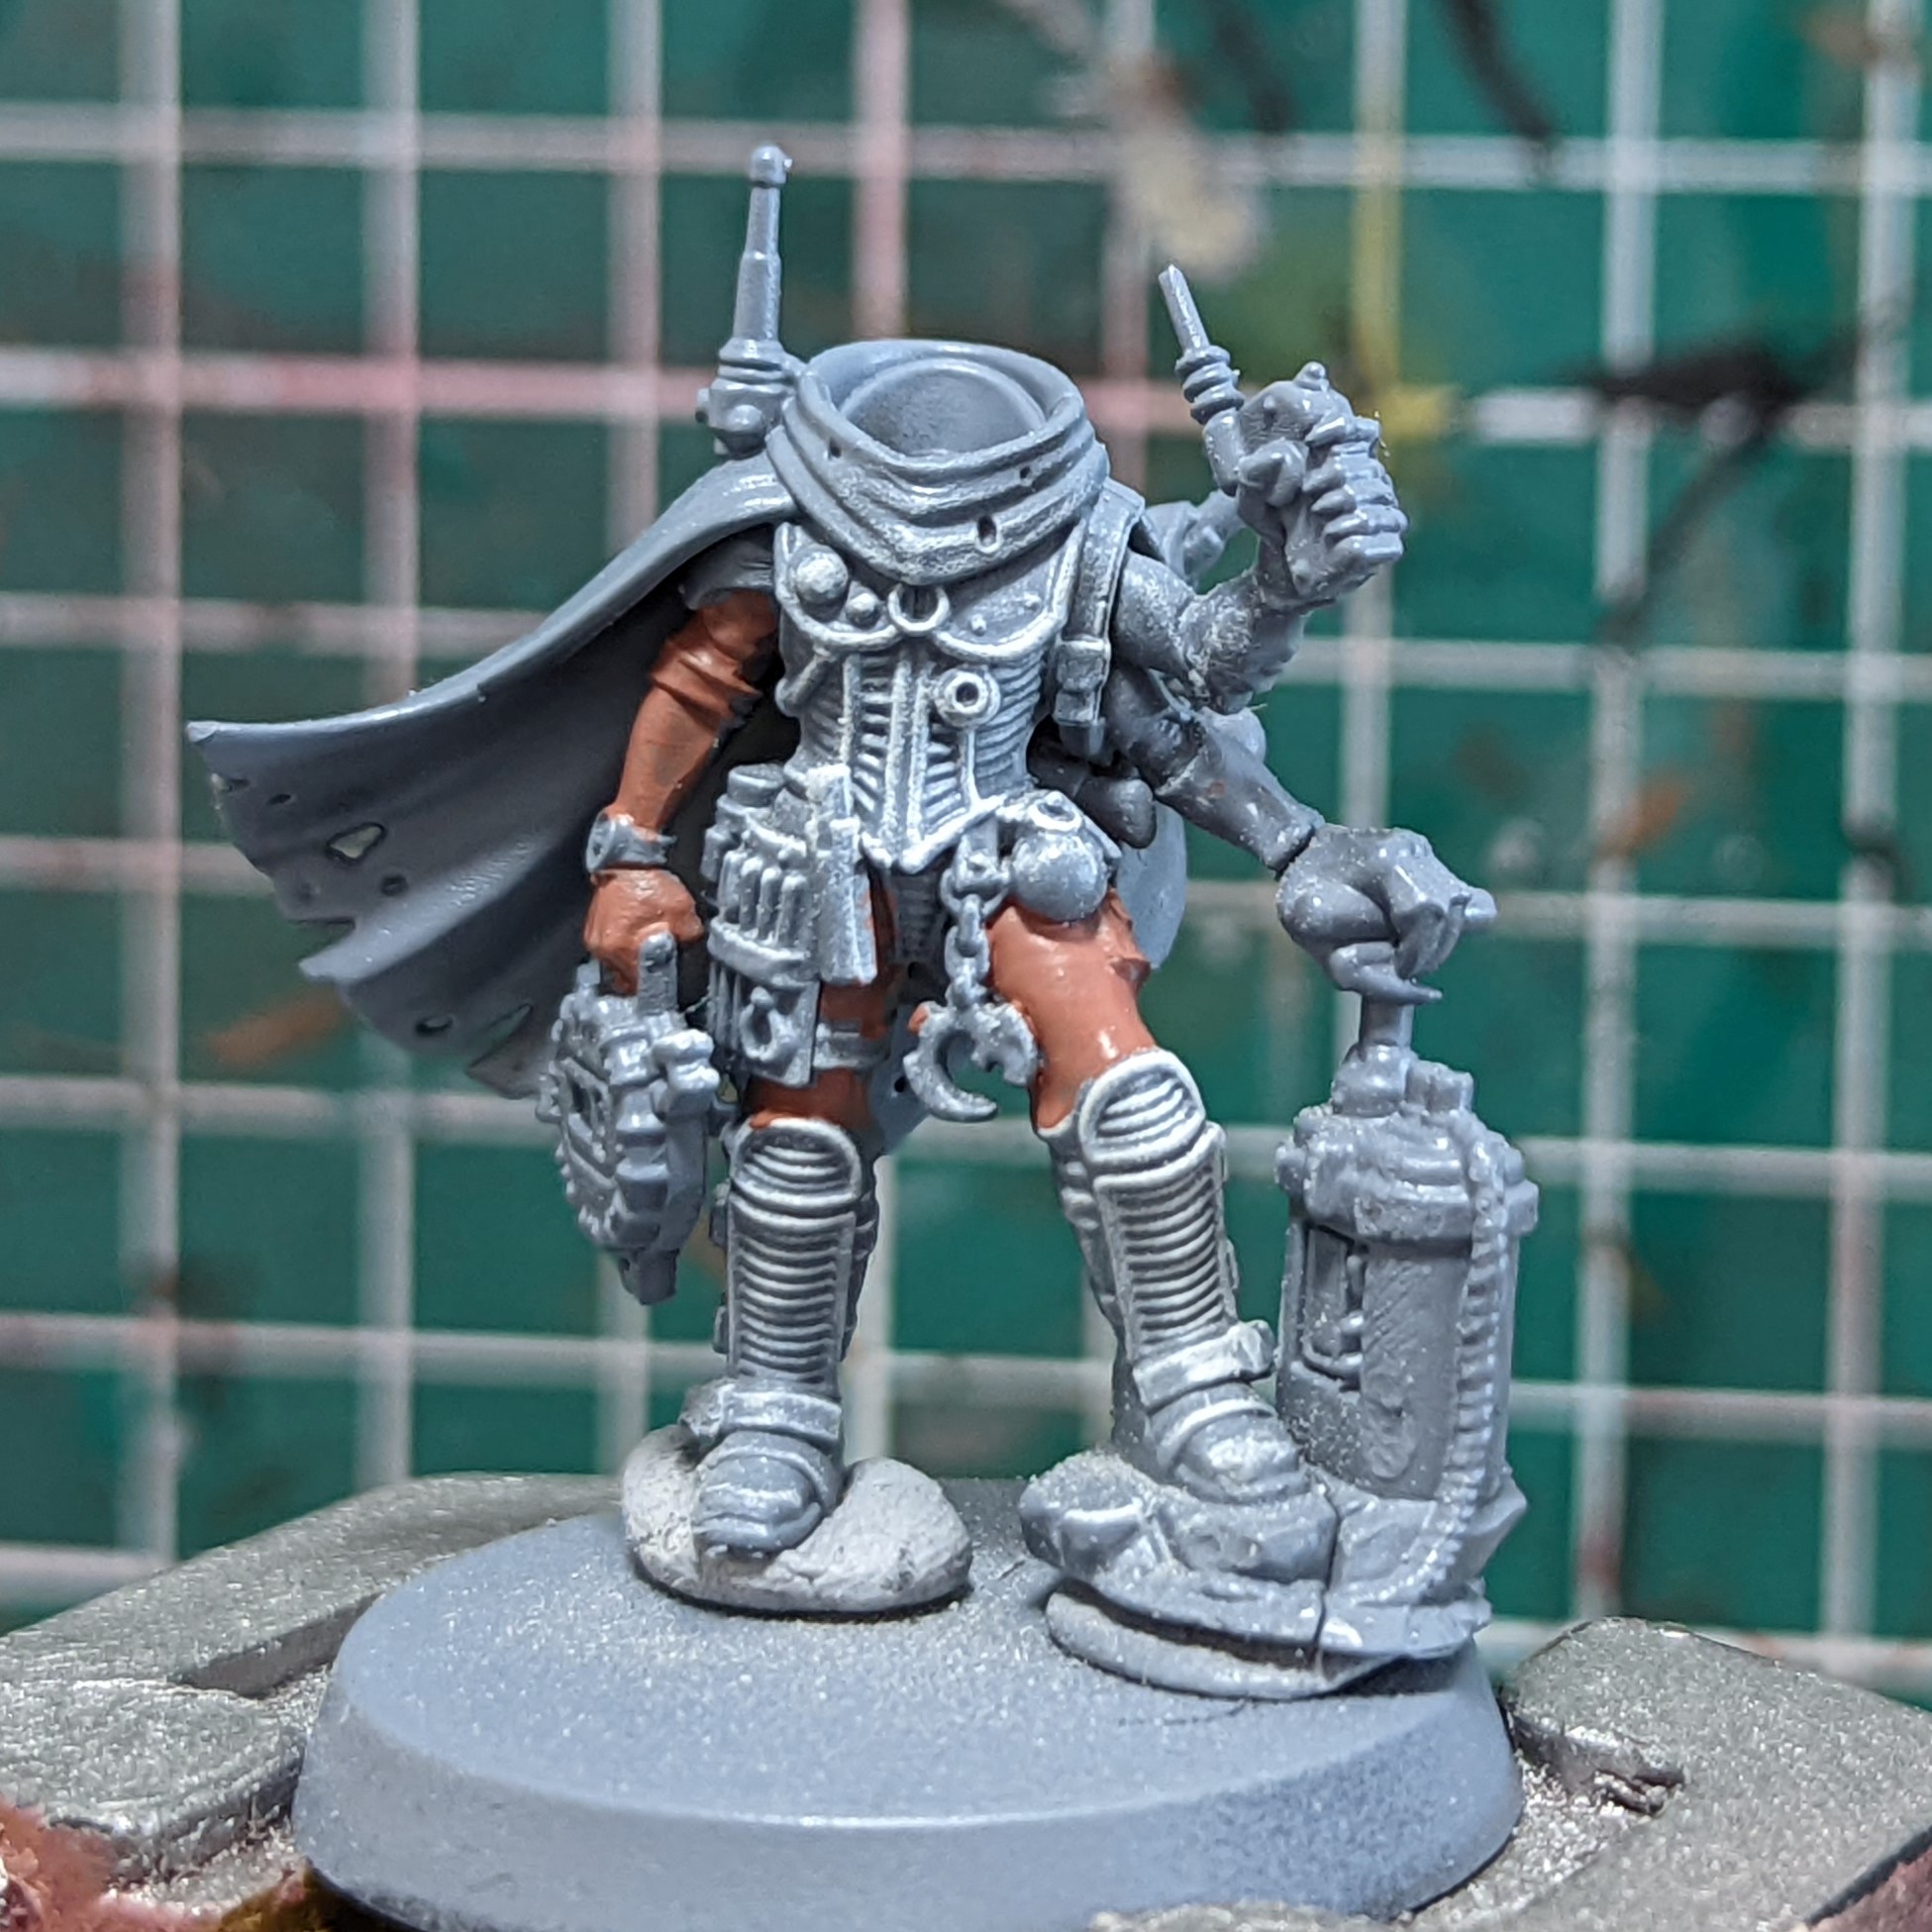

Bugman’s Glow is a great base for orange
Details/ Skipping right on to dessert

- Carapace: Macragge Blue > Temple Guard Blue > Baharoth Blue
- Genestealer Flesh: Xerus Purple > Genestealer Purple > 50/50 Genestealer Purple and Emperor’s Children
- Claws: Slaneesh Grey
- Reds: Mephiston Red > Evil Sunz Scarlet > extreme edge of Flash Gits Yellow
- Silver: Army Painter Gun Metal (it reminds me of the old Boltgun Metal and covers very well)
- Bronze: Brass Scorpion, Edged with Gun Metal
- Grey Chassis: Skavenblight Dinge, edged with Administratum Grey
- Stone: Stormvermin Brown, edged with Administratrum Grey
- Wicks: Rakarth Flesh, Washed with Reikland Fleshshade
- LCD Displays: Using Rockfish’s approach to lenses I used Caliban Green > Warpstone Glow > Moot Green and tiny touch of white ink in the opposite corner.
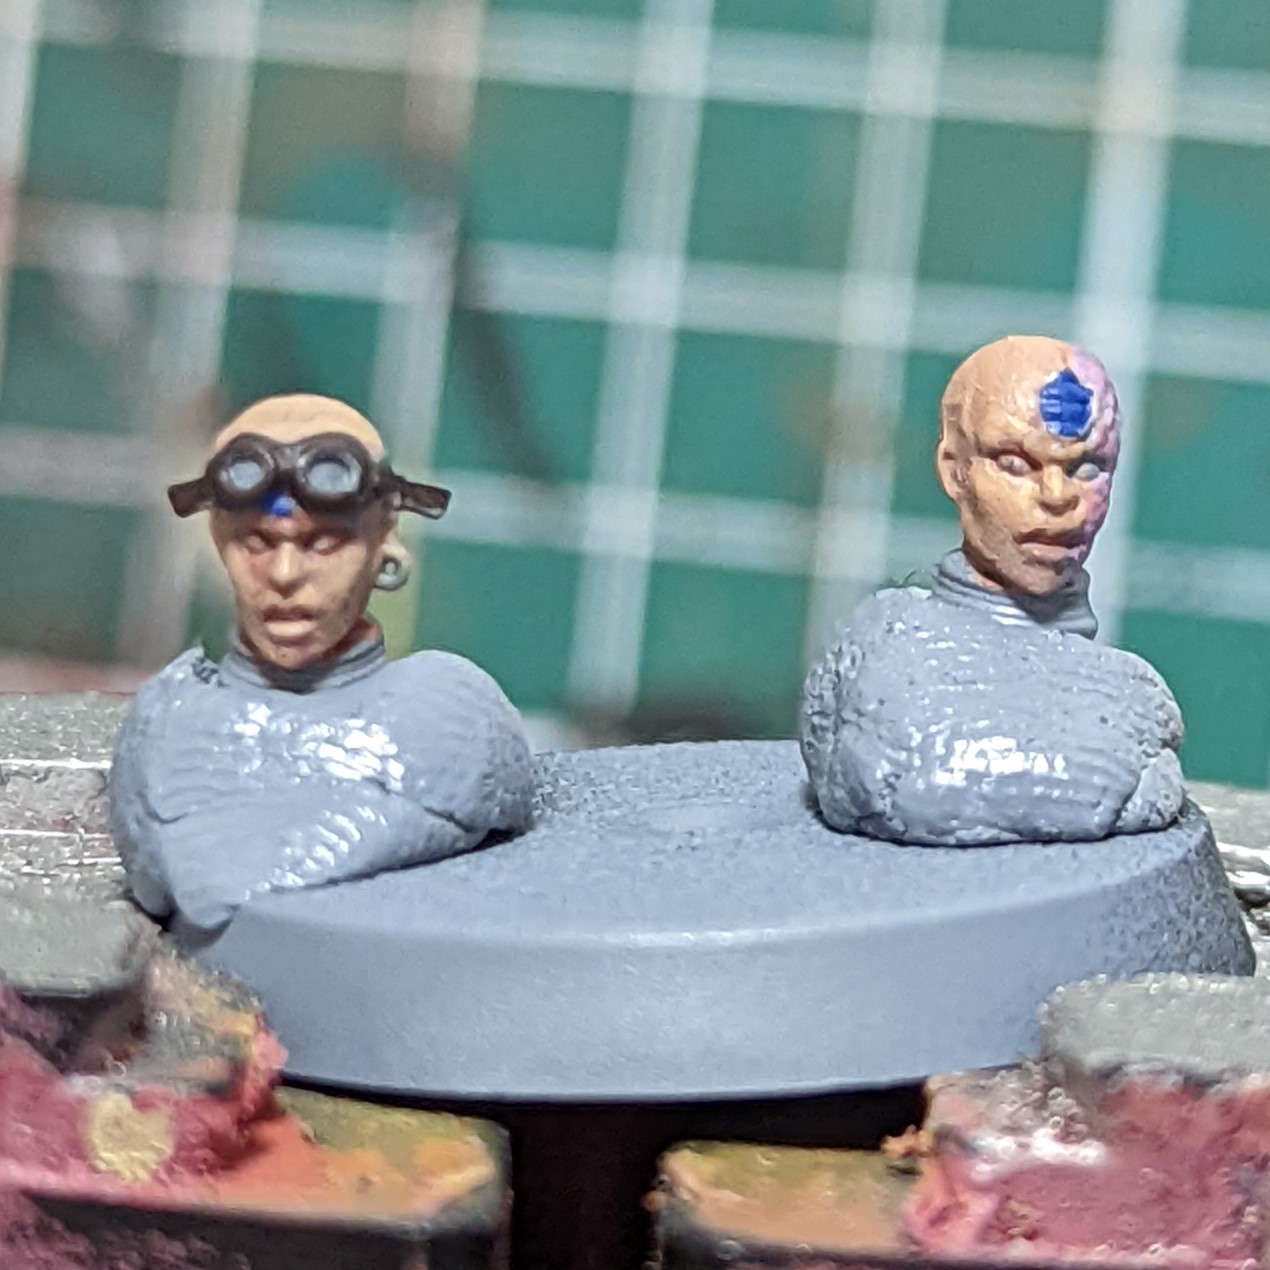
Face Off
-
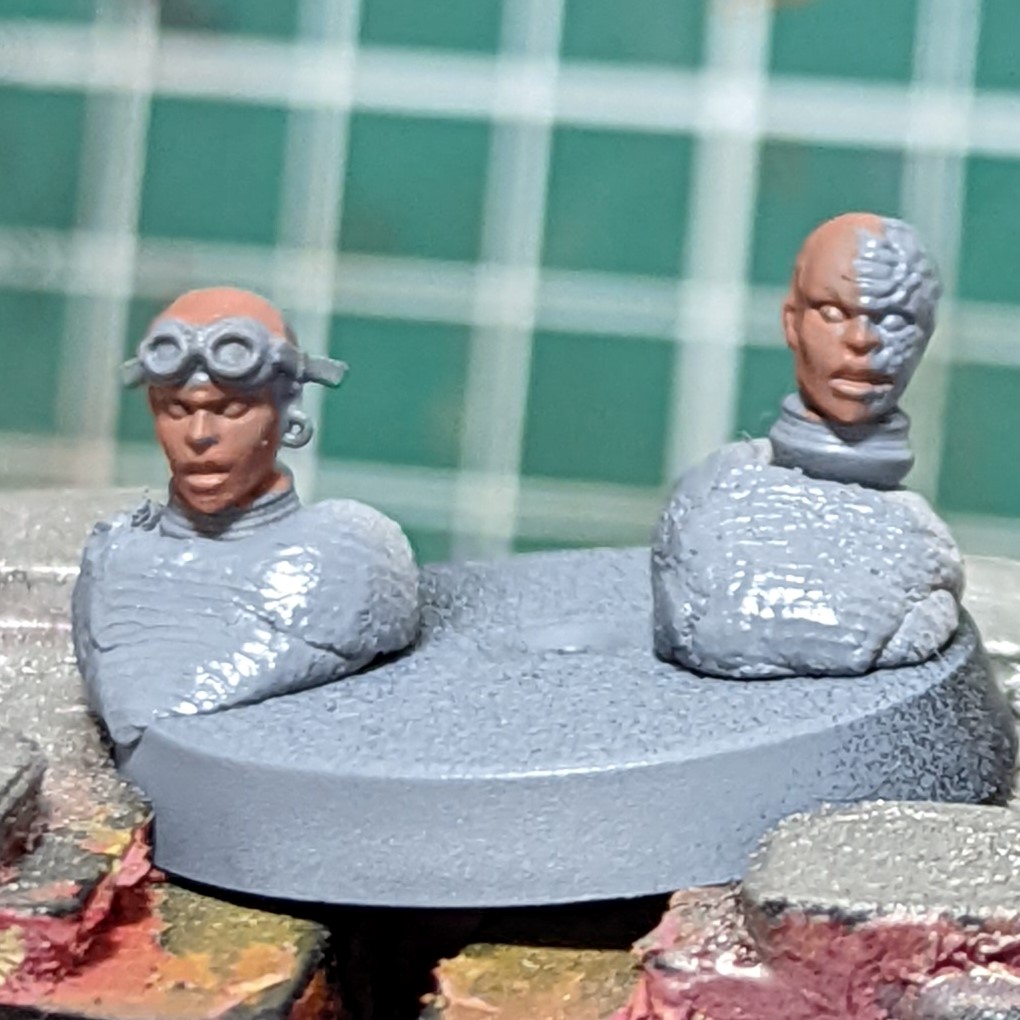

Bugman’s to the rescue -

Kislev Flesh is a bit pasty -
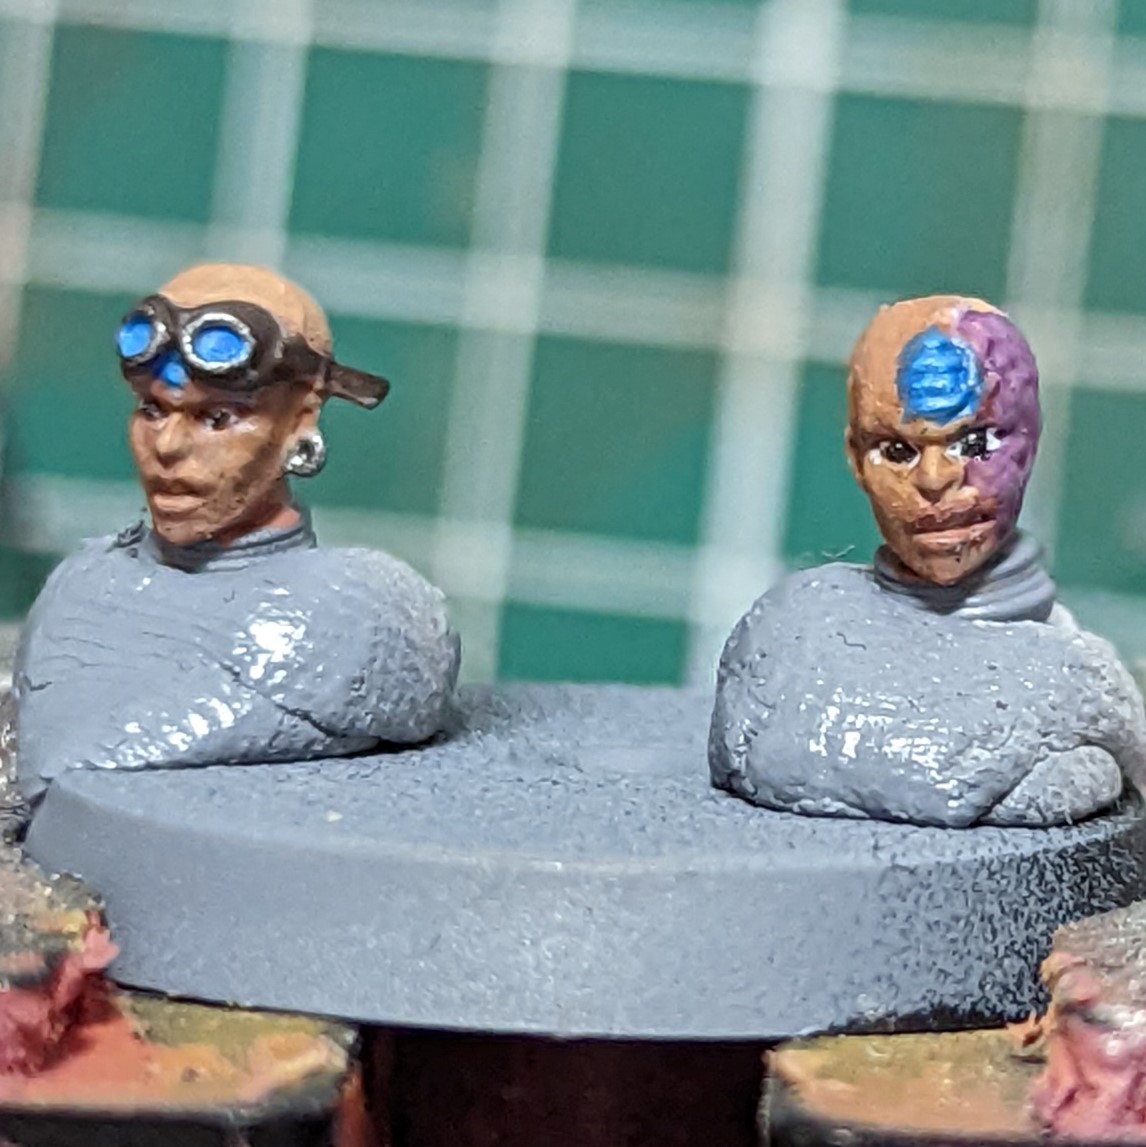

A wash evens it out
- Start with a dot of black in the middle
- Flank the dot of black with tiny dots of white
Shades/ It all comes out in the wash
- Oranges/Reds: Washed very lightly with Reikland Fleshshade in the creases
- Grey Armour: I gave the armour a very light application of Basillicanum Grey thinned with contrast medium to give it a little bit more depth. As I had mixed up too much of this I also applied it to the grey panelling.
- Carapace: Drakenhoff Nightshade, to darken it down a bit to stand out against the cape
- Genestealer Flesh: Druchii Violet to give a little bit of depth
- Boots: as mentioned earlier, I experiemented and was happy enough with the result of Druchii Violet over Incubi Darkness
Basing/ All your base
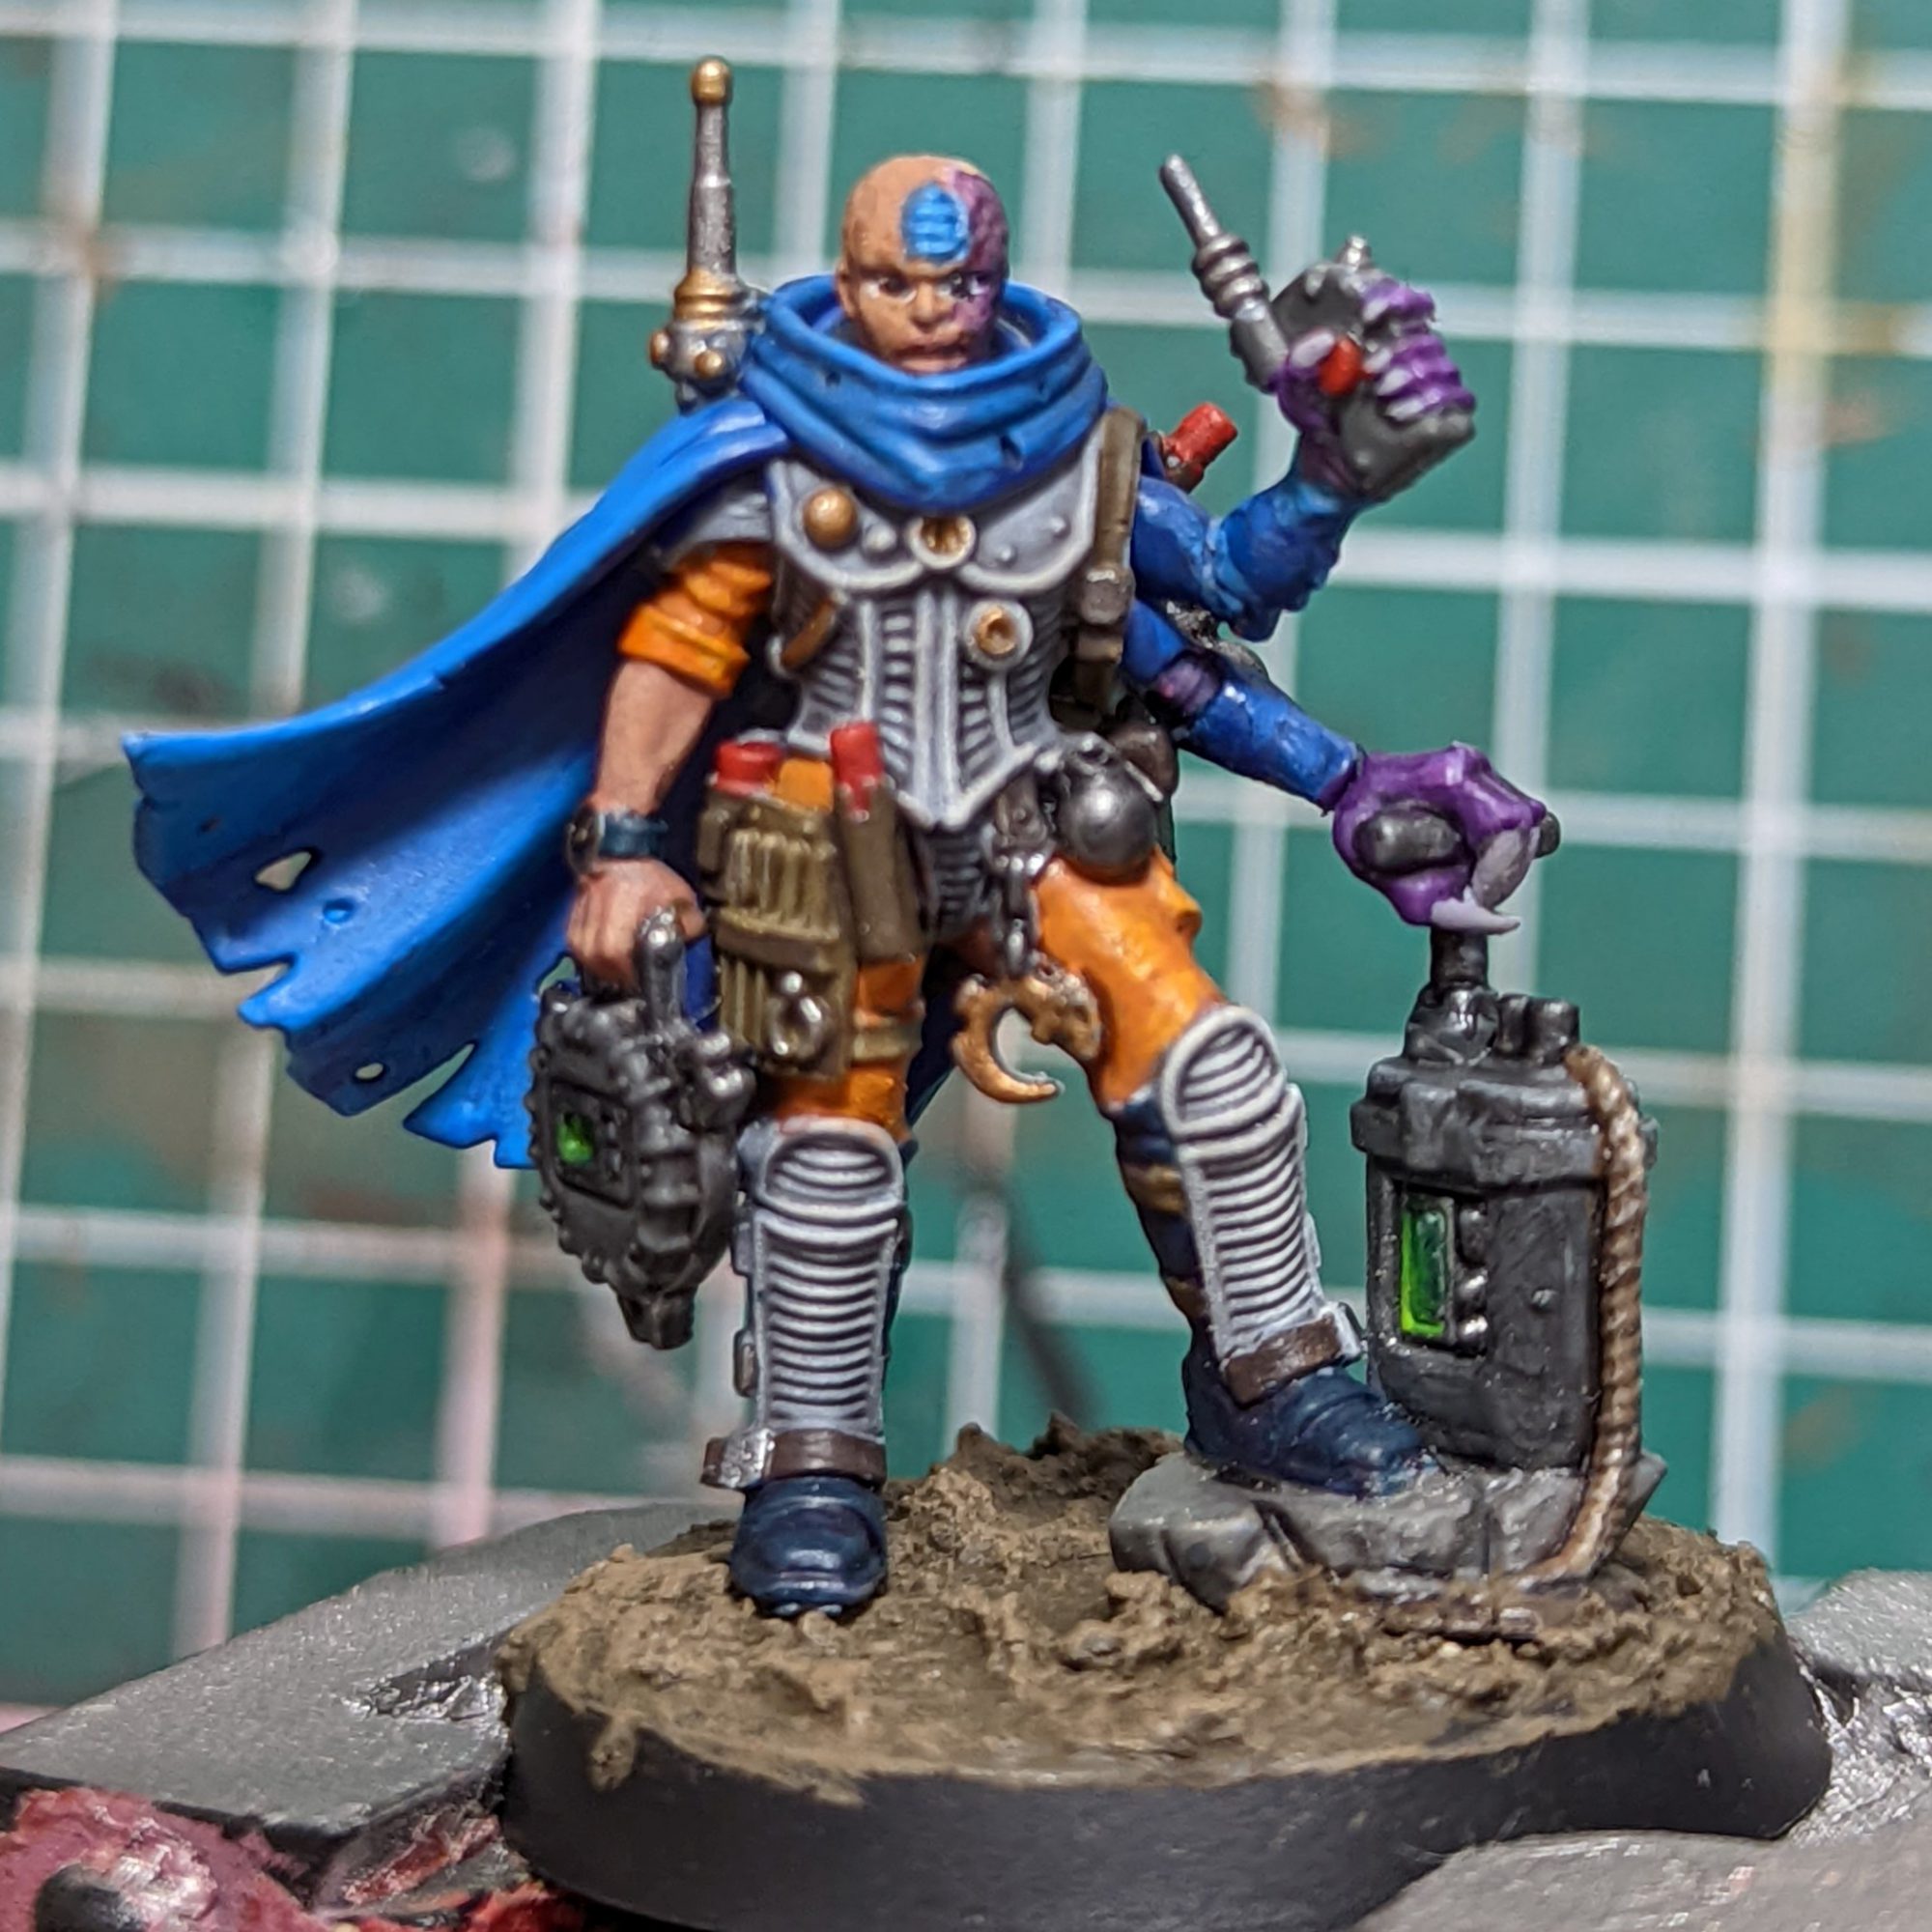
- AK Muddy Ground (It’s an huge old container that’s nearly finished, next time I’ll pick up the Vallejo texture that Rockfish used)
- After giving this plenty time to dry, give it a drybrush of Steel Legion Drab followed by a very light drybrush of Ushabti Bone.
- I put on one or two Middenland Tufts to break things up slightly.
- No model is finished without painting it’s rim. What colour to use can be a controversial topic, but I’ve stuck to Steel Legion Drab for this army
Gallery
-
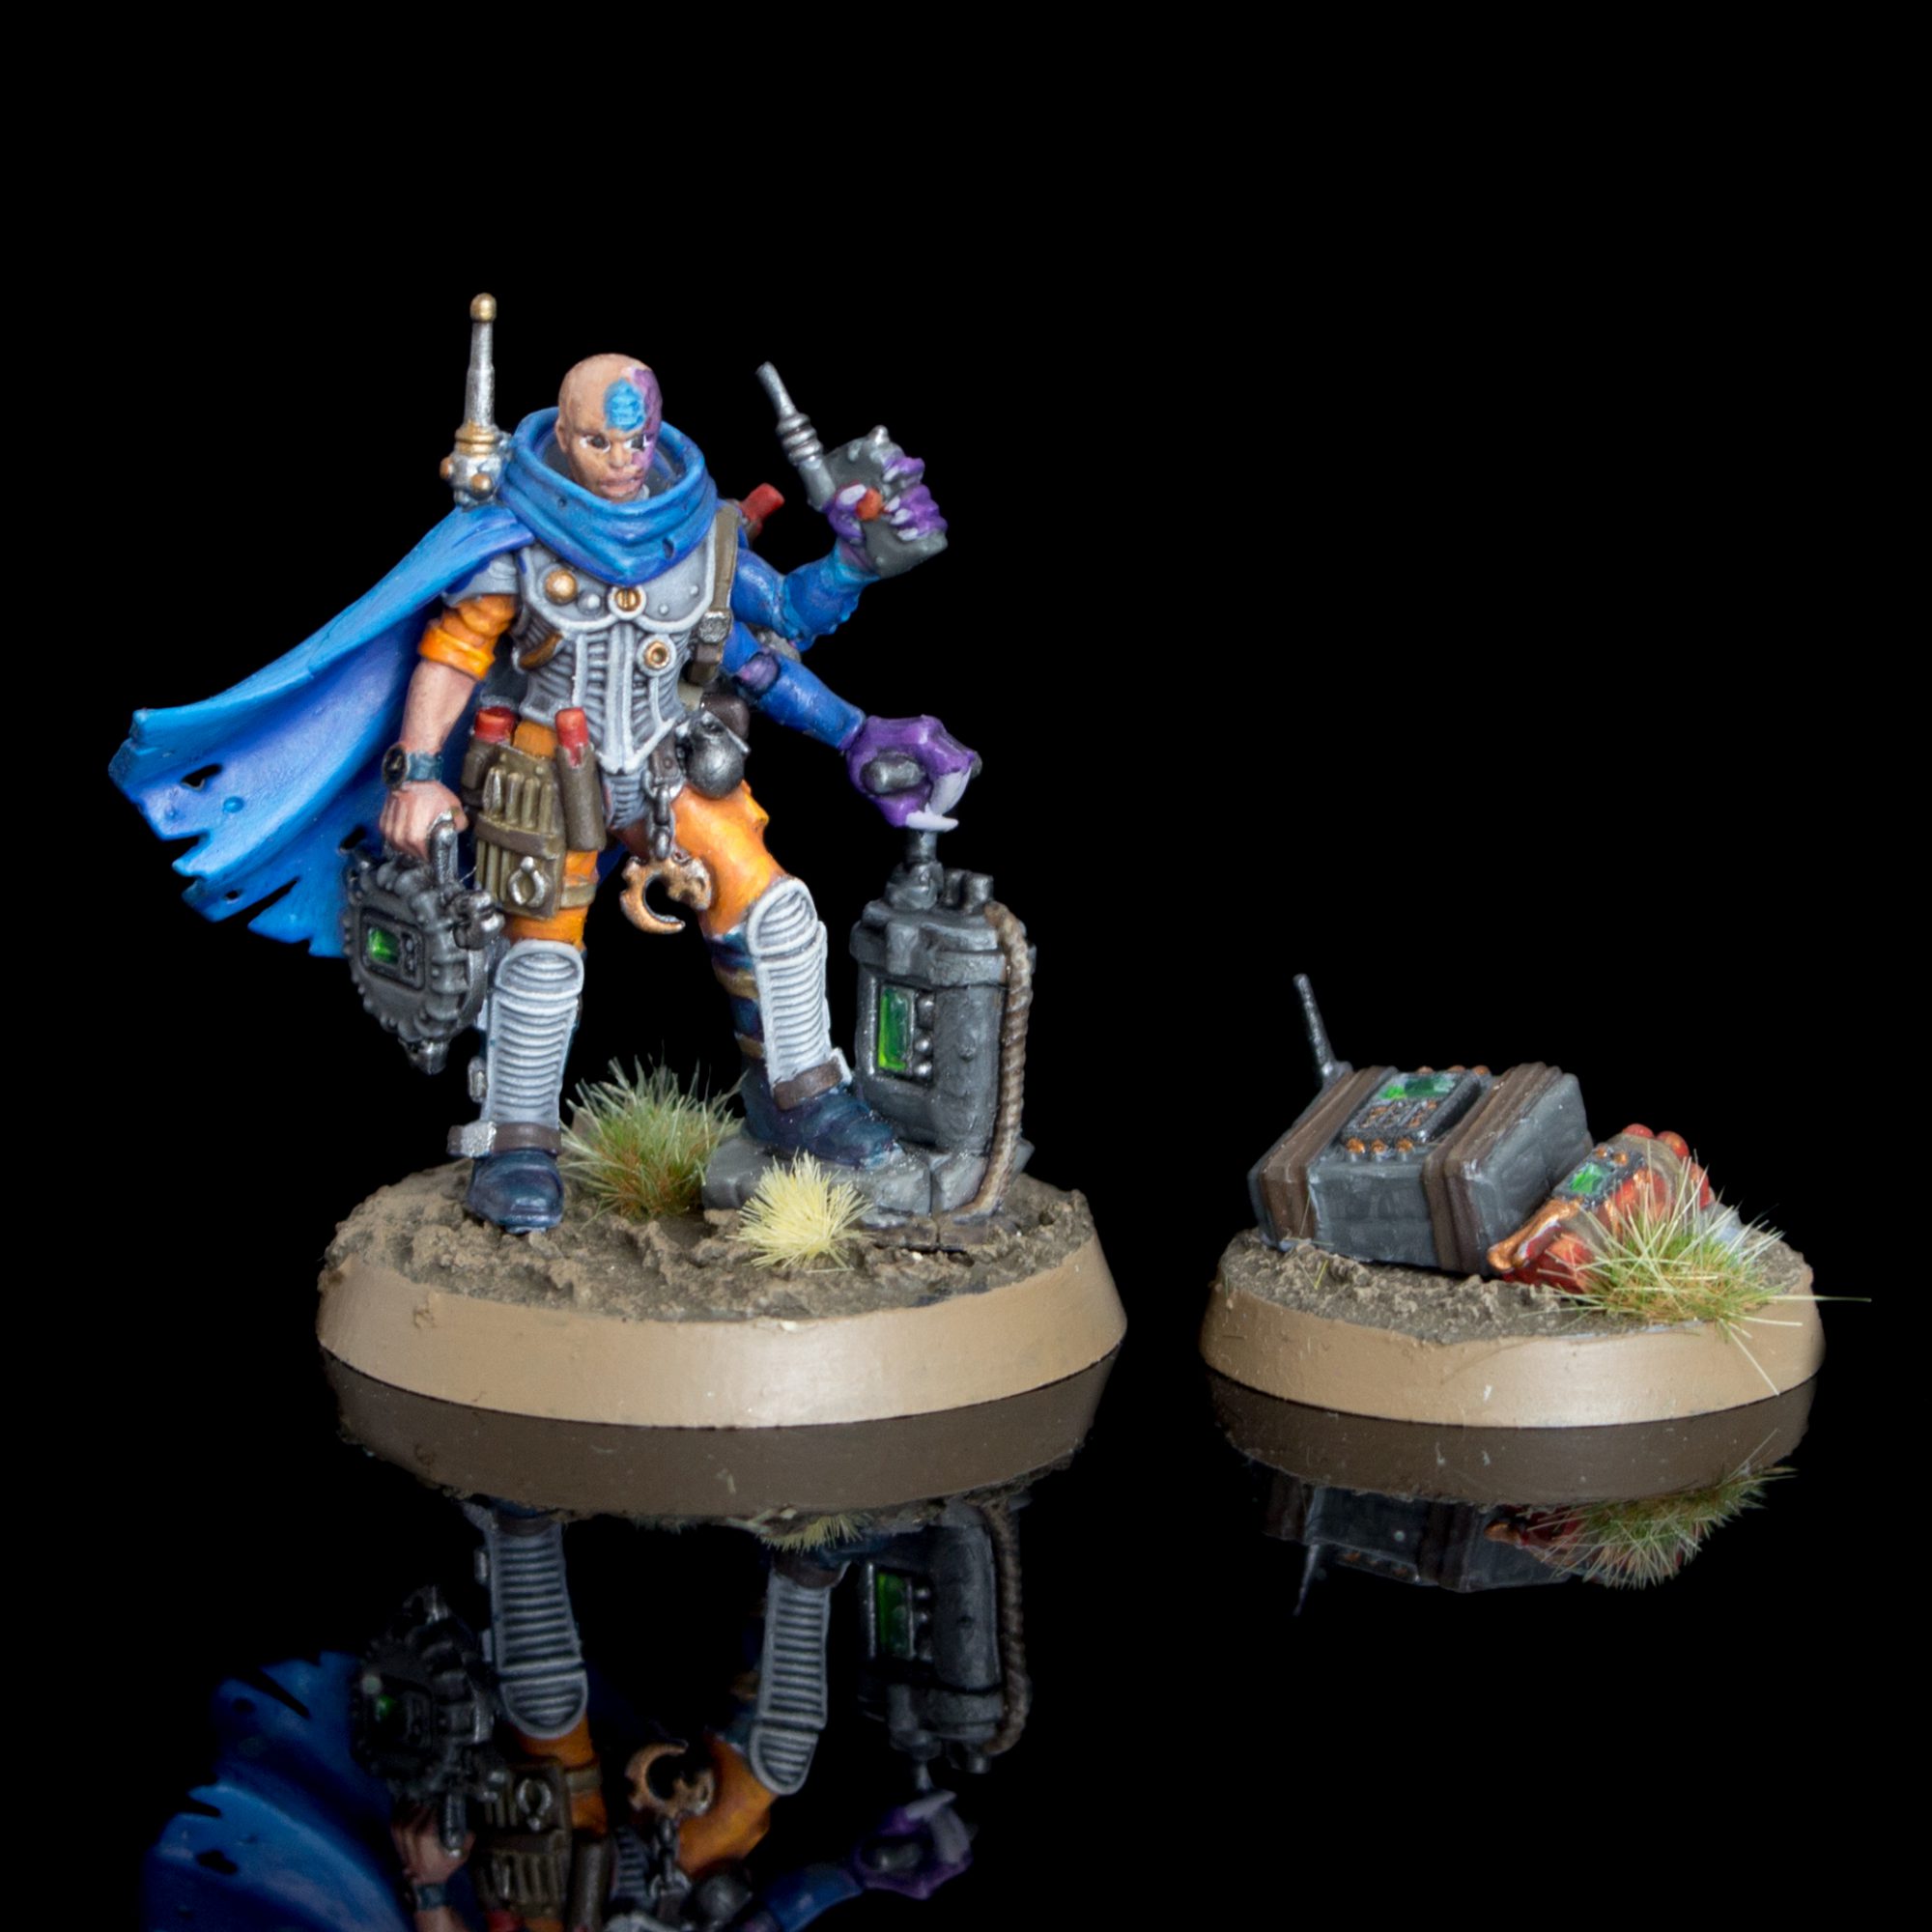
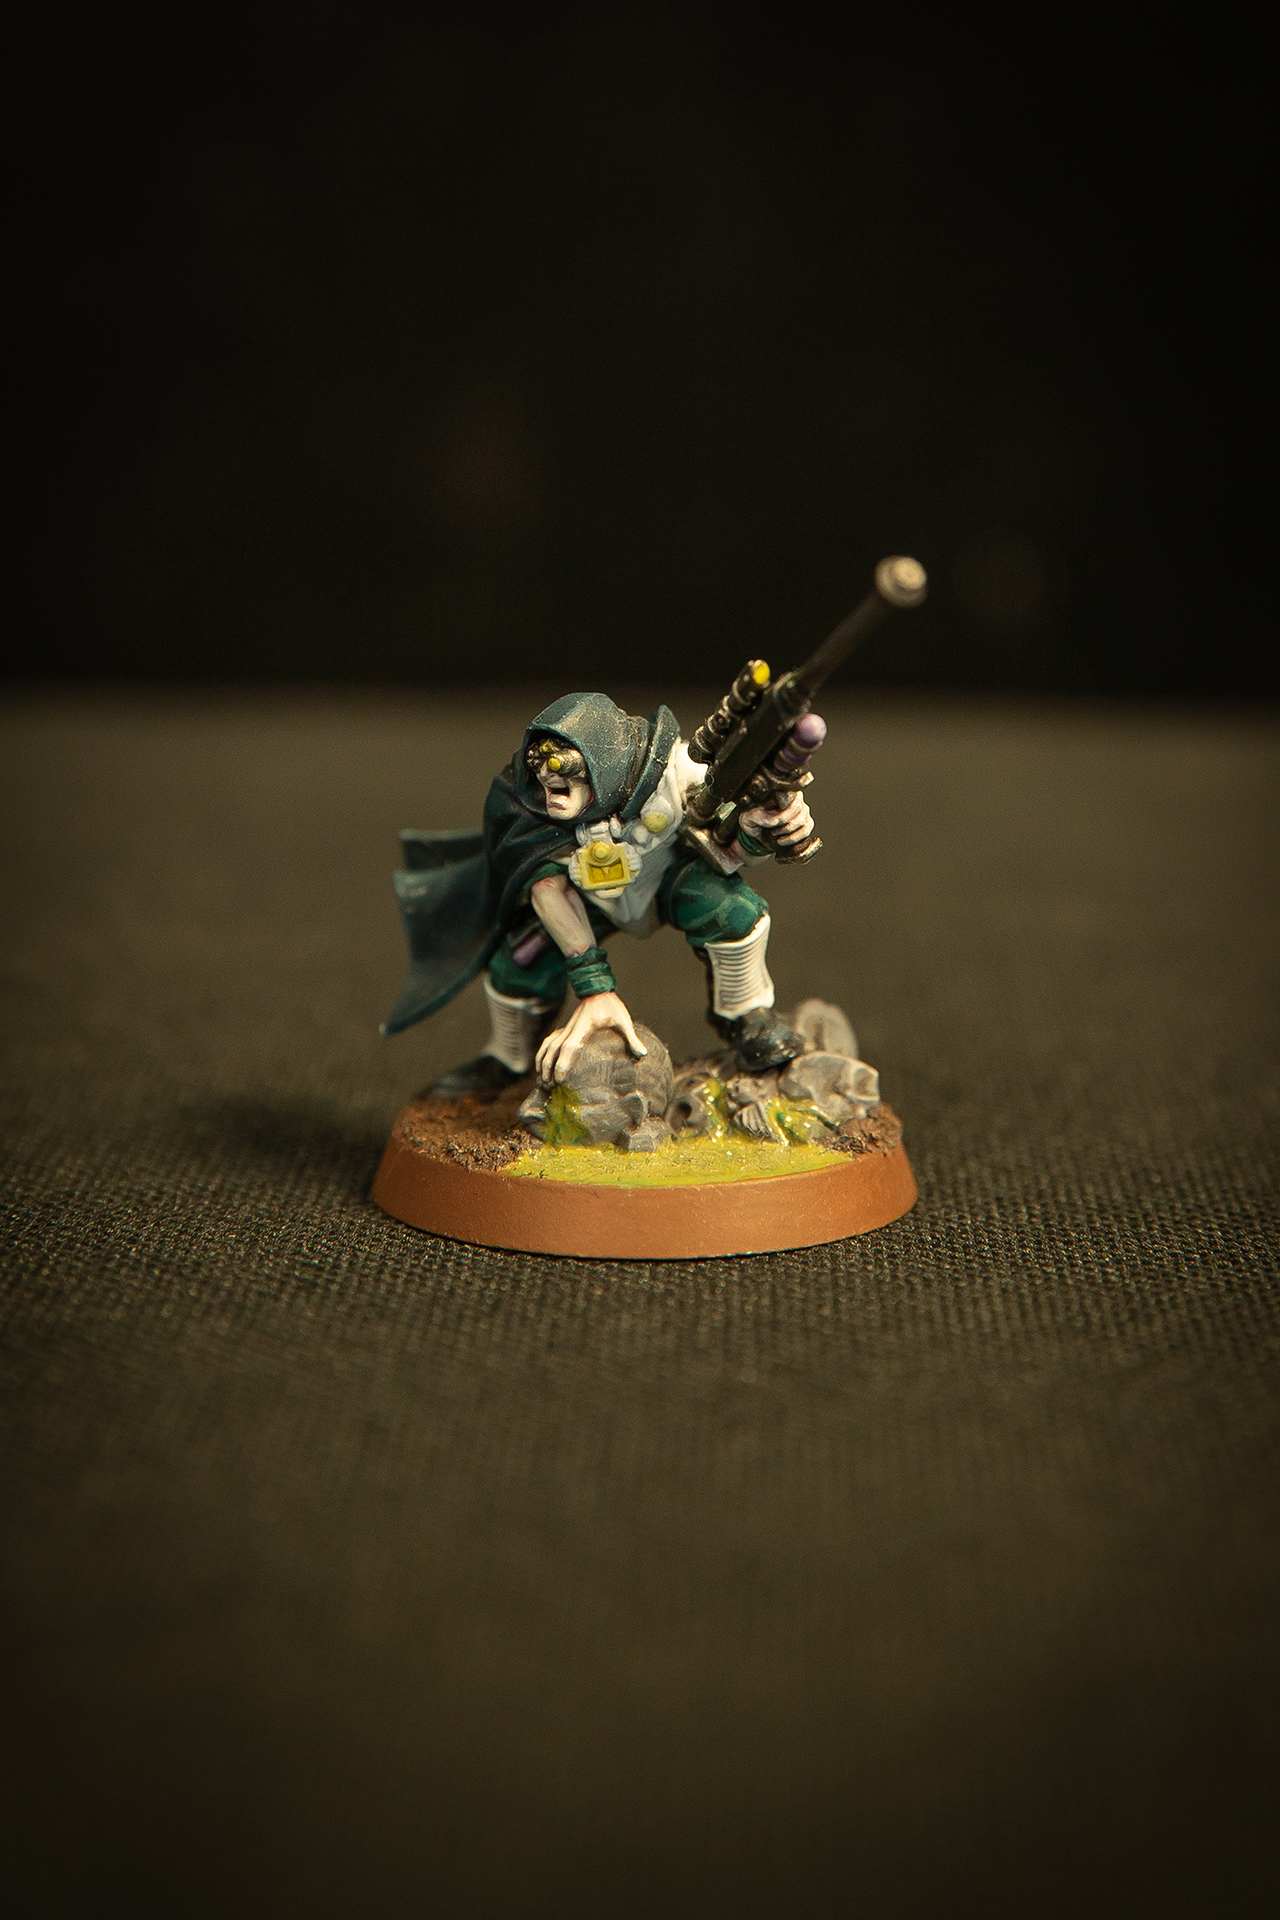
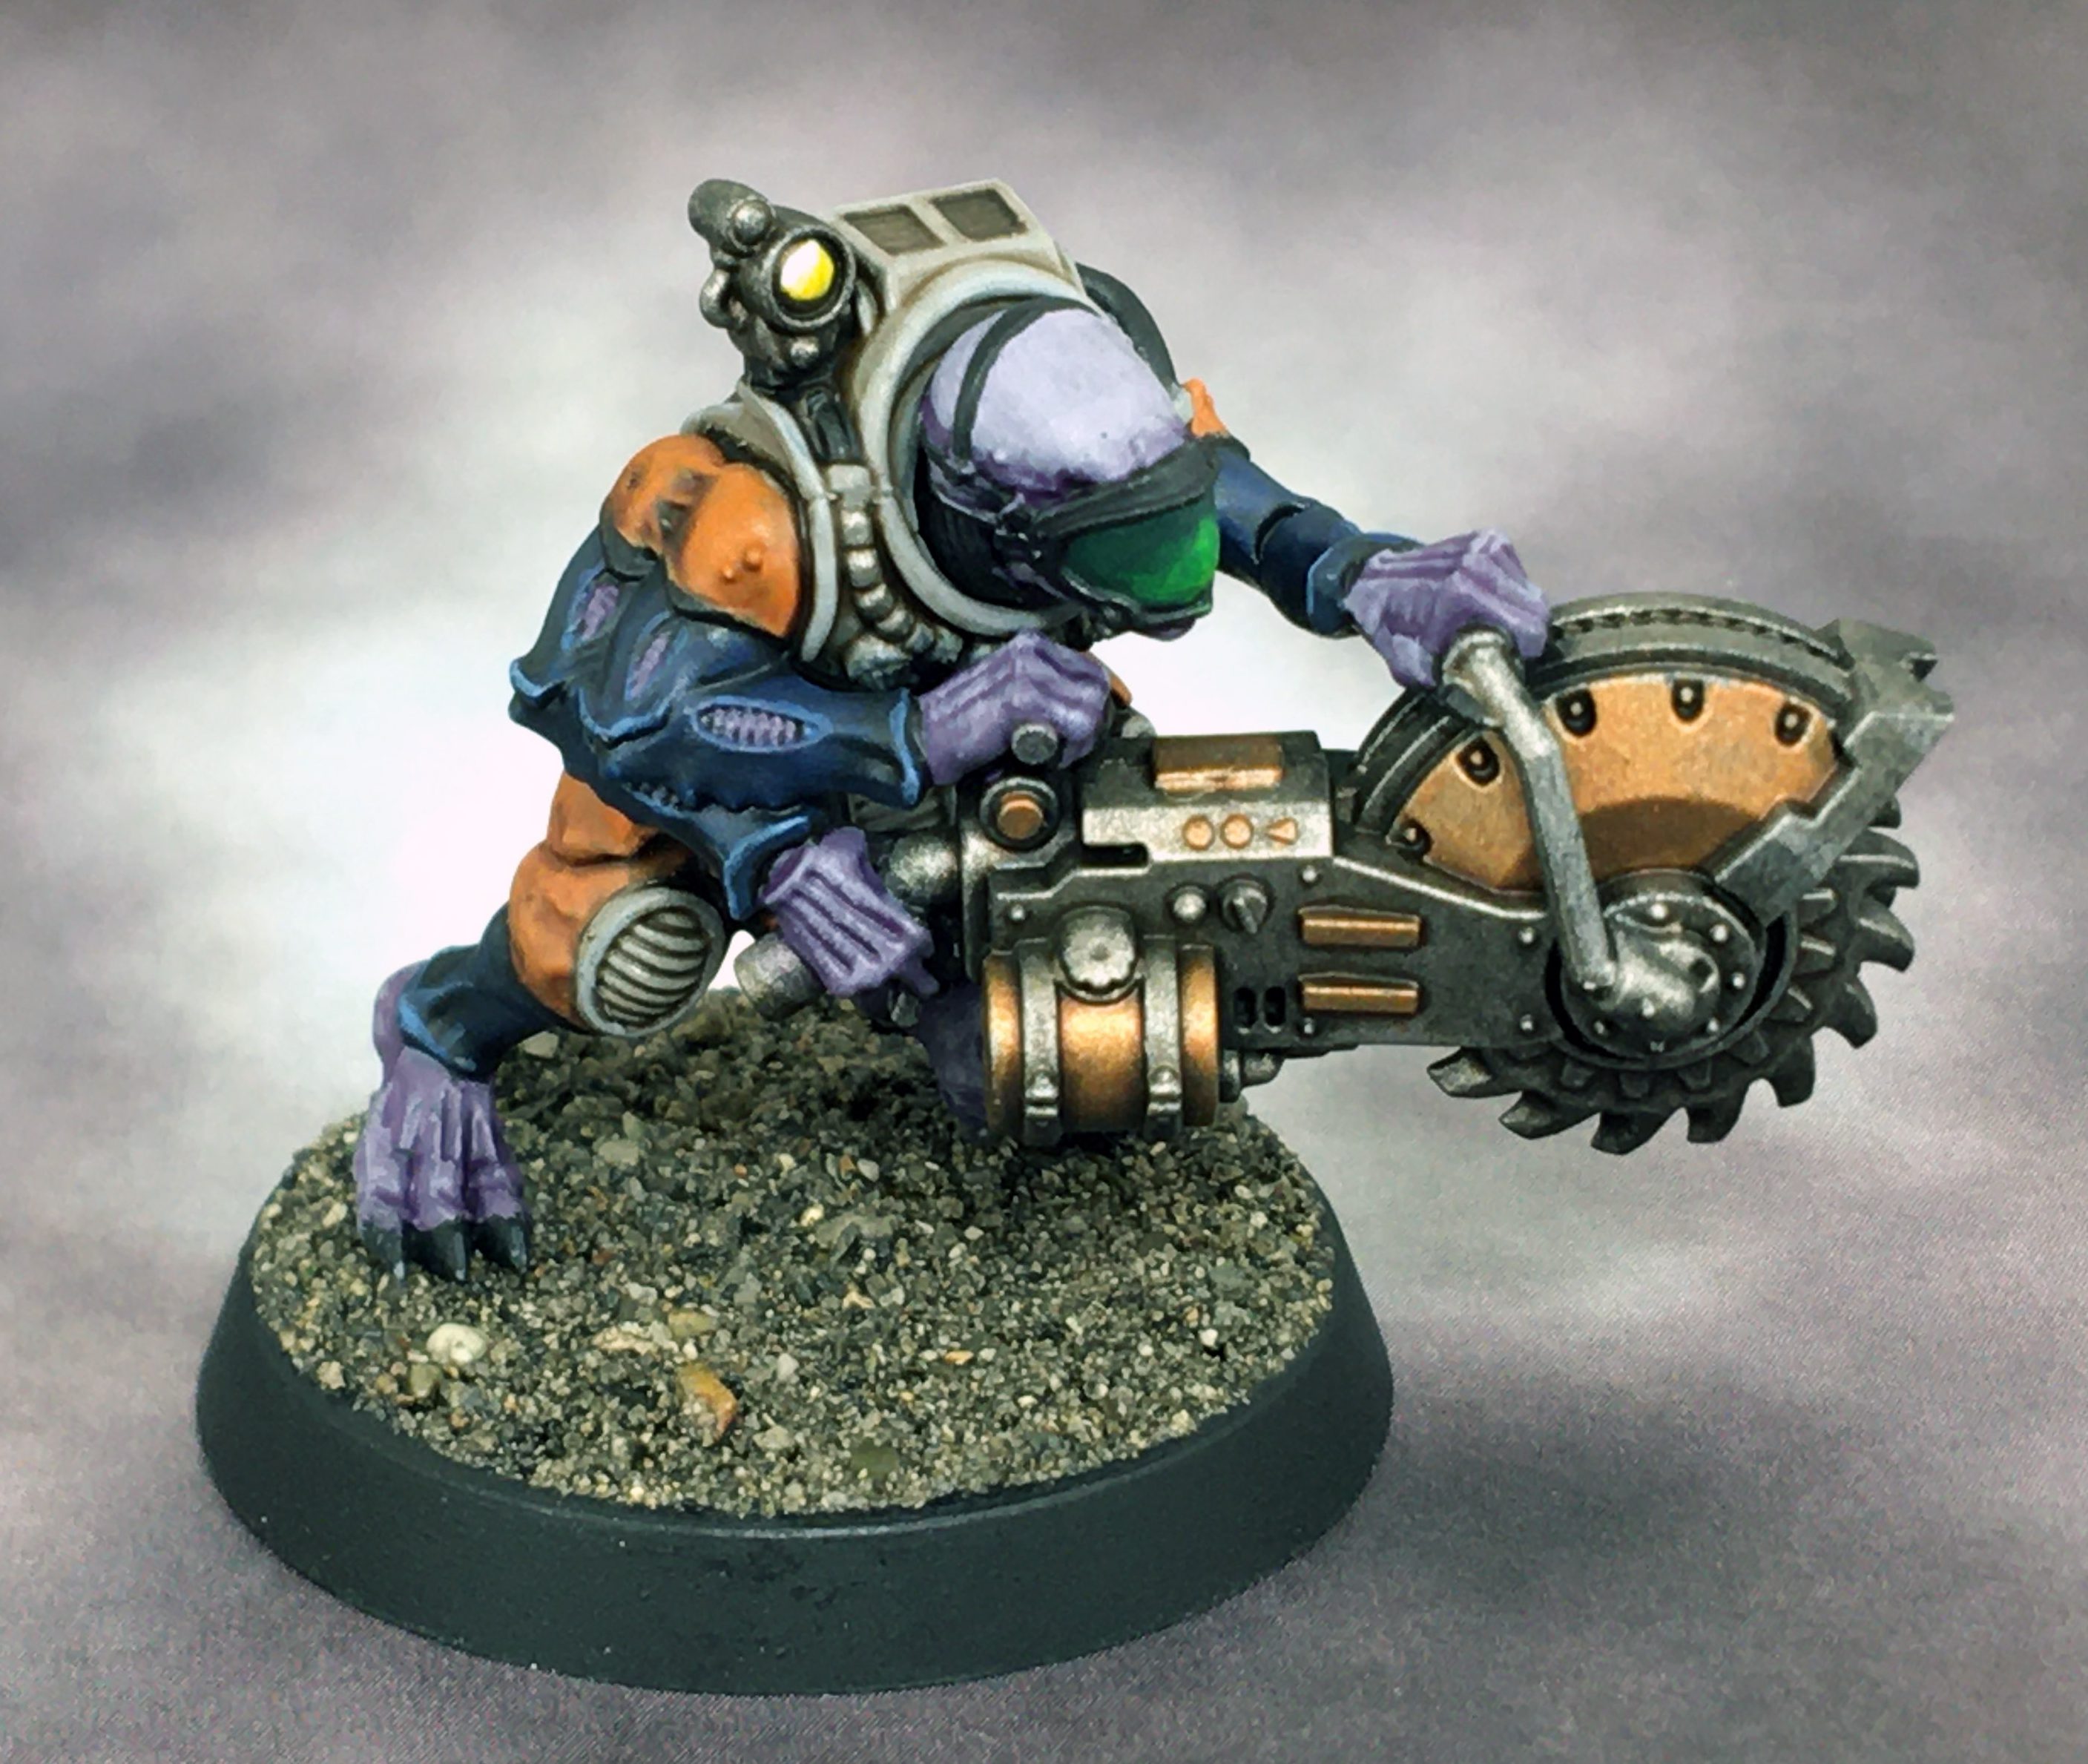
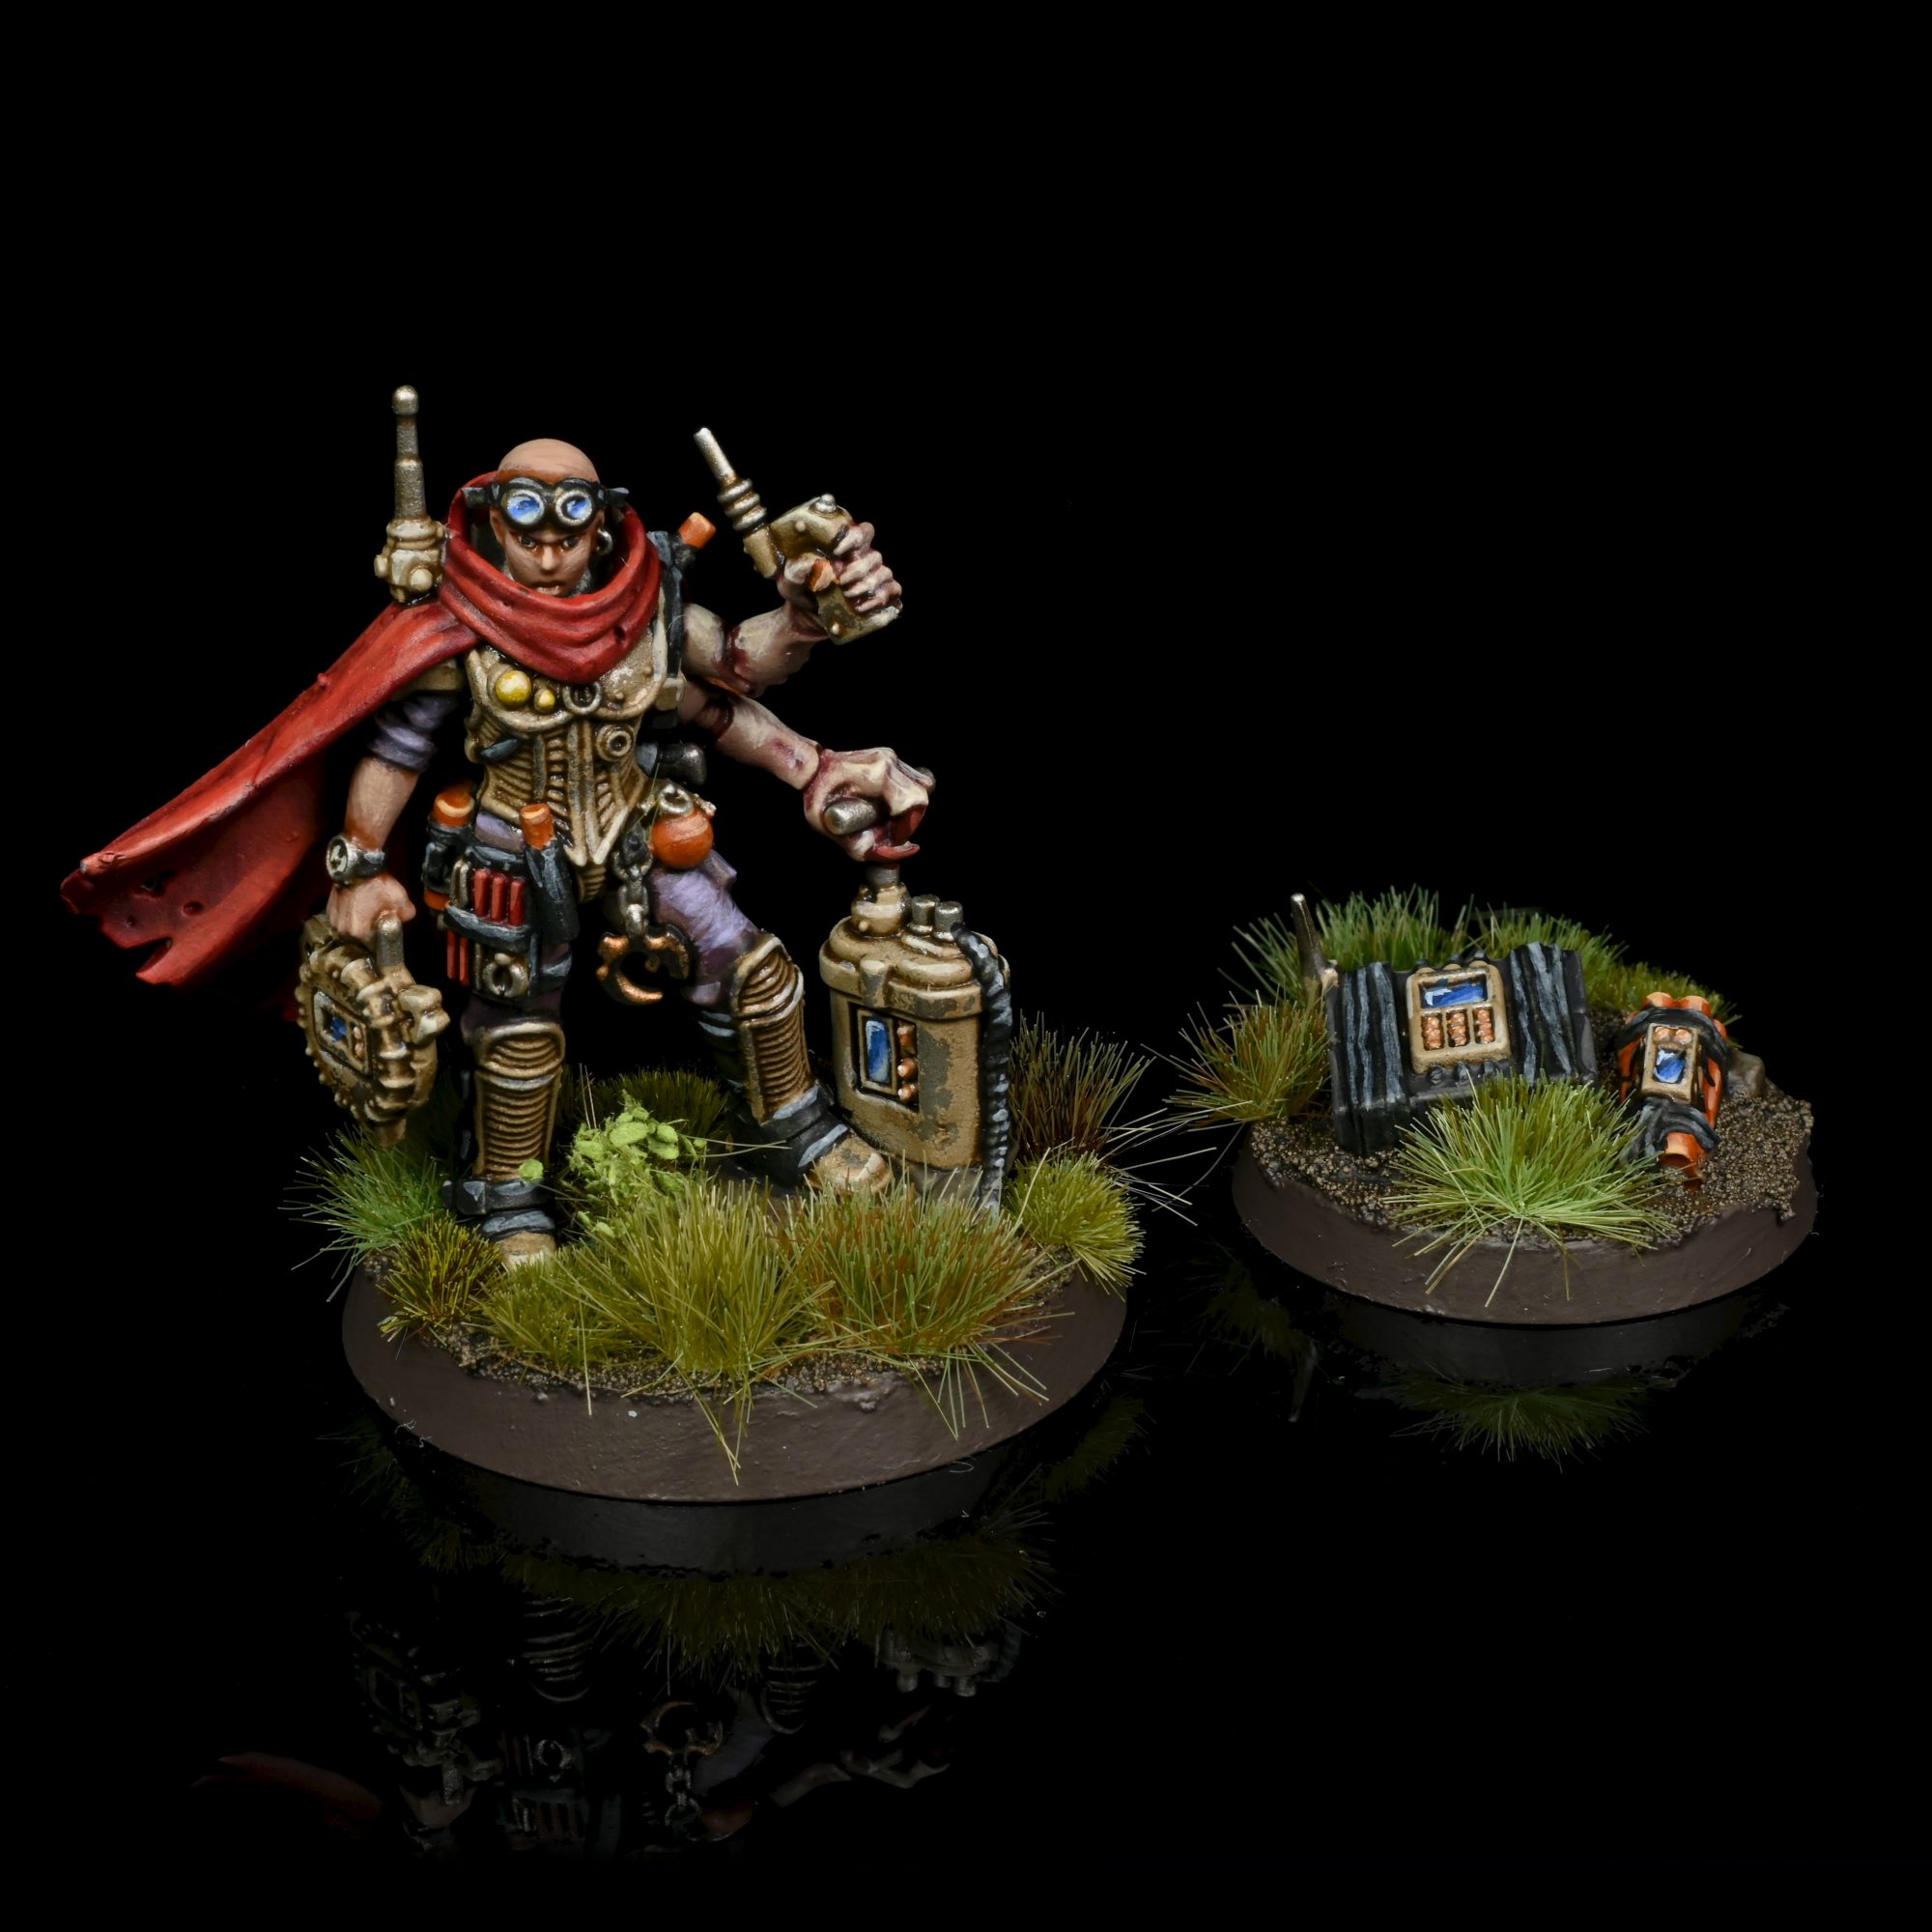
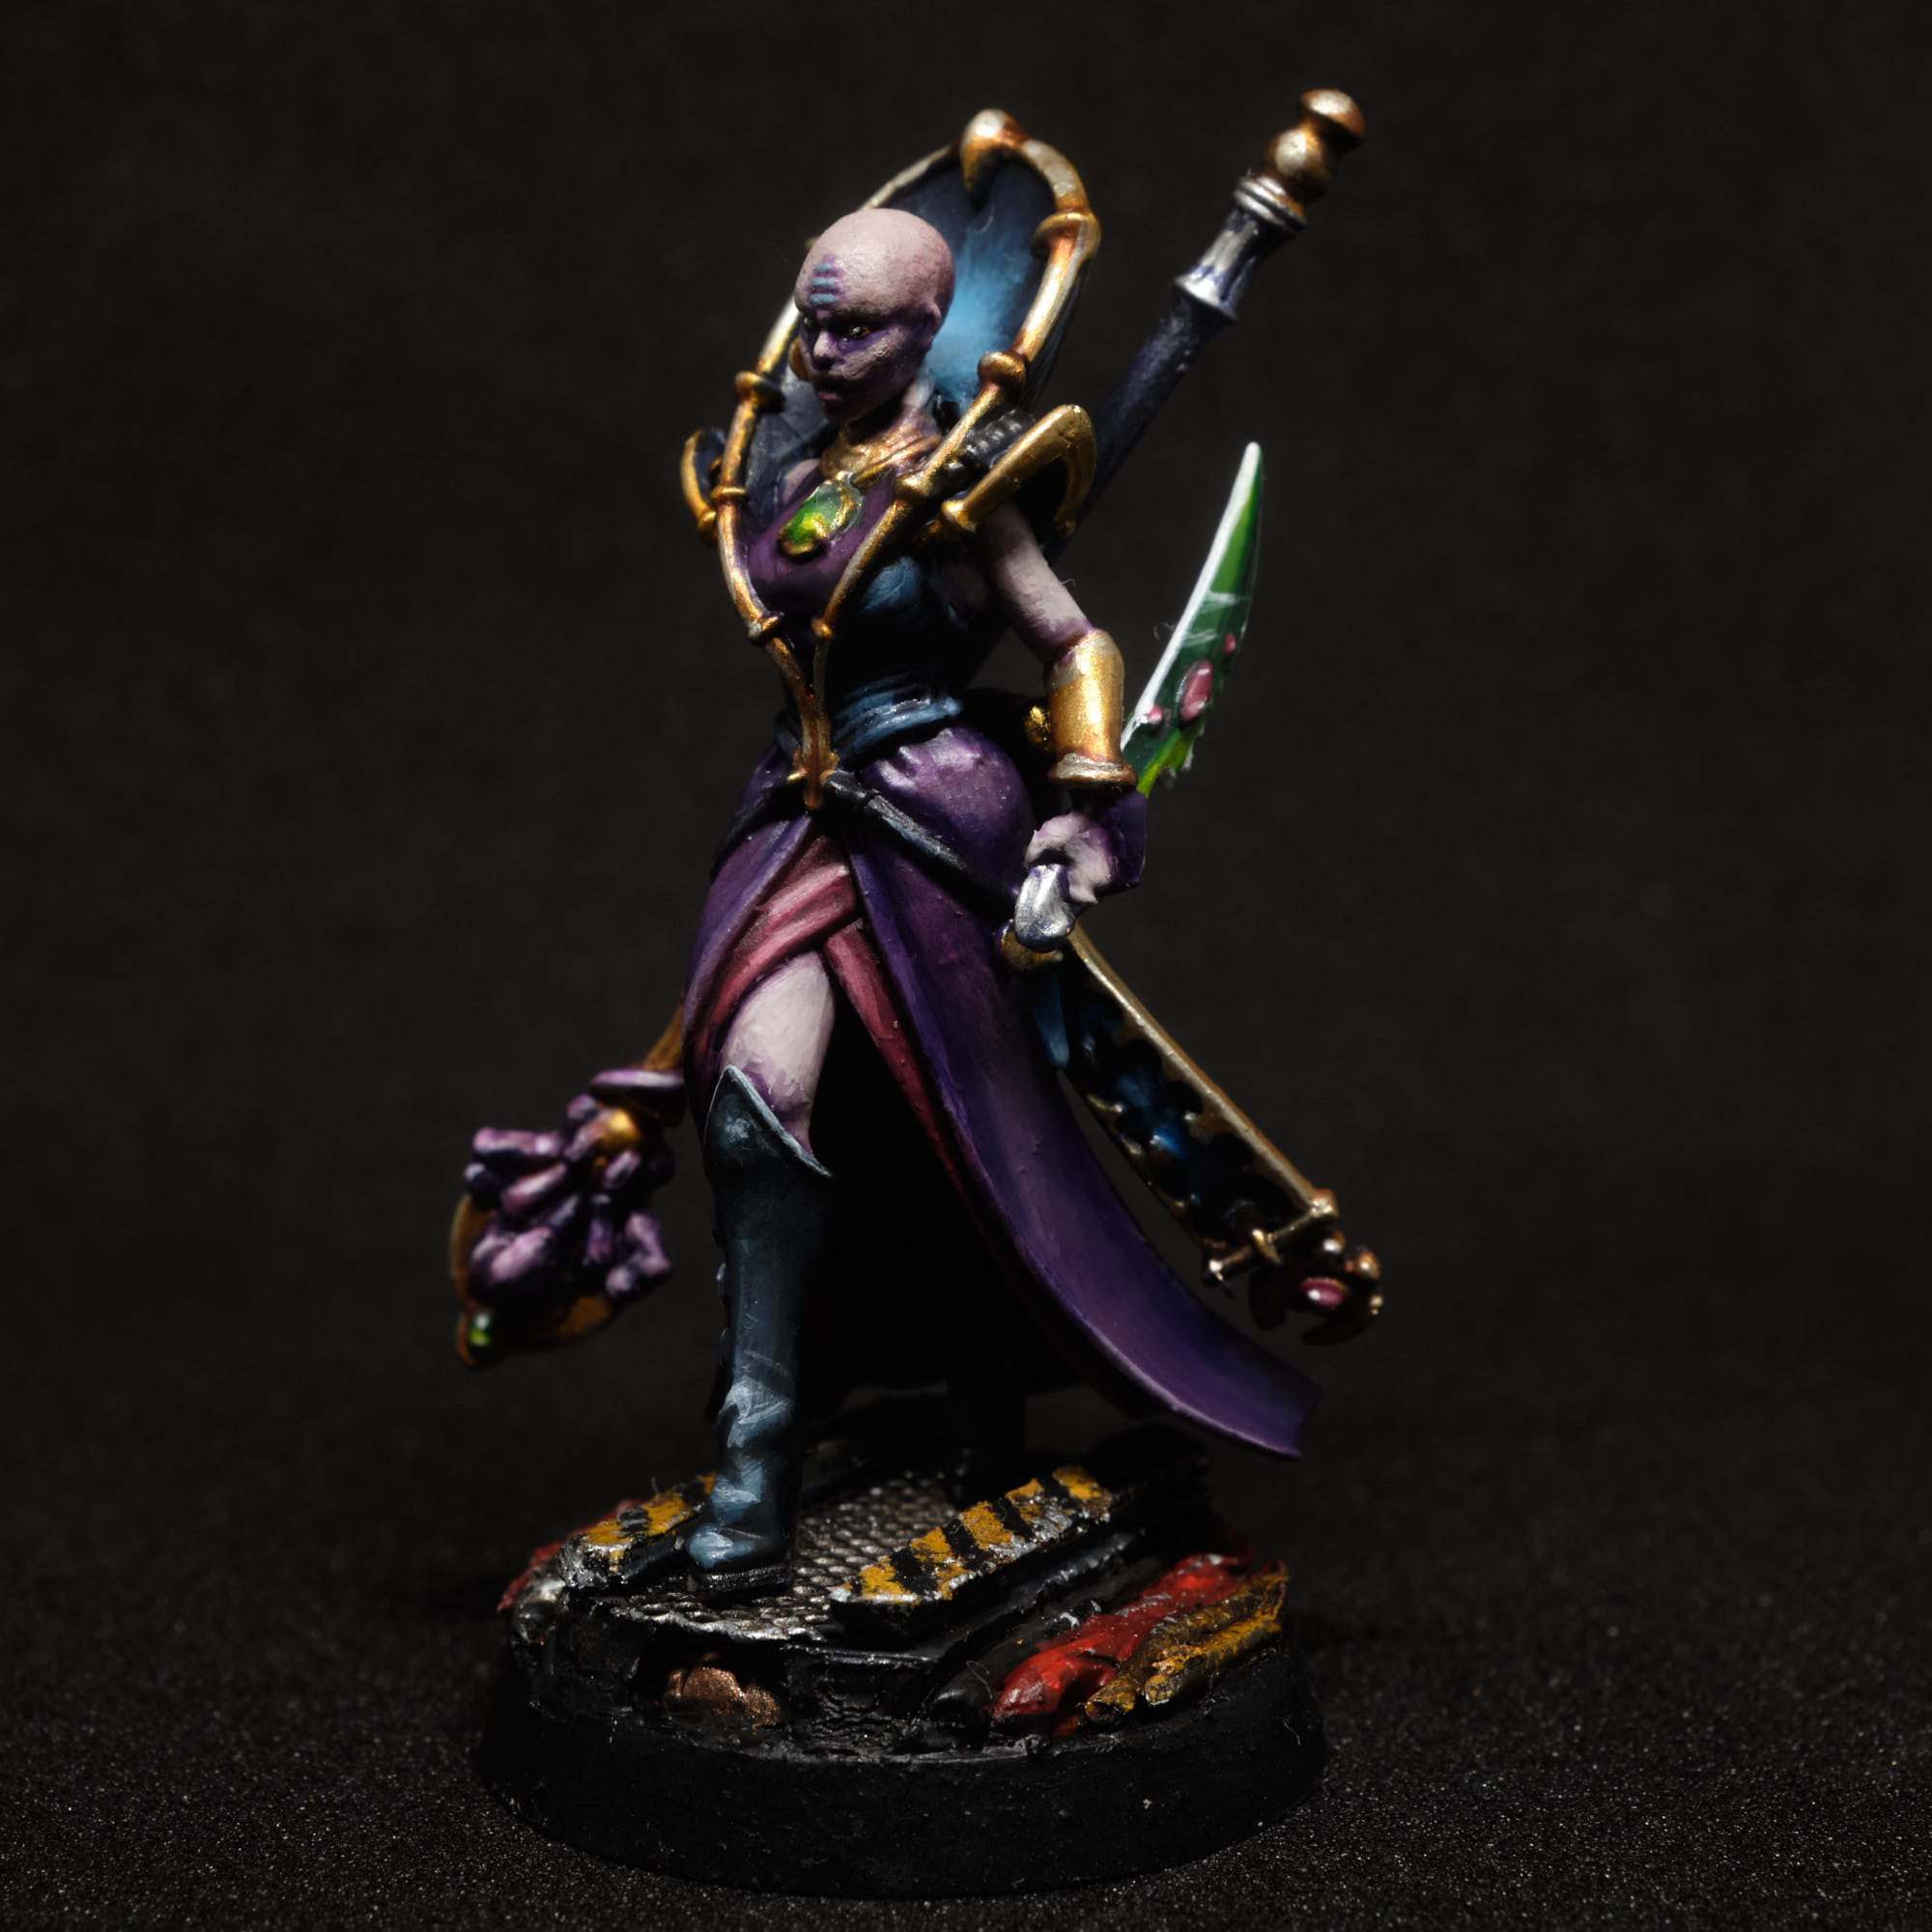
Reductus Saboteur. Credit: Soggy -
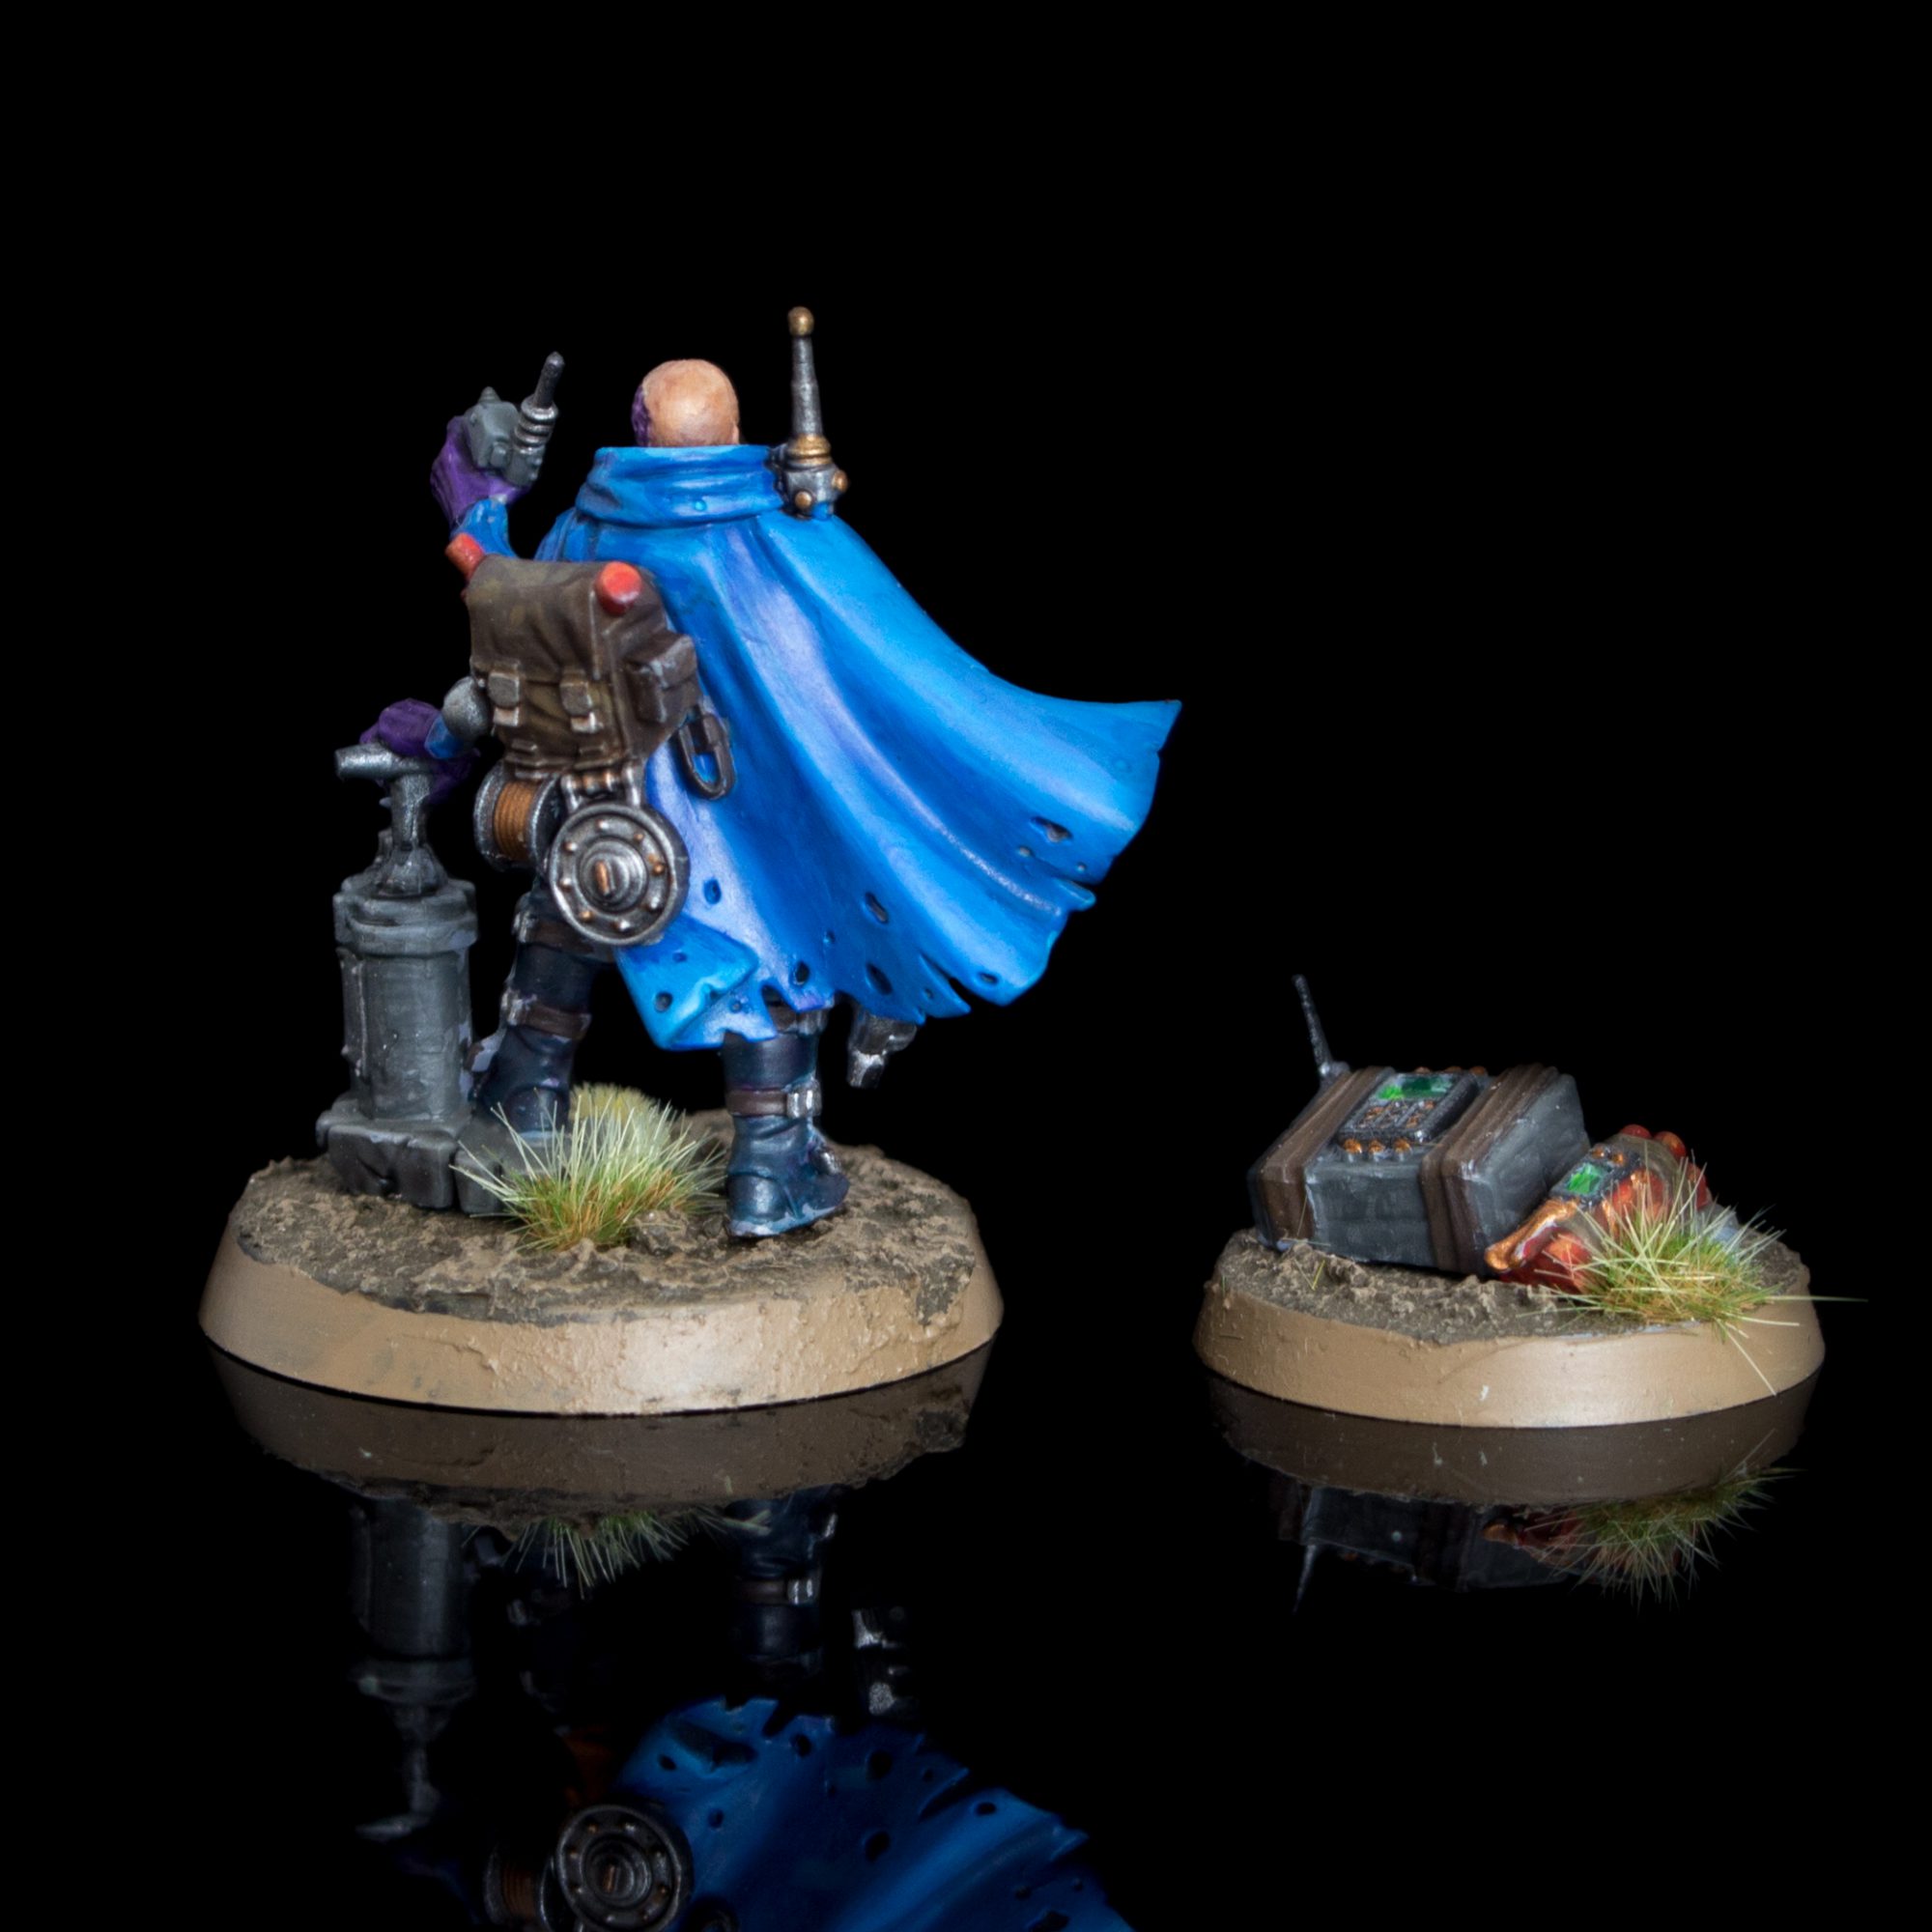
Reductus Saboteur. Credit: Soggy -
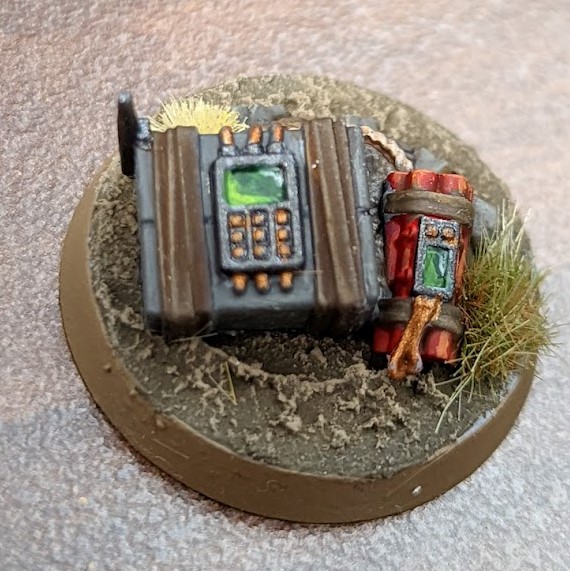

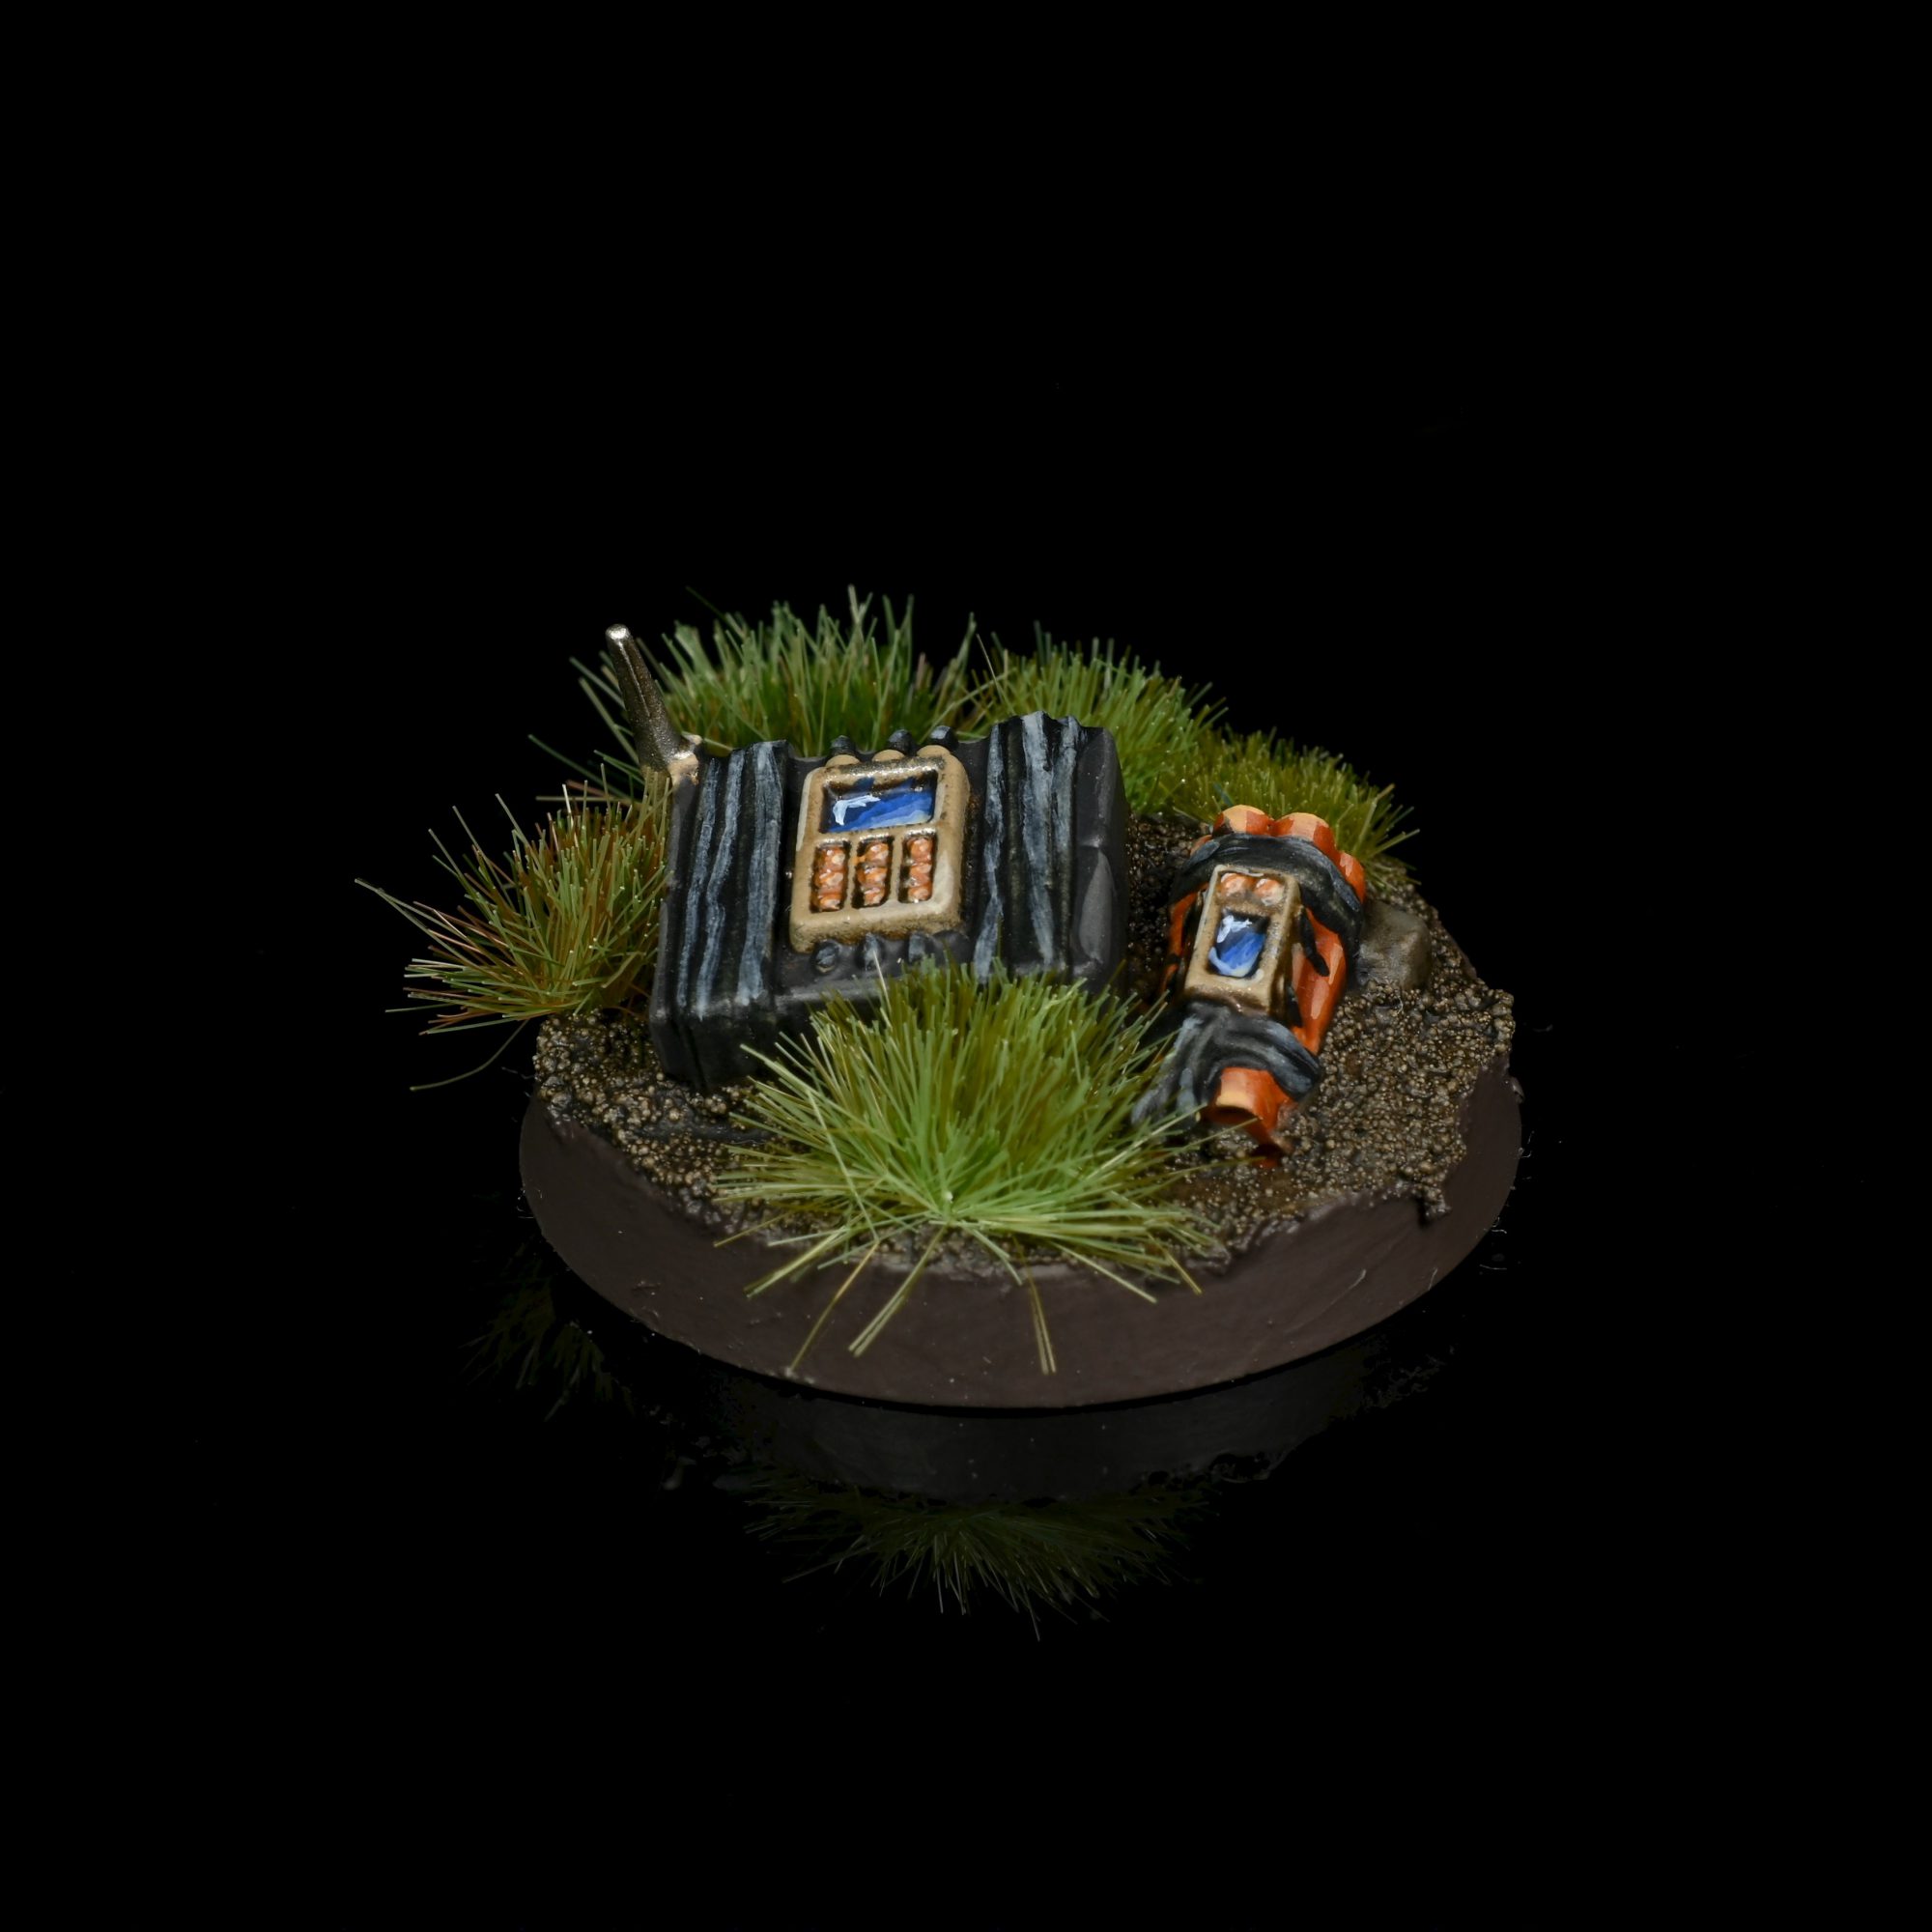
Bomb has been planted.

SteelMentor's Method - Click to Expand
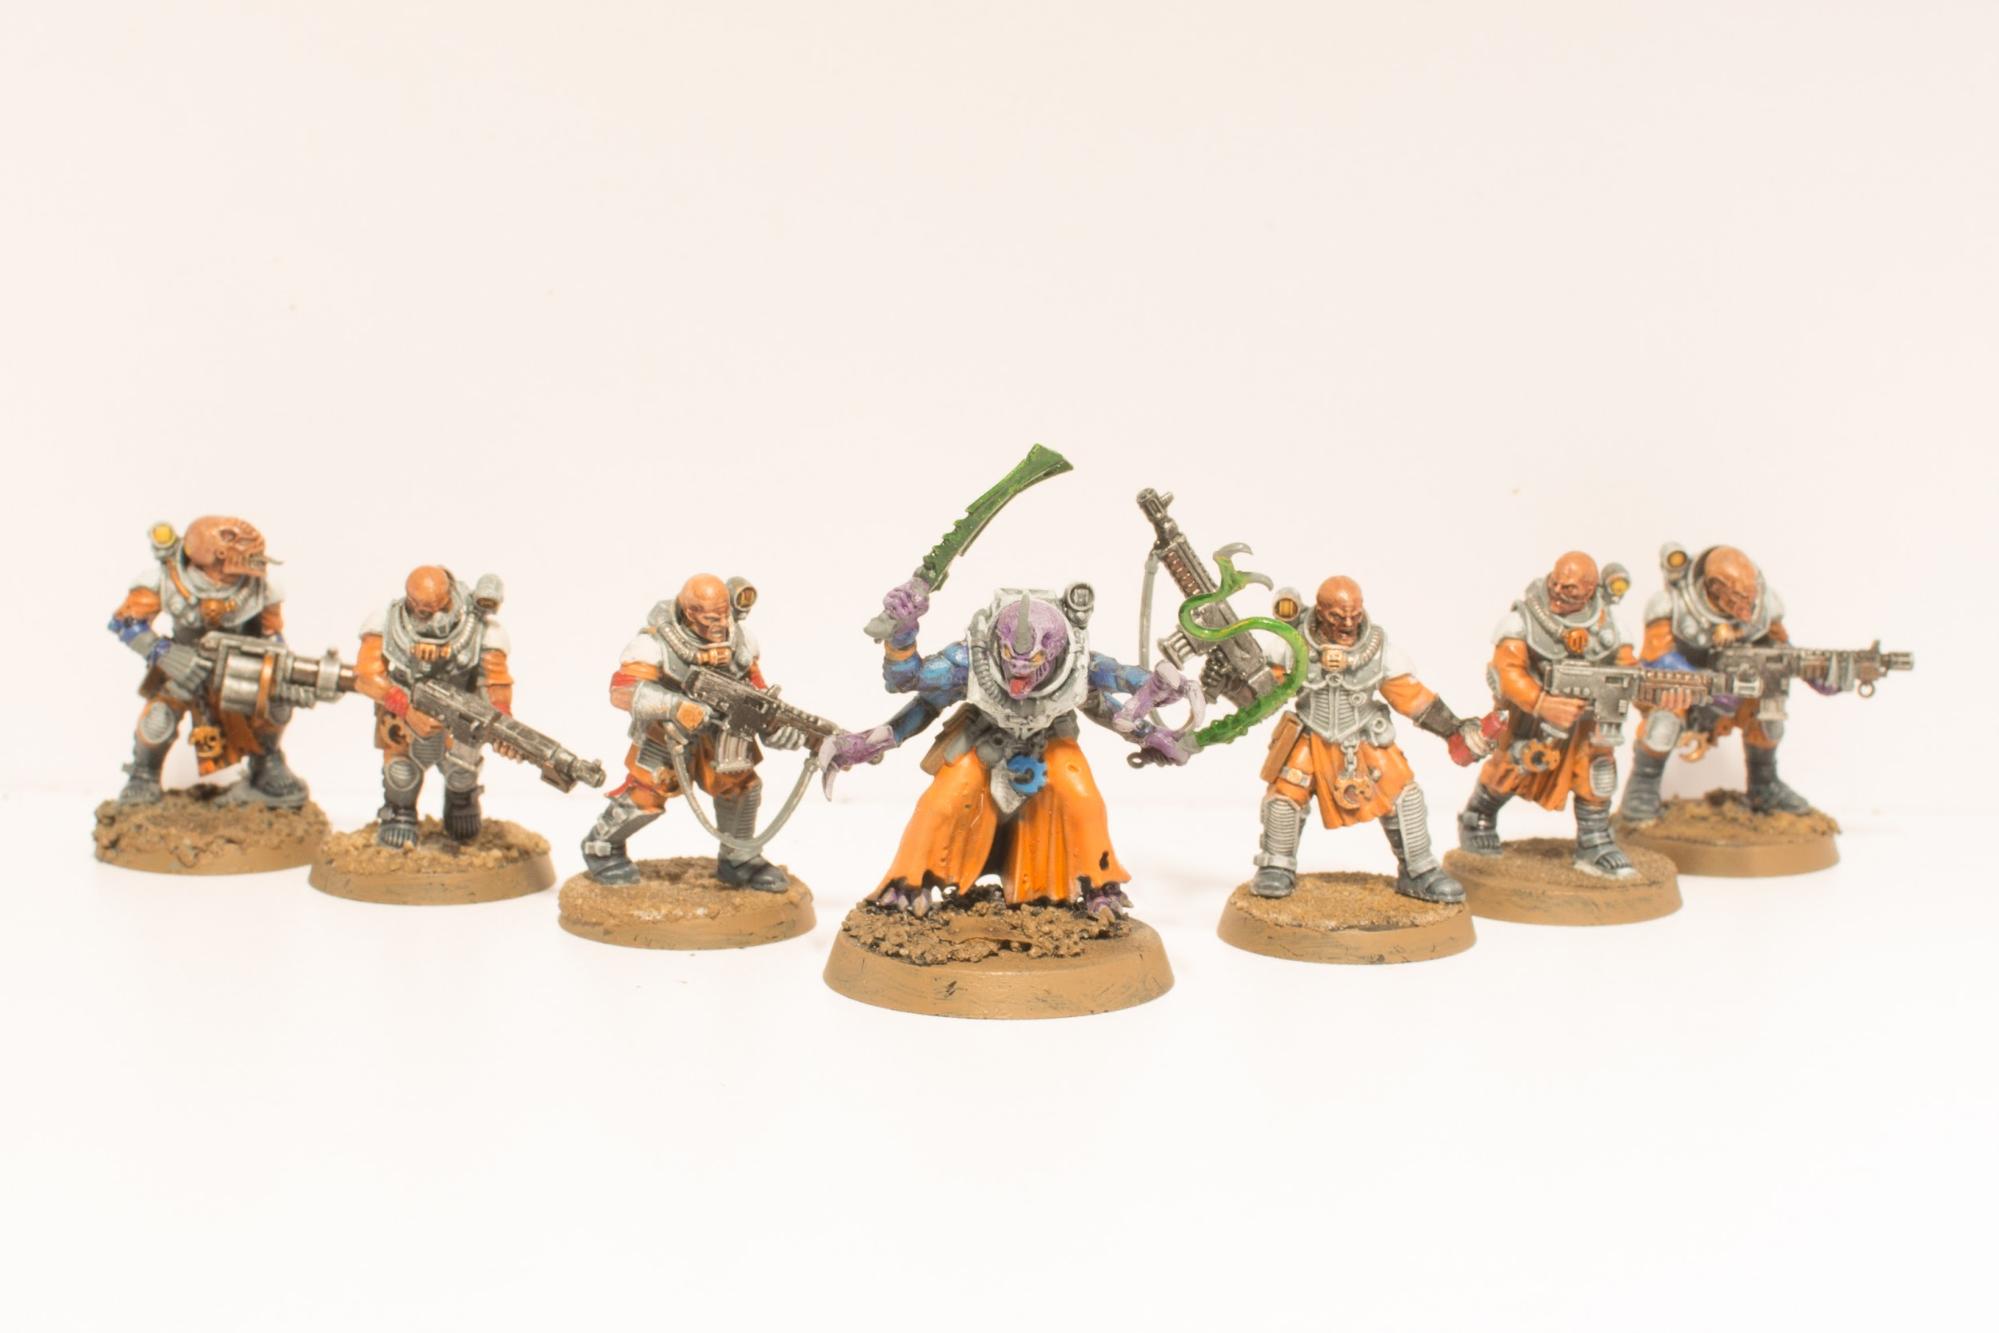
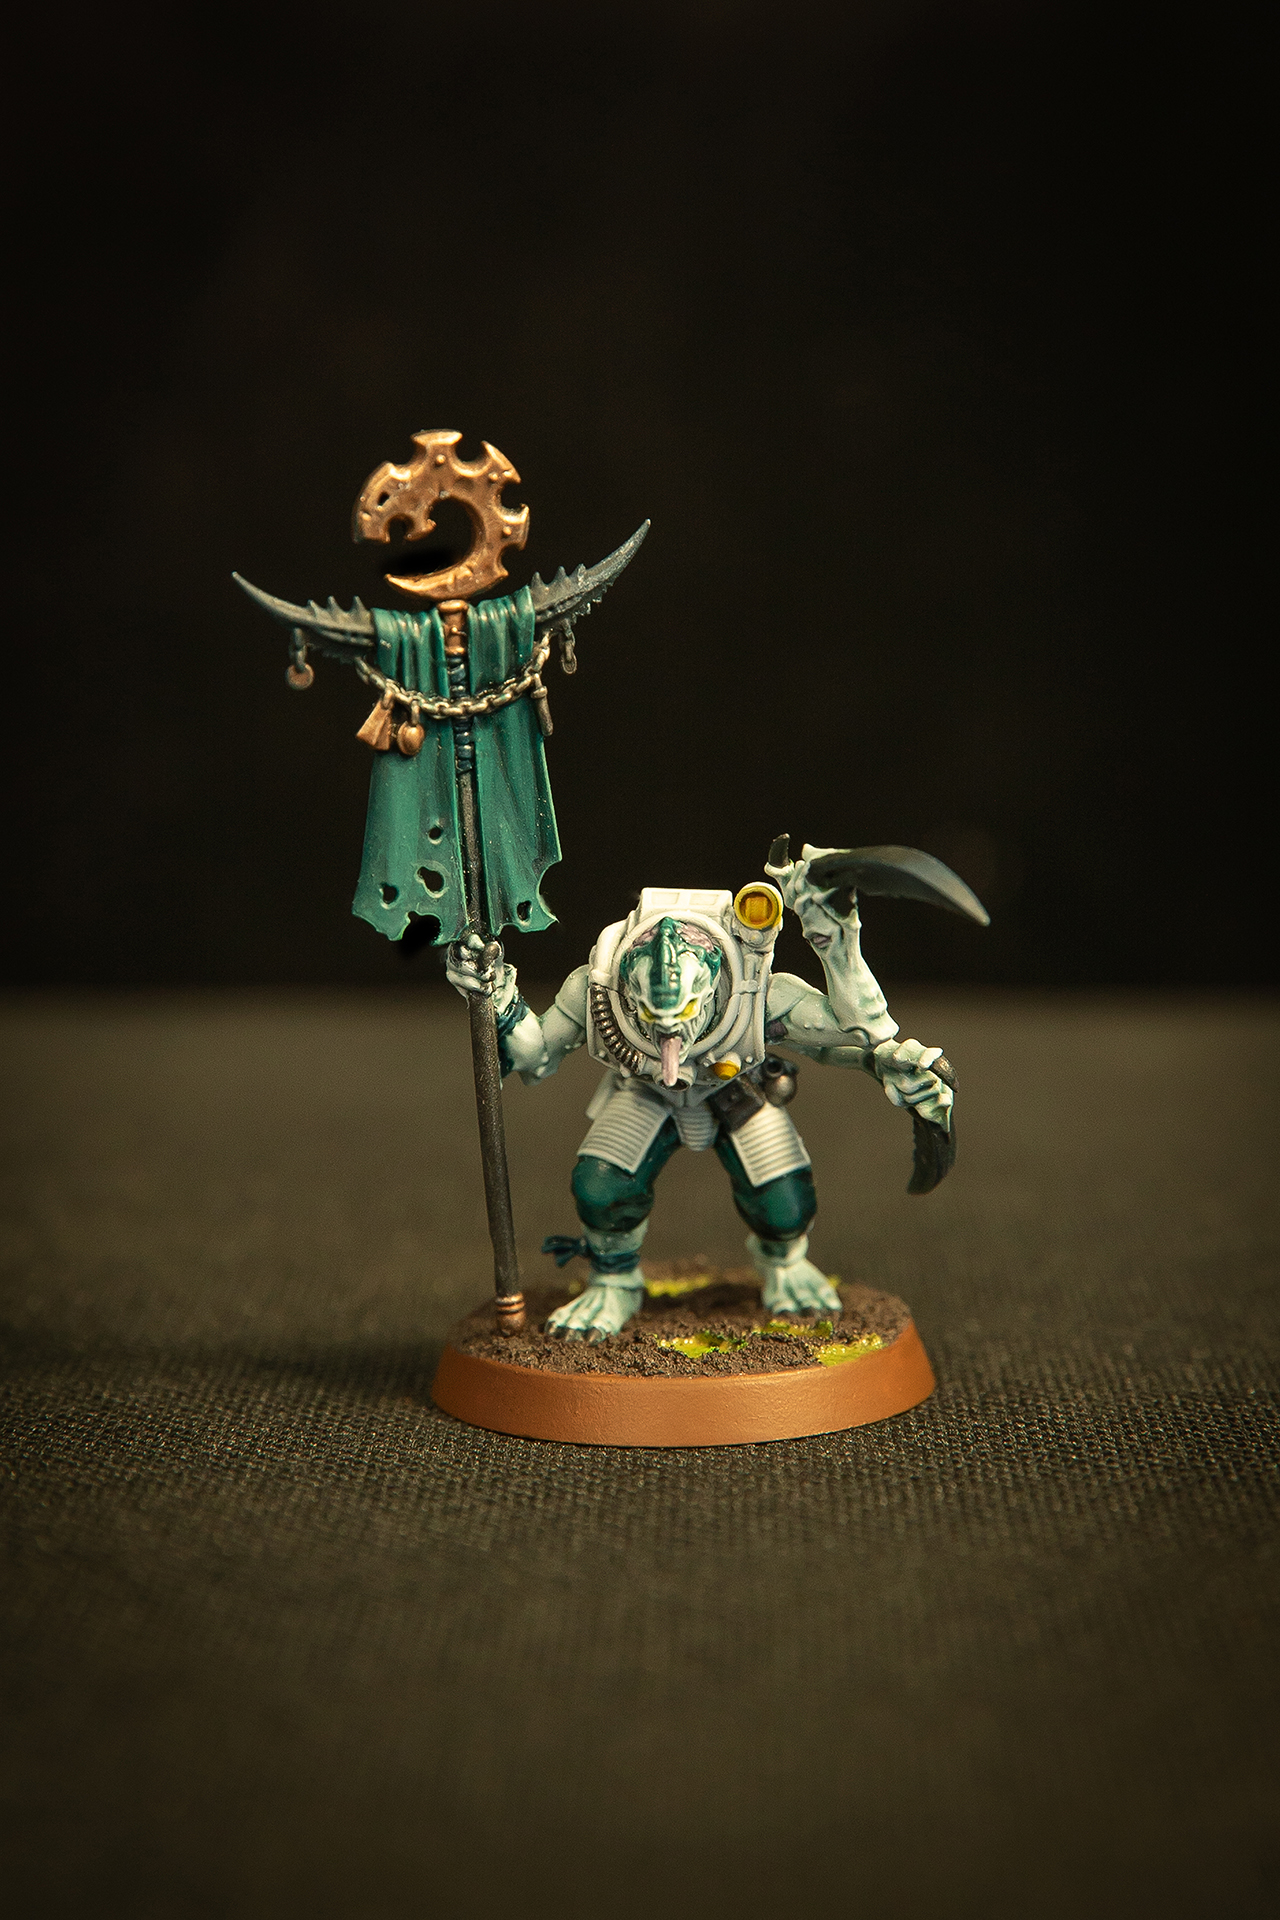
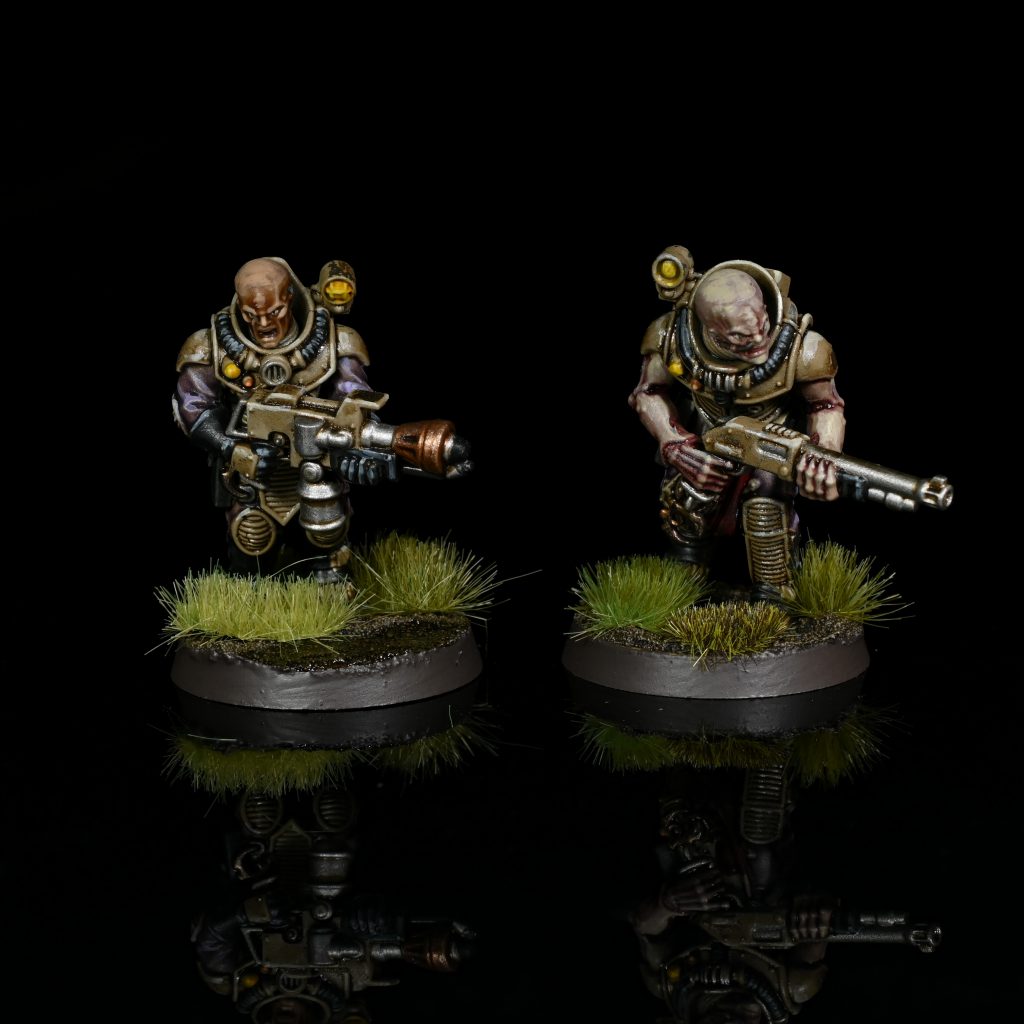
A good source for inspiration for Genecult colour schemes is to look at their tentacle-mawed gods’s own. After all, it’d make sense they wanna emulate the giant space bugs they’re desperately trying to summon right? The 2019 codex features 2 minor cults that do this with the Sons of Jormungandr and the Behemoid Undercult parroting the schemes for Hive Fleets Jormungandr and Behemoth respectively, with and this formed the basis for my own cult’s scheme based off the cold minty chitin of Hive Fleet Tiamet.
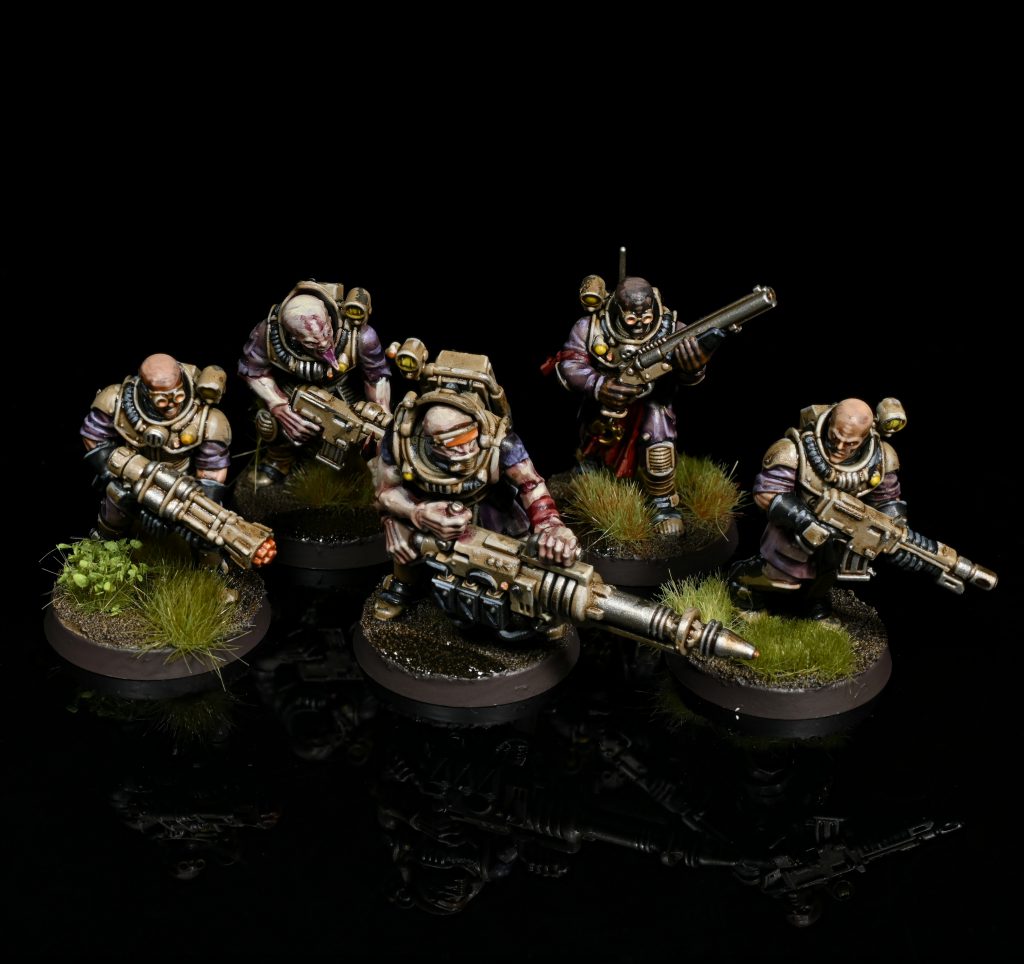
Everything: – Prime Grey Seer. White Armour: – Wash with Apothecary White, keep an eye out for pooling in the crevices and draw it away before it sets too much. – Soft Drybrush VGC Ghost Grey with a round-tipped makeup brush. – Edge Highlight the most raised parts of the armour with White Scar. Mutant Flesh: – Wash with a 50/50 mix of Coelia Greenshade/Lhamian Medium. – Apply a light 60/40 mix of Coleia Greenshade/Lhamian Medium to the more prominent crevices and separations in the alien arms. – Soft Drybrush VGC Ghost Grey with a round-tipped makeup brush, focusing on the most prominent raised edges and features (face, hands etc). Build up a few light layers on the smooth areas of the head this way to help blend into the darker skin. – Edge Highlight with Pallid Wych Flesh. Mutant Innards (Tongues, Tentacles, Exposed Muscle, Blood Vials): – Base with Daemonette Flesh. – Wash with Guilliman Blue (if available) or 50/50 Tallasar Blue/Contrast Medium – Carefully Highlight with Warpfiend Grey. – Edge Highlight with Slaanesh Grey. Green Chitin and Cloth: – Wash with Terradon Turquoise. – Layer with Lupercal Green, leaving the deepest recesses. – Highlight with Kabalite Green, focusing on the raised areas of the cloth/carapace. – Edge Highlight with Sybarite Green – Edge Highlight any bladed/horned parts of the carapace with Dawnstone. (Larger areas of Chitin on Metamorphs/Purestrains, Patriarch can be carefully Drybrushed instead for a more naturalistic, less clean look).
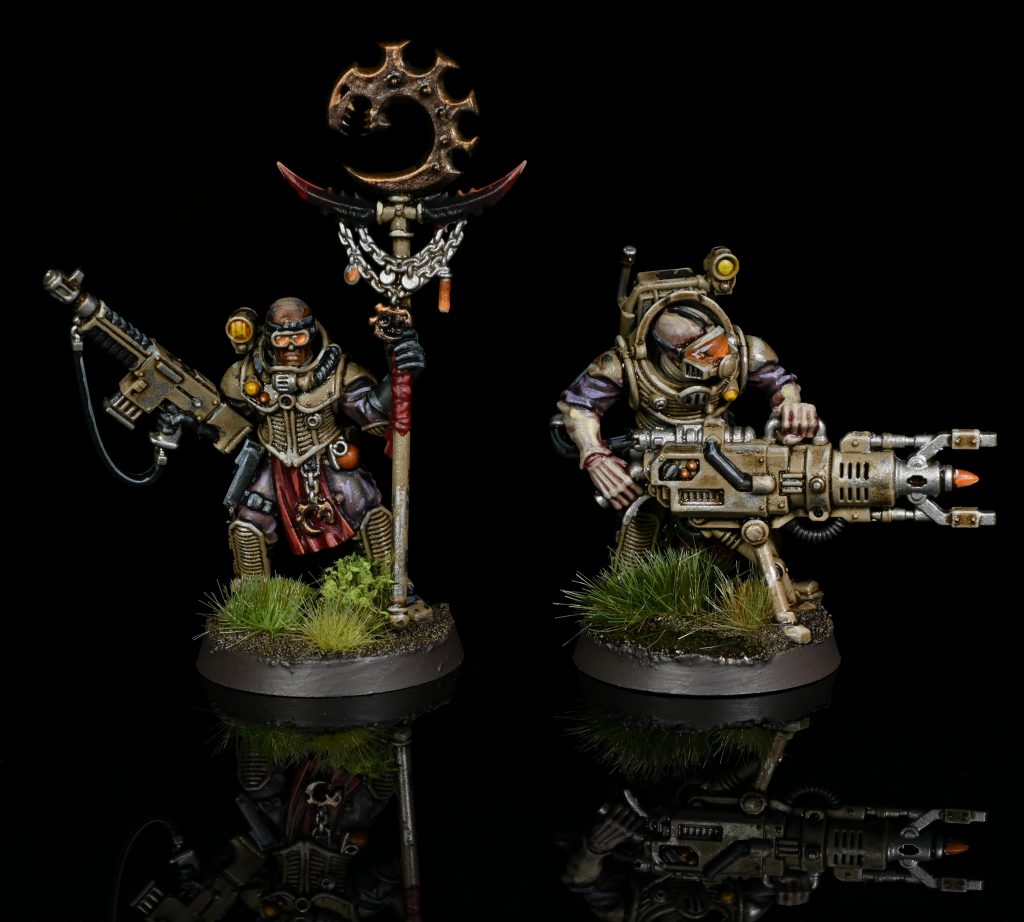
Blue/Grey Cloth: – Base with Dark Reaper. – Wash with Coelia Greenshade. – Highlight with Dark Reaper. – Edge Highlight with Thunderhawk Blue. Claws and Weapon Casings: – Base with Corax Black – Drybrush claws with Eshin Grey, focused along the edges. – Edge Highlight casing and claws with Dawnstone. – Wash Claws with 50/50 Aethermatic Blue/Contrast Medium for an alien sheen. Leather: – Base with black of choice. – Drybrush with Skavenblight Dirge – Edge Highlight with Stormvermin Fur along the most raised/distressed folds. Metal: – Base with Leadbelcher. – Wash twice with Nuln Oil. – Edge Highlight Ironbreaker. Decorative Metal (Icons, Leaders’ Weapons): – Base with Balthasar Gold. – Wash with Agrax Earthshade. – Drybrush with Hashut Copper. – Lightly Drybrush with Sycorax Bronze, focused on the edges.
Glowing Areas (Eyes, Torches/Headlights, Battery Packs etc): – Clean up any overspill from other steps with Grey Seer. – Wash desired area with Lamenters Yellow (if available) or 50/50 Iyandan Yellow/Contrast Medium. – Apply another wash of Lamenters Yellow or Iyandan mix, draw the wash out around the surrounding area to start building a glow. – Wash with Cassandora Yellow. – Wash with Lamenters Yellow or Iyandan mix, once again drawing the wash into the surrounding areas, but tighter than before. Toxic Morass Basing: – Apply Stirland Battlemire to the base, piling up in some areas. Carve out little divots with your texture tool of choice as it dries. Don’t be worried about getting it on the model, they’re trudging through the mess after all. – Wash with Agrax Earthshade. – Drybrush with Ryza Rust. – Lightly Drybrush with Elf Flesh. – Apply a 50/50 mix of Agrax Earthshade/Lhamian Medium. – Base the insides of the divots/craters and any deep cracks left by the Texture paint drying with Moot Green. – Apply Nurgle’s Rot to the green areas until it starts to look thick and toxic. These steps can be used to paint any unit in the GSC roster, even say… a mildly stole- errr I mean liberated Shadowsword tank.
All it takes is a slightly larger makeup brush.
 Pendulin's Method - Click to Expand
Credit: Pendulin
Credit: Pendulin

Rockfish's Method - Click to Expand
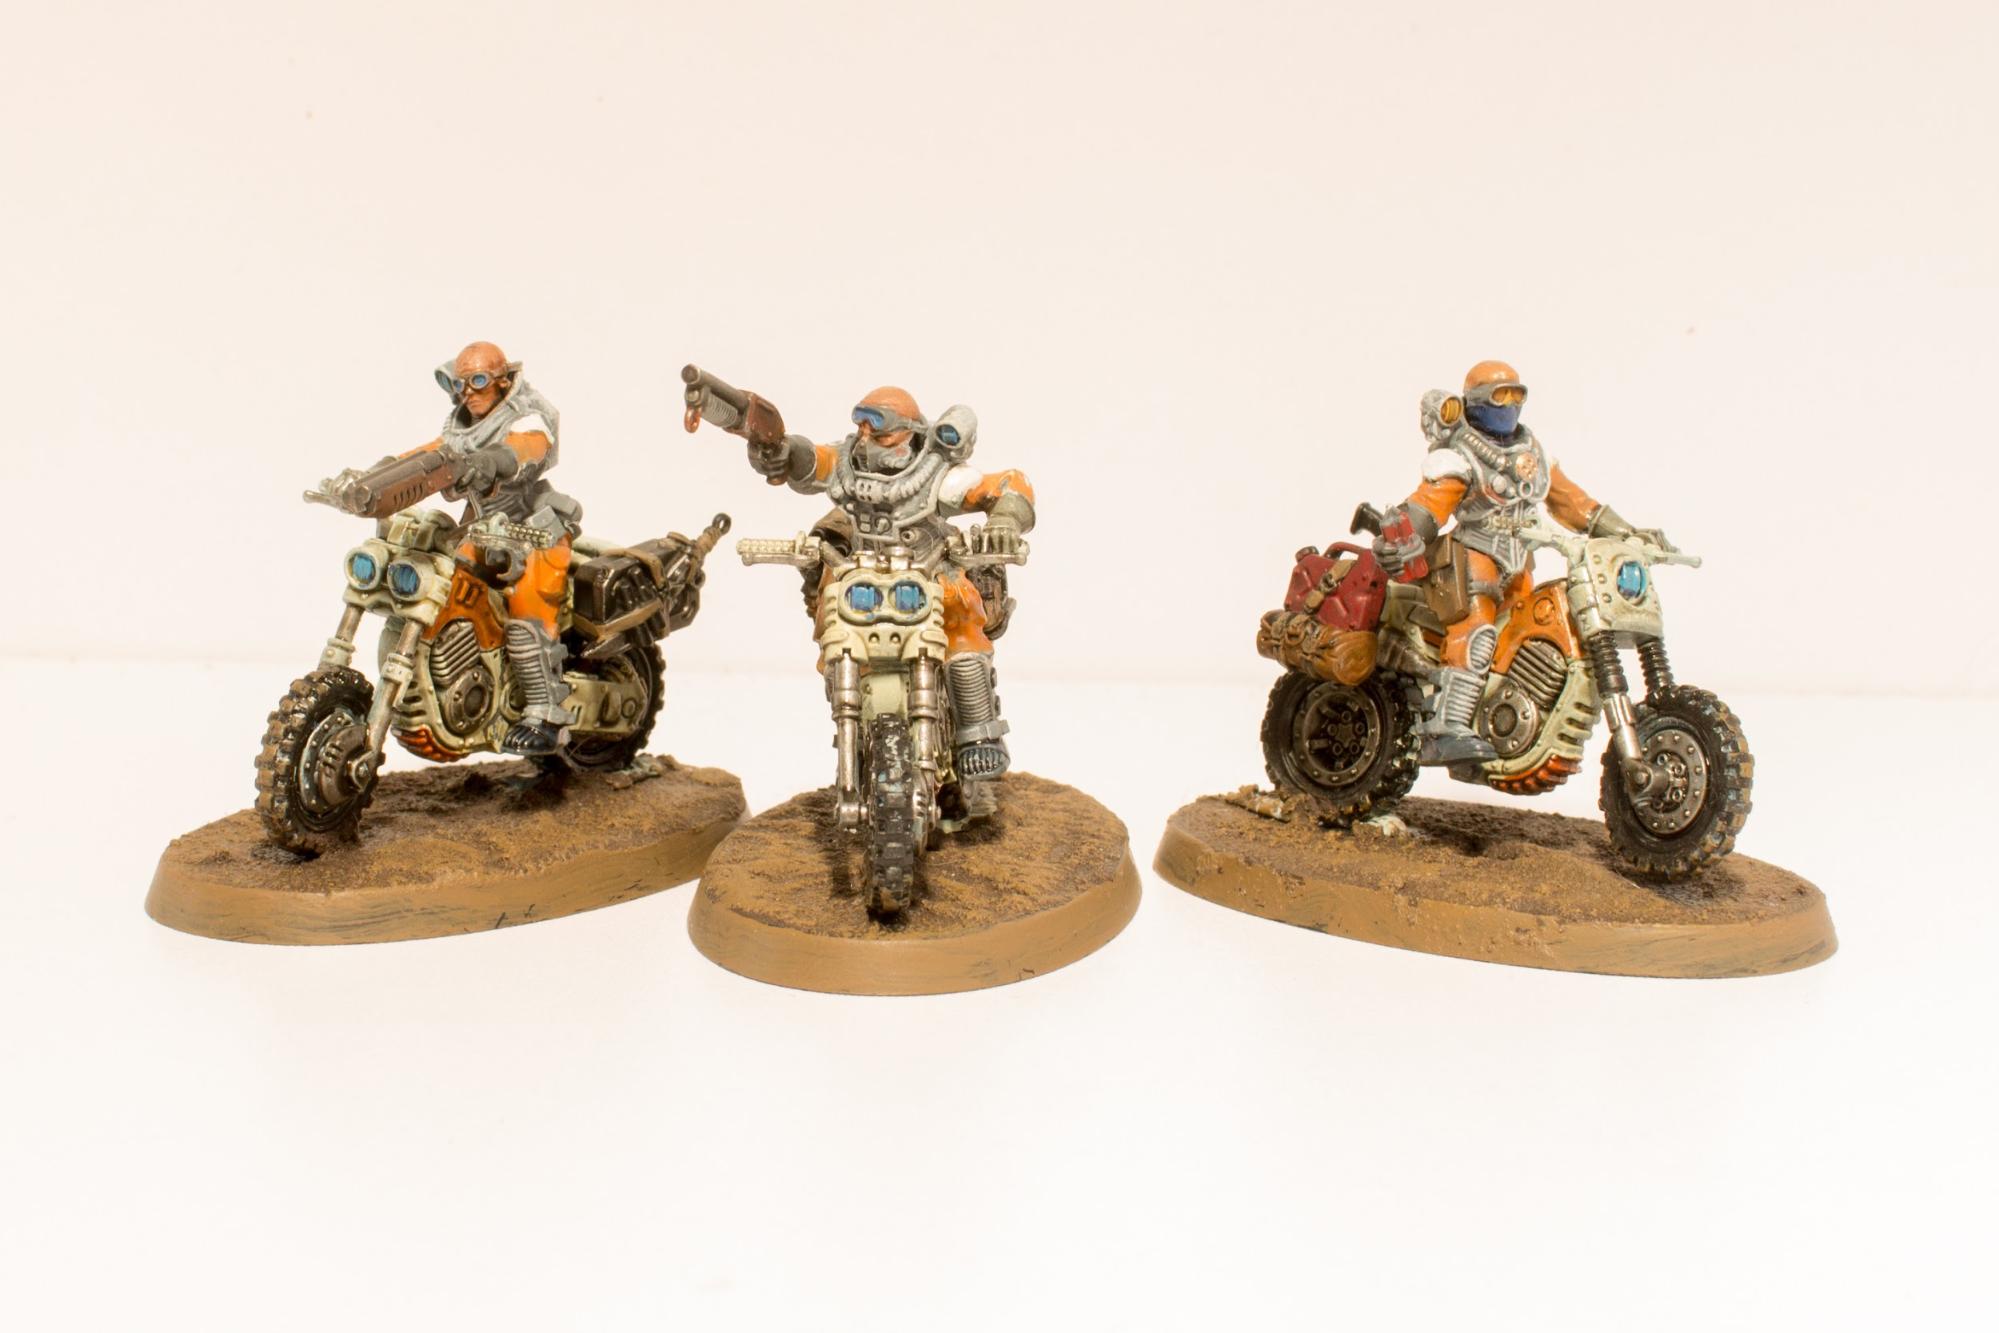
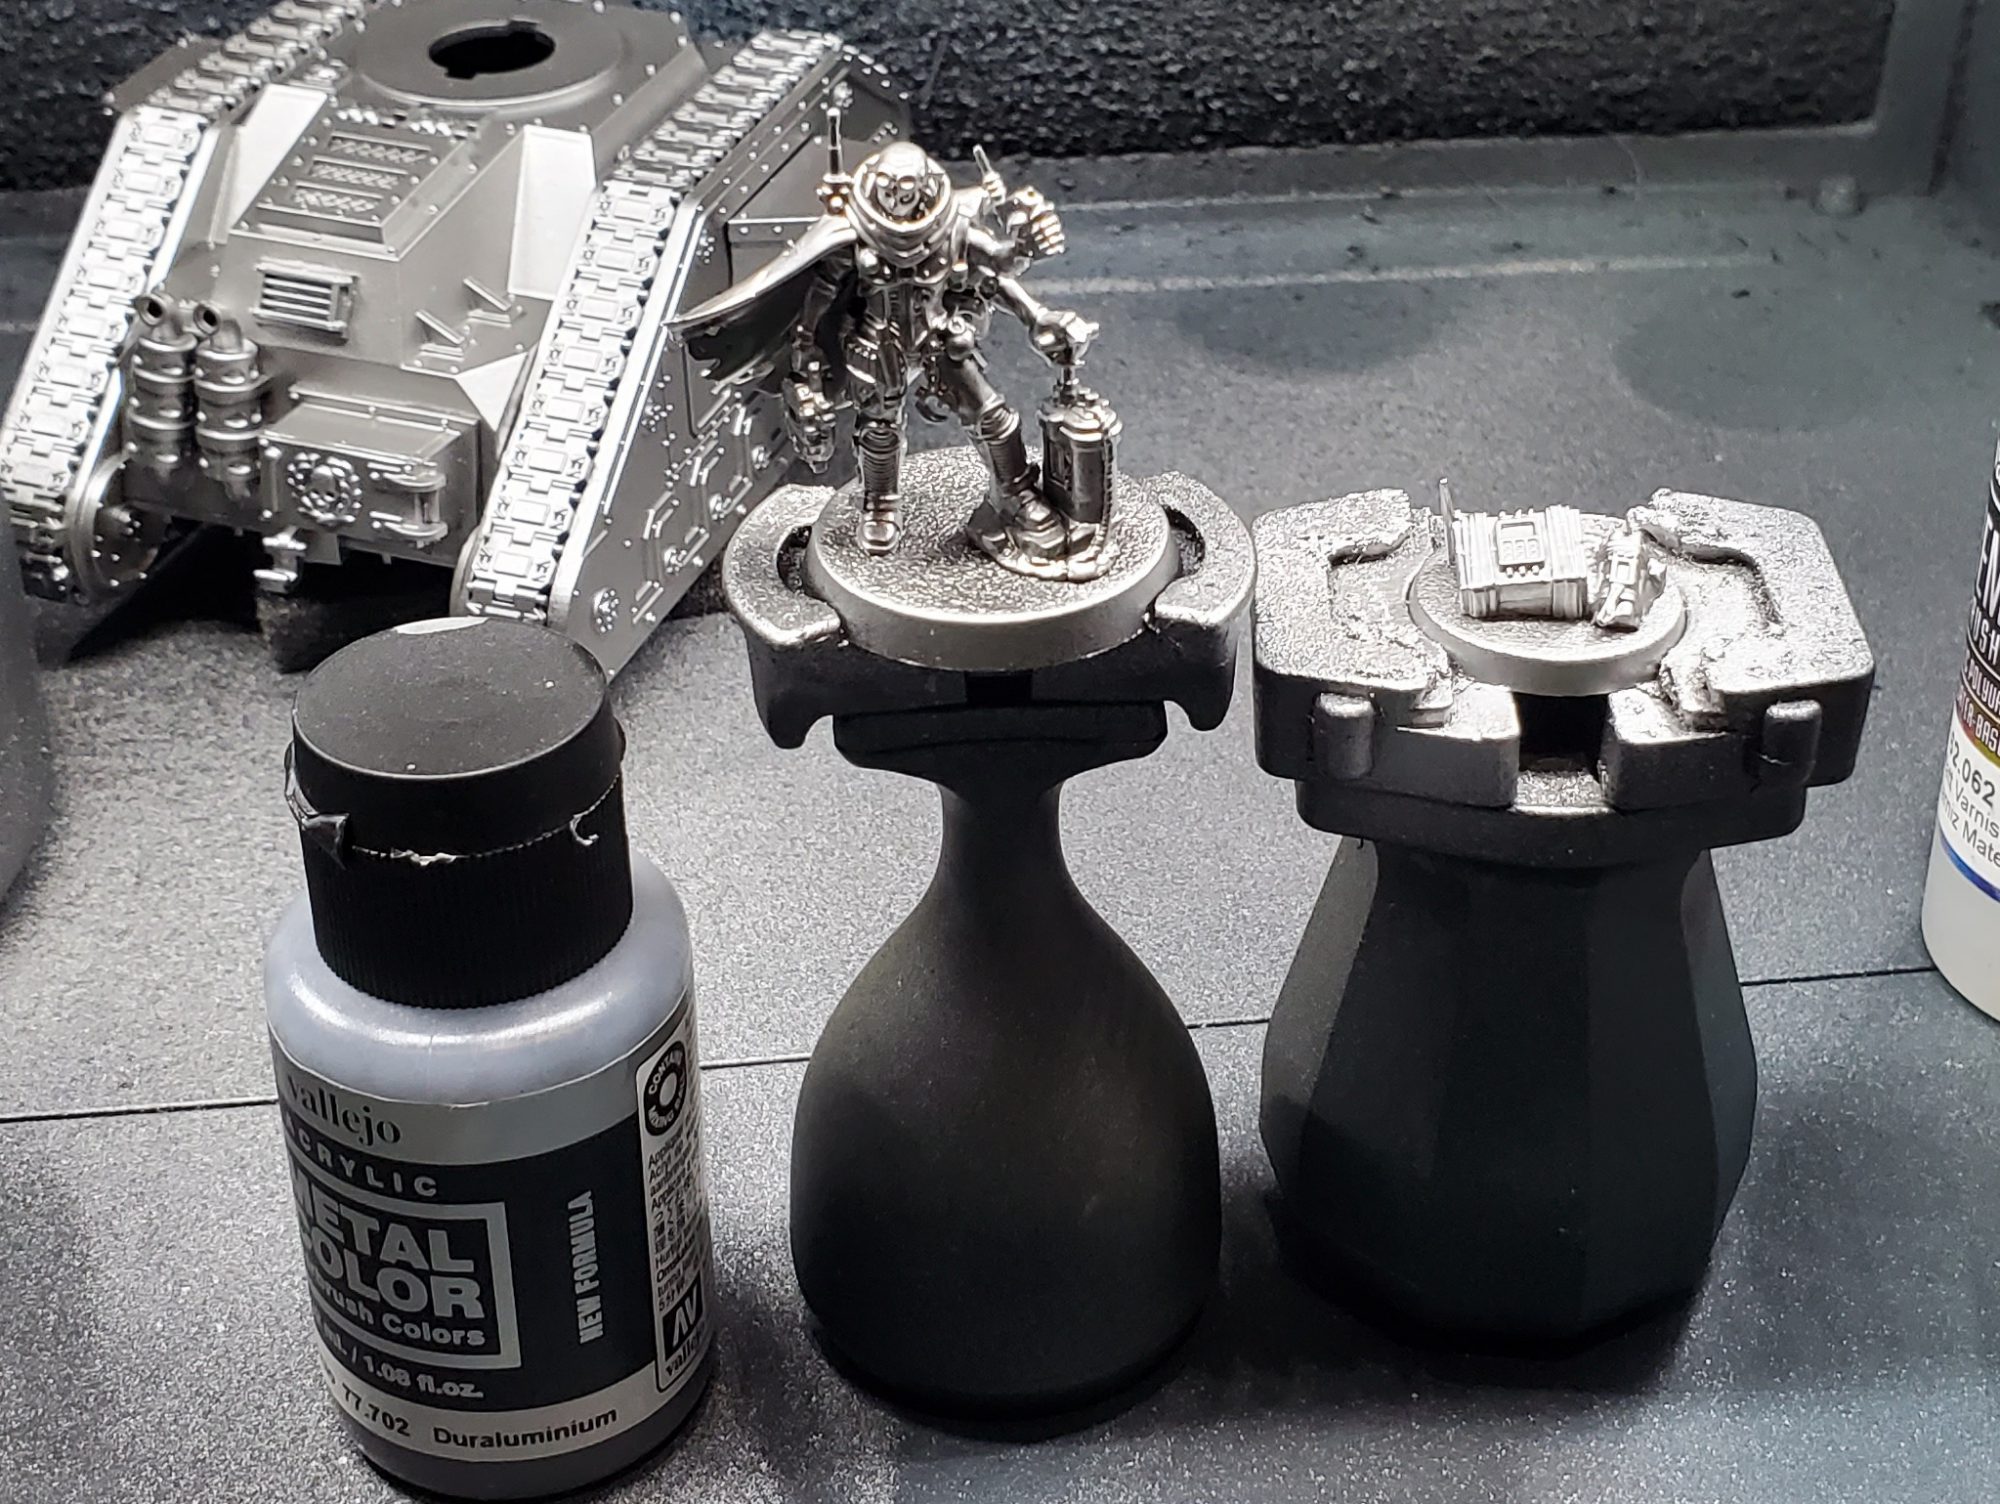
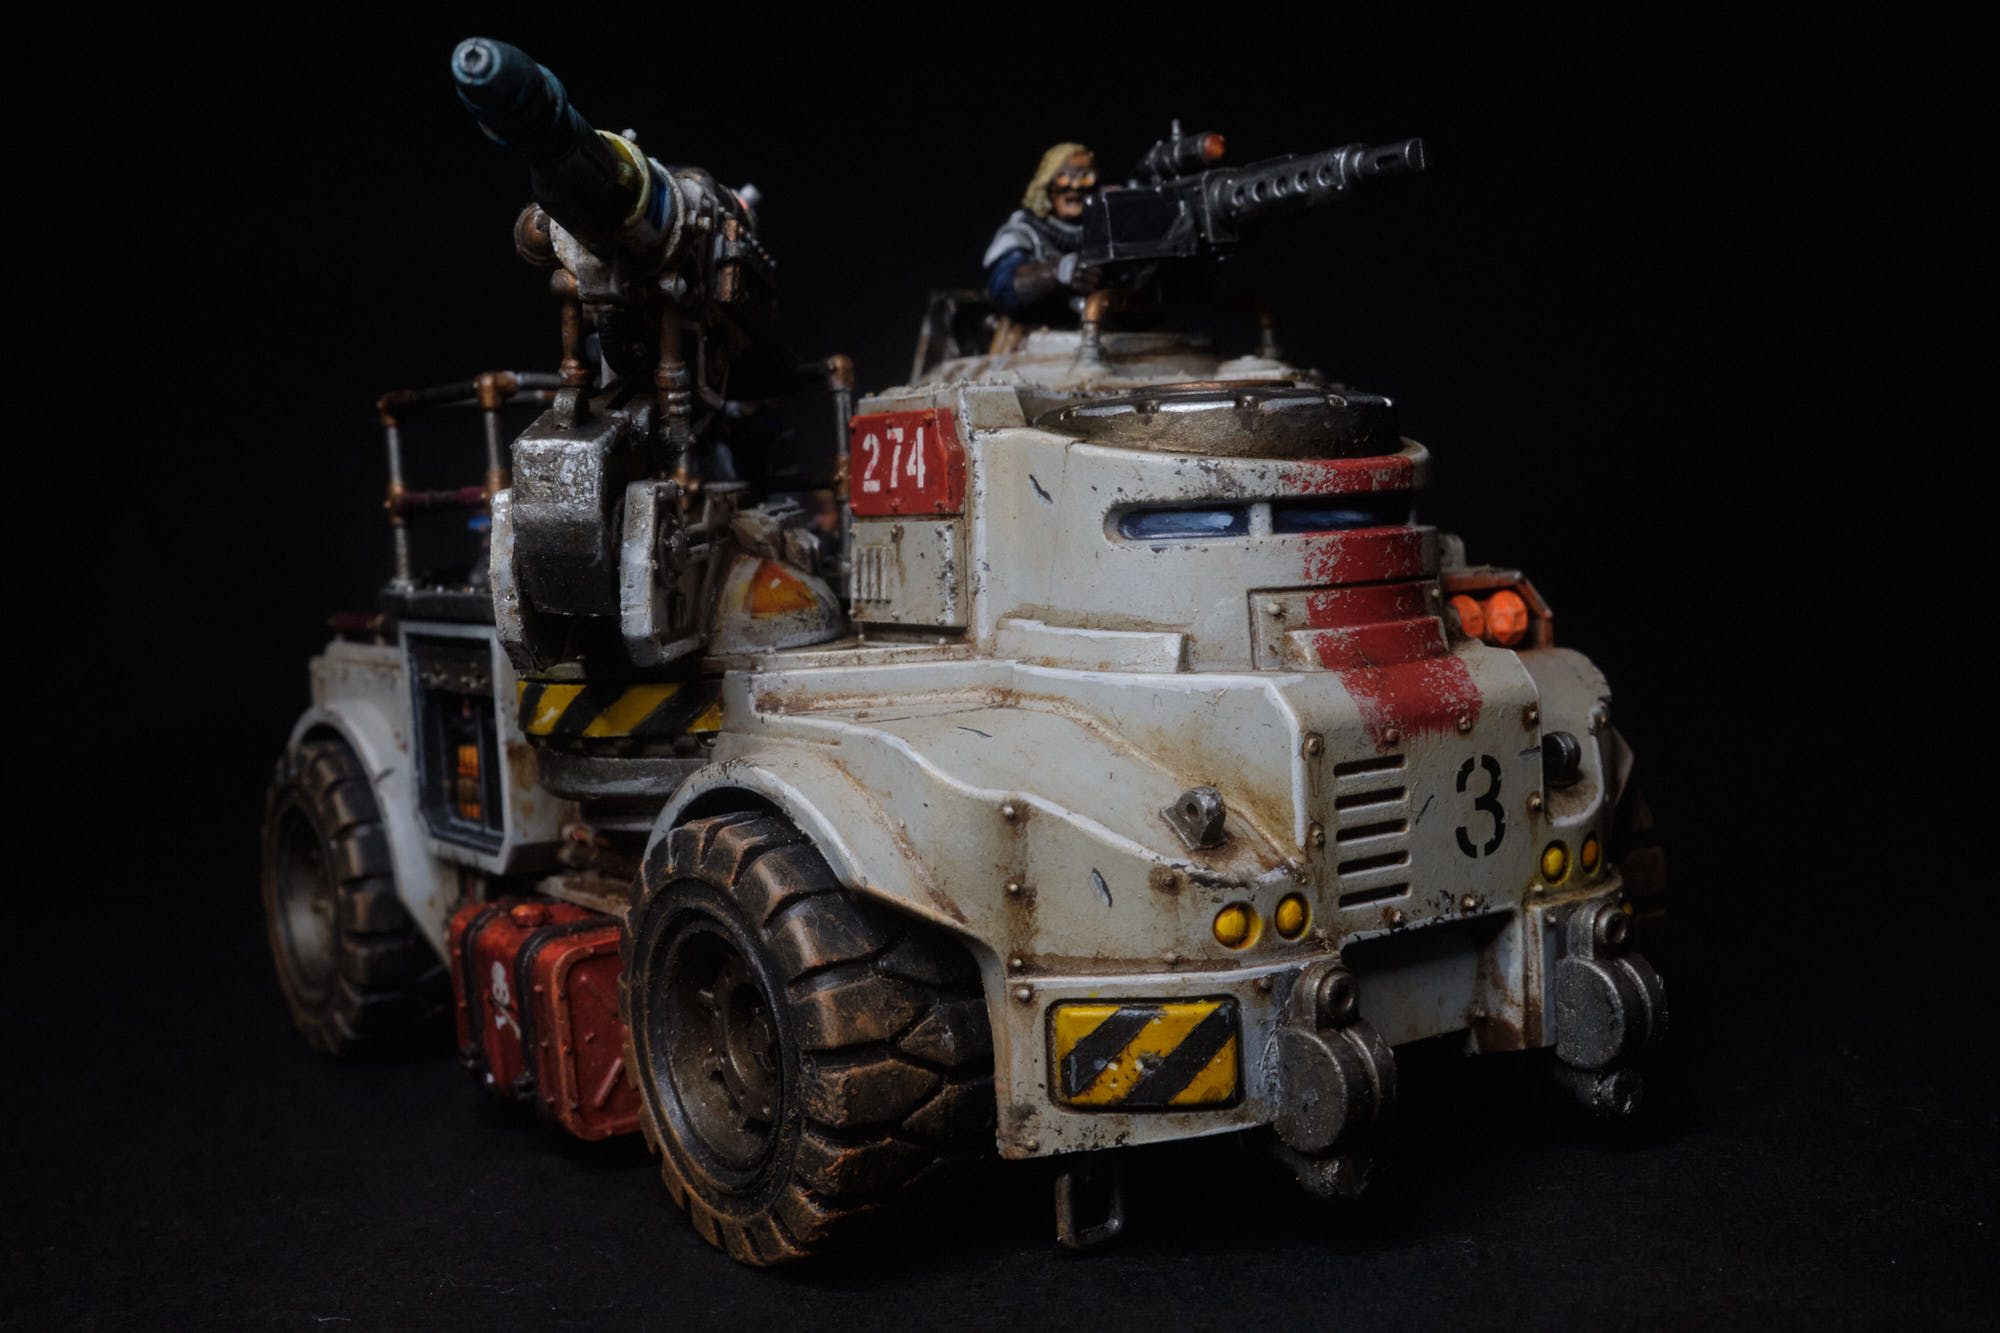
Hey look, I am starting another army, its not like I haven’t done this a million times before. Technically I started this one quite a while ago, as I picked up a box of these cultists like a year ago for some reason or another and they have been lurking in my mercifully small backlog since then. Most of the colours for this army were based on happenstance honestly, while I was sure I wanted to have them fit in with my Leviathan Tyranids I wasn’t quite sure how. What ended up happening was that I bought some chipping medium and a box of Vallejo air paints for another project and decided that I could test them on something “simple”. With the initial sandy colour figured out, the rest ended up being mostly just seeing how I could get the red and purple of leviathan in there. I think they ended up working pretty well given how its comparatively simple for one of my schemes! With the background out of the way, lets move on to getting paint on models…
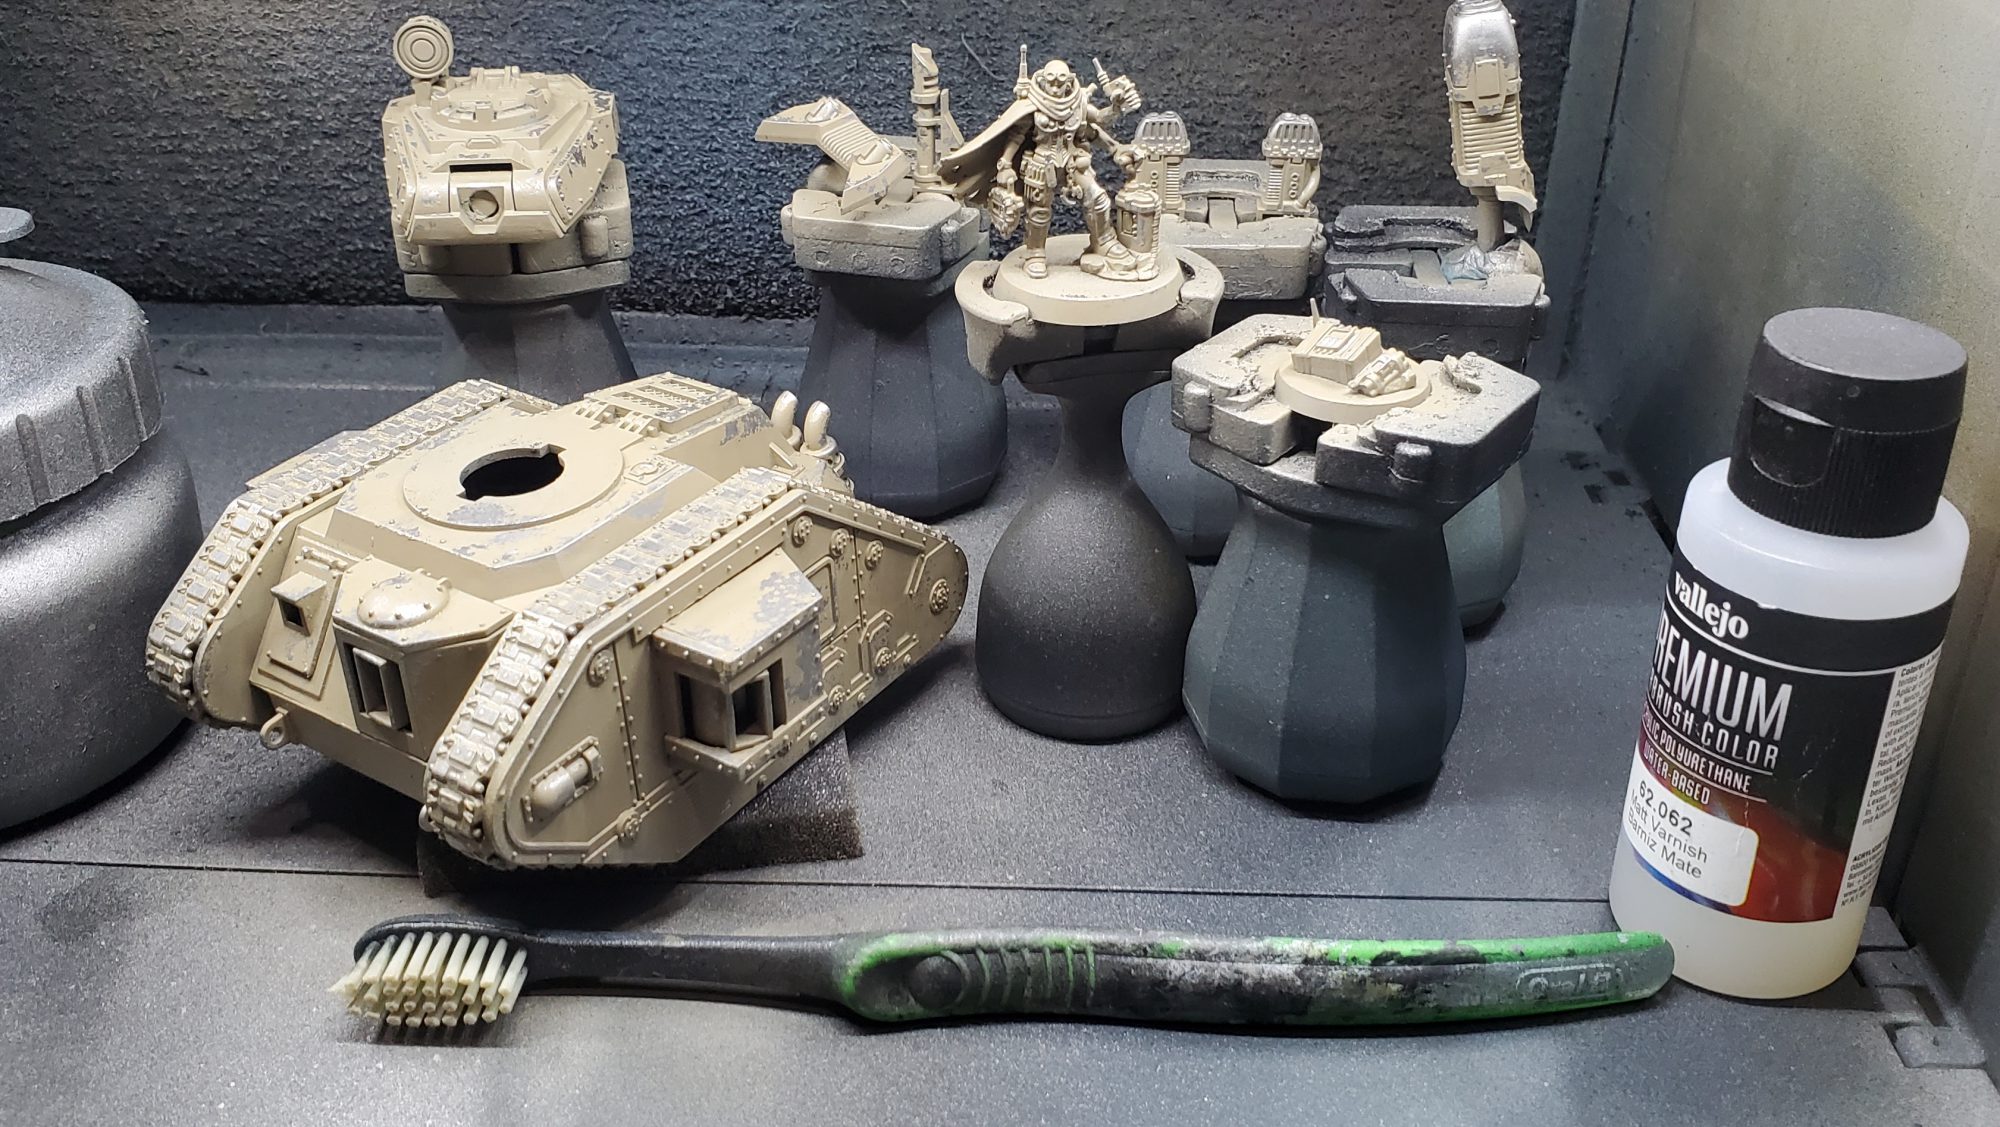
Airbrush Work – Chips can be addictive
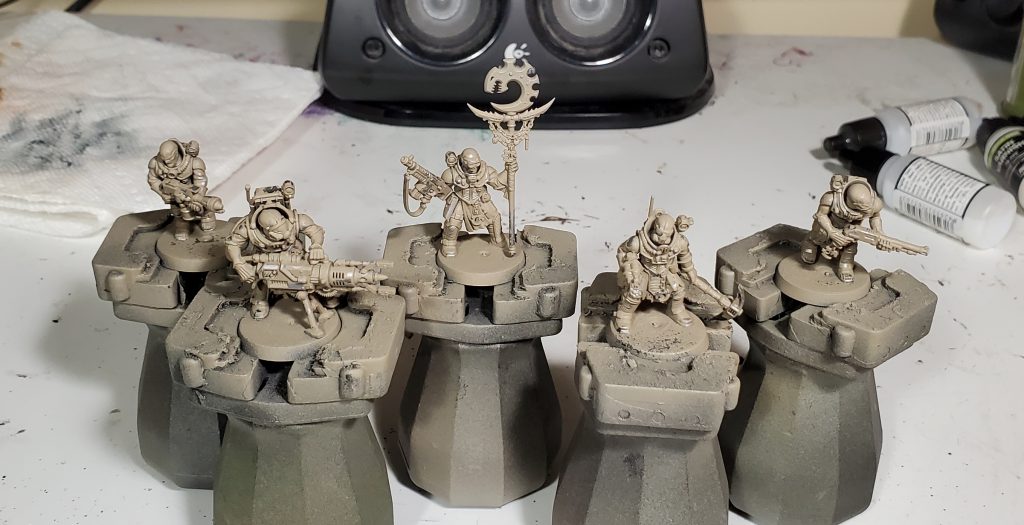
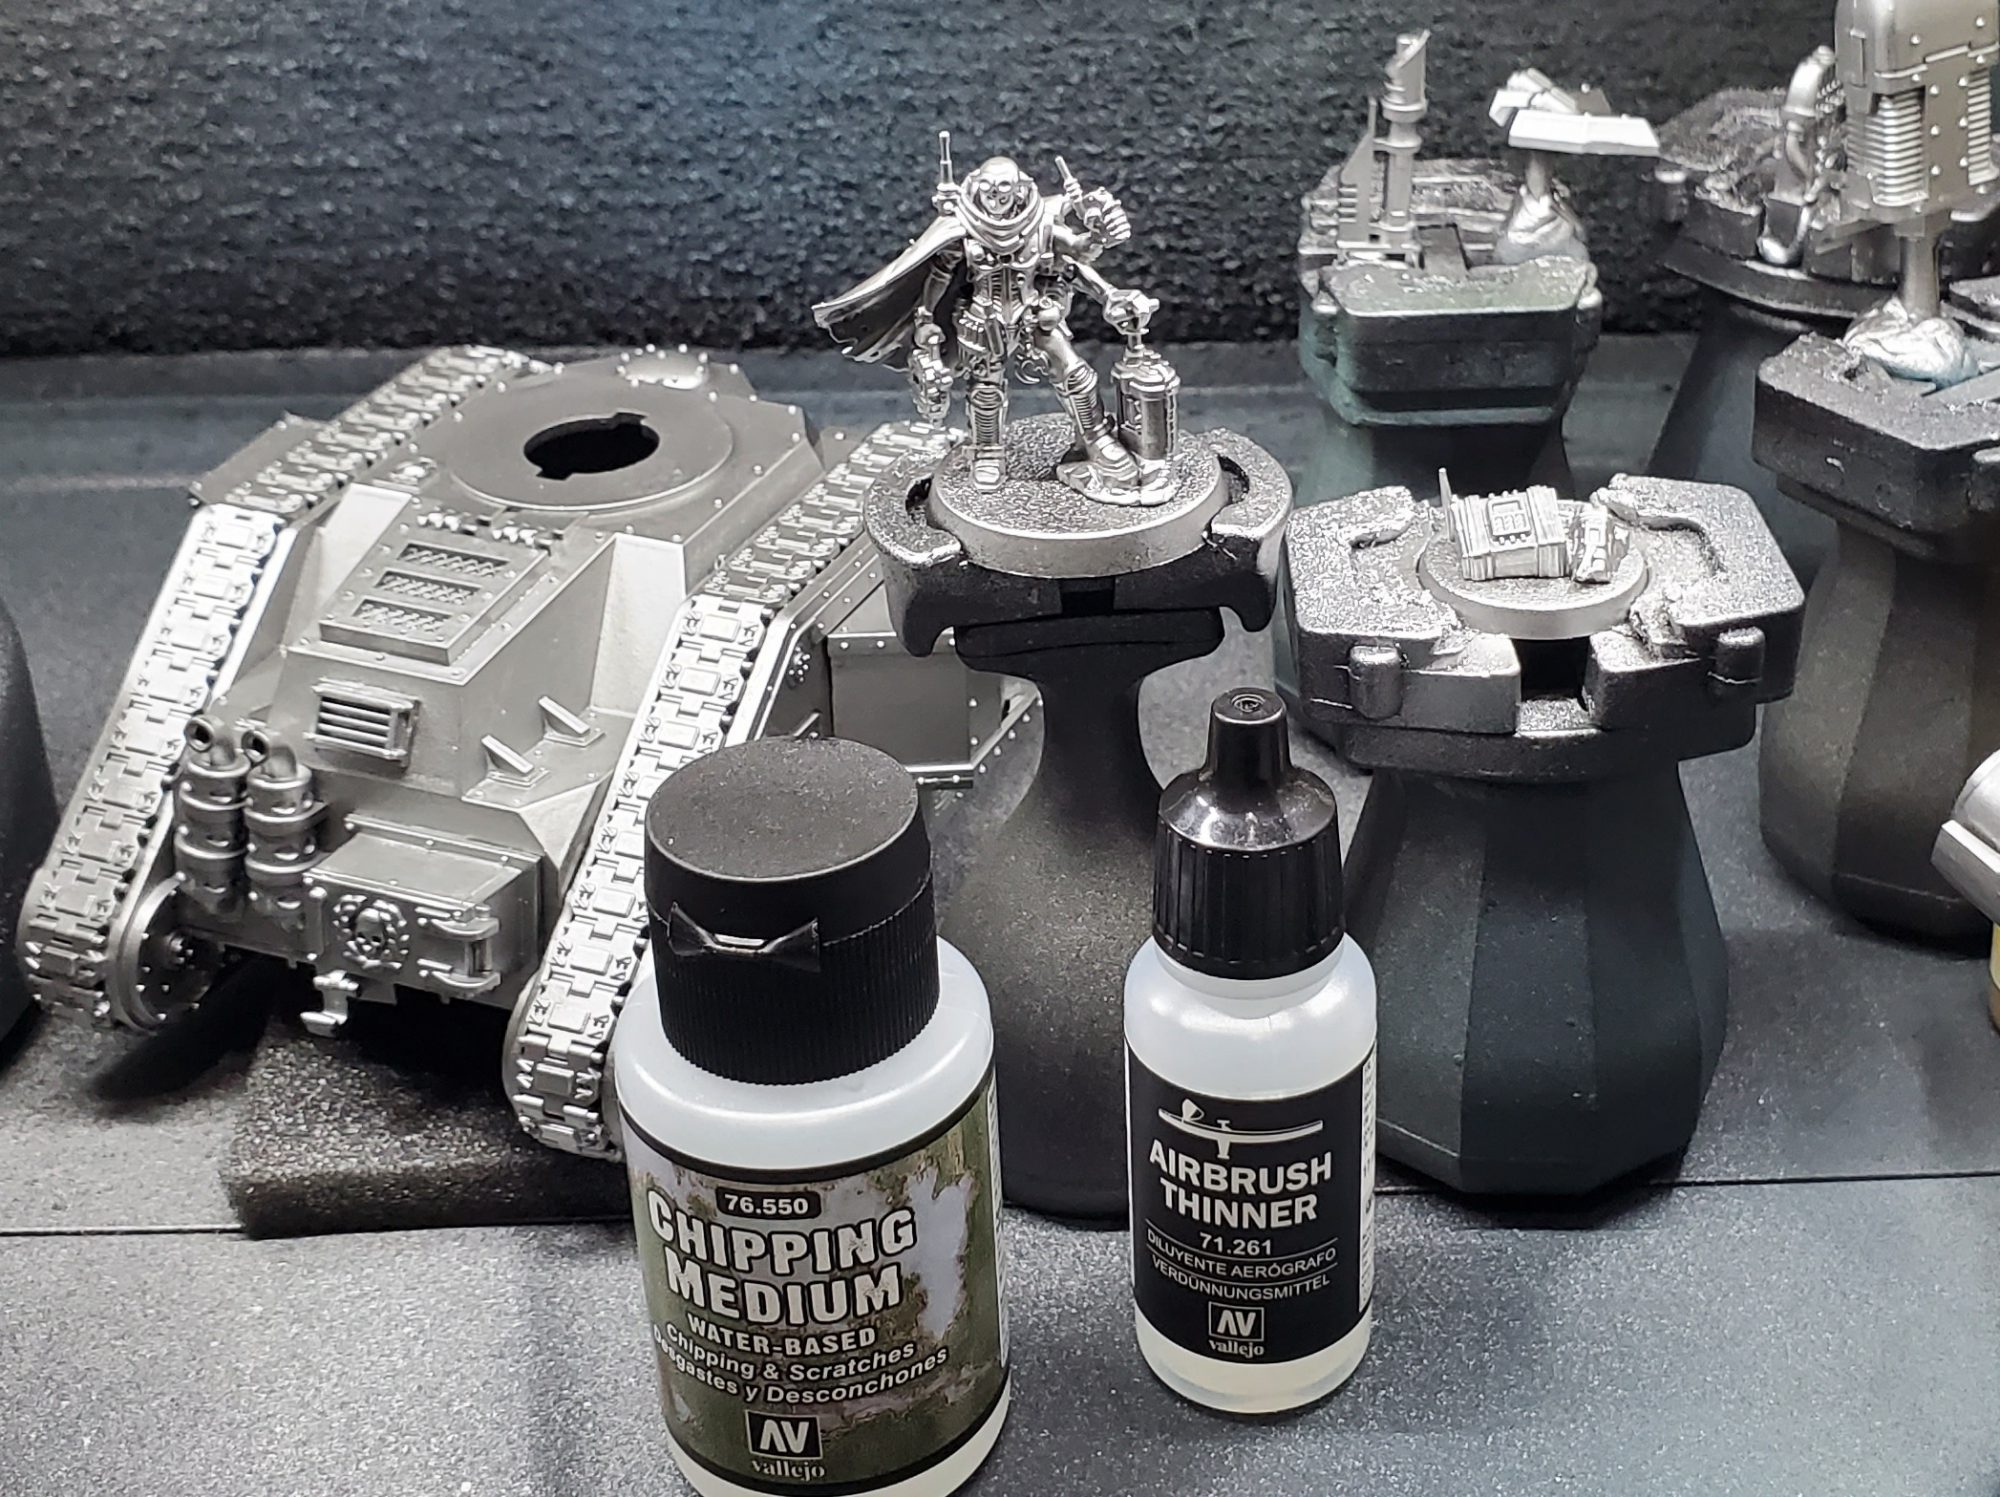
After priming black I gave the models a coat of Vallejo Metal Colour (VMC) Duraluminum, followed by two thin coats of Vallejo Chipping Medium thinned down with water. You might be able to get away with one thicker layer but this stuff is weird to apply through a airbrush, so your experience may vary. After that was just about dry, I applied a coat of Vallejo Model Air (VMA) Yellow Brown that I then chipped back in a few ways to get variety:
- Just using a fairly damp toothbrush, you have to be gentle with this as the chipping medium is not that active so if you go ham you might tear through the metal layer. This is mostly if you want to just chip edges without knocking anything large off.
- Applying a bit of water to a area and leaving it for a bit before coming back with a rough paint brush. This tends to chip off large pieces so you have to be careful with this on small models, otherwise you might find yourself running out of the top coat.
- Being lazy about waiting for the chipping medium to dry, since the medium behaves weirdly through the airbrush I find it tends to pool occasionally resulting in areas that take longer to dry. You can exploit this by just not quite letting it dry in those spots as it will give a good impression of a larger patch of paint falling off after a bit of gentle rubbing with a damp brush.
- You can get spider webbing cracks by rushing the drying paint with a hairdryer, this one might not be up your alley in which case you probably just gotta wait on it drying slowly.
Once the chipping is where you want, its crucial that you seal thoroughly with varnish, otherwise washes and later paint layers can reactivate the chipping medium. In my case I am using either Vallejo Mecha Matte or Premium Air Matte, and I am not quite sure how other finishes will affect how the the scheme turns since there are a lot of washes involved. Do note, that while I describe doing this with a airbrush you could probably do it by hand or rattle can, its just that it might take a lot longer.
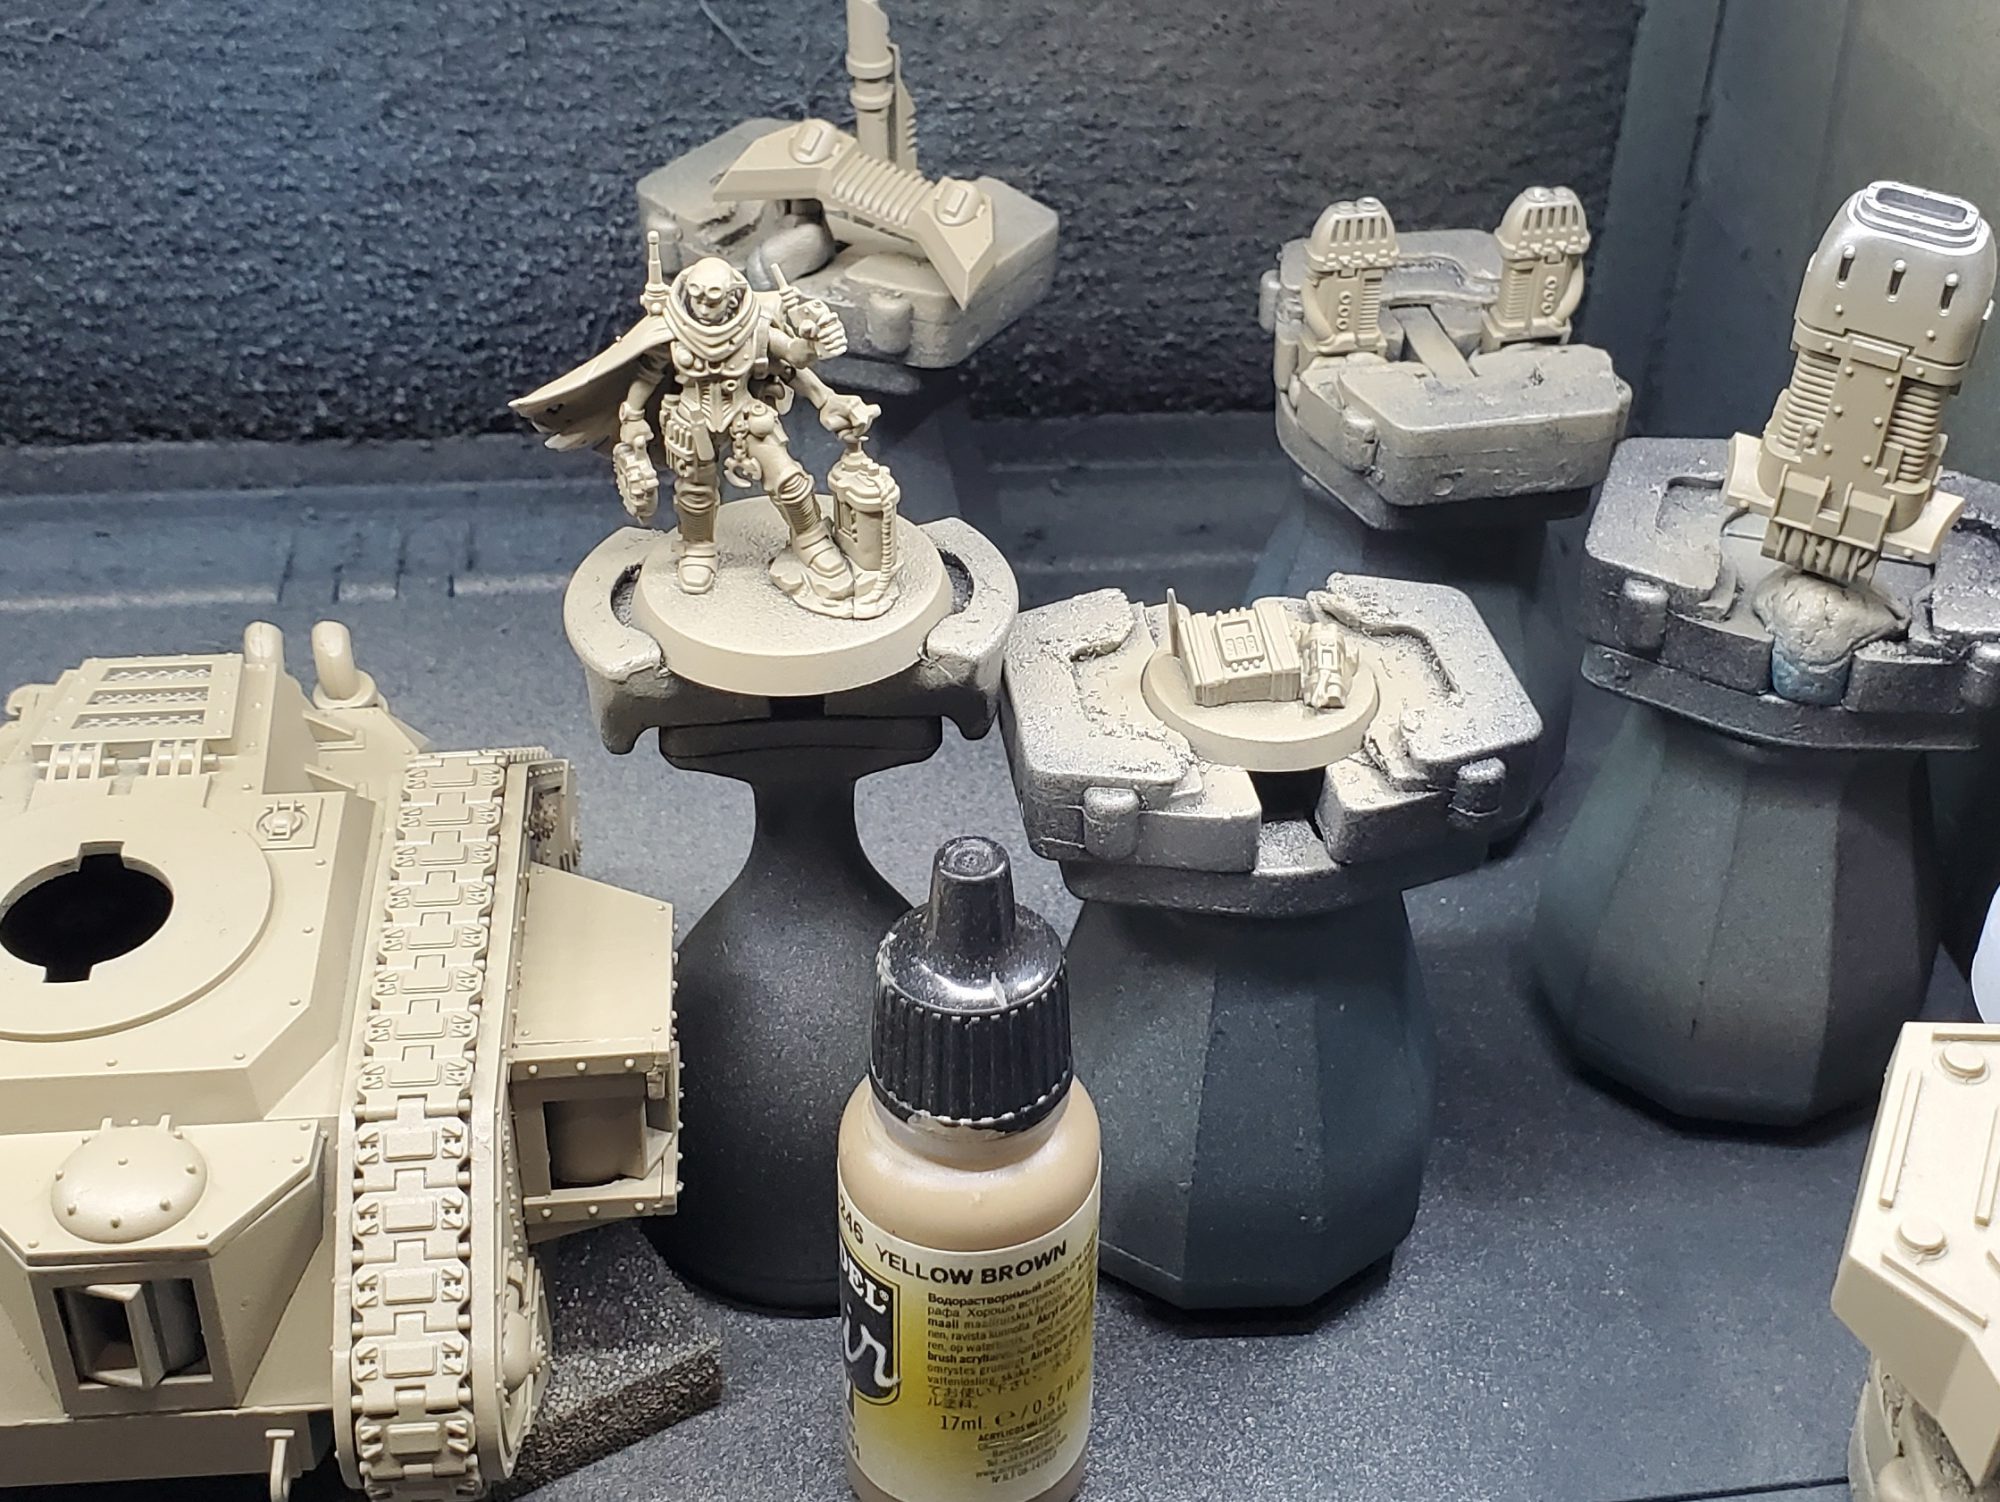
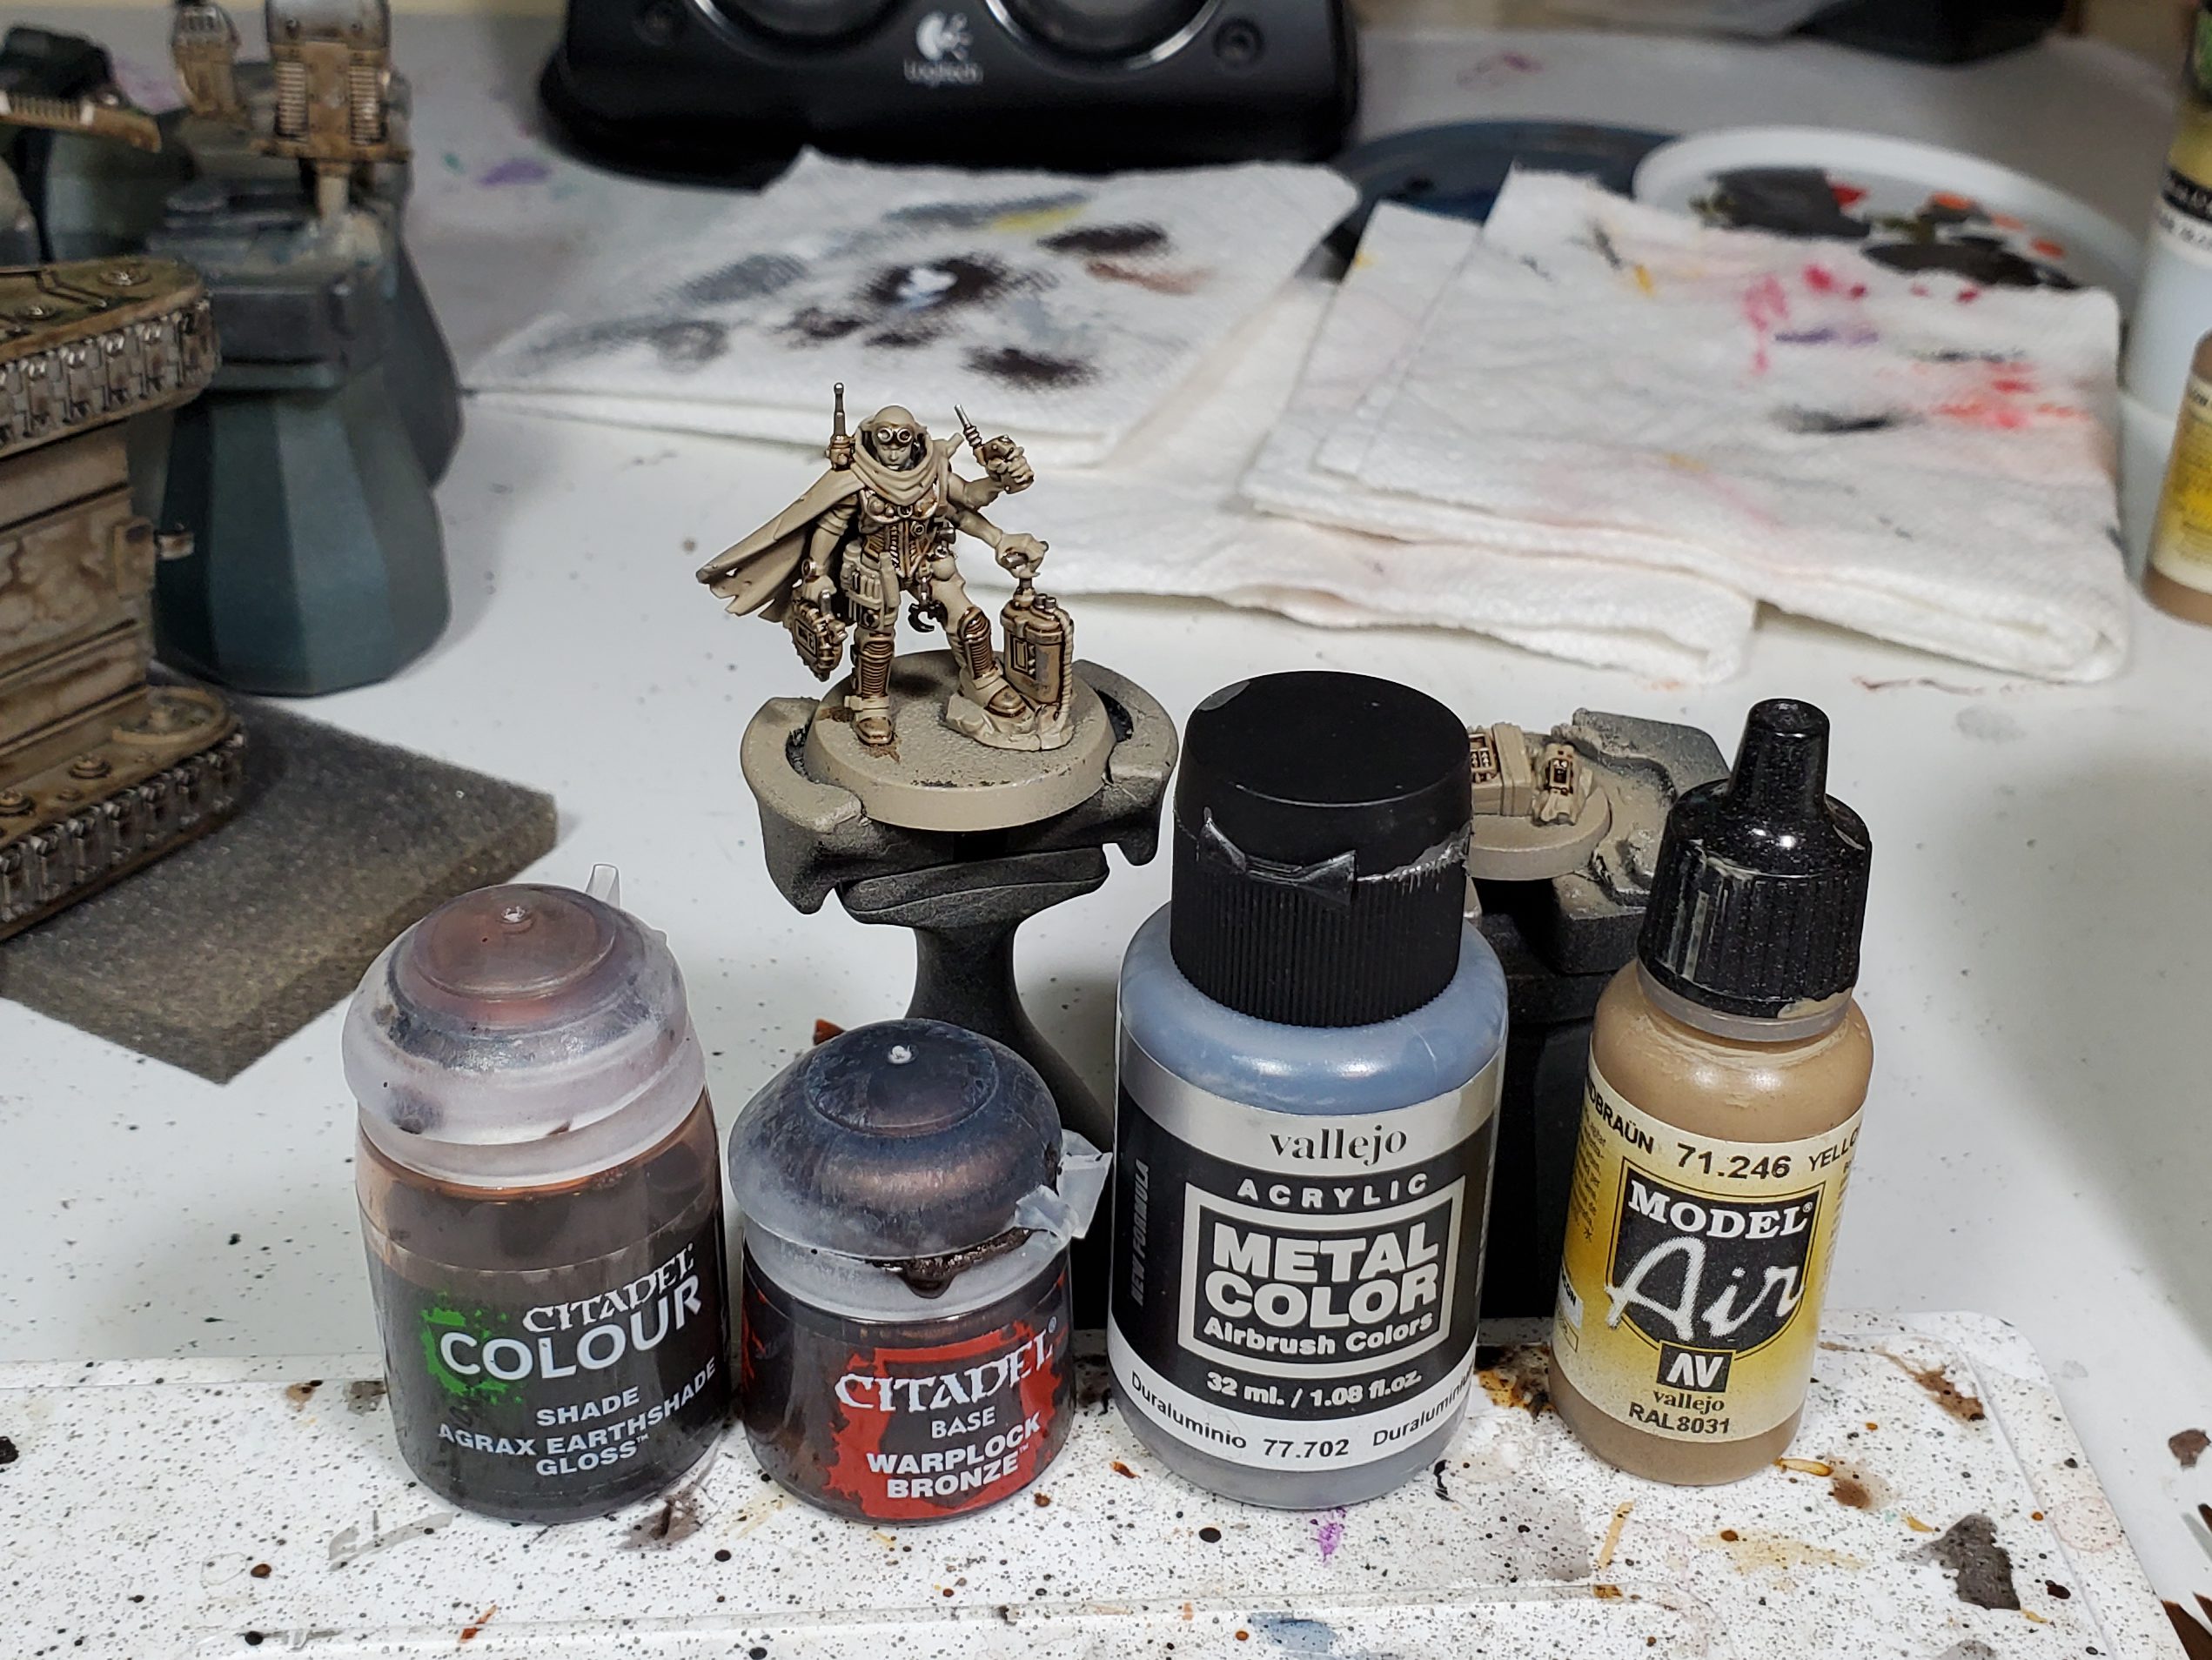
Base Coats – Its almost all washes baby
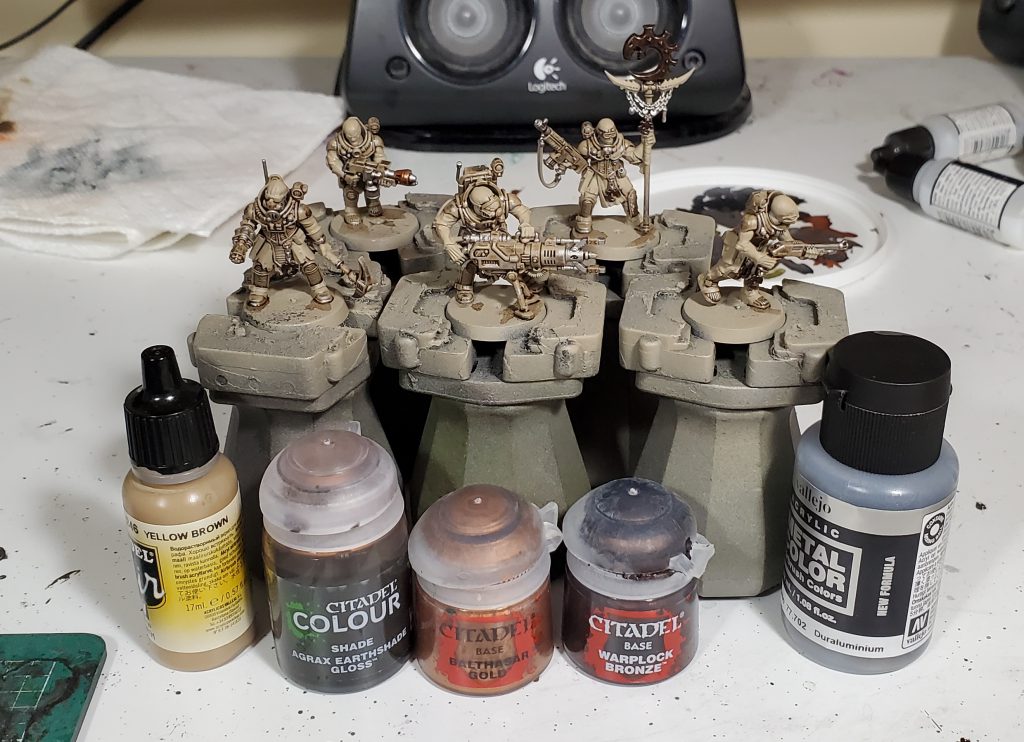
The first thing I did was get all the metals done, this included hitting anything I wanted bare aluminum with the VMC Duraluminum to tie it back to the material under the chipped paint. In this scheme I am using the Warplock on iconography and Balthasar on coppery pieces of equipment. Next up, I washed the metal and armor panels alike with Agrax Gloss, this will get us the final sandy beige of the main armor and recess shading on the metals. After that dried, I went and cleaned up everything but the metals and armour with VMA Yellow Brown, this is needed becausein the last step you probably had excess chipping or weird textured areas. You could go straight to base coating with conventional colours, but I wanted to save time and I am happy with how contrast looks over the yellow brown.
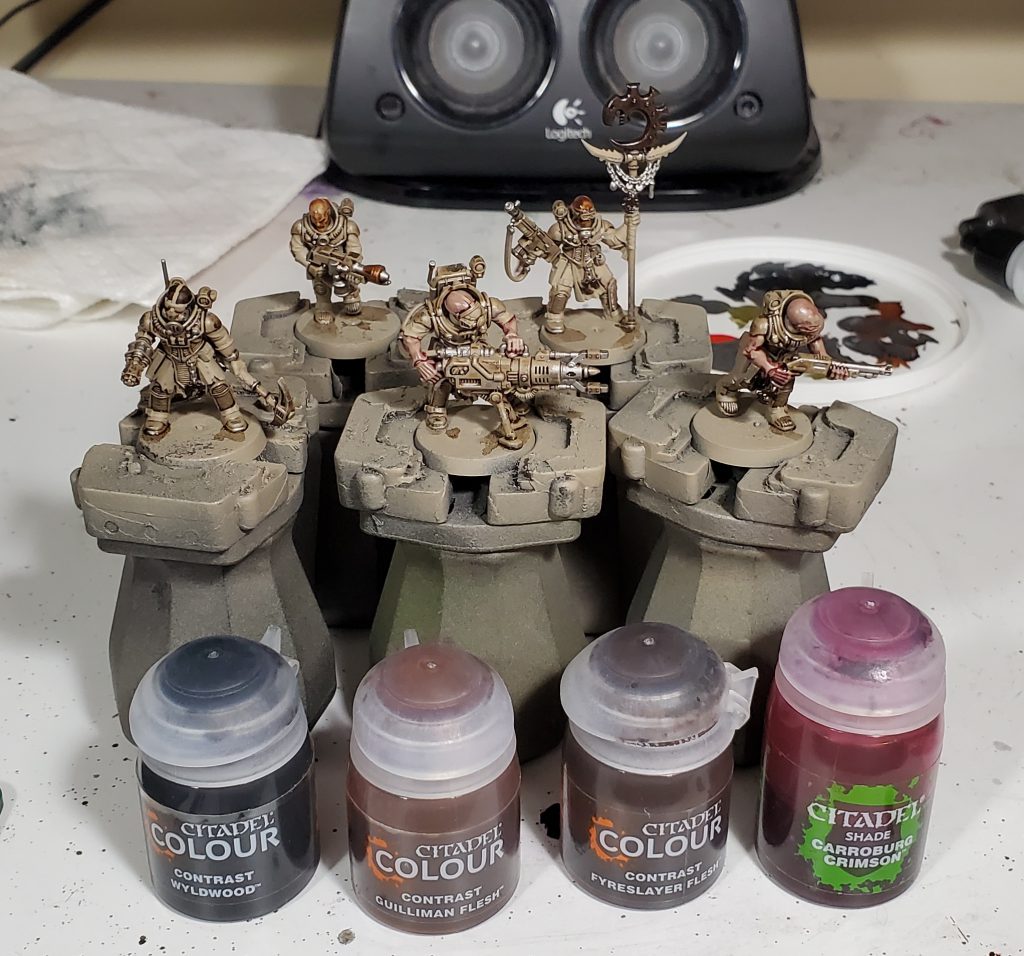
The first round of base coats are for the skin, and this is pretty much what you can see. I used Carroburg on the more evidently Tyranid hybrids and then various flesh contrasts for the more human range skin tones.
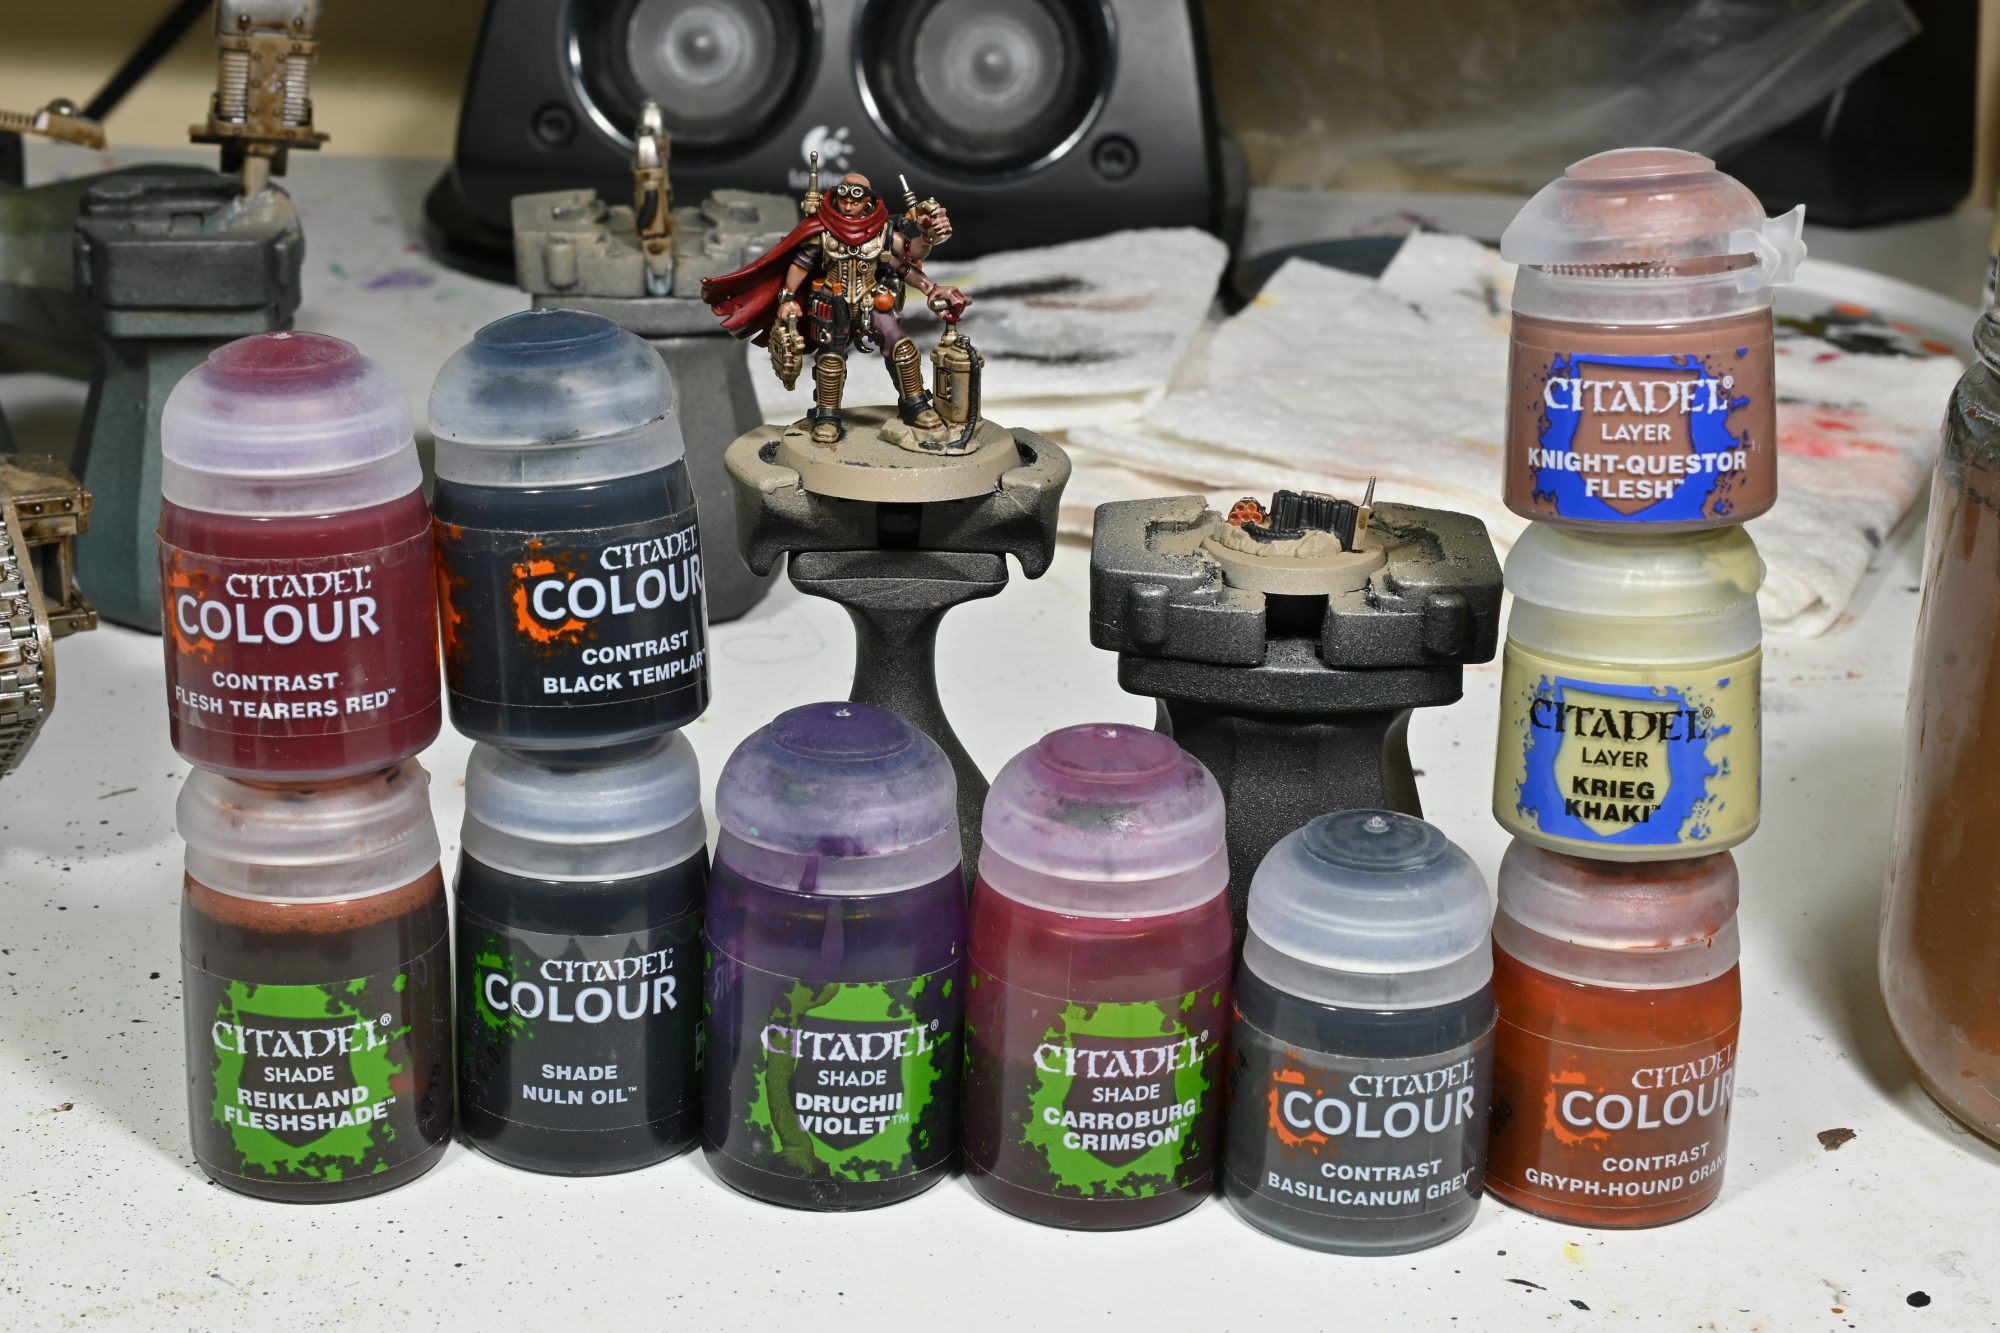
The rest of the base coats are also pretty straight forward:
- Flesh tearers is on special cloth, claws, etc
- Gryph-hound on grenades and webbers
- Black templar on rubber, wires, grips, etc
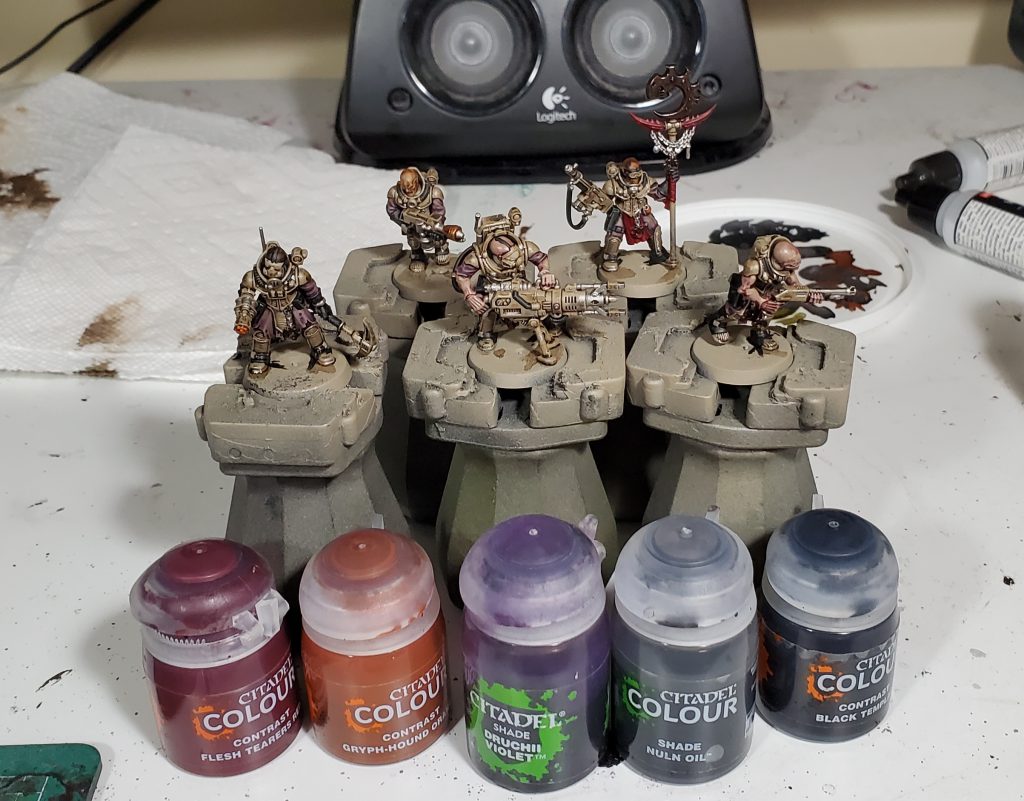
What might be confusing here is the uniform, where I start with Nuln to darken and desaturate it a bit before Druchii gets colour right.
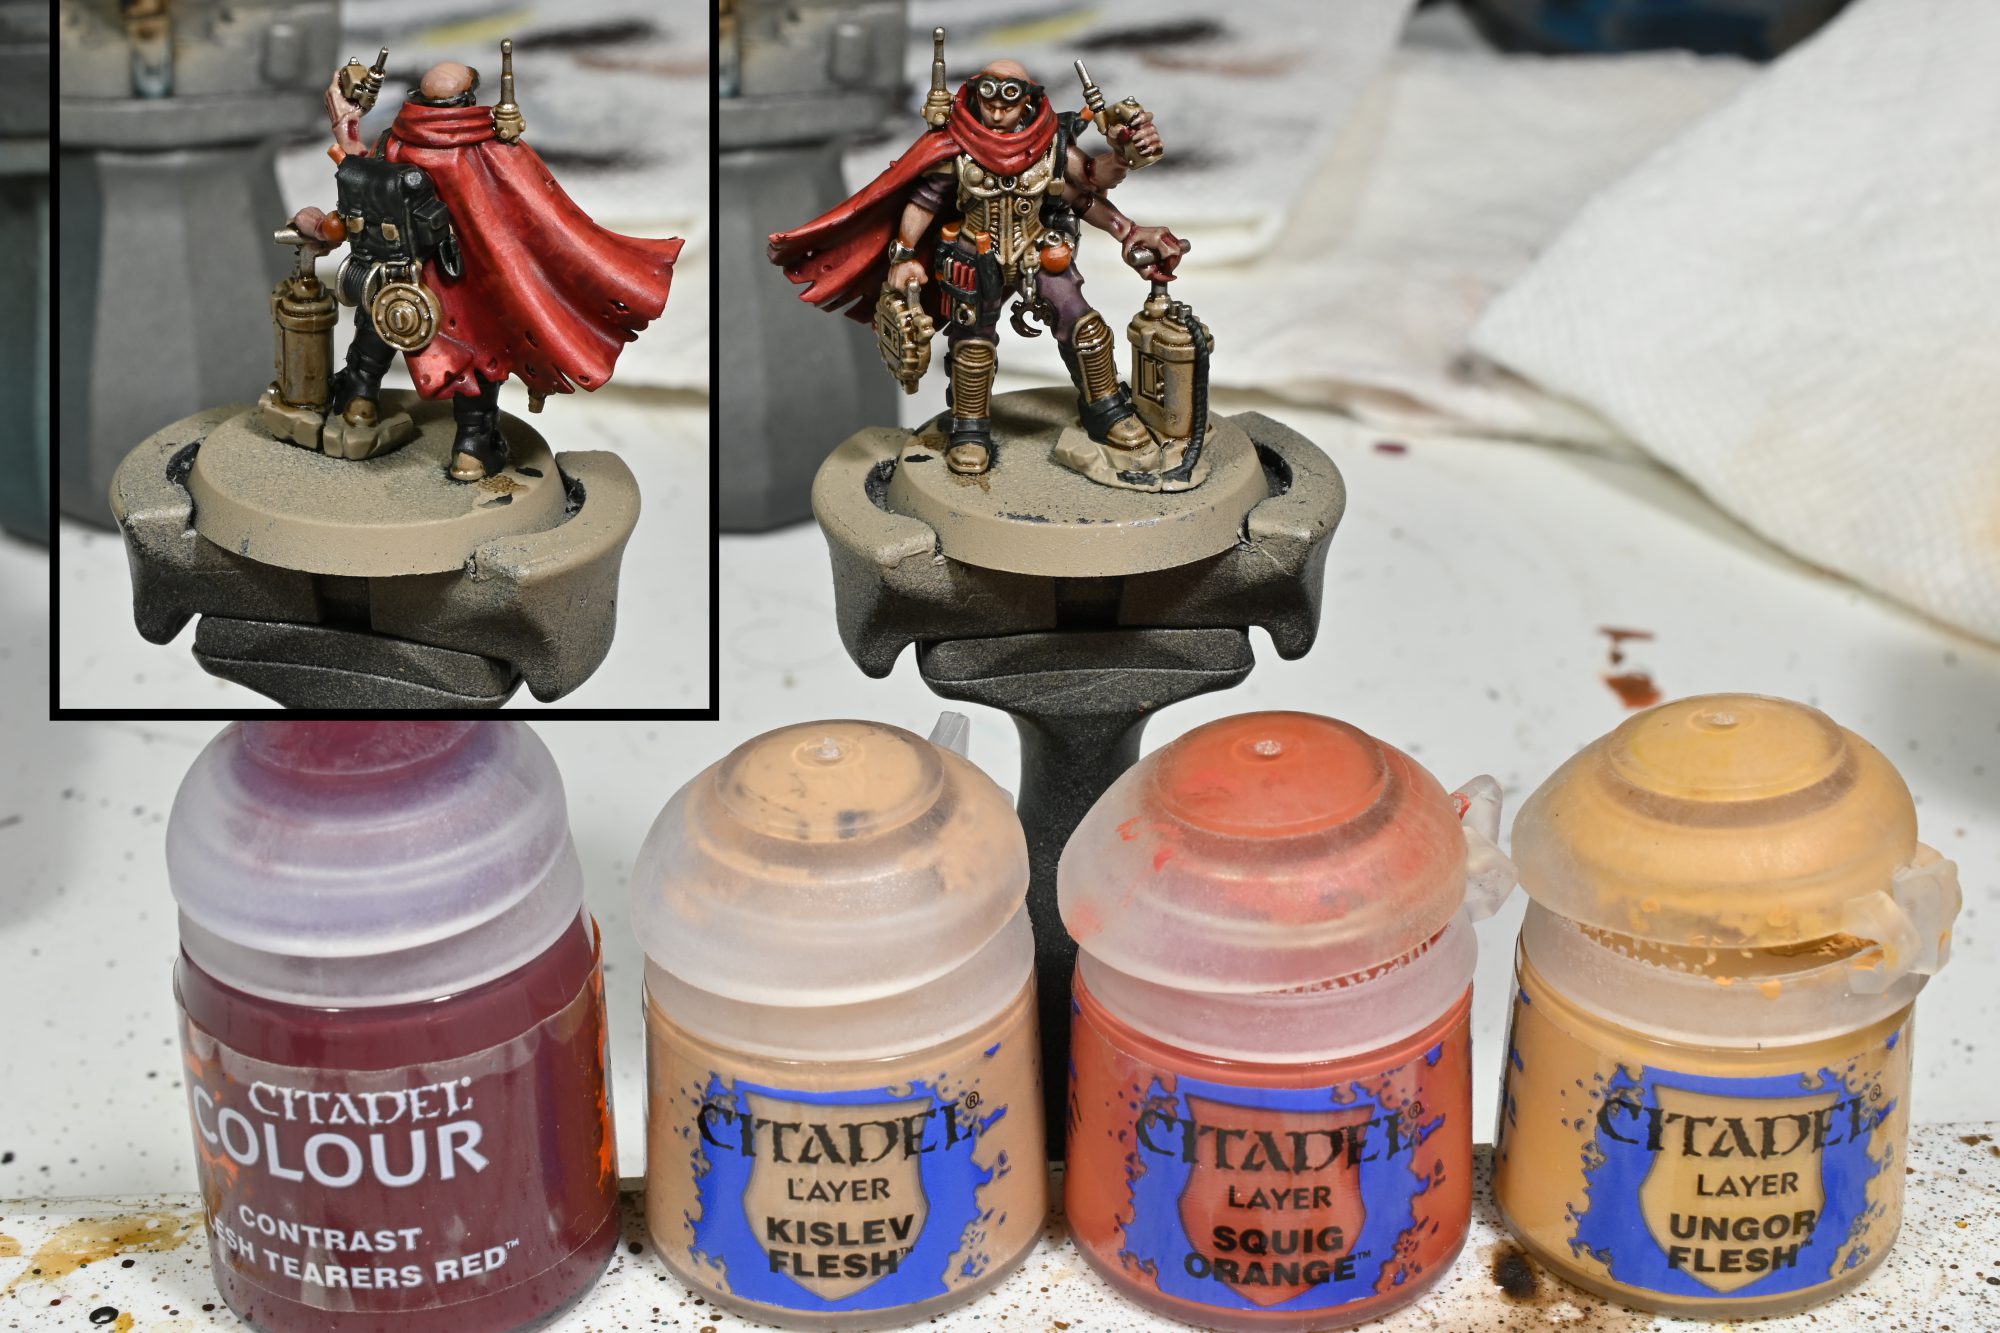
Highlights – Making the gribblies pop
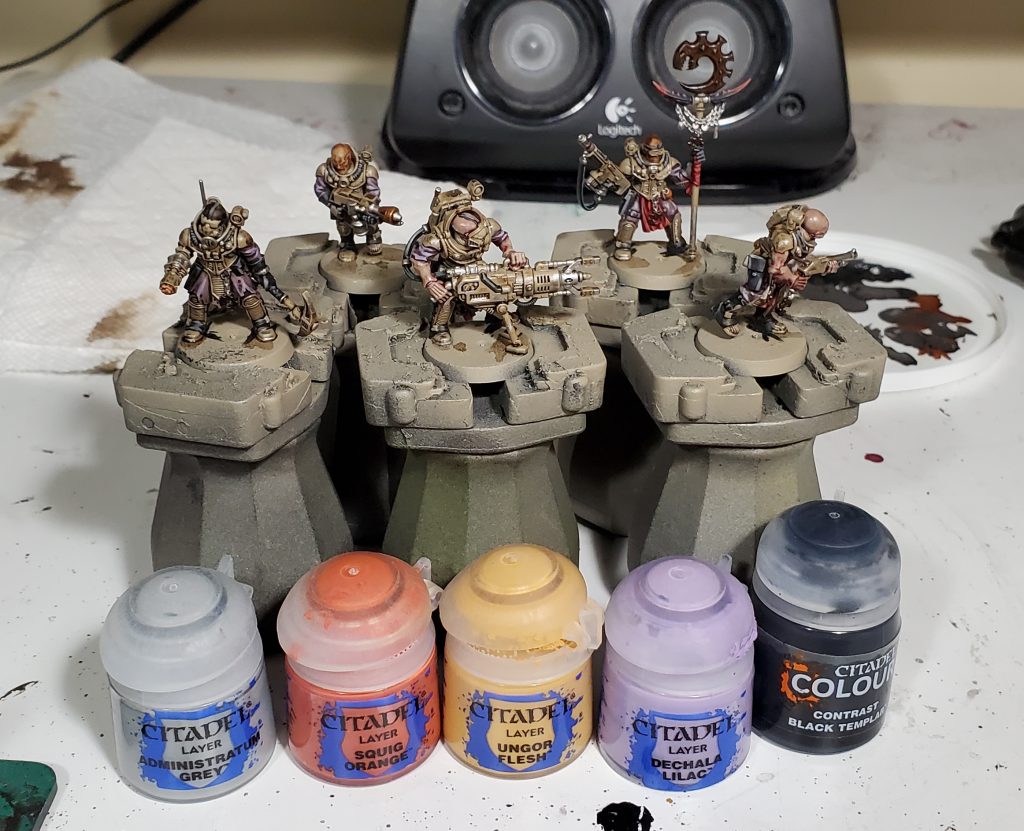
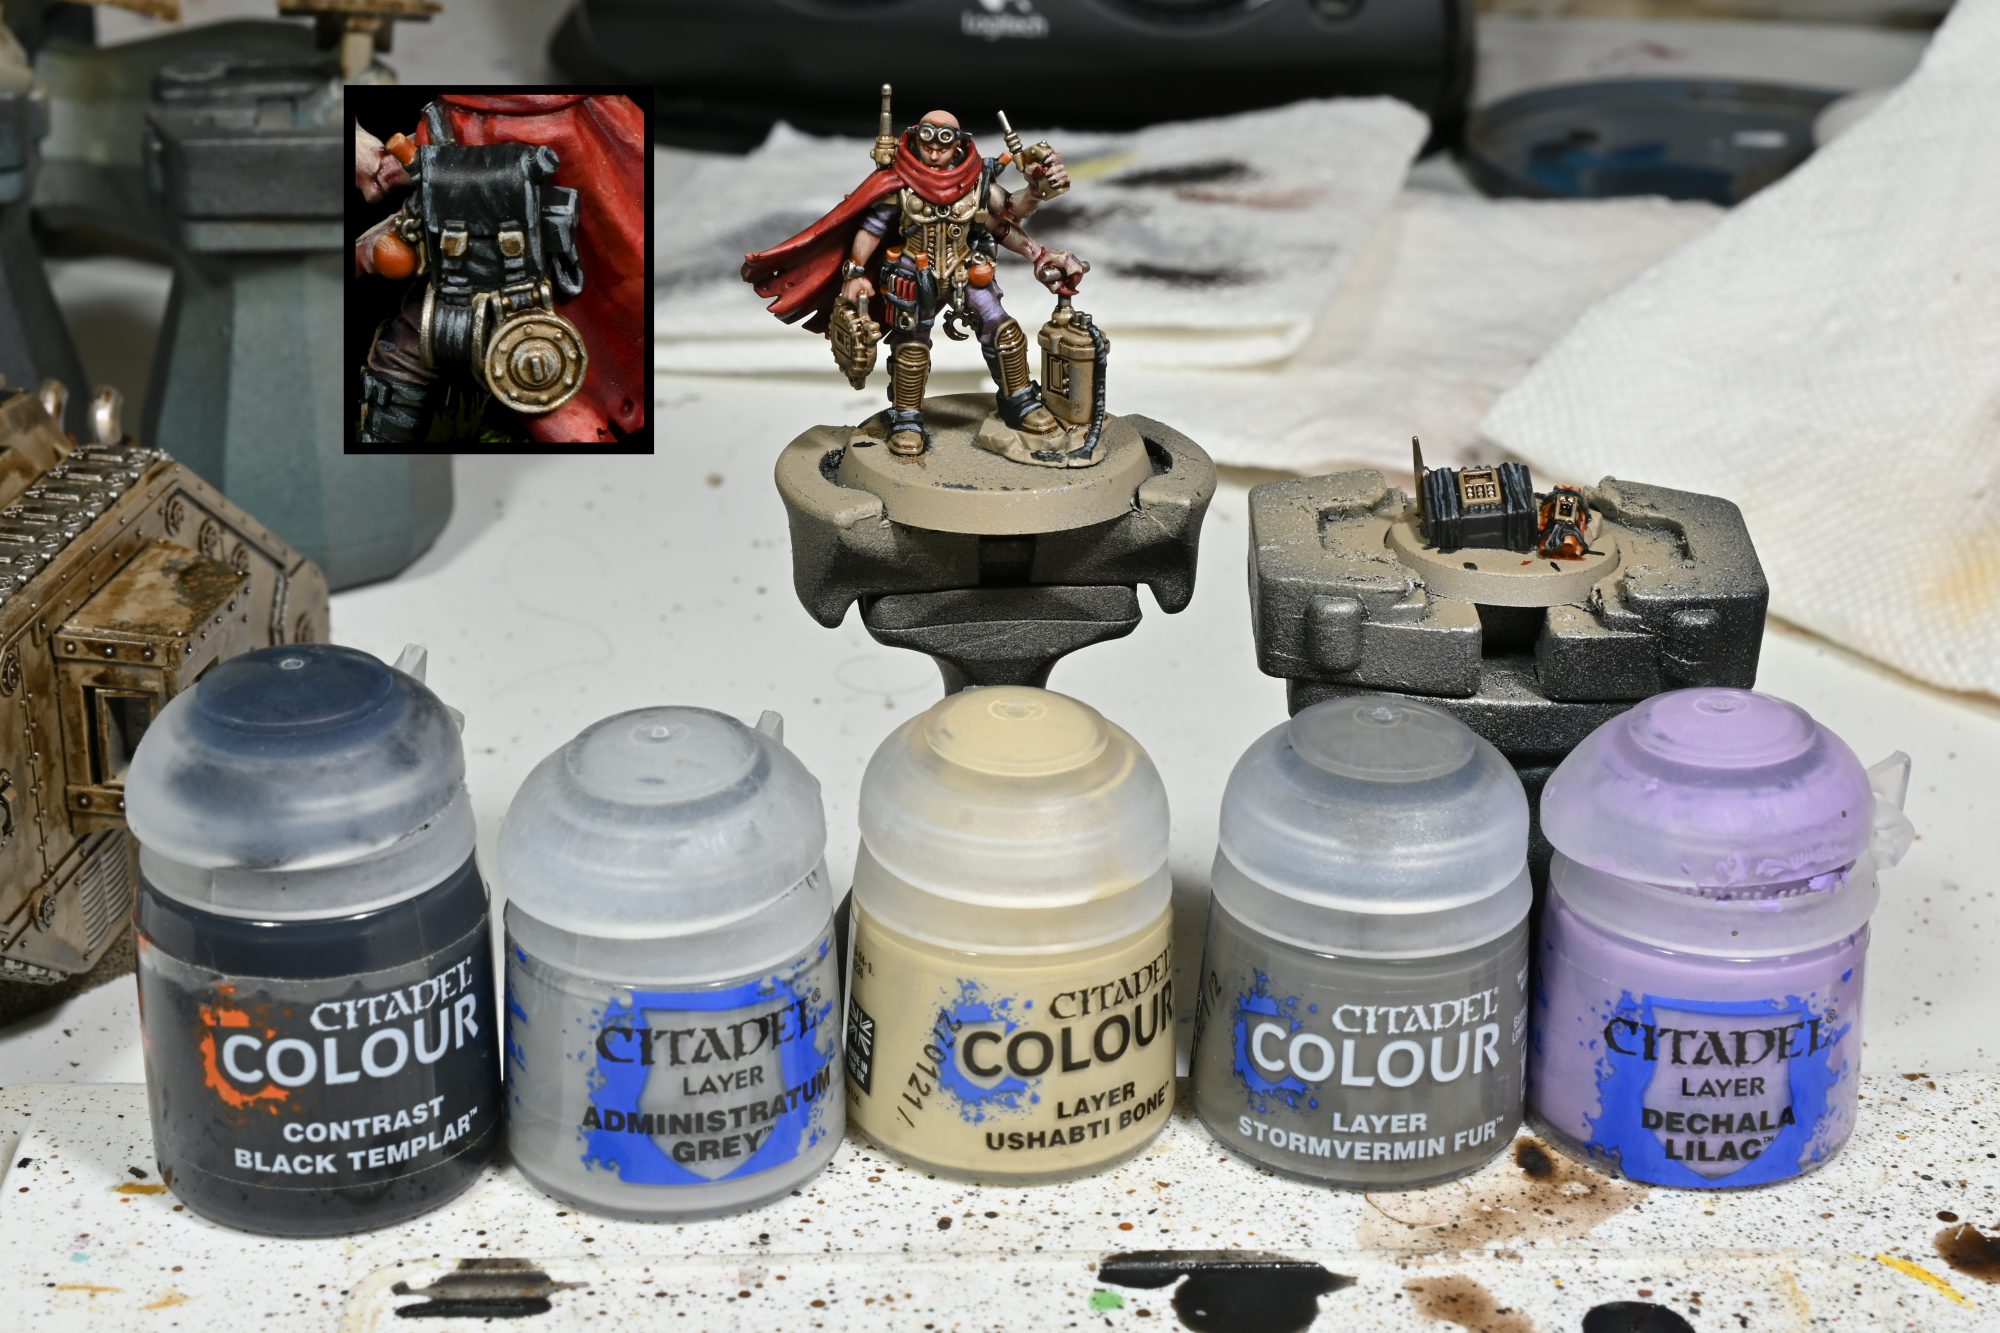
While not a highlight, the first thing I did at this step was to used black templar to tint the base of the claws on the banner, this was in a few steps thinned each time although the first step was probably a bit dense. After that the highlights mostly go where you expect:
- Administratum on the black
- Squig on the red
- Ungor on the orange
- Dechala on the uniform
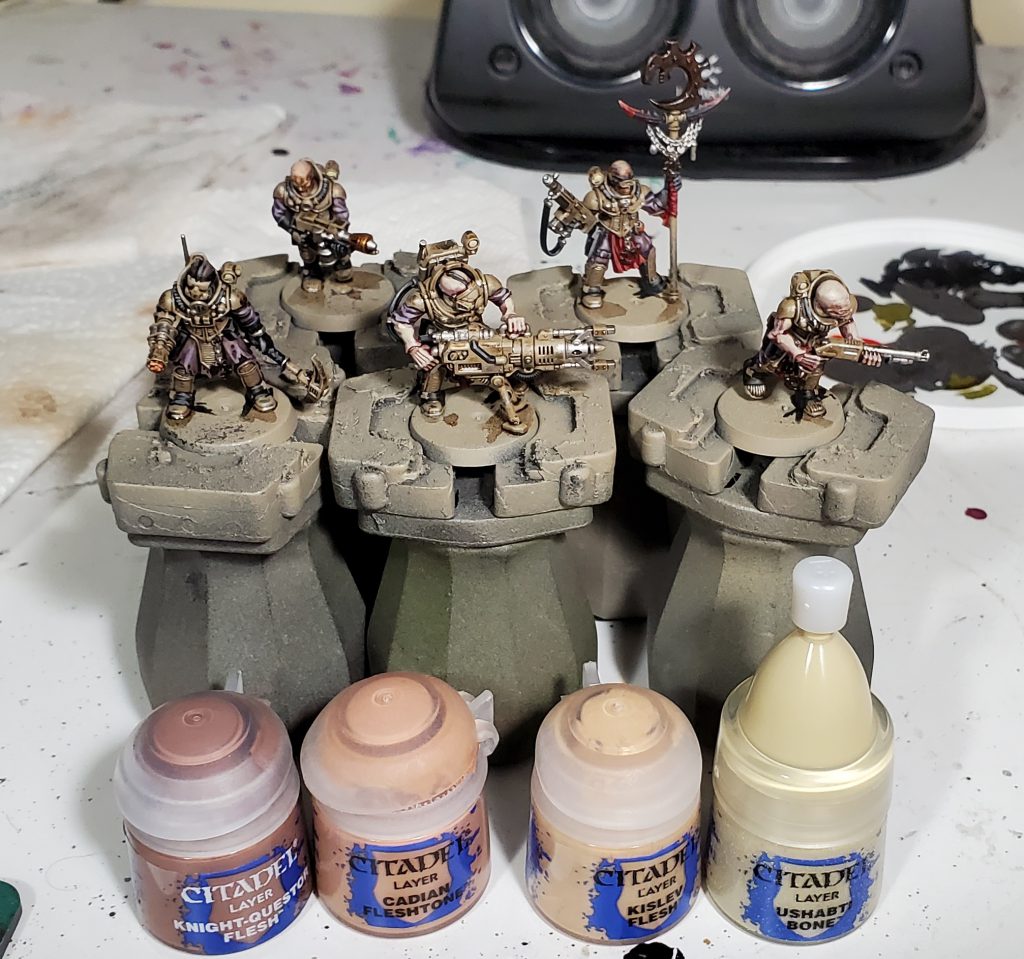
For the human skin highlight the colours are basically just moving left to right from darkest to lightest of this trio of paints. The darker skin is a couple of thin coats of Knight-Questor, then for the last highlight mixing in a touch of Cadian. The medium skin tone started with Cadian followed by mixing in a bit of Kislev for the final highlight of the medium tone. Then I reused that Cadian/Kislev mix for the initial highlight of the lightest tone that was then finished off with kislev. The hybrid skin is a couple of thin coats of Ushabti over the base coat, you can push it a touch further with screaming skull if you want.

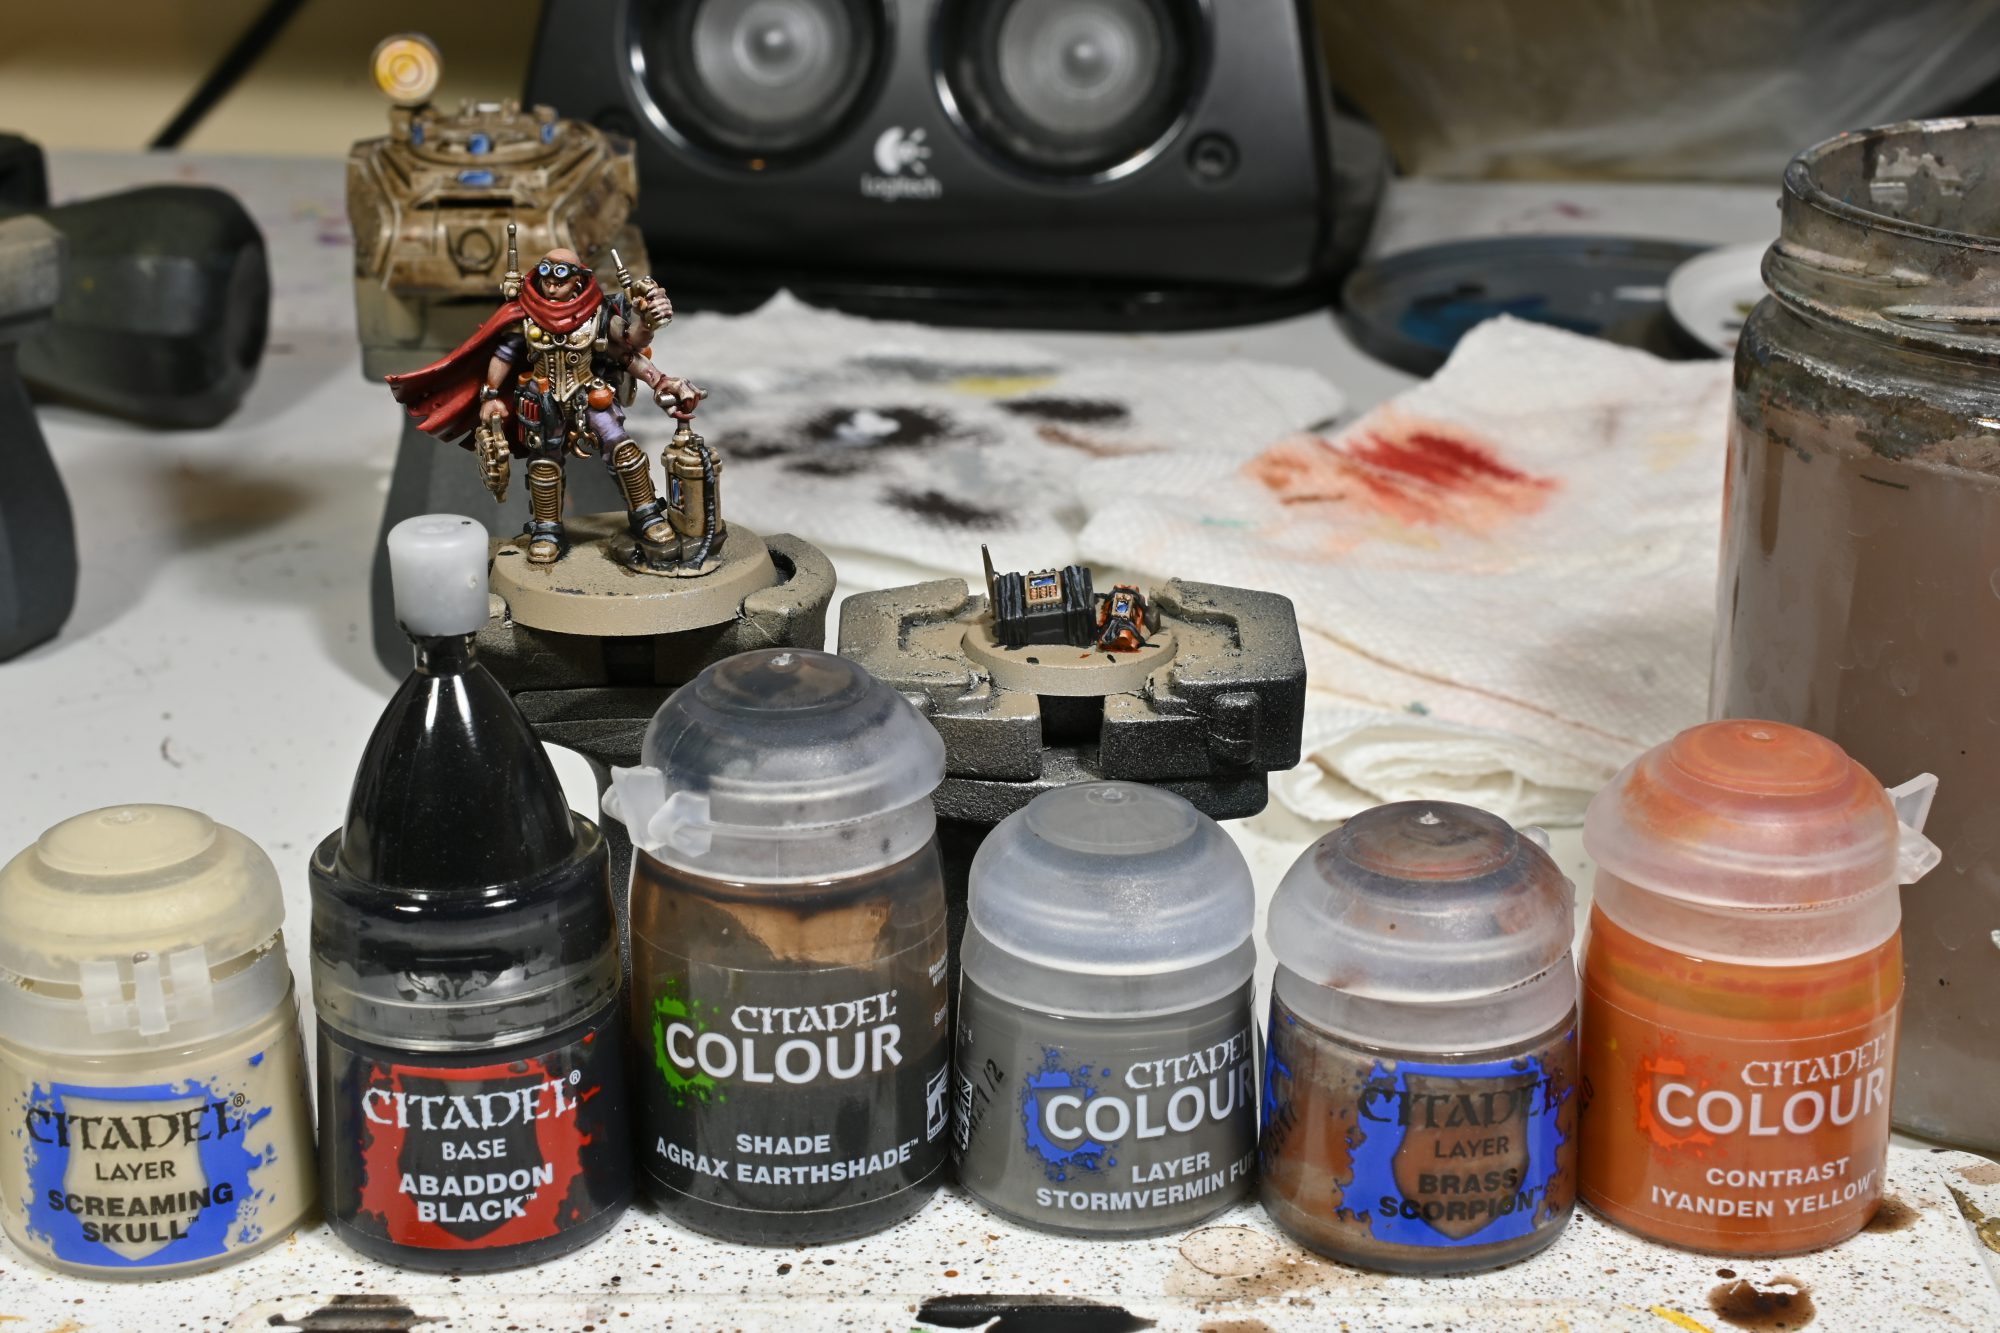
We have a few quick hits to start off this step:
- I did the eyes with Ushabti and Black templar.
- The lights are coated with Ushabti and then washed Iyanden, on larger things you can use Ushabti, Screaming Skull and White to do a lens effect implying the glass but that tends to be overkill on small models.
- The pieces of iconography are highlighted Brass Scorpion
- The flamer shroud and any other similar coppery material is hit with Sycorax.
Moving on to the armour, it is carefully highlighted Screaming Skull making sure not too cover up too much of the chipping that we worked so hard on. Getting the right balance is somewhat tricky, as it can look incomplete without enough highlights or too clean with a excess.
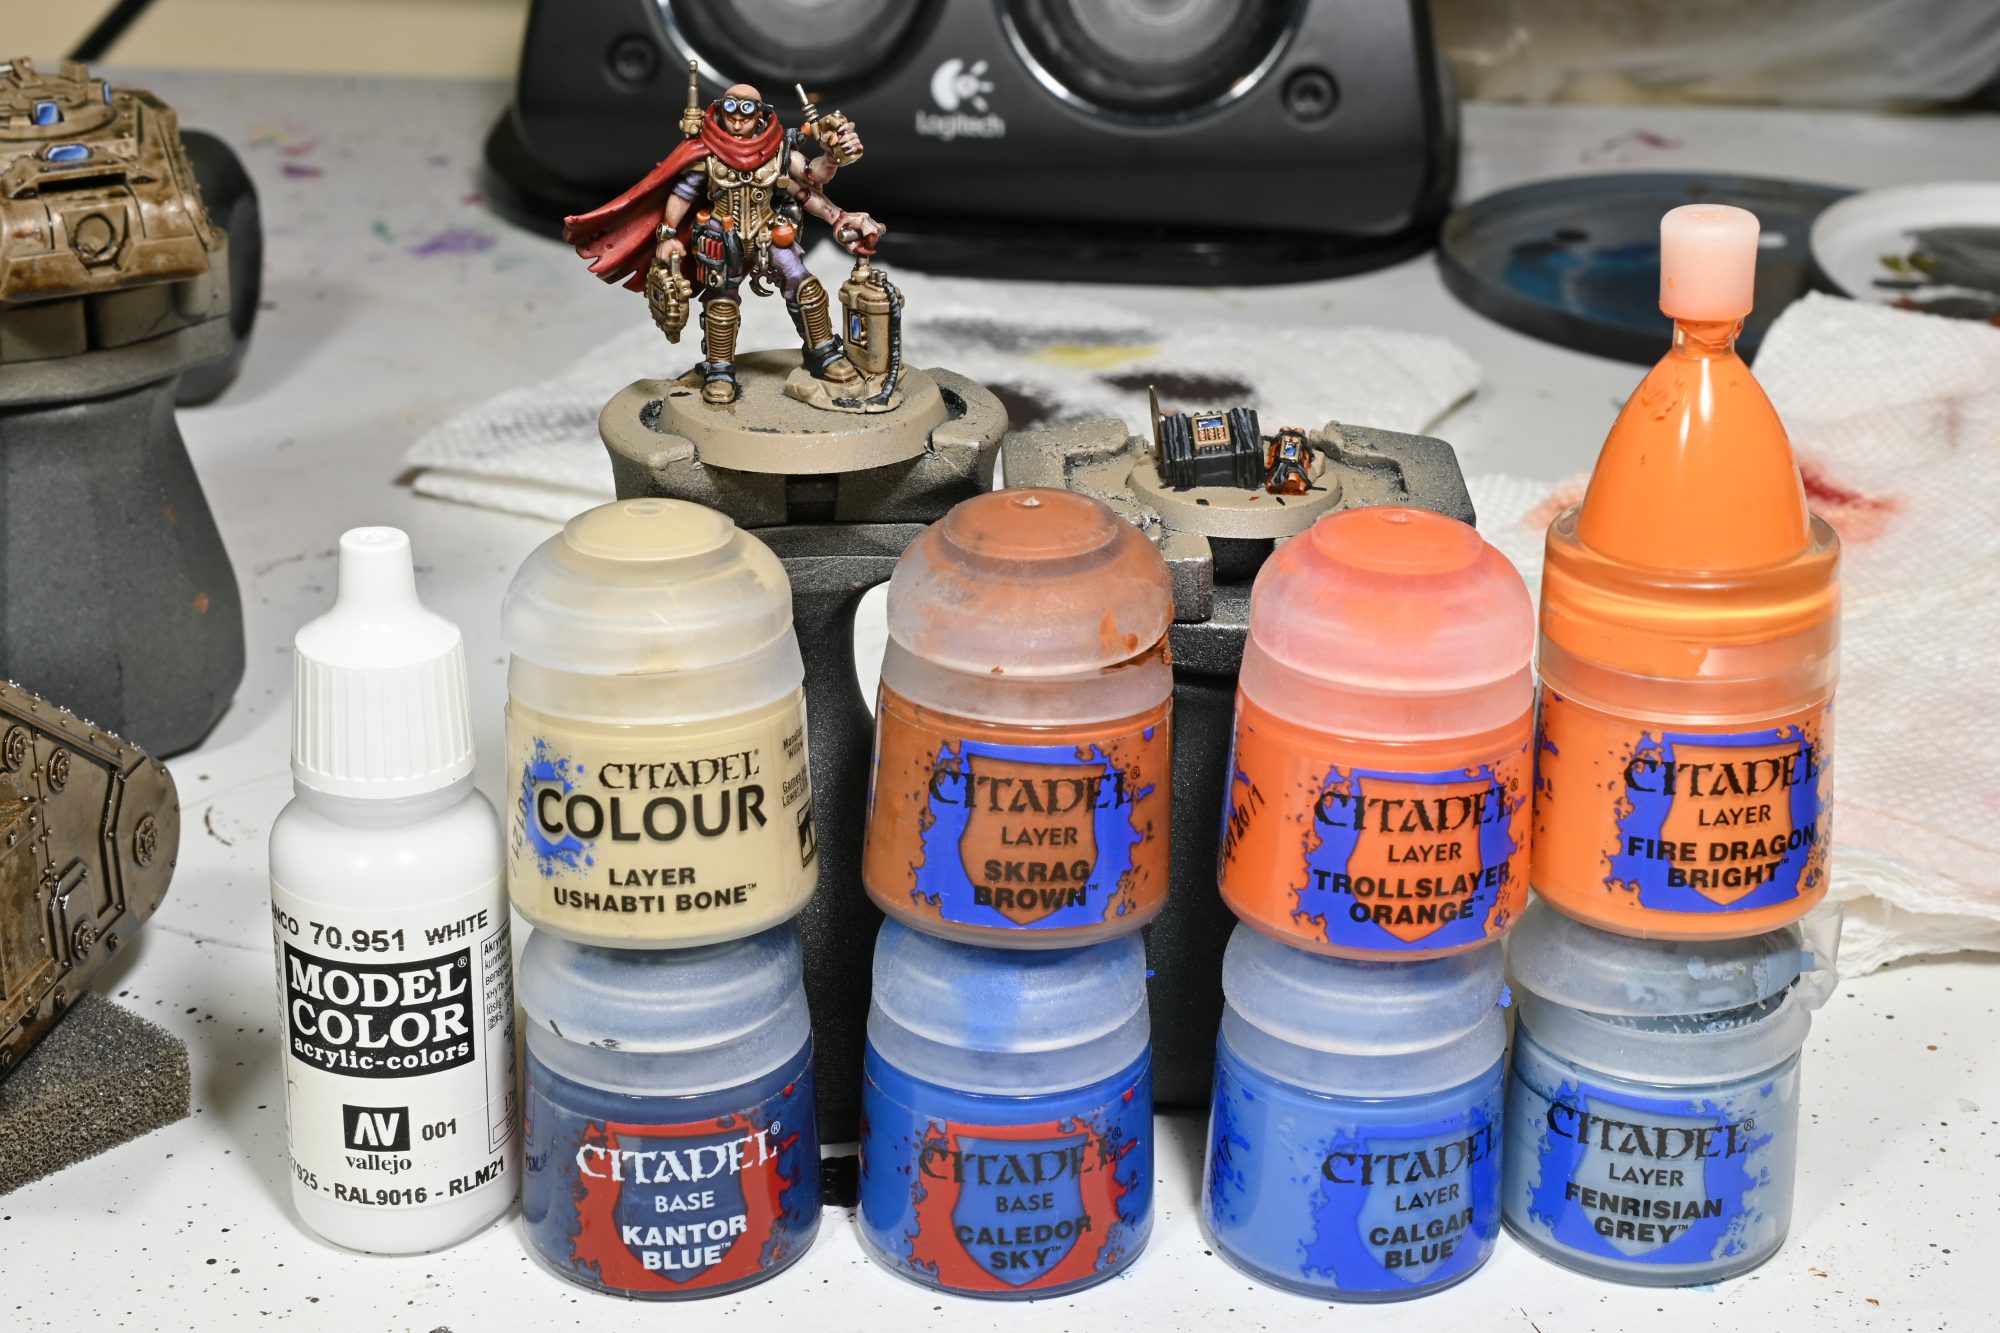
Lenses – All the better to see you with
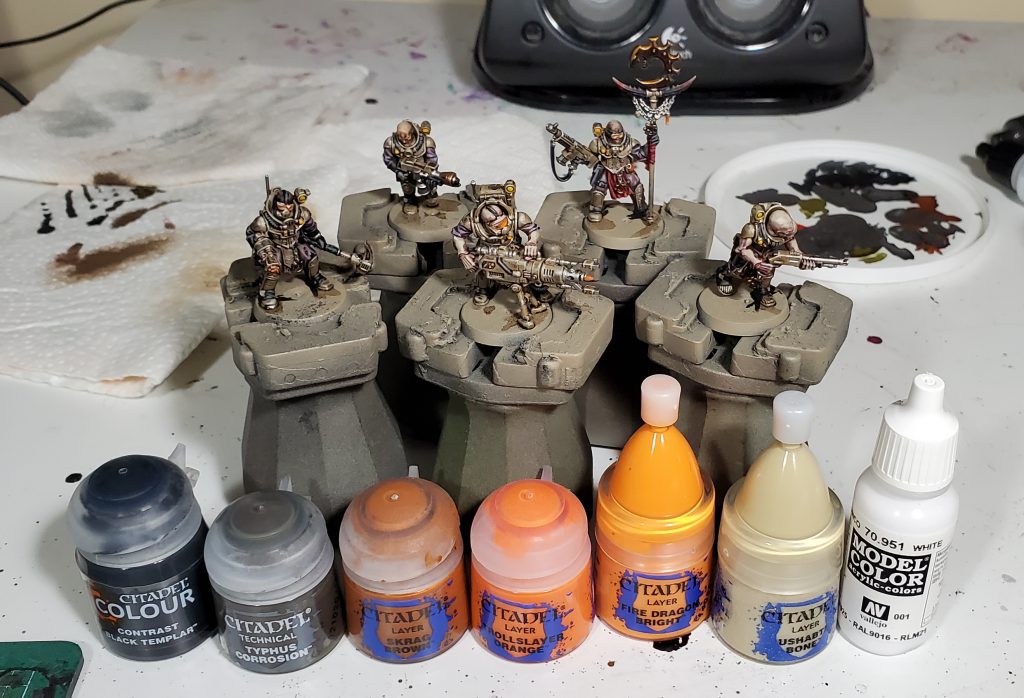
The lenses are just the most basic approach from our Gemstones tutorial, I am not blending the colours to any real degree just because there are a lot of these to be done in the army.

You are aiming for something like this, essentially crescents getting lighter towards one side with a extreme contrast in the other. In this I am using Skrag, Trollslayer, Fire Dragon and Ushabti for the main colours and a extreme reflection of Vallejo Model Colour White. I did use some left over thinned black templar to recess shade the crack on the heavy weapon fellow’s visor. This is just a little optional detail, but the flamer gets a layer of crusty burnt stuff by doing a layer each of Typhus and Black Templar contrast. This kind of thing works well on exhaust stacks too! The models themselves are just about done now!
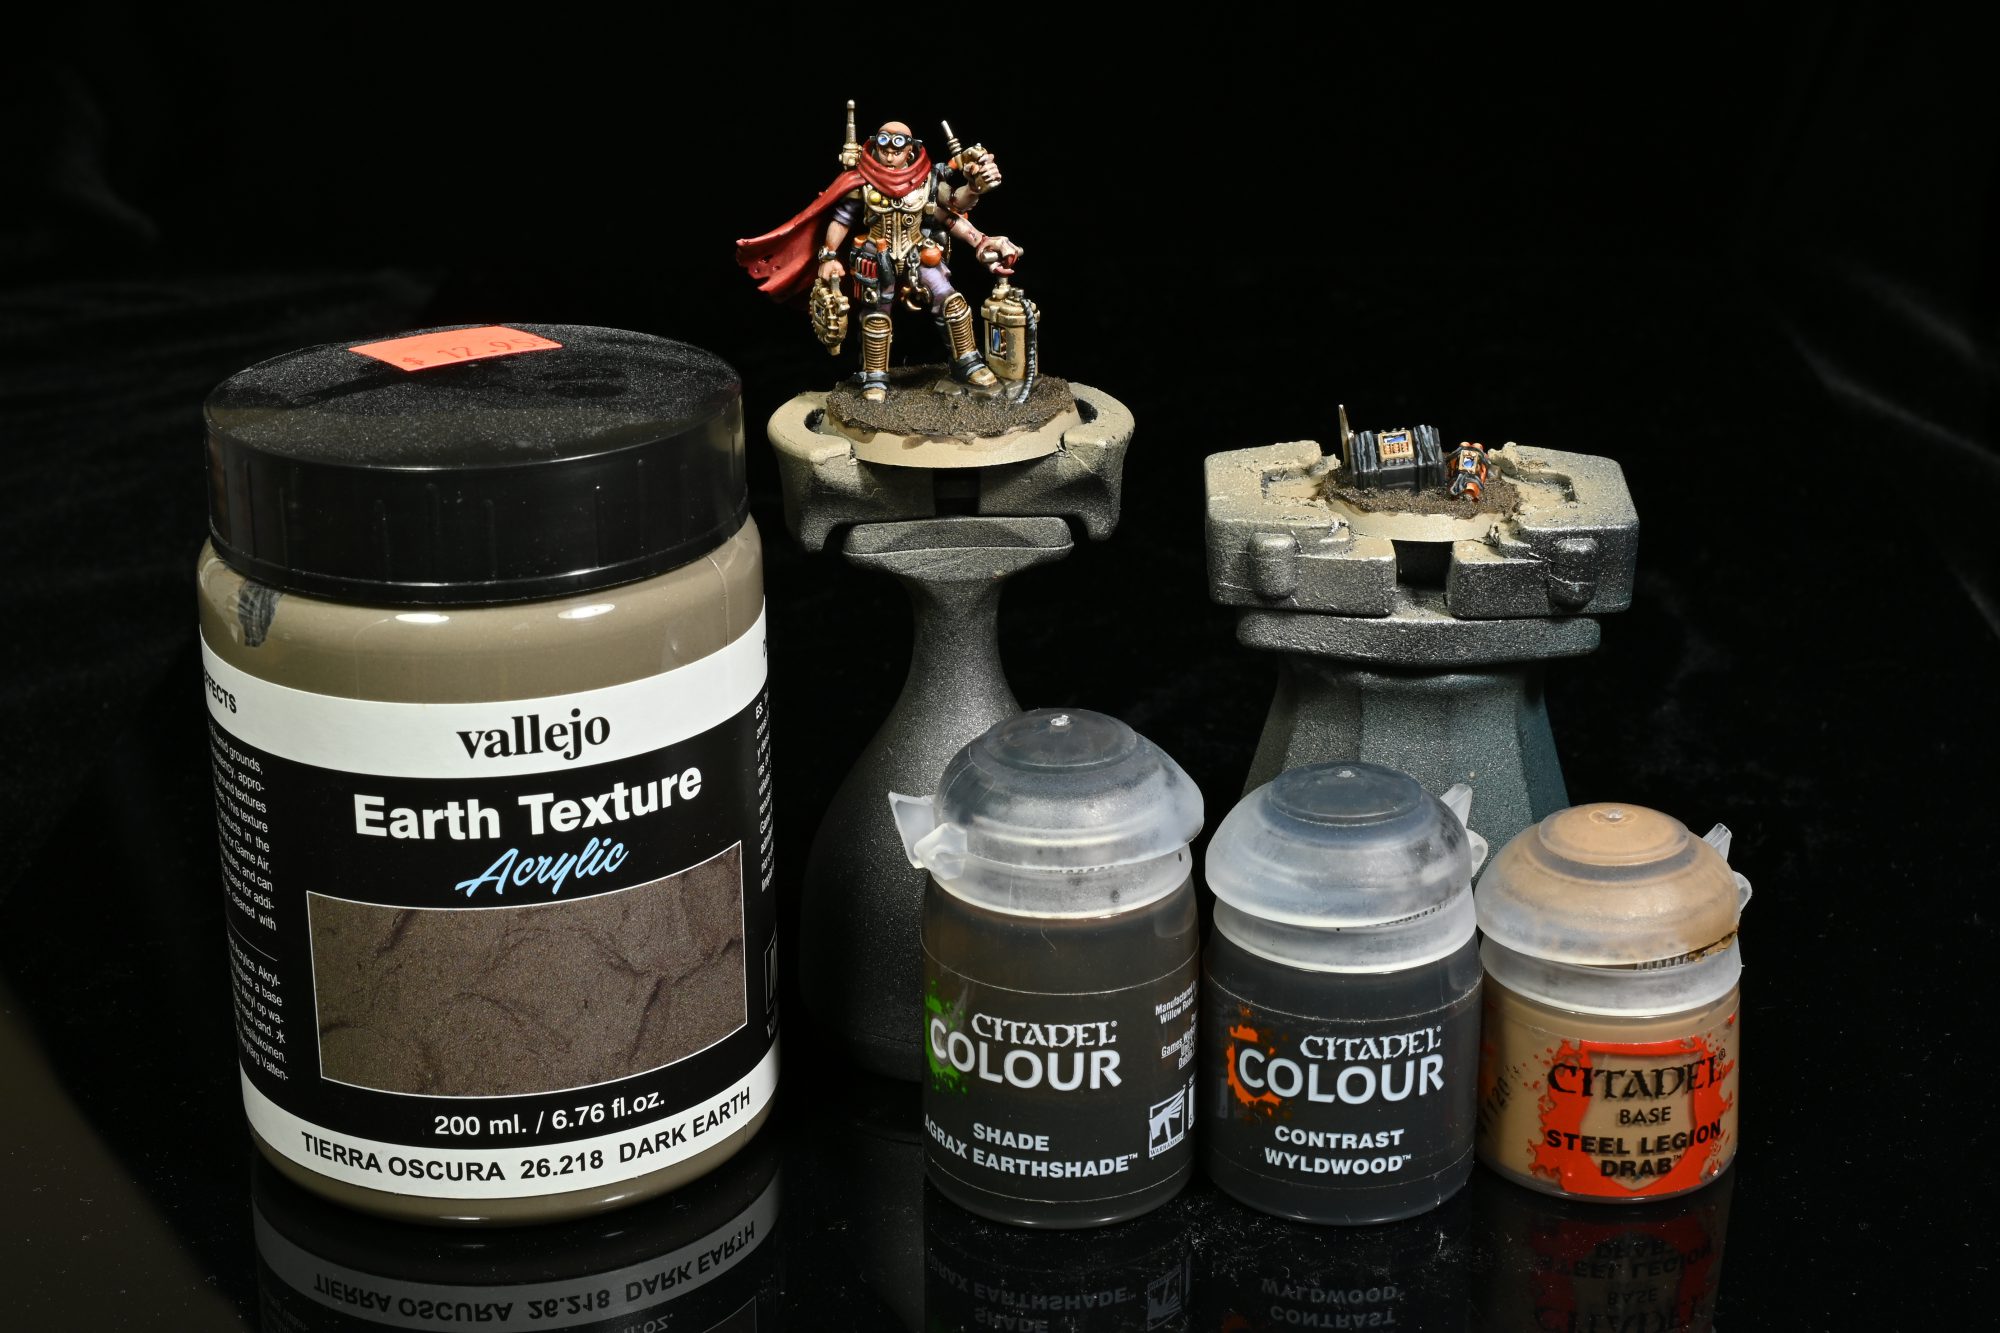
Basing our cultists – A pretty little swamp
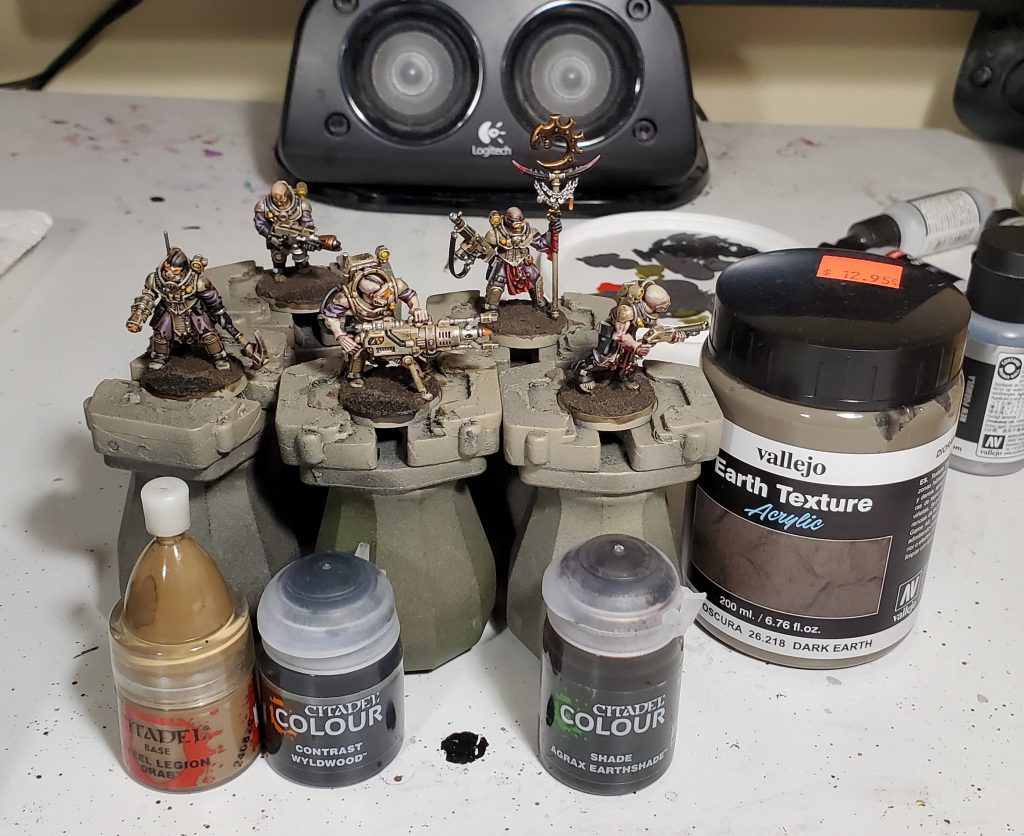
For the bases, I start by hucking a bunch of vallejo dark earth on in a nice thickish coat, for the river/lake I pressed the paste back in a few areas to create lower areas and you can exaggerate this by building a bank up a little bit. Once that dried I put wyldwood on the river/lake and agrax on the rest of the base, then I drybrush everything but the river with steel legion. Then I varnish the models with matte varnish, for this I am pretty happy with either Vallejo Mecha Matte or Premium Air Matte.
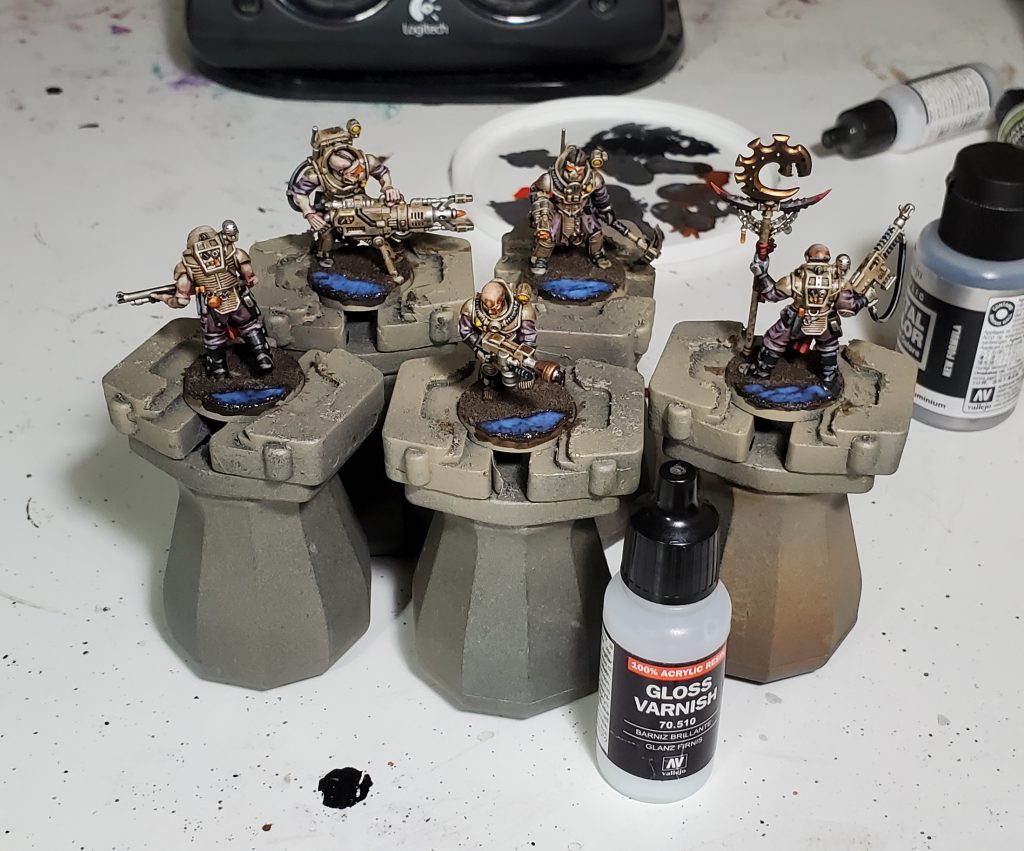
To get river/lake looking shiny I just kinda pour some gloss varnish from the bottle on, you will want a paper clip or something to poke any bubbles. The penultimate step is painting the rims with your choice of paint, in this case I used dryad to match my Tyranids. The last model thing the models need is to throw on some tufts, I like using these ones from Gamers Grass:
- 6mm Burned Grass
- 6mm Dry Green
- 2mm Dry Green
- 2mm Moss
- 4mm Green
- 6mm Mixed Green
- 6mm Strong Green
- Spiky Green
- Dark Green Shrubs
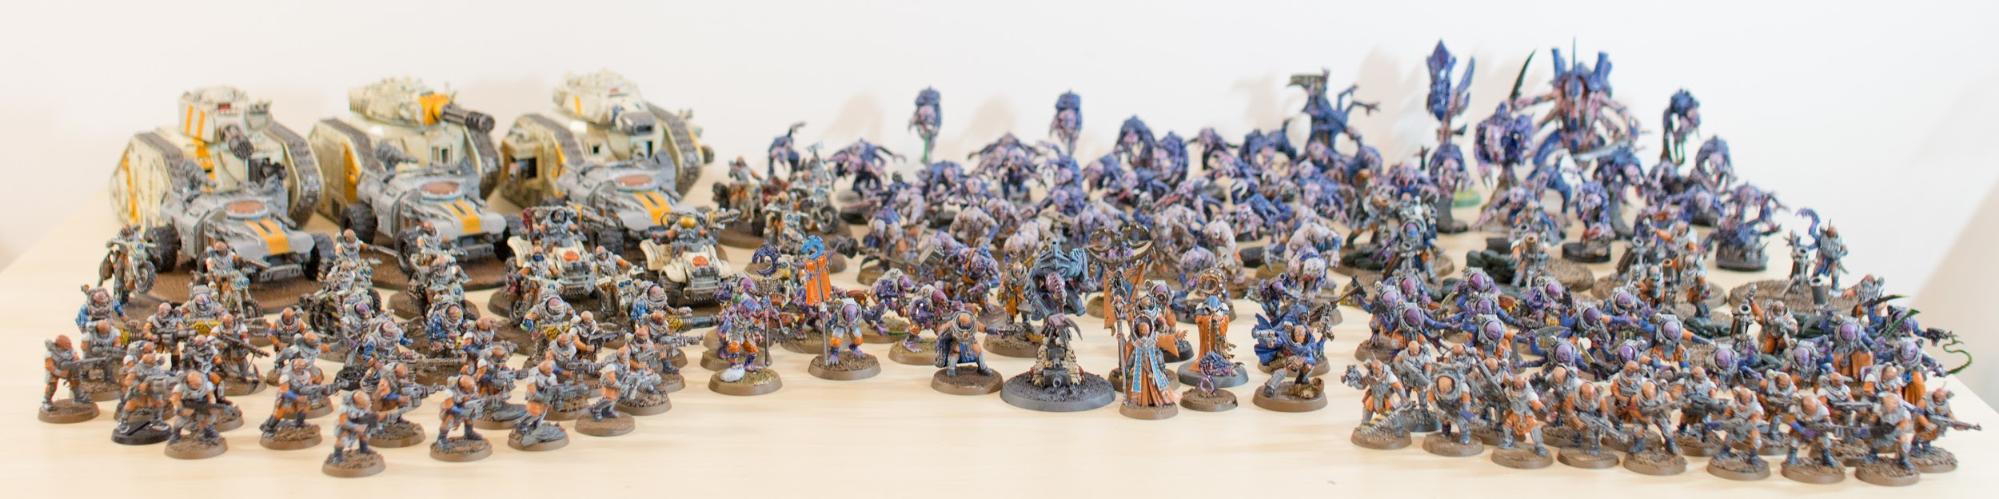
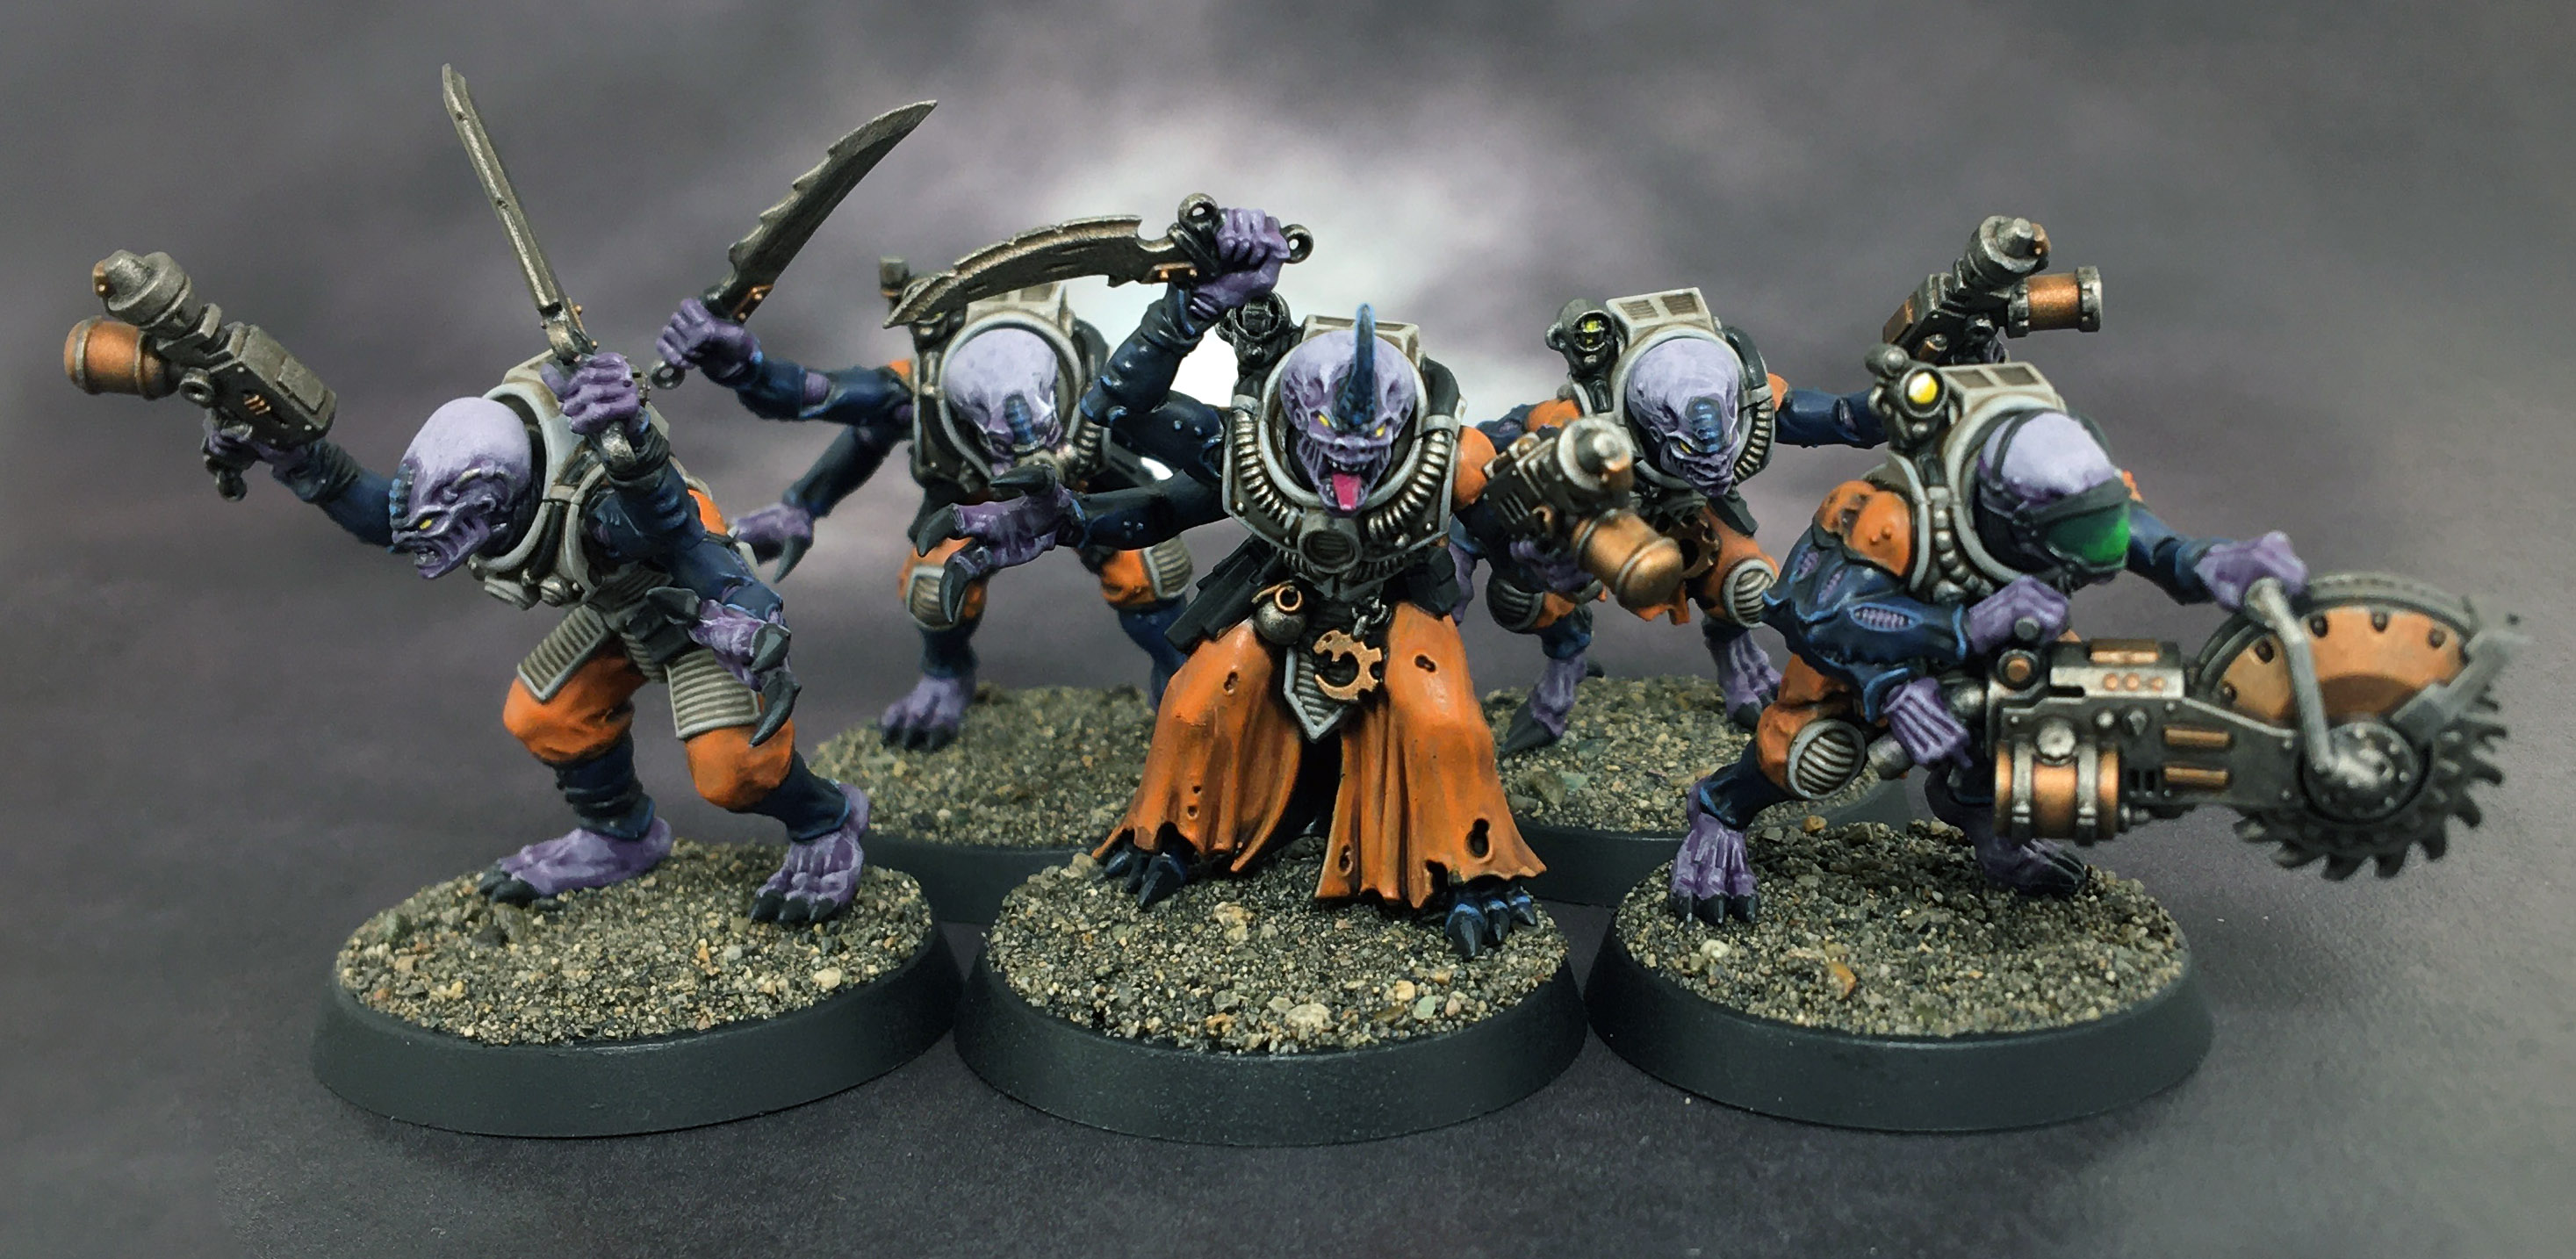
The Final Results
Then we take some pretty pictures and sit back and be pleased with ourselves!
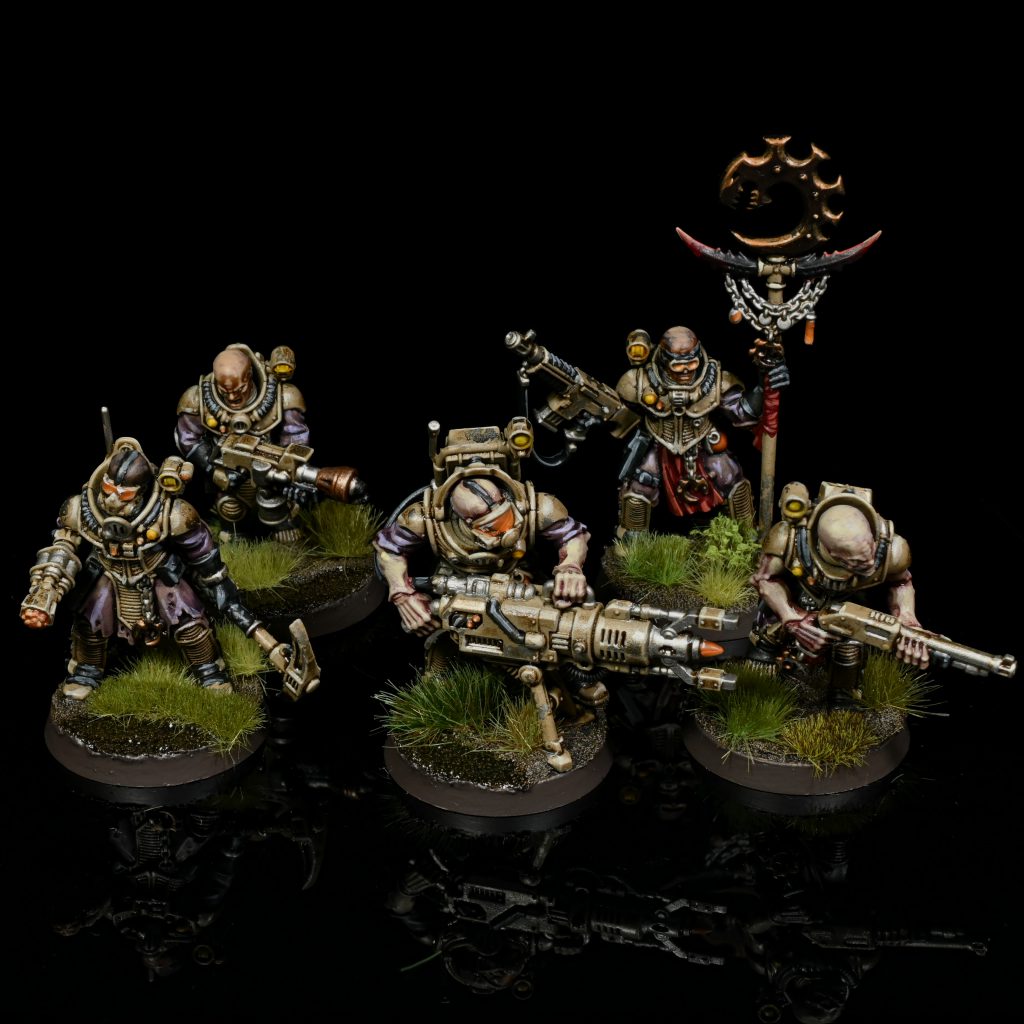
Here’s another five I did earlier!
Painting the Reductus Saboteur - Click to Expand
Part 1 – Airbrushing
Part 2 – Base coats and washes
Part 3 – Highlights
Part 4 – Details (and the remaining highlight)


Part 5 – Basing
- 6mm Burned Grass
- 6mm Dry Green
- 2mm Dry Green
- 2mm Moss
- 4mm Green
- 6mm Mixed Green
- 6mm Strong Green
- Spiky Green
- Dark Green Shrubs
Gallery
-
Reductus Saboteur. Credit: Rockfish -
Reductus Saboteur. Credit: Rockfish -
Reductus Saboteur. Credit: Rockfish
-
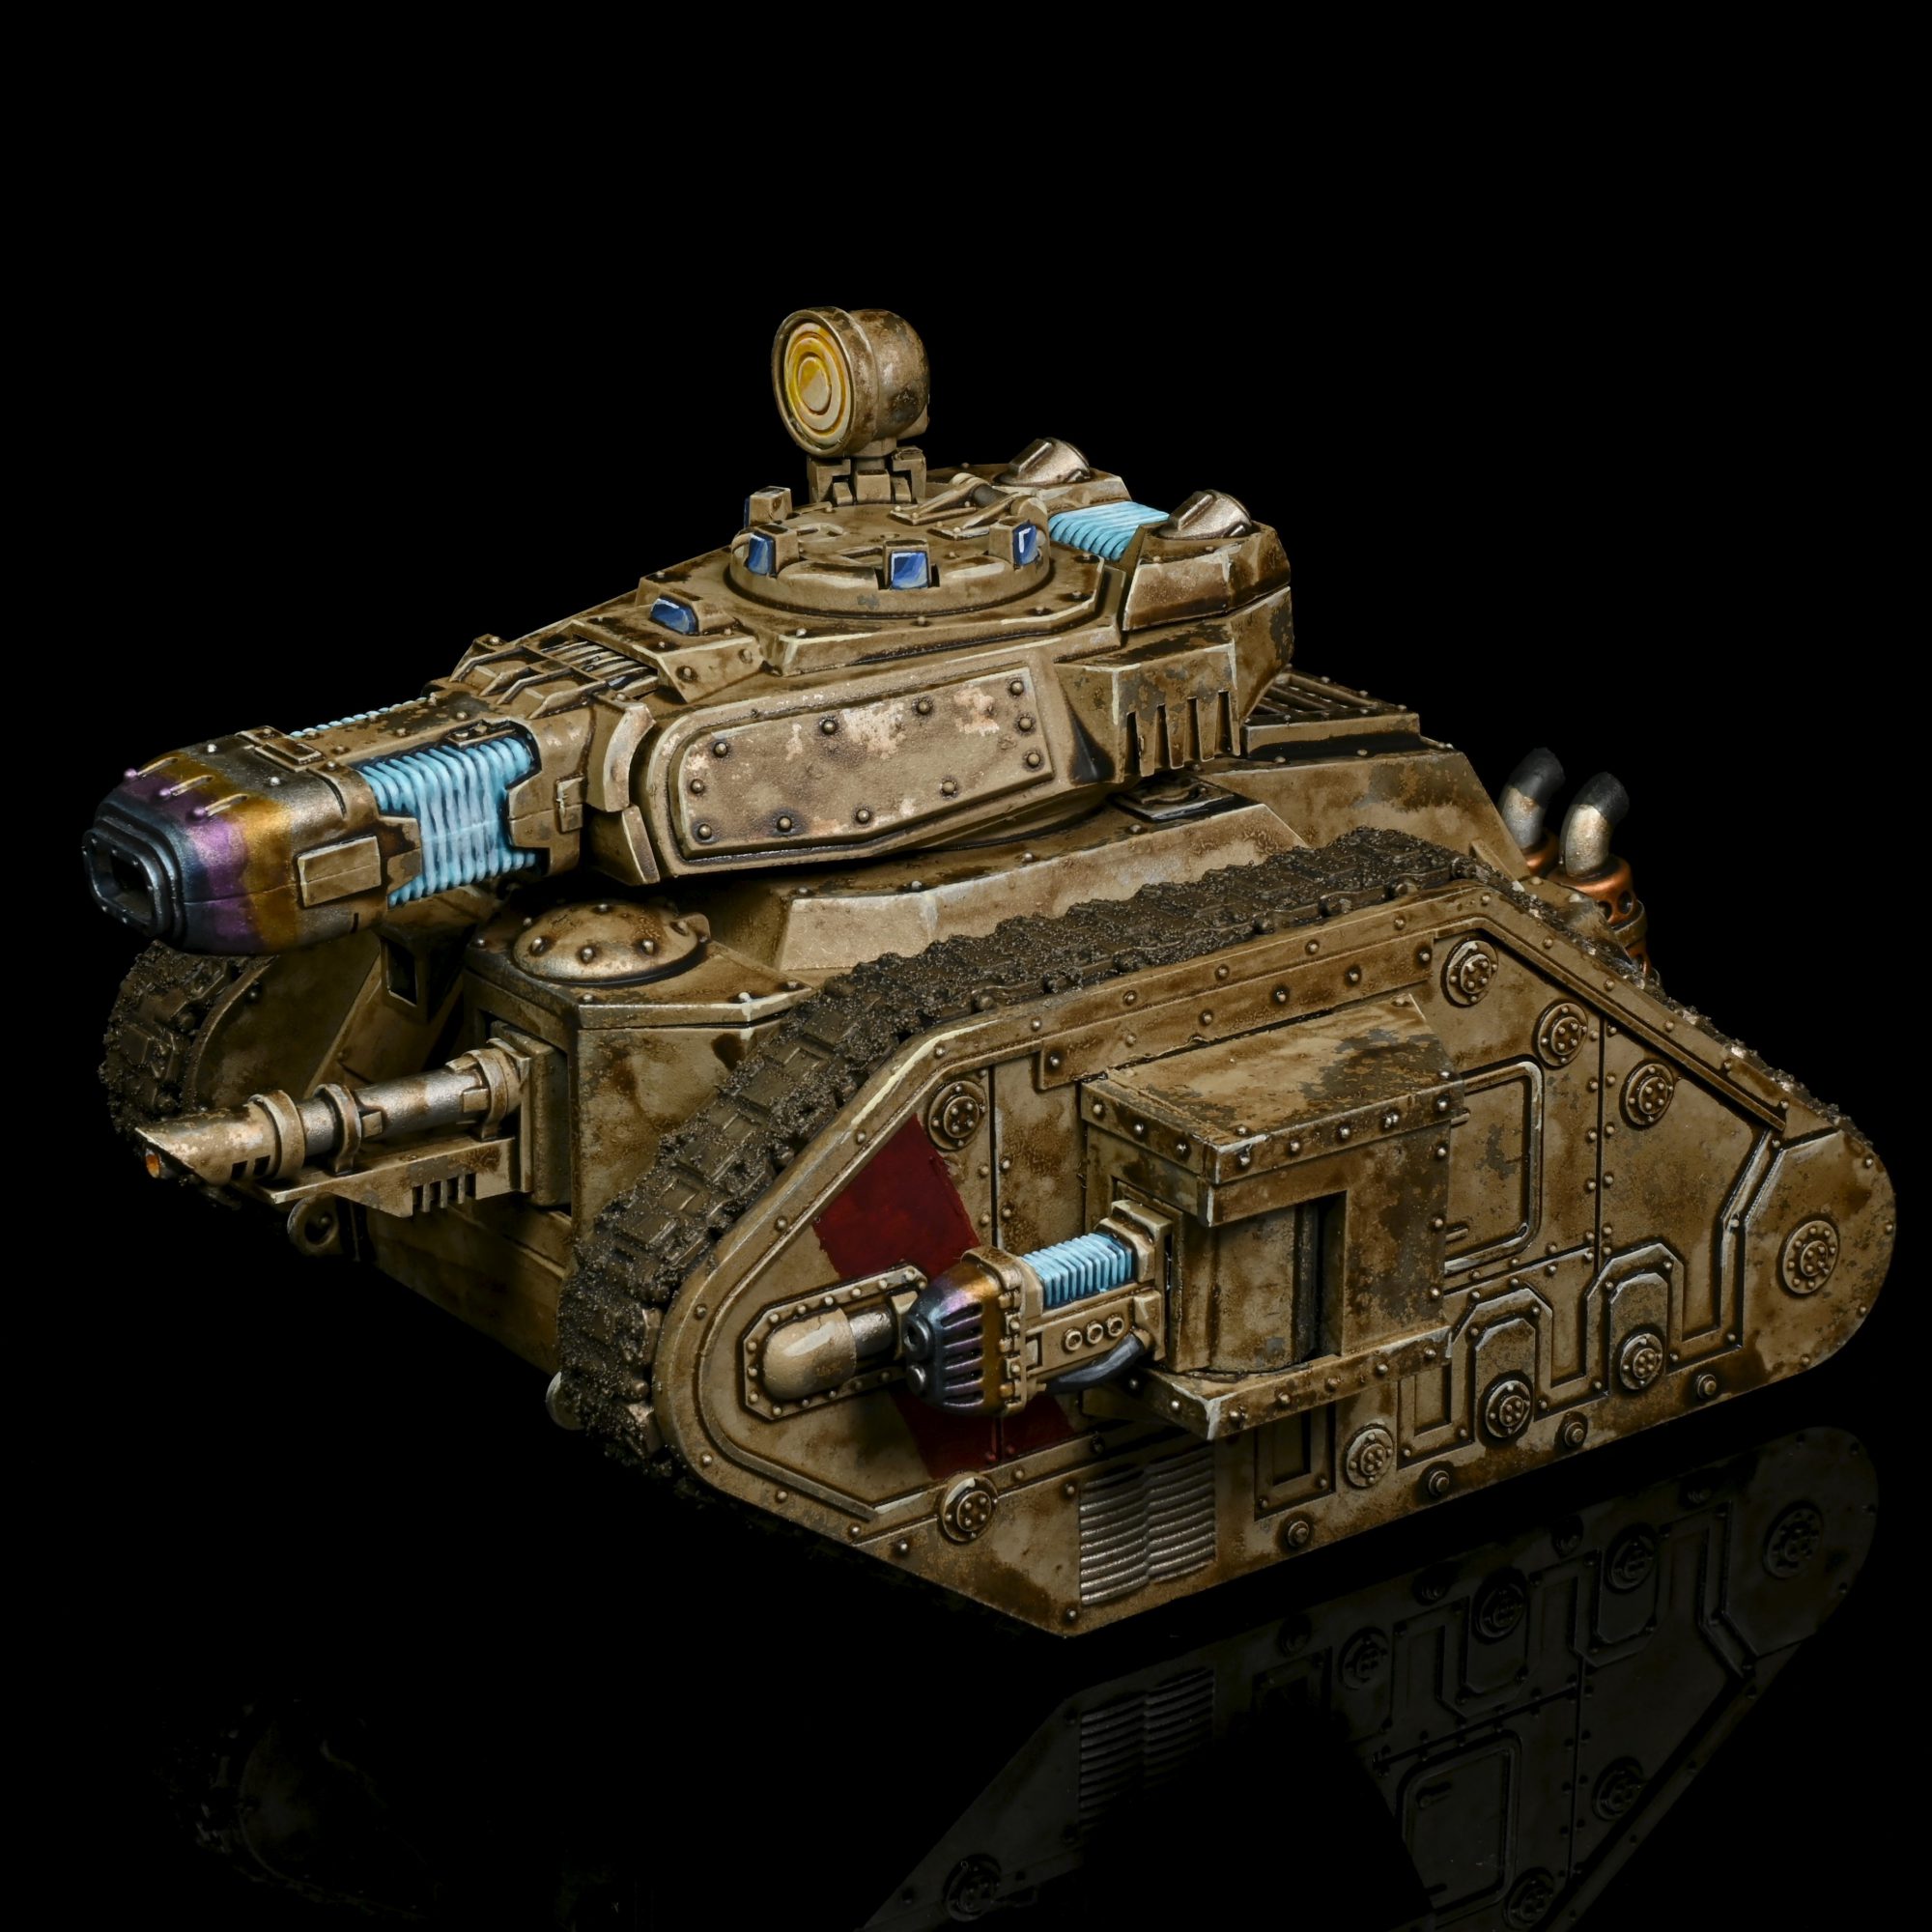
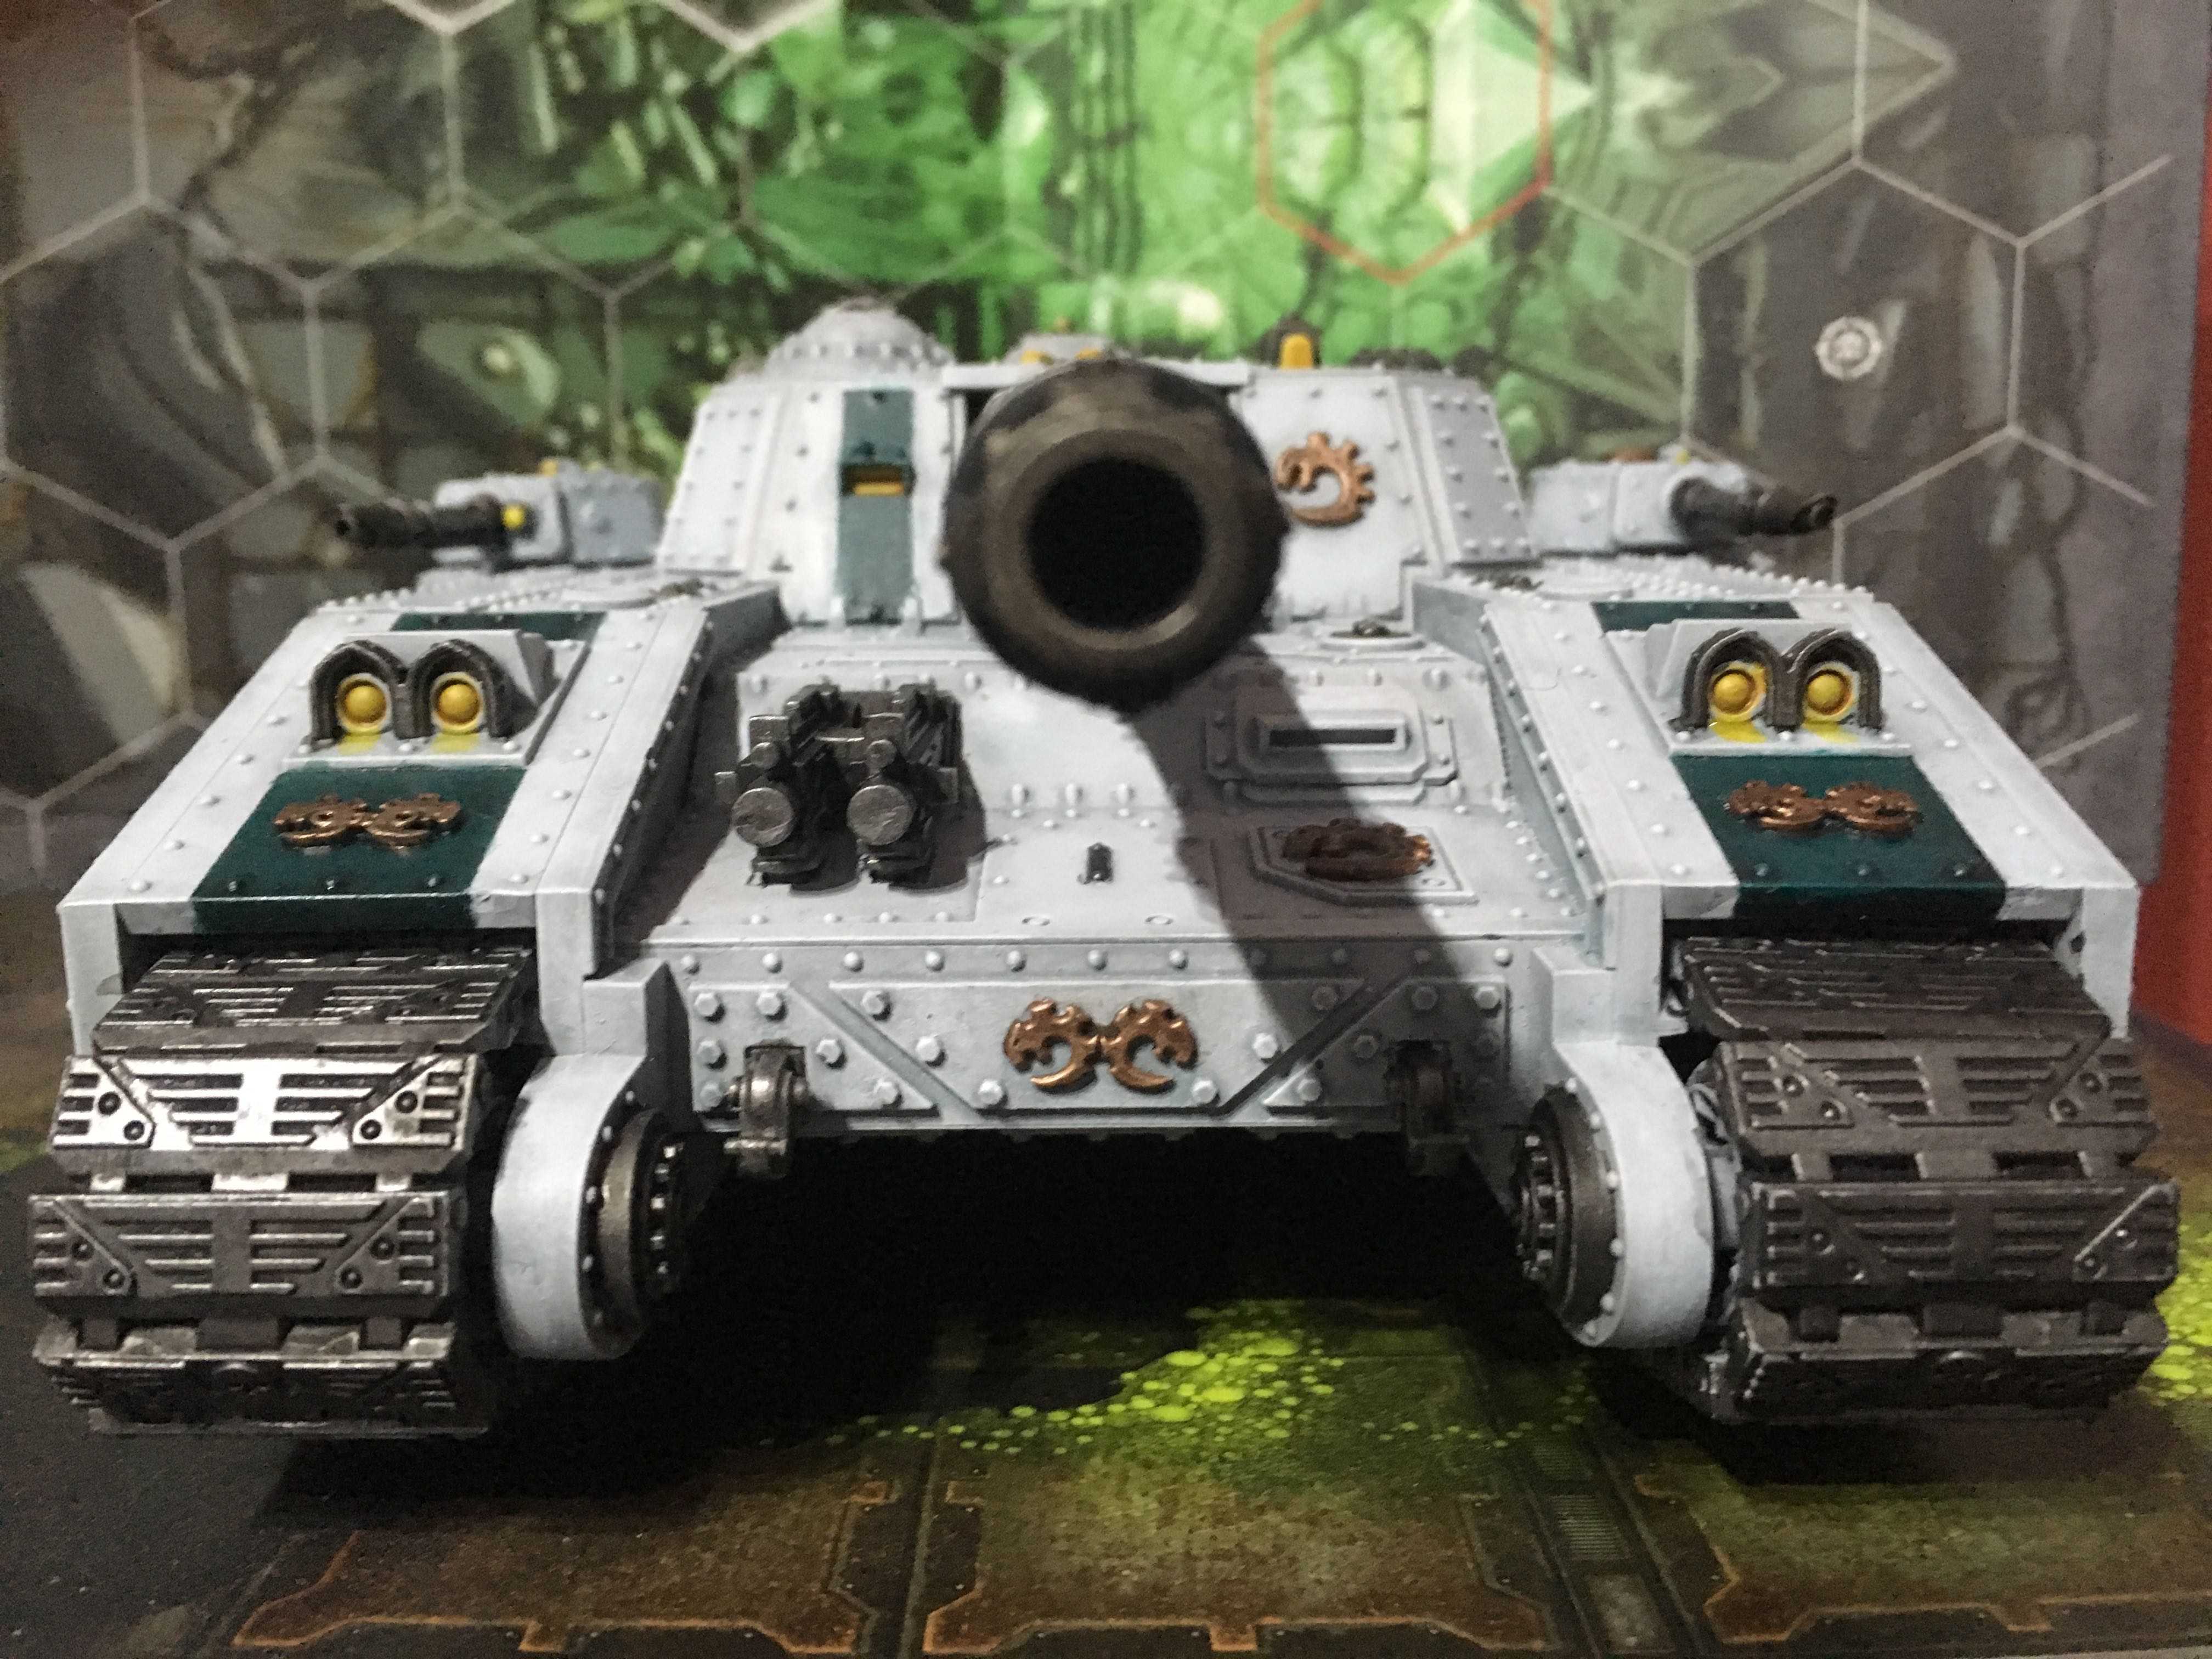
Leman Russ Executioner. Credit: Rockfish -
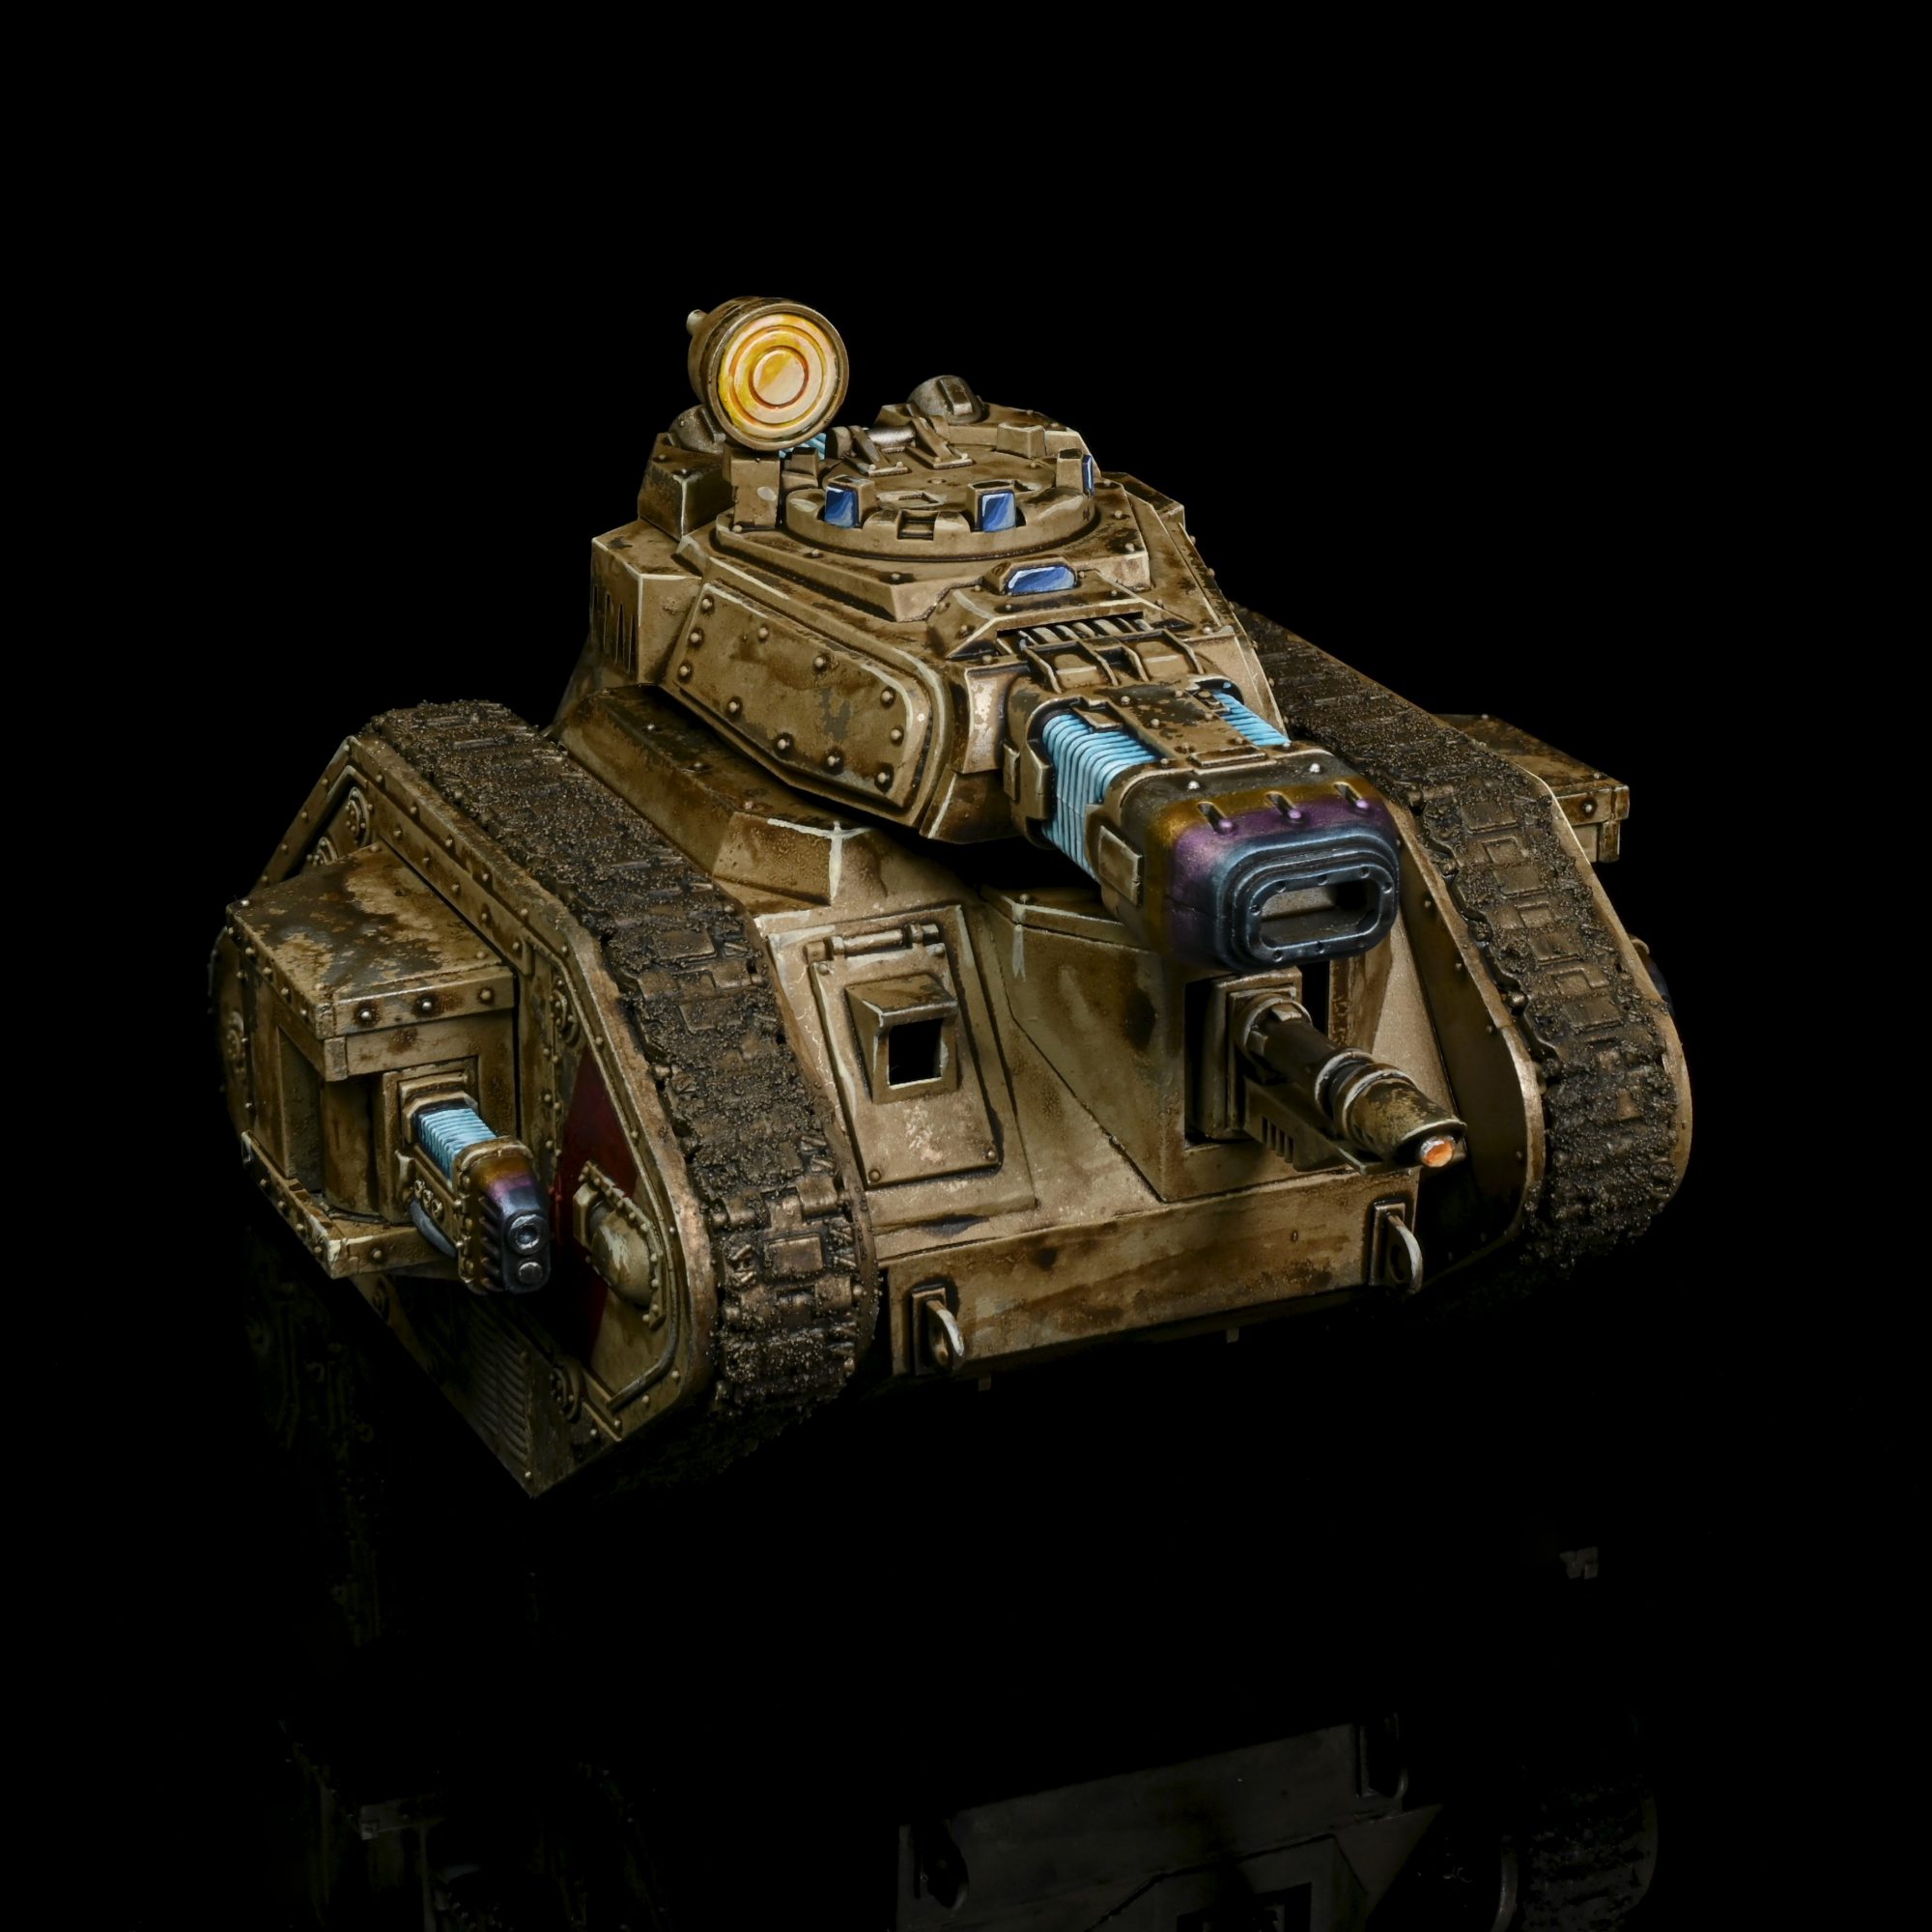
Leman Russ Executioner. Credit: Rockfish -
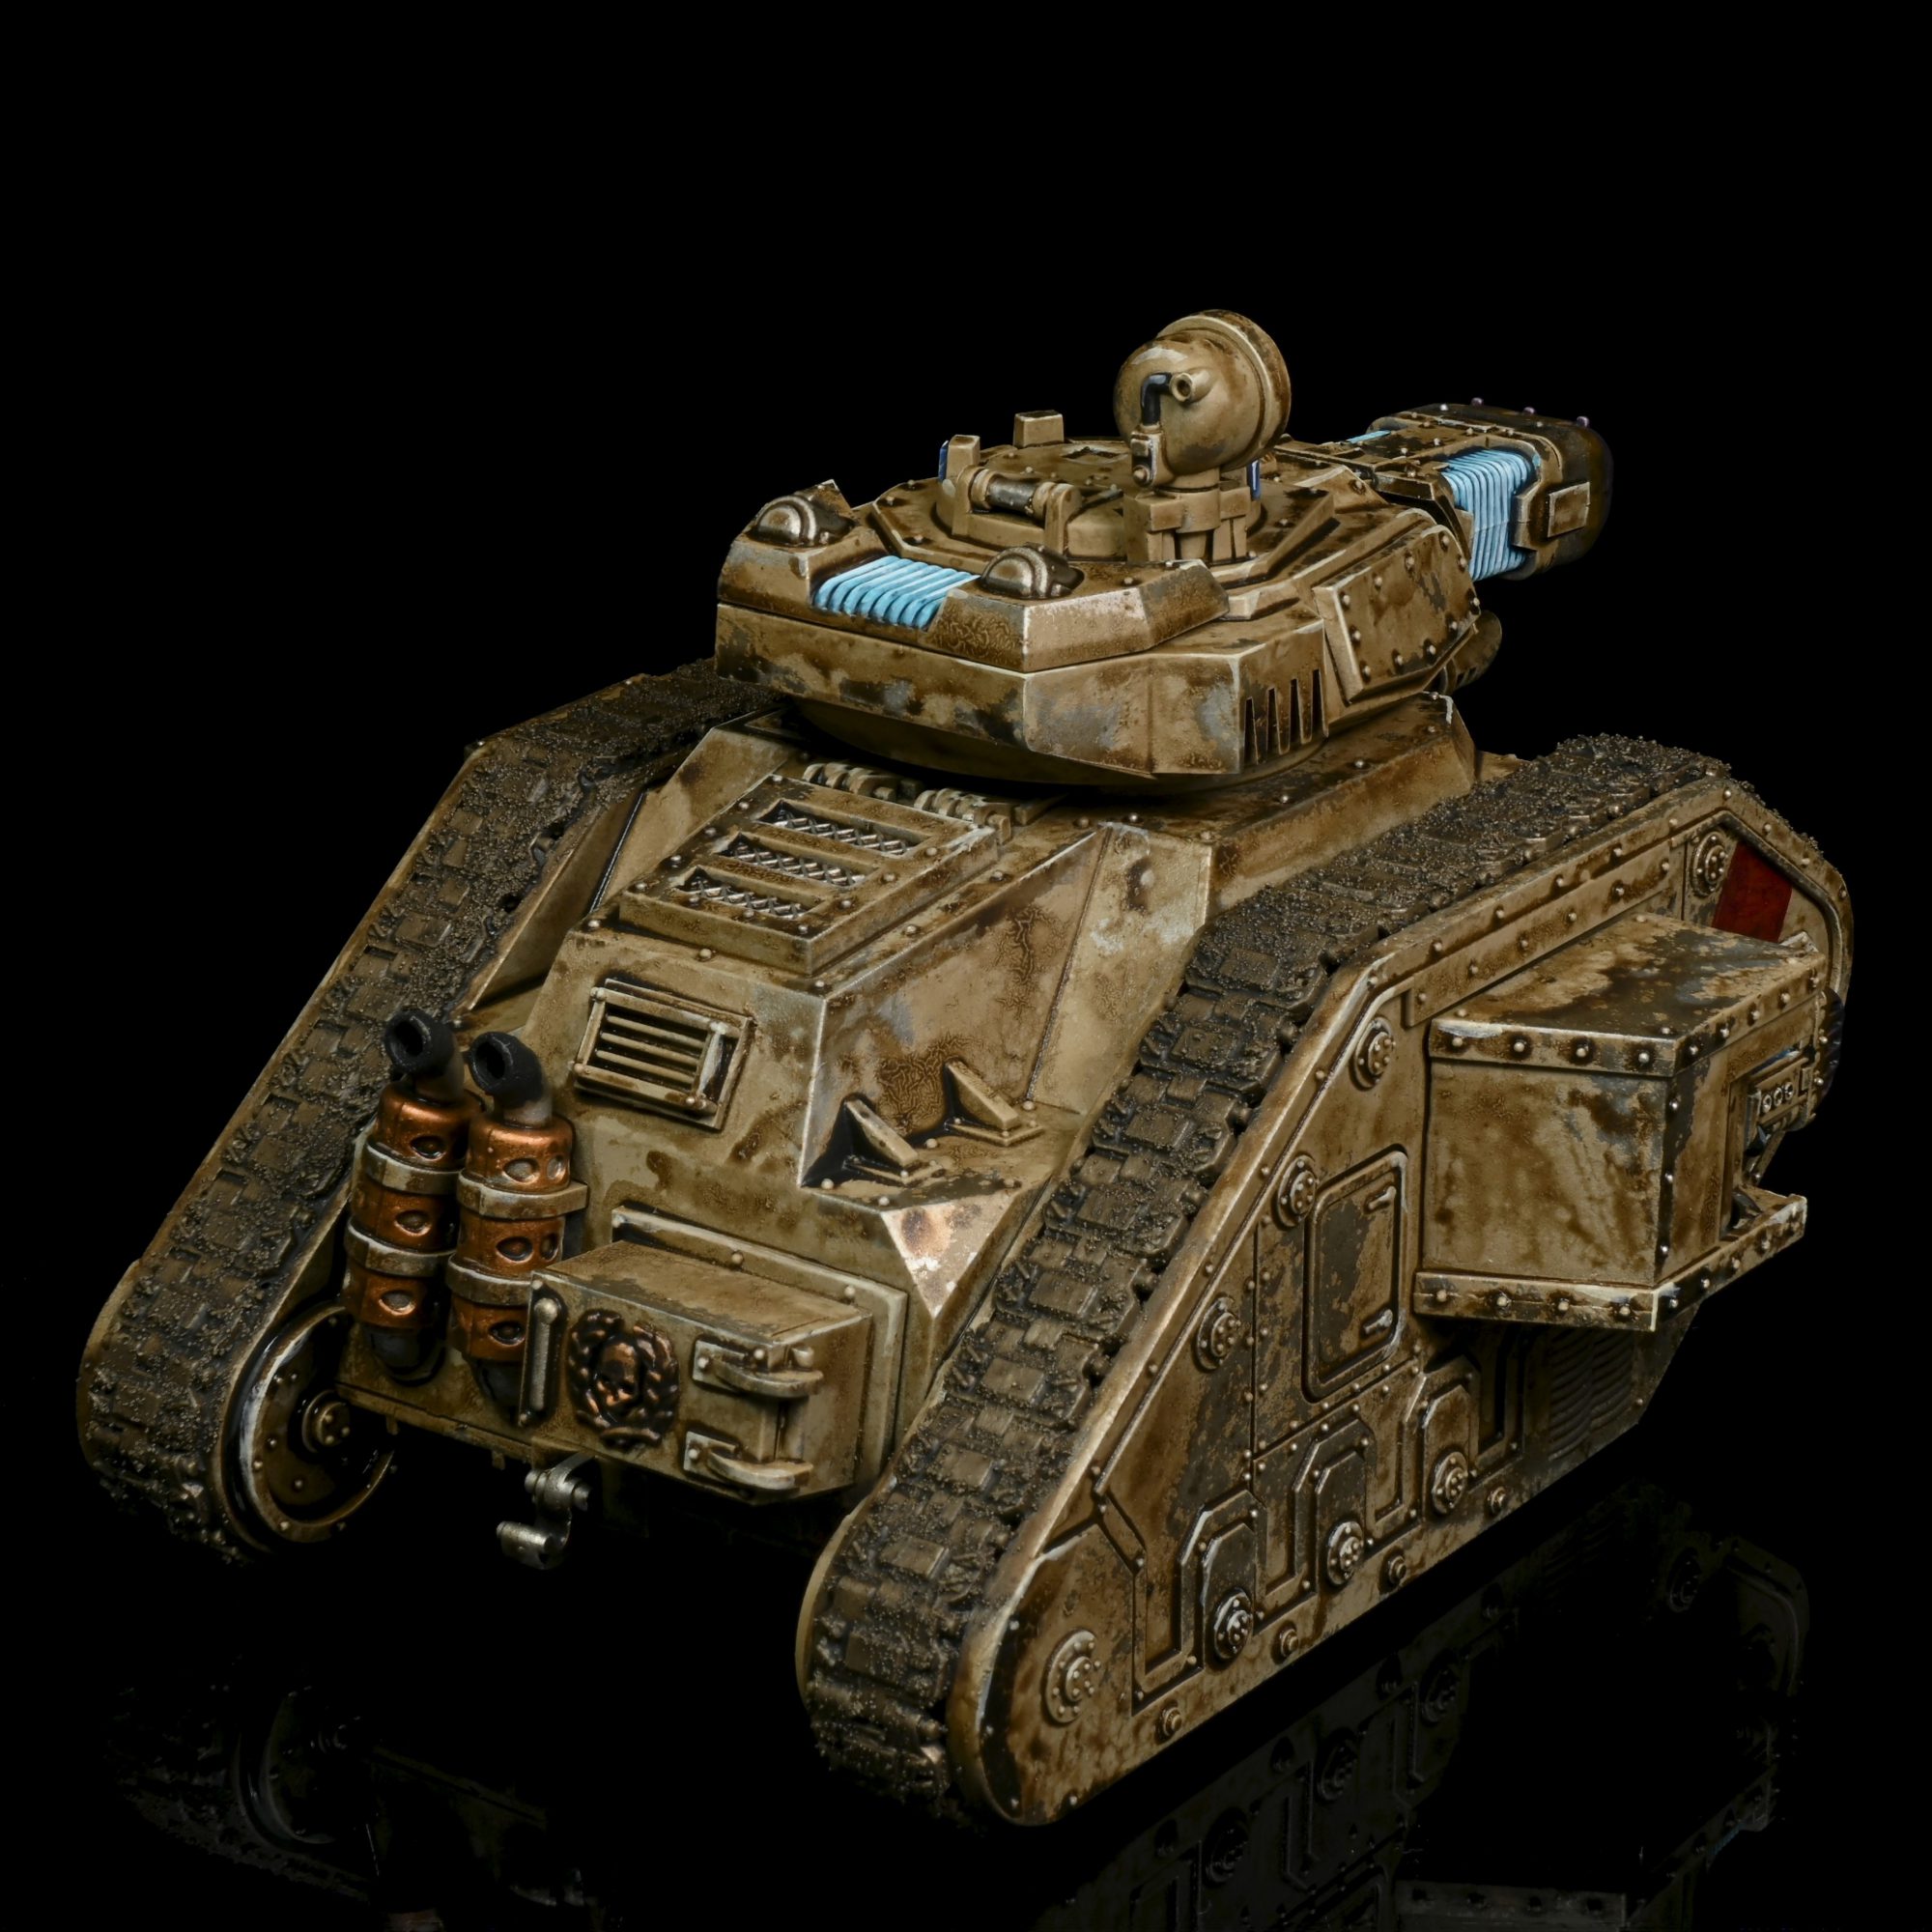
Leman Russ Executioner. Credit: Rockfish

Keewa's Method - Click to expand

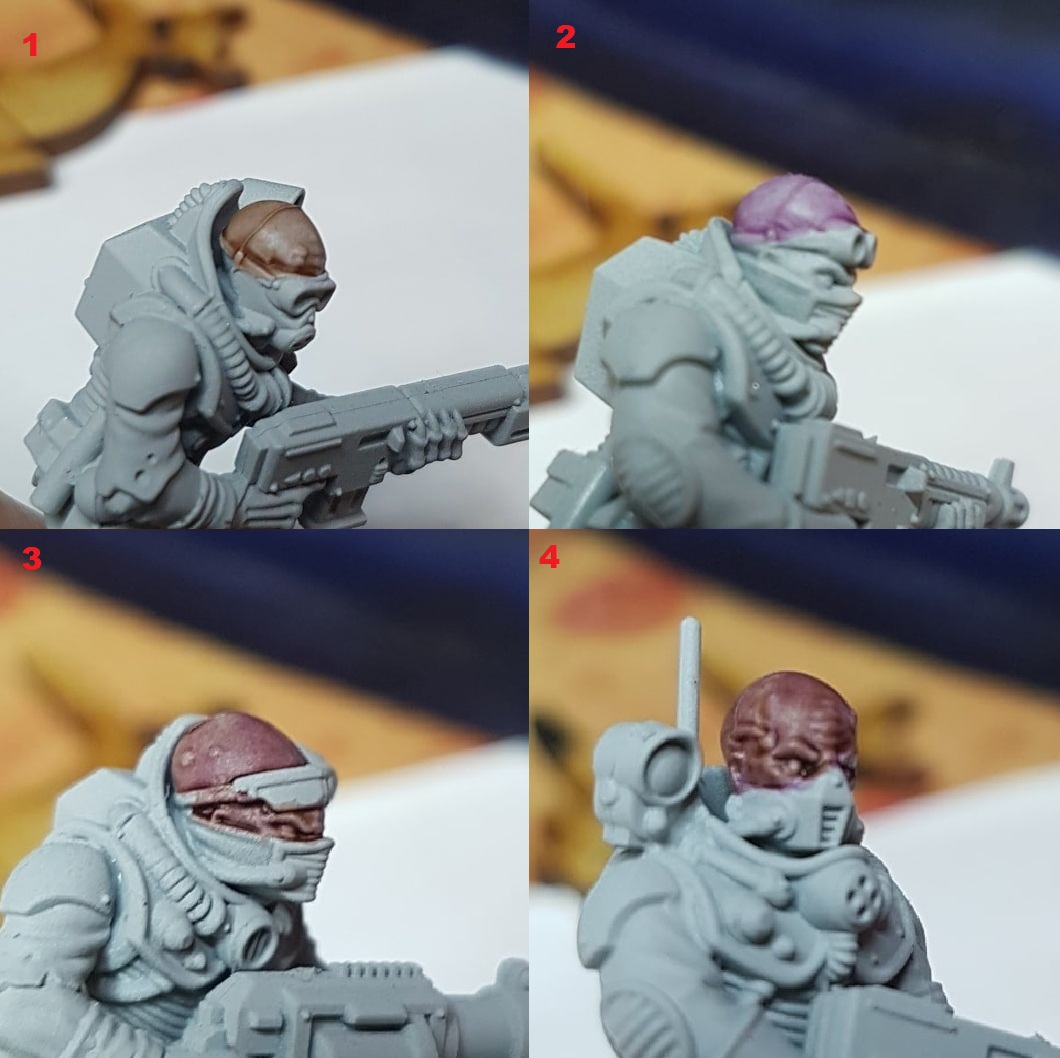
Flesh
- Prepare basic fleshtone mix from Slaanesh Grey, Cadian Fleshtone, and Ushabti Bone (5:3:1). I made a whole batch of this in a dropper bottle for all of my first to third generation Genestealers, so that the tone would be consistent across units. Hereafter I’ll refer to this as Genestealer Flesh Mix.
- Basecoat with thin layers of this colour, taking care not to build up so much paint that the details are obscured. Slow and steady wins the race!
- Once a solid basecoat is set down, shade the skin with Druchii Violet
- Reapply the Genestealer Flesh Mix, avoiding the recesses.
- Lighten the Genestealer Flesh Mix with Pallid Wych Flesh (2:1) and layer carefully on raised areas.
- Another layer, adding more Pallid Wych Flesh focussed on the sharpest edges and most raised surfaces.
- Colour the eyeballs with Averland Sunset
- Dot the eyes with black pupils, painted slit-fashion, to create an alien appearance.
- Using a very fine brush and Screamer Pink, paint the brain veins on the head
- Thin down Carroburg Crimson with Lahmian Medium (1:5) and glaze the vein pattern, pulling the brush down towards the back of the head, where the veins gather.
- Mix Night Lords Blue and the lightest flesh mix (1:10) and carefully paint any forehead ridges
- Shade forehead ridges with a very fine brush and some Night Lords Blue
- Paint any exposed tongues with Screamer Pink, highlight with a fine line of Pink Horror
- For 4th generation hybrids (Neophytes and other more human models) you can substitute the use of Genestealer Flesh Mix with your normal skin colour, and simply glaze the shadows with a bit of Druchii Violet.
- I find it really useful to paint the heads as a separate subassembly, it really helps to get the faces right if you have 360 degree access to them, rather than struggling to paint them when they’re surrounded by a high collar.
Blue Carapaces and Boiler Suits
- Basecoat any chitinous parts or boiler suits with Night Lords Blue
- Shade with Drakenhof Nighshade
- Reapply Night Lords Blue basecoat, avoiding the recesses
- Thick edge highlight with Teclis Blue
- Finer edge highlight with Lothern Blue
- Final edge highlight on the sharpest corners with Lothern Blue and White Scar mix (1:1)
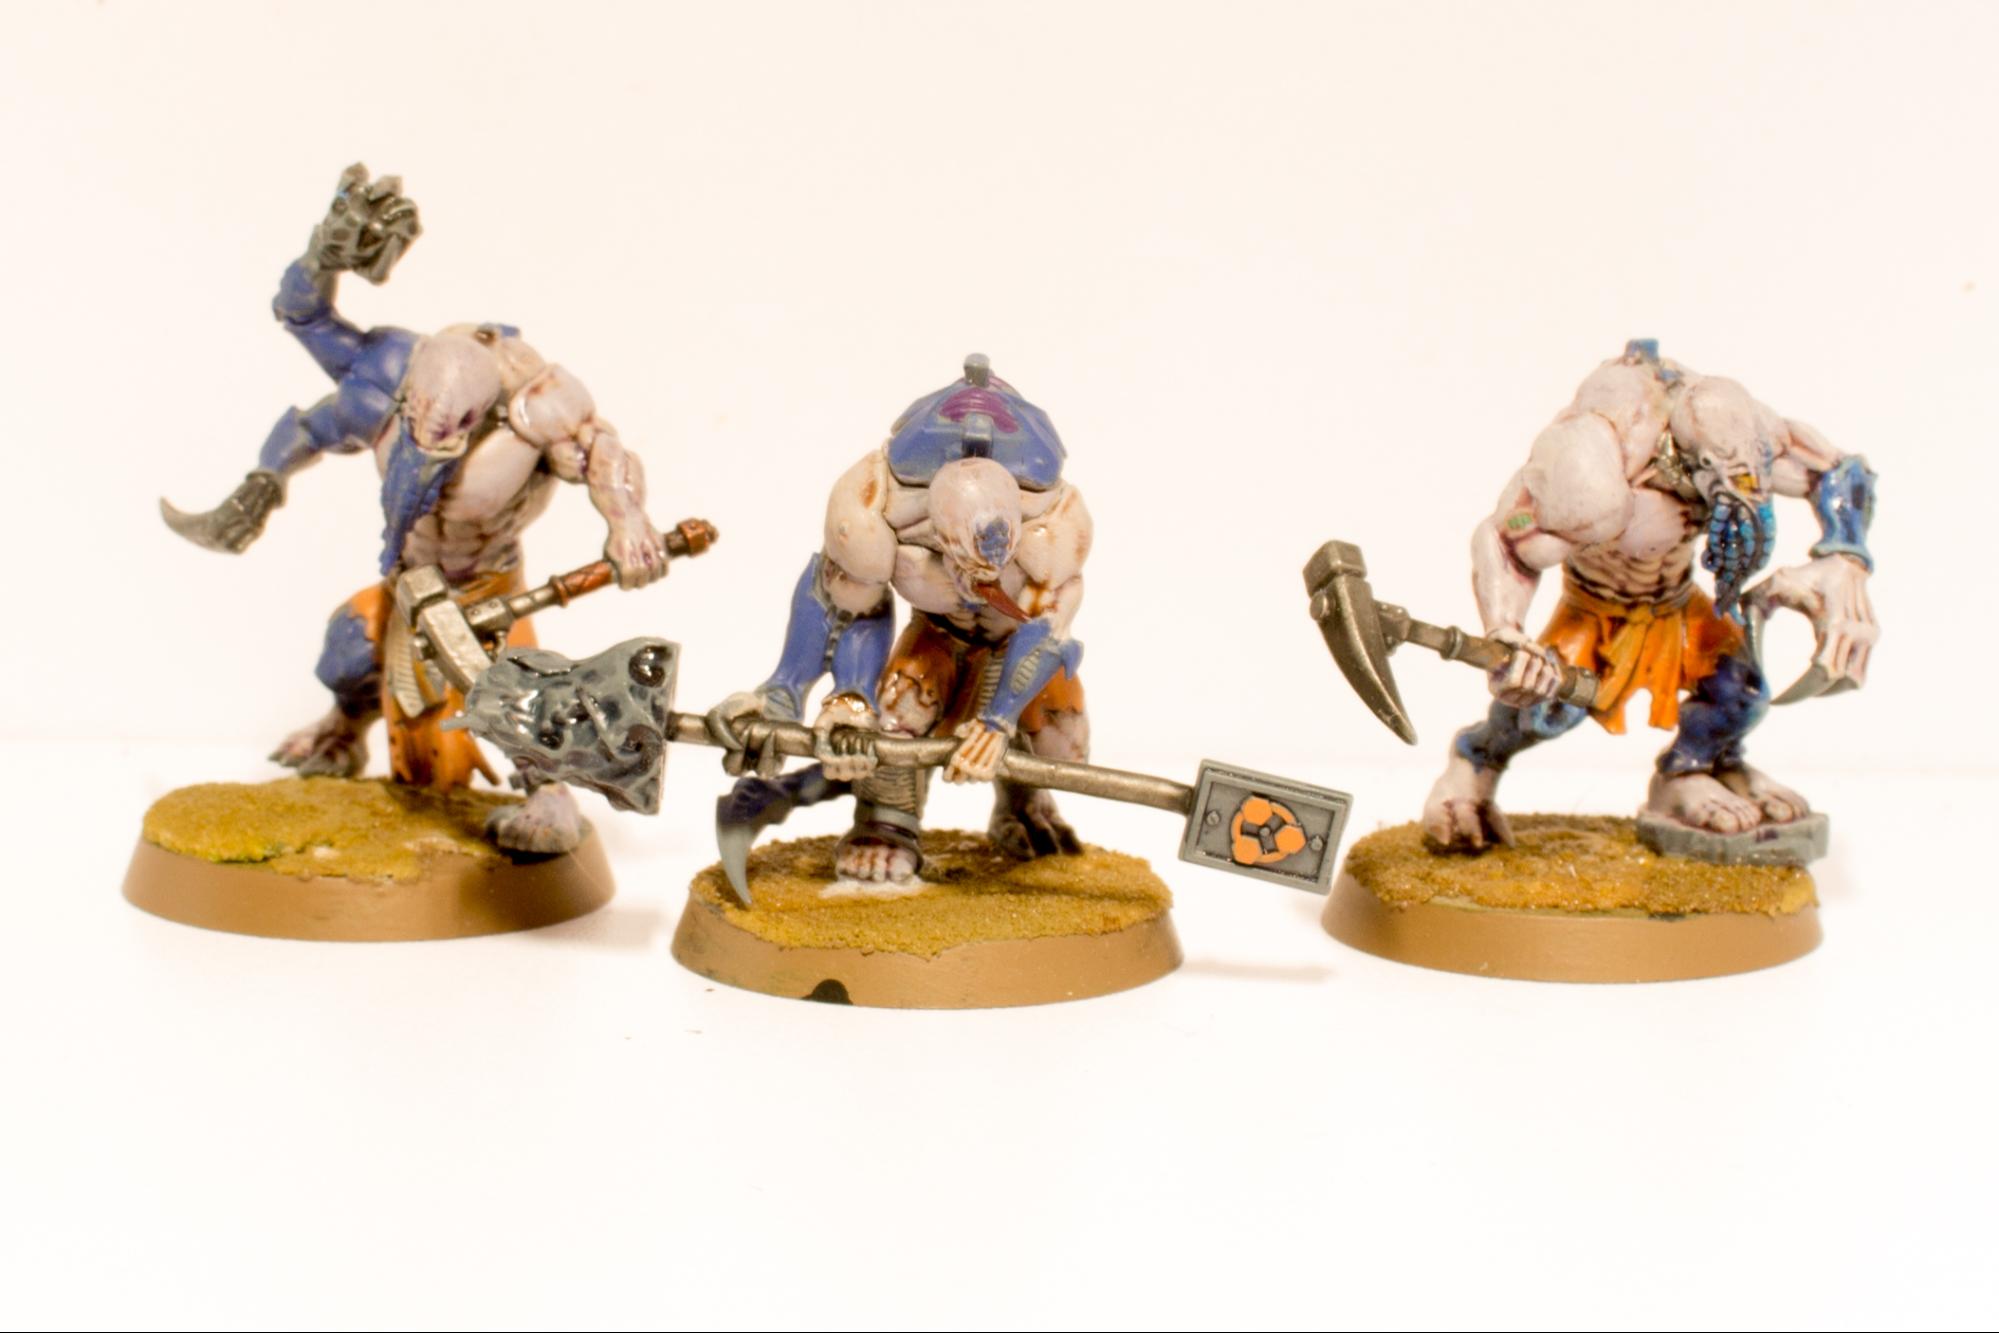
- For the flesh of the arms on more mutated hybrids, where the purple fades into blue, wet blend the Genstealer Flesh Mix with Night Lords Blue. Alternatively, glaze Night Lords Blue down the arm, increasing in intensity towards the hands.
- For the ridged sections between any carapace plates, basecoat with Xereus Purple and shade with Druchii Violet
- Basecoat any claws with Lupercal Green, shade with Coelia Greenshade, highlight with Sons of Horus Green
White Armour
- Basecoat Grey Seer
- Recess shade with Nuln Oil, thinned with water.
- Tidy up with more Grey Seer
- Edge Highlight Grey Seer mixed 1:1 with Vallejo Model Air White
- Edge Highlight White Scar
- For the chipping, take a fine piece of sponge and use it to dab Rhinox Hide on the sharpest corners.
- For additional weathering on vehicles, apply a coat of matt varnish all over the model, then once dry, thin down Raw Umber oil paint with mineral spirit, wash into the recesses, then very carefully wipe away any excess with a cotton bud dipped in mineral spirit. You have to be extremely careful with this part, if you rub too excessively, you run the risk of wearing away the paint underneath.
Orange Lanterns Quick OSL
- Basecoat with several coats of Vallejo Model Air White
- One thick coat of Scalecolour FX Fluor Orange on the lantern itself
- Mentally trace where on the model light rays would fall as they radiate away from the lantern in straight lines
- Thinned down glazes of Scalecolour FX Fluor Orange following these lines, pulling the paint towards the lantern, so the colour is strongest closer to the bulb itself. Feather the colour with a bit of water at the farthest extremes to create a soft gradient between the orange and non-orange colour, the gel medium of the Scalecolour paints really helps when it comes to blending it out like this.
 Maxi's Method - Click to Expand
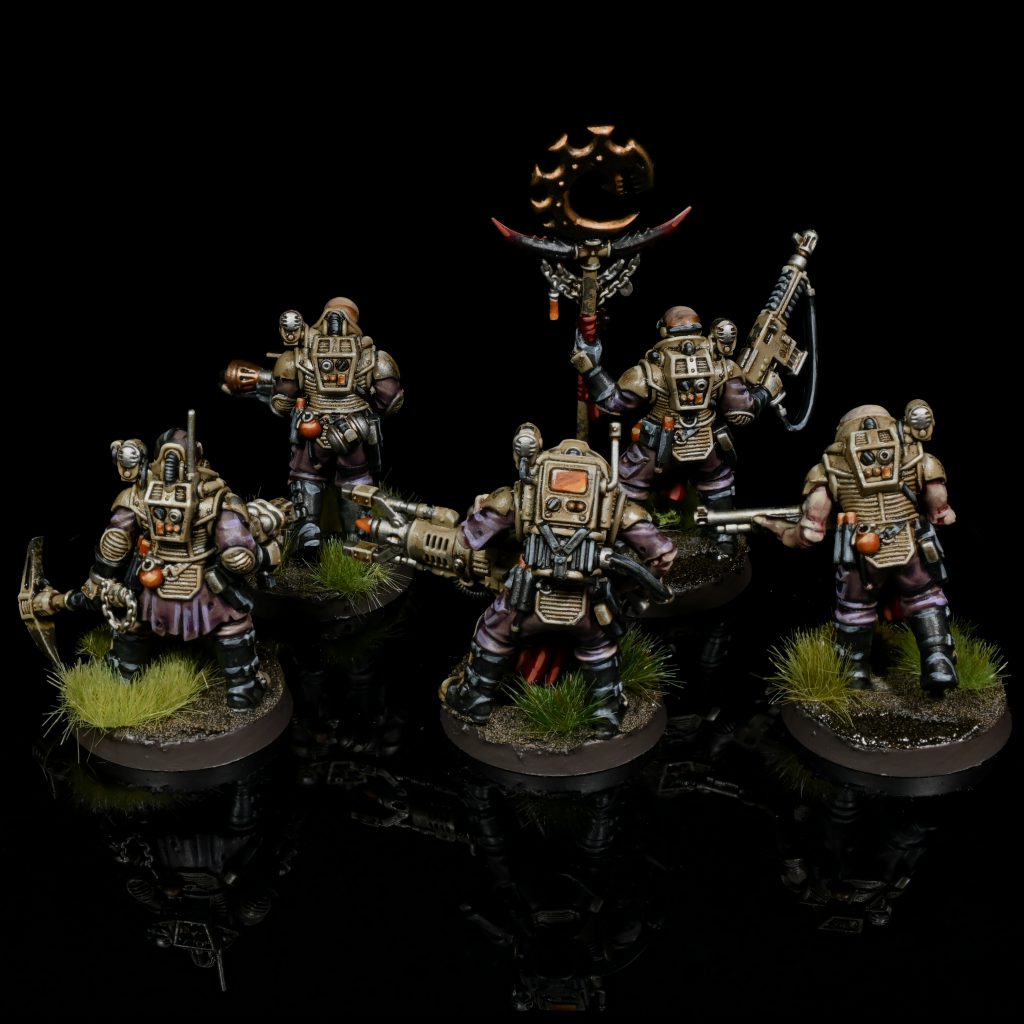
 Then I drybrushed the model again using Celestra Grey, again putting extra pressure on the cloth and skin to get it nice and bright. Now we start using contrast, starting with Black Templar I block in all the pipes, metallics, boots, and rubber glove parts of the model. On the gloves I like to leave the little rim in grey, this gives a bit of separation once it’s all done. Next I block in the yellow cloth using Nazdreg Yellow. Don’t worry if you catch any of the grey areas with the yellow, you can apply Dawnstone or Celestra back over it.
 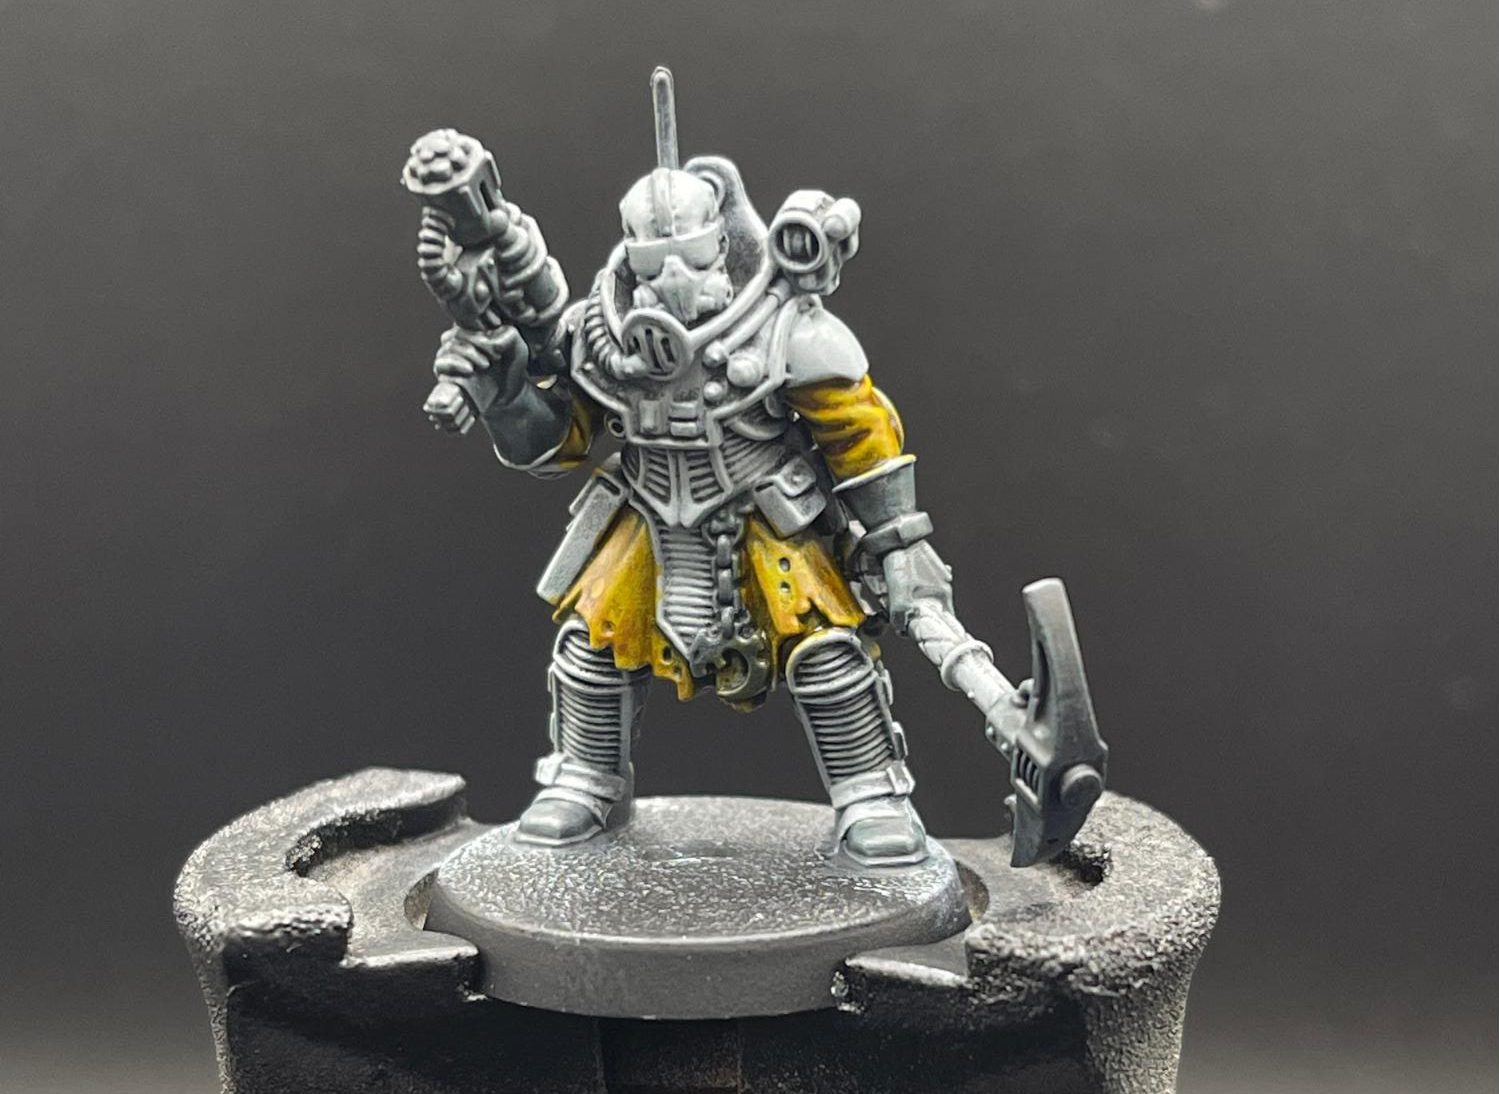 From here I hit all the pouches and belts with Snakebite Leather and the diamond wrapping of the power pick with Volupus Pink. Next I wash the skin with a heavy coat of Druchii Violet to get that classic cult look. While that dries I drybrush all the silver metallics with Leadbelcher and pick out the cult icon hanging from their waist with Retributor Gold.
 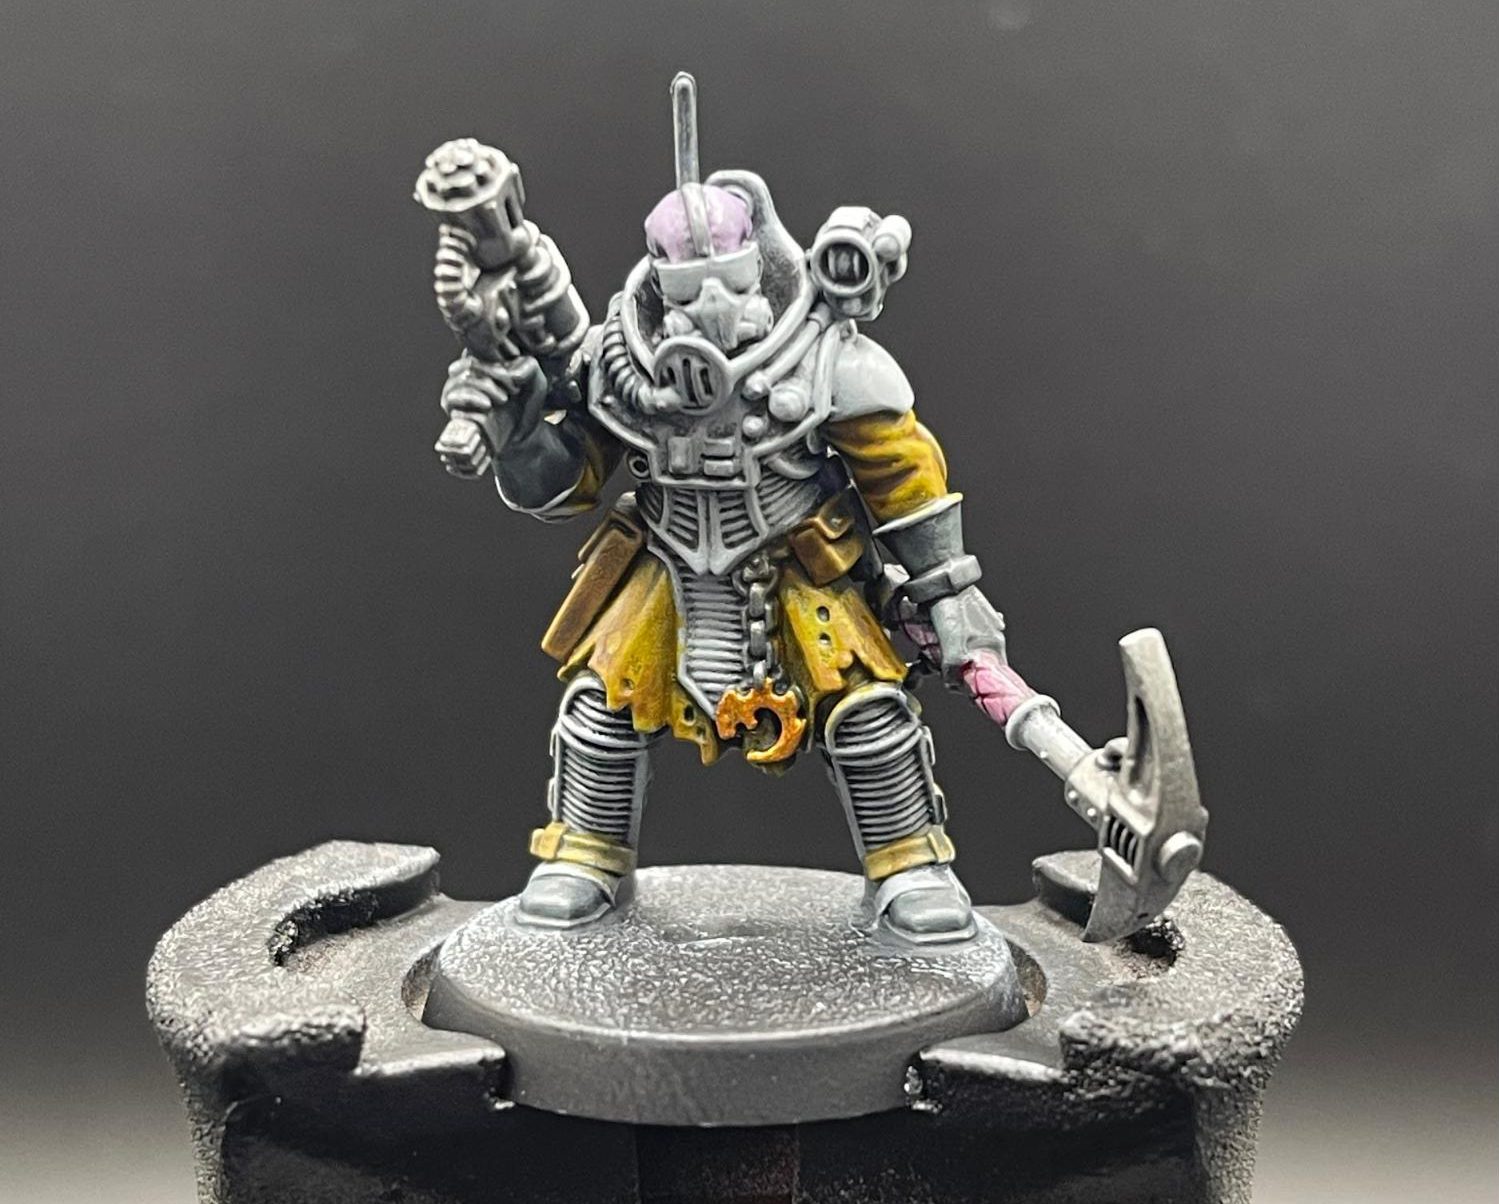 I layer the skin with Slaanesh Grey next, and then get to some details. I apply Tesseract Glow into all the lamps and on the little buttons of the mining suit, Flesh Tearers Red onto the dynamite sticks, Creed Camo on the grenades, and the eyes or lenses of the face get hit with Mephiston Red. Once that’s dry I layer the red lenses with Evil Suns Scarlet and add a dot of pure white into the corners. I then take Grey Seer and put a stripe down the center of the shoulder pads. Once you have a good few squads done, the shoulder is an excellent place to put a unit marking, and having this stripe of “white” is a great backing for applying a black unit number or symbol.
 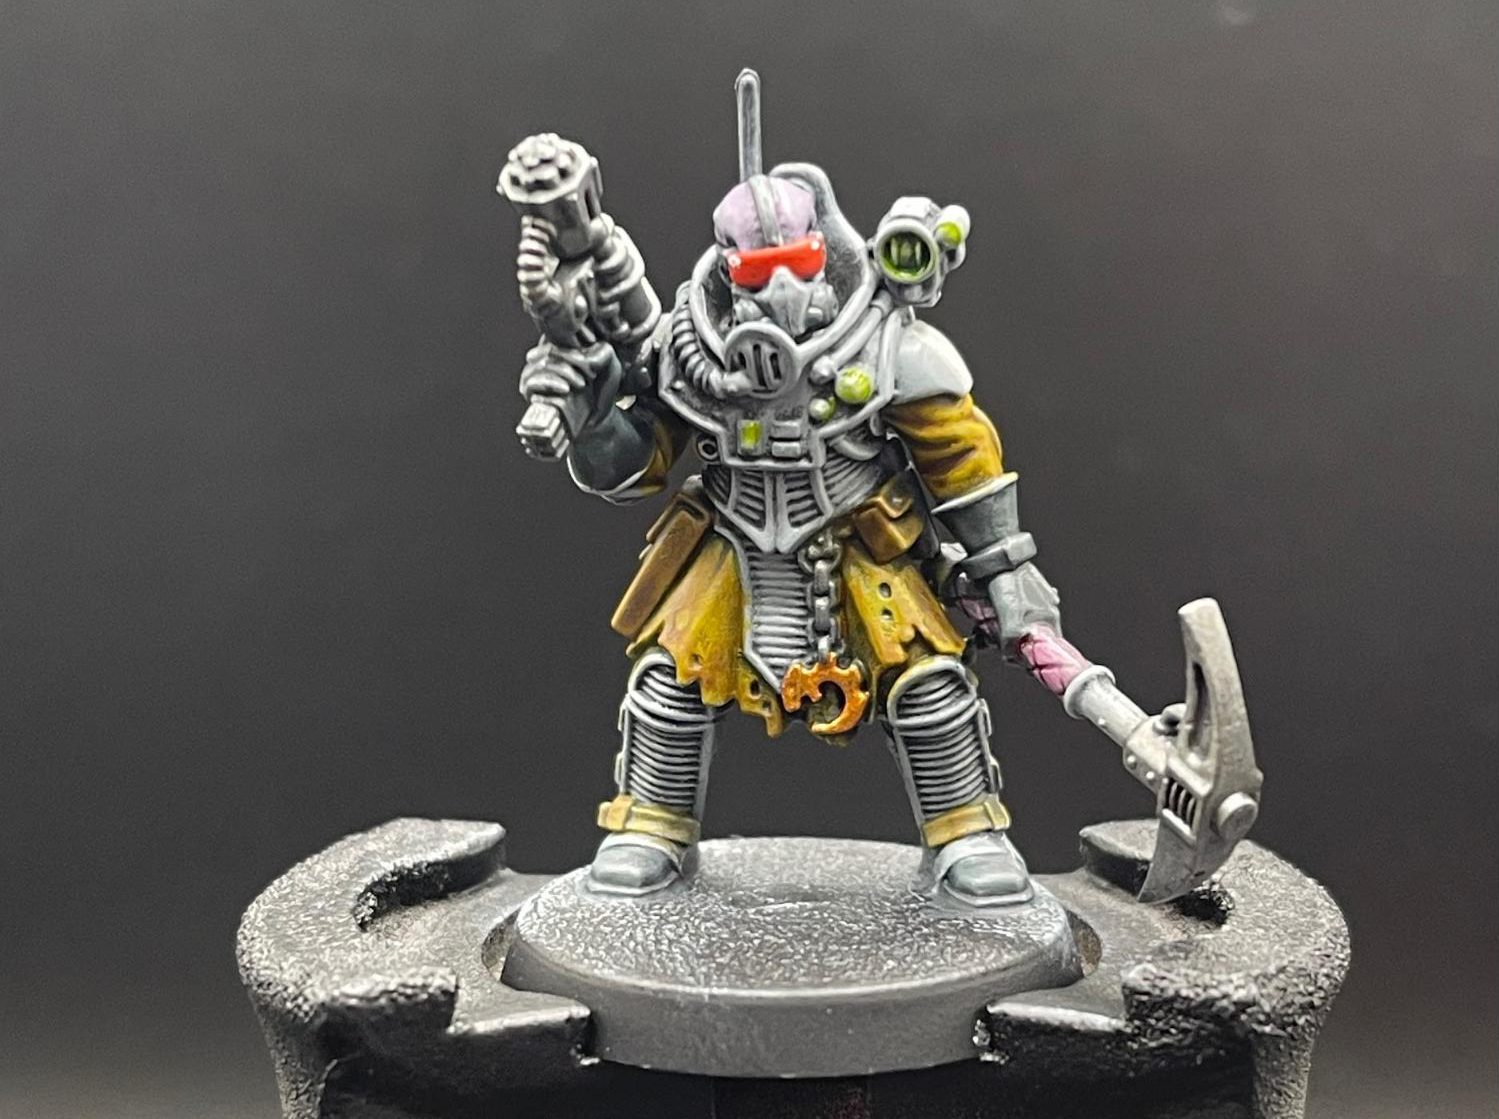 At this point I decided to breakup the face mask by applying Black Templar on the sides of the rebreather. Now for basing, I start by applying Astrogranite with a texture tool and once it’s dry I apply Druchii Violet.
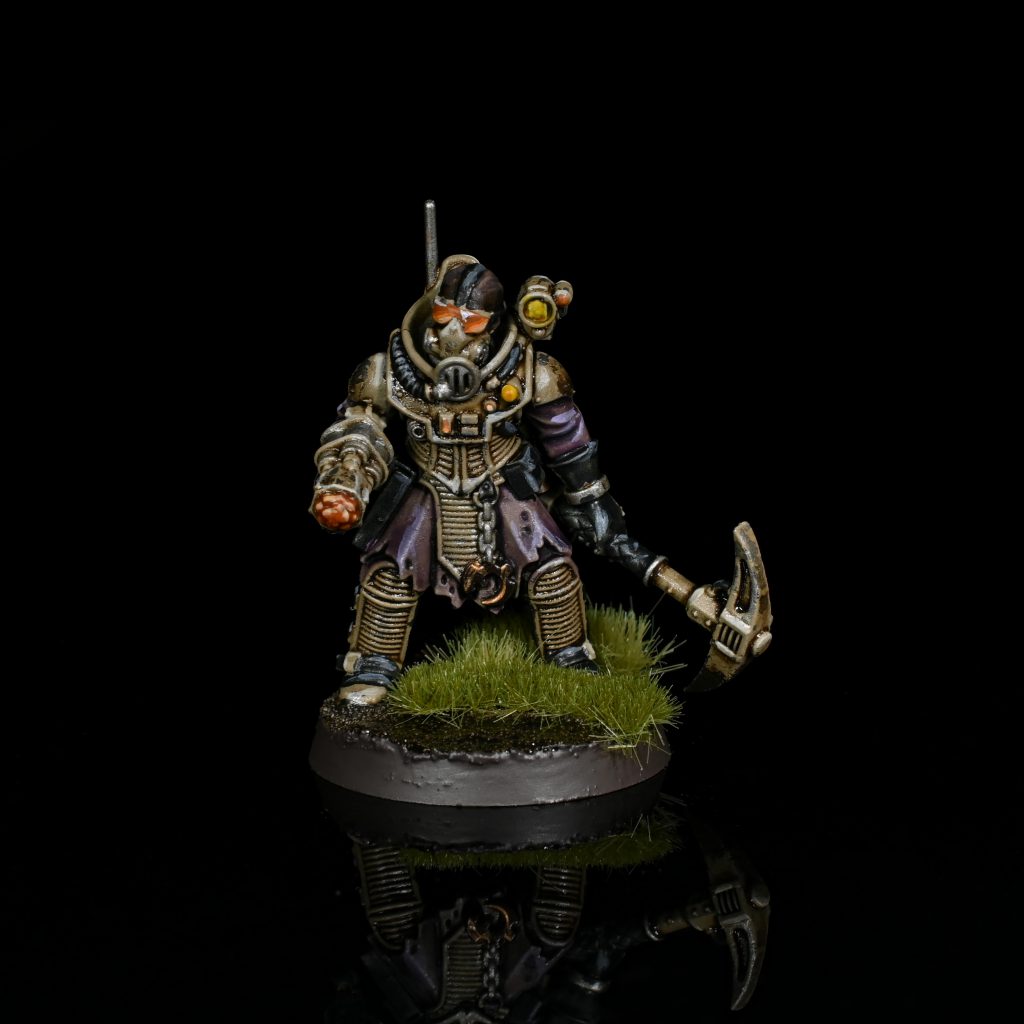
 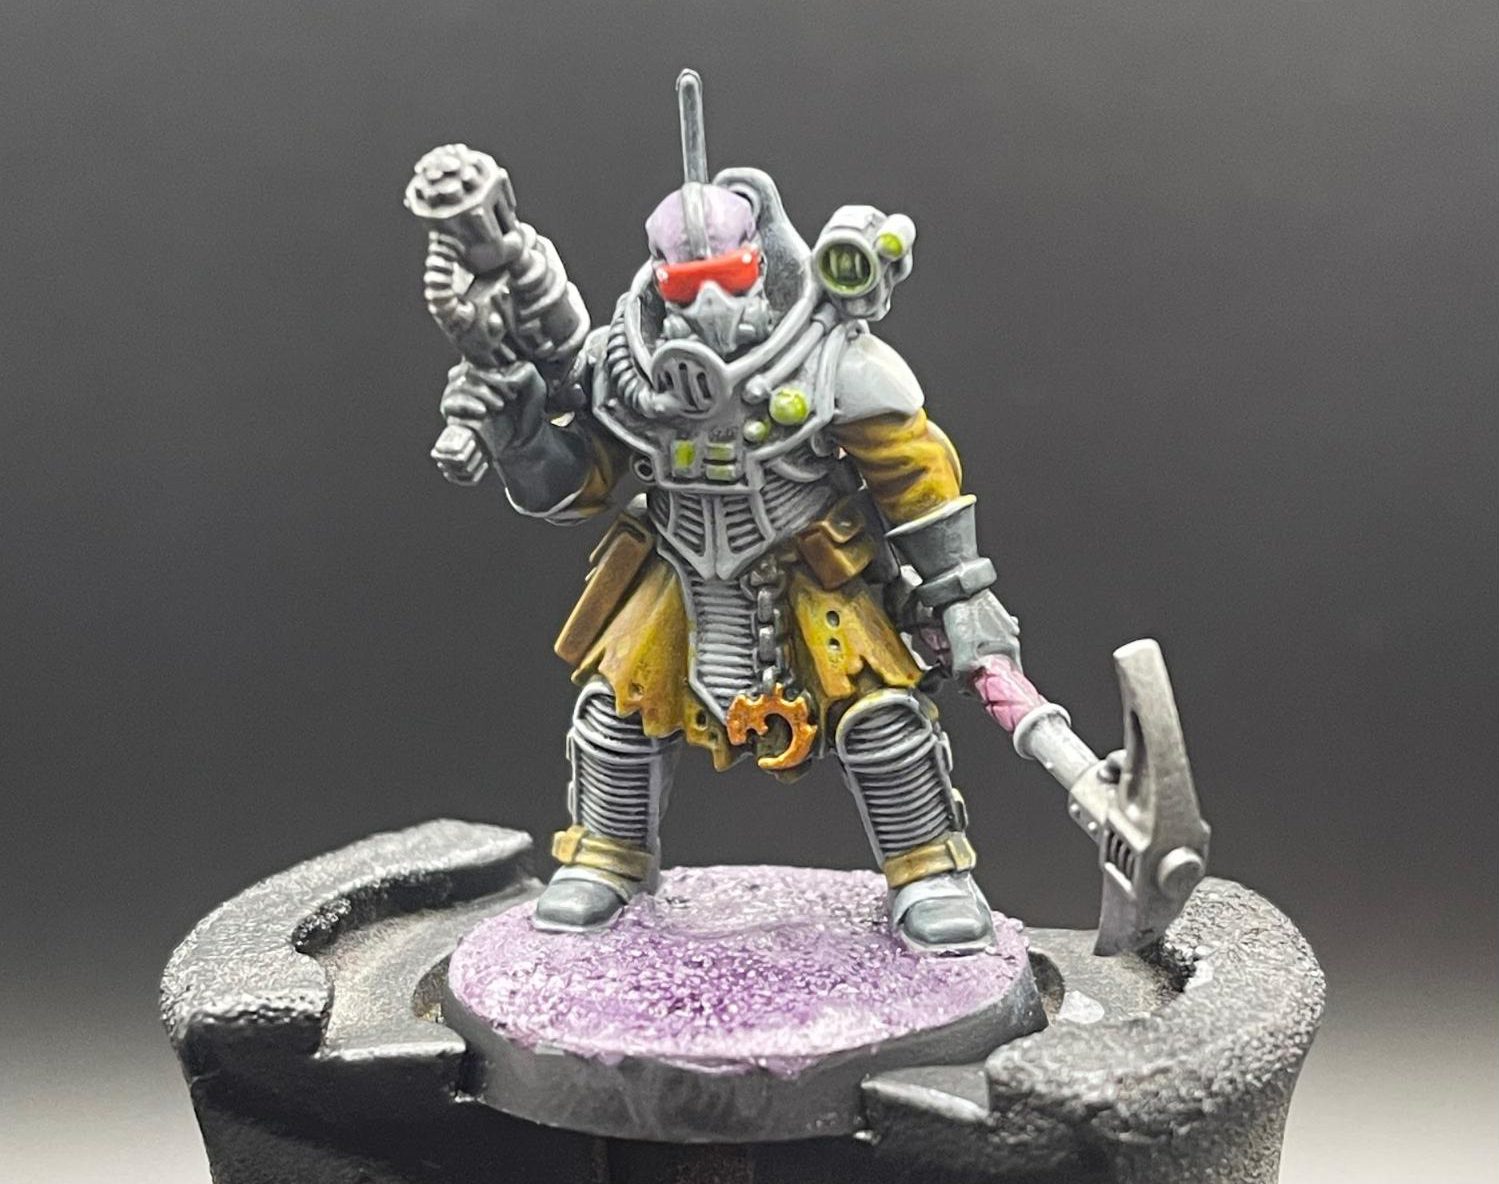 This is then drybrushed with Dawnstone, then we black rim the base and add some tufts and our little freedom fighter is done!
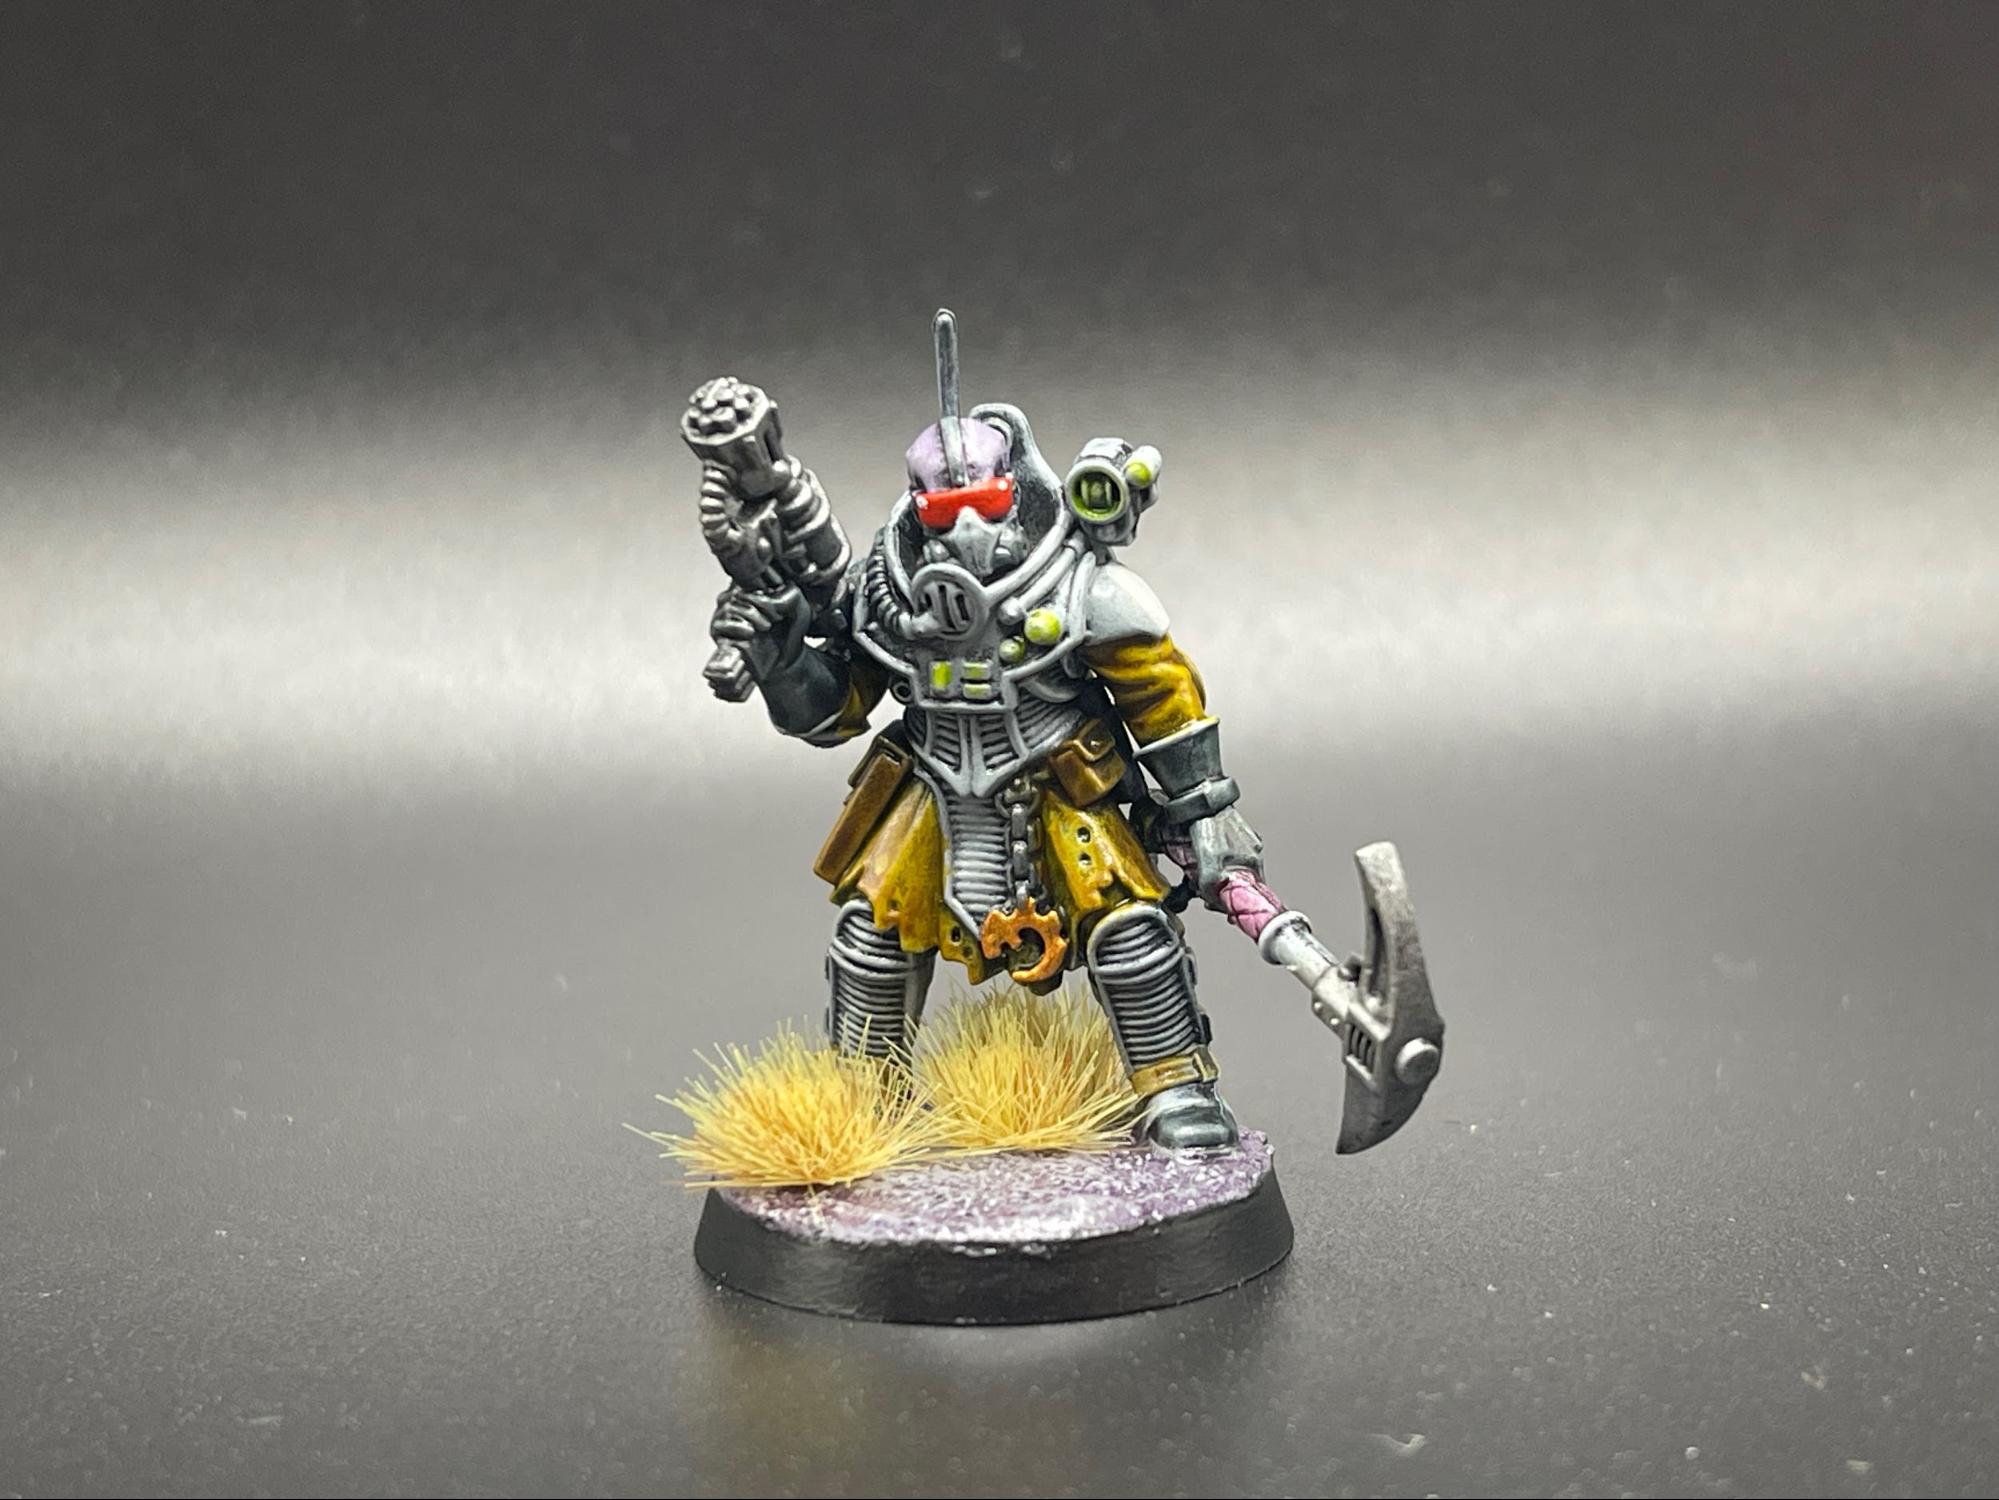
Prepare for the Sky God’s Arrival
That wraps up our look at painting Genestealer Cults. Hopefully you’ve got what you need to start playing around with different styles and schemes, and you feel comfortable going beyond just the standard blue-and-purple for Genestealers. As always, if you have any questions or feedback, drop us a note in the comments below or shoot us an email at contact@goonhammer.com.
