Clad in ceremite, resplendent in their glory, the fabled Ultramarines charge into battle and face their most treacherous foe.
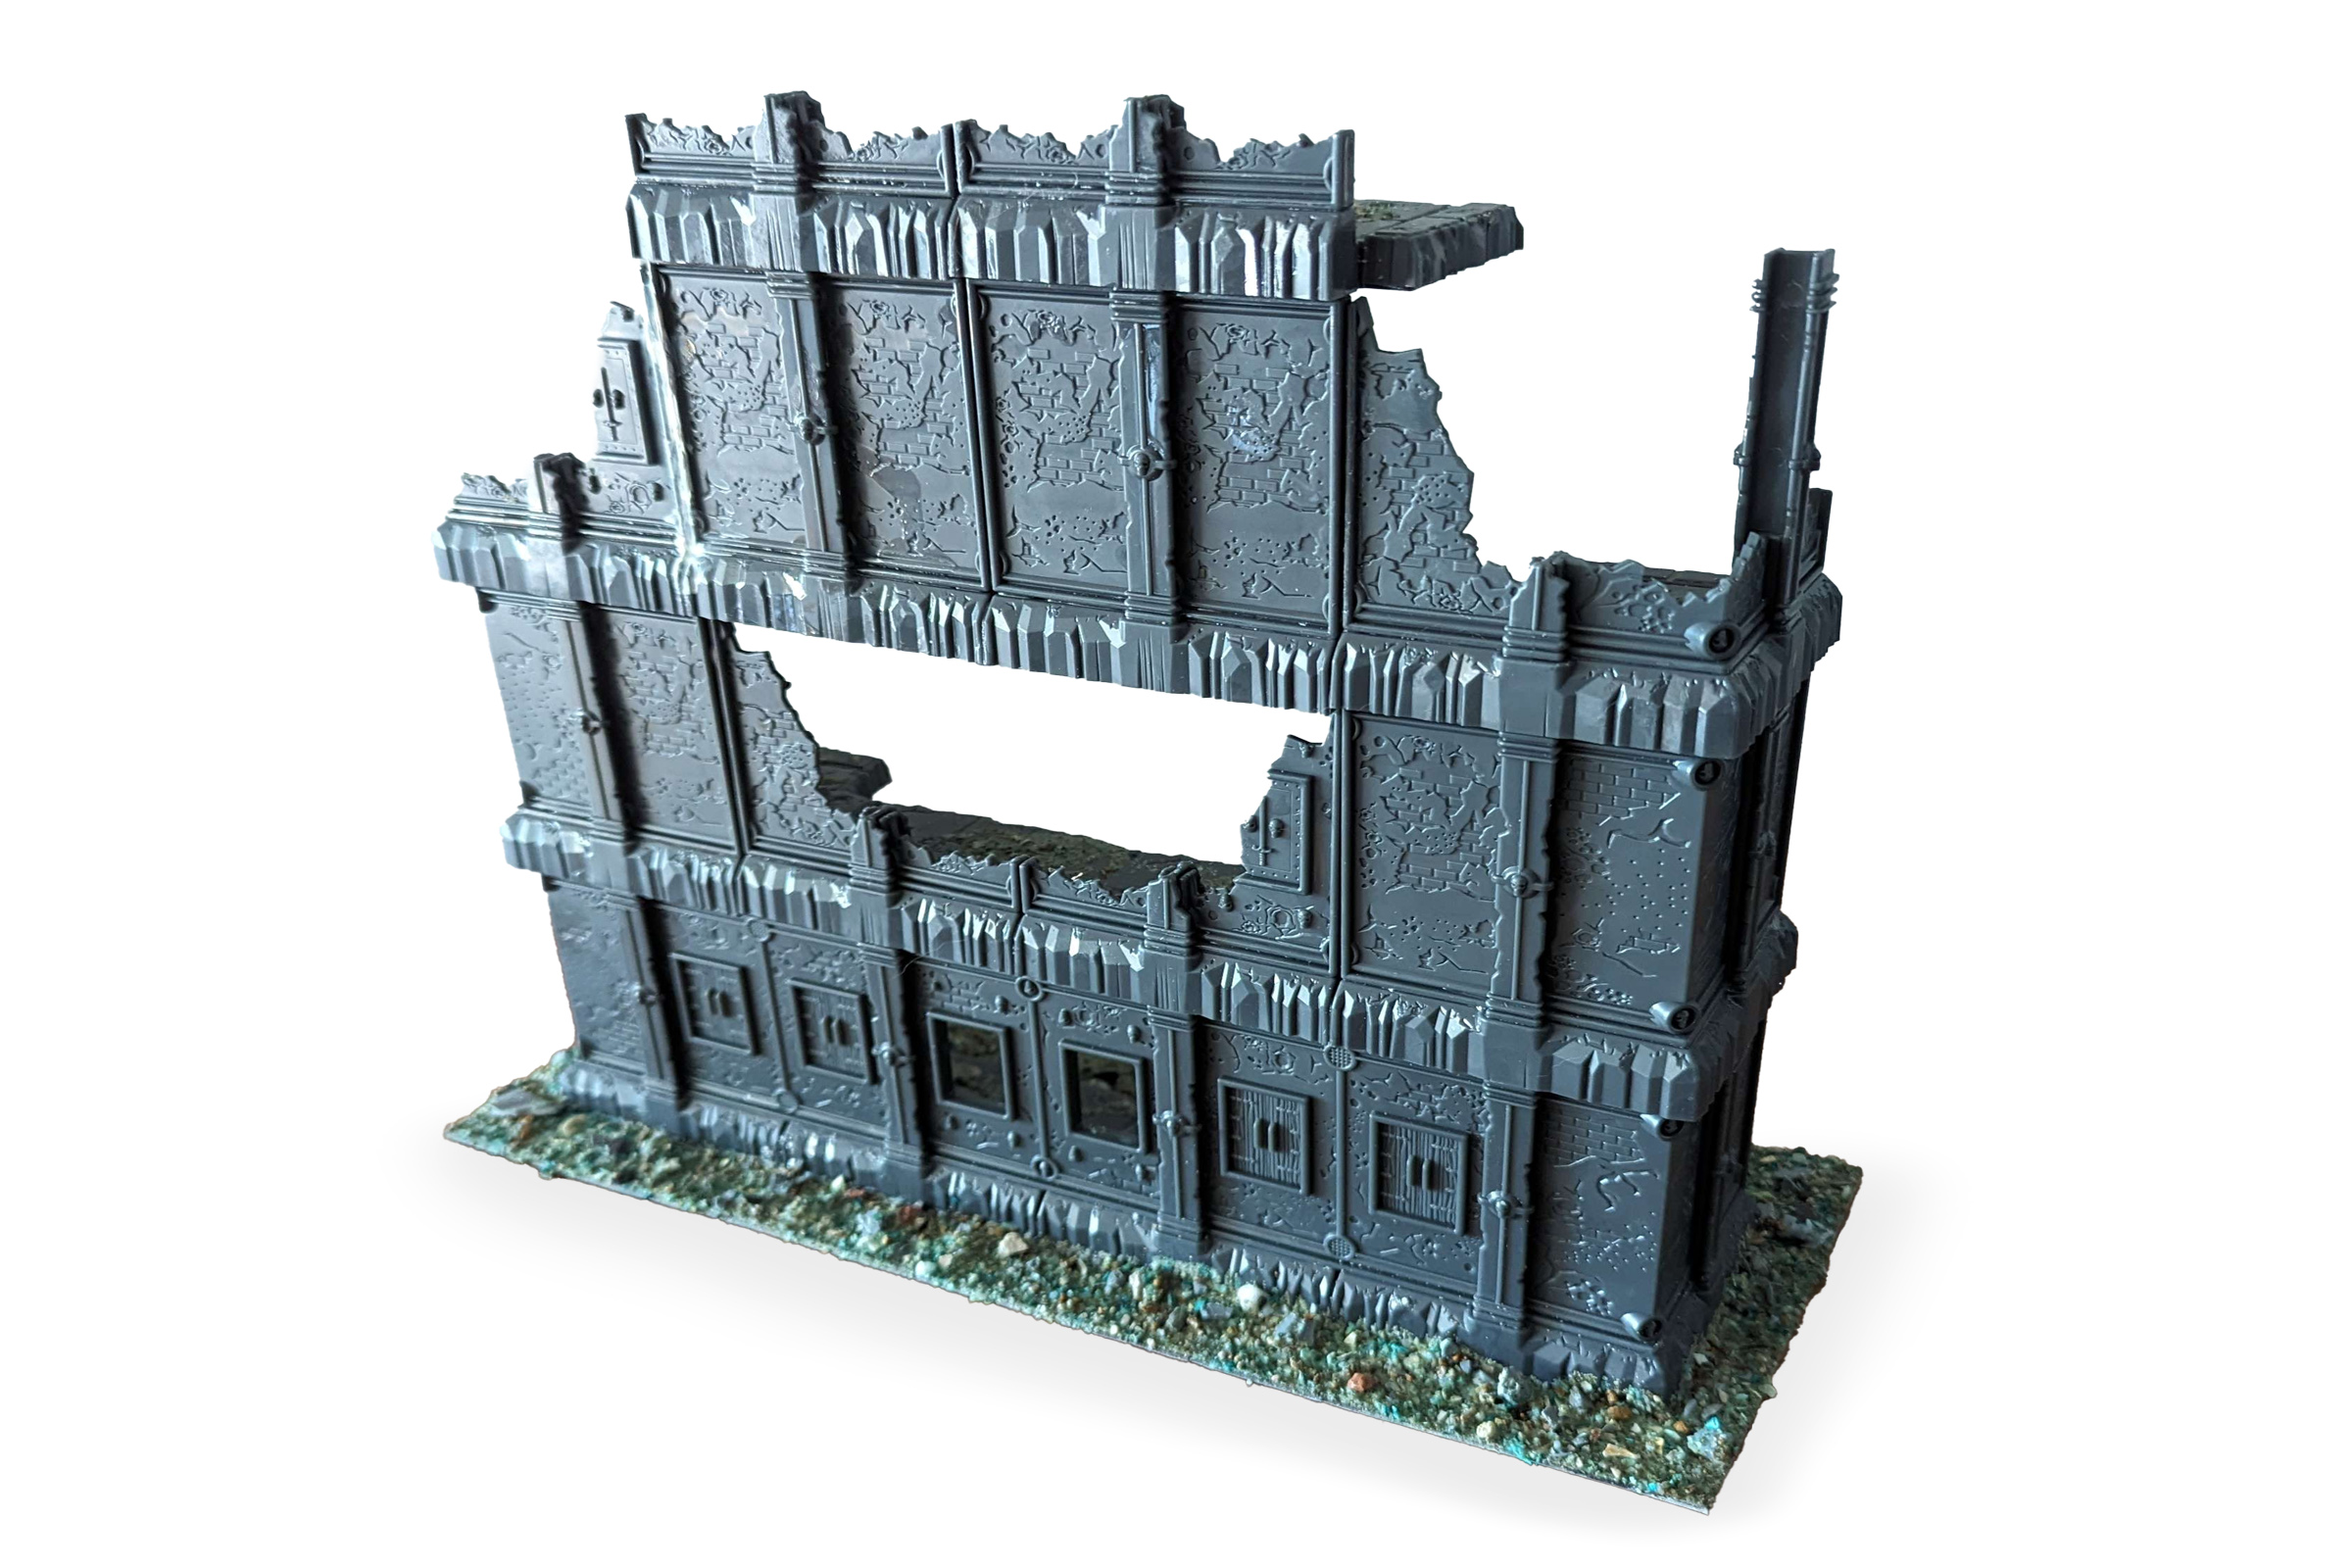
Unpainted terrain.
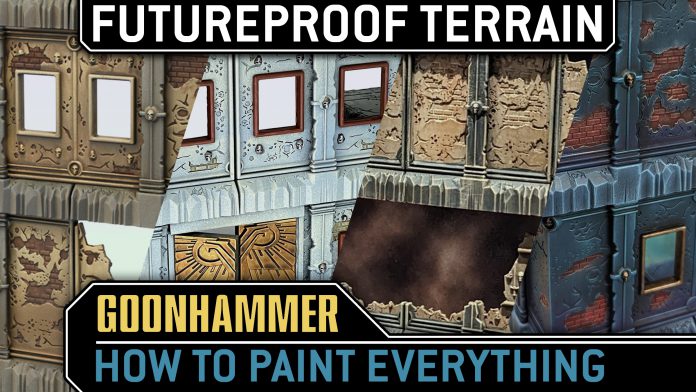
Terrain can seem daunting to paint. If all you’ve ever painted are small miniatures, the idea of painting something so large as to cover a battlefield can be overwhelming. But rest assured, it’s easier than it looks. Today we’re diving into FutureProof Modular Terrain and showcasing some quick ways you can transform your battlefield from drab to fab.
Pendulin
I’ve always been a fan of the traditional sandstone look for terrain. It’s easy to paint, looks good, and goes well with just about any army’s paint scheme. There are tons of ways to achieve this look, but for me, an airbrush is indispensable.
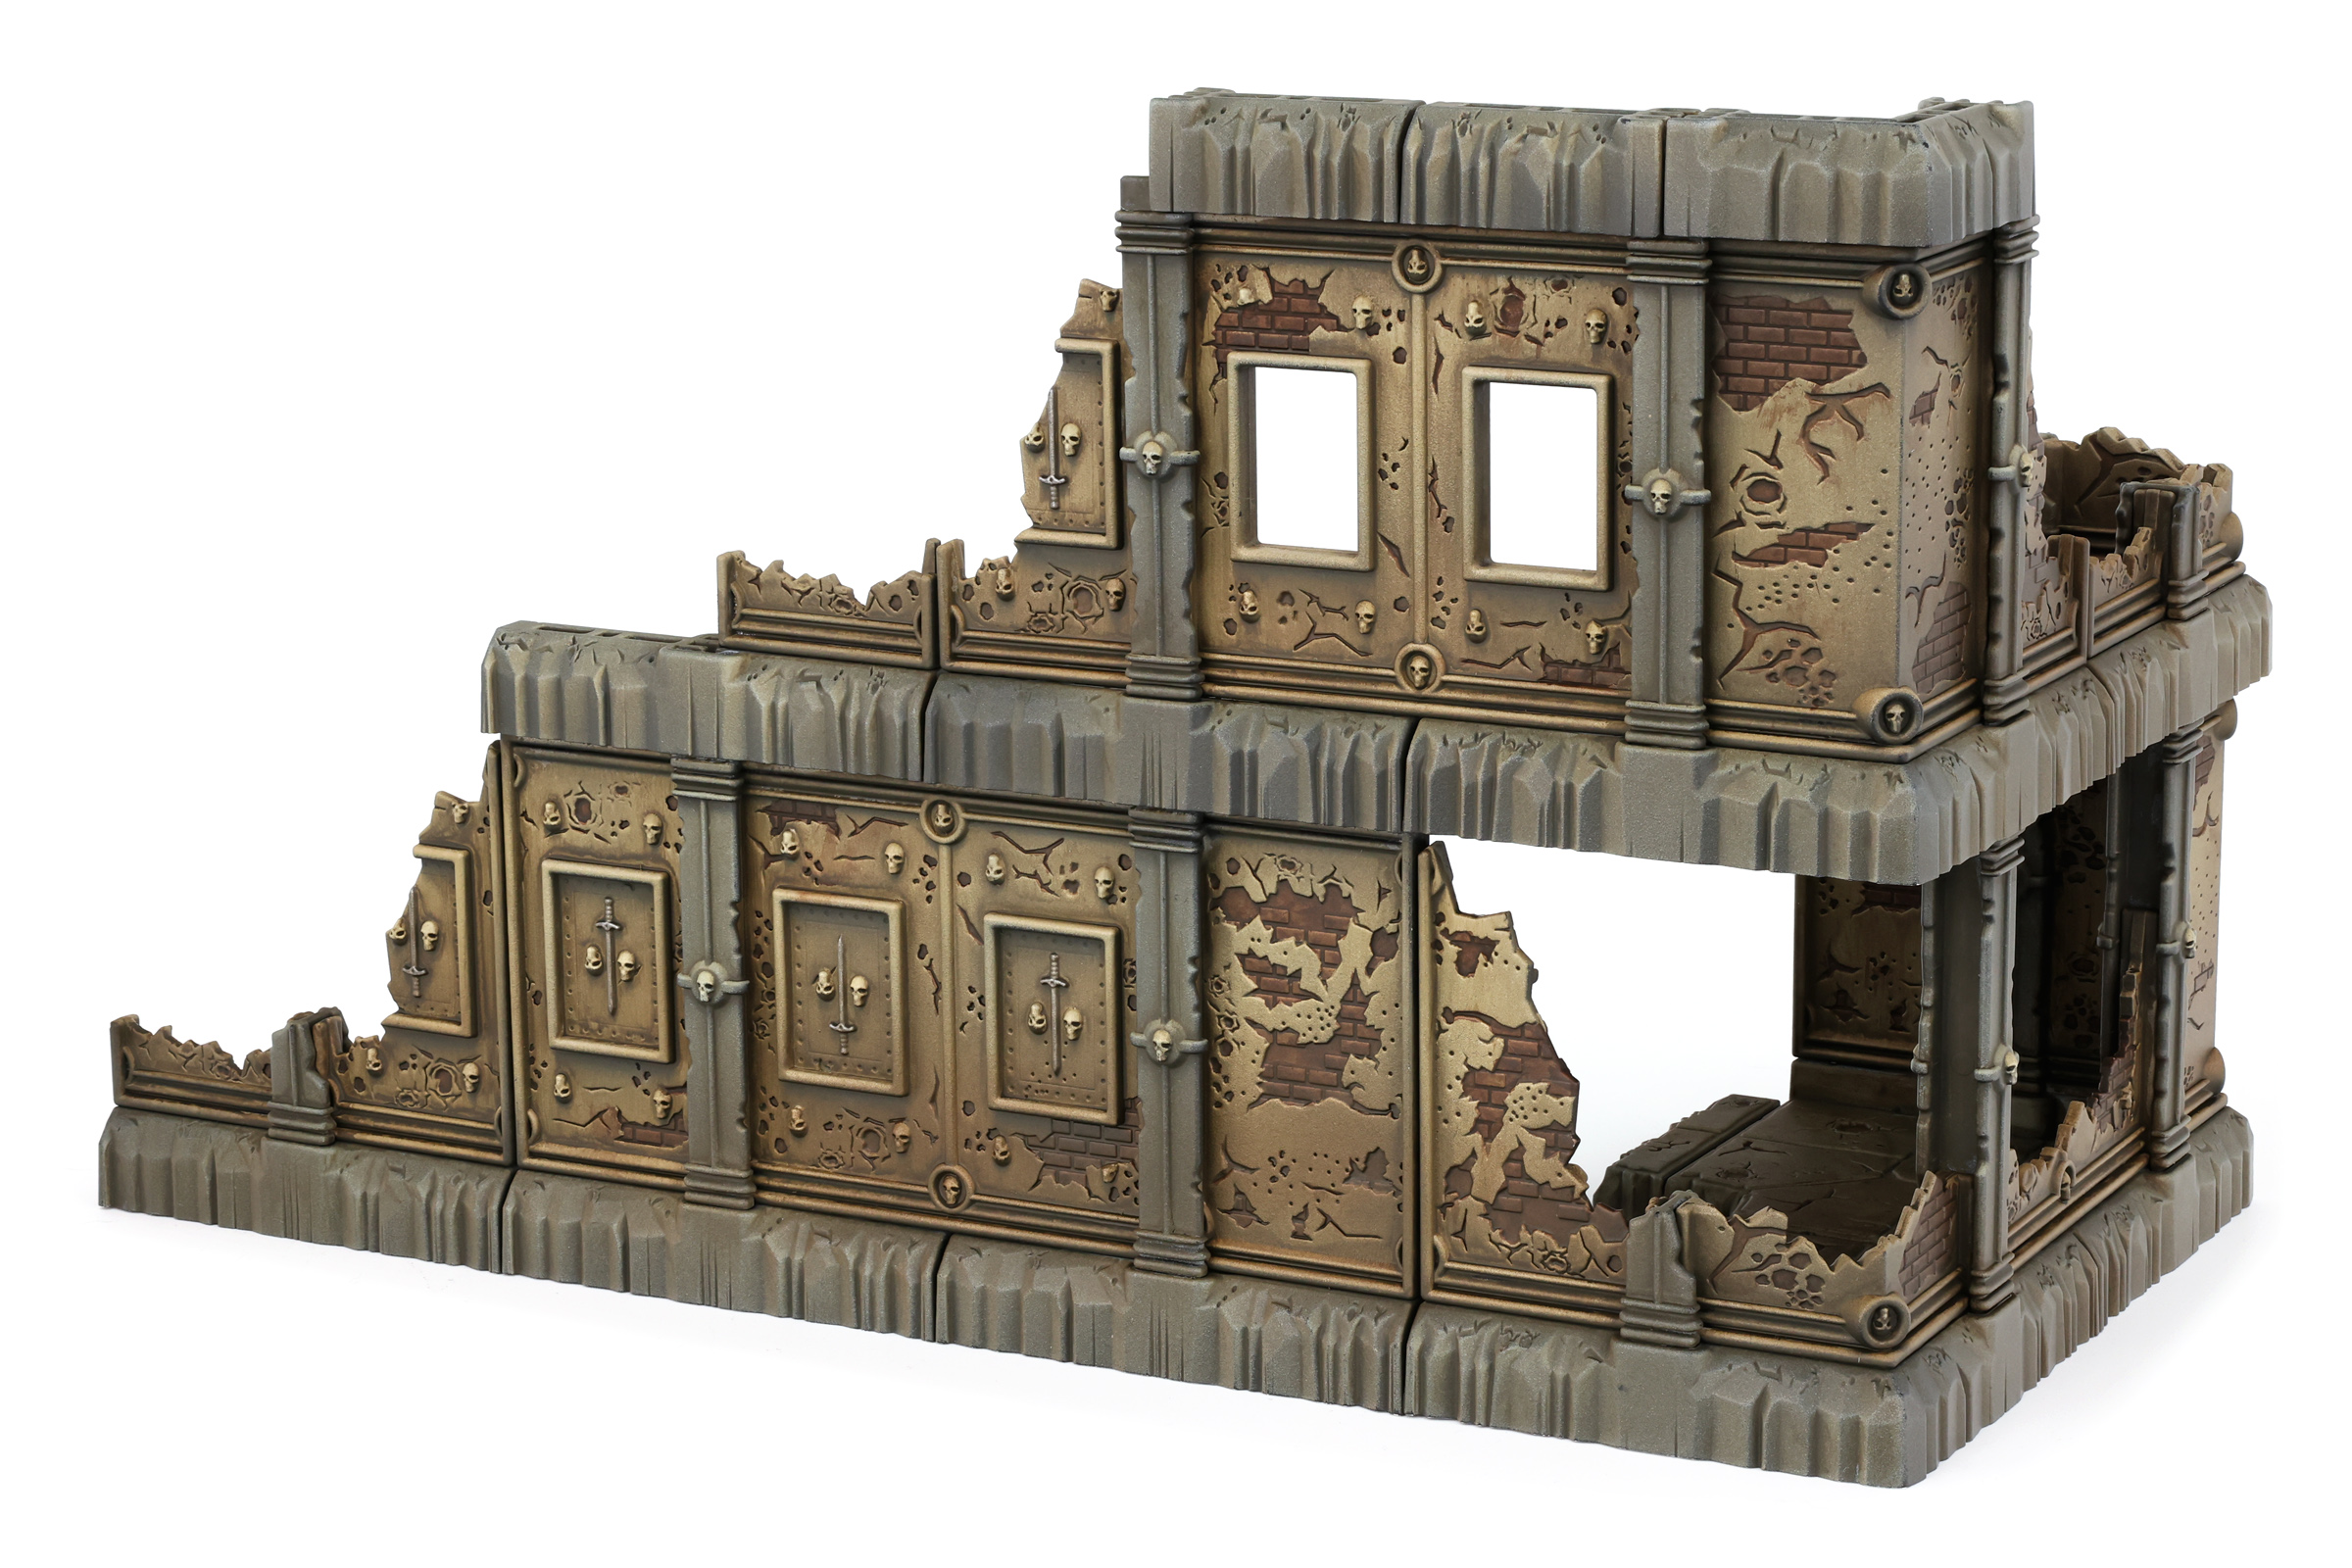
It’s not strictly necessary, in fact you can follow all these steps with basic rattlecans to get an extremely similar look, as DYLON does below. But if you have an airbrush on hand, here’s one way you can make use of it.
Paints Used:
- Rustoleum: 2x Paint+Primer Black (or any black rattle-can primer)
- Games Workshop: Zandri Dust
- Vallejo Model Air: Cement Grey
- Vallejo Model Air: White Grey
- Vallejo Game Color: Bone White
- Vallejo Metal Color: Steel
- Games Workshop: Snakebite Leather
- AK Interactive: Streaking Grime
- Vallejo Game Color Special FX: Corrosion
- Daler-Rowny FW: Burnt Umber Ink
- Testors: Dullcote Spray Lacquer
Step 1: Prime Black
You can either paint the ruin fully assembled, or paint the components separately. I split the difference because I’m difficult that way. I primed the components separately, as well as applied their base coats separately. I then reassembled the ruin and finished painting it together.
If you want to follow my lead, consider putting a little bit of masking tape on the wall and column connectors that will be pushed into the floors. Either mask them now, or scrape them later (I forgot to mask them, so I had to spend like 15 minutes scraping. It’s no big deal, honestly).
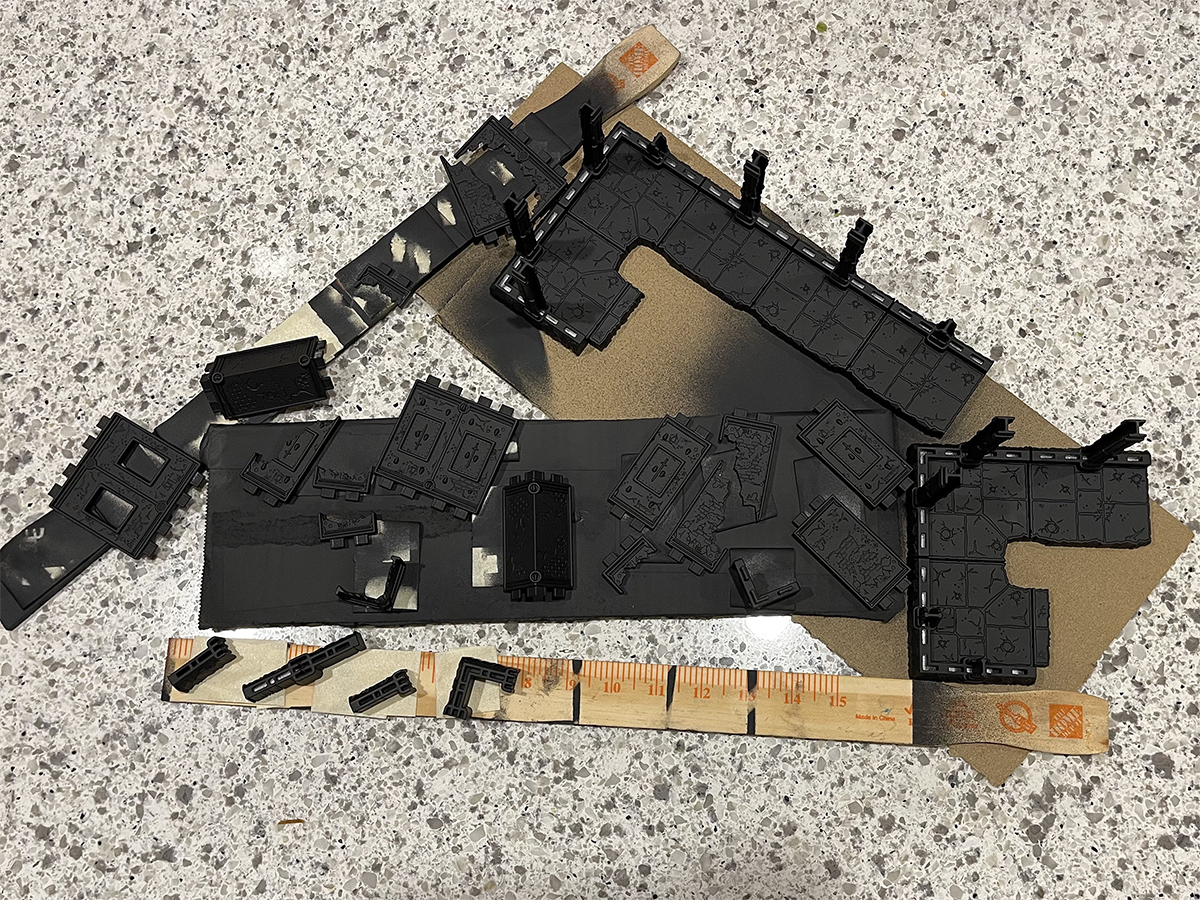
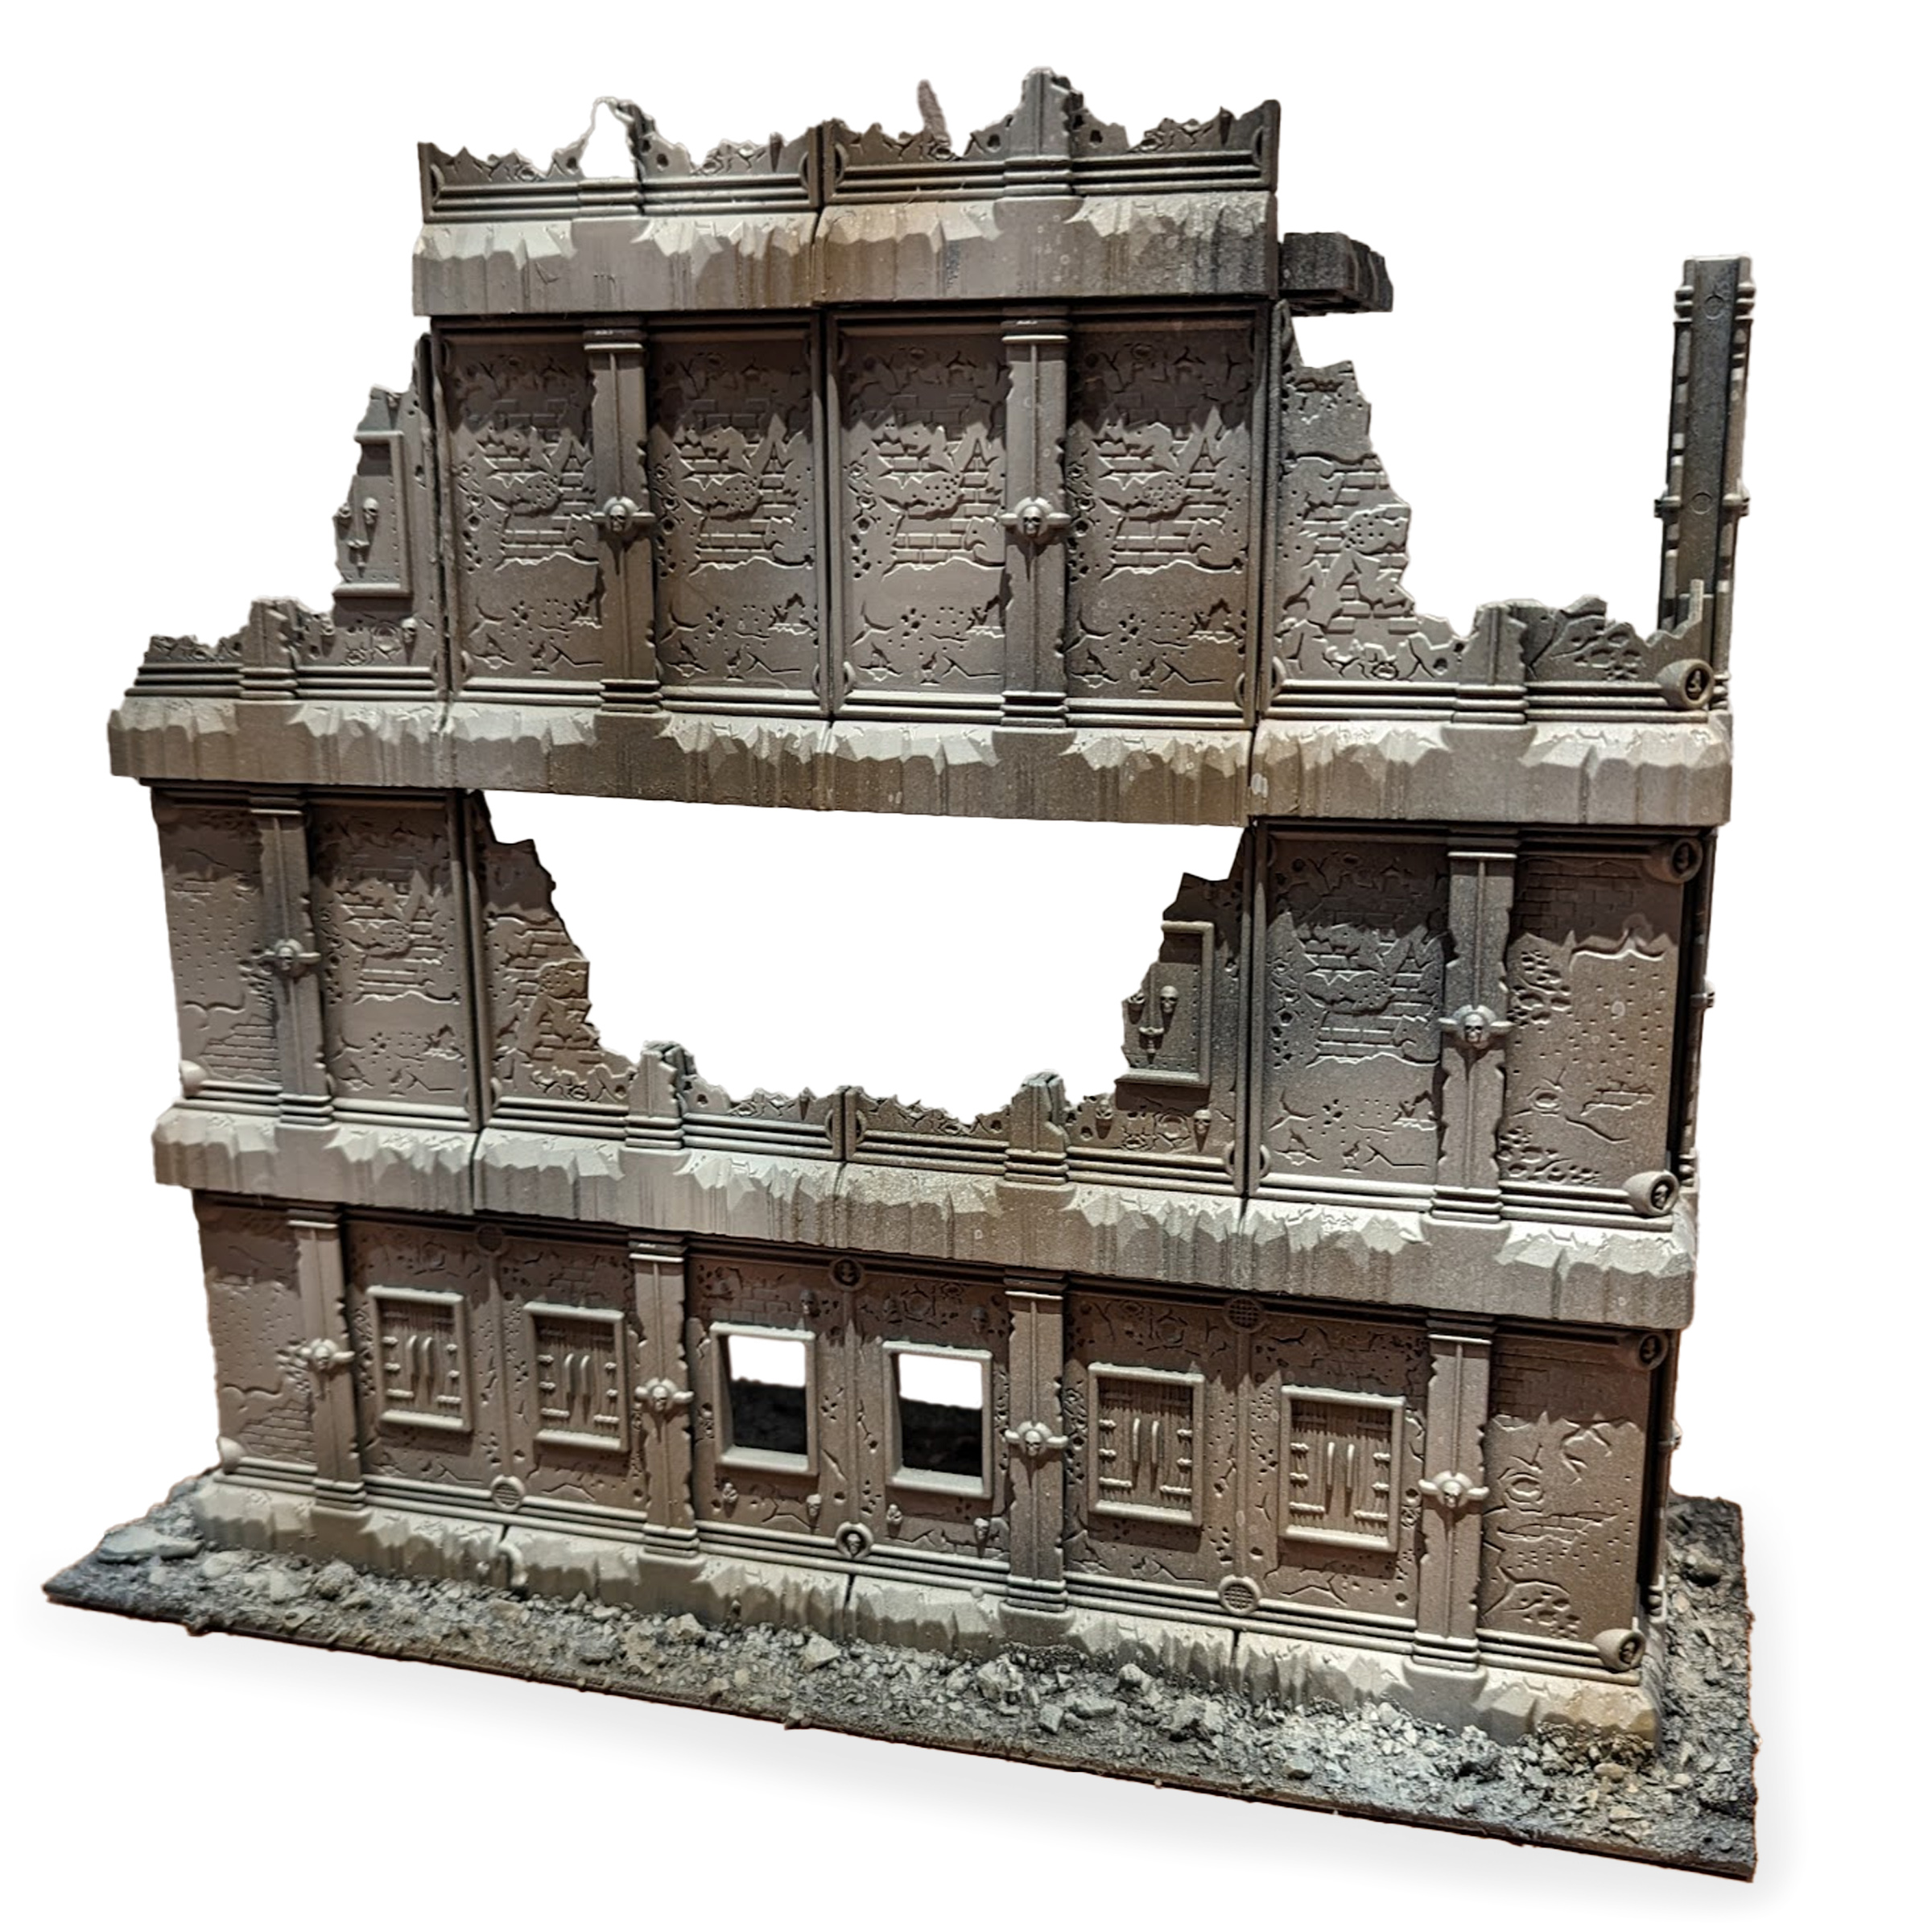
I know I said “airbrush this” and “airbrush that”, but priming with a rattlecan is just so much faster. I used some cheap Rustoleum 2x Primer+Paint I had lying around, and primed all the components separately.
After I took that picture, I actually disassembled it further and hit it with another layer of primer. I wanted to get into all those gaps between the floor tiles and under the columns. Not really necessary, but I didn’t want any slivers of unpainted plastic to show through.
Step 2: Zenithal Walls with Games Workshop Zandri Dust
By keeping the walls and floors separate, I can easily paint them different colors. Taking full advantage of that, I start off by doing an airbrush zenithal of Zandri Dust.
If you’ve never zenithal’d anything before, don’t worry. It’s easy.
Hold the piece almost parallel to the airbrush. This way you get all the color on the “top” parts of the model, and leave the “bottom” parts without paint. This actually works great on FutureProof terrain. It’s so flat, and the details are so exaggerated, that with nothing more than a quick zenithal, you create a ton of depth.
If you don’t have an airbrush, you can do this with a rattlecan of Zandri Dust. But you do get a lot more control with an airbrush.
For the paint, I mix maybe 1 part Zandri Dust to 1 part Liquitex Airbrush Medium, and then a drop or two of Flow Improver. Nothing precise, but it airbrushes buttery smooth.
If you don’t have an airbrush, and don’t want to use rattlecans, you can skip this entirely and just apply Zandri Dust with a big brush. You lose a little bit of depth, but it’s really not a big real. An airbrush will save you a ton of time, though.
Step 3: Zenithal Floors/Columns with Vallejo Model Air Cement Grey
Cement Grey is an excellent grey color that has a hint of green in it. Fantastic for grungy cement, which is precisely what I’m going for. As before, hold the floor tiles at a sharp angle and airbrush “parallel” to it. You want to leave the scratches, dents, and craters without paint. No pictures here, partially because it’s just a repeat of the above, just with a different color, and also because I forgot to take them!
Step 4: Zenithal everything with Vallejo Model Air White Grey (very lightly)
Be careful with this step. You want to do the same as above, but be extremely light with this color. White Grey is, as the name implies, almost pure white. So it will easily blow away the colors underneath this. Use it sparingly and put the lightest zenithal of White Grey on the ruin.
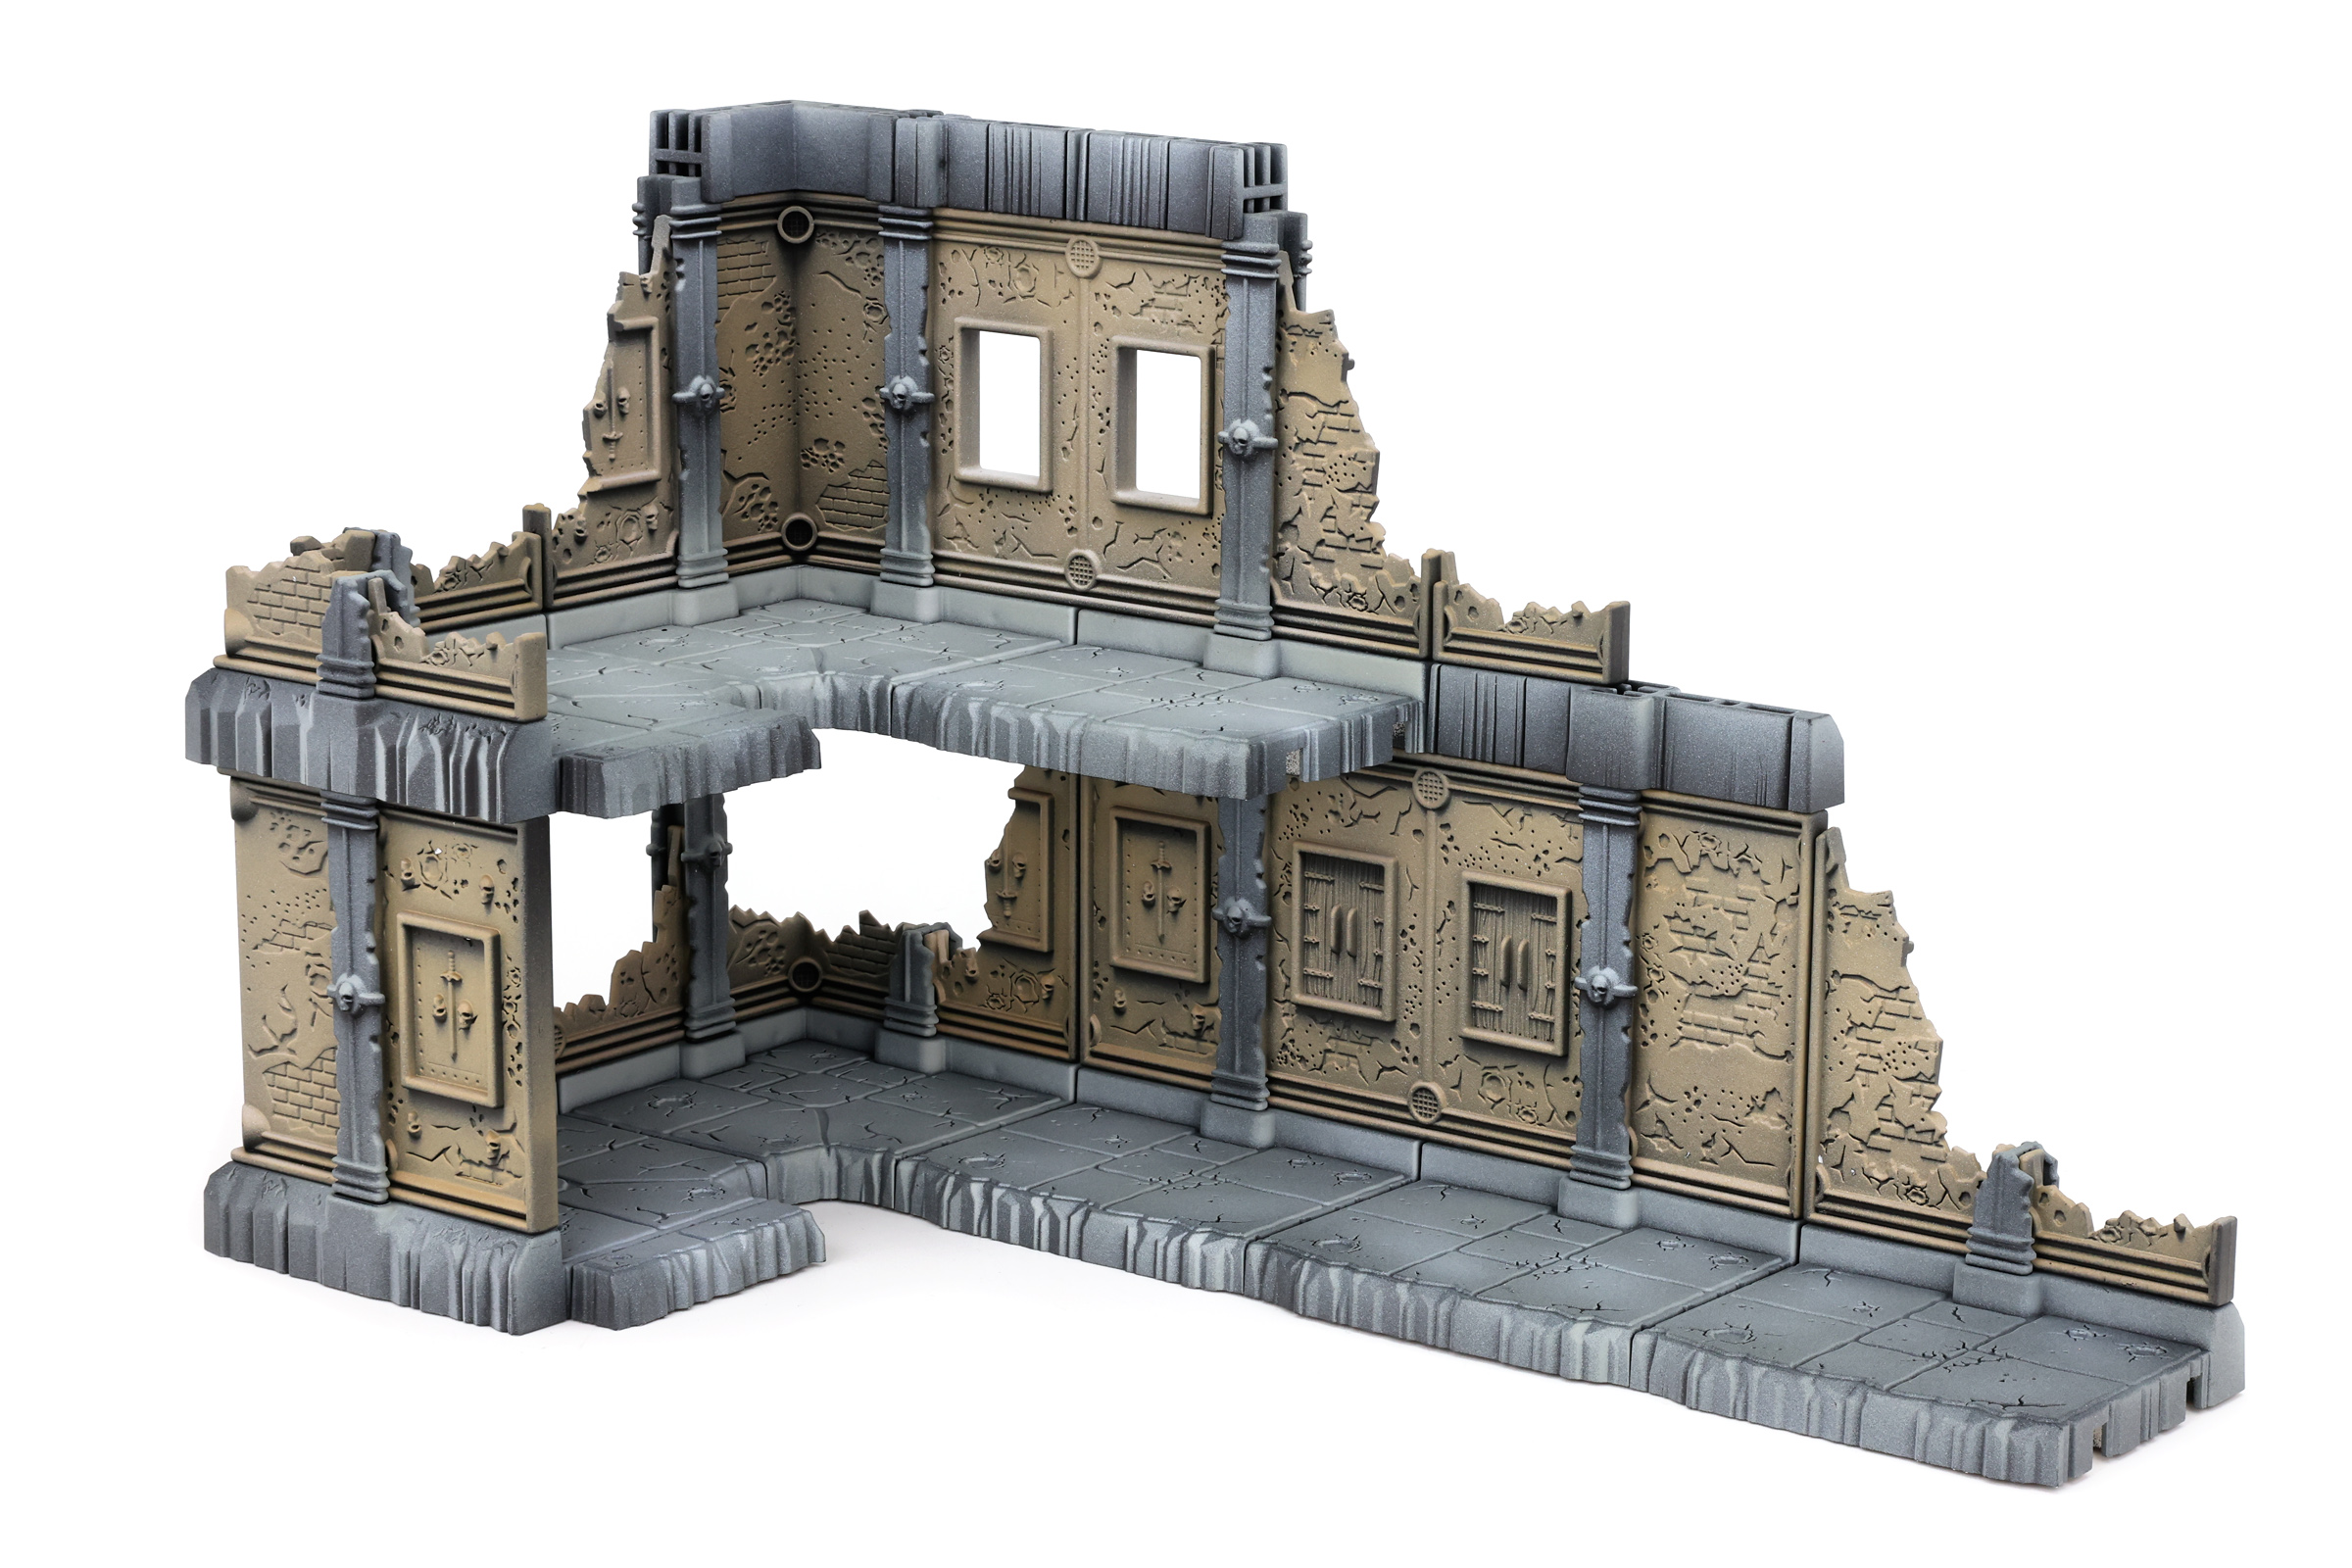
Do this to both the walls and the floors, which helps tie the colors together.
Step 4.5: Reassembly
Half-step here. If you’re following along, you might notice that you can’t really fit the pieces back together. That’s because the primer and paint have added enough bulk to the connectors, so that they no longer fit together. You can avoid this either by masking them ahead of time (which I did not do because I’m not a smart man), or taking a razor and just scraping them down a bit.
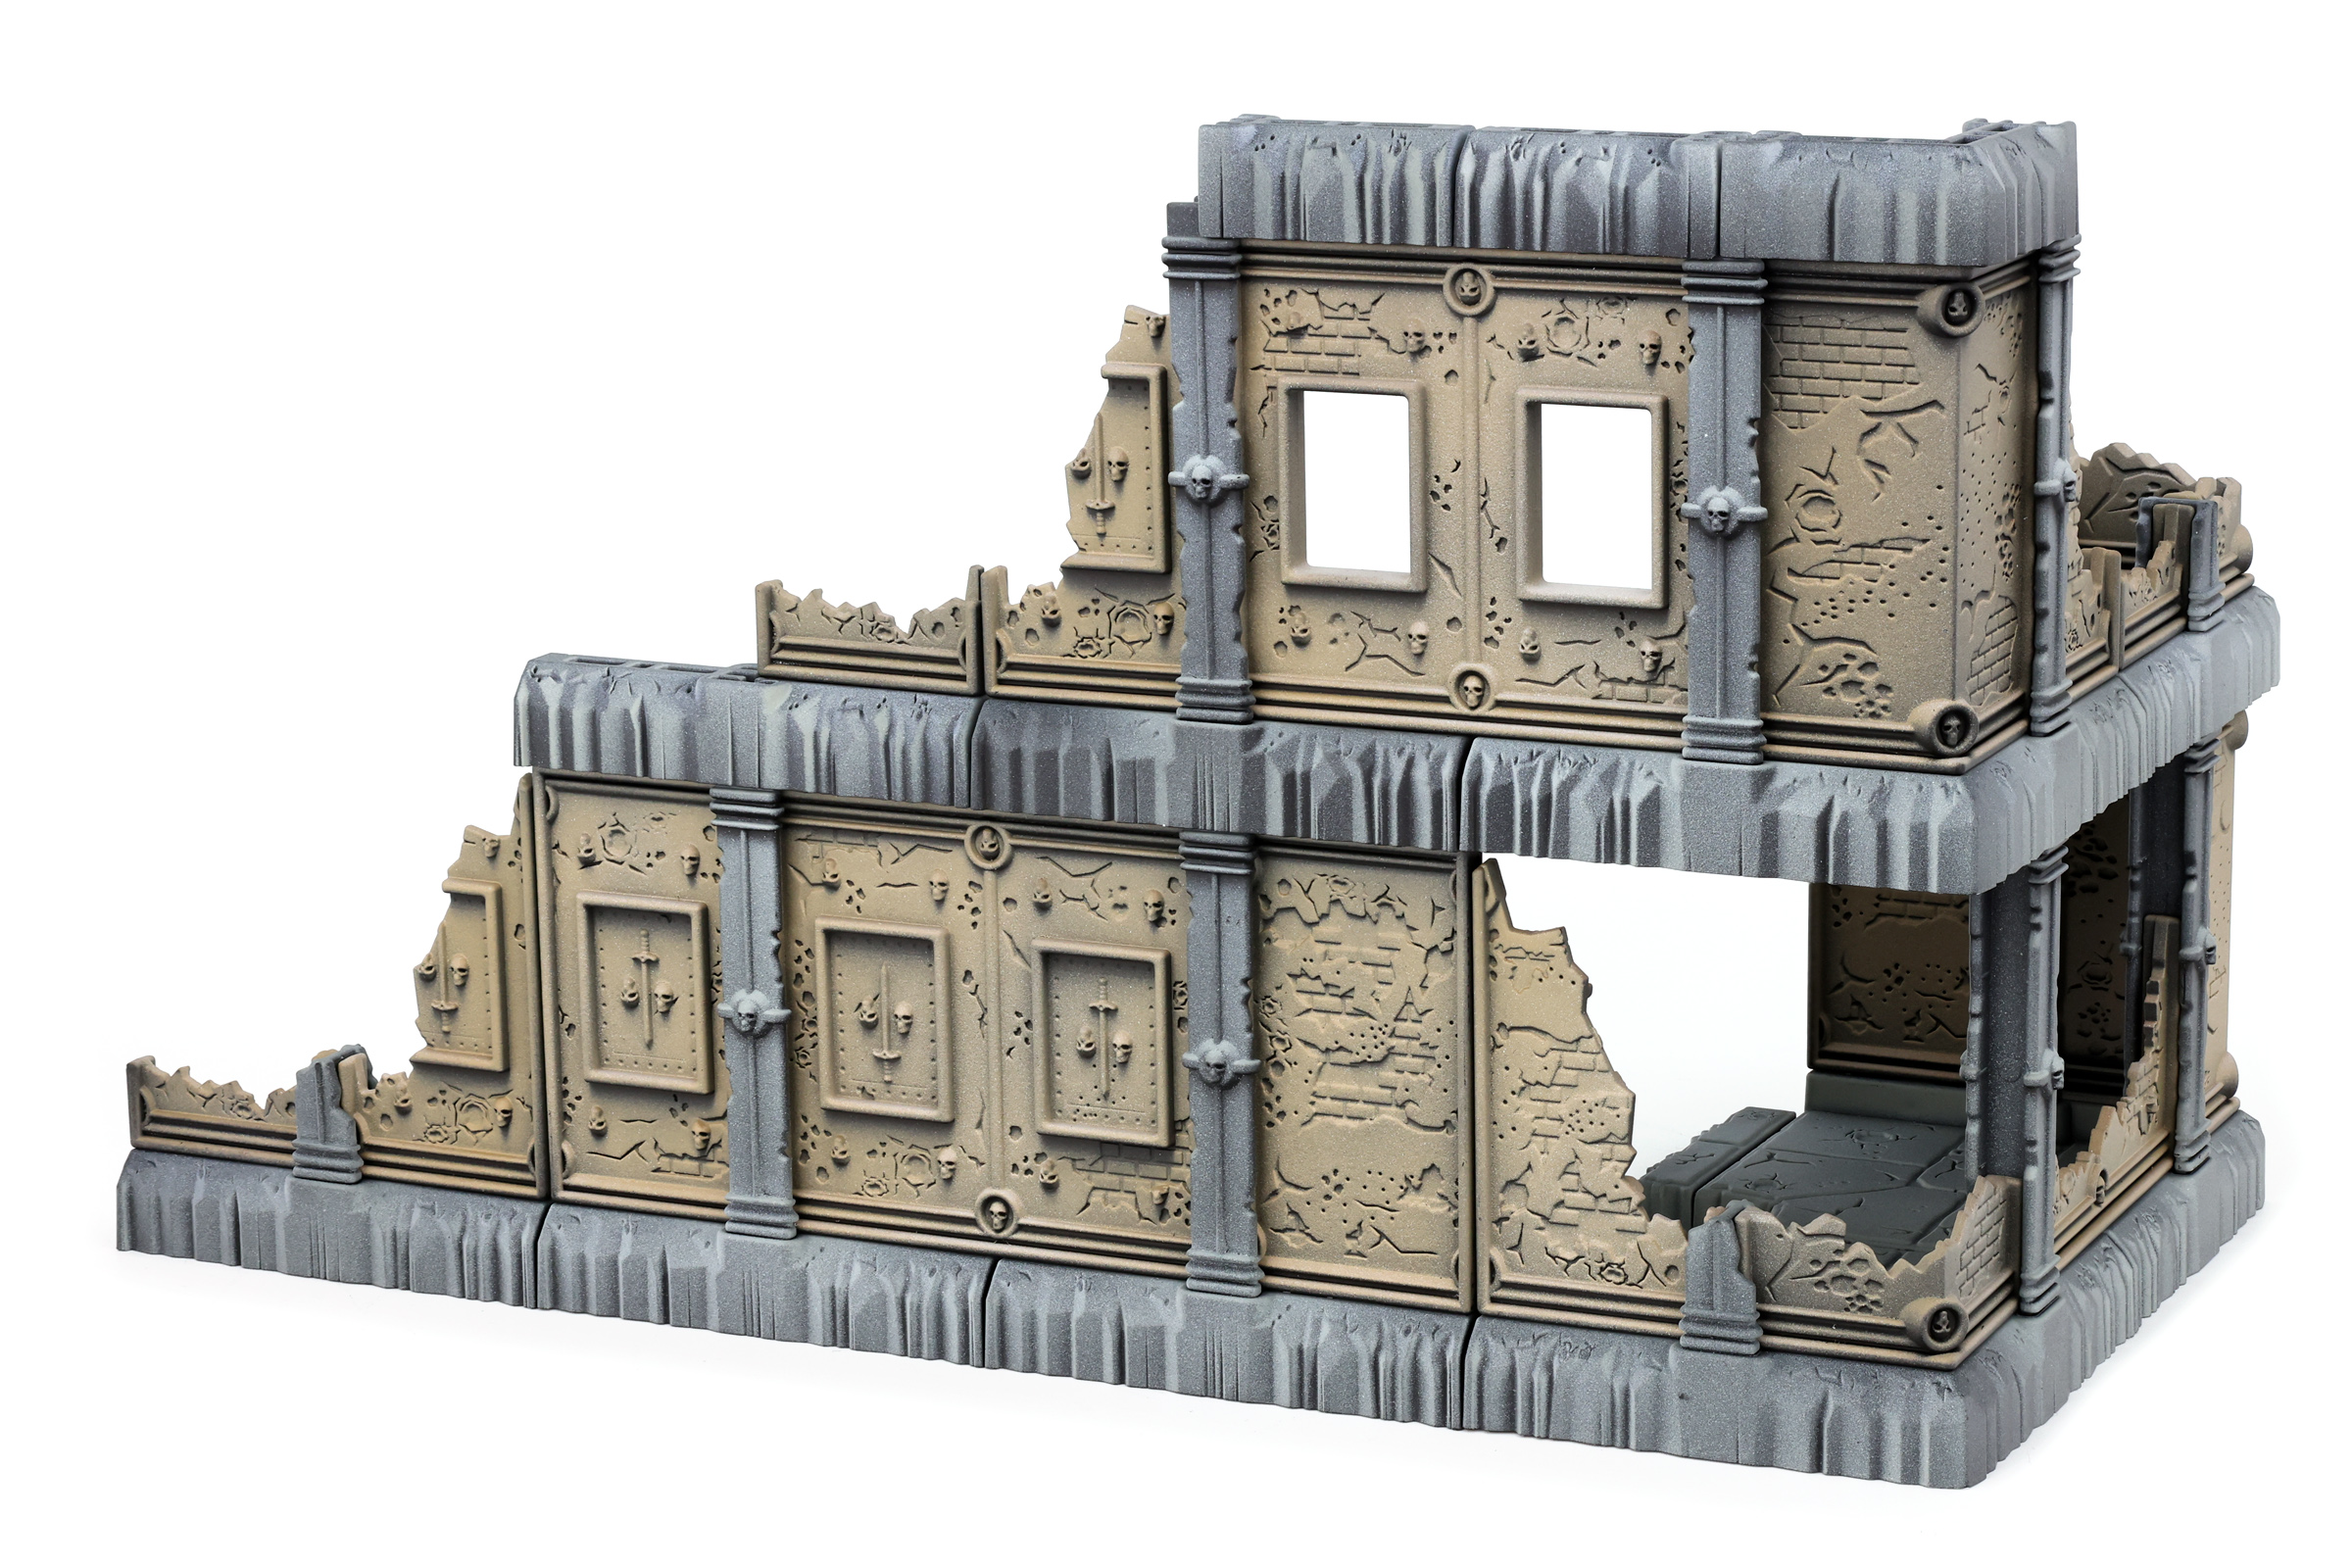
If you want the ruin to be 100% permanent, use a drop of plastic or superglue, and reassemble the ruin.
Step 5: Details
You don’t need to do a lot here. Just pick out some details and put some color on them. I painted all the skulls with Vallejo Game Color: Bone White, the swords with Vallejo Metal Color: Steel, and the wooden shutters with Games Workshop: Snakebite Leather.
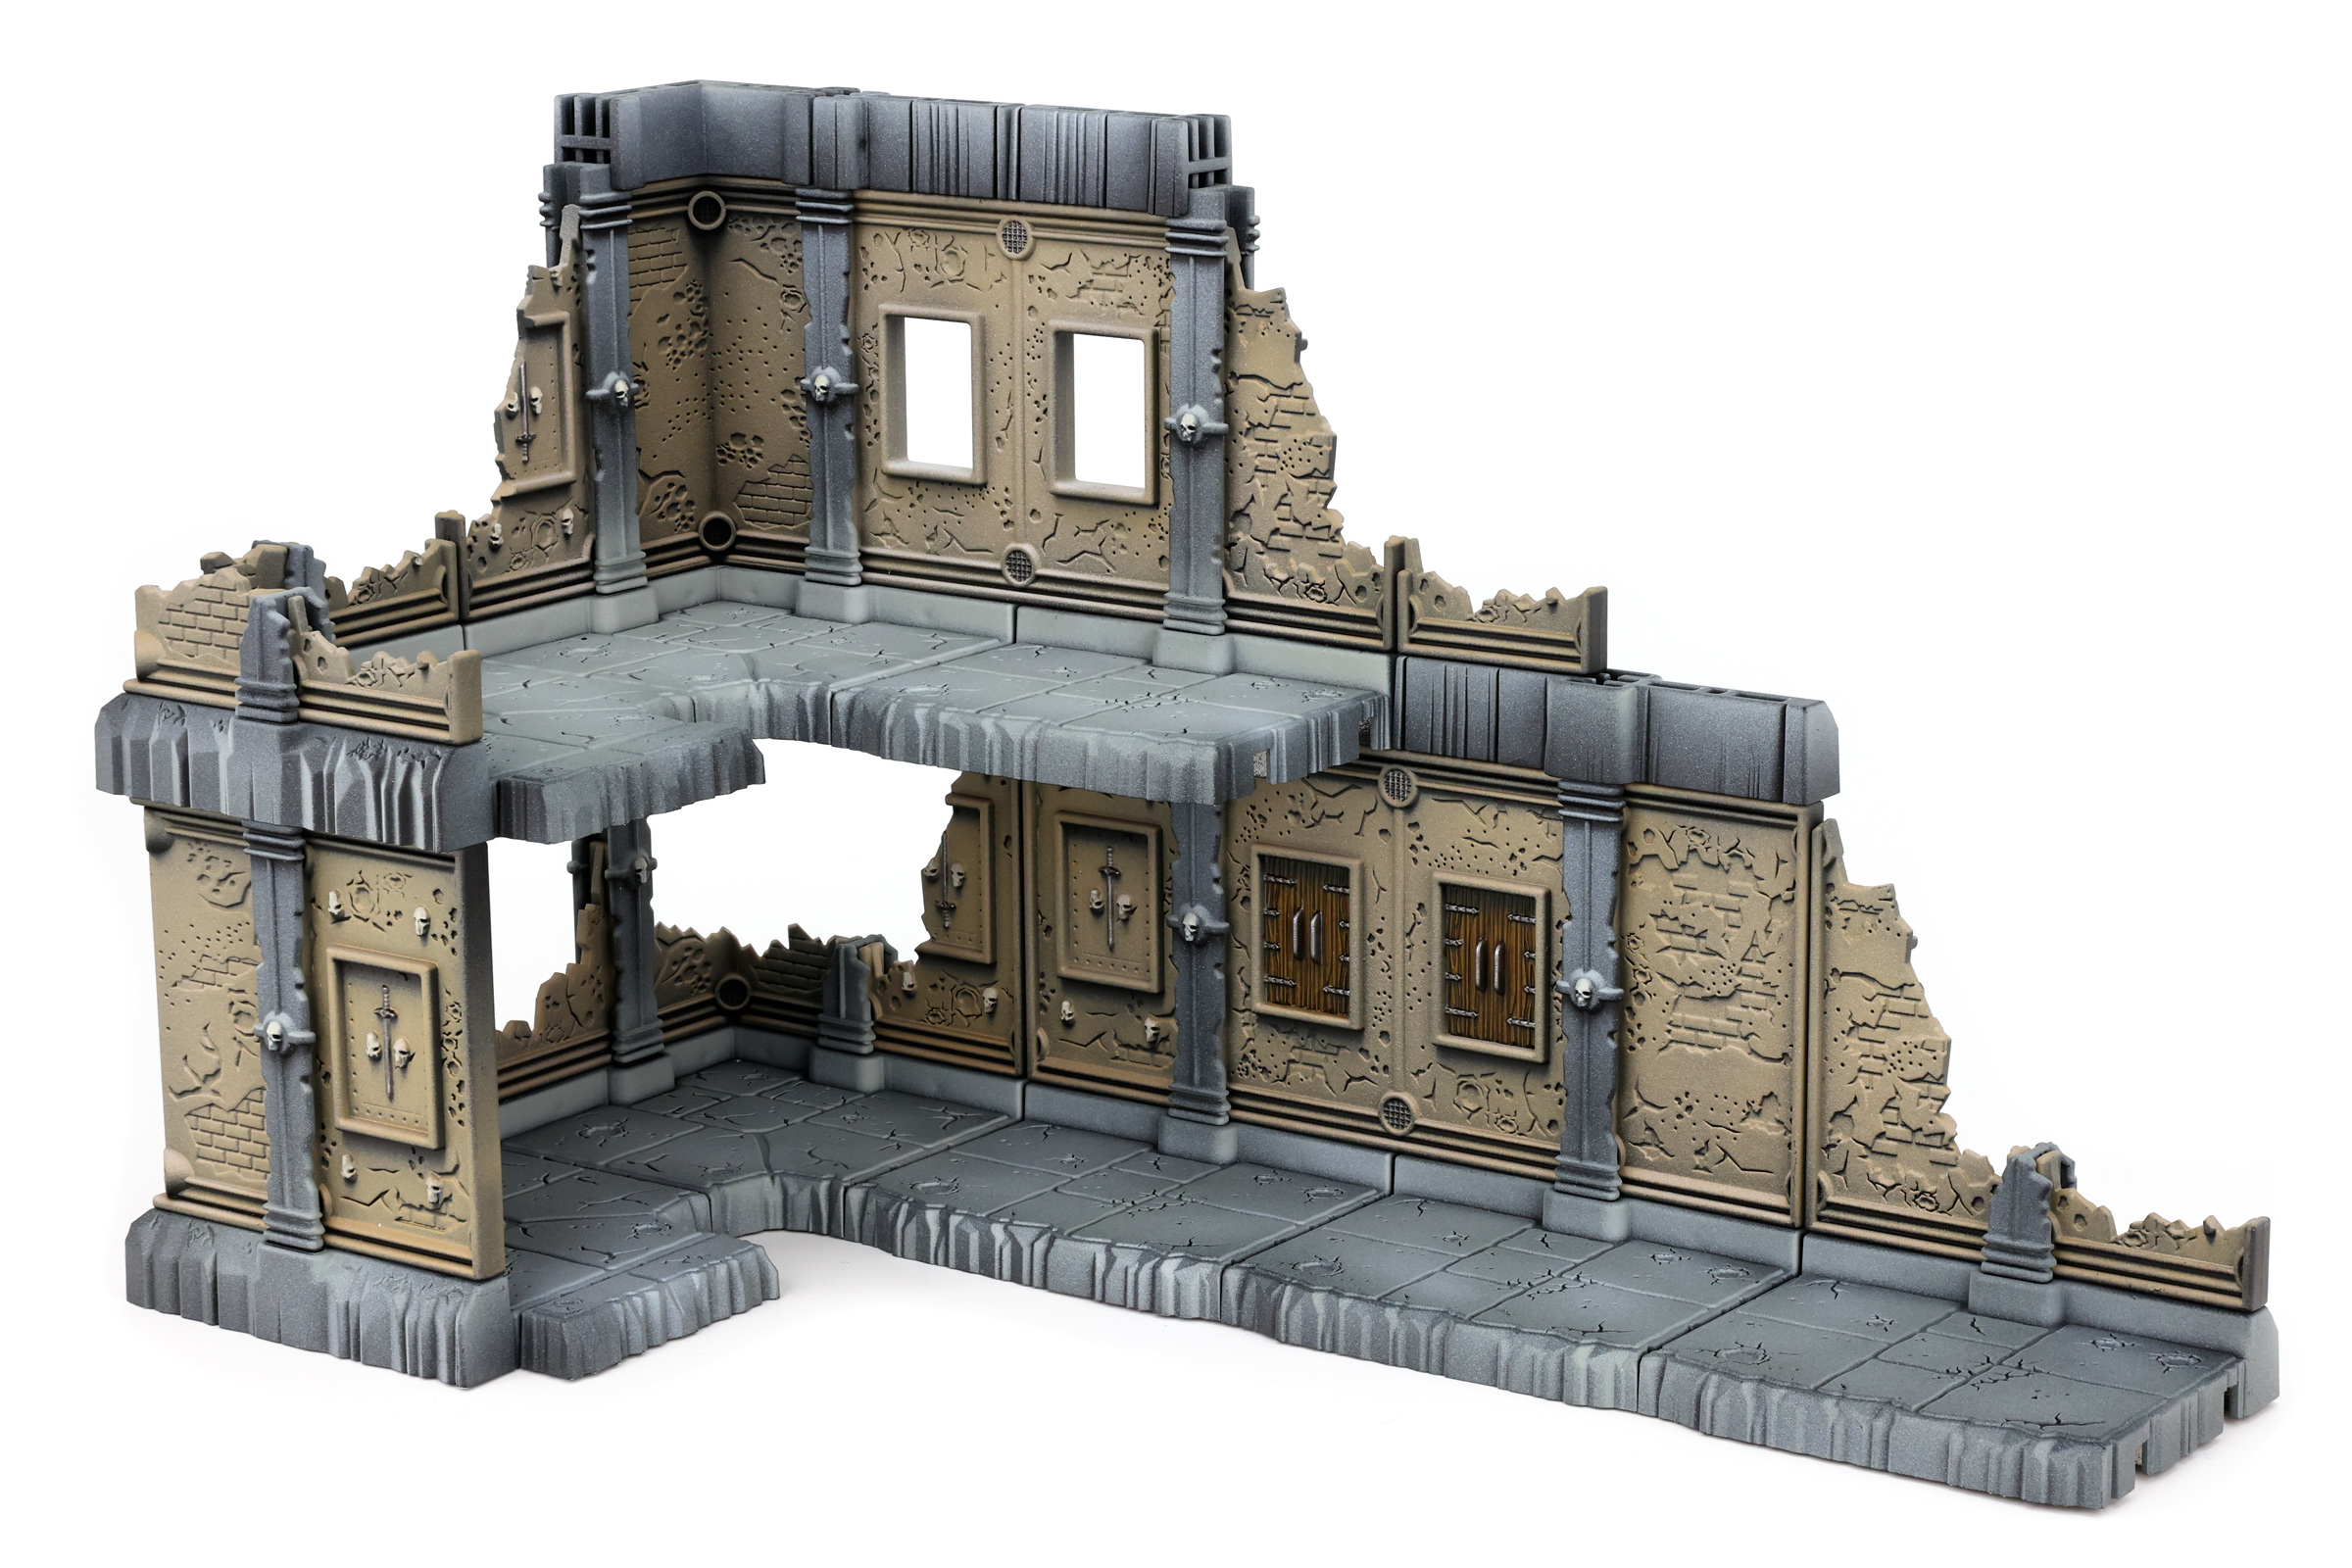
For the skulls, I tried to emulate a “zenithal brushing”. That is, I held the brush perpendicular to the wall, and only brushed straight down. Only areas that my brush hit go the Bone White color. This let some of the zenithal shadows remain intact, despite brushing over them.
Step 6: Streaking Grime
The staple of getting things to look gross without a lot of work, I covered the whole ruin in AK Interactive: Streaking Grime. I did this by painting about 1/4 of the ruin with Streaking Grime, then going back through with a makeup sponge and wiping it away, top-to-bottom. I didn’t really mess with using any mineral spirits, just disposable makeup sponges.
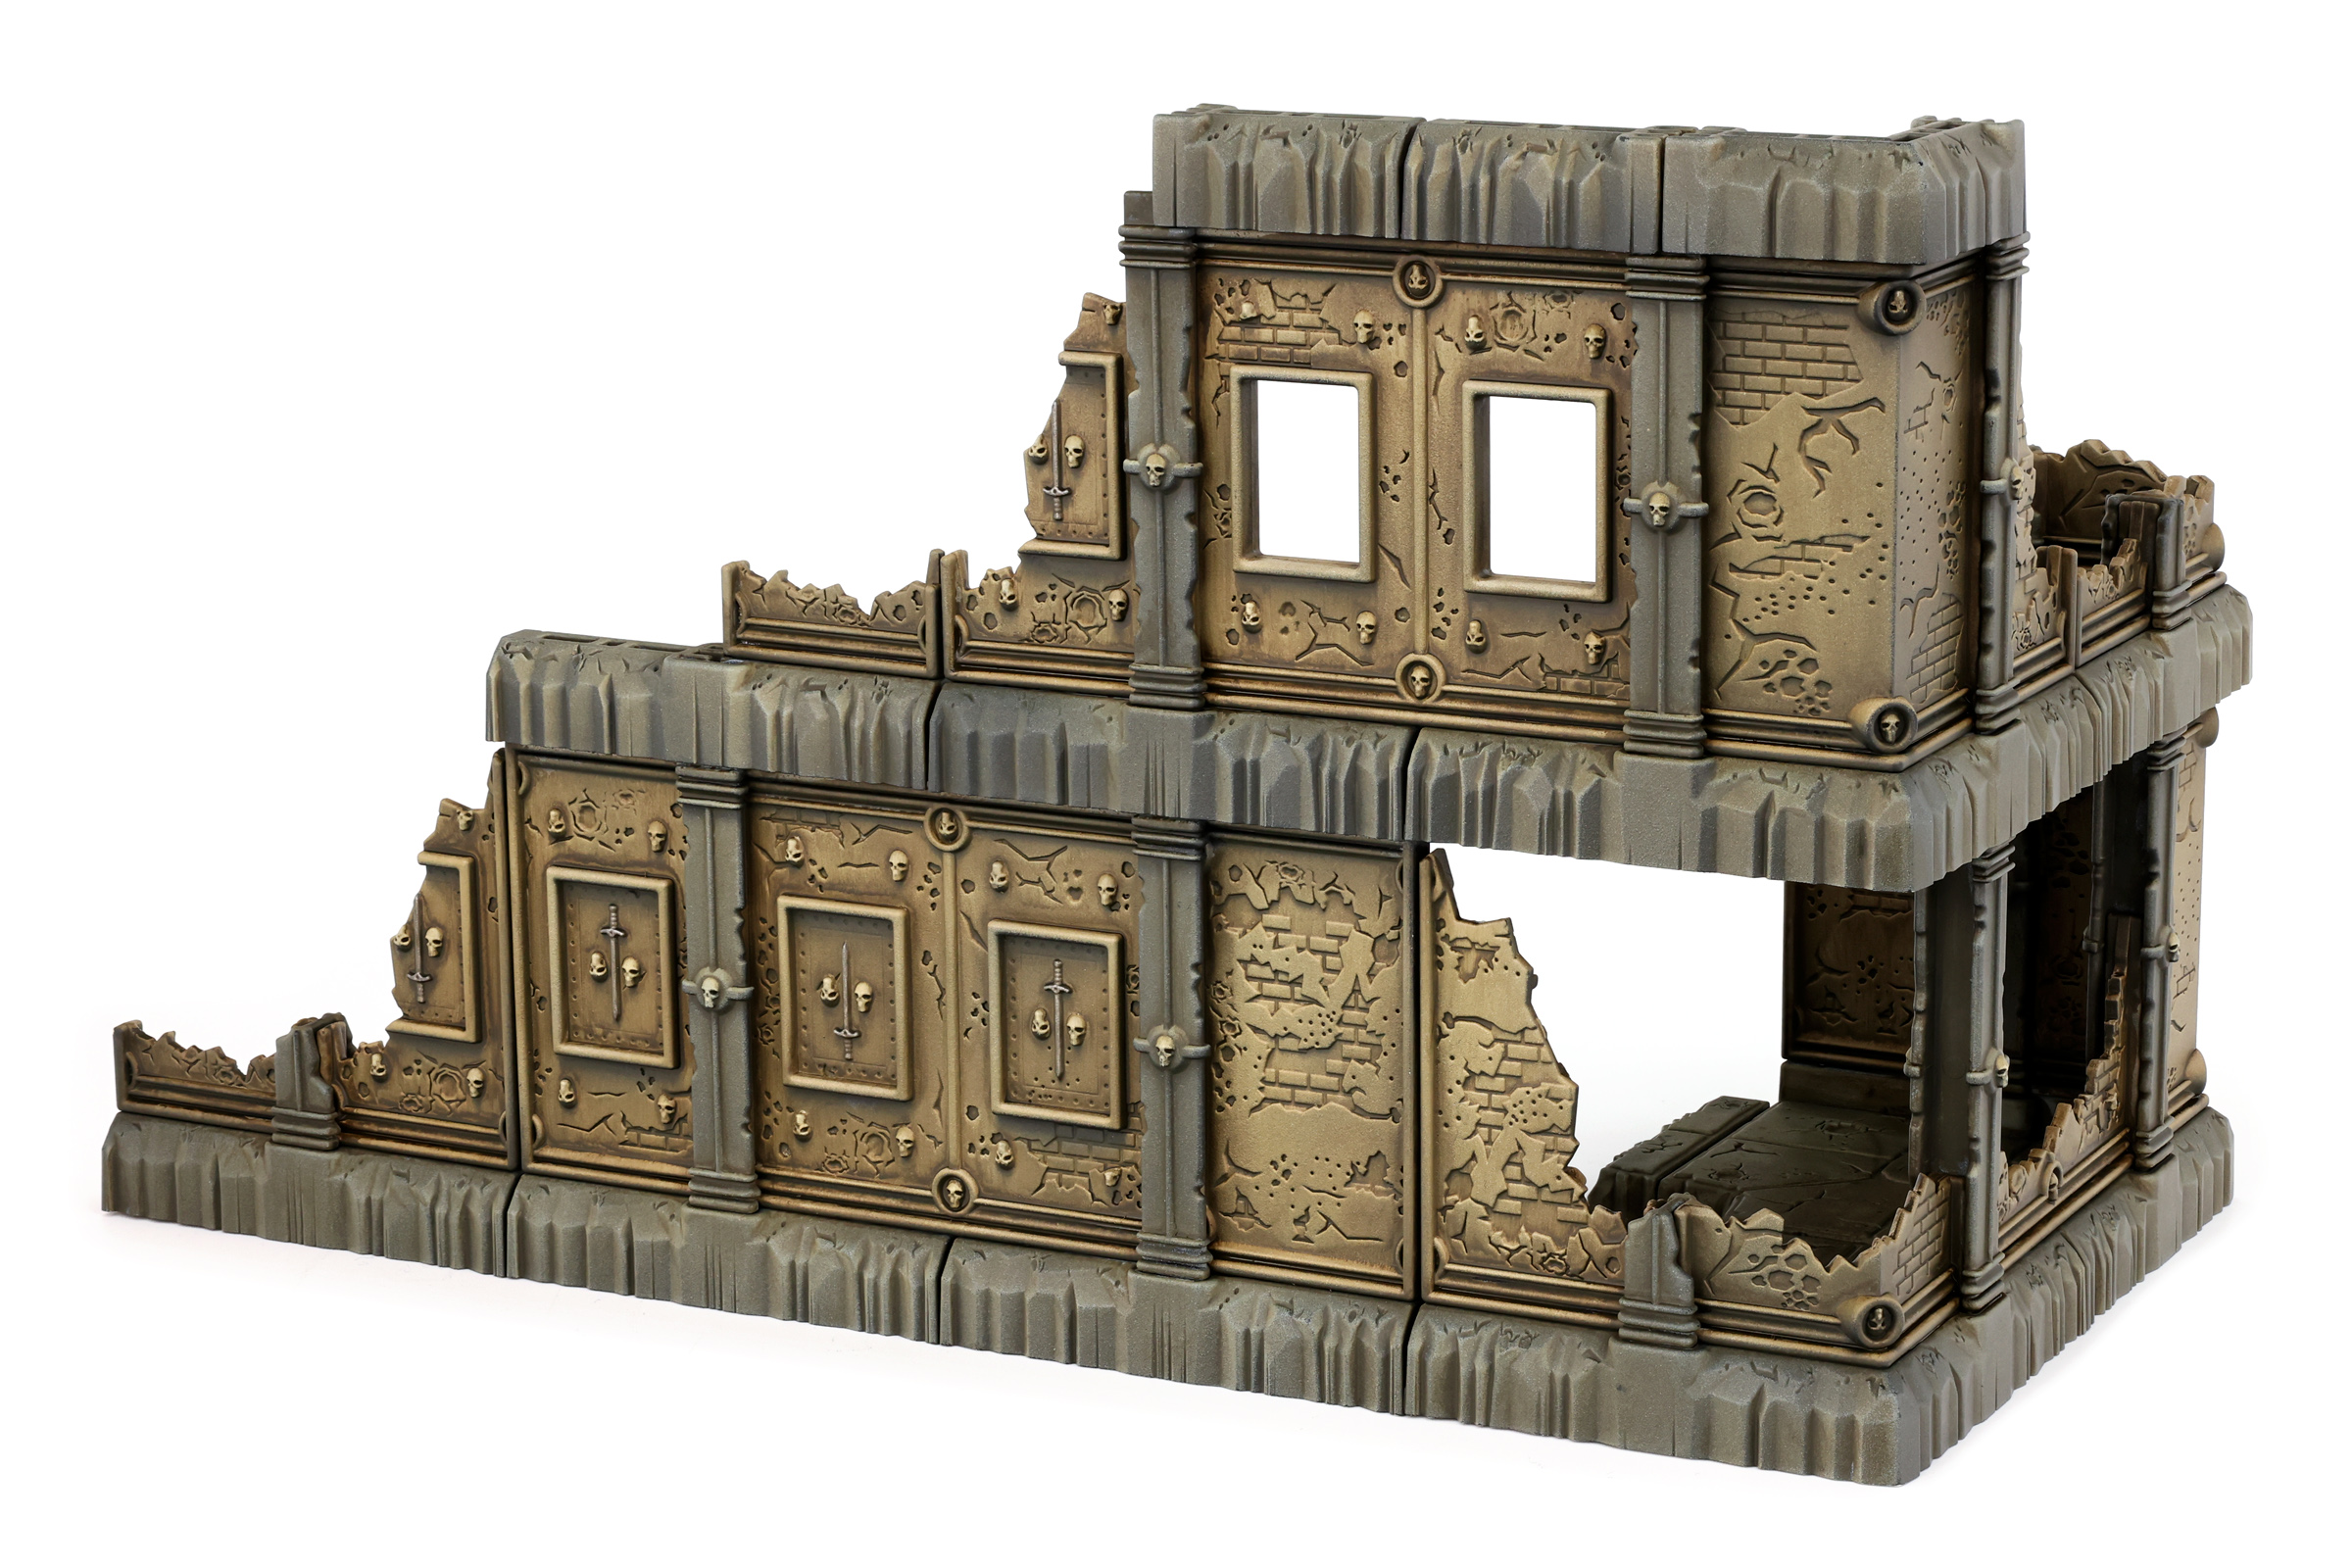
You instantly get a gross, grimy, uneven look without a lot of work. This did burn through about 1/4 of a bottle of Streaking Grime, so if you’re building an entire table like this, you might need 2 or 3 bottles.
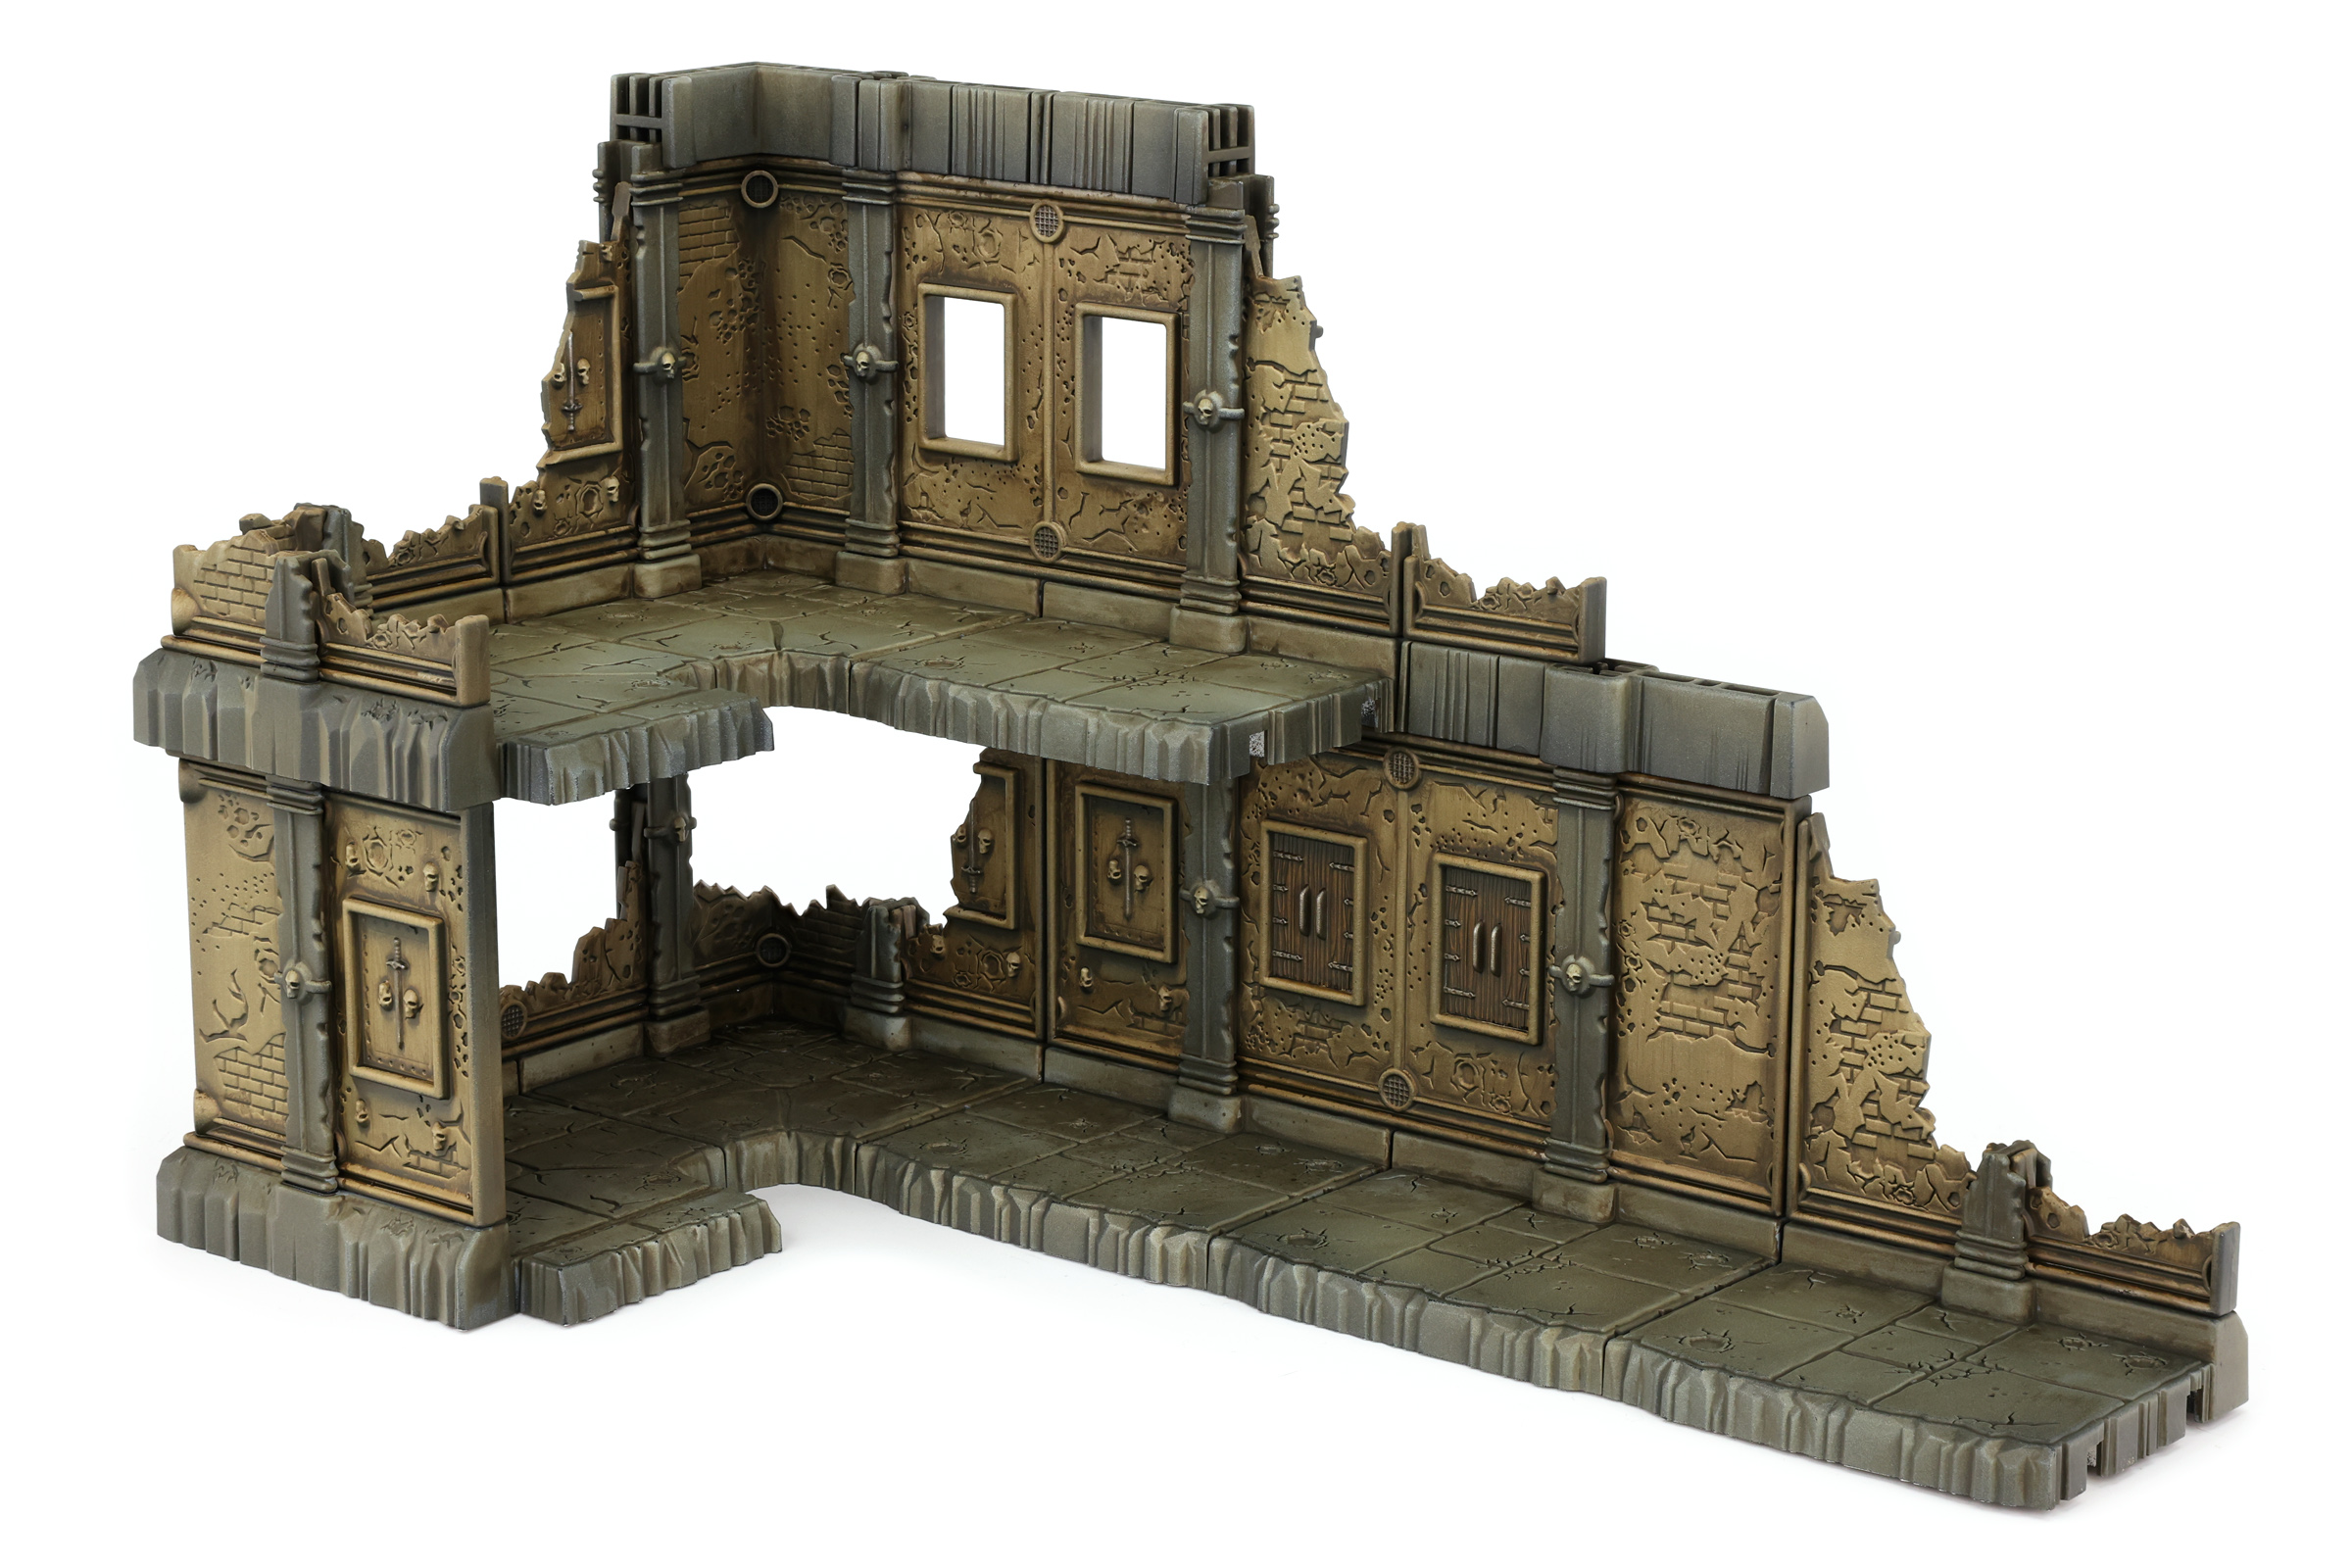
Step 7: Corrosion
This step takes a while. But it’s so, so worth it. Take you time, put on a good audiobook or podcast, get yourself some Vallejo Game Color Special FX: Corrosion, and paint it into every crack, bullet hole, and pockmark. Given that it has a deep reddish brown color, I also used Corrosion to paint all the exposed bricks on the walls.
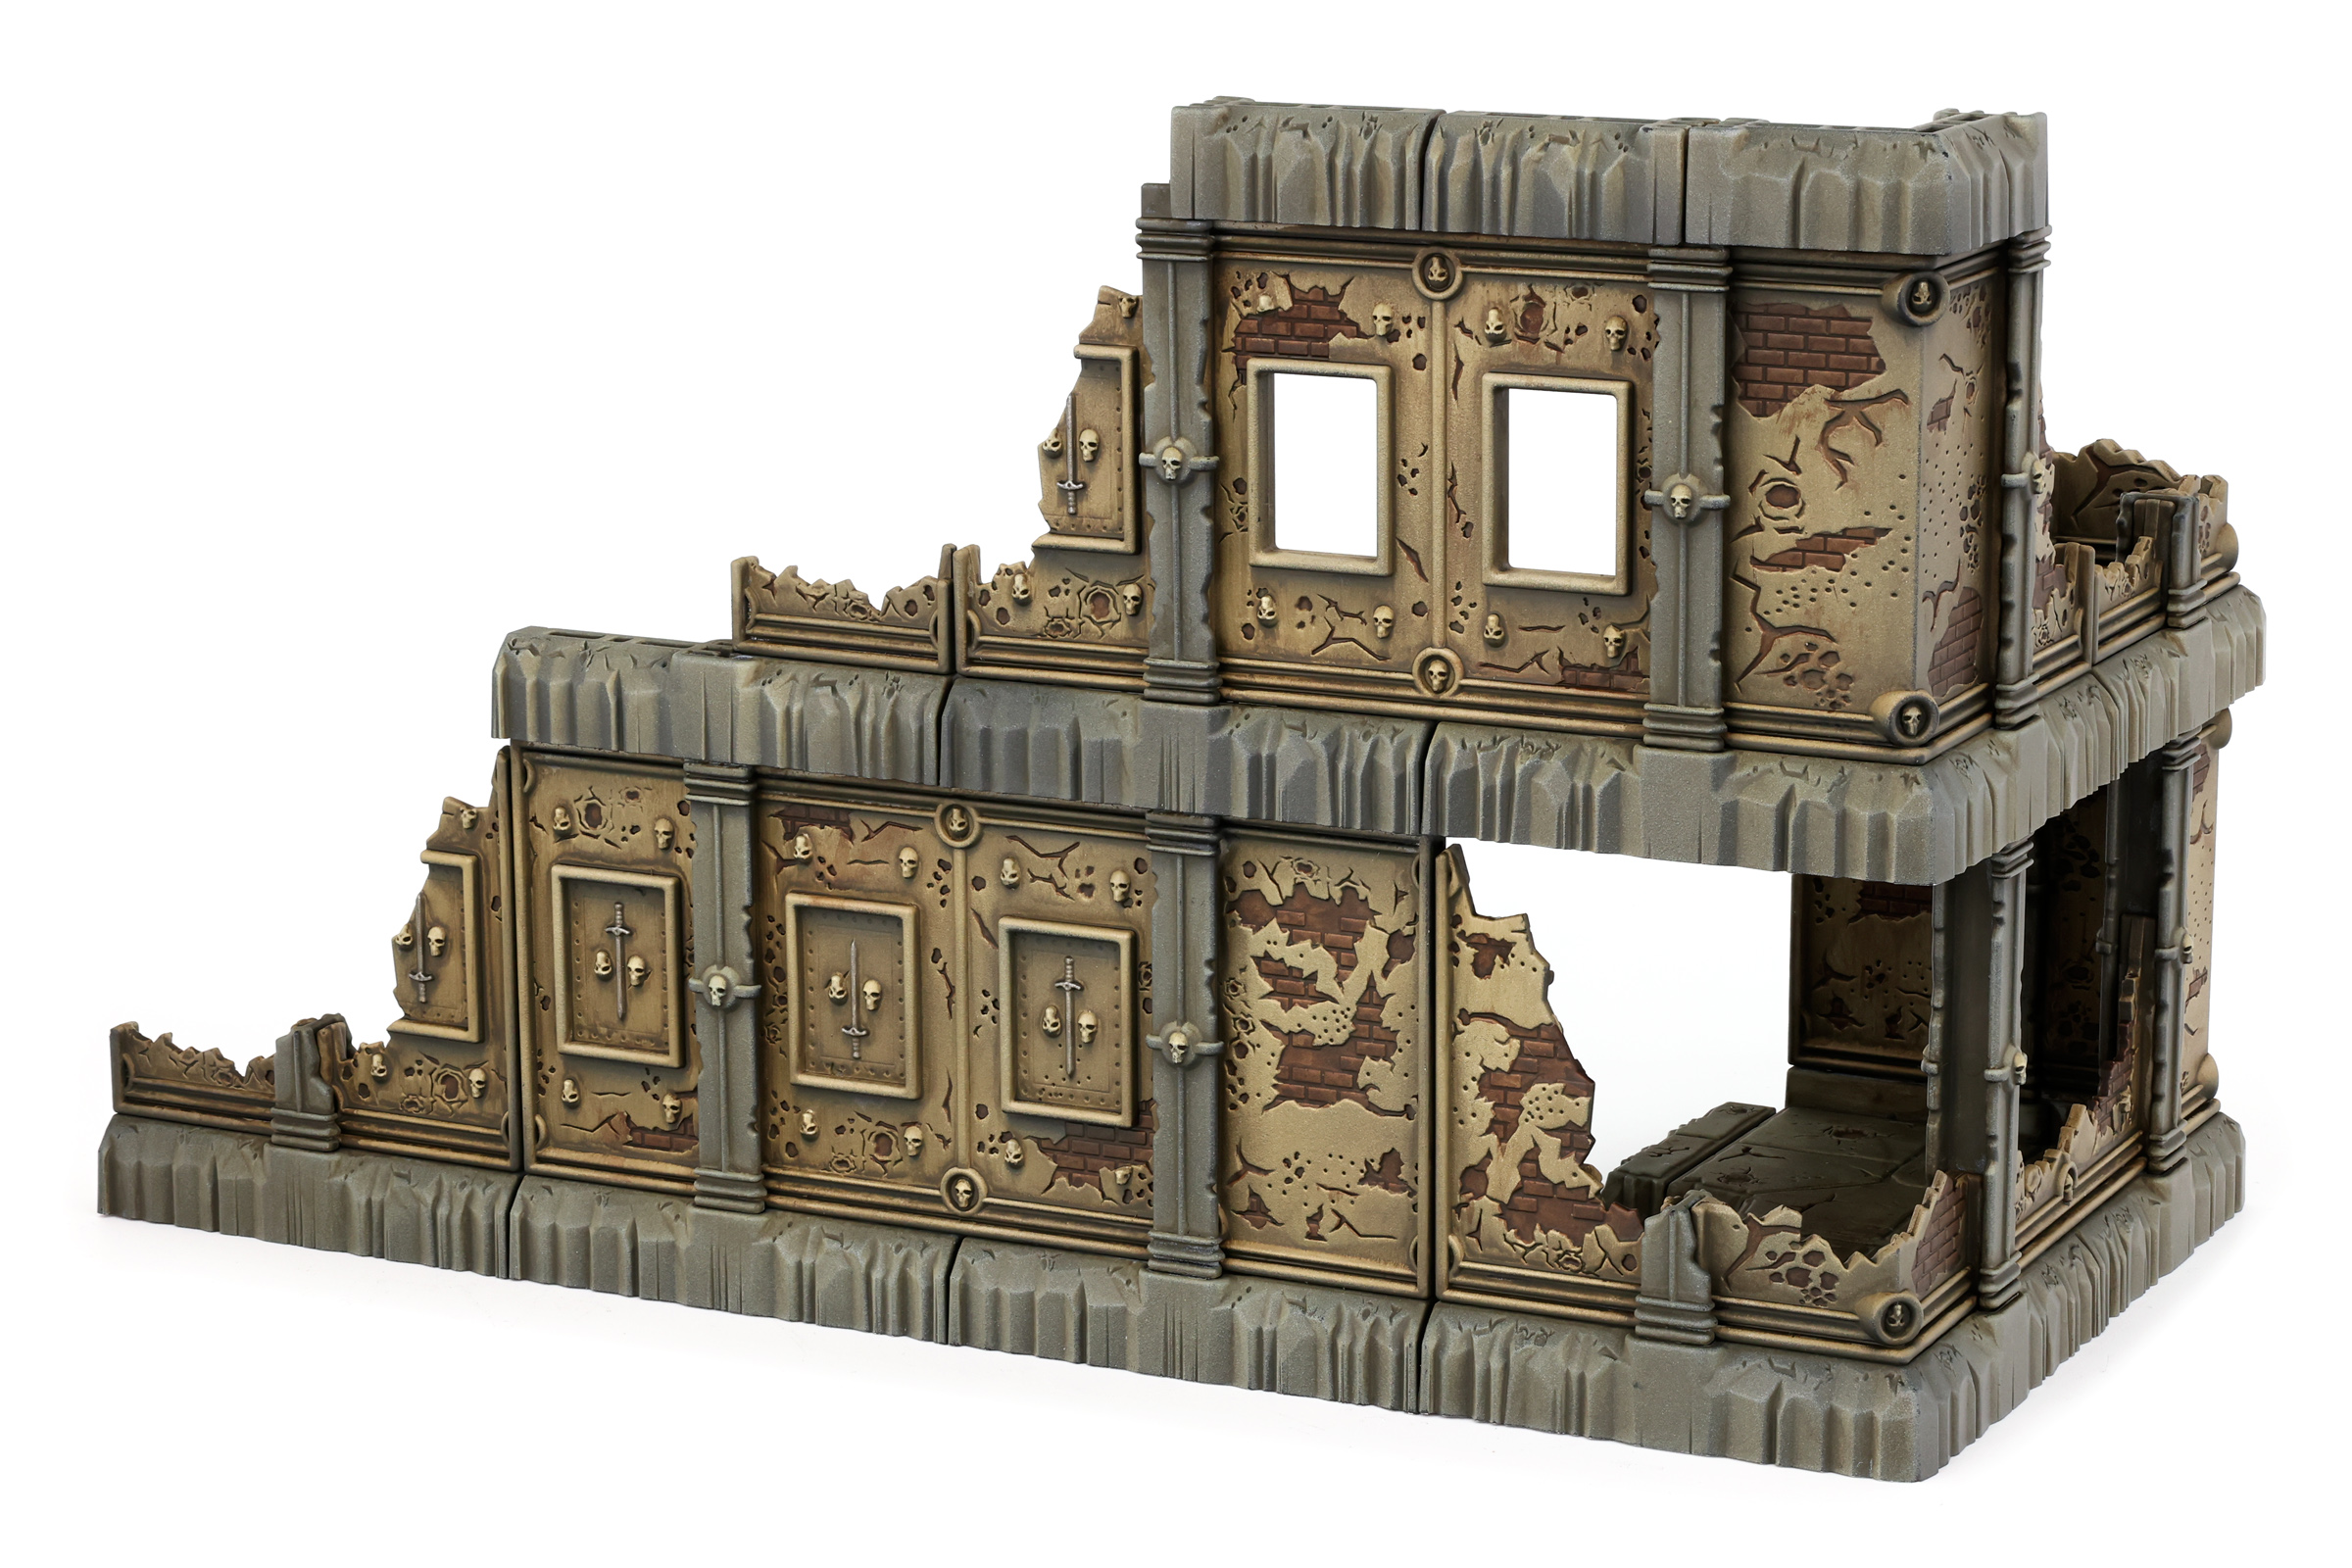
Do the same for the floors, but you only need to fill in the little craters.
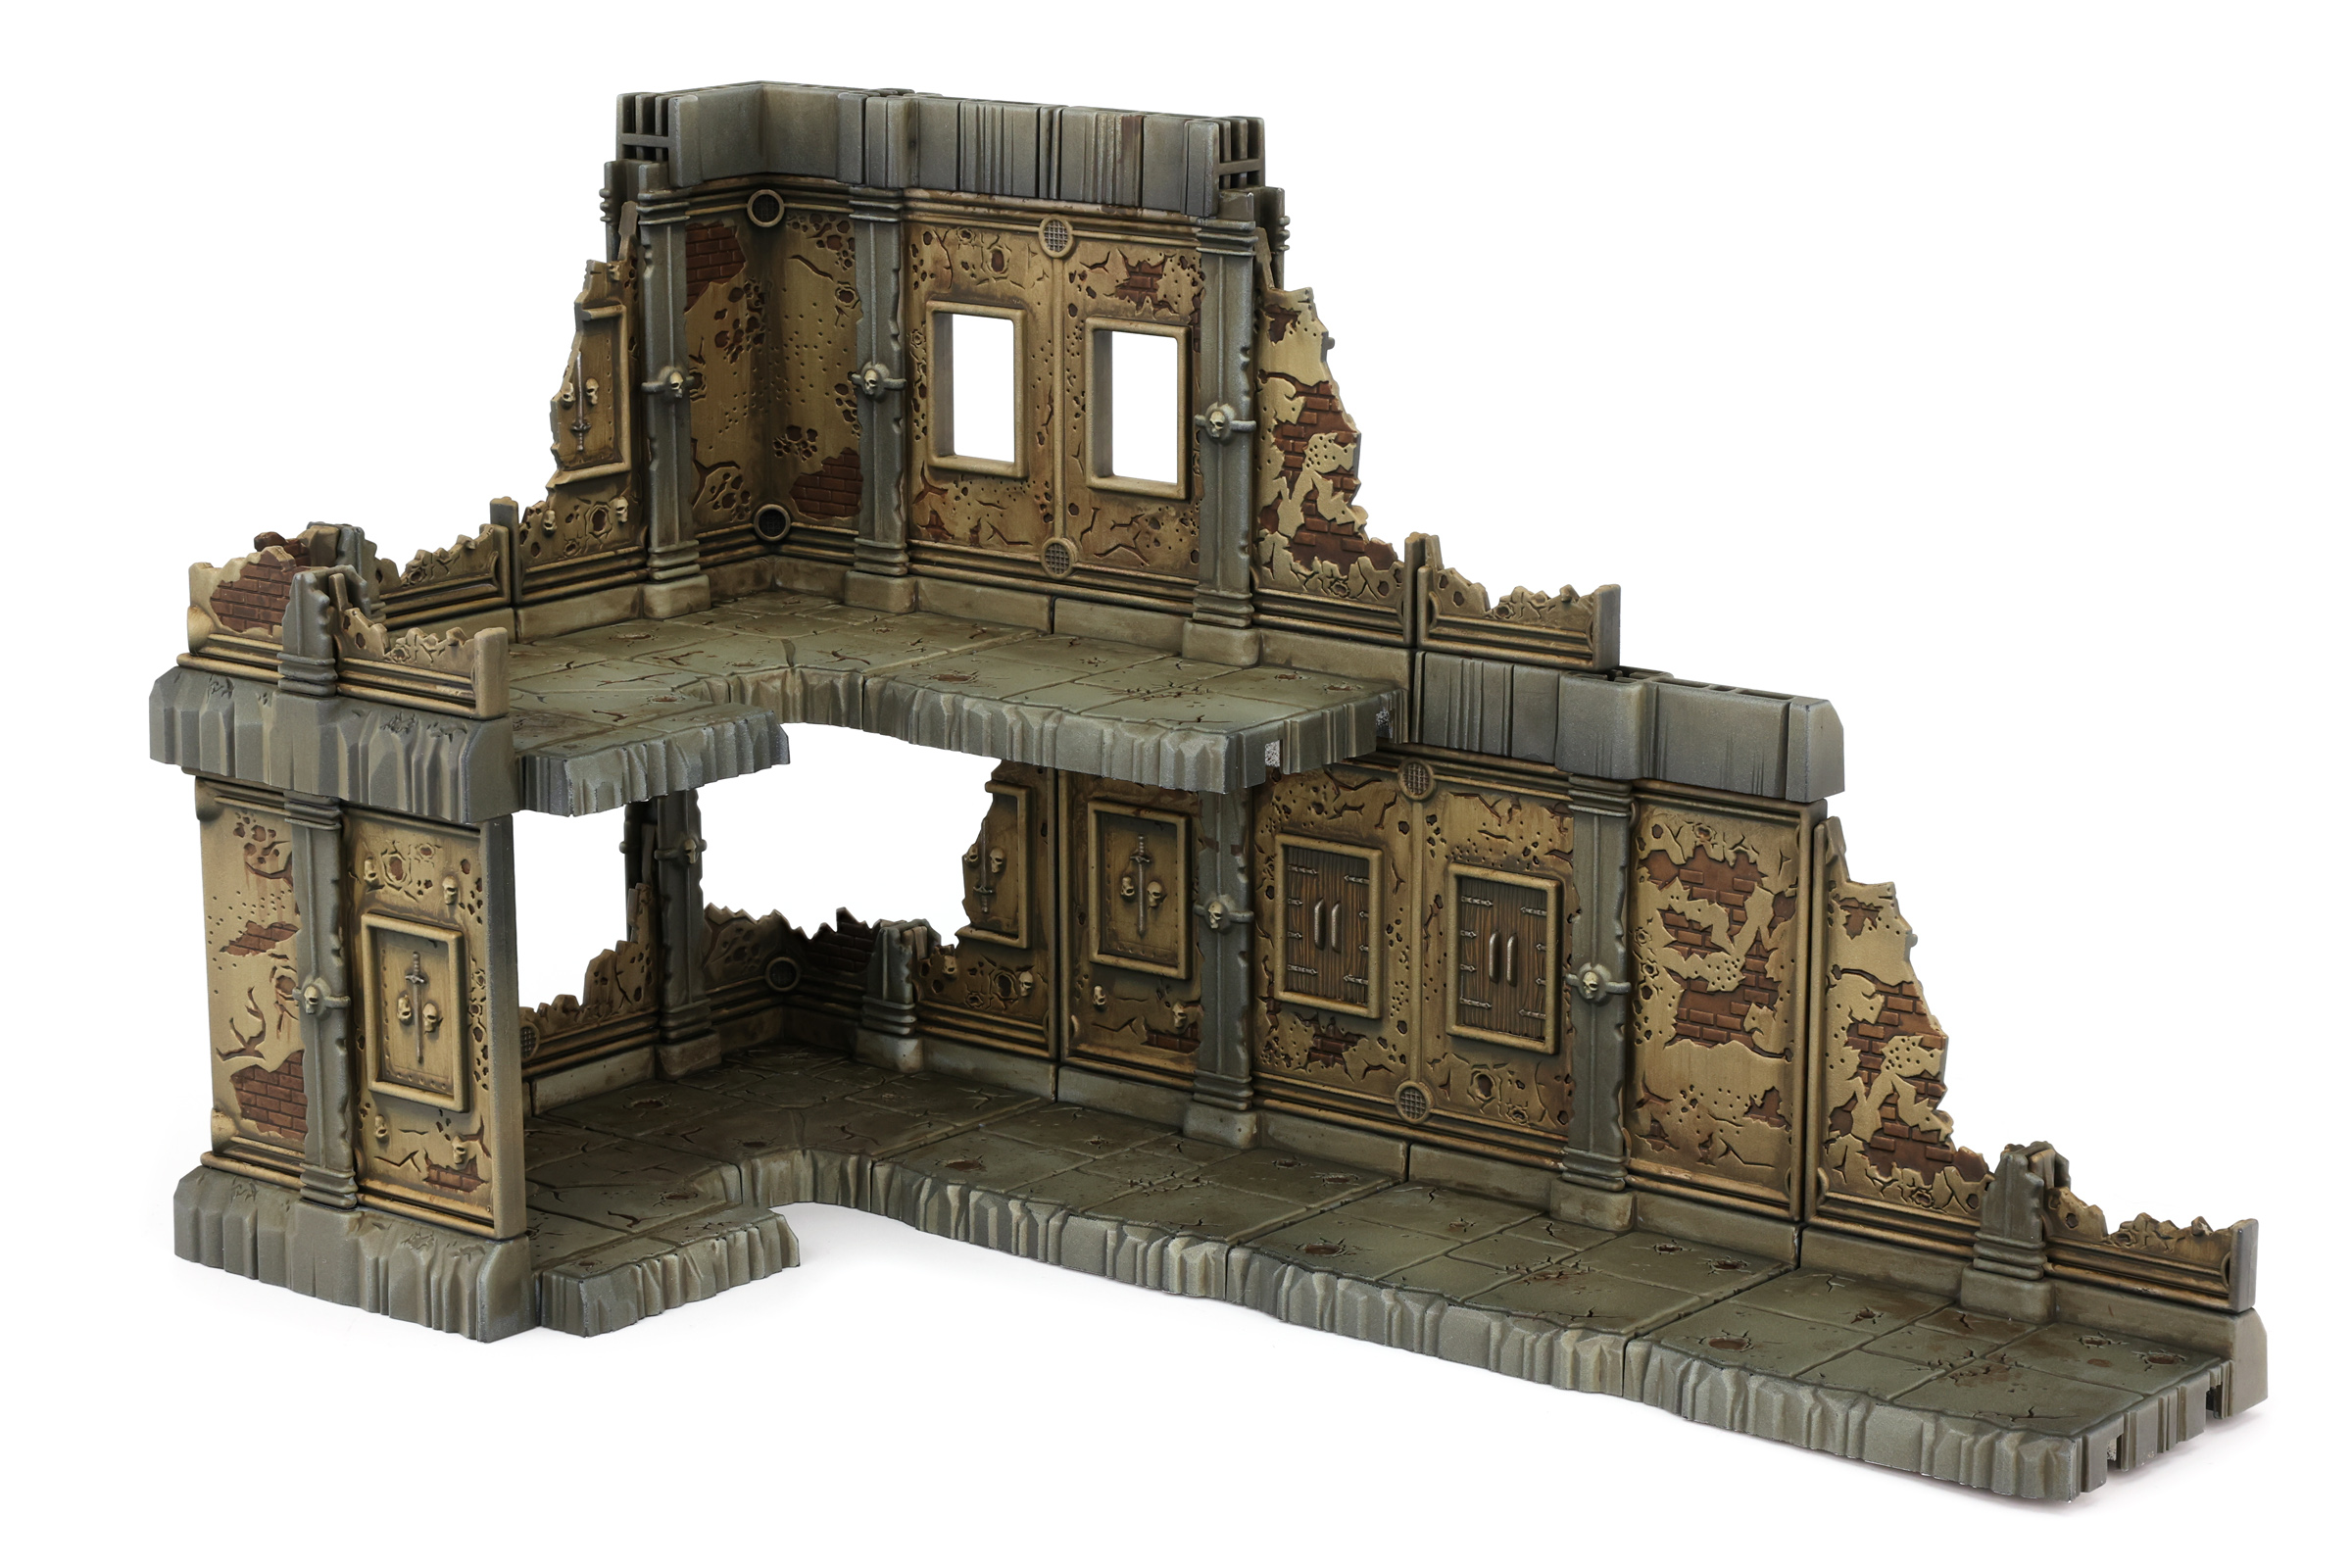
Almost done. In fact, just one step left.
Step 9: Airbrush Burnt Umber Ink
Back to the airbrush, this time with some Daler-Rowney FW: Burnt Umber Ink. Similar to airbrushing White Grey earlier, go very light with this. It’s rather strong. Airbrush a small amount in areas that soot would collect: notably where the floors meet the walls.
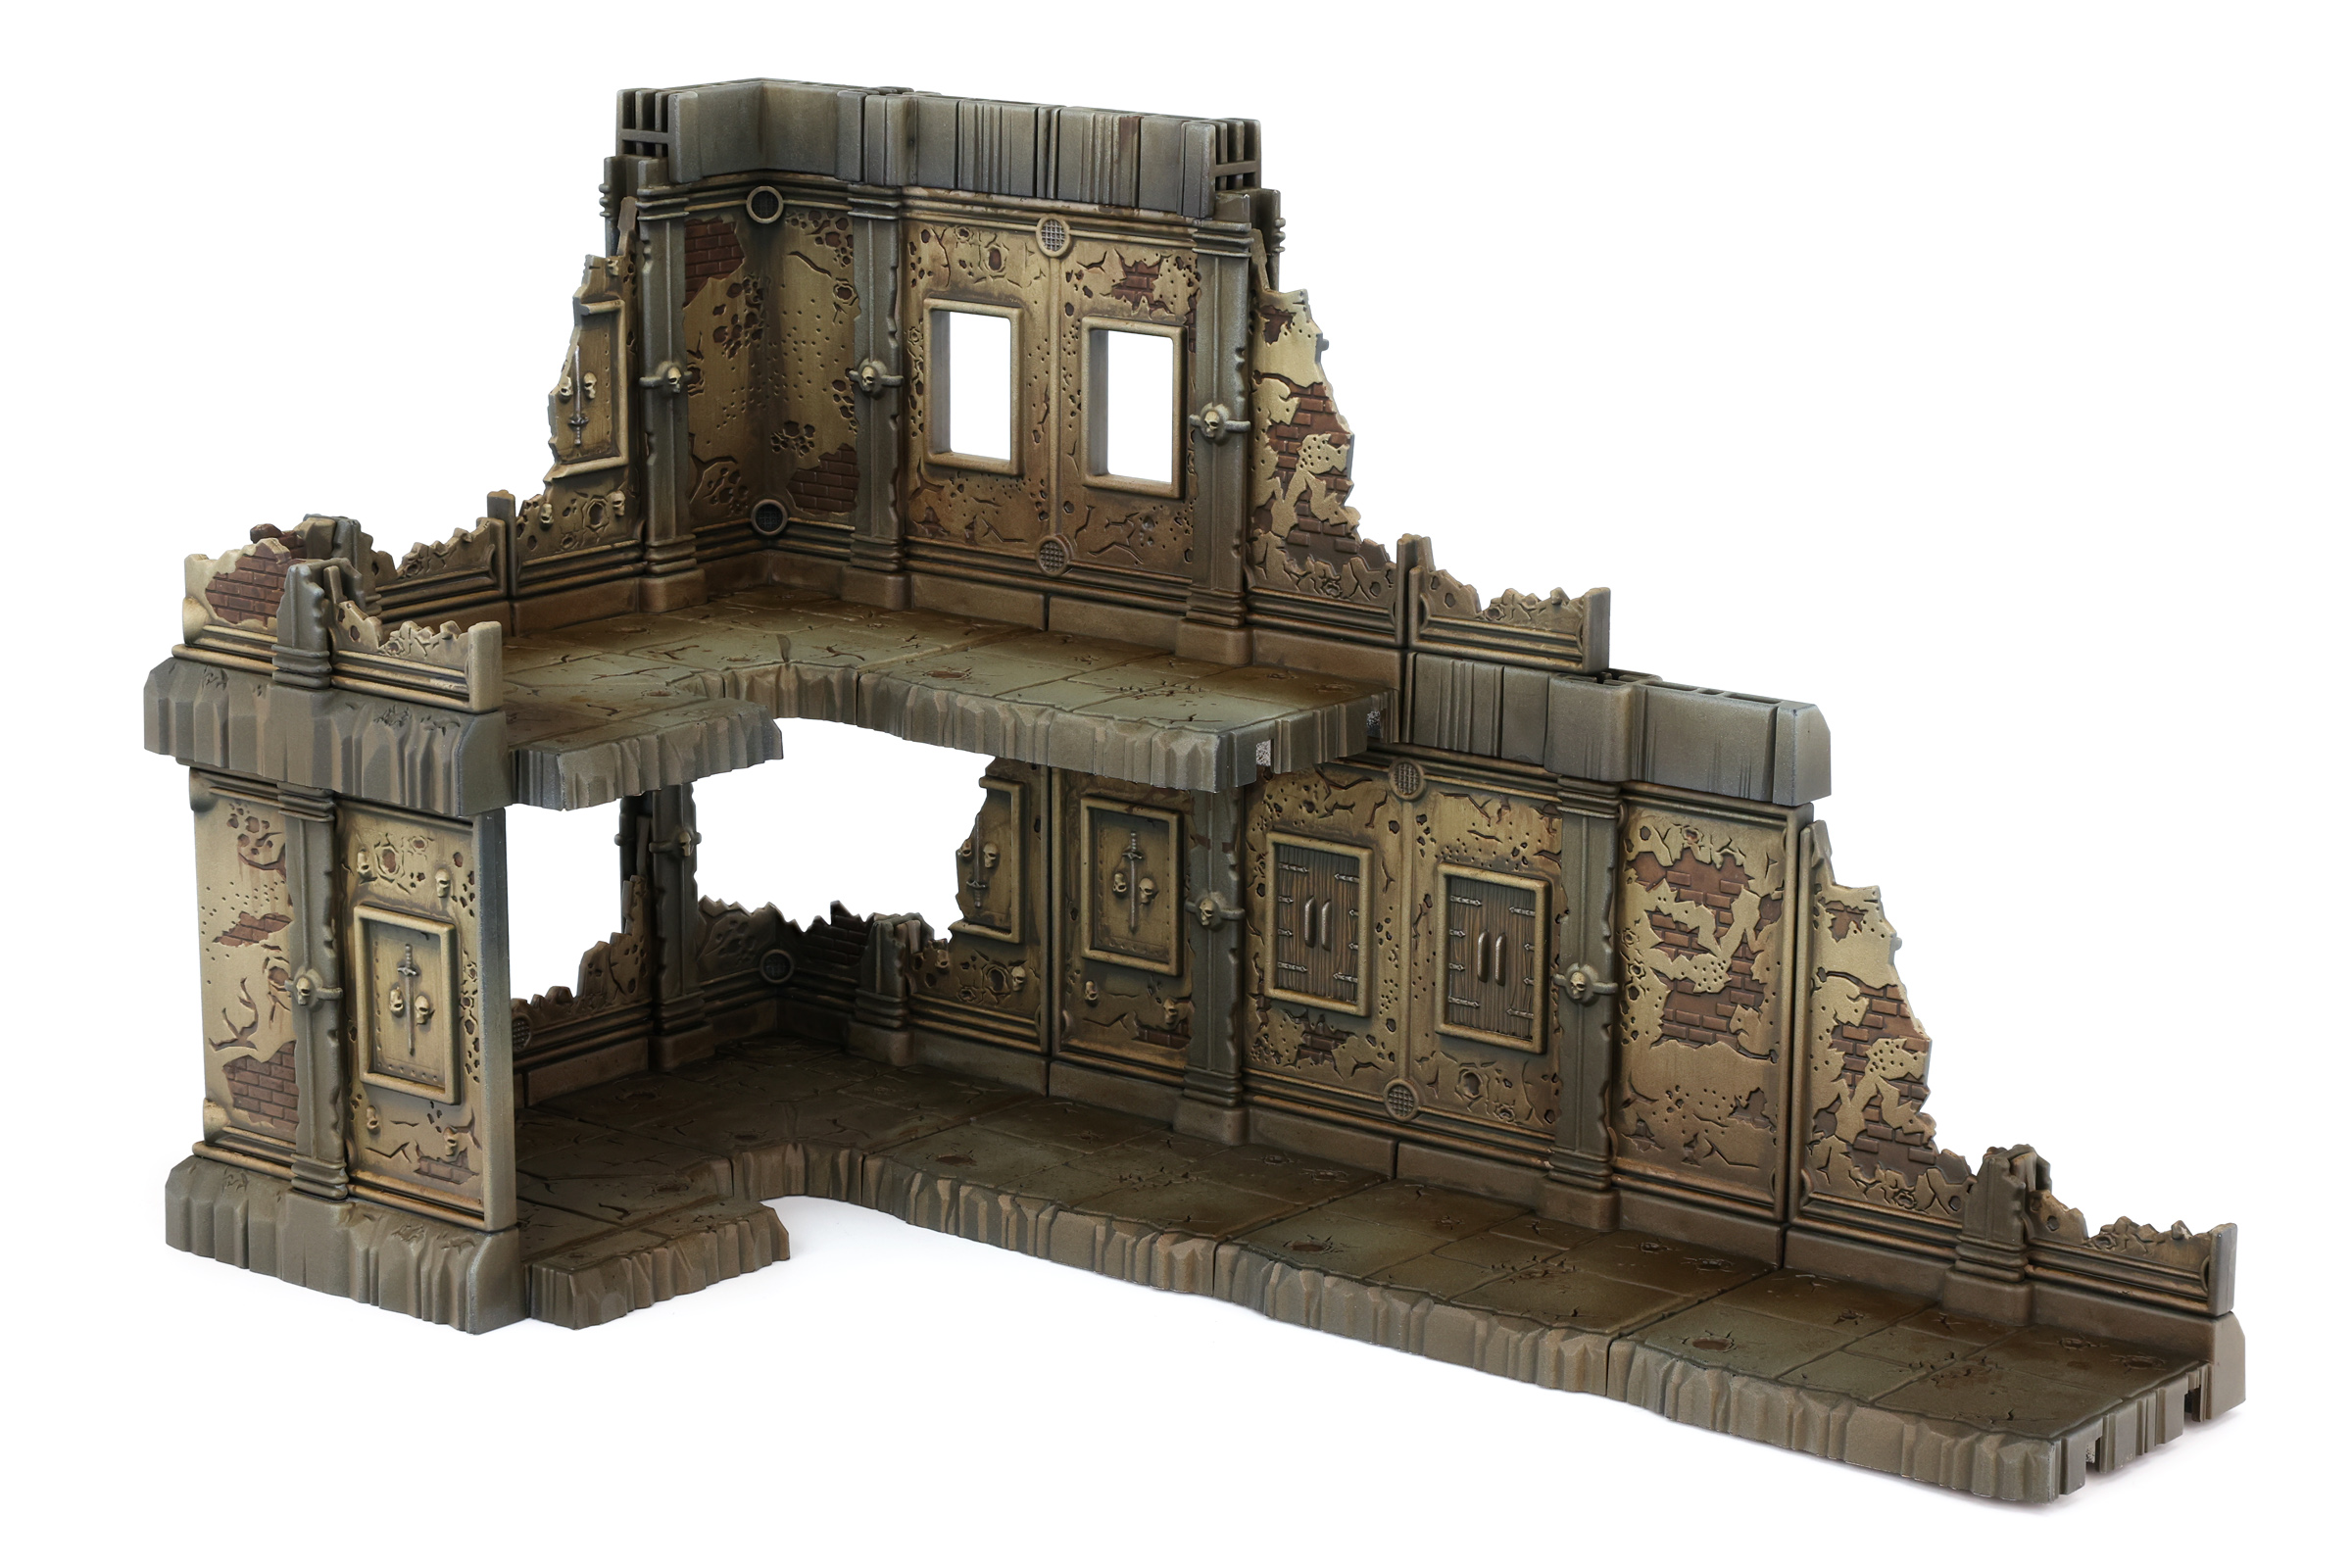
It’s a subtle effect, but it gives everything a nice, natural looking gradient. Plus, if you have other terrain, even painted in another style, a light airbrush of Burnt Umber on both will tie them together.
And if you’ve made a mistake at any point (which I absolutely did with some errant brush strokes), you can use the burnt umber ink to blot out those mistakes and turn them into happy accidents.

Step 10: Varnish with Testors: Dullcote Spray Lacquer
I’ve tried a million different varnishes. Rattle can, airbrush, brush on, acrylic, enamel, you name it. The only one I’ve had 100% consistently perfect results with is rattle can Testors: Dullcote Spray Lacquer. I was a bit afraid of the new packaging (which just says “Spray Lacquer and doesn’t actually say “Dullcote” as far as I can tell), but it’s still 100% perfect.
Hit the terrain with a layer of Dullcote to protect from scuffs and scratches, let it cure overnight, and you’re done! A grimy, weathered ruin, ready for the battlefield!
DYLON
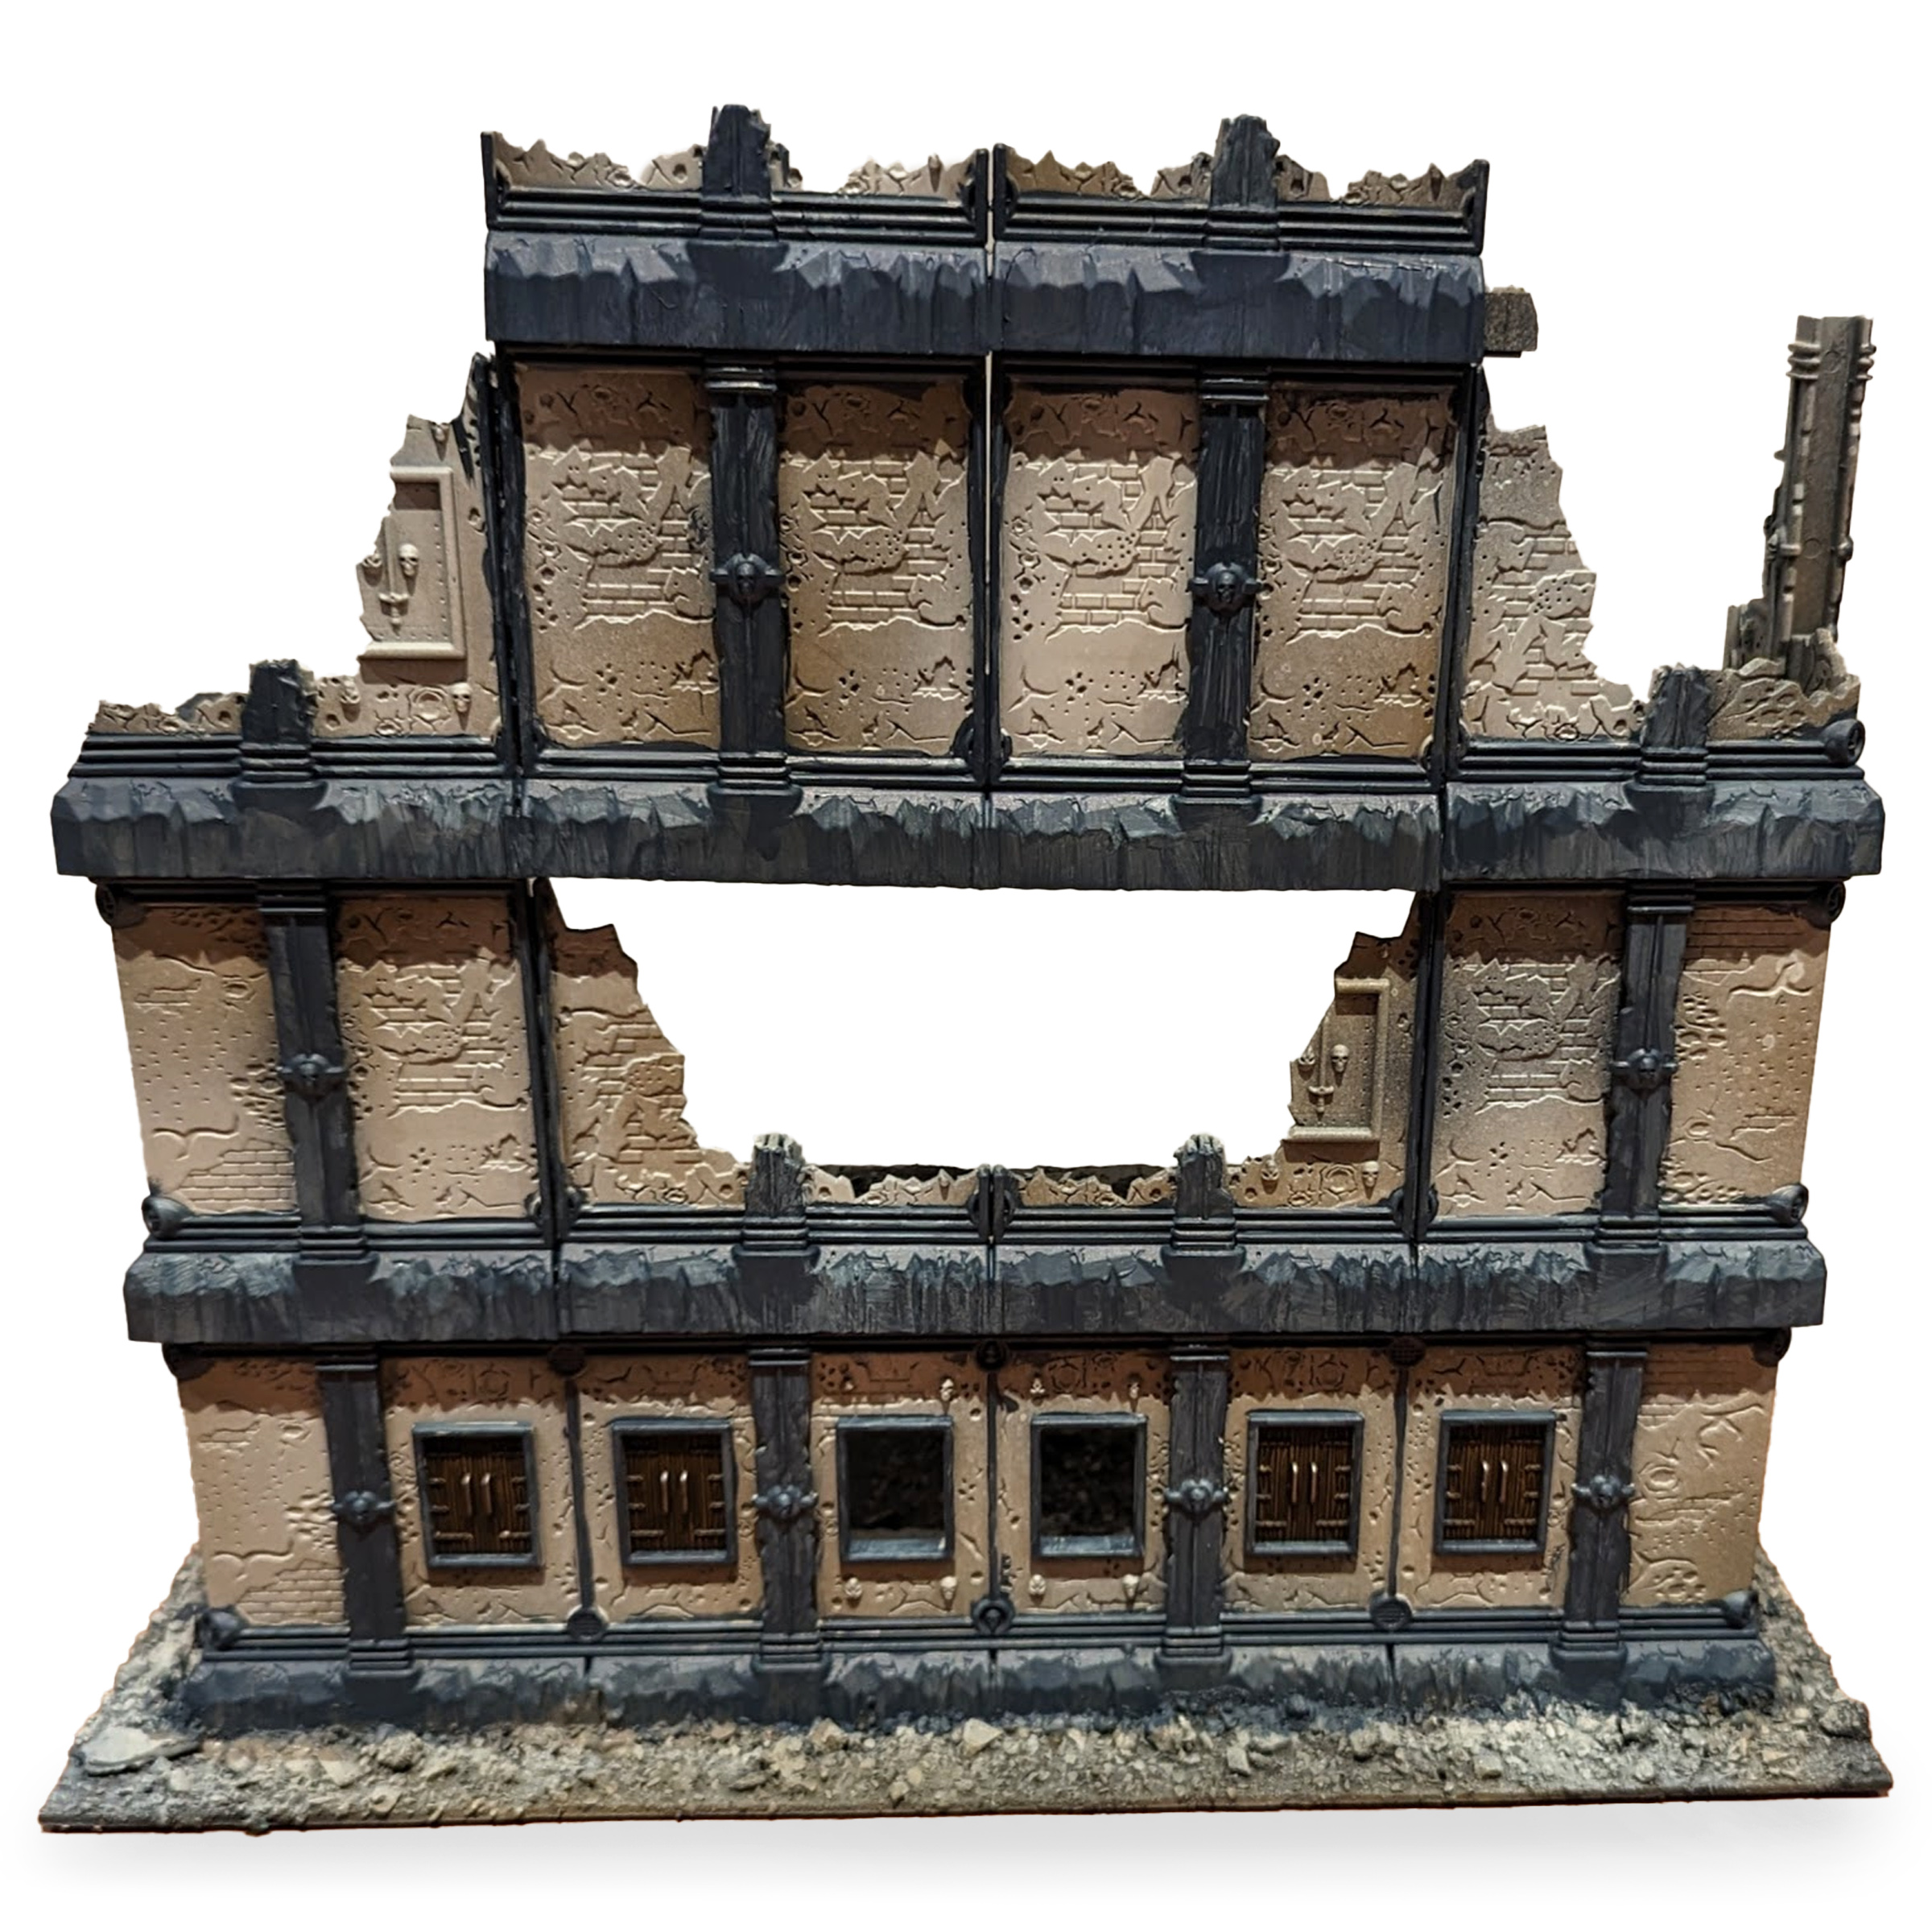
I paint a lot of terrain and in general find ways to paint it up that is faster than the build process itself. For the piece of FutureProof Modular Terrain that I assembled, I used a method very similar to how Campbell paints his up. I wanted to keep it super simple and quick. You could paint up a table of this stuff in a day with this method.
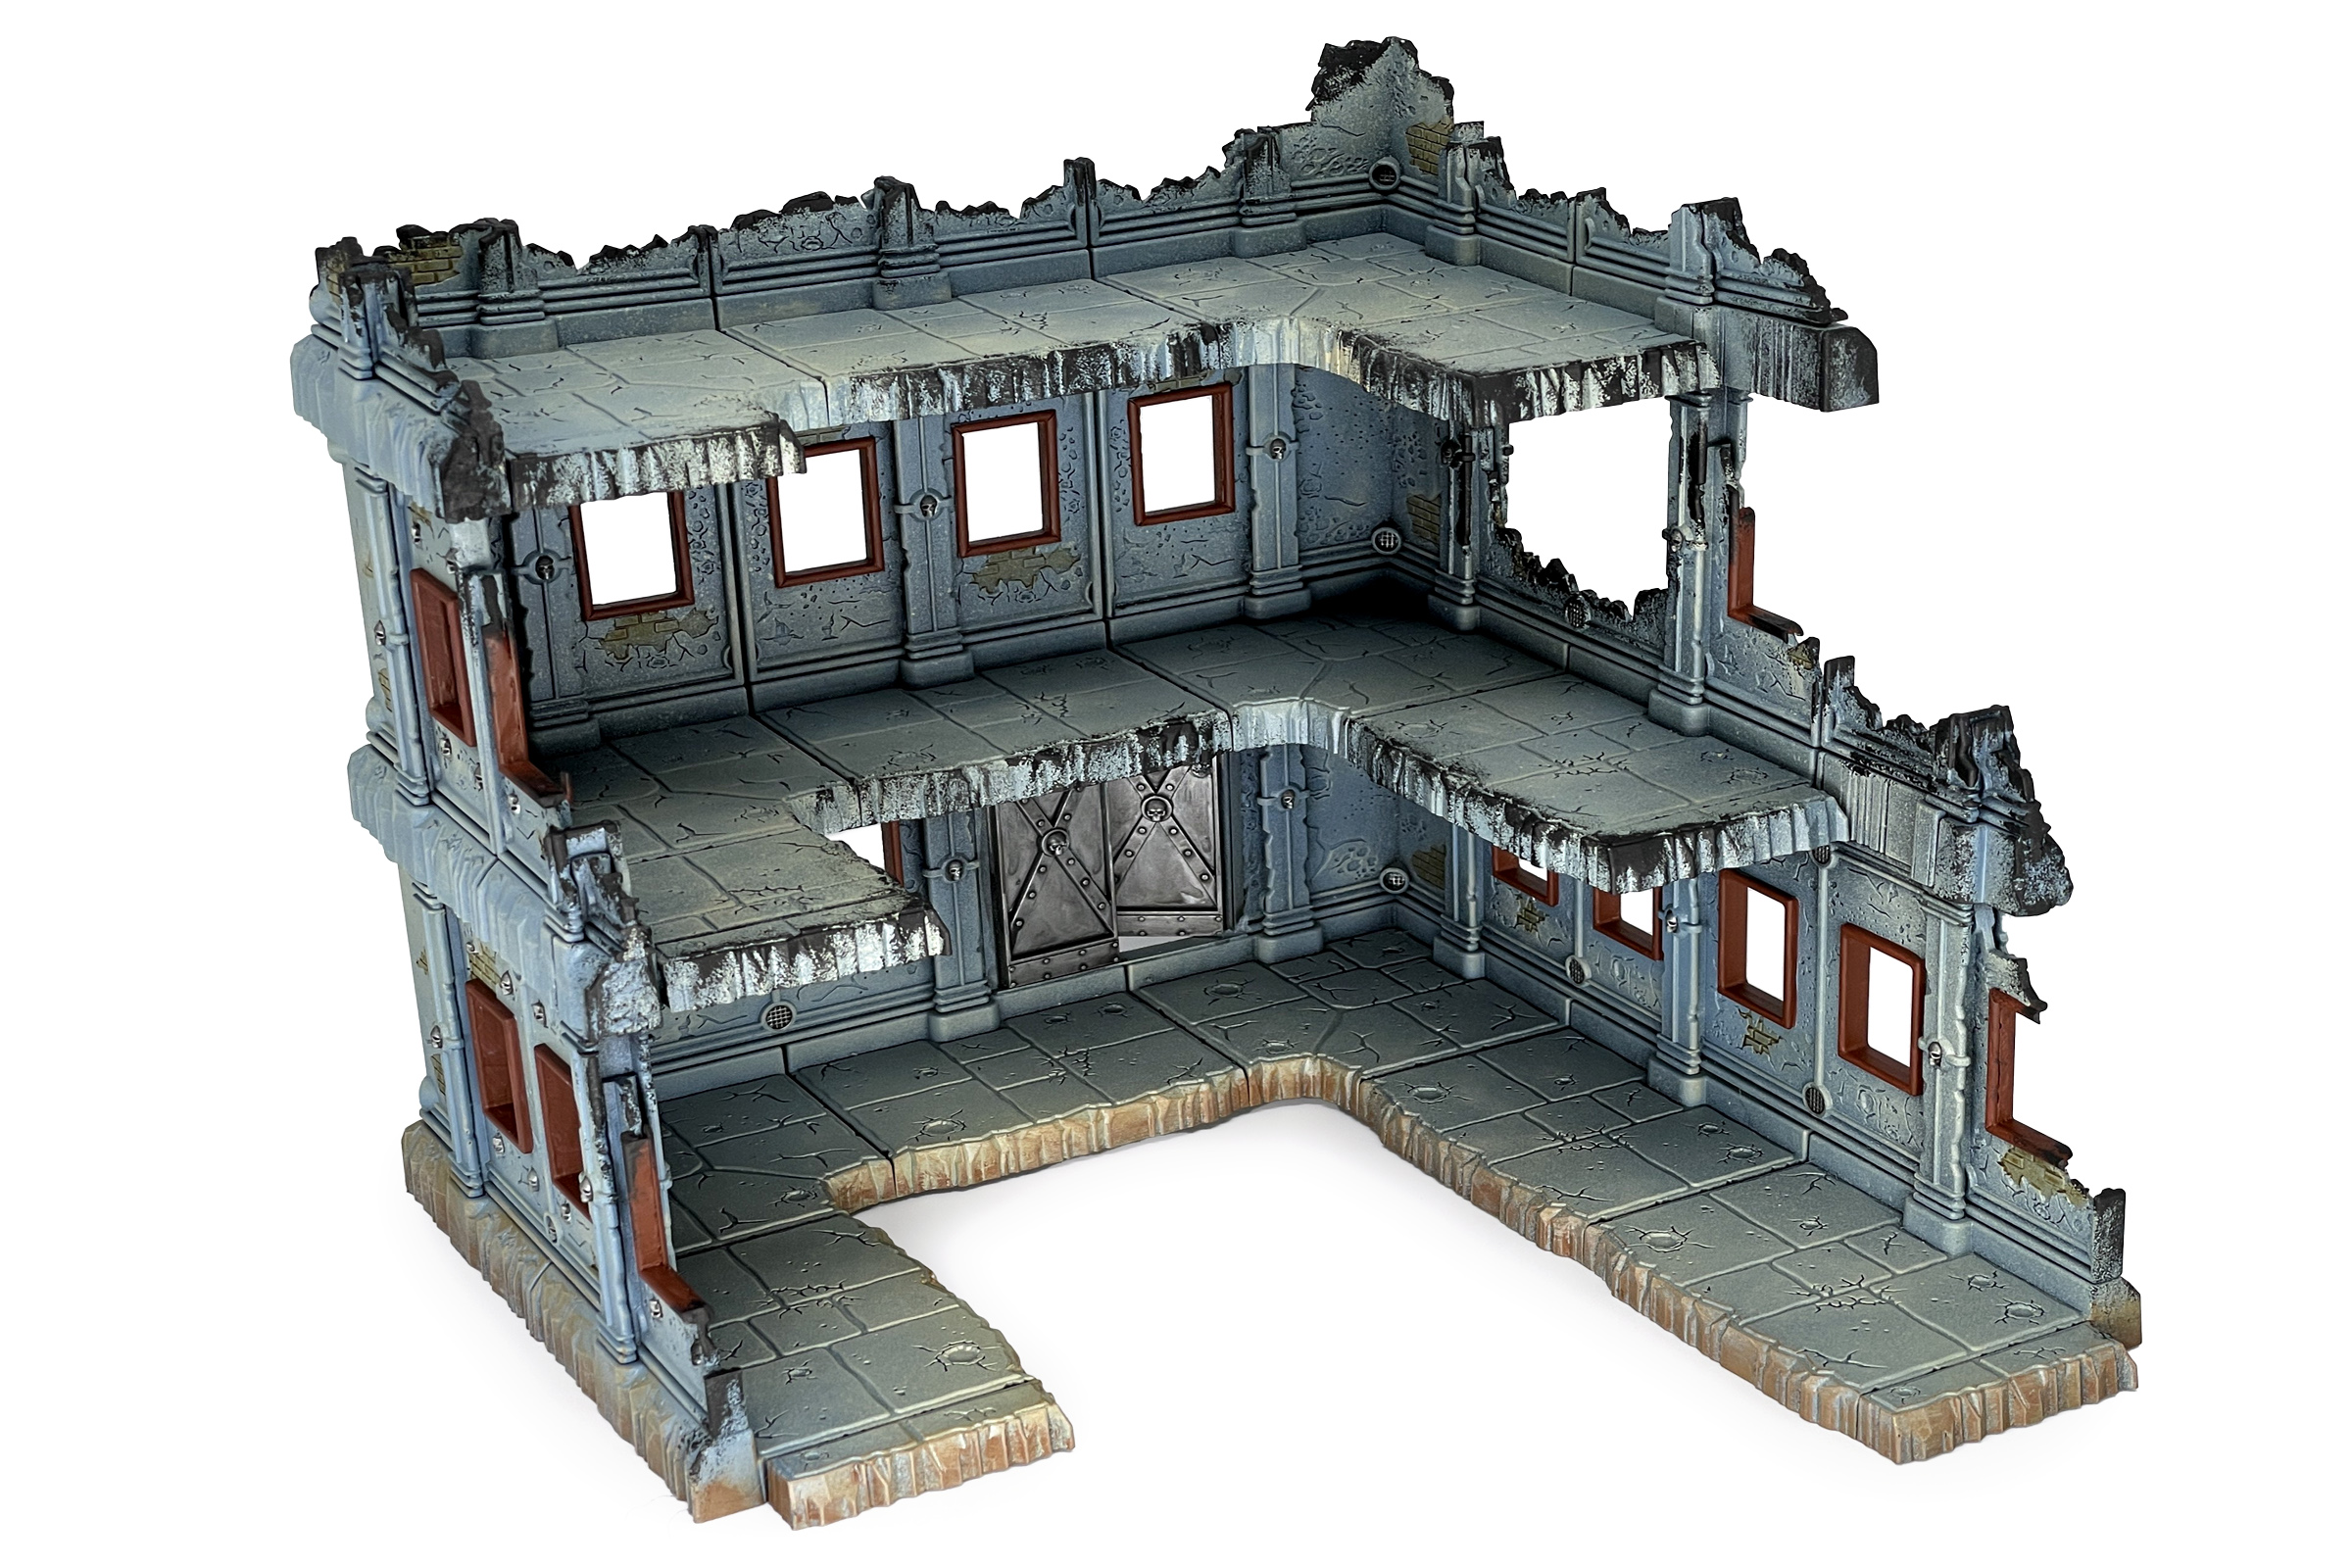
Step 1: Primed Black
Step 2: From above, spray the whole thing with Army Painter Wolf Gray spray.
Step 3: From a similar angle, spray to the top half of the walls of each floor with Army Painter Skeleton Bone spray.
Step 4: After the sprays have cured, drybrush the entire thing with Ushabti Bone.
Step 5: Paint all the areas of Brickwork with Skeleton Horde Contrast.
Step 6: Paint the window frames with Doombull Brown.
Step 7: Paint all the skulls and metal parts with Army Painter Plate Metal.
Step 8: Paint the door (if you added one) with Retributor Armor.
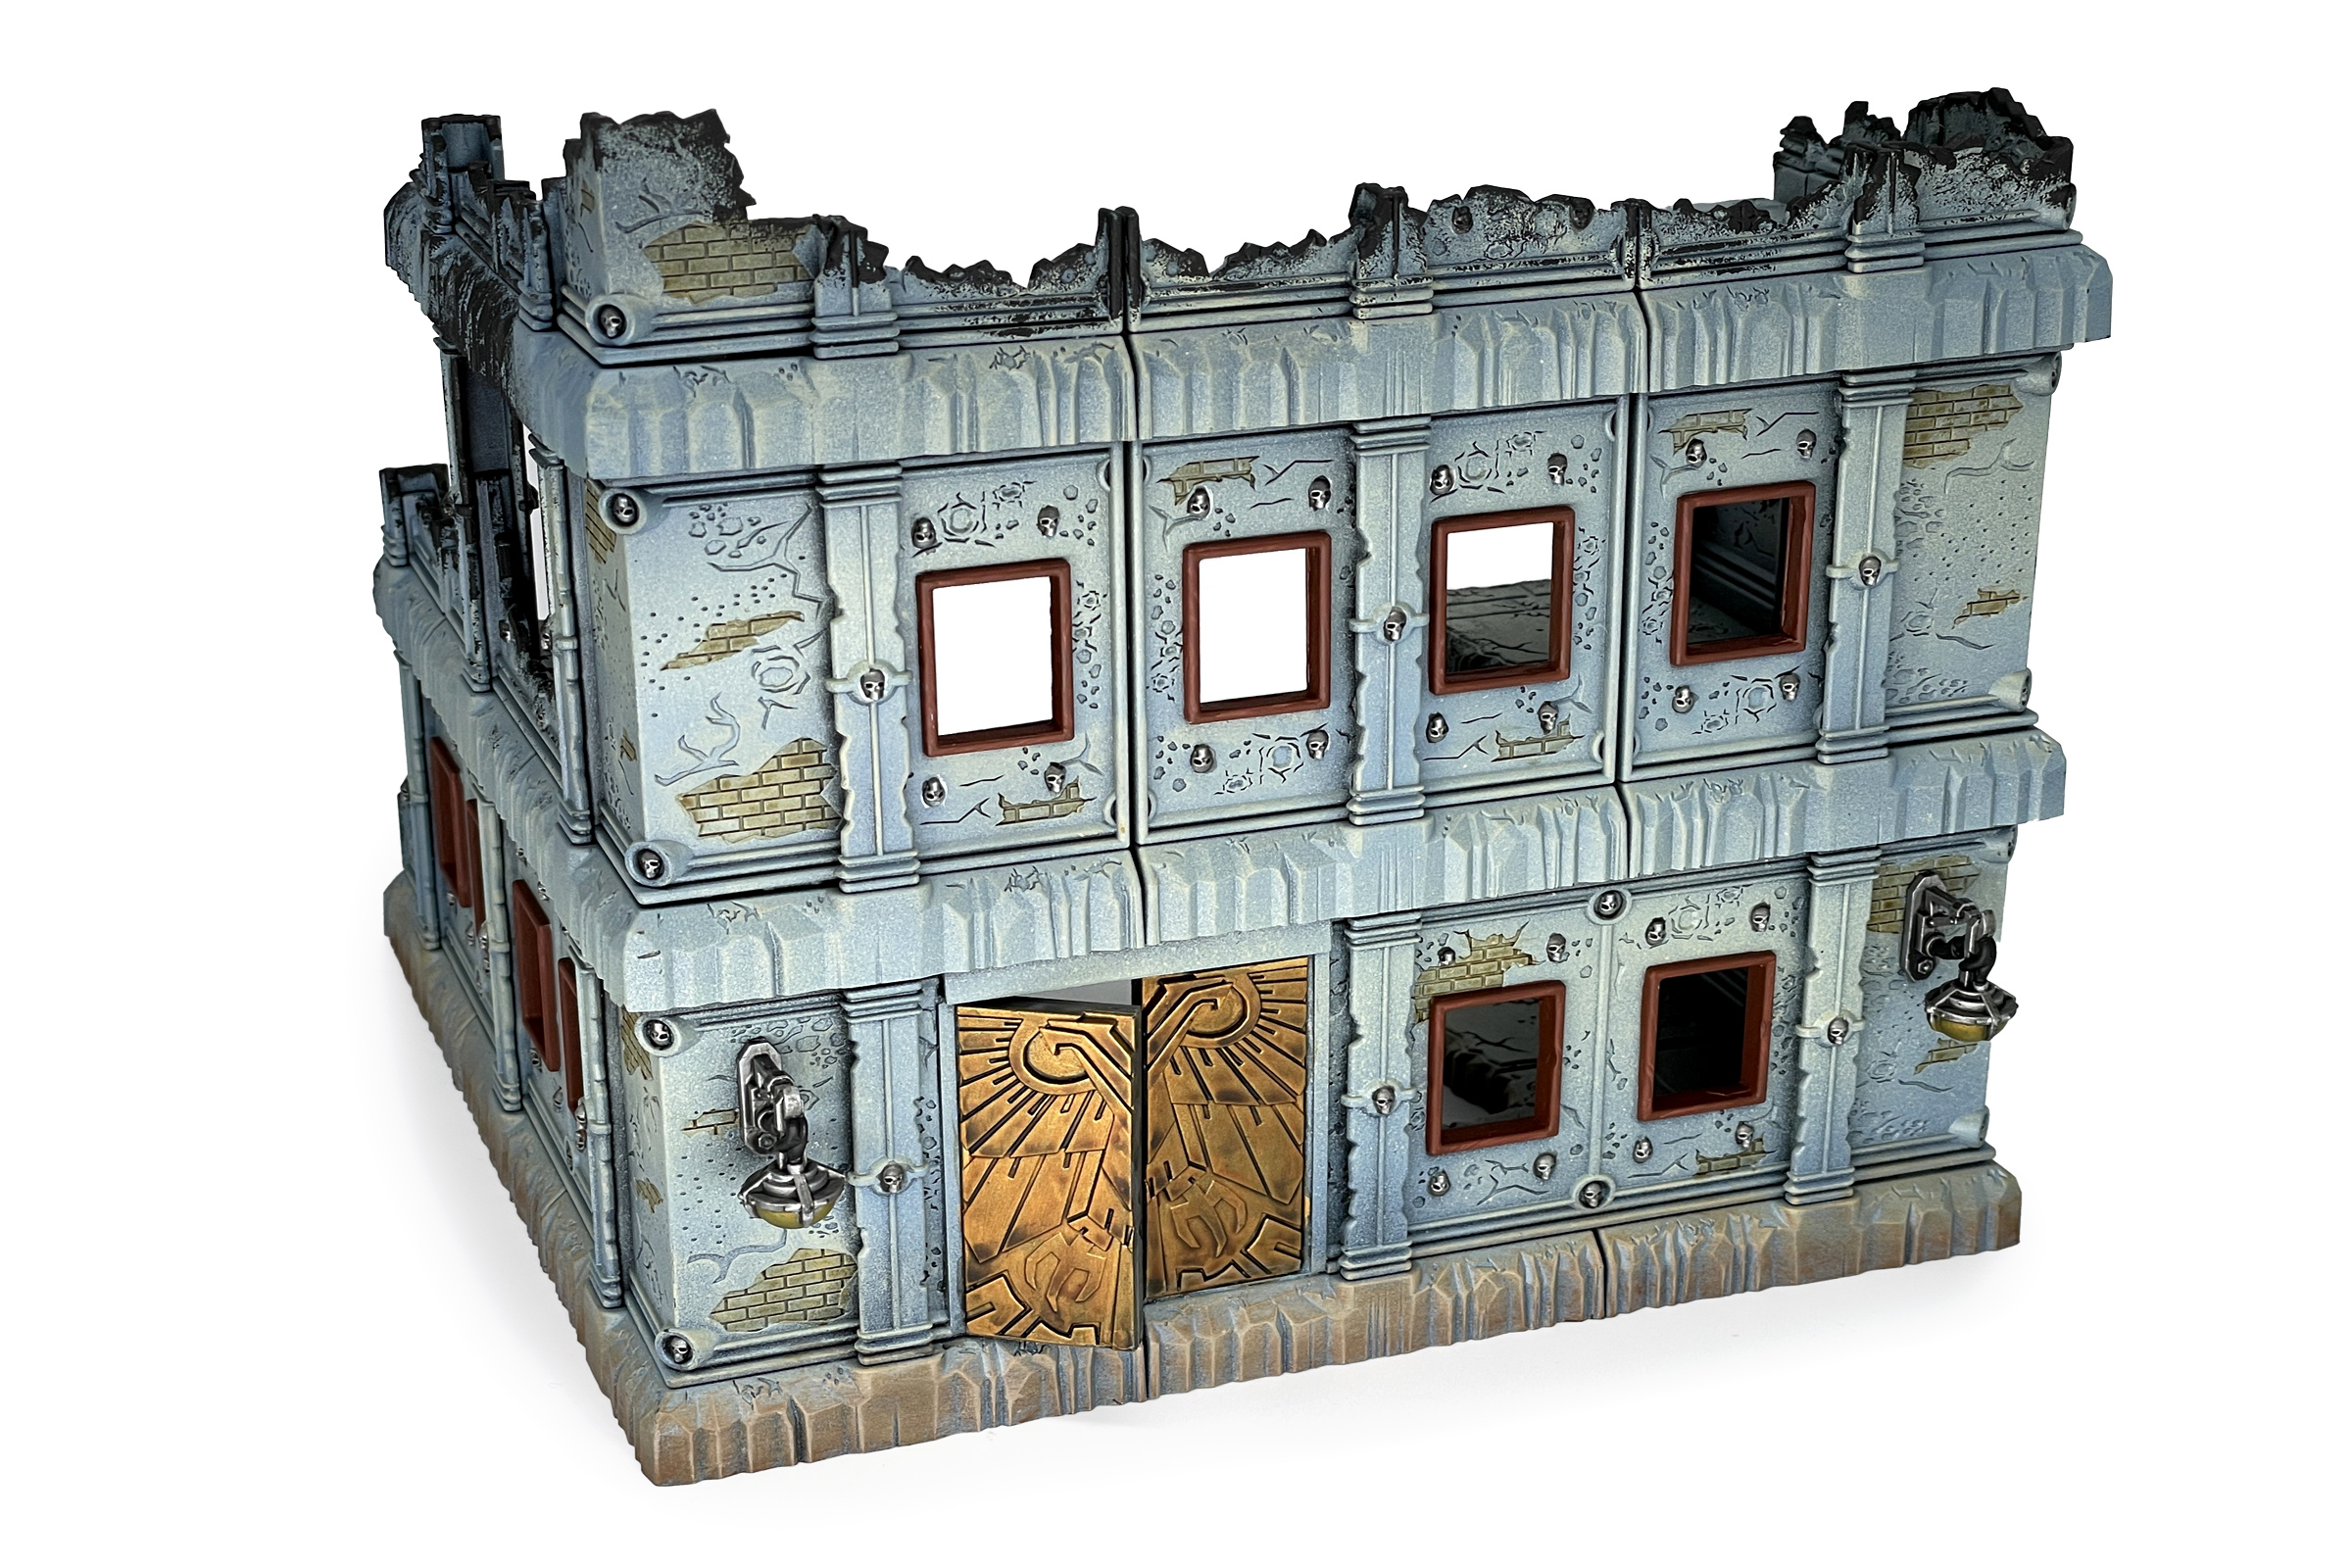
Step 9: Wash all metals with Nuln Oil.
Step 10: Glaze door with Skeleton Horde.
Step 11: Drybrush Mournfang Brown heavily along the base with it touches the ground.
Step 12: Drybrush over that and higher up the base with XV-88.
Step 13: Drybrush the base edge with Ushabti Bone.
Step 14: Sponge Black across the top, floor edges, and ruined sections.
Step 15: Glaze the lamps with Iyanden Yellow Contrast.
Crab-stuffed Mushrooms
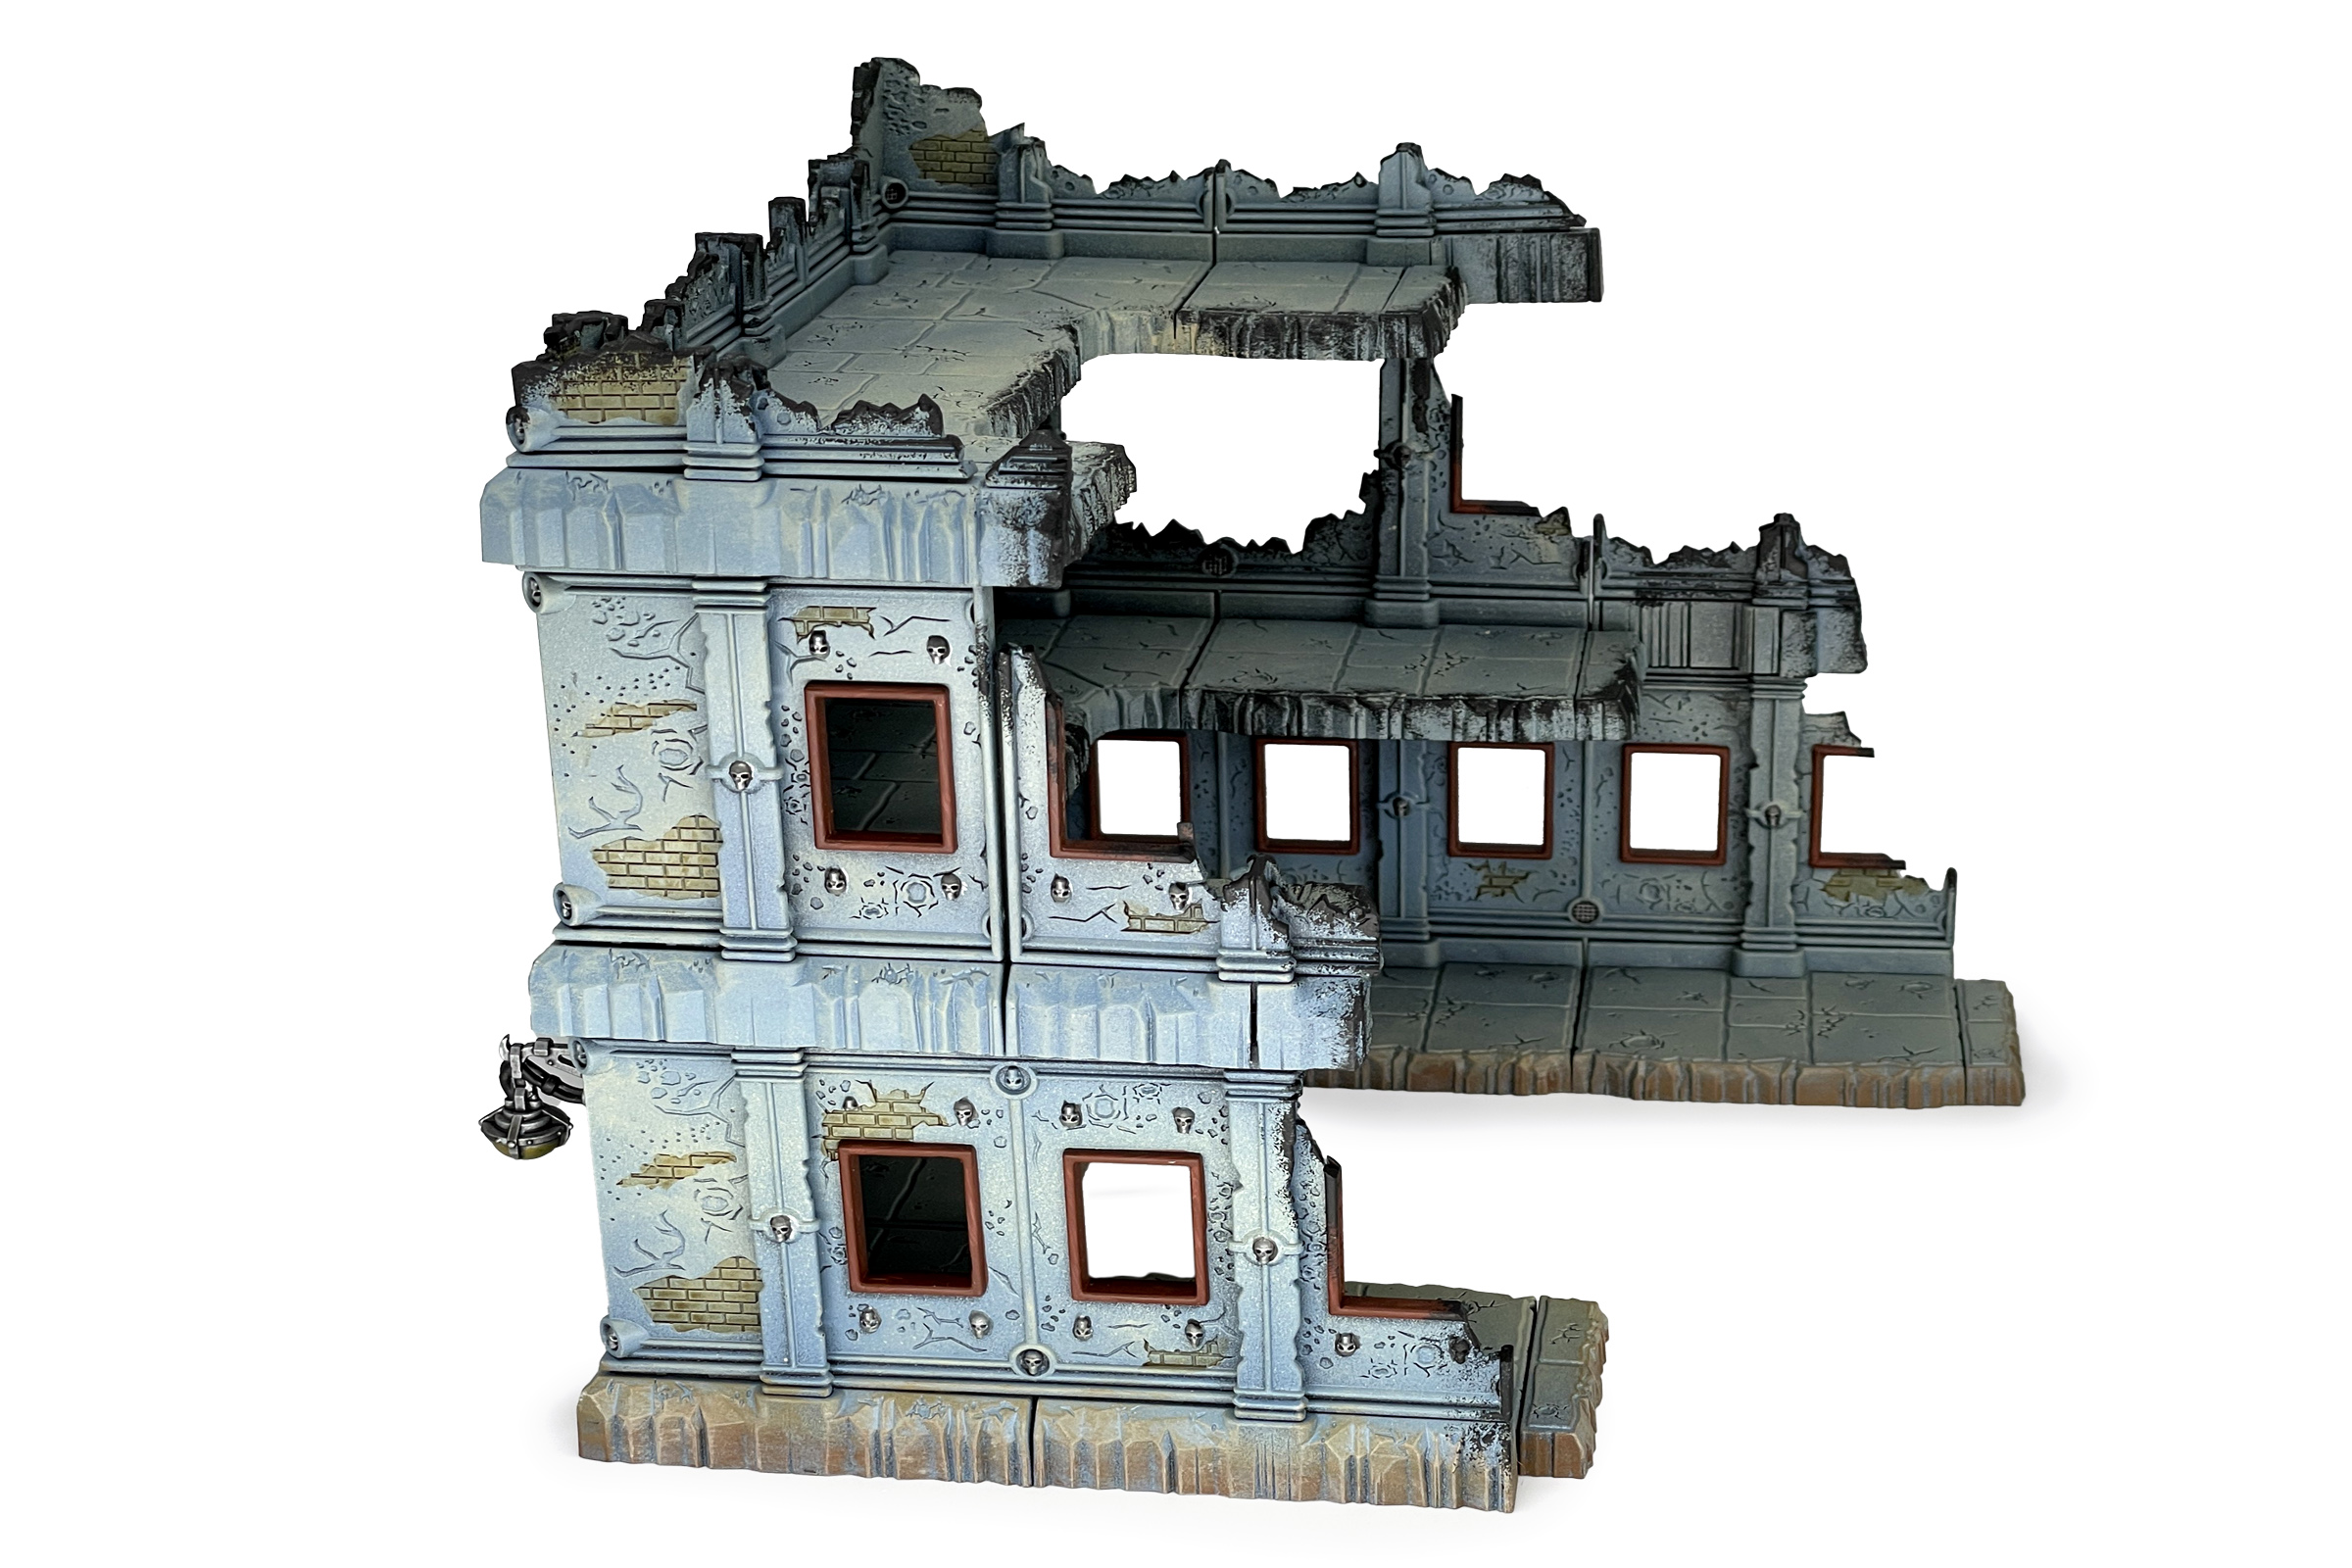
These modular blocks are perfect for tournament terrain: Easy to assemble and even easier to paint. I didn’t use any airbrushes for this and it took less than 72 hours.
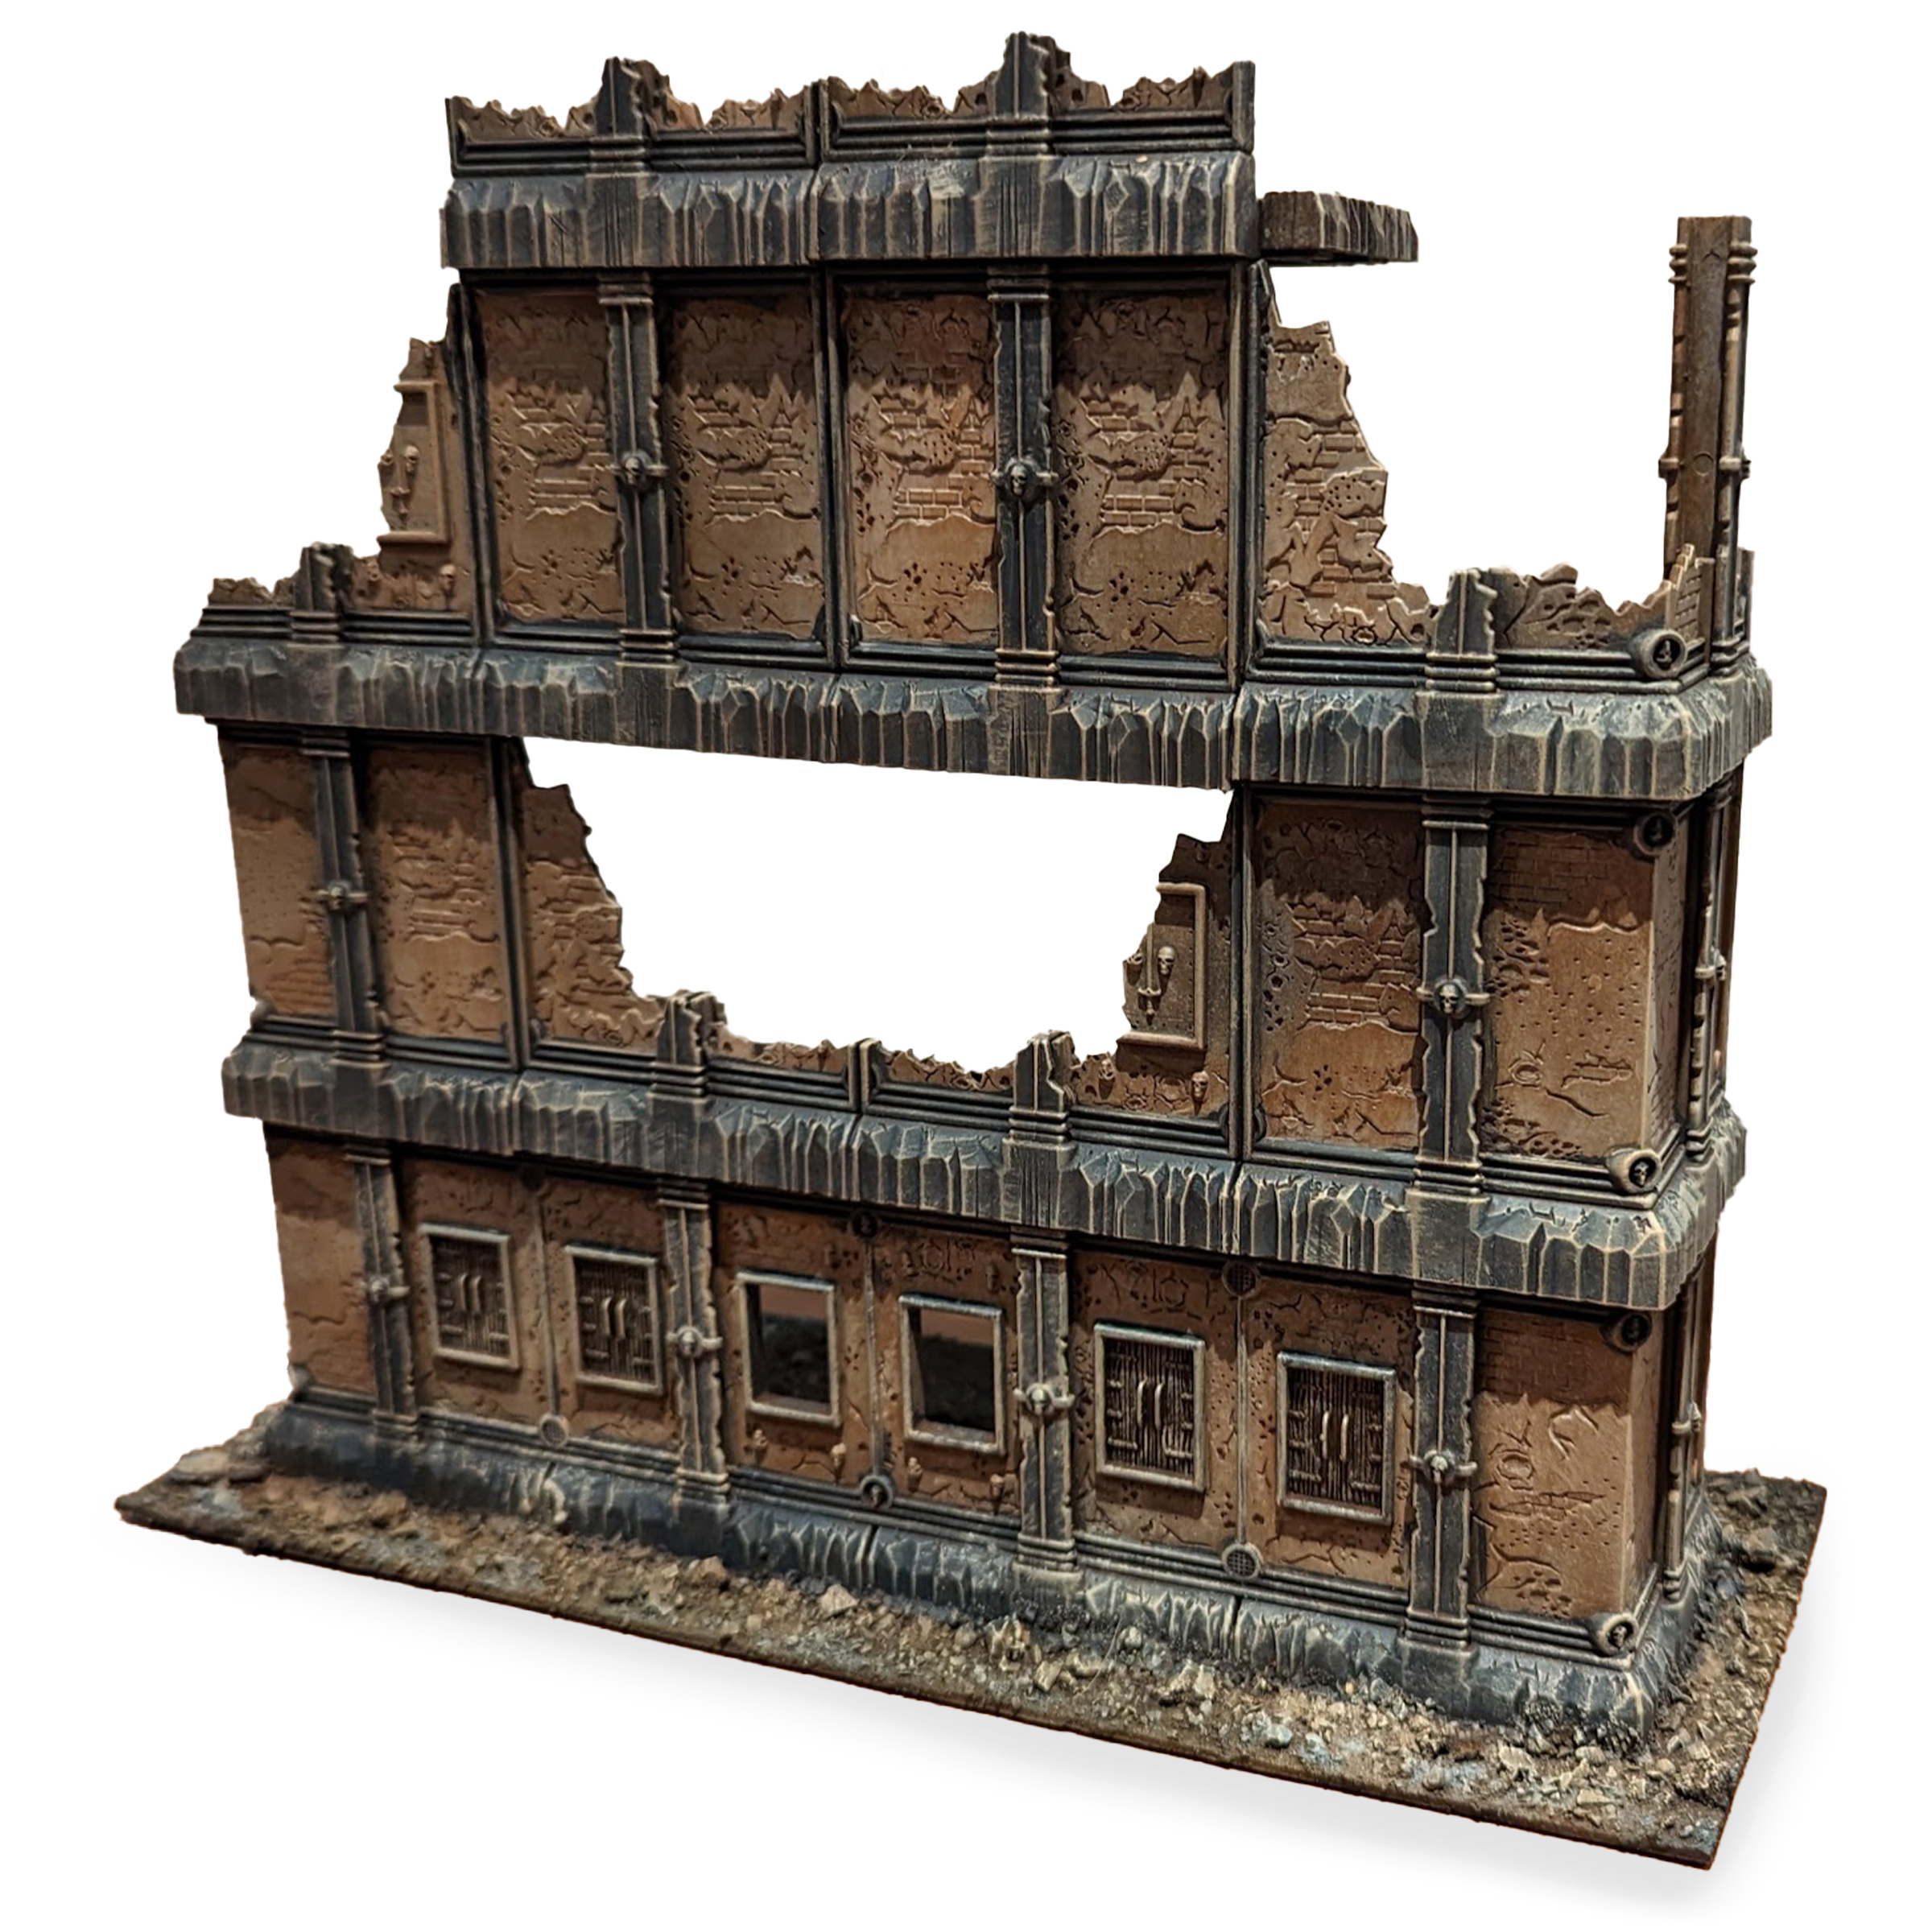
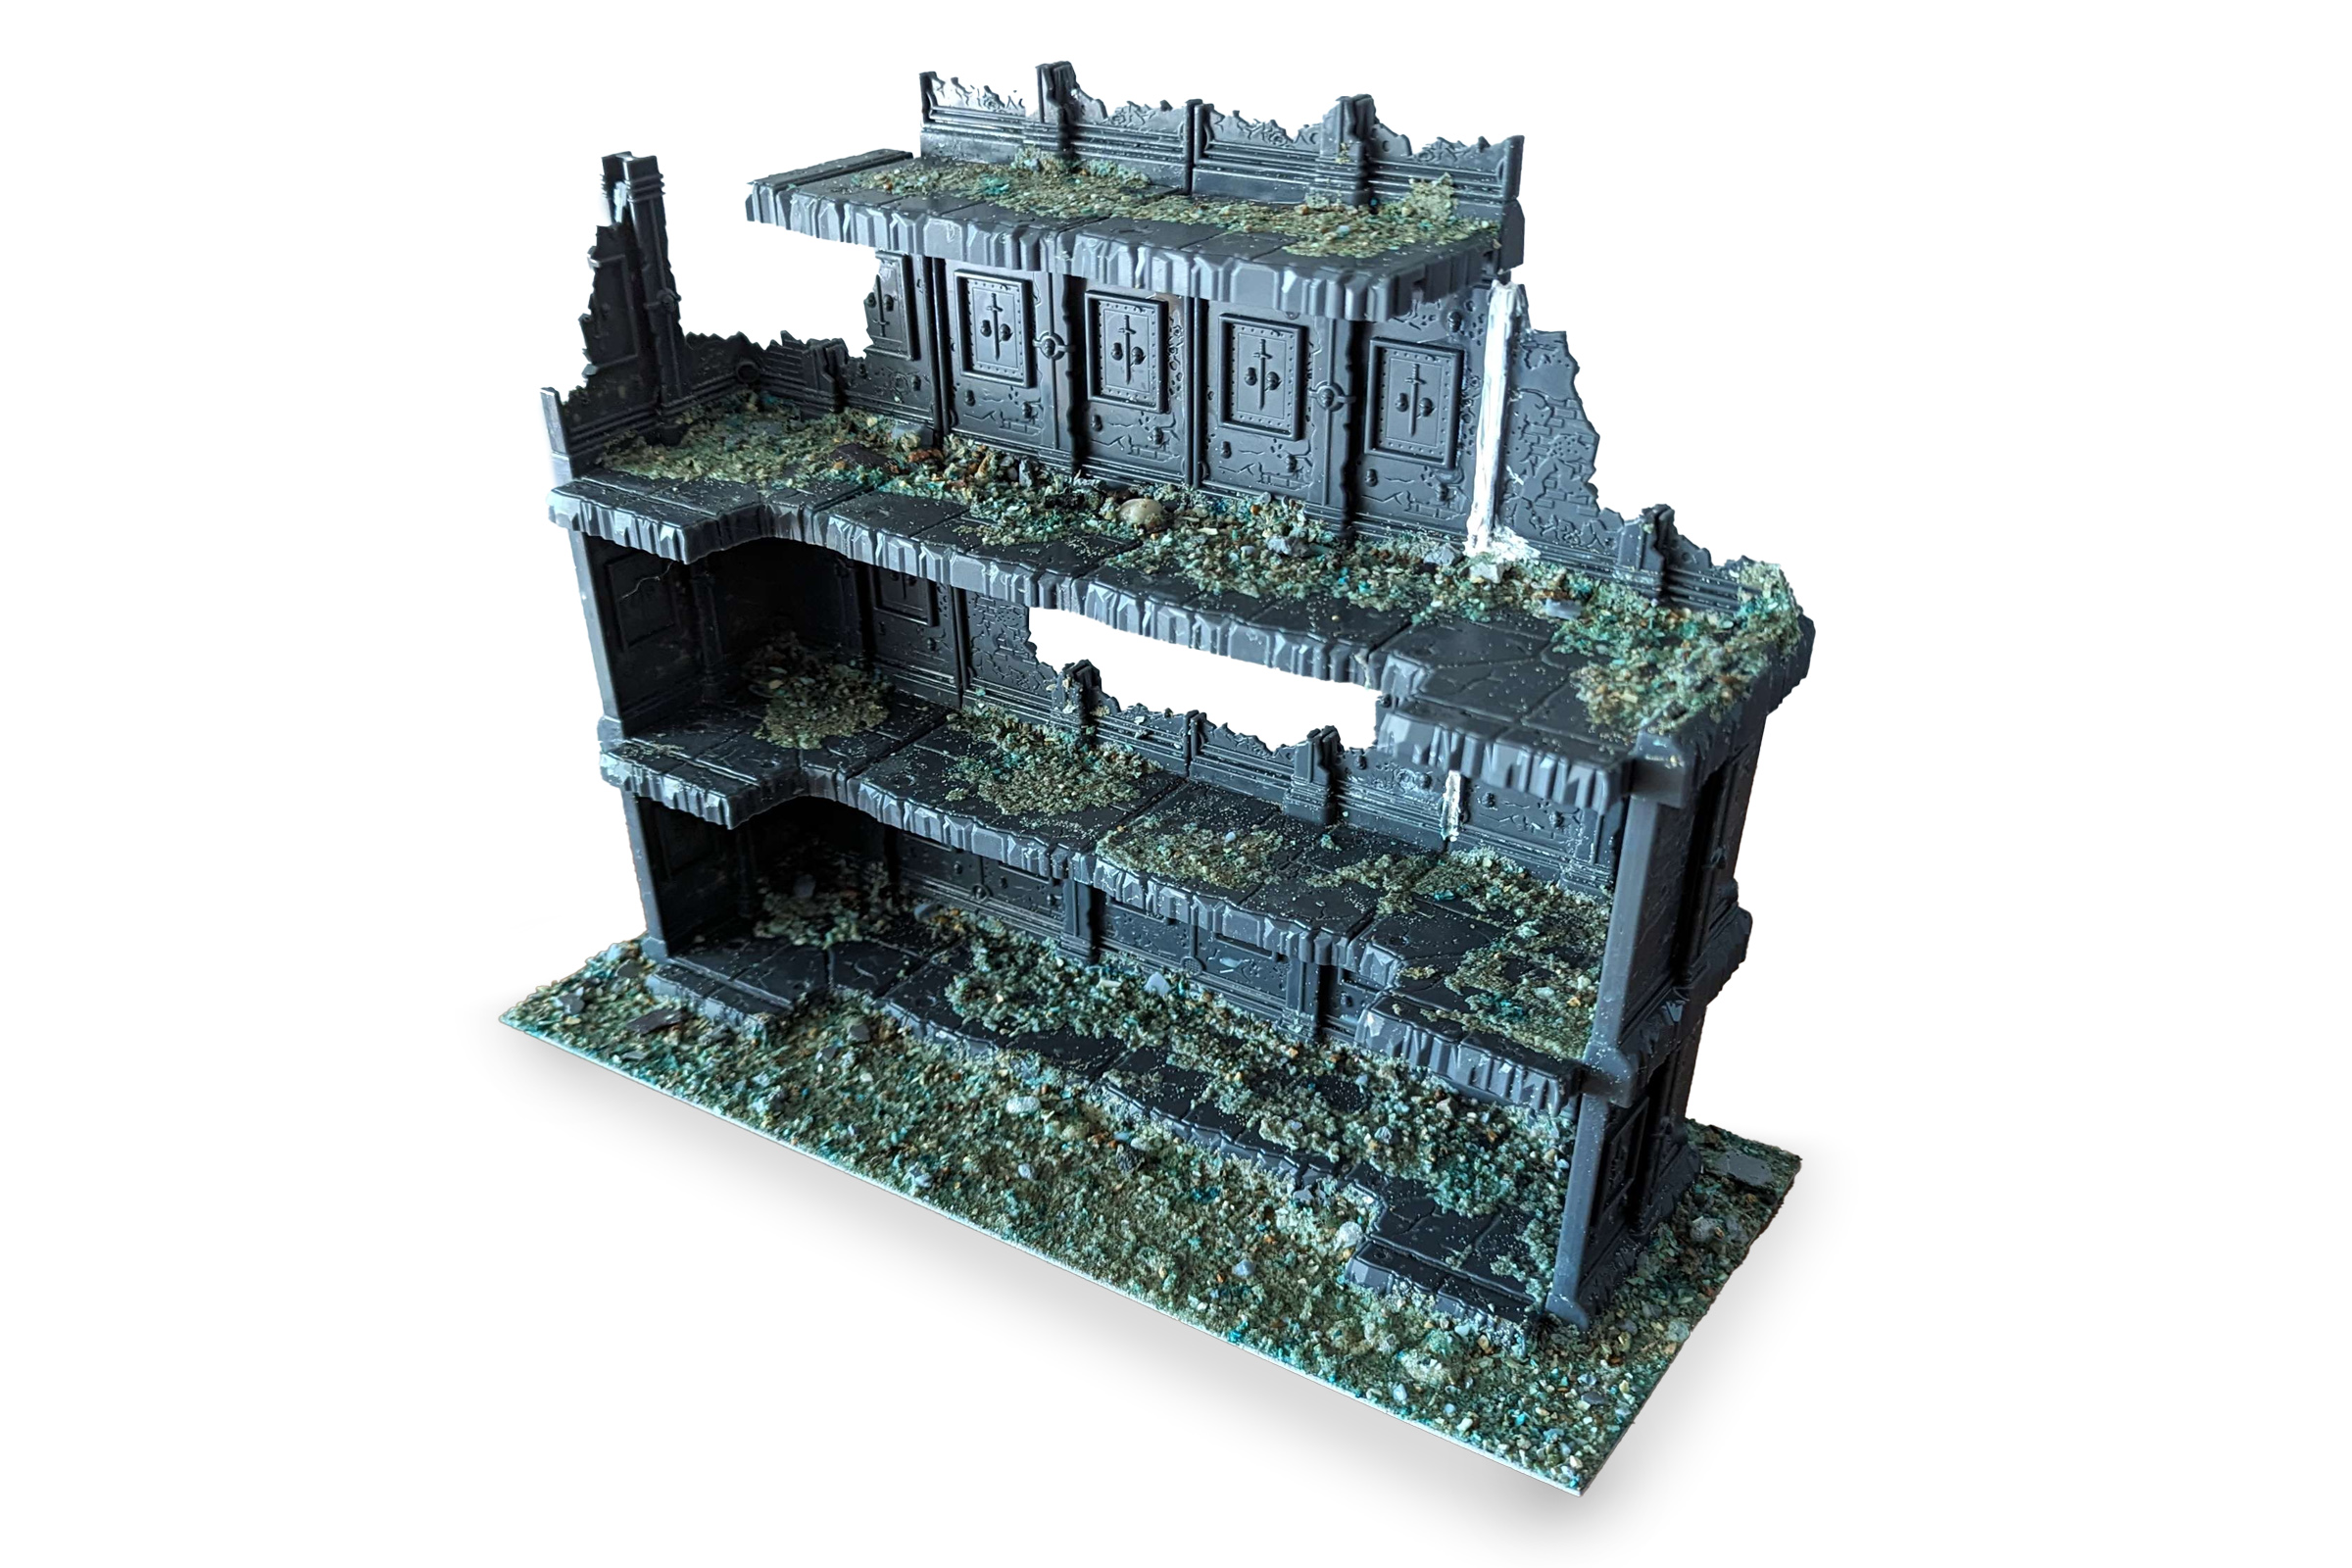
- Basing: I used Buffalo Chicken’s method for basing: I cut a piece of vinyl flooring tile that would conform to the template sizes used in competitive games.
- Although glue isn’t required, I glued the terrain pieces together to withstand wear and tear. I then glued the terrain to the base using Gorilla Glue.

Credit: Crab-Stuffed Mushrooms - To help the ruins look more ancient, I covered a few areas with a mix of sand and mineral grit for small birds.
- I applied the sand/grit mix using PVA glue, then gave the terrain piece a good shake to loosen anything that didn’t adhere.
- Give this a few hours to dry.
- Apply a 3:1 mix of water and PVA glue as a seal over the mineral grit/sand mix.

Credit: Crab-Stuffed Mushrooms
- Once everything is dry, prime the terrain piece black.
- Instead of using an airbrush, I sprayed the terrain piece in random spots with Zandri Dust and a few other random spots with Wraithbone. Try not to over-think this part and don’t worry about covering everything.

Credit: Crab-Stuffed Mushrooms - I painted the layers in-between the walls with Dark Reaper.

Credit: Crab-Stuffed Mushrooms - Oil Wash
- I applied an oil wash over the terrain using Water-Mixable Burnt Umber.
- You can read more about oil washes, including water-mixable oil paints in this article.
- I left this to dry overnight.
- Once dry, I applied a drybrush of Screaming Skull over the entire terrain piece, this helped to blend all of the colors together.
- Done!


MasterSlowPoke
I am incredibly far behind on my terrain backlog, so I wanted to train myself in the art of drybrushing to get myself motivated to actually paint more. I basically exclusively used the Artist Opus D series brushes, along with the trusty Gregbot texture palette.

I wanted to go with a kind of exotic stone facade over regular brick for this ruin, kind of in the style that I see a lot of boarding action boards done in. I think I could have pushed the highlights a bit further, but at the same time I don’t want my terrain’s paintjob making it hard to see the actual models.
Step 1: Facade
I looked through the colors that I don’t really use too much and are kind of desaturated to decide on this scheme. Any colors that contrast would be good for this two-tone shadowed approach.
The entire model is primed black, then I use a heavy drybush/stippling motion to coat the bottom half of all the wall pannels with Naggaroth Night.

Next, the whole panel gets a regular drybrush of Lupercal Green. This is kept at mostly a downward angle, and the drybrushing is a little lighter over the purple section, while still trying to catch some of the raised detail.

The green color is intensified by repeating the drybrushing with Sons of Horus Green. The detail is really starting to come out at this point. Its best to go slow, as reversing mistakes is kind of a pain in the neck with drybrushing.

Finally, I mix a little bit of white into the Sons of Horus Green for the extreme highligh stage of drybrushing. I did about a 25/75 mix, though as I said above I think I could have pushed this even a little higher to really get the ruin to stand out.

Step 2: Brick
With a small drybrush, I go over all the exposed brick sections with a white drybrush to prepare them for a layer of Flesh Tearers Red contrast paint. Over this, I then use the same small brush to do a very targeted drybrush of Wild Rider Red mixed with Wraithbone. I think it was about 2:1 ratio of red to bone. This reestablishes the highlights and sets the brick apart from the facade.

Step 3: Foundation
I wanted the floors to contrast a bit, but not too much, with the walls, so I decided on a blue-gray, though a true gray would also look good. I’ll provide what paints I would use for either.
I first repainted the floor tiles with a heavy Corvus Black overbrush to get rid of all the purple and teal. I then did layering drybrushes with Dark Reaper, Thunderhawk Blue, and a 50/50 mix of Thunderhawk Blue and white. Each was lighter than the last. For a true grey, I would have gone with Dawnstone, Administratum Grey, and white.

Step 4: Details
For all of the little skulls, swords, and window frames, I basecoated them in Runelord Brass then washed with Agrax Earthsade. I thought about throwing on some Nihilakh Oxide for a patina, but I think it would be lost on the stone facade’s coloring. I also chose not to highlight it with Canoptek Alloy like I usually do for that color, as I don’t want these bits to be all that distracting.

Complete! I had a good time painting this. The detail is fairly shallow, but more than enough for a drybrush to grab onto. This whole thing took maybe a couple hours, and most of that is probably due to my lack of experience drybrushing.
Your Turn
Now that you’ve got a couple ideas fresh in mind, it’s your turn to paint some great terrain. Get yourself a set of FutureProof Modular Terrain and try one of these paint schemes out. Mix a few different styles together, and see what you come up with. Or throw caution to the wind and just wing it. If you want to read more about FutureProof terrain, check out our review, or take a look at our interview with Snot Goblin Gaming where we immediately get distracted with talking about Speed.
Thanks for reading! If you have any questions or comments feel free to drop us a note in the Comments below or email us at contact@goonhammer.com. And if you want regular updates in your inbox, subscribe to our newsletter.
