In our How to Paint Everything series we look at how to paint, well, everything, with different techniques and approaches from different painters. In this article we’re looking at how to paint the Emperor’s Children traitor legion.
The III legion of space marines, the Emperor’s Children were nearly wiped out in their infancy by a genetic flaw which caused tumorous growths across their bodies. Afterward they’d devote themselves to perfection, both genetically and on the battlefield, led by their exacting primarch, Fulgrim. Under Fulgrim’s command the Emperor’s Children were known as peerless warriors and they alone bore the distinction of being able to wear the double-headed eagle on their chestplates.
During the Heresy Fulgrim was corrupted by a daemon weapon discovered on the planet of Laer and would side with the warmaster. His legion would fall into the worship of Slaanesh, taking part in vile raids and debaucherous acts on terra before the traitors were finally defeated.
Since the heresy, the Emperor’s Children have continued to slide further into depravity, trading out their regal gold armor for bright pink and black armor. This is in part practical: As more of the legion gives itself over to becoming noise marines, their other senses become dulled, making it difficult to distinguish friend from foe without the bright, garish colors of their armor.
Covered in This Article:
How to paint the Emperor’s Children, with different schemes from different painters that show varied approaches.
Notes on how to paint specific details on the Emperor’s Children, such as flayed skin and purple metal.
Notes on the heraldry of the Emperor’s Children.
How to paint Heresy-era Emperor’s Children.
How to paint 2nd edition-style Noise Marines.
Emperor's Children Heraldry - Click to Expand
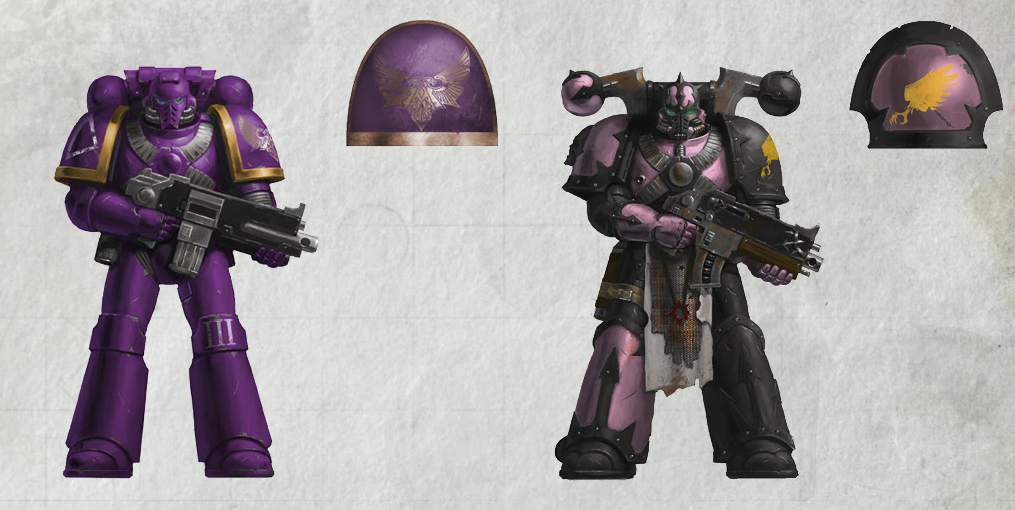
Although once one of the most regimented and disciplined legions of the Adeptus Astartes, the Emperor’s Children have long since abandoned their heraldry and squad markings in favor of the garish colors and intricate, perverse designs that show their dedication to the Prince of Excess.
Credit: Games Workshop
That said, if you’re painting the Emperor’s Children in their current 40k scheme, the thing to be aware of is that they can vary up how they combine pink and black. In a similar fashion to the Red Corsairs, Emperor’s Children can have pink armor or pink trim, and may vary things up on the same model. In the image below I’ve shown an example of how this looks.
Credit: Robert “TheChirurgeon” Jones
Note that as well as using pink and black in a mix, they can also use fully black or fully pink armor, using trim the same color as the armor. These all look pretty fine in combination, but it can be helpful to think about how you want to plan things out before you start putting paint down on the models.
Flayed Skin - Click to Expand
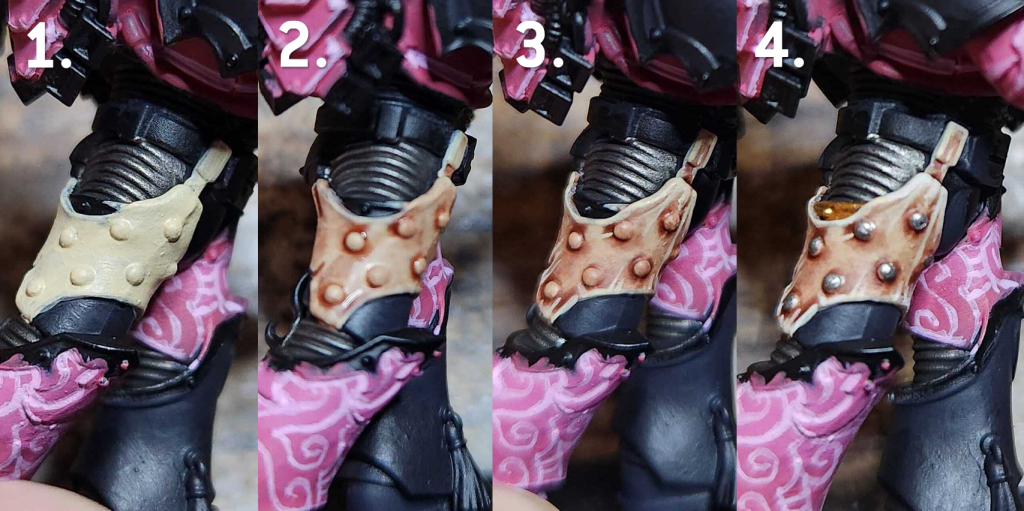
One common element of the Emperor’s Children – particularly the new kits released with their codex – is the use of strips of flayed skin and flesh to cover parts of their armor. Skin can always be daunting, but here’s a simple three-step method I use which works well with the pink and black scheme of the faction’s armor.
1. I start by painting the flesh area with Flayed One Flesh. It’s got the appropriate level of pale, stretched flesh and will work well here.
2. Next I wash that with a 2:1 mix of Reikland Fleshshade and Carroburg Crimson. I need something a bit redder than Reikland will give me and this ends up being about the right mix. I’ll do a second light pass with this around rivets and in folds as needed.
3. Then I come back and highlight with Flayed One Flesh, accentuating the folds and doing edge highlights on the skin bits to bring back some regular flesh color.
4. Finally I’ll hit the most raised bits with Reaper Polished Bone and paint any rivets. This method will work with more than just Flayed One – if you want to vary up your skin tones, you can start with different shades of flesh and just use the base color as your highlight.
You can also paint these as dark or patent leather, which will work better over pink armor than it will black armor.
Purple Metal - Click to Expand
One of the interesting developments on the new Emperor’s Children release is the use of purple metal to vary up the scheme. This shows up as trim on a lot of models, bordering both pink and black armor elements, and is used on things like the backpack arms. It’s a pretty easy color to set up, even if there’s no GW purple metallic paint.
First, start by painting the area with Leadbelcher.
Then, shade that with Druchii Violet. This can be done in two or three steps; you want a light coating over the metal generally so you’re keeping some of the shine, but a second or third pass to darken the recesses is going to help give it a more purple shade.
Finally, I do edge highlights with a 1:1 mix of Runefang Steel and Dechala Lilac. This gives you a nice, light purple that still has some light shininess to it.
Painting the Emperor’s Children
The Emperor’s Children have one of the brighter color schemes in Warhammer 40k, sporting pink and black armor with gold and yellow accents. Noise Marines in particular sport even brighter, more colorful patterns, often to make up for the dulling of their other senses. So for players used to painting Chaos minis in darker colors, the Emperor’s Children can be a fun change and also a challenge.
TheChirurgeon's Method - Click to Expand
I started painting some Emperor’s Children a while ago, for both my Black Legion and my Emperor’s Children. While I ended up using the 3rd edition metal bits for my Black Legion Noise Marines, I decided to use the resin guns from the Horus Heresy Kakophoni models for my Emperor’s Children Noise Marines. That said, I also used a fair amount of the older metal bits for the Emperor’s Children models, combining them with the newer plastic Chaos Space Marine kits.
I still use the same method for the current modern Emperor’s Chlidren kits, though I’ve started adding in some purple metal details at parts – see the tutorial above for more on how to paint purple metal.
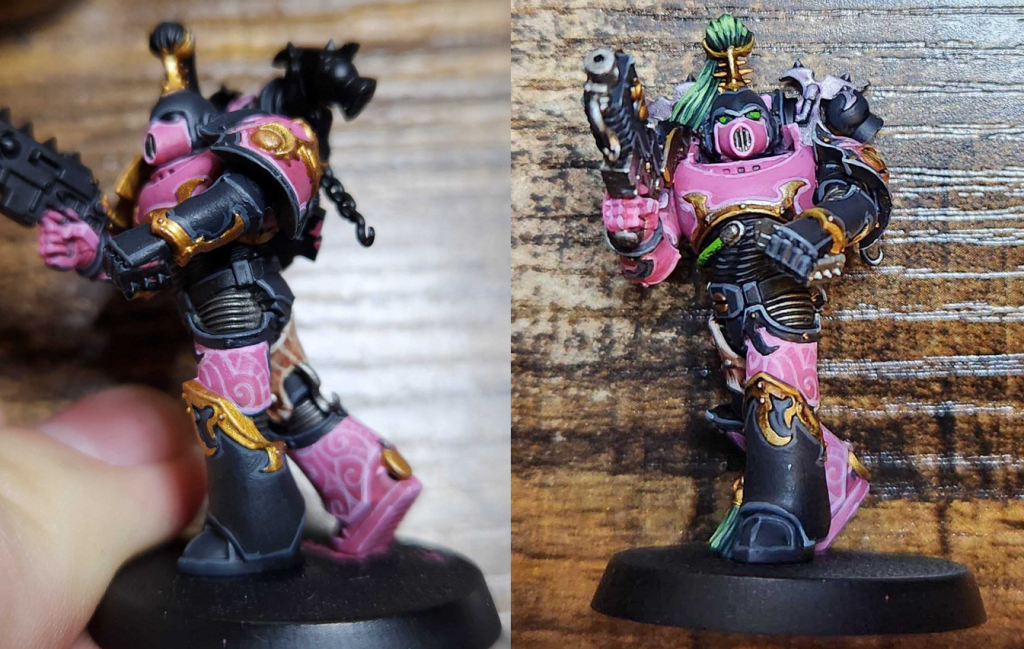
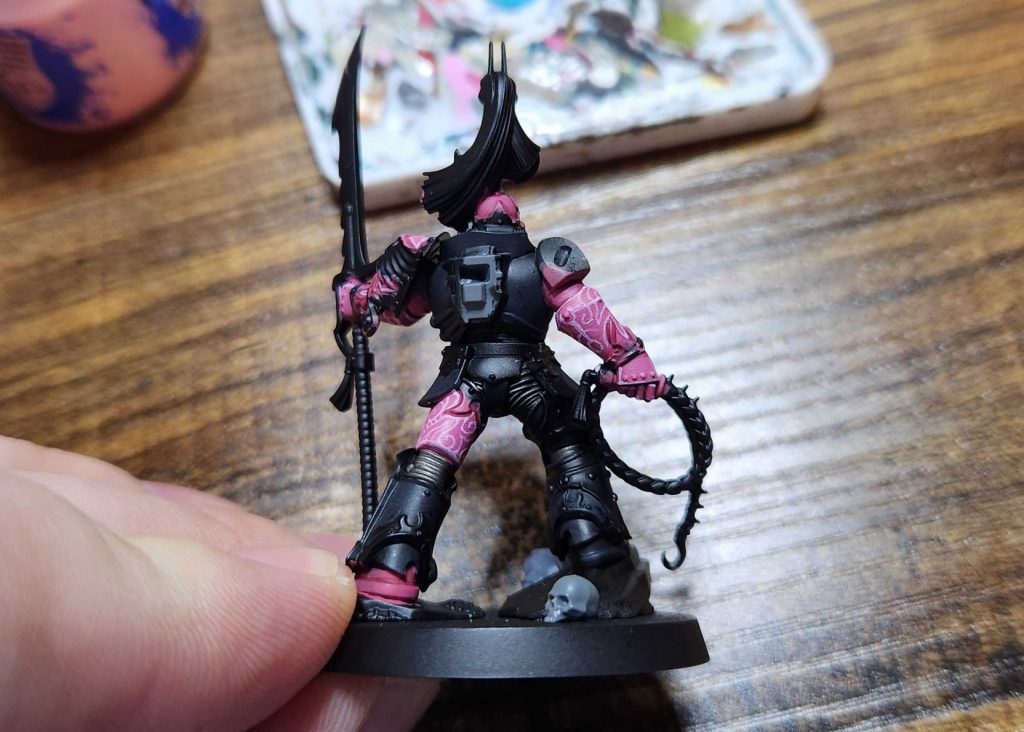
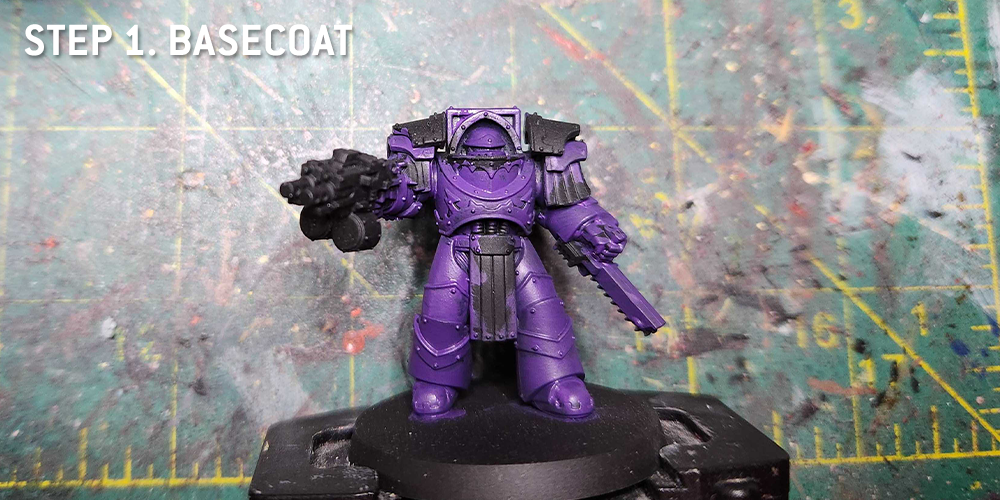
This particular model is a plastic Chaos Space Marine body with the metal Emperor’s Children Chaos Lord arms and backpack, and the head from a resin Heresy Kakophoni marine. I primed him black.
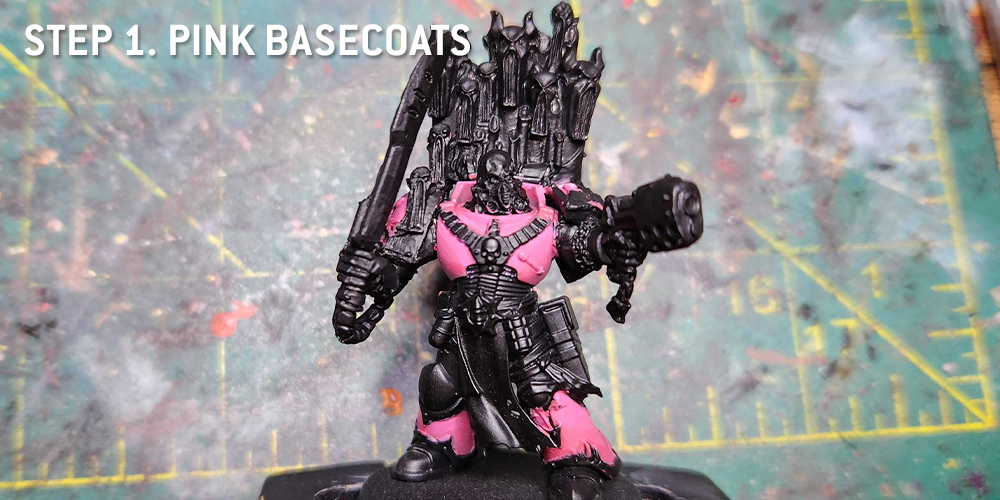
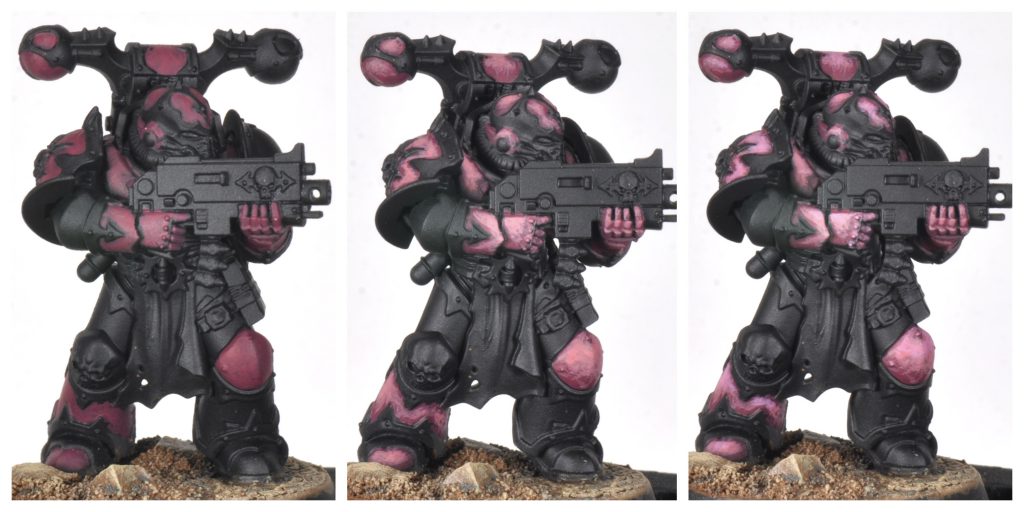
Step 1. Pink Basecoats
I started by laying down the basecoats for the pink parts of the model. This is Pink Horror to start, then blend-highlighted up to Emperor’s Children.
This usually ends up being more of a three- or four-step process most of the time. It takes two to three thin coats of Pink Horror to get the base pink I’m looking for on the model, then I’ll do one pass of 2:1 Pink Horror mixed with Emperor’s Children followed by a 1:2 mix and then finally I’ll hit the top areas with pure Emperor’s Children.
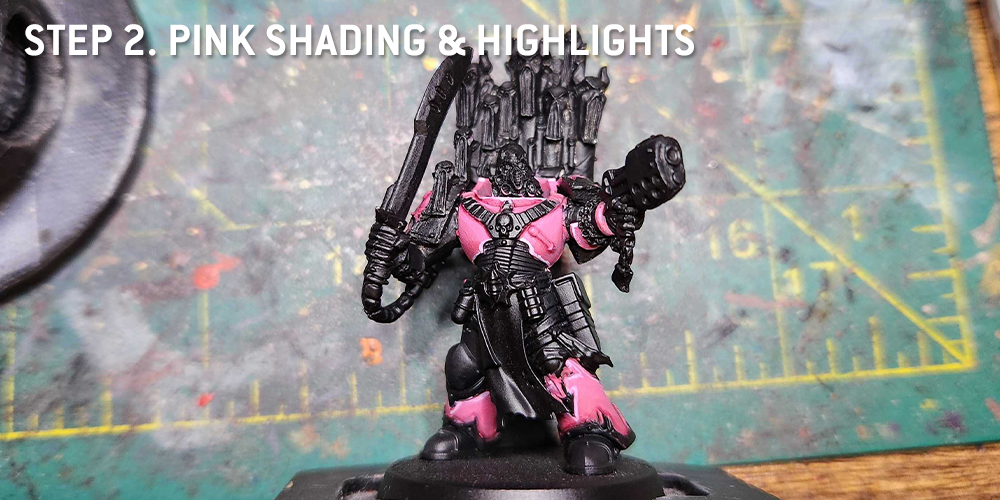
Step 2. Pink Shading & Highlights
Next up I do some panel lining with Carroburg Crimson, using it to shade around the bottom edges of trim and the cabling on the armor. For the top edges I do a thin line of Fulgrim Pink, and use that to edge highlight the pink armor as well.
On my more recent models I’ve started doing lots of freehand filigree details. This both helps them stand out and also hides some of the rougher color transitions. There’s unfortunately no secret to doing these; I just use a small (3/0) brush and Fulgrim Pink. I usually start by doing a couple of swirl designs and then just building around that.
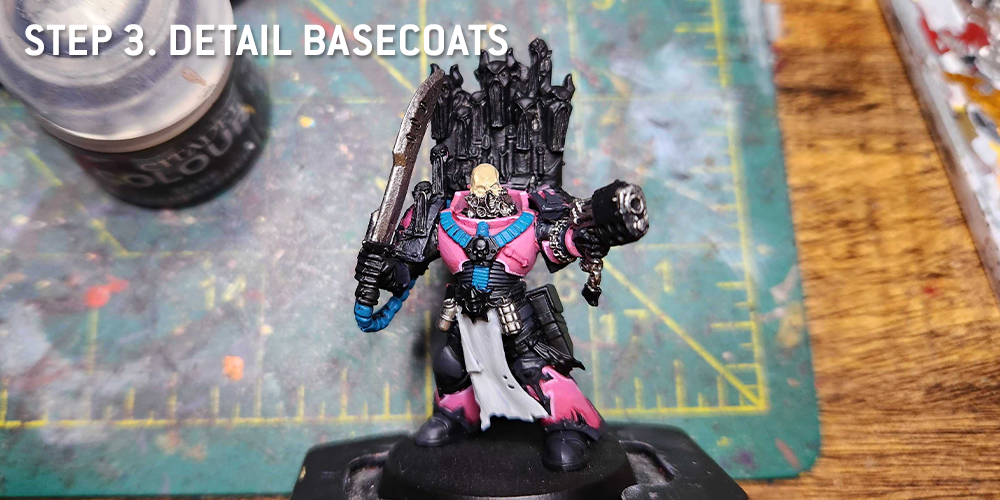
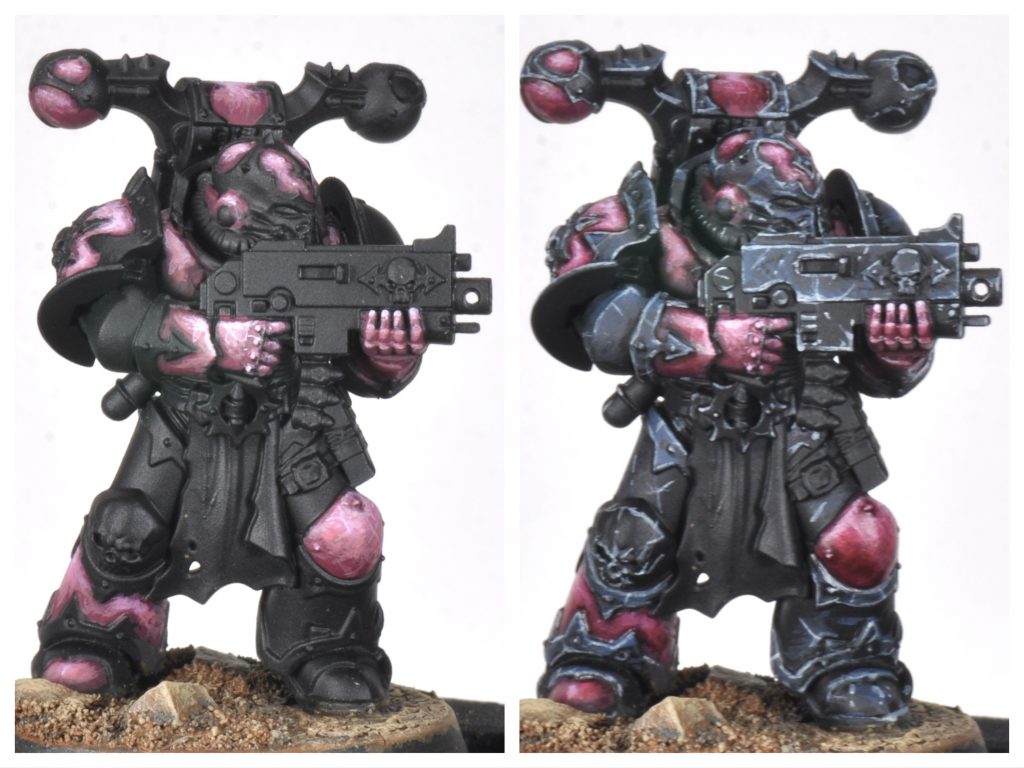
Step 3. Detail Basecoats
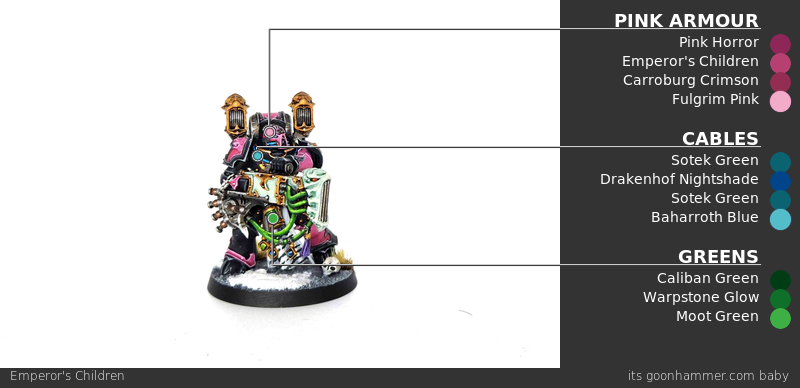
Time to start doing more of the basecoats. The cabling on my Emperor’s Children is Sotek Green, while the metal parts are all Leadbelcher. This is also where I come back and repaint the trim with Abaddon Black before highlighting it with Corvus Black and shading the two using a mix of Corvus Black and Black Legion contrast paint.
The loincloth is Grey Seer at this point.
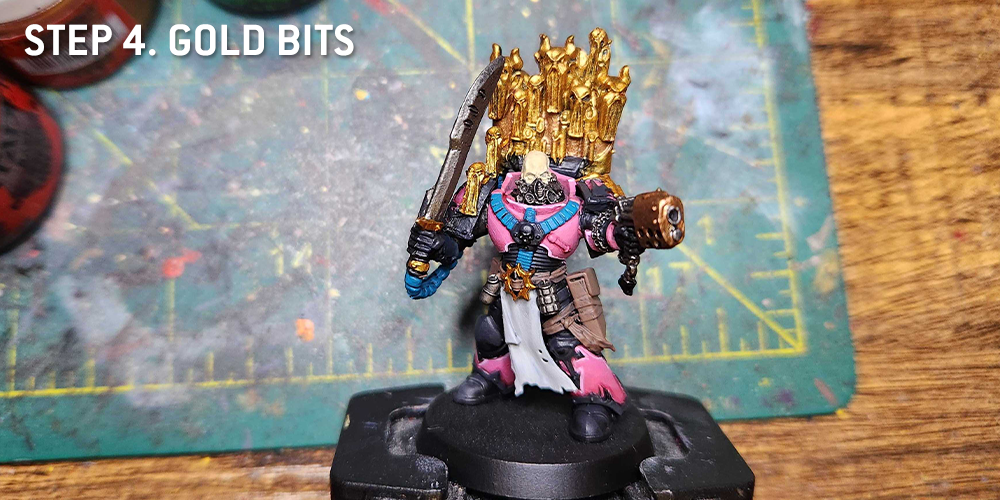
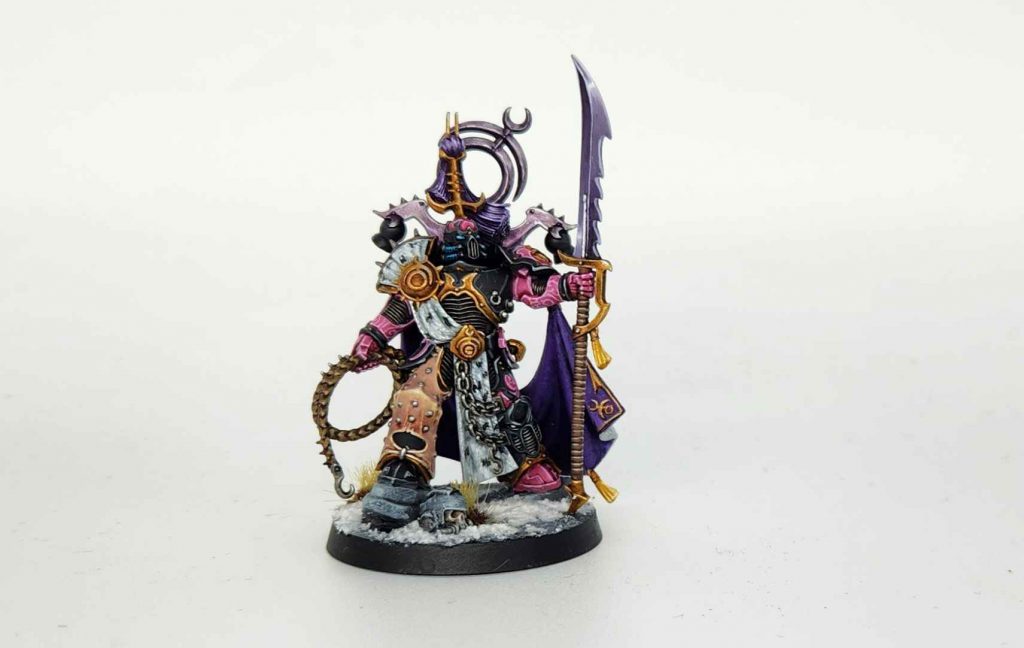
Step 4. Gold Bits
Time to hit the gold parts. They’re painted with Retributor Armour, though the plasma pistol was painted with Balthasar Gold. The leather parts – belt, holster – were painted with Cygor Brown. The skin on the head was painted with Flayed One Flesh to give him a much paler tone.
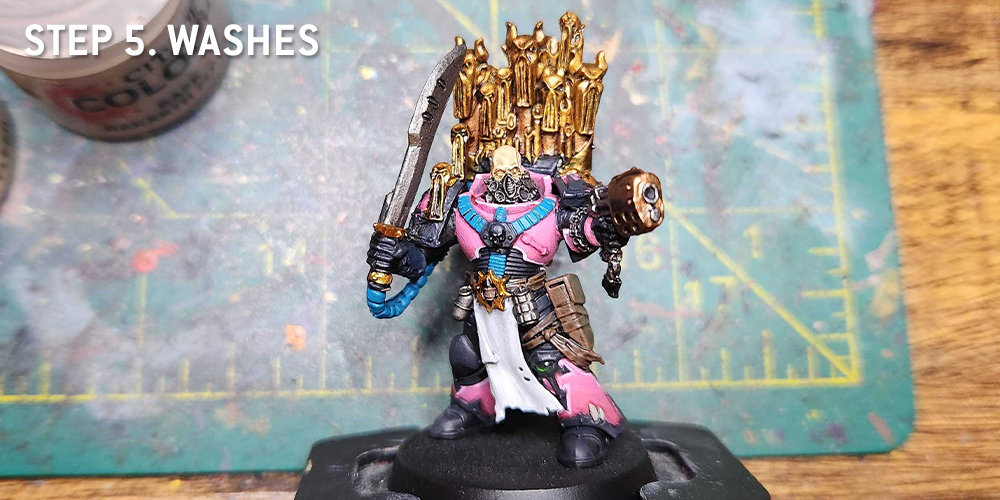
Step 5. Washes
Now It all gets washed. The gold parts are washed with Agrax Earthshade, the silver bits with Nuln Oil, the cabling with Drakenhof Knightshade, the leather parts with Agrax Earthshade, and the loincloth with Apothecary White Contrast paint. The skin of the face is washed with Reikland Fleshshade, though I do some Druchii Violet around the eyes before dotting them with Reaper Pure White.
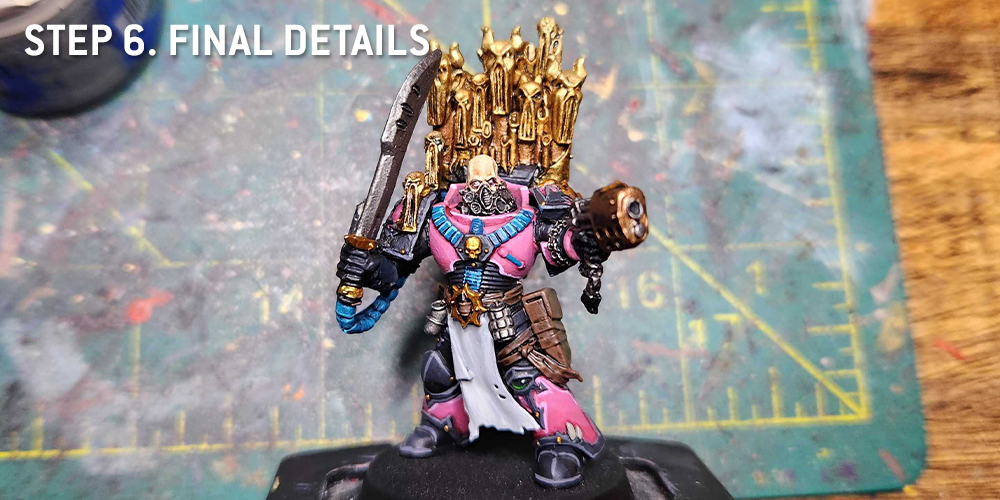
Step 6. Final Details
The final step is a bunch of little steps finishing off different color groups. The cabling gets a new highlight of Sotek Green and an edge highlight of Baharroth Blue. The black armor panels and trim are edge highlighted with Mechanicus Standard Grey. The leather parts are edge highlighted with Cygor Brown. Any rivets on the black armor are painted with Retributor Armour.
And that’s pretty much it. I highlight the face skin again, using Flayed One Flesh and some Reaper Polished Bone. It’s a relatively simple scheme, but the trick is how you apply it, figuring out when and how to mix up the pink and black.
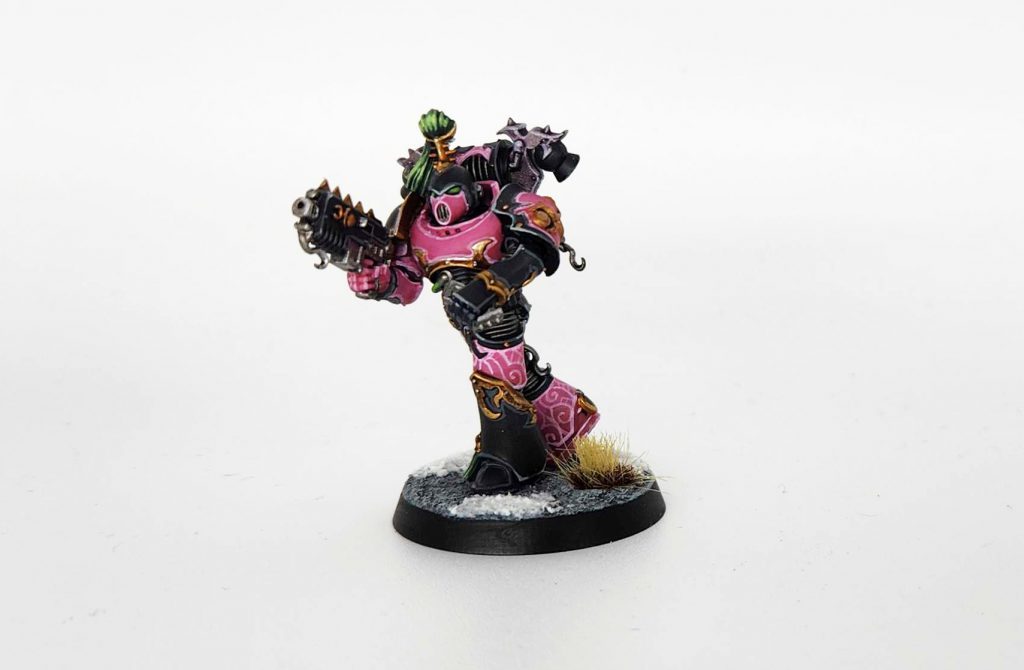
Credit: Robert “TheChirurgeon” Jones
On the more modern models there are some different details to get, and I’ve started doing more with greens like I’ve seen on the GW paint scheme. These are usually Caliban Green with highlights of Warpstone Glow and Moot Green, though I use more muted colors for hte topknots and tassles.
Overall my scheme hasn’t changed much since going to the new models. I use more Liberator Gold for highlights on the gold now, and I use Deepkin Flesh shaded with Poxwalker when I need to do the pale green elements on models like Noise Marines, but the core is still very much the same.
Credit: Robert “TheChirurgeon” Jones
The Lord Exultant
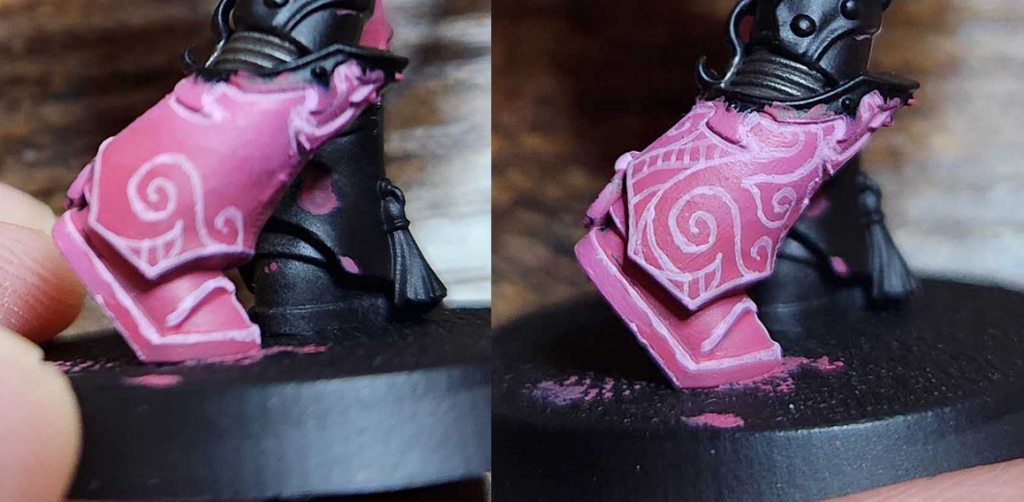
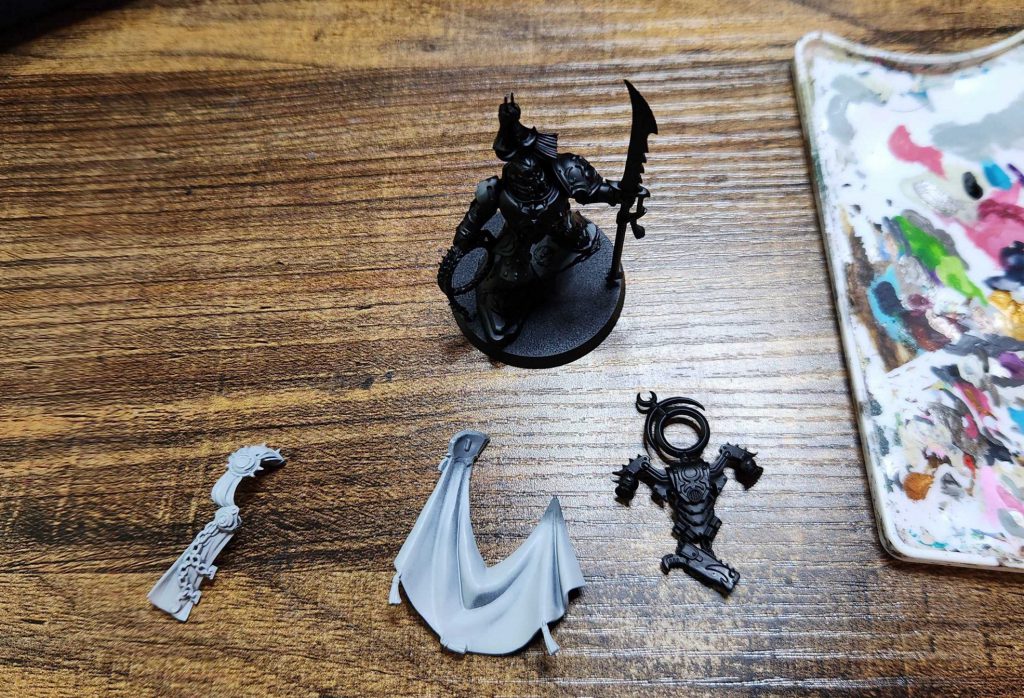
I talked about this guy in the model review, but he needed a bit of TLC in order to be painted properly. While he’s pretty straightforward to assemble, he’s got a number of bits that are a real pain in the ass to work around – specifically his combo cloak/tabard/toga doubles as his right shoulder pad, and glues together in two pieces at the top of his shoulder, with the draped cloak connecting on the left side at the bottom corner of his shoulder pad there. Because of this, when I painted him I decided to use a four-part sub-assembly:
This let me get at the hidden parts of the model pretty easily and paint the underside of the cape and tabard as I went, while also letting me easily prime them a lighter color so I could do the white fur effect.
The base model is relatively unexciting, though I mean that in a good way – it’s a very solid model with good details that never feels like it’s trying to do too much. The Emperor’s Children models they’ve released generally have a little less trim than the Thousand Sons and even standard Chaos Space Marines, and that’s delightful.
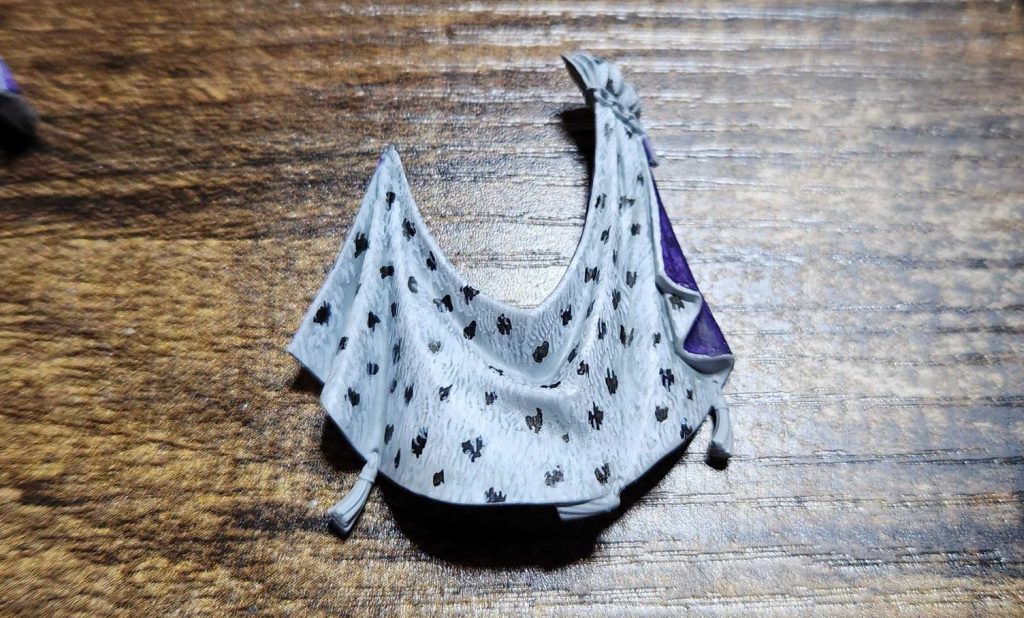
Speaking of that fur cloak, this was my first attempt at painting a fur cape. I’d see some painters do this online and wanted to try my hand at it, though having done it now I’ll say that it seems like it’s a lot easier to do this when you’re doing it with brown than with white. I started with the primer coat of Grey Seer, and then shaded using a 3/0 brush in small, short strokes with Apothecary white. I then came back and did lighter layers of those strokes as highlights, mixing Grey Seer and Reaper Pure White. the spots are painted in similar fashion with Black Legion Contrast, then I did a final pass doing small, thin hairs with Reaper Pure White. I’m very happy with the final result, though it looks a lot more impressive from a foot away. It’s an ambitious choice for the model and while I’m happy with it, I also think I only got like 90% of the way there in terms of selling the effect.
Credit: Robert “TheChirurgeon” Jones
Skails' Method - Click to Expand
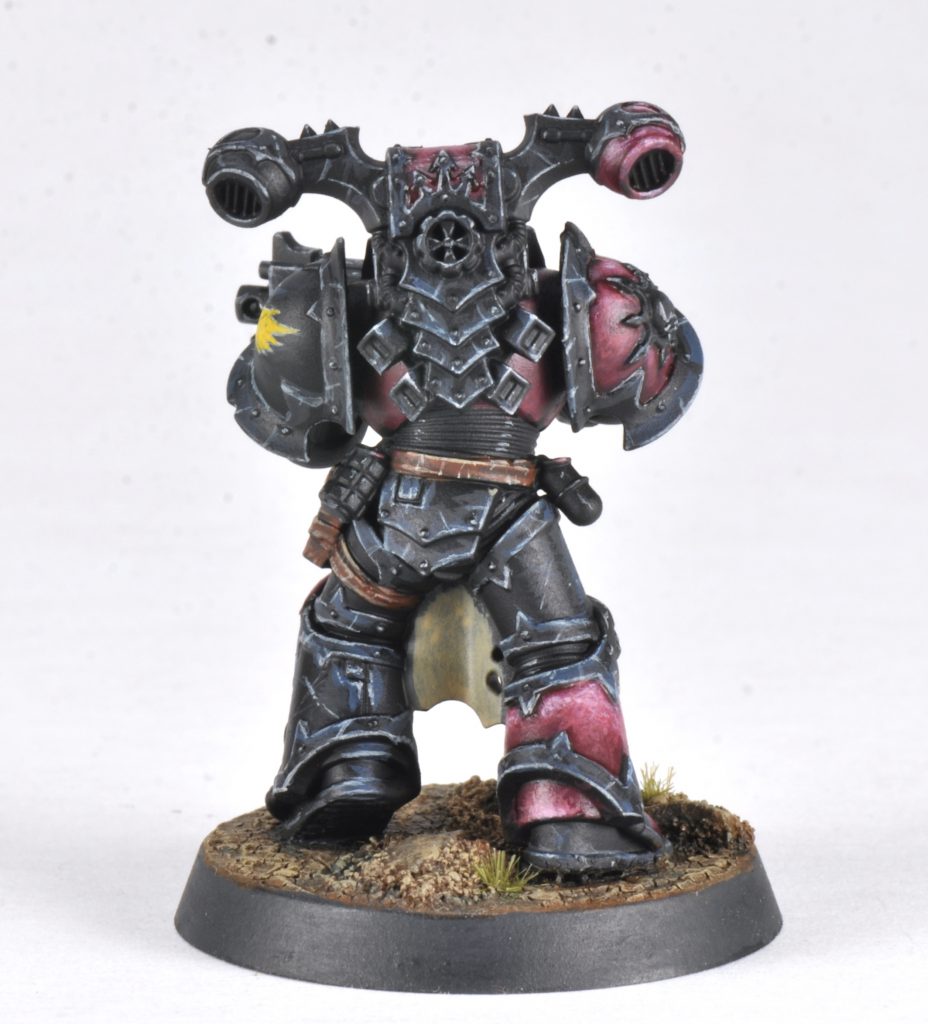
For my Emperor’s Children Marine I built and painted a model based largely on the art for the official 40k scheme (see pic in heraldry section). I simplified things a bit from my normal approach by only using metallic paint on the Bolter ammo. I also went for a more ‘raw’ look to the pink armor.
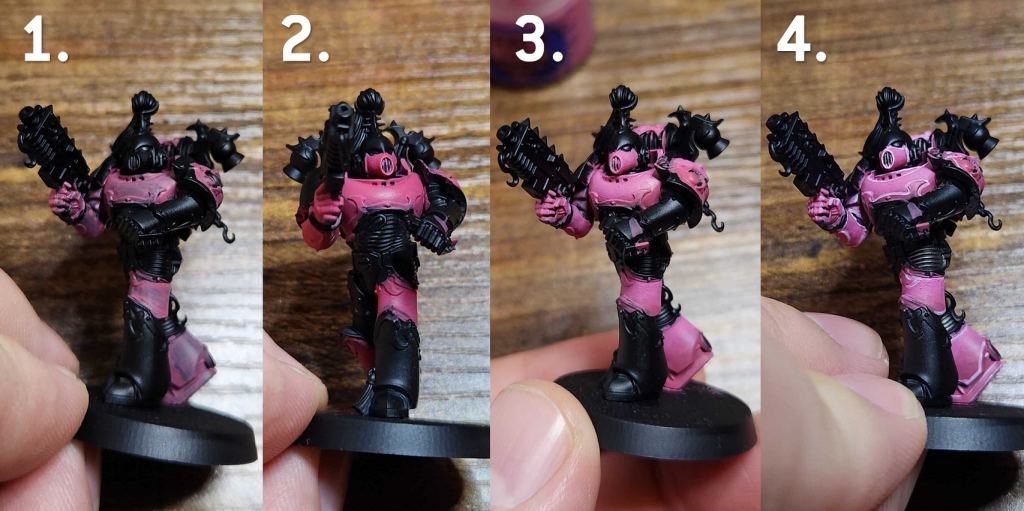
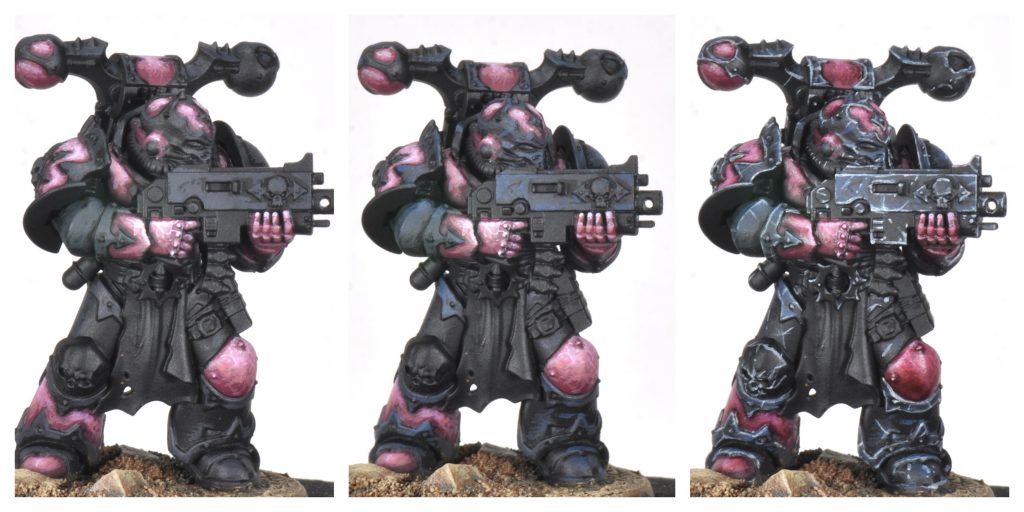
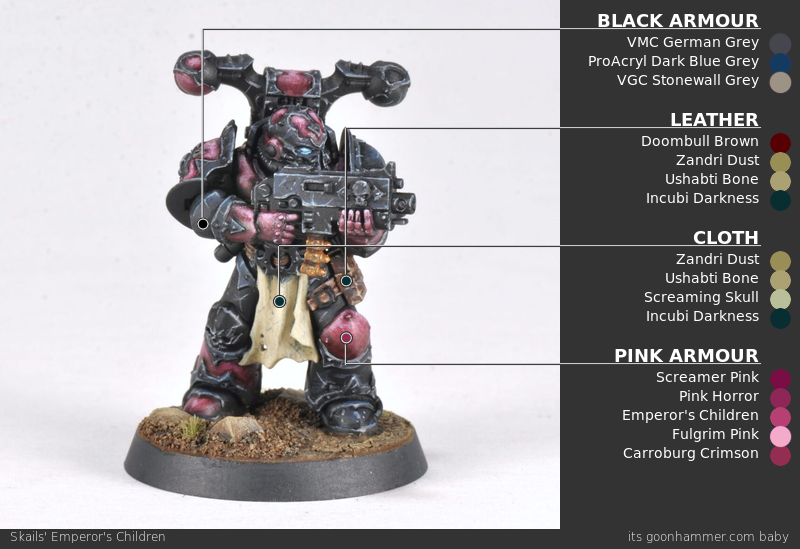
Pink Armor
(left to right)
1. Citadel Screamer Pink base coat for the pink sections of armor.
2. Citadel Pink Horror layer, covering about 75% of base coat, focusing on upward facing angles.
3. Citadel Emperor’s Children layer, again covering about 75% of previous layer. Focused on where light falls.
4. Citadel Fulgrim Pink Highlight on upward facing surfaces.
5. Citadel Carroburg Crimson wash on all pink panels. (I did come back with Fulgrim Pink and retouch the highlights afterward.)
Black Trim & Armor
(left to right)
1. Vallejo Model Color German Grey layer broadly over area where light falls. (I might be inclined to skip this step as I develop the scheme.)
2. Pro Acryl Dark Blue Grey layer toward upper edges.
3. Vallejo Game Color Stonewall Grey edge highlight. This part is time consuming but makes the whole scheme pop. I hit all edges with this; top and bottom edges of trim, body of bolter & muzzle, skull and decorations.
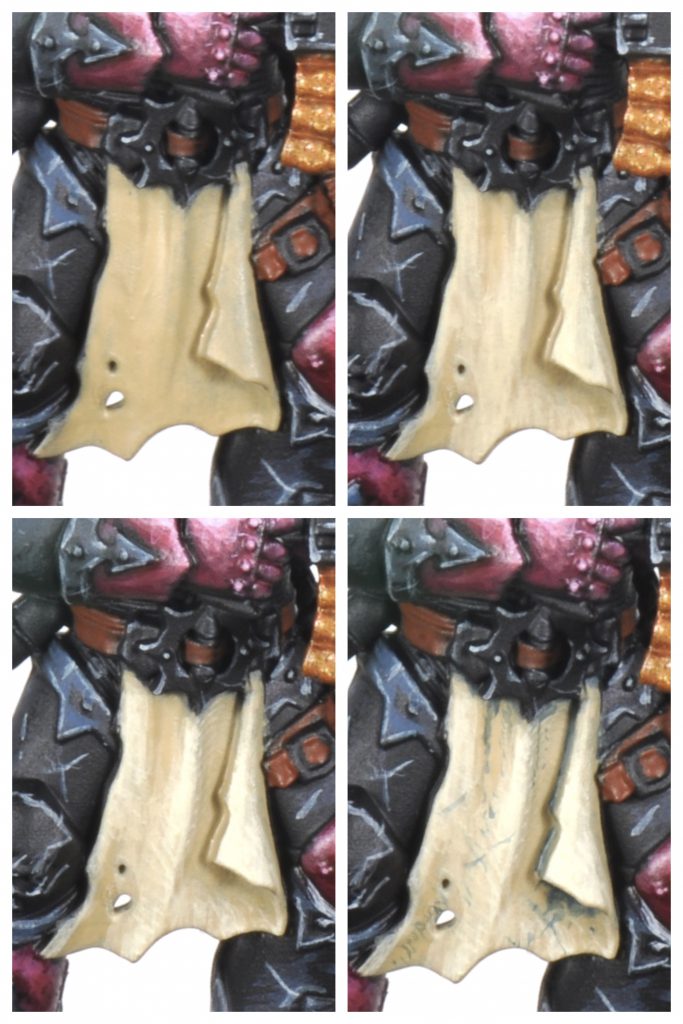
Cloth
1. (Top left) Citadel Zandri Dust base coat.
2. (Top right) Citadel Ushabti Bone layer covering about 75% of base coat.
3. (Bottom left) Citadel Screaming Skull highlight, covering about half of previous layer, focusing on raised areas. Applied with thin lines.
4. ( Bottom right) Citadel Incubi Darkness deep line recess shade and slashes.
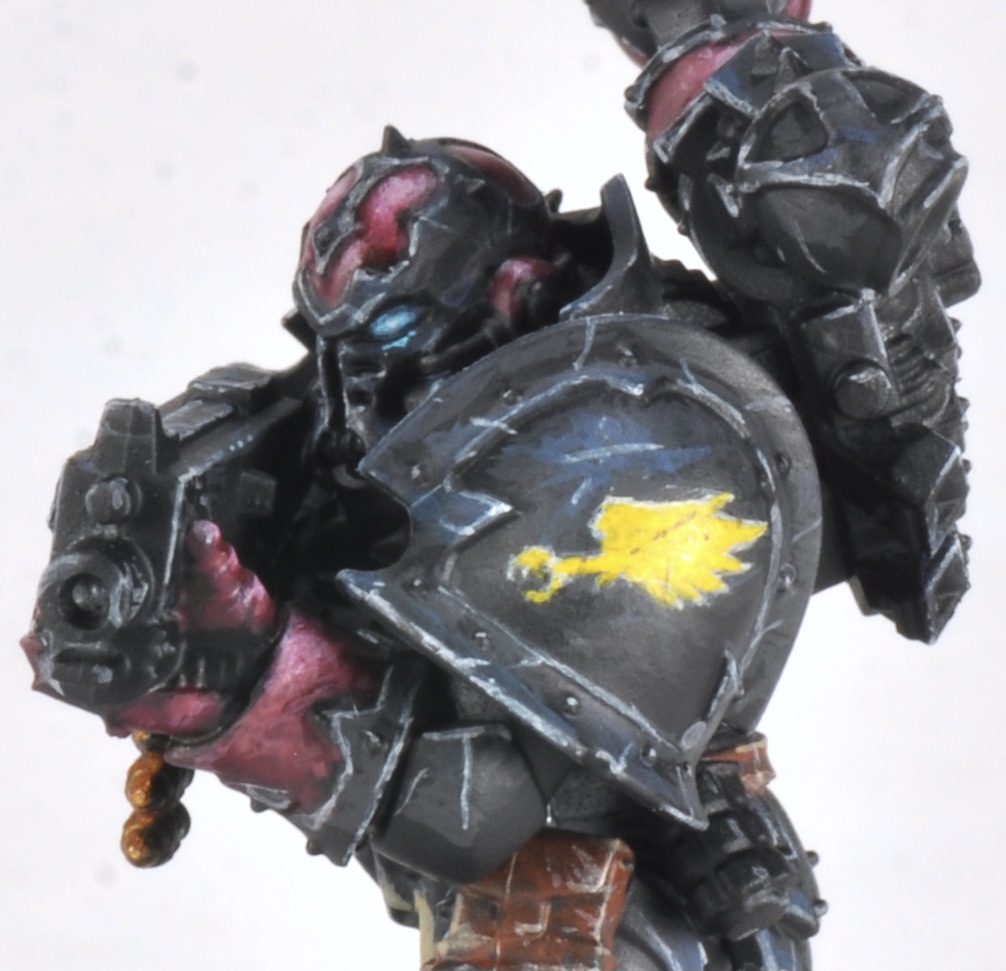
Emblem
Doing this emblem is very much ‘draw the owl’. I started with an outline of the claw and wing using Ushabti Bone and then filled it in with the same. Touch ups and adjustments were done with German Grey. Once that was done I used Vallejo Game Color Sun Yellow. The Ushabti Bone base layer allows the yellow to go on smooth and bright.
Other Bits
Lenses: Pro Acry Turquoise highlighted with Vallejo Game Color Glacier Blue Leather: Citadel Doombull Brown base coat. Zandri Dust on all edges. Scratches with Ushabti Bone and Screaming Skull. Incubi Darkness recess shade and scratches. Bolter Rounds: Scale75 Victorian Brass base coat. Citadel Seraphim Sepia wash. Scale75 Pure Copper highlight. Recess shade & deep lines with Incubi Darkness.
Emperor’s Children Chaos Marine. Credit: Skails
TheChirurgeon's Pre-Heresy Emperor's Children - Click to Expand
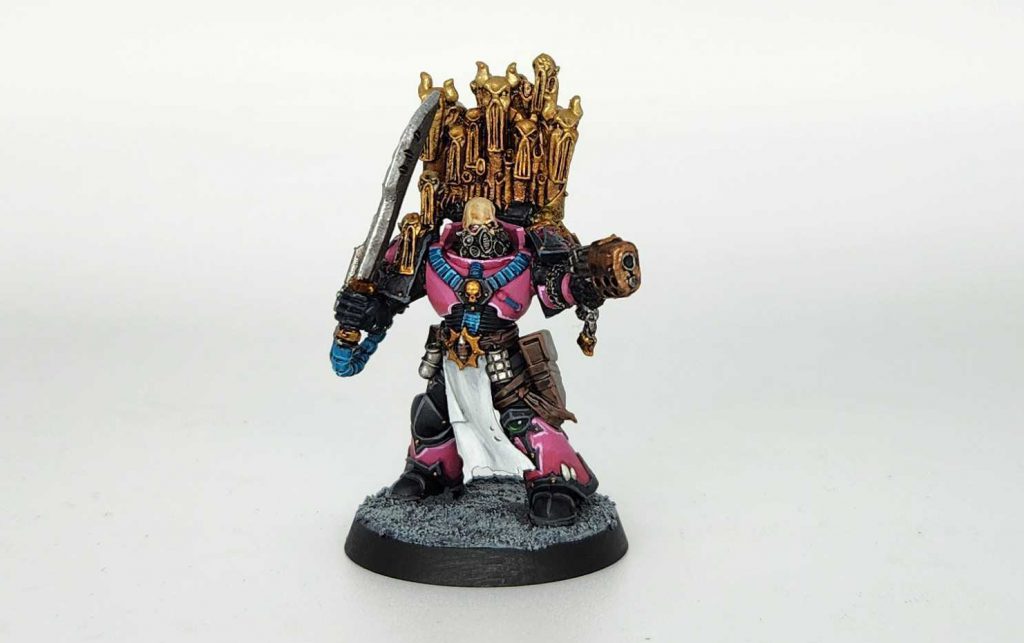
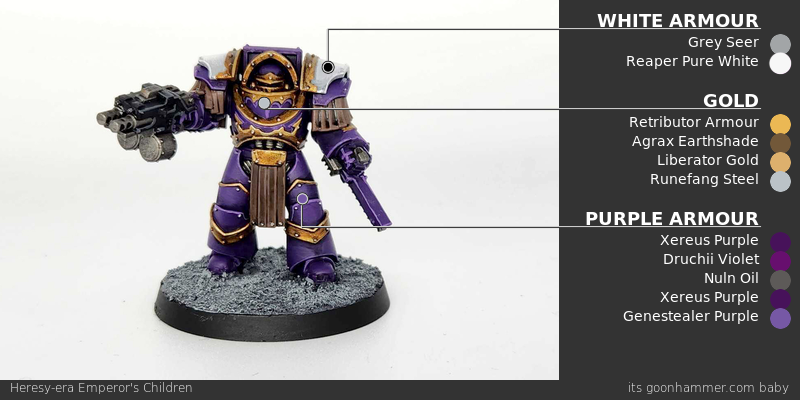
Prior to their traitorous turn, the Emperor’s Children wore regal purple armor, with their elite warriors often featuring gold trim and white shoulderpads. I chose to paint an Emperor’s Children Terminator to make sure I had these elements as well.
I started by priming this model black.
Step 1. Purple Basecoat
Start by coating the model with a couple of thin coats of Xereus Purple. That’s the base color I used here.
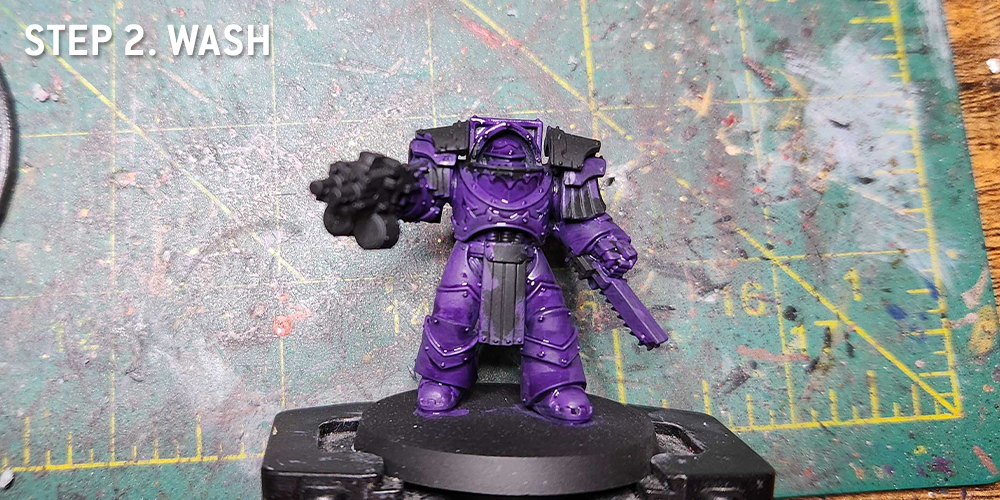
Step 2. Washing/shading
Next up comes washing the thing. I used Druchii Violet for this at first, but that was a little too close in shade to Xereus, so I’d recommend mixing it in a 3:1 fashion with Nuln Oil for a better effect.
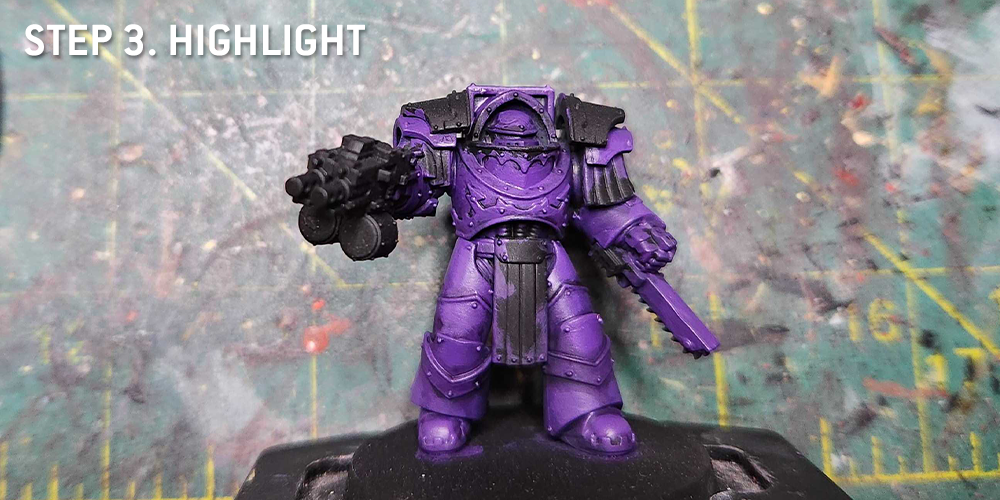
Step 3. Highlight
Next up I hit the armor again with some Xereus Purple, then a blended highlight mix of Xereus Purple and Genestealer Purple.
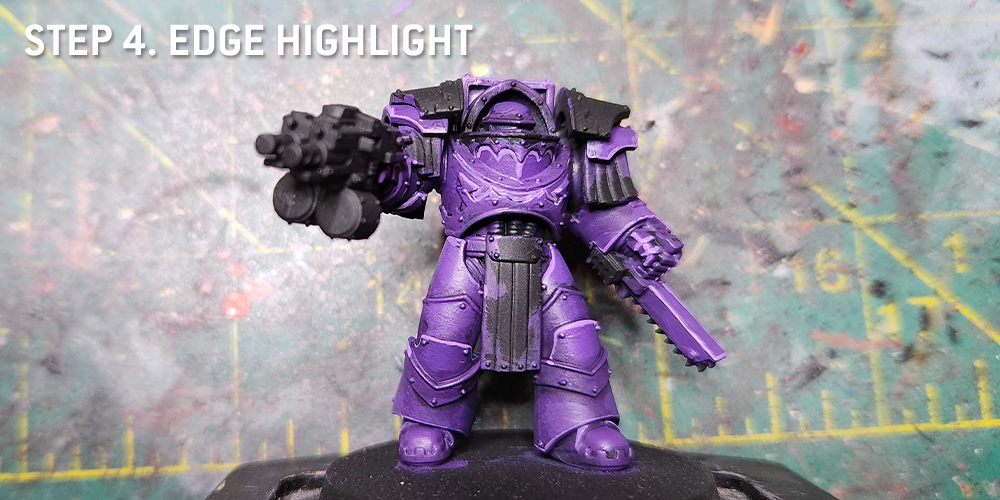
Step 4. Edge Highlight
Edge highlight the purple with Genestealer Purple.
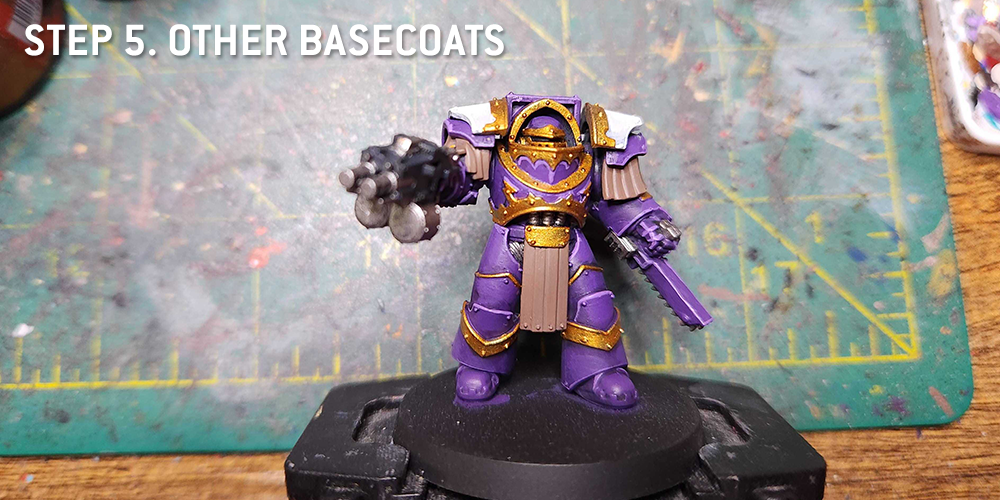
Step 5. Other Basecoats
This seems like a lot but it’s not as bad as it looks. The metal bits are painted Leadbelcher, the gun casing is Corvus Black. The upper shoulder pads are Grey Seer, which I’ll blend highlight up to Reaper Pure White. The gold trim is Retributor Armour, and the leather strips are done with Cygor Brown.
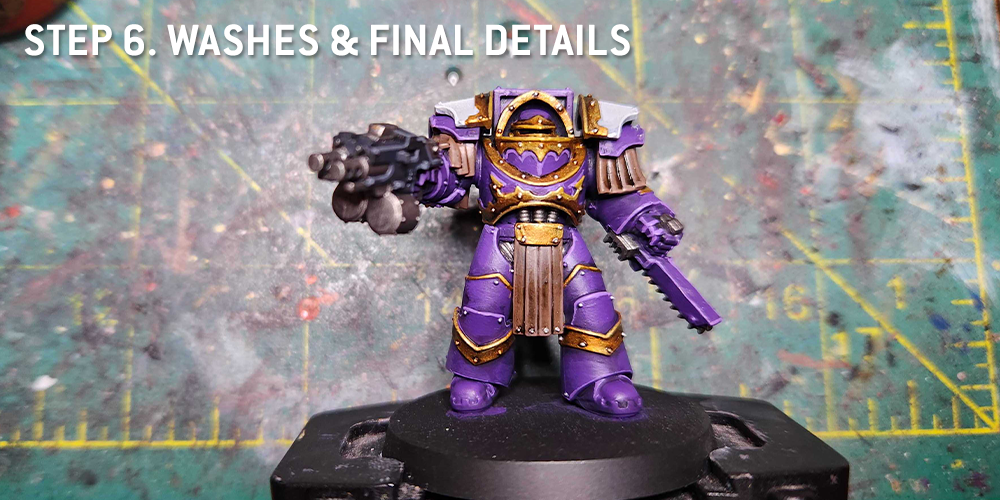
Step 6. Washes & Final Details
Again, seems like more than it is. I washed the leather and gold bits with Agrax Earthshade, and the metal parts and gun casing with Nuln Oil. I came back and edge highlighted the gold parts with Liberator Armour to give it a brighter, paler shine, and then I painted the rivets with Runefang Steel. The upper shoulder pads were edge highlighted with Reaper Pure White.
And that’s it. This was easier to paint than I expected and turned out pretty nice.
2nd Edition Noise Marines - Click to Expand
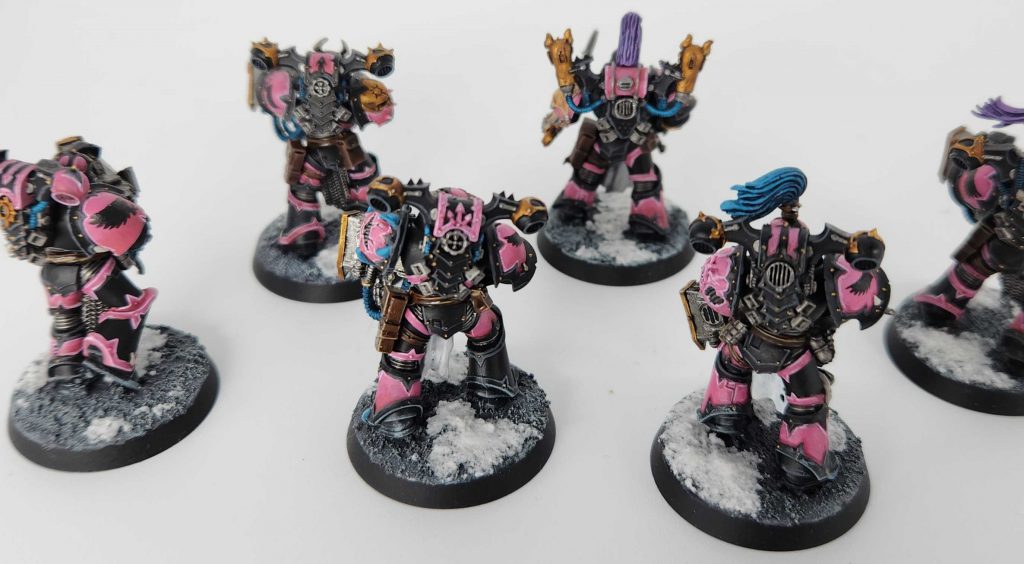
2nd Edition Noise Marines were a lot less uniform in color, using mostly dark armor with lots of bright pink, blue, and yellow trim to go with the metal models that came out about 6 months after Codex: Chaos released. They’re pretty wild models on the whole, and unlike nearly anything else in the Chaos range.
I started by priming the model black, then highlighting the black areas with Corvus Black and later a 50/50 mix of Corvus Black and Mechanicus Standard Grey, which I’d edge highlight with Mechanicus Grey.
The pink trim is Emperor’s Children, sometimes shaded with Carroburg Crimson or Pink Horror, with Fulgrim Pink for edge highlights. The skulls on the knee and the sonic blaster are Warboss Green shaded with Biel-Tan Green and then edge highlighted with Skarsnik Green. The red parts on the gun are Mephistoon Red with some highlights of Evil Sunz Scarlet and Wild Rider Red. The mouth tube is Naggaroth Night highlighted with Xereus Purple.
Originally the Noise Marine models were presented with three color schemes: Pink for the sonic blaster, blue for the blastmaster, and yellow for the doom siren model. I’ve also painted up a Blastmaster model below, using Caledor Sky as the base color on the trim and highlighting it with Lothern Blue. For the yellow I’d do Averland Sunset as the base, then highlight that with Flash Gitz Yellow and edge highlight it with Dorn Yellow.
Credit: Robert “TheChirurgeon” Jones
Finally we should mention Fabius Bile, the former Chief Apothecary of the Emperor’s Children. While Bile has long since cut ties with the legion and struck out to lead his own Consortium, he does still fall under the category of “Emperor’s Children named characters.” Click on the banner below to go to his article.
Have any questions or feedback? Drop us a note in the comments below or email us at contact@goonhammer.com. Want articles like this linked in your inbox every Monday morning? Sign up for our newsletter. And don’t forget that you can support us on Patreon for backer rewards like early video content, Administratum access, an ad-free experience on our website and more.
This website uses cookies so that we can provide you with the best user experience possible. Cookie information is stored in your browser and performs functions such as recognising you when you return to our website and helping our team to understand which sections of the website you find most interesting and useful.
Strictly Necessary Cookies
Strictly Necessary Cookie should be enabled at all times so that we can save your preferences for cookie settings.
If you disable this cookie, we will not be able to save your preferences. This means that every time you visit this website you will need to enable or disable cookies again.
3rd Party Cookies
This website uses Google Analytics to collect anonymous information such as the number of visitors to the site, and the most popular pages.
Keeping this cookie enabled helps us to improve our website.
Please enable Strictly Necessary Cookies first so that we can save your preferences!