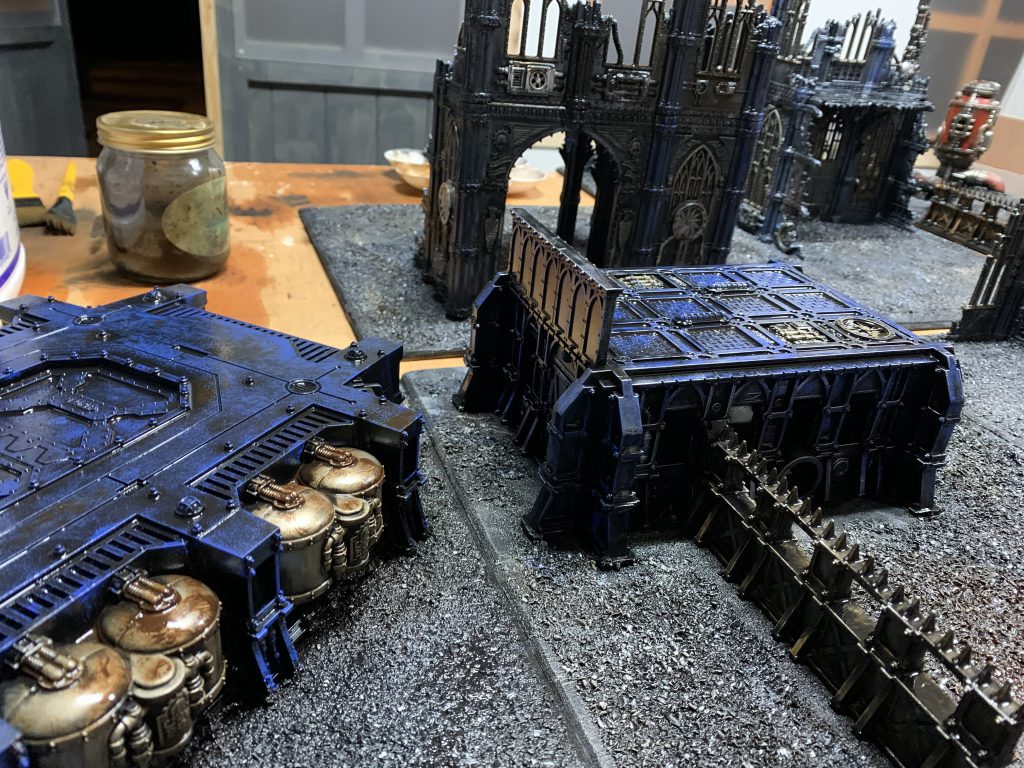
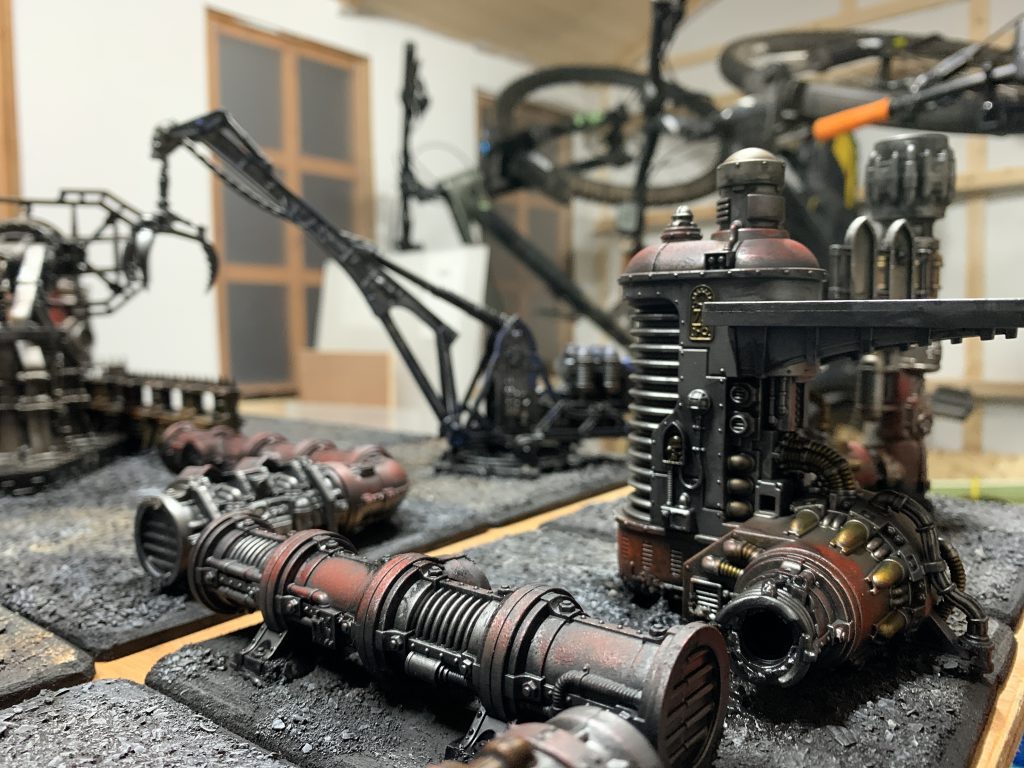
In our How to Paint Everything series, we take a look at how to paint different models, armies, and materials, and different approaches to painting them. In this article, we talk about adding bases to your terrain, with an emphasis on painting multiple pieces in a short period of time so you can get a full table of terrain ready.
When it comes to terrain, there’s often a big question to answer before you start painting things: Are you going to put a base on the terrain or not? There are a number of reasons to add bases to your terrain and in this article, we’ll cover some of the pros and cons about adding terrain bases, then we’ll walk through some methods for creating and painting terrain bases.
Why Base Terrain?
Basing terrain is a fun project, and there are several reasons you might want to do it:
- Mechanical advantages. Sometimes the game rules really want you to have pieces of area terrain, or terrain pieces with a clearly defined area for models to be on in order to gain a benefit. Warhammer 40,000 is absolutely this kind of game, and its rules push you toward having things like ruins and forests on bases. This isn’t necessarily as important in other games, though.
- Aesthetics. Generally speaking, based terrain looks better, and there’s a lot more you can do with bases for your terrain, like build around the terrain features and transform a piece of terrain into a small diorama. This can really add a sense of place to a piece and make it stand out on the table.
The case against
That said, there are a few reasons you might not want to base your terrain, and we’ll run through those really quickly:
- Aesthetics. While based terrain tends to look better, it also locks you into a particular aesthetic. If your terrain base doesn’t match the table, it’s going to look off. There are a few ways to get around this, however.
- Modularity. Once you glue that terrain down to a base, you’re stuck with it, and that will typically mean you’re less free to move pieces around and change things up.
- Storage space. Terrain bases take up a lot of space, and almost always increase the footprint size of a piece of terrain.
Mike Bettle-Shaffer’s Method
Planning hobby projects is often a blind-spot for me, and is only really in writing guides like this that I can share what went wrong for me and how I might tackle things differently if I was doing it all again. Before doing anything else, have a think about how much space you’re trying to cover and what the end goal of the project is. Once you’ve got this established don’t be tempted to let the scope of the project creep as your goal here is volume and if you’re on a tight time schedule a little change to the level of detail can blow up the overall effort you’re going to be putting in.
If you’re planning on basing all of this, pick a material early and get everything together that you’re going to need to treat it. Warping can be a real pain so do a little research and understand how you cant treat the material, and what can be done if you do fall to the warp. If the kit includes any roads, walkways or pipes that need to be linked start considering how you might want to different configurations to work. After building my pieces but before attaching them to the bases I used some paper templates to test different configurations.
Slapping built kits straight on to painted boards can end up looking pretty plain, so getting some additional texture added can go a long way towards bringing the board to life even if it’s as simple as a layer of gap filler or Stucco.
Next up is your colour palette choice, the tighter you keep this the faster your overall process is going to be but this doesn’t mean the pieces need to end up looking boring. Selecting two or three contrasting colours can add pop to terrain without too much extra work. If you’re going to be using oil washes you should be aware of how you’re filter layer is going to change the overall tone of your base colours, I’ll be covering a couple of the more common choices later.
Assuming this is all for club or tournament use, you’re going to want a solid layer or varnish. I didn’t have time to source anything stronger than Vallejo Mecha varnish however I’ve heard good stuff about Future Floor Polish applied by airbrush. Regardless you’re going to want a couple of coats.
Now that you’re done, where’s it all going in the short term, and long term? Sturdy stackable storage boxes are great and there’s a huge variety of options. I’m a fan of of using heavy duty recycled plastic boxes and I know lots of people like the Really Useful boxes.
There’s a lot to think about here, but it really is worth taking the time to consider all of it and prevent your future self some headaches.
I ended up dividing my working area in to three staging grounds, sorting sprues in one area, setting aside space for a dedicated build area and then stacking built pieces in a separate space.
Assembly
It’s worth taking some time to match up the various sprues, especially when building multiples of the same kit or a kit with repeated pieces. This allows you to do the same step all at once which can really help speed up the work flow.
Assuming you’re building plastic kits then a decent plastic cement like Tamiya Super Thin helps speed things along and if you’re building MDF superglue is actually a fine choice and if you combine it with an accelerator spray you can get through kits incredibly fast. The downside of this is bonds can be more fragile than using PVA but if you’re assembling pieces that need to be held at odd angles while glue sets superglue can be a real time saver here.
Basing
There’s a few good options for basing your terrain, EPVC foamboard and plywood are both good choices for thinner (minimum 5mm thickness) bases and materials such as XPS work well at higher thicknesses for basing.
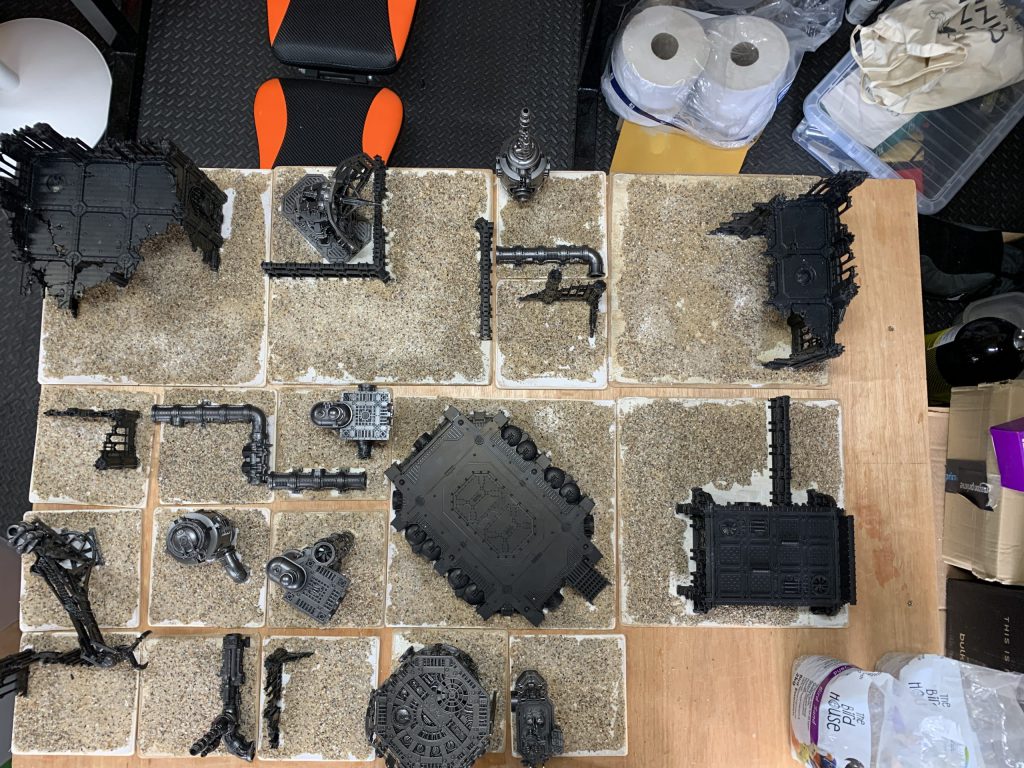
For my build I happened to have a bunch of spare plywood from another project. Terrain in Horus Heresy comes in two sizes, either 6″ or 12″ squares. I marked up all of the long cuts and using a plunge saw batch cut all of my pieces. Make sure you count how many you need before starting, and then double check the count. Getting everything set up again to make two or three more cuts is annoying. For more varied shapes a jigsaw and if it’s the only thing you have around to make long straight cuts then just take your time and you’ll be fine. Once everything is cut sand the edges to remove the sharp corners and help the base piece blend in with the overall board, again a palm sander is great for this but if you don’t have one then a palm sized section of 2″x4″ wrapped with some 80 grit will work just as well. For finishing I’d suggest working up to 120 or 160. You’re going to be applying filler and primer down the line so it doesn’t need to be perfect right now.
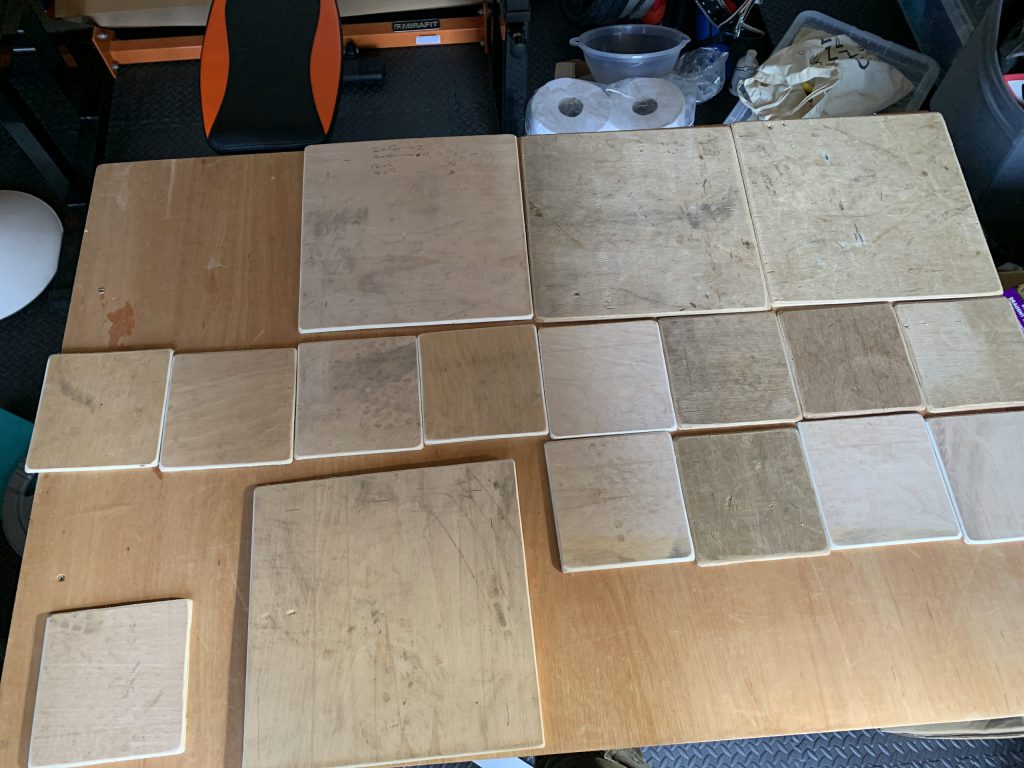
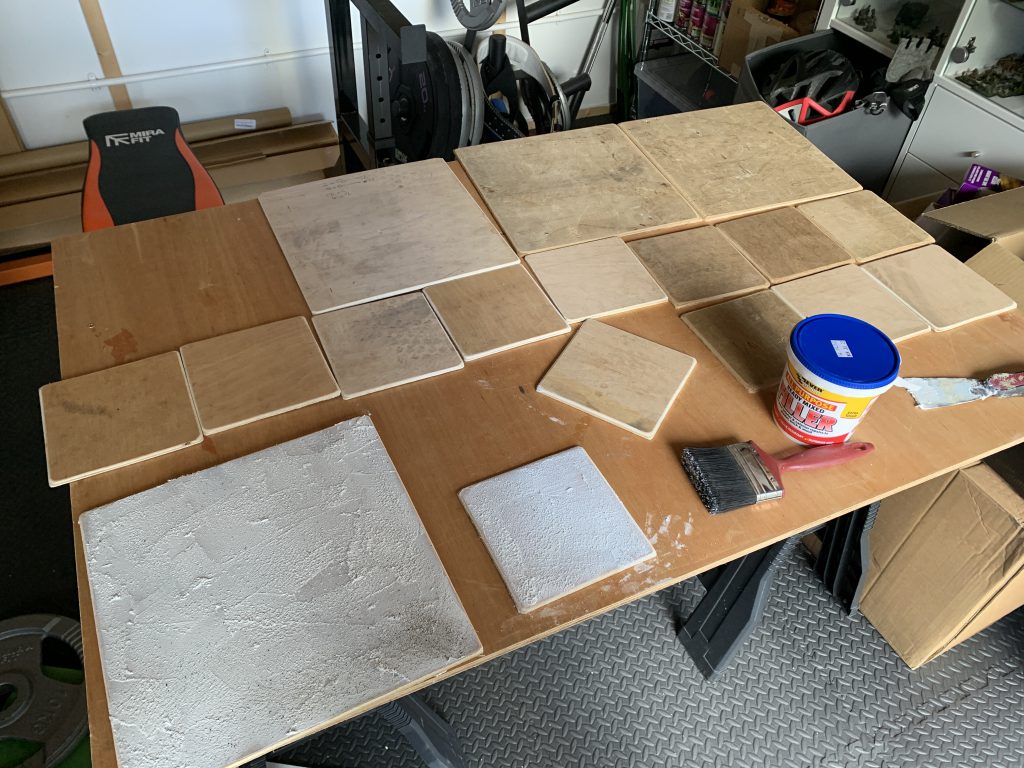
If you don’t properly treat your base boards you can very easily end up with warped pieces which can be a huge pain to fix. Warping occurs when one side of the material is forced to contract due to a layer like primer or PVA being applied to an improperly sealed piece. A simple way to prevent this is to apply a layer of non-shrinking or crack resistant filler to the side you’re basing. A reasonable layer of this will then allow you to build upon the surface with various grits and texture pastes without having to worry about the board subsequently shrinking. Given you’re going for volume here, if cost isn’t an issue then premixed is a great choice, otherwise mix your own and get a layer down. Once the filler is dry you can go back and clean up any edges with your sander as needed, and then you’re ready to start getting things attached.
With your boards prepped it’s time to get all the assembled terrain pieces together to attach them to the bases. The best way to tackle this is a high flow hot glue gun, I’d suggest using one capable of at least 60W if you’re doing large pieces or a lot of terrain. Get everything tacked down to the boards in a few spots, then I’d actually suggest going back and running a thinner bead along the base to help strengthen the bond and blend the terrain to the board a little more. I missed doing this on a couple of pieces and didn’t notice until it was too late to go back and fix easily. Once everything is glued down you’re ready to apply some extra texture.
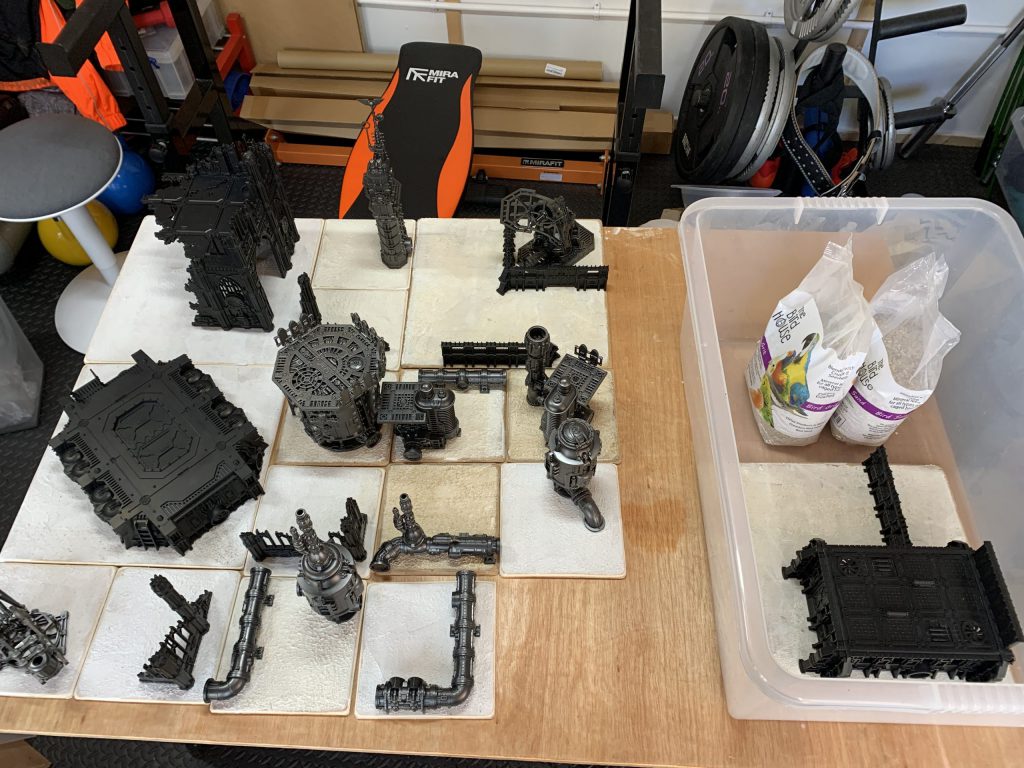
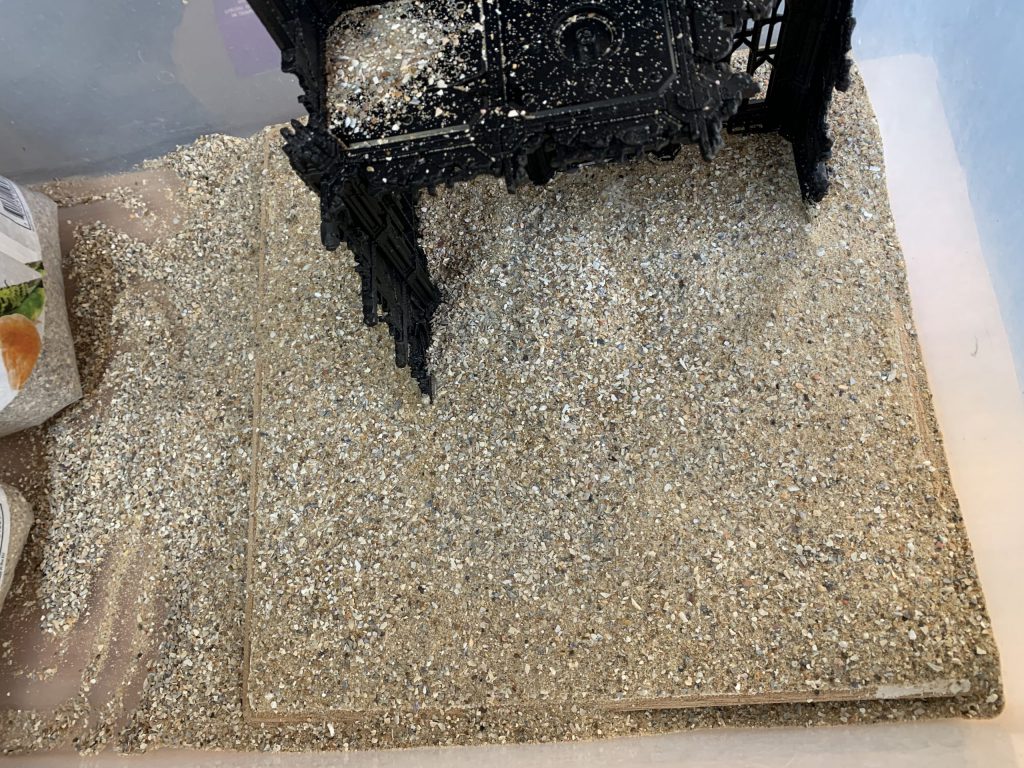
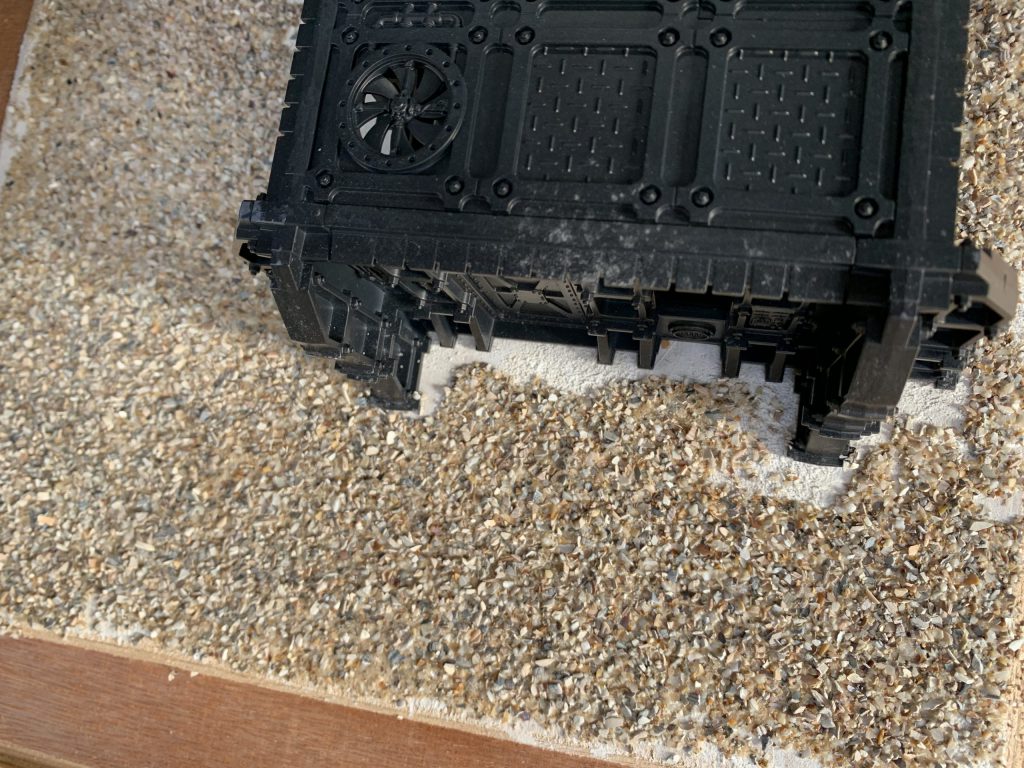
There’s a lot of great options for cheap textures here and hardware and pet stores are your friend. A 5kg bag of playground sand is going to last forever for fine texture work and a sharp sand mix or coarse bird grit is great for adding more body. I used a mix of coarse and fine bird grit for this a couple of kilos was more than enough. To fix it all down I started with a layer of PVA thick enough to look white can cover the gap filler, then I applied generous handfuls of the coarse bird grit over the entire area, followed by the fine grit. Once I’d completed both passes I’d turn the boards on their end to shake off the excess and move on to the next one. Through my process I varied how much of each I used in a given pass just to give a little more variety to the overall base. This can be a messy process so make sure you’re somewhere that’s easy to clean up, and if you have it a large shallow tray to help contain everything can be super useful.
Once the first layer of PVA is dry you can move on to priming if you want, however if this is going to be used for clubs and tournaments it’s worth adding some extra strength. I did this using a technique commonly used by railway modellers and other scenic builders, a combination of wet water and diluted PVA. Wet water is a 1:1 mix of methylated spirit and distilled water, adding alcohol to the water allows it to flow in to all the small spaces while also driving a faster evaporative process. For a less toxic option you can mix 1:100 dish soap with water. Start by applying the wet water using a small paintbrush, gently dabbing it on to the basing material and allowing it to soak through. A spray bottle can also be helpful for this, but I ended up just using spare house painting brushes. Once the surface has been wetted apply a watered down PVA solution containing 1:1 PVA to water, a drop of dish soap is also helpful to break the tension further and aid in distribution. This entire process helps the glue mix soak through the ballast layer, increasing the bond strength and overall durability of the texture layer.
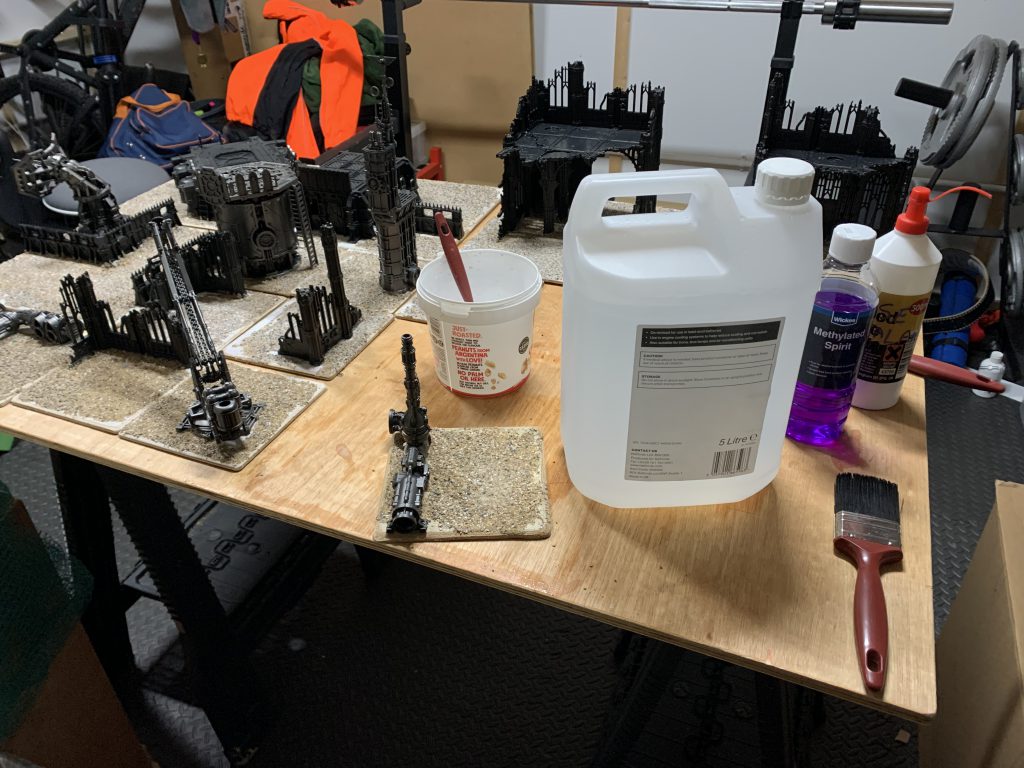
Painting
Spray priming is going to give a more durable layer but it can end up expensive, depending on how much terrain you’re trying to prime. I used my airbrush for this project and ended up having to split it across two sessions after tripping the thermal cut out on my compressor. In my images, I’ve primed everything before gluing it down and honestly I don’t think it makes too much of a difference. If you’re priming with an airbrush the additional primer layers may help with toughness, spray priming I’d advise assembling everything to bases then priming just so you’re not losing too much detail.
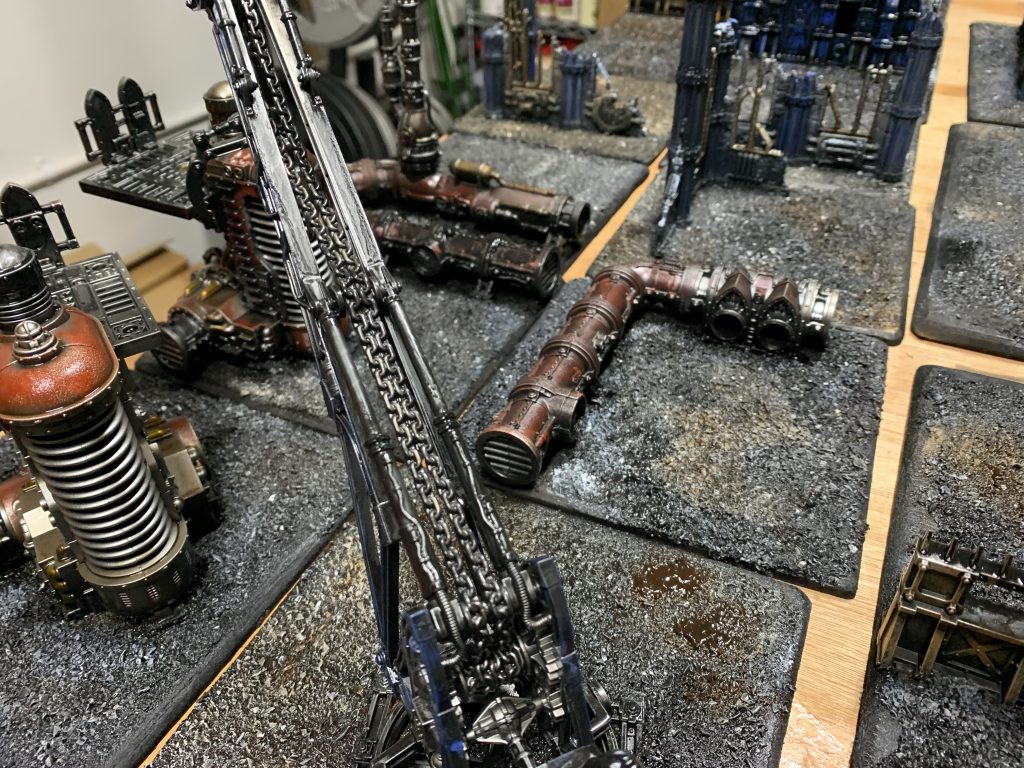
With everything primed I hit all of my metals with my choice of metallic using the airbrush. A few drybrushing passes would work equally well here and will give a different overall texture to your metals. After the initial pass with the airbrush I picked a brighter silver and a large dry brush to catch the edges. Once the metals were done I went back and using a sponge added my first colour to the Mechanicus pieces. For the garrison walls, I used a large dry brush to add browns and oranges across the pieces to simulate rust and grime.
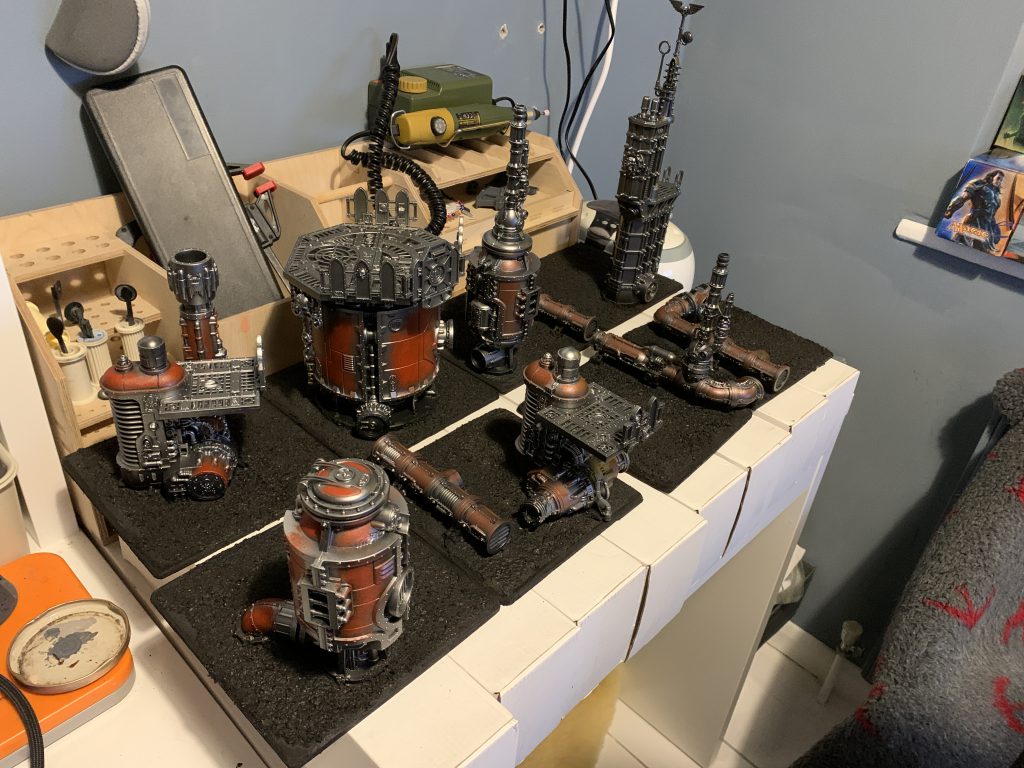
For my non metallic pieces I again used the large sponge and heavy body acrylics from the Daler Rowney System 3 range. These work out cheaper than regular war gaming paints and go a lot further when you’re painting terrain. A sponge is a great way to add some texture and get large areas covered relatively easily.
Once all of the base coats were applied I went back and picked out the light sources such as generator coils and lights with white ink using the airbrush, and then used yellow ink for the lights and Ghost Tint Plasma Discharge for the generators.
With the buildings done I worked up in three passes from grey through to white on the bases themselves in a slightly random pattern to highlight different areas, underpainting ahead of applying my oils.
Weathering
Oils are an incredibly easy way to add some extra life to your terrain, and are very easy to work with when blending. For this project I used Lamp Black and Burnt Umber, diluting them down with odourless thinner to be applied as a wash. This wash was used across all of the pieces and the boards themselves to add some colour quickly. After covering the pieces with the oil wash I then used old rags, and cotton buds for the smaller areas, and more thinner as needed to remove the wash and blend it to the recesses. If you haven’t experimented with oils before a terrain project like this is a great chance to try things out as they can be easily removed using thinner. Another great thing about oils is even after drying they can be reactivated with the thinner and continue to be worked, until sealed with varnish.
I was working pretty fast through all of this and wasn’t being too careful about how the two oil washes overlapped. When working with oils, especially in this volume I’d recommend wearing an N95 mask and making sure your space is well ventilated as the thinners can be pretty unpleasant.
With everything weathered you’re finally ready to seal it with varnish. There’s no harm in a couple of extra coats at this point and it’s all going to help with the overall durability of the project.
Hopefully you’ve figured out how you’re storing everything at this point, because you’re ready to deliver it to your club or local tournament organiser, unless that you. In which case I hope you have the space for all your shiny new terrain!
TheChirurgeon’s Method for Building a Games Workshop US Open Table
The GW terrain layout isn’t my favorite – I think it needs taller ruins to hide bigger models – but it’s pretty good, and gives melee units the ability to approach out of sight on most maps. The ruins are large and do a decent job preventing long sight lines most of the time, and you have to make some careful decisions about placement.
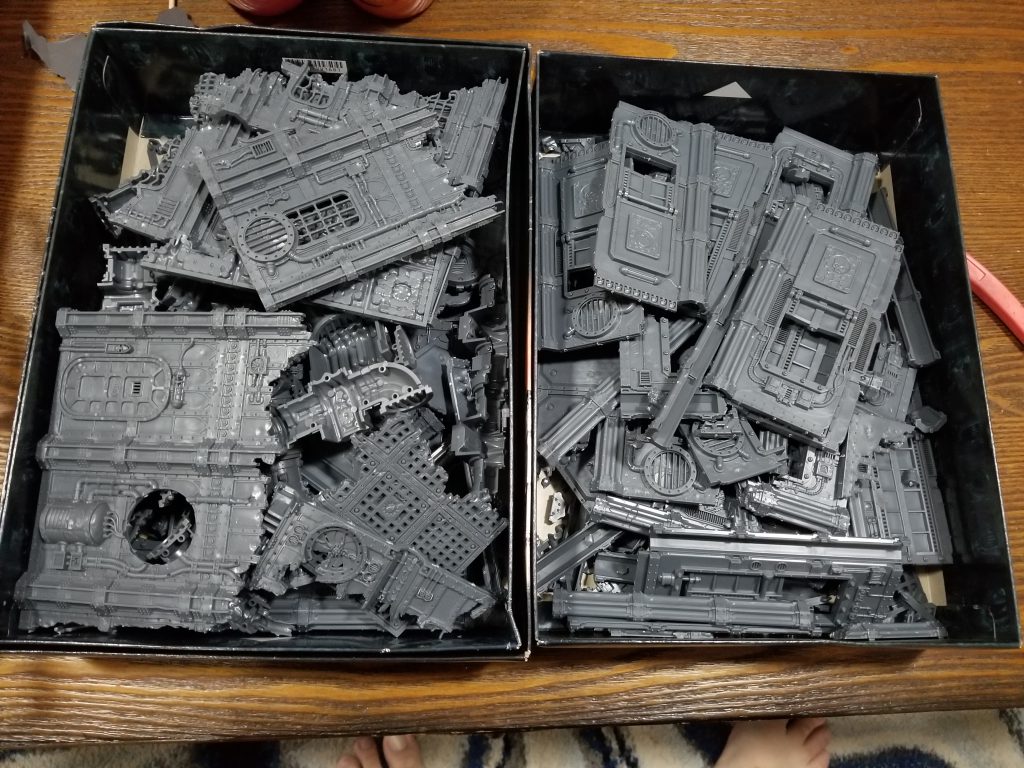
Breaking Down the Project
There are basically four aspects to this build:
- The bases
- The four large ruins
- The two medium ruins
- The four pieces of dense terrain
The ruins – all of the terrain – are built from official GW terrain. That means that replicating them will be easy but also pretty expensive. I’ll come back to that later. The bases are also non-trivial, since I need to figure out how to create solid large bases without gluing the terrain down on them – the terrain has different configurations on the bases for day 1 and day 2, and so I need to be able to adjust and move the terrain around on the bases. That means that adhesive-backed vinyl floor tiles – my usual go-to – are out.
Building the Ruins
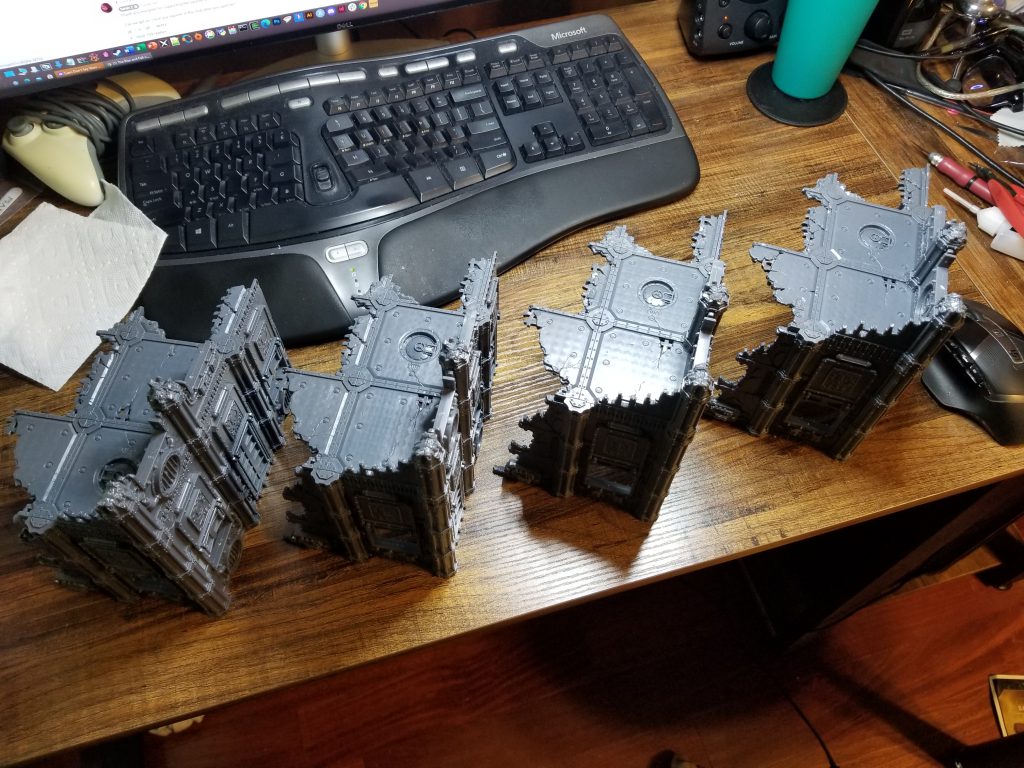
At the bare minimum, here’s what you need to build this terrain:
- Two Sanctum Administratus kits
- Two Sub Cloister and Storage Fane kits
Those will get you two of the four big ruins, half of the other two, and both of the medium size ruins sorted. To complete the other two ruins you’re going to need either another two Storage Fanes or two Ferratonic Furnaces topped with Alchemite Stacks. You can put whatever on the four small dense terrain pieces; GW likes to use thermal conduits, Thermic Plasma Regulators, Haemotrope Reactors, and the Nurgle terrain – both the Feculent Gnarlmaw and the Miasmic Malignifier.
If you’re keeping track at home, that means that doing this from scratch – if you didn’t own any of this terrain already – is going to cost you about $460, and that’s if you buy two battlefield expansion boxes instead of the last two Storage Fanes – but the upside is that’ll also get you the pipes and other debris you need to do the dense terrain features.
The good news on my end is that I already had one battlefield expansion and one Sanctum Administratum at home, plus some ferratonic incinerators and Haemotrope reactors, so I only had to buy one more Administratum and one Storage Fane to get everything I needed for the terrain.
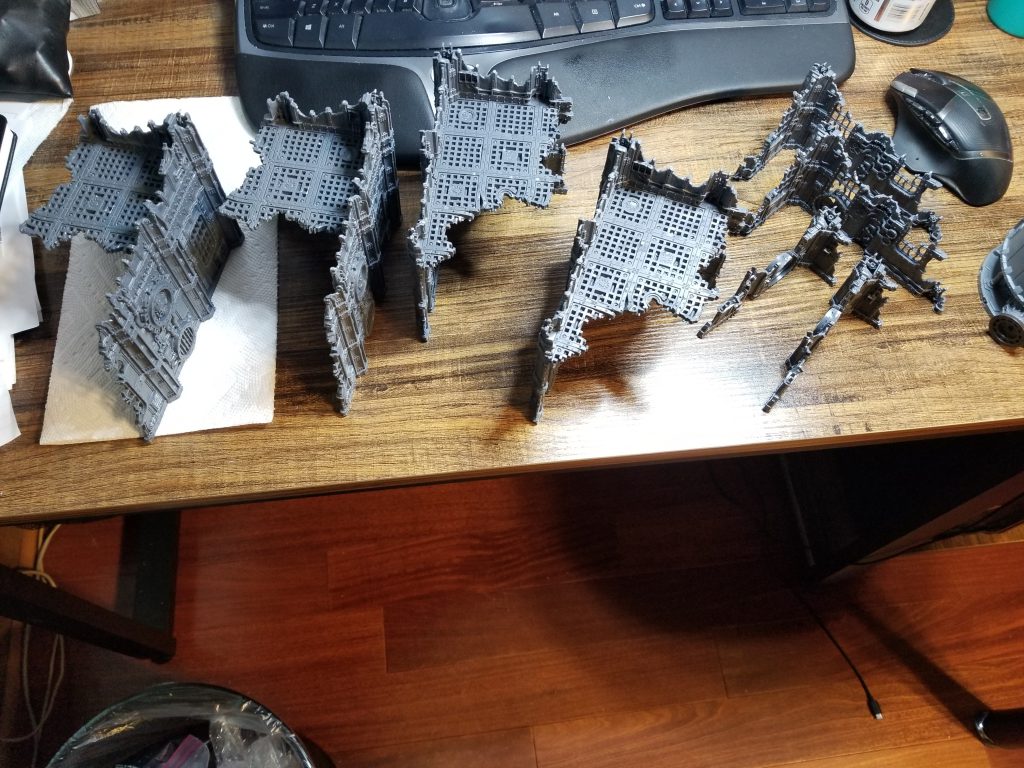
Over the last weekend I hastily assembled all of the terrain I’d picked up, plus another furnace I had the parts for sitting around. There’s nothing too crazy about these – just assemble them to the basic box specs. The only thing you need to really be mindful of are the Sanctum Administratii – you’ll have parts left over on these. Try to put the closed walls on the front. At the GW US Open these are treated as completely opaque, and also they put little plastic pieces over them to actually close them off, but most of these started falling off late in the event.
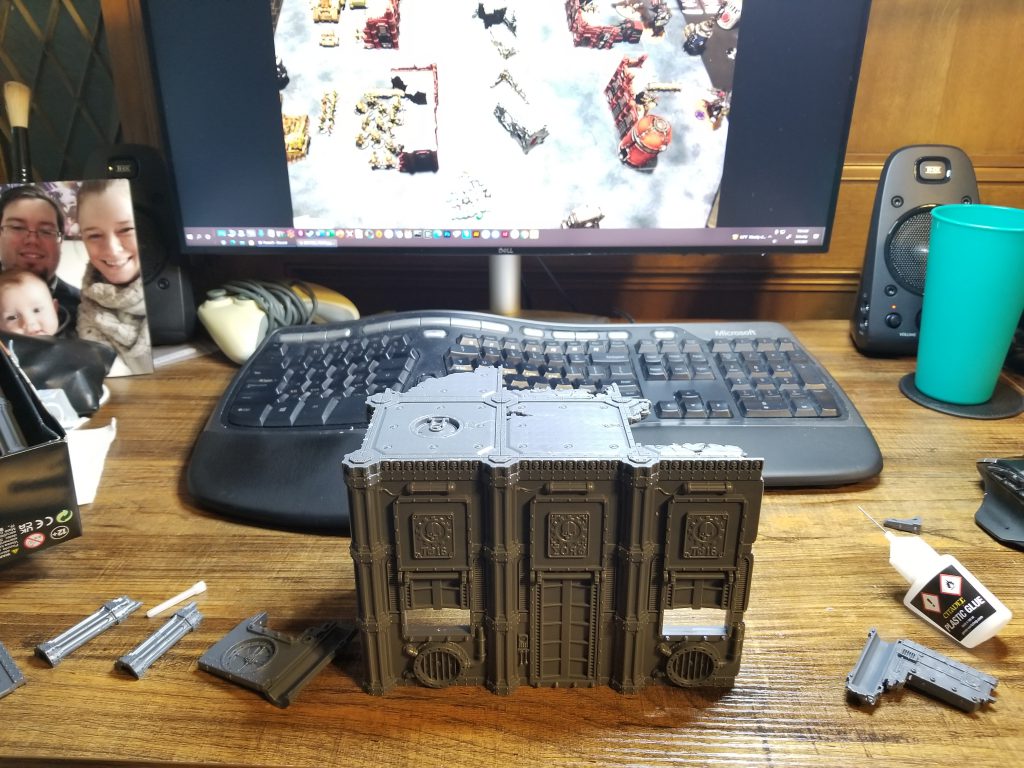
Painting the Ruins
Once I had them all done, I went ahead and primed them – I started by coating the interior walls and bottom halves with Chaos Black, then I primed the tops of the upper floors of the Storage Fanes with Leadbelcher, making sure to get in the recesses, and finally I primed them with Mephiston Red. This would ensure a decent color fade on the buildings before I even got started, and would mean that the pipes inside the floors would look metal. Most of my existing terrain is gray, so this was a good chance to branch out a bit and do something more colorful.
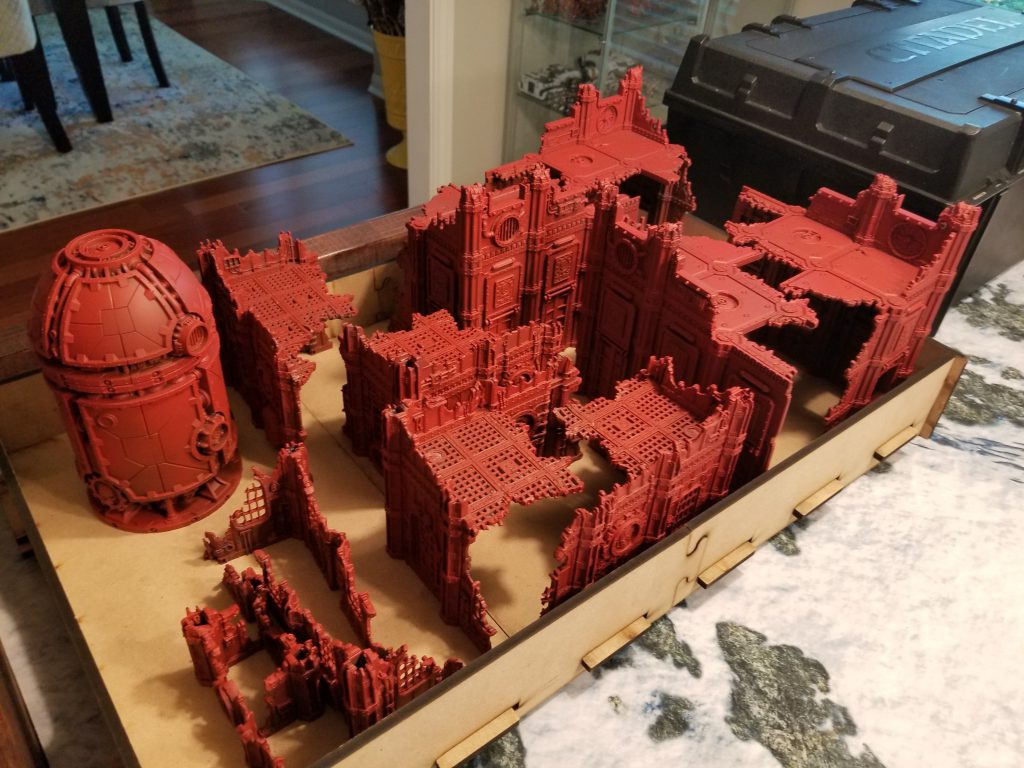
After that it was time to paint these bastards. I settled on a pretty simple strategy for painting them that would let me breeze through while still giving them ample color:
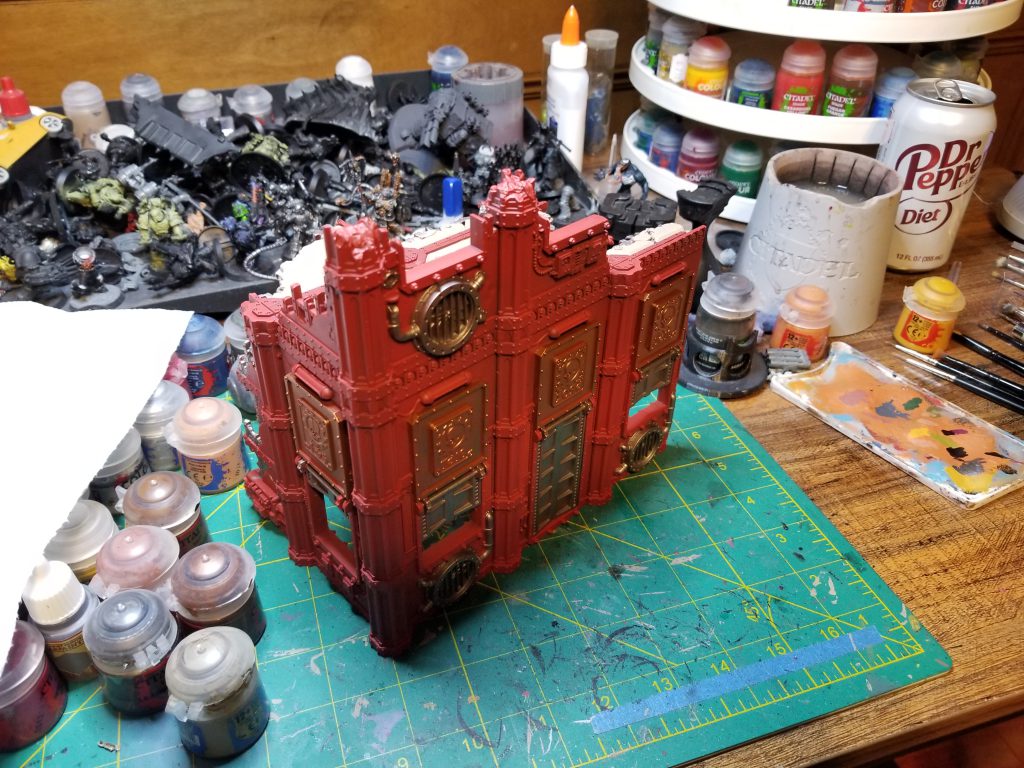
- Paint the most prominent pipes and grates with Leadbelcher. Get some of the wires and exposed pieces of rebar, but I’m not trying to hit everything -just the big bits and something on every face.
- Paint the metal plates and Window grates with Balthasar Gold. Again, I don’t need to get everything here but just enough to add a third color.
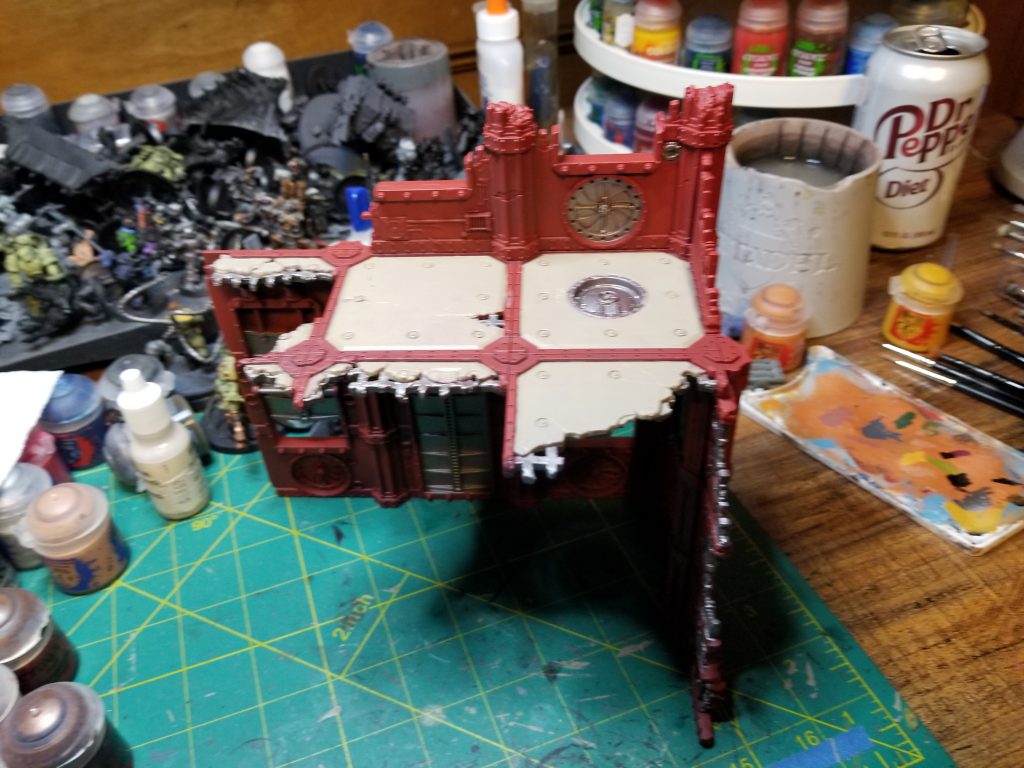
- On the Sanctums, paint the floors with Karak Stone.
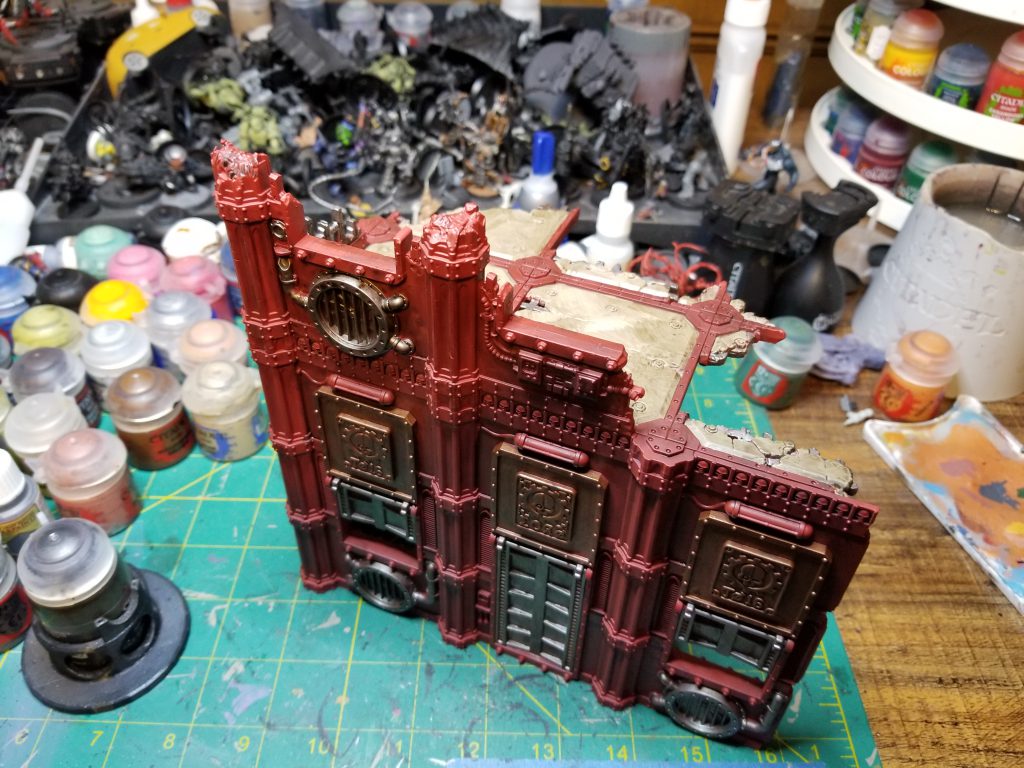
- Wash the whole thing with Agrax Earthshade. Use more on the lower parts of the model.
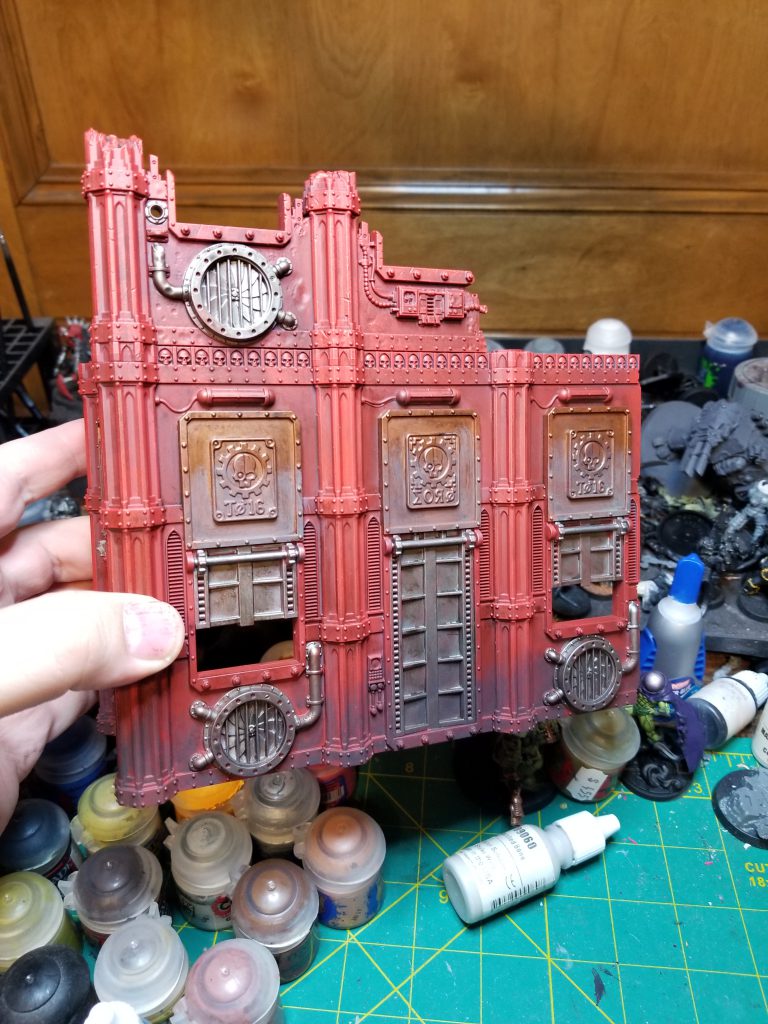
- Weathering – I painted the bottom third of the ruins (or so) with Typhus Corrosion, making sure to hit any spots where I messed up and went outside the lines, and also hitting all of the parts painted with leadbelcher. Then I hit the copper plates with Nihilakh Oxide.
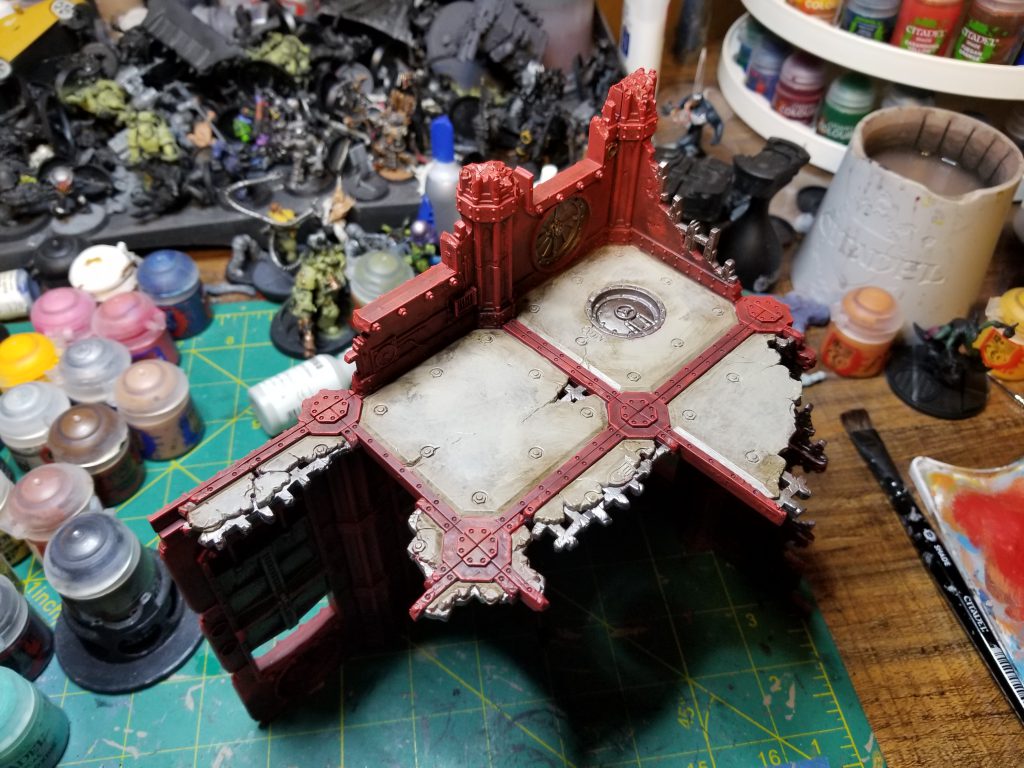
- On the Sanctums, I did a quick second pass with Karak Stone to give the floors more of a patina look.
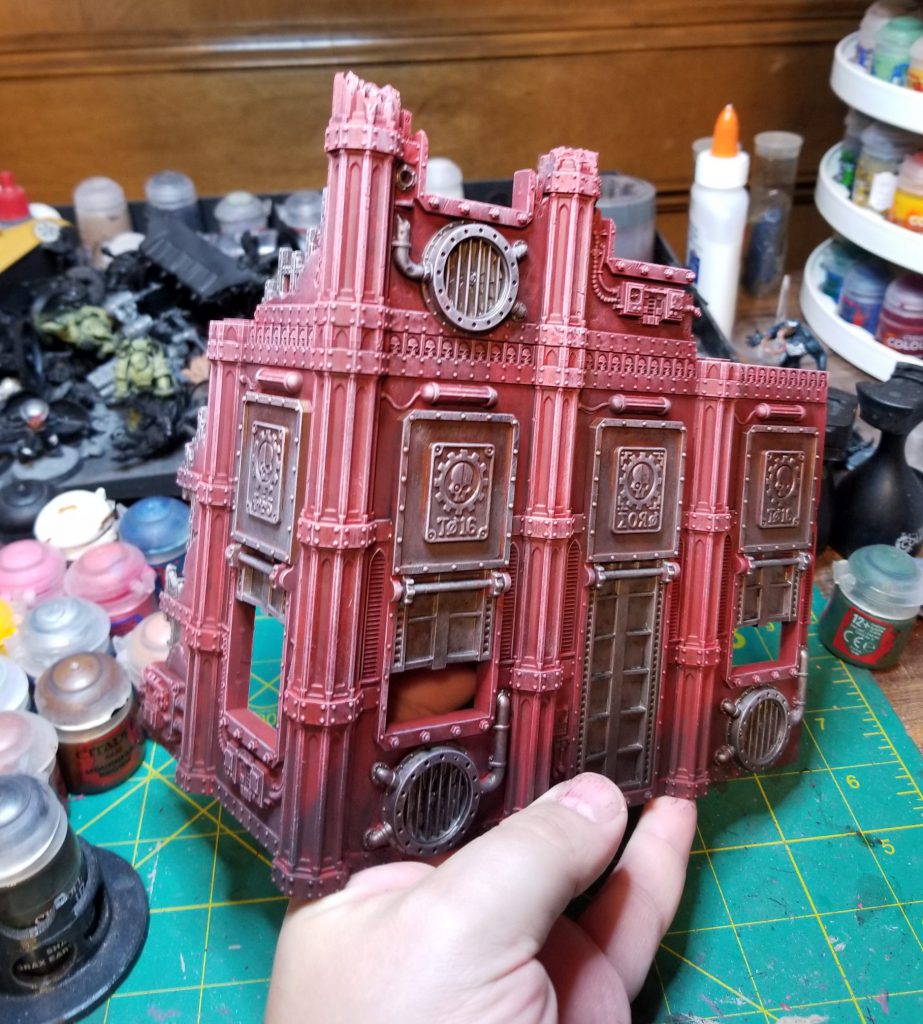
- Drybrushing. I take a large drybrush and put a tiny dot of Mephiston Red into a lot of Reaper Polished Bone (any light bone shade will do) to give it a sliiiiight pink tint, then I drybrush that over the model, using more near the tops. This is the last step, and basically finishes the whole thing. By the end a single building could be done in an hour, maybe less.
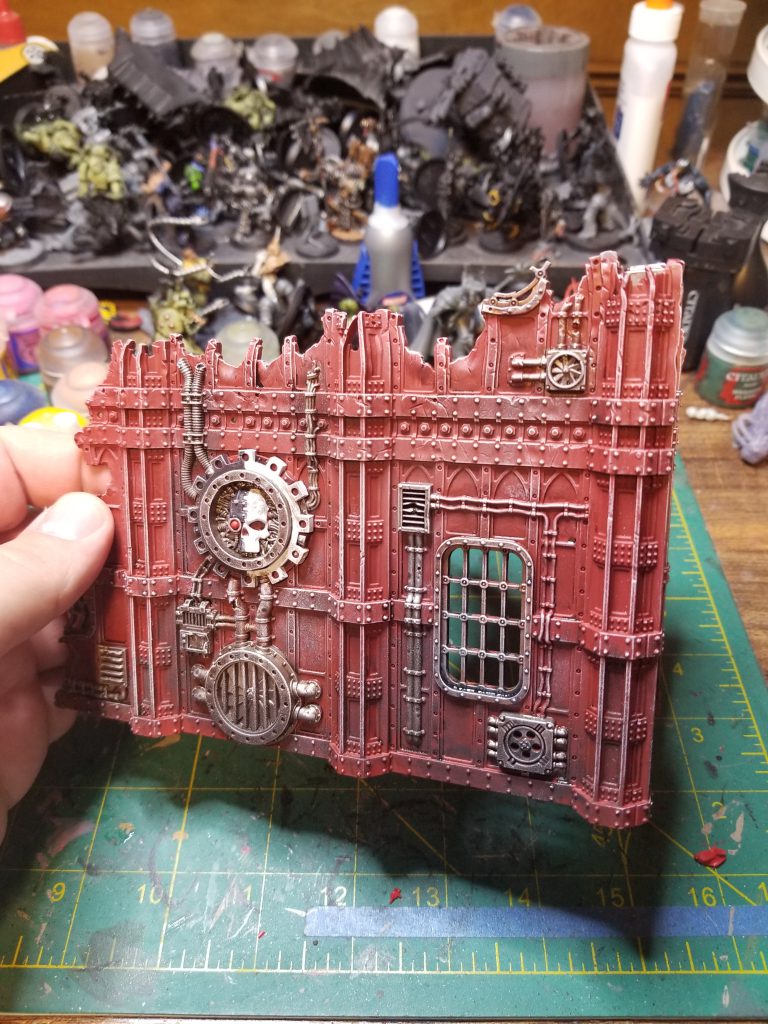
On the other ruins I add an additional detail wrinkle of doing the Mechanicus logos – Paint half of these with Corvus Black and the other half with Reaper Ghost White before doing weathering and drybrushing.
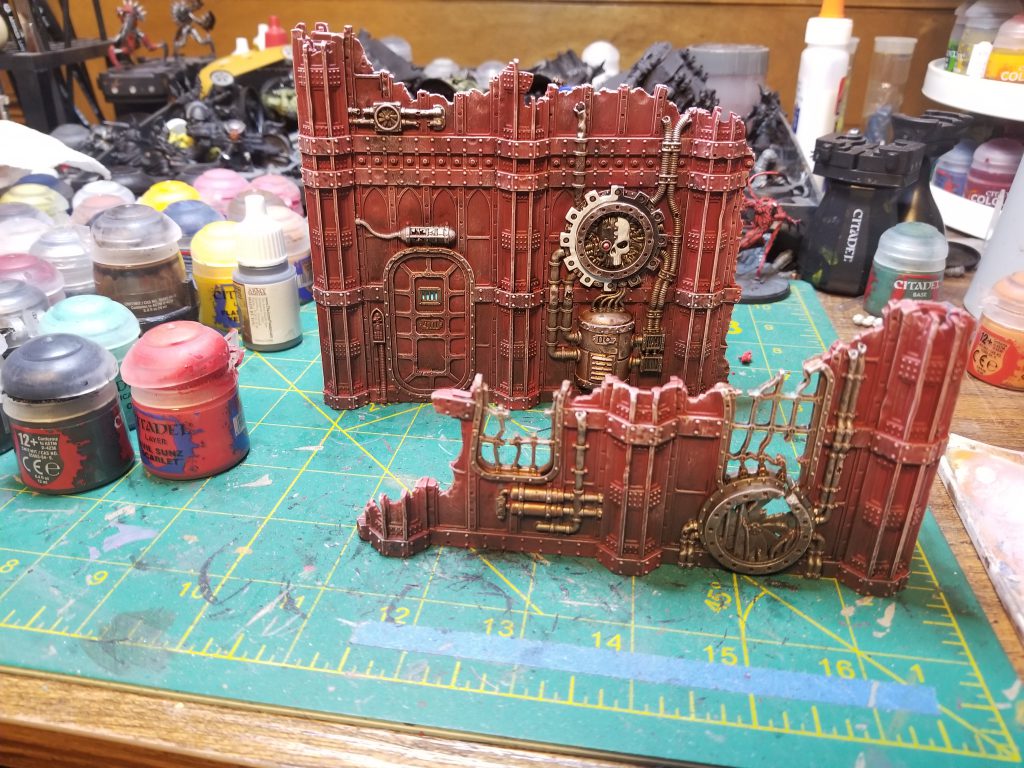
The smaller walls are just more of the same, and go even faster.
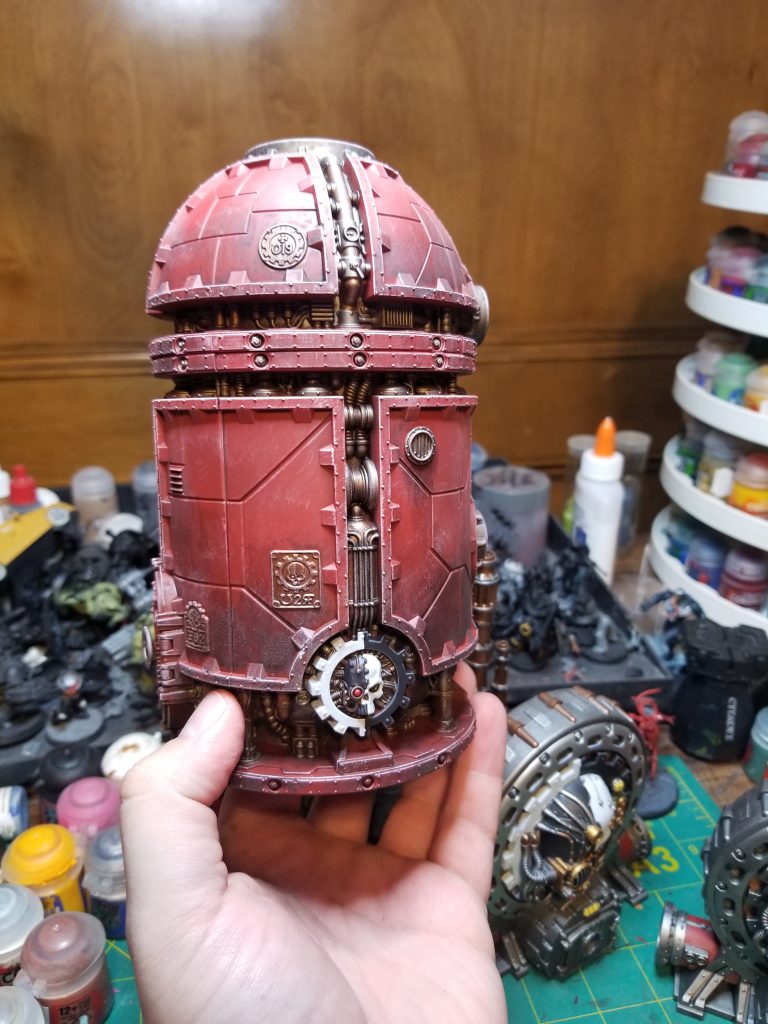
Ditto the furnace, though I started by painting the interior metal parts of this one before coming back and retouching the red spots.
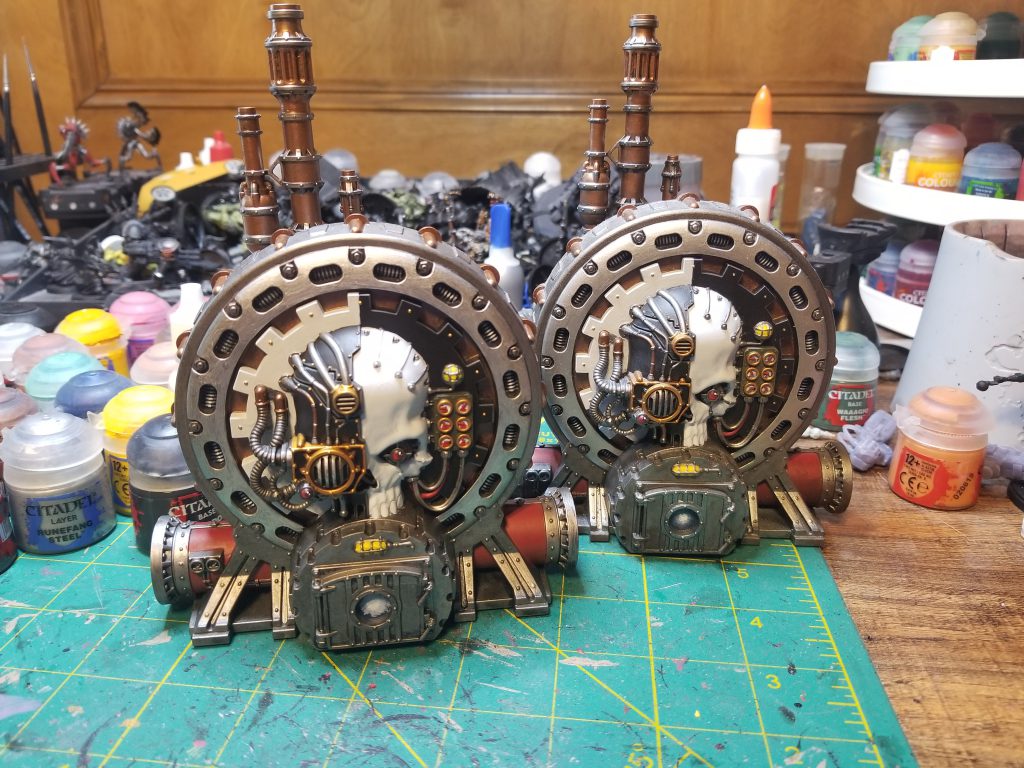
The furnaces took a little more time, but are basically using the same process. I painted one of them years ago and used this as an excuse to finally paint the second.
Creating the Bases
There are three different base sizes I needed for the terrain:
- Four 12″x12″ plates – these are the large plates the ruins go on.
- Two 10″x5″ plates for the medium ruins
- Four 4″x6″ plates for the dense terrain
I decided I wanted something that wasn’t clear plexiglass for these – I’m very much not a fan of the plexiglass; I think it looks bad and it slides around a lot and the terrain slides around on it, plus it can be difficult to see where the terrain is at a glance. I’ve had Warhammer Fantasy Movement Tray kits sitting around for a while that I picked up on ebay. These make wonderful terrain bases, since they’re plastic and tiled. I decided to use those for the smaller plates, but as they’re 8″8″ in size, they weren’t quite big enough to make 12×12 work.
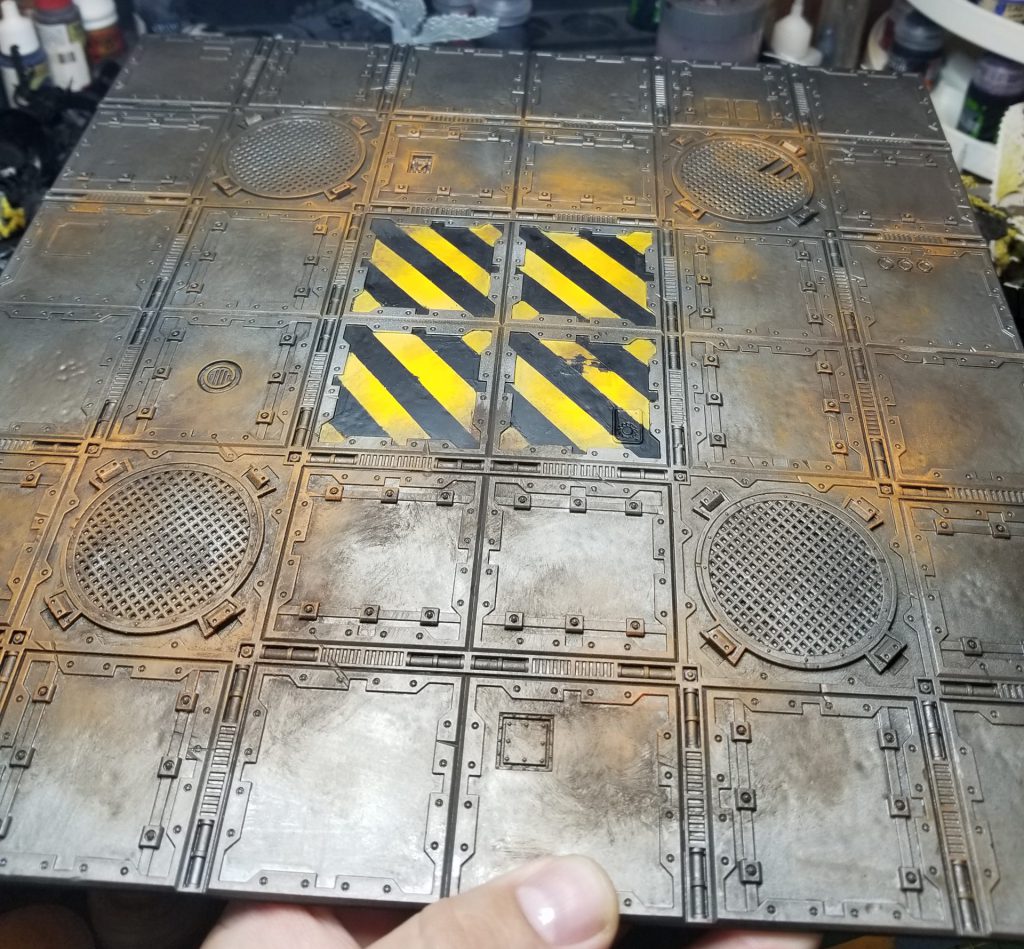
Fortunately for those I had Necromunda tiles I’d painted up recently. I’ll cover painting those up in a future article but the general idea is: Prime with Leadbelcher, paint the area you want the paint on black, mask off the yellow, paint that, then wash the whole thing in Agrax Earthshade, sponge/brush on a bunch of Typhus Corrosion, then drybrush parts of it with Ryza Rust.
These made great 12″x12″ bases and were easy to paint and replicate the scheme. For the smaller plates, I used the WHFB base plates, cutting and gluing them as needed. To give them some extra support, I used thin sheets of styrene under the 5″x10″ ones.
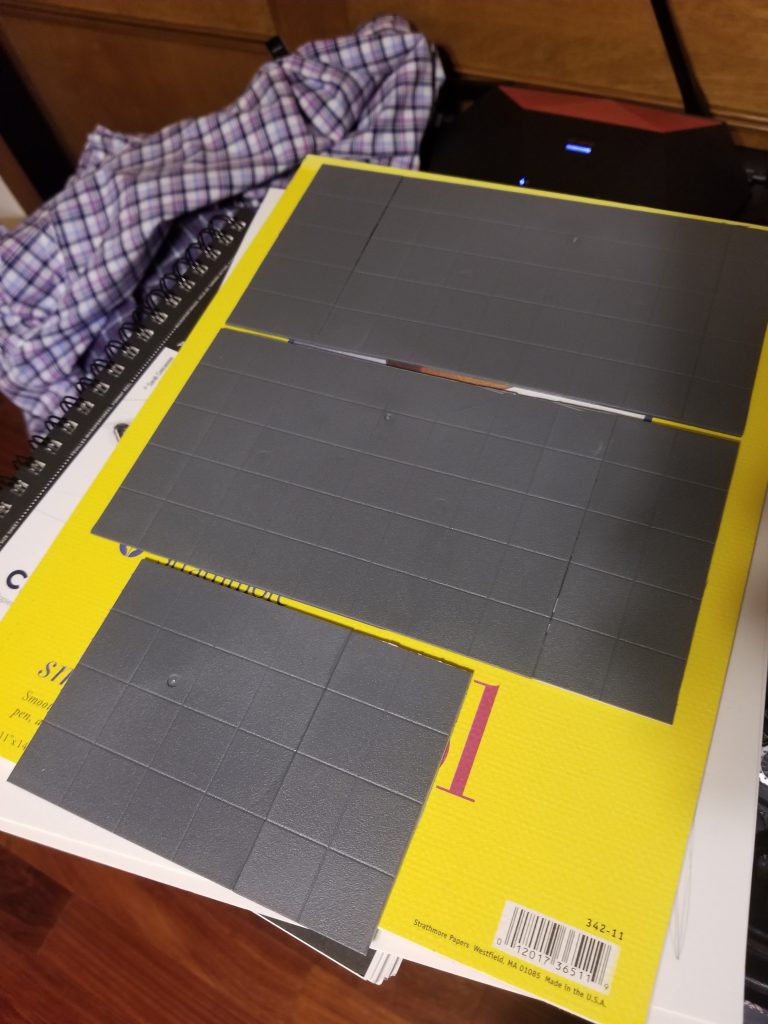
They’re sturdy enough for what I need them for, and this gave me all the bases I needed.
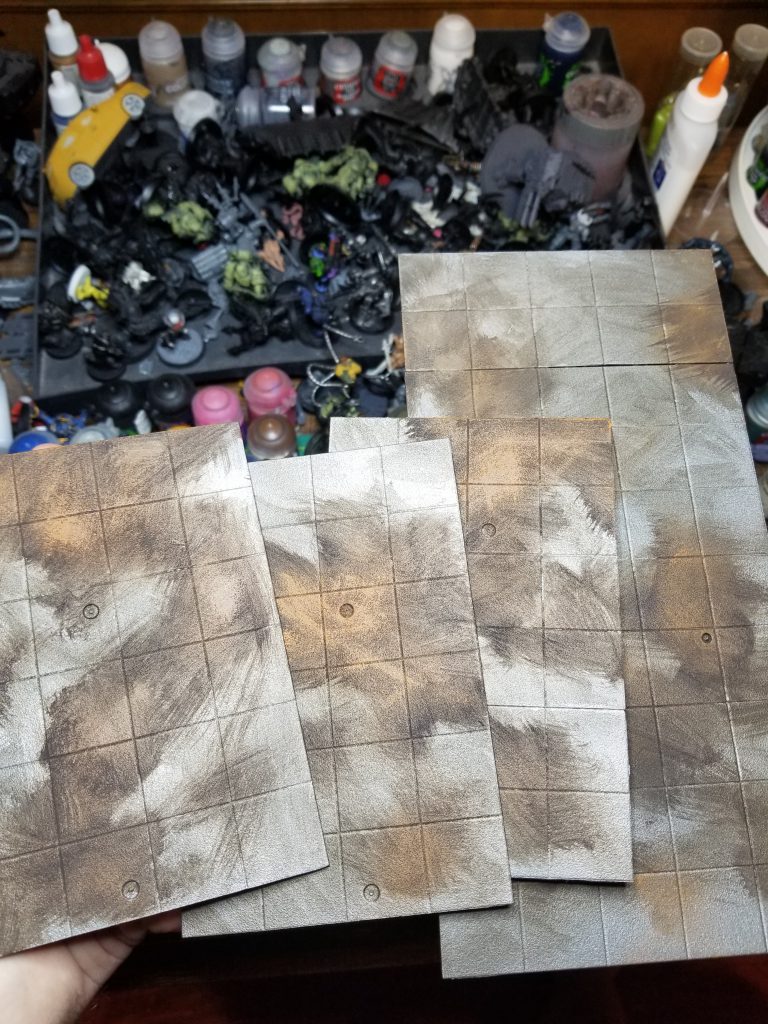
Painting them went pretty quick, in part because it was late in the week and I just needed to be done. I will likely come back and touch these up later but for now I just couldn’t be bothered. They’re primed with Leadbelcher, then washed in Agrax Earthshade and painted with Typhus Corrosion, then drybrushed with Ryza Rust. in the future I’ll come back and use Nuln Oil/Agrax to add little spills, Blood for the Blood God to add spatter, and I may glue a couple of tiny details to them, like skulls or whatever. For now they’re done, though.
The Table
I finished the table just in time for my practice game, which was pretty cool. Above are the standard layouts I used, and how the table looks when you have it in either configuration. A note on the big ruins: There are basically three configurations these come in when you’re building them, and you have some options if you don’t have a pair of furnaces to use.
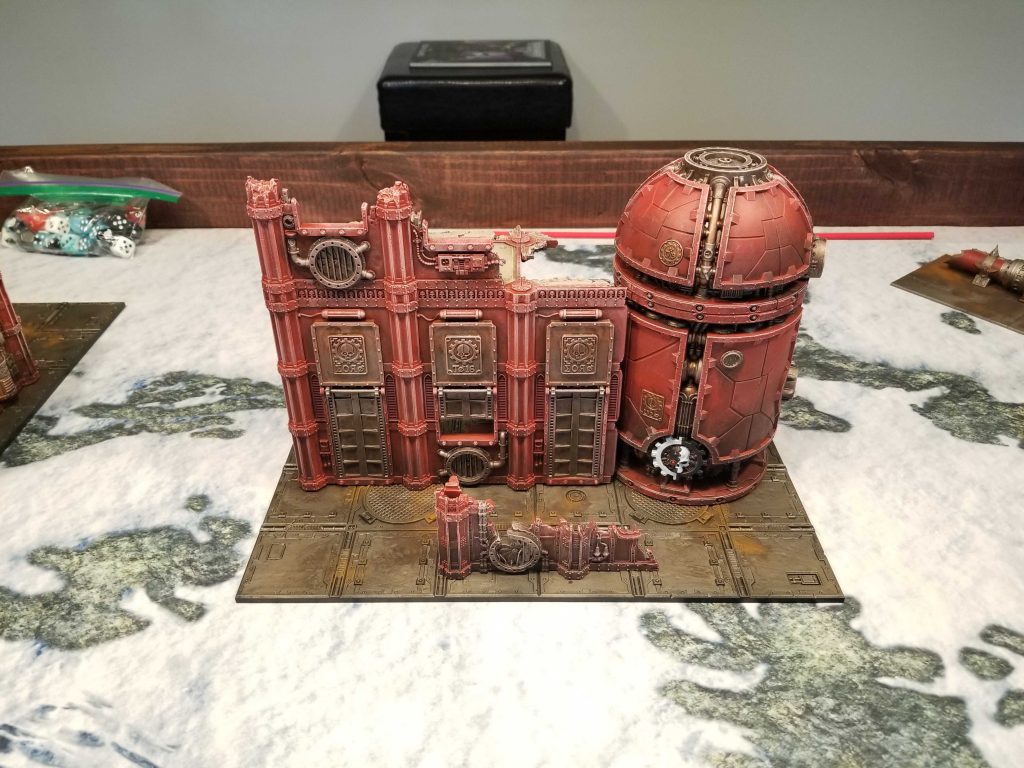
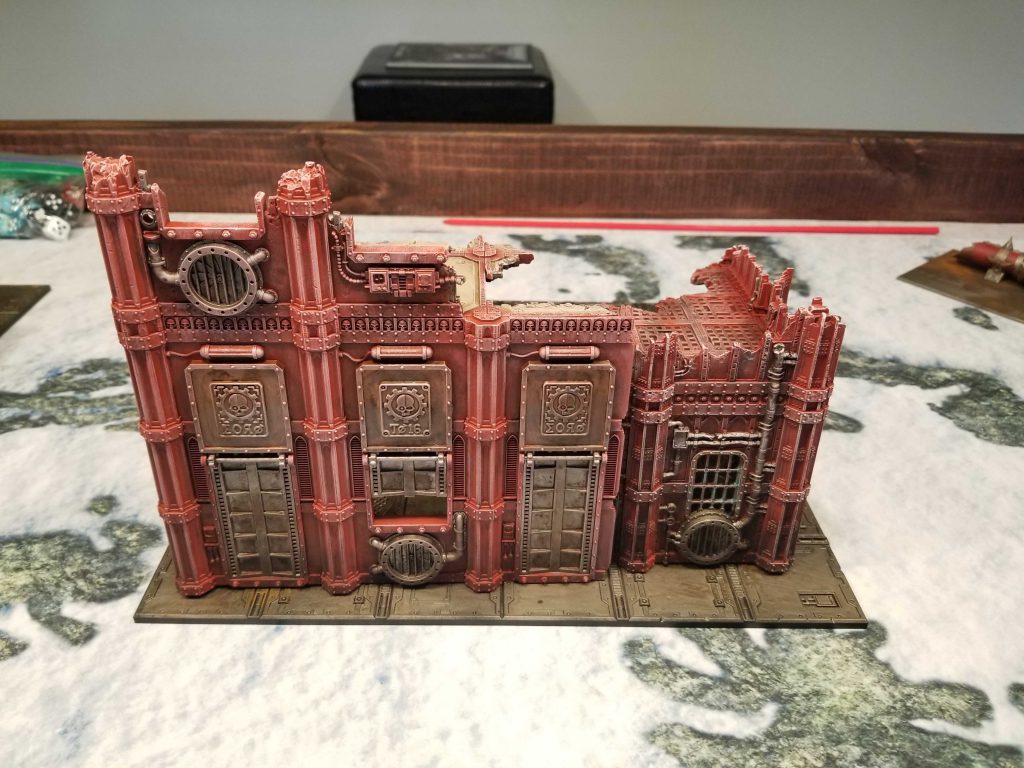
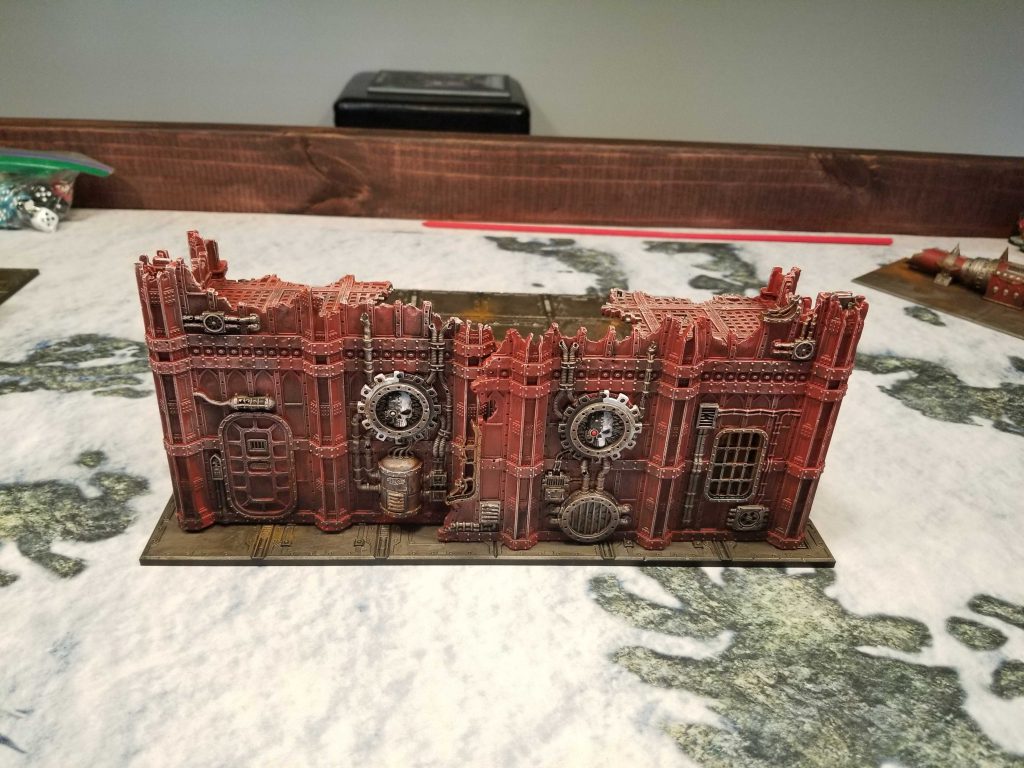
Any one of these works, and the GW terrain doesn’t always have four identical sets. Just remember when you push two Storage Fane ruins together that any gap on the first floor is meant to be covered/opaque – you can’t shoot through those first floor ruins, and you should be pushing them together.
Using Floor Tiles and Making Forests
This tutorial was originally published in a 2019 Narrative Forge article by BuffaloChicken.
If you’ve been in the hobby for a few years, you may remember the release of the Deathworld Forest terrain kit. Amidst an era of excellent new releases, this one was universally panned. The spindly sculpts, lurid colors, and lackluster line-of-sight-blocking capacity of the terrain made it a hard miss for almost everyone. The studio models look more at home on a Chaos Daemon World than a jungle deathworld.
Step back, however, and look at the kit through fresh eyes. What if, instead of seeing this as an “out-of-the-box Deathworld Forest,” you instead processed this release as a “Deathworld Forest Accessory Kit”? Bizarre, dangerous flora to stick amidst your more innocuous jungle terrain and lend a subtly alien feel to your battlefield? With that mindset, the kit becomes a lot more interesting.
My goals with the Deathworld Forest kit were as follows:
- Create a durable base for each terrain piece
- Add small creatures from other model ranges to communicate a jungle crawling with life, both plant and animal
- Choose new colors for the pieces which were more in line with real-world jungles, while still looking dangerous and exotic
- Use plastic aquarium plants on the terrain bases to add volume and tie them into my existing jungle terrain
Step 1: Making the Bases
As promised, this technique will be useful for anyone embarking on a terrain project. After being failed by Google and countless online project logs, I wandered Home Depot (one of my favorite hobby activities) in search of the perfect terrain basing material… and finally found it.
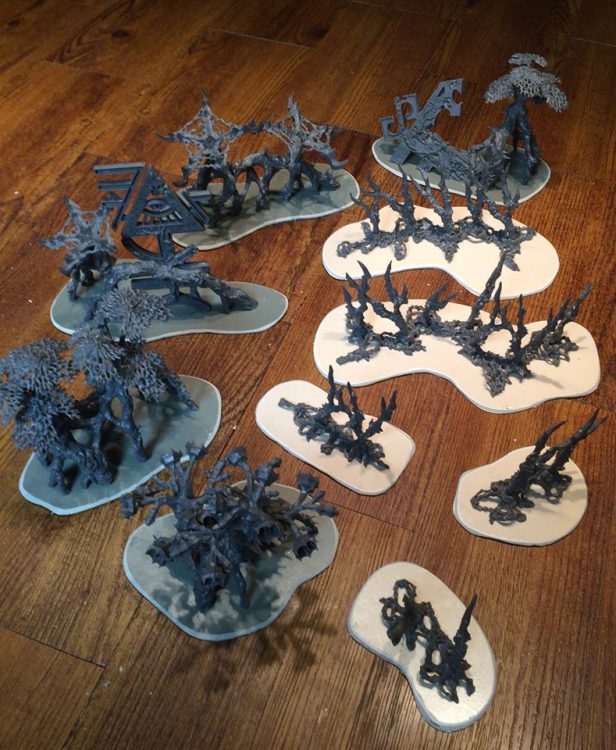
For years my basing material of choice was 1/8″ MDF. Cutting this required a jigsaw and was a messy prospect for anyone not living in a log cabin, as I was at the time. After much exploration and experimentation, I discovered the simple joys of adhesive-backed vinyl tile. Make sure you buy the thick ones that don’t flex easily – you don’t want your terrain base warping. These also have a very pleasant heft to them. The tile here cost $1.09 and is a foot square:
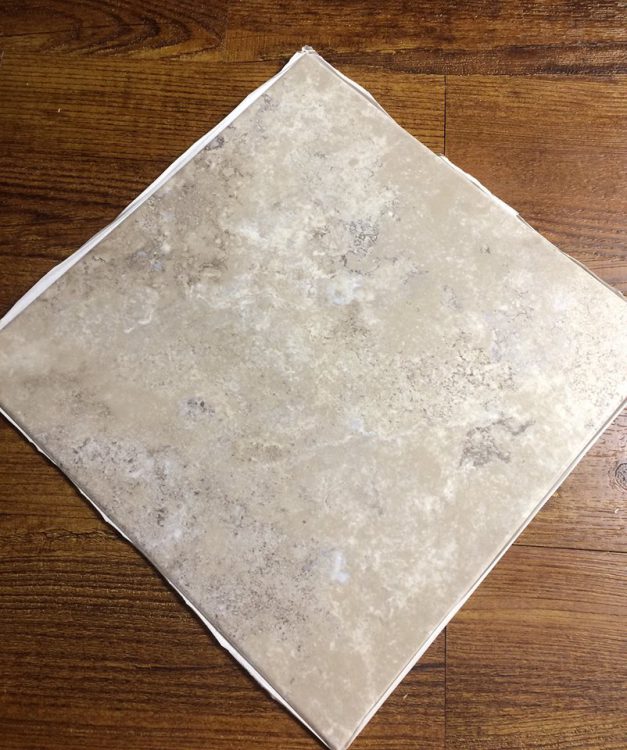
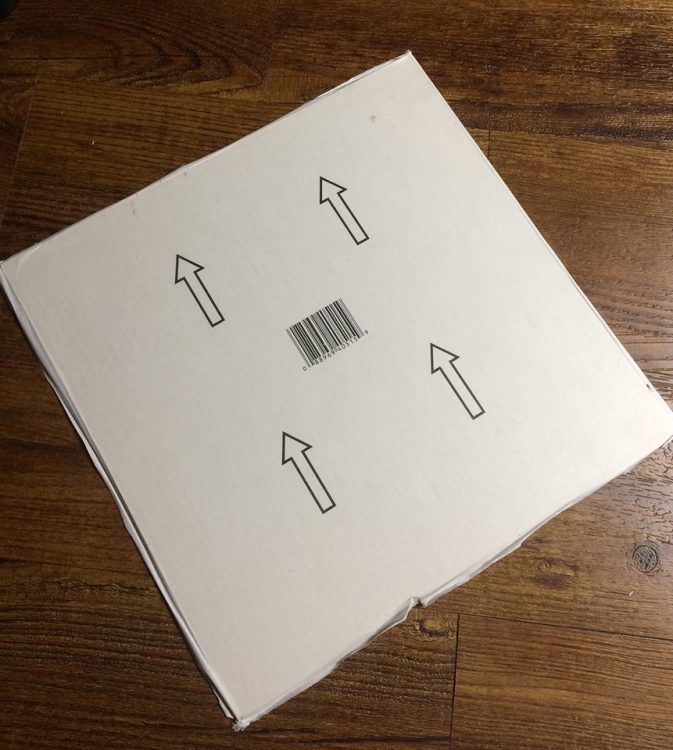
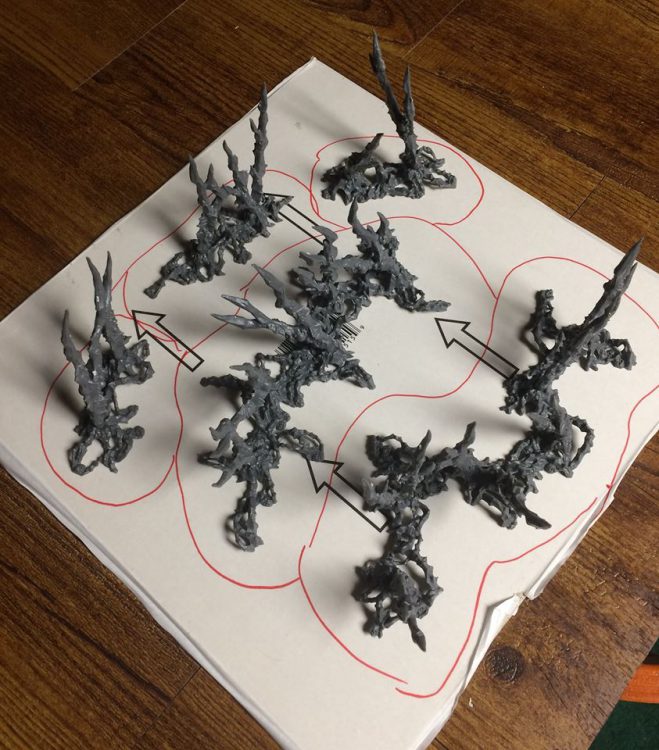
Essentially, the tile is a rugged vinyl decal with an adhesive backing. After acquiring this magical bit of material, you’re going to want to arrange your terrain on the adhesive paper side to maximize the use of the tile. This both minimizes your waste and guarantees the smallest footprint for storage if you “puzzle” your pieces together.
TheChirurgeon’s Note: I used the thinner tiles that BuffaloChicken had left over from this project and I didn’t have a problem with them warping, so if you have to go with something thinner, you’re likely still going to be OK.
HOBBY TIP: Terrain storage can be one of the most space-intensive parts of the hobby. If you have limited storage space, line your drawers or shelves with butcher paper. Spend some time “puzzling” all of your terrain together as tightly as possible. Once you’re sure you’ve found the most efficient configuration, trace the outline of each terrain piece’s footprint on the butcher paper and write which terrain piece belongs there. It’s amazing how much space this can open up, and how much time it saves when putting terrain away. If you have any small unoccupied spaces between terrain pieces, consider converting objectives on bases designed to fill those storage gaps.
After arranging your terrain on the paper side of the tile, draw an outline of the footprint you want for each base. As per the hobby tip above, if you wanted to be very efficient with your use of materials and storage, you would divide the full 1′ square tile into “puzzle pieces” that all fit back together with almost no waste. The layout below was much more casual than that:
Take the terrain off, and use heavy scissors (like kitchen shears) to cut out the bases. The tile can crack if you rush this, so make slow cuts and take your time. I try to make half a cut, then move over and start a new cut that will intersect the first. That way, if the tile does split, it’ll typically join the two cuts and cause minimal damage. Making two intersecting cuts also allows the tile more flex as you work and reduces the chance of a crack happening at all. It’s also best to cut everything out rough and angular at first, then snip the rounded edges once they’re separated.
After everything is cut, mark the bases so you remember which terrain piece goes to which base.This could be handwritten, or done via doodles as below:
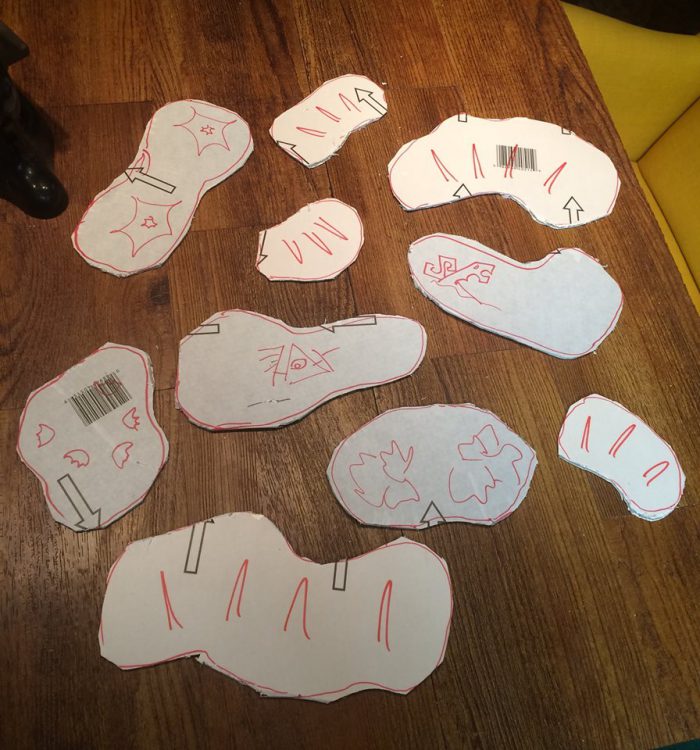
After the bases are cut out, the edges are sanded smooth. Using a cheap sheet of medium-grit sandpaper to round off the edges is totally fine, but if you have a handy orbital sander (or a lot of time to hand-sand), you can bevel the edges. This looks a lot more professional and helps the terrain visually transition into the tabletop.
Once any sanding is done, peel off the paper backing and use a glue gun (absolutely necessary terrain tool) to stick the terrain onto the adhesive side. Now the hard part is done! It’s all fun from here.
Step 2: Forging the Narrative
With the basing done, this is your opportunity to begin visually “forging the narrative” with your terrain. What this means is adding details that help tell a story. Examples of narrative-forging in terrain:
- Details that thematically tie the terrain to your personal army
- Ruins or corpses of your common opponents
- Signs of local flora or fauna
- Evidence of prior habitation – graffiti, abandoned war materiel, residential detritus, etc.
- Battle damage
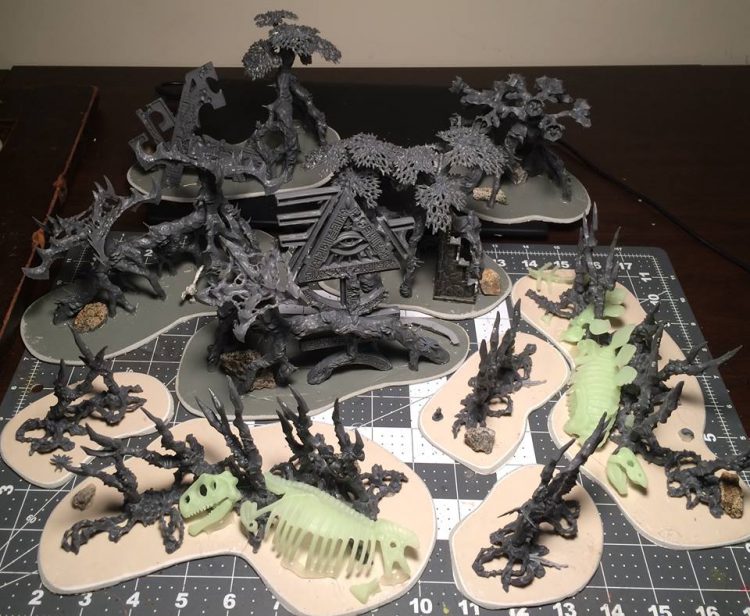
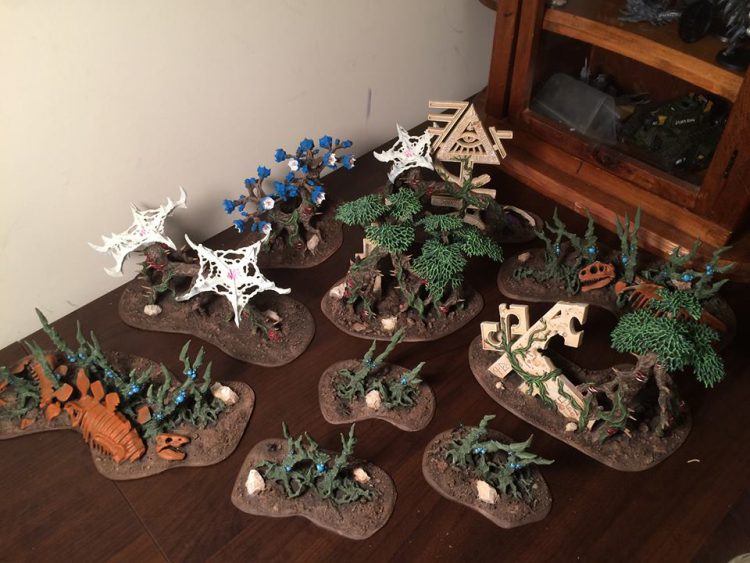
For my own personal Deathworld, I wanted to hint at how monstrous the planet’s native wildlife is – and also suggest that the deadly plants are able to hold their own, with the remains of monstrous beasts impaled upon them. Dollar-store dinosaur skeletons were an easy way to do this while also tying the terrain to my Catachan army’s Jurassic Park theme. Also note the rocks hot-glued down, since almost any “wilderness” terrain looks unnatural if it’s too flat.
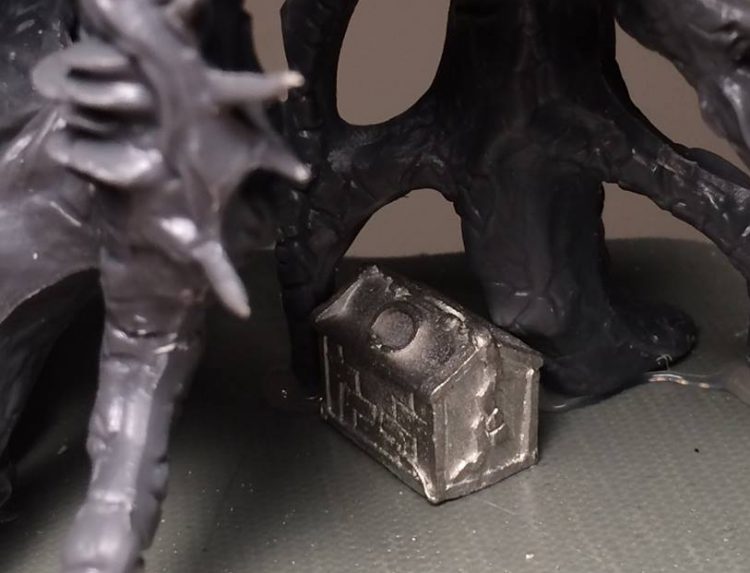
In my own personal bits box, I have a section of “basing odds and ends.” These are shattered bits of statues, tiny animals, plastic plants, and other things to pick through whenever doing a large base or terrain piece. For this project I chose a chest of valuables and tucked it into the embrace of a stand of deadly venomgorse – who threw it to the tree’s protection? What does it hold? Was the chest intentionally hidden within the venomgorse, or did some arcane item trapped within it prompt the growth of this unnatural plant around it?
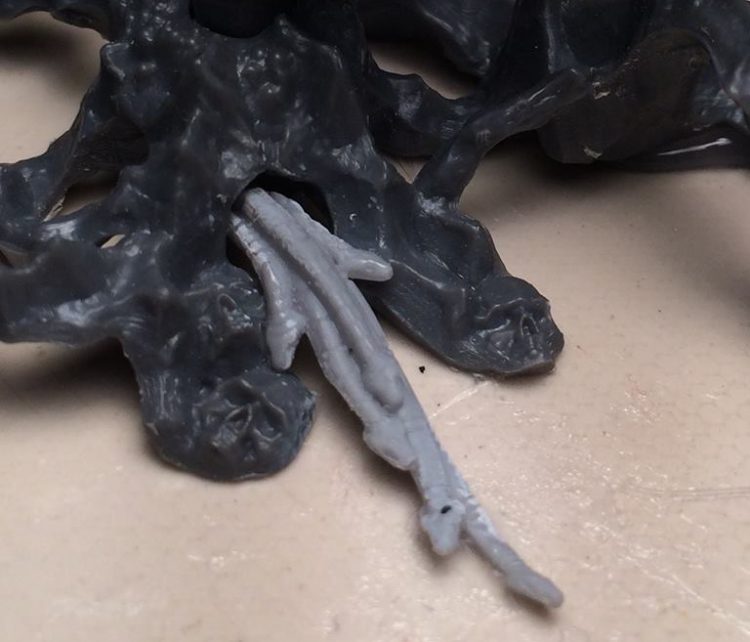
The Lizardman (Seraphon) range is an amazing source of basing bits for jungles, and the Bastiladon has yielded fragments of statuary that adorn many of my bases. I chose to have snakes pouring out of dens in the shardwrack spine bases. Do the venomous snakes have some sort of symbiotic relationship with the venomous plants, the same way poison dart frogs get their own toxicity from their diet? If a model in-game dies to a dangerous terrain effect from this model, is it due to shardwrack impalement or snakebite?
In addition to Lizardmen, the Treeman (Sylvaneth) range has tons of tiny critters perfect for terrain projects. These bits are fragile, however, and you want to be sure to glue them in a relatively protected place that doesn’t protrude from the footprint of the terrain piece. This makes them far less likely to break off during play or storage. Also take the time to pin them in place with a pin vise, or at the very least position them where their spindly bits have as much contact as possible for gluing.
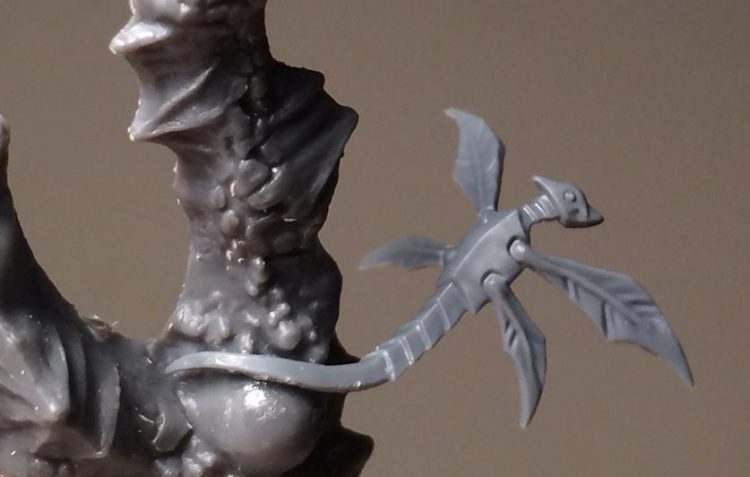
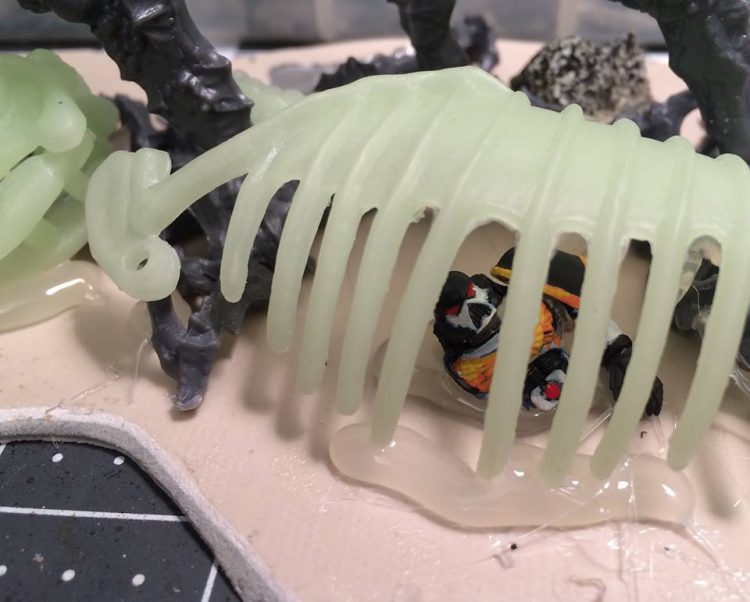
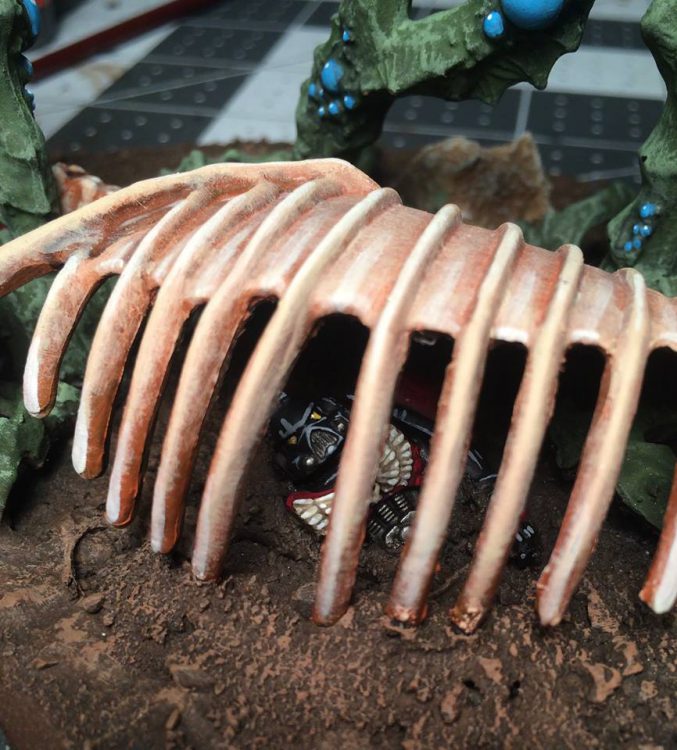
This Space Marine, donated by TheChirurgeon, was glued inside the ribcage of the tyrannosaur. I imagine he was swallowed and somehow managed to kill the beast from the inside, but perished himself in the process. Note that the ribcage was pulled out and left loose to ensure the Space Marine could be painted down the line.
Hopefully those small examples of “narrative forging” encourage you to look at your next terrain project as an opportunity to tell some stories!
Step 3: Basing the Terrain
Take a roll of tinfoil (aluminum foil) and tear off small strips. Crumple these strips up, not too tight, and attach them to your bases – usually I glue them down, but the sticky tile makes it unnecessary in this case. The reason for the tinfoil is twofold. First, it adds a more natural uneven surface. Second, it gives a place for plastic aquarium plants to be inserted. After everything is painted, a sharp tool will be used to poke holes in the tinfoil mounds. Aquarium plant stems will be inserted into these holes and glued in place. If you don’t have tinfoil mounds, making these holes to insert plant stems will be impossible.
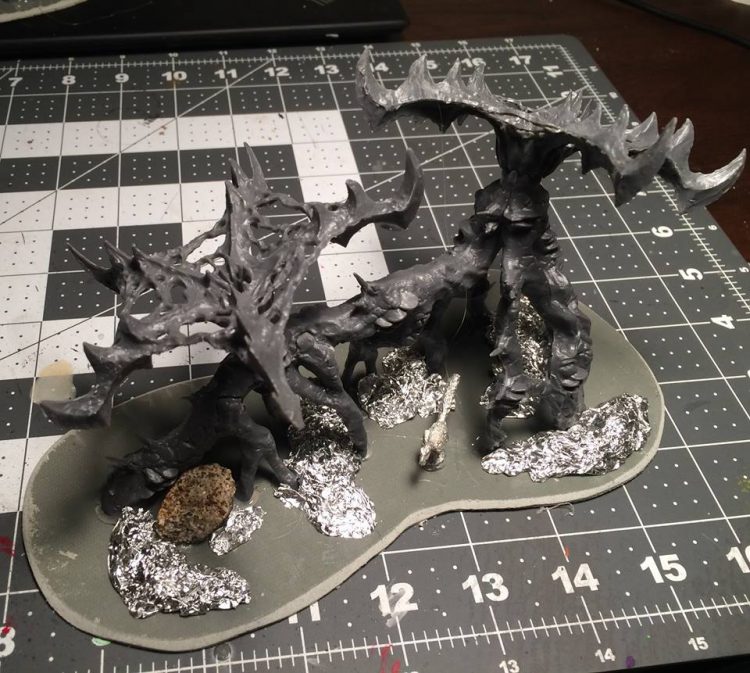
Next up is the sand. If you’re doing most standard basing techniques you should always, always, ALWAYS glue the sand on before priming. It saves a ton of time when it comes to painting, a lot of paint (sand is surprisingly absorbent), and the primer helps hold the sand together to make everything more durable. I use sand from a local lake beach – if you use sand from outdoors like this, bake it in the oven at 500 degrees for a while. This will make sure it’s completely dry and devoid of troublesome organic material.
I use cheap white dries-clear PVA glue (Elmers or the dollar store equivalent) straight from the bottle, and it always works great. Keep toothpicks on hand to spread the glue evenly and make sure it gets to all the nooks and crannies. After the first round of sand-gluing dries, inspect the terrain. Glue contracts as it dries, so some areas may have holes or gaps that need to be filled.
Do a second round of sand-gluing, dropping beads and lines of glue where more material is needed to fill gaps or smooth out transitions. In the case of these pieces, I also added more layers of glue and sand where the tree trunks or rocks meet the ground. Having the sandy ground slope up to meet the terrain looks more natural than having terrain features look like they’re sitting on top of a flat surface.
After the second round of glue/sand is dry, take a metal tool – like a greenstuff sculpting tool, though a bent paperclip will work nearly as well – and peel off any spots where sand may have been glued to the terrain by accident. Once done, shake each piece thoroughly to dislodge any remaining loose material.
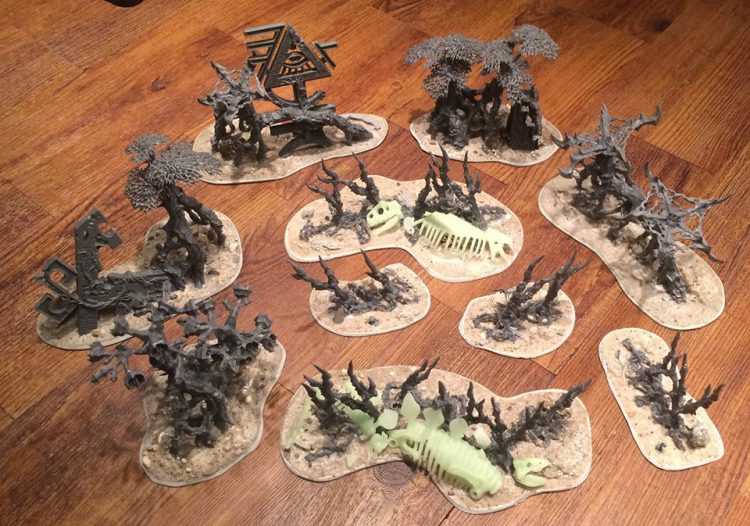
Then you’re ready to prime!
Step 4: Priming and Painting
For terrain I use the same Krylon Flat Black spray paint that I use to prime all my models. For actual painting I use cheap craft store paints like Americana or Apple Barrel, which cost between $1-2 for 2oz bottles at massive chain retailers across the United States. For context, Games Workshop base colors retail at $4.55 for 12ml… that’s about $0.38/ml, compared to $0.03/ml for the craft paints. If you’ve got a big terrain project that makes a huge cost difference, and the superior quality of the GW paints isn’t necessary for simple basecoats and drybrushes. I do use GW paints when doing details or specific color matches, however.
Below you can see most of the basecoats, drybrushes, and washes done. At this point I was starting to hone in on the details like mushrooms, venom globules, flowers, spines, etc. Nowhere near finished, but they almost pass for “tabletop standard”:
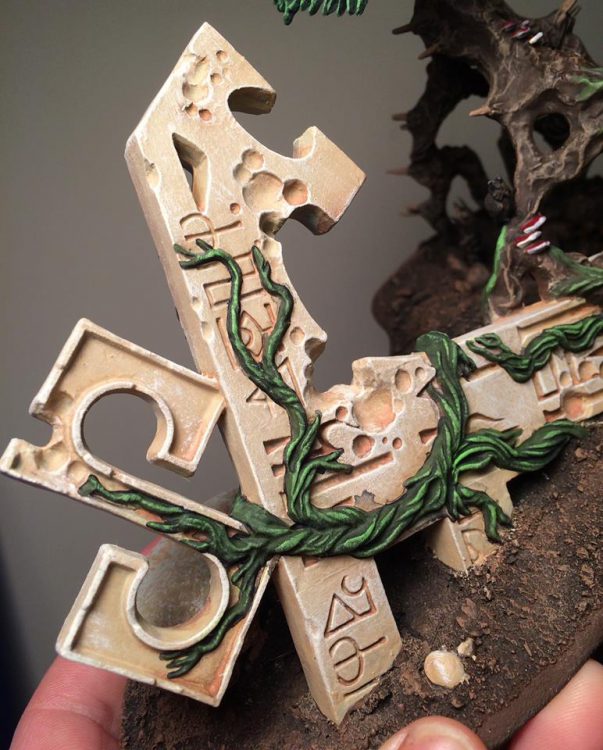
The work-in-progress stone below was done entirely with cheap craft paints – they have good coverage, work well as washes after adding water, and drybrush just as well as GW paints. Eventually the clean stone will get brown dirt streaking, greenish algal patches, and other jungle touches.
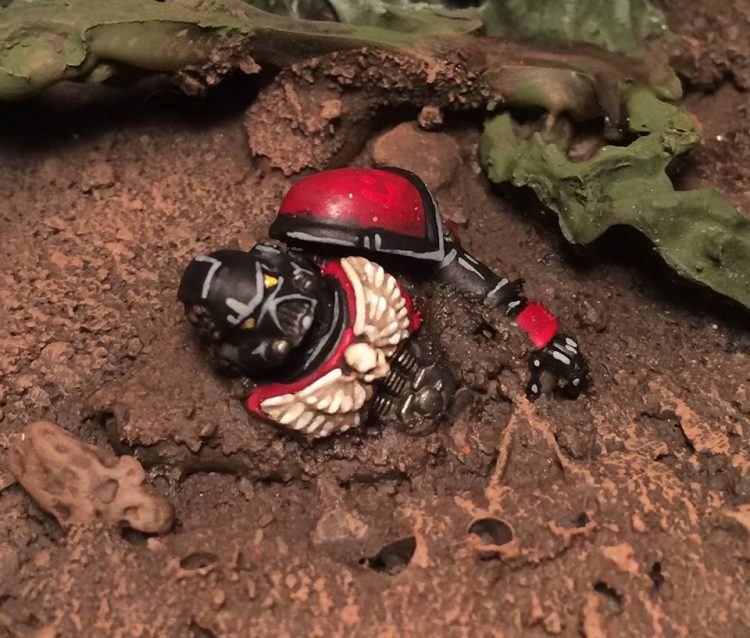
The Space Marine evolved from one of TheChirurgeon’s White Panthers to become a member of my brother’s Firedrakes Chapter. The two of us have a history of “taking trophies” from the other when making models.
When it came to painting plants, the studio scheme was far too chaotic. It looked like the warp had overtaken a world which, while interesting, didn’t look at all like a forest or jungle as intended. I wanted something with roots (put not intended) in our natural world, but still a bit alien. I decided to use pitcher plants as inspiration. The veins, stripes, spots, and bright colors all made them look dangerous and unusual.
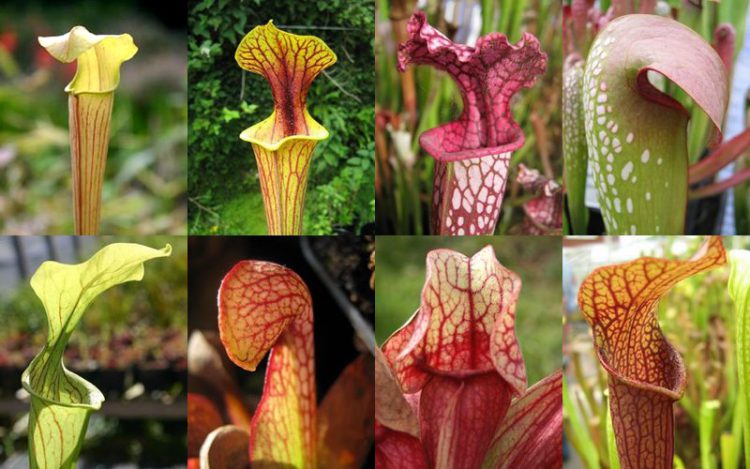
After finally settling on white flowers with purple veins for one stand of venomgorse, I debated what to do with the “teeth” ringing the maw of each flower. Highlight up to pure white? Paint brown to match the wood/thorns? My brother suggested gray, and that wound up being perfect.
All of my Tyranid models use dark gray for their sharp bits (talons and teeth), and I wanted to subtly convey that this jungle world was intertwined with them. Was this because the Tyranids consumed the jungle biomass, adopting traits of the native lifeforms? Or was it the opposite – was the presence of Tyranid spores corrupting the ecosystem, changing the native life to become more Tyranid? Here are the ways I tied the jungle colors to my Tyranids:
- Gray teeth on the carnivorous flowers, matching Tyranid teeth and claws
- Blue venom globules on the shardwrack spines, matching Tyranid toxin sacs
- Olive green as base color for the shardwrack spines, matching existing Tyranid terrain and basing details
- “Glow-in-the-dark” pale green on several of the small bugs, matching the color used for Tyranid fleshy bits
While not being in-your-face obvious, these little details make the Tyranid army feel “at home” in this environment. Other small details similarly tie the terrain to my Catachan and Chaos Daemon armies.
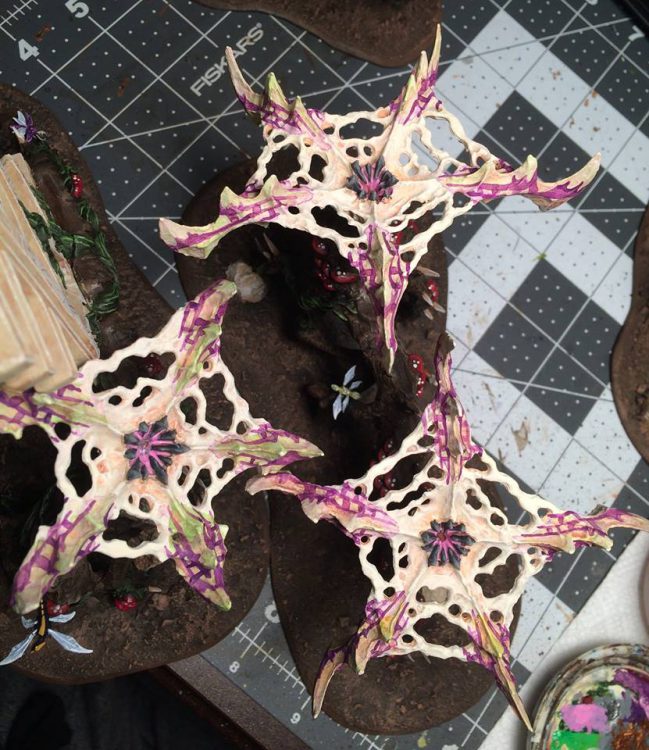
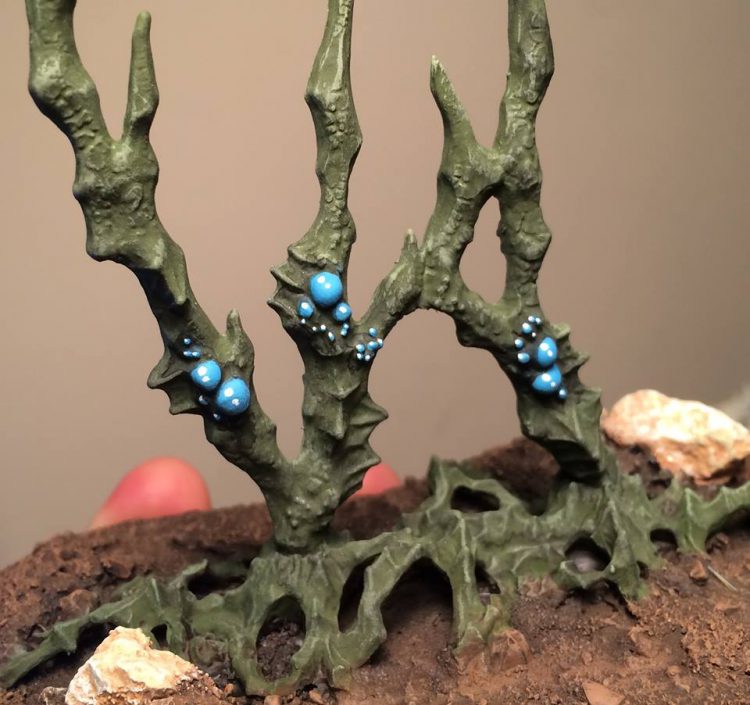
After all the painting was complete, standard green modelling flock was glued down with PVA glue in random blobs across the terrain. As you can see, however, the terrain still looks very flat and open – it doesn’t have the density, variety, and texture you’d want from a proper jungle.
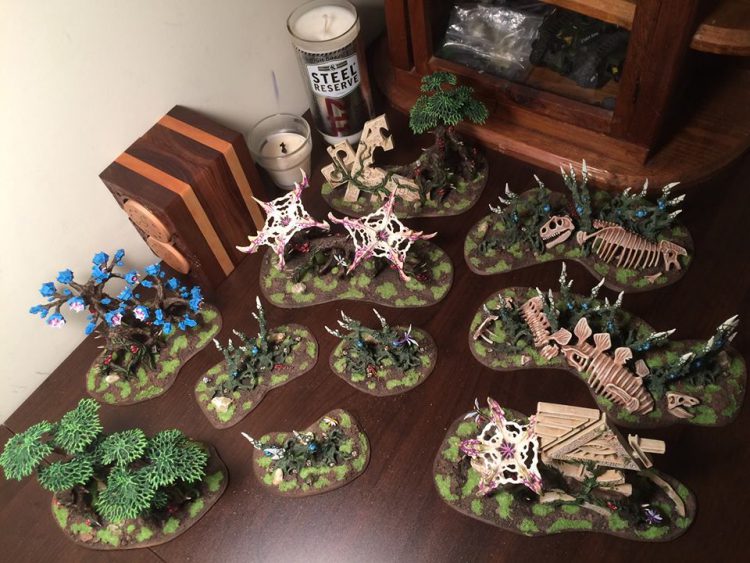
What comes next is my favorite part of any terrain project… landscaping! The list below is everything in my “jungle box”:
- Plastic aquarium or decorative plants collected over the years
- A darker, more uneven flock than the standard bright green one
- Leaf litter/scatter
- Clump foliage
- Adhesive grass/flower tufts
- Decorative dried lichen
I try to keep the plastic foliage restricted to a green-yellow palette. This keeps things from looking too visually confusing, and the recurring yellow ties the jungle to my Catachan (who wear yellow bandanas instead of the standard red).
HOBBY TIP: Even if you don’t have a jungle board, you can still have a “terrain box” to collect characterful and inspiring tidbits. An urban box might have tiny printouts of Games Workshop propoganda posters, Skaven rats, old models to chop up as statuary, and some O-scale pigeons designed for railroad dioramas. A desert box might have a ziploc baggie of pebbles, slabs of bark that look like rock formations, model cactus plants, and plastic succulent plants that often go on sale for cheap at craft stores. Keep an eye out for bits to hoard in your terrain box, and you’ll start seeing them everywhere – some of the seed pods used on my jungle terrain were collected while crawling through mud under paintball fire in a eucalyptus grove, and I once picked up shattered safety glass in a sketchy neighborhood because it would be perfect ice detailing on the base of a friend’s Imperial Knight with a snow theme. I won’t say this is all normal behavior, but it does make life more interesting!
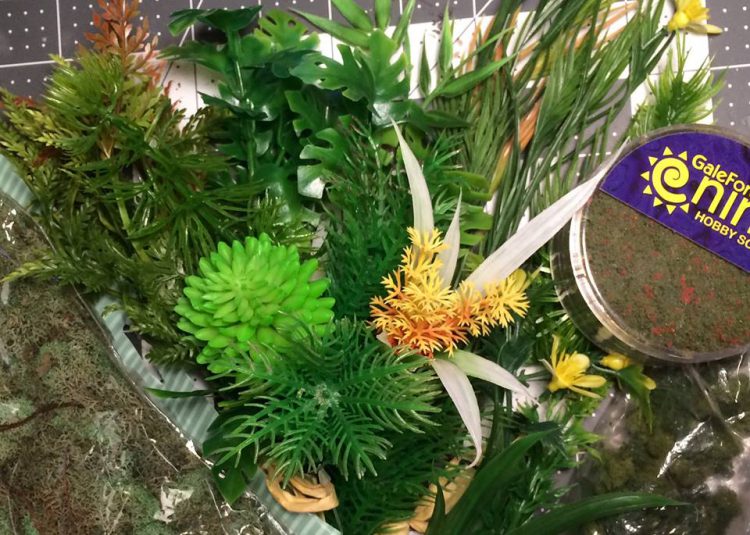
After playing around with what should go where, the plastic plants had their stems inserted into holes made in the tinfoil mounds using my pointiest greenstuff sculpting tool. They were secured with super glue, and the remaining decorative elements (lichen, flock, scatter, etc.) were secured with PVA glue.
Below is the final result, minus a bit off additional weathering. After that photo was taken the brighter stone and bone bits were given a bit more jungle weathering/streaking, as well as some tufted grass growing out of ribcages or stone cracks.
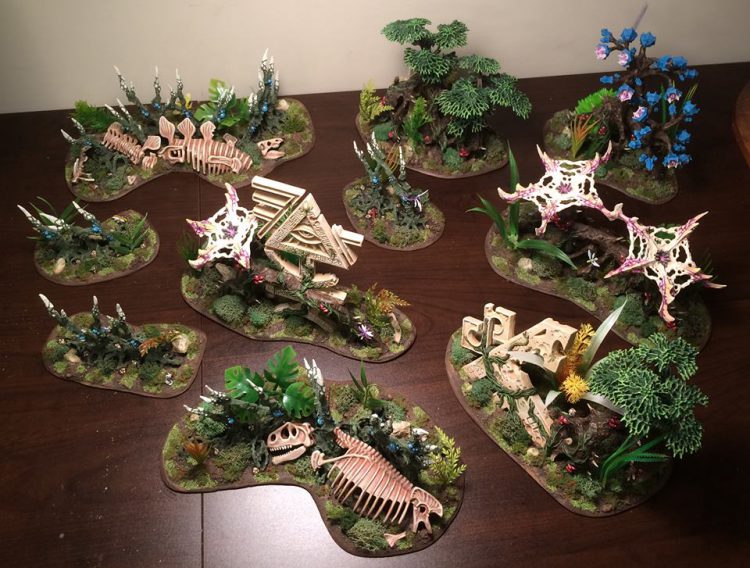
I hope this has inspired you to look at your future terrain pieces as models in their own right, worthy of attention and as capable of telling a story as any HQ or hero. Happy hobbying, and please share your results with the community – every conversion makes the Warhammer 40,000 universe grow a little larger!
Adding Floor Tile Bases to Ruins
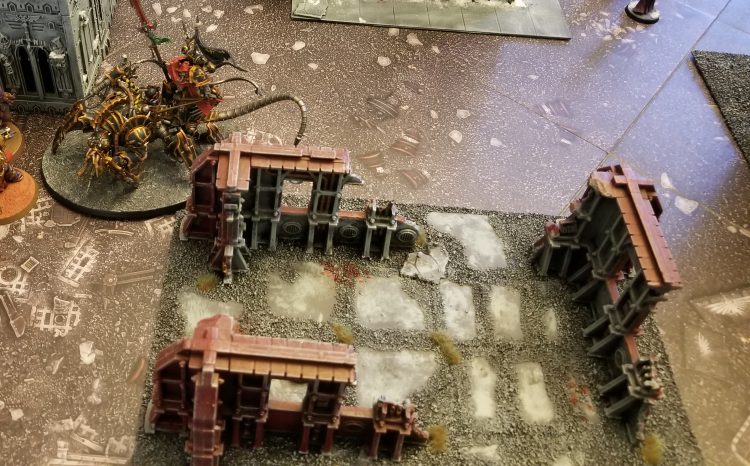
TheChirurgeon: You can absolutely replicate this for non-jungle terrain as well. THe process is the same, but you’ll use different plastic bits. You start by ordering a bunch of 12″x12″ tiles (I use 1/8″ but up to 3/8″ works just fine, it’ll just change what you need to cut them), then laying out how you want to cut them to fit your terrain. Then you cut them and trim/sand the edges.
One major upside to doing this is that the tiles already have an adhesive side. It’s not strong enough to hold a building so you’ll want to superglue those down, but it is strong enough to hold a layer of basing grit in place until you seal it. So start by laying that down, gluing down any details like plasticard panels or debris, then throw basing grit/sand on it and tap it off until you’ve got a solid layer. At this point I cover the whole thing with Woodland Scenics spray adhesive, AKA watered down PVA glue in a spray bottle. Coating the whole thing with this seals the model and keeps everything in place so I’m not constantly losing grit over time.
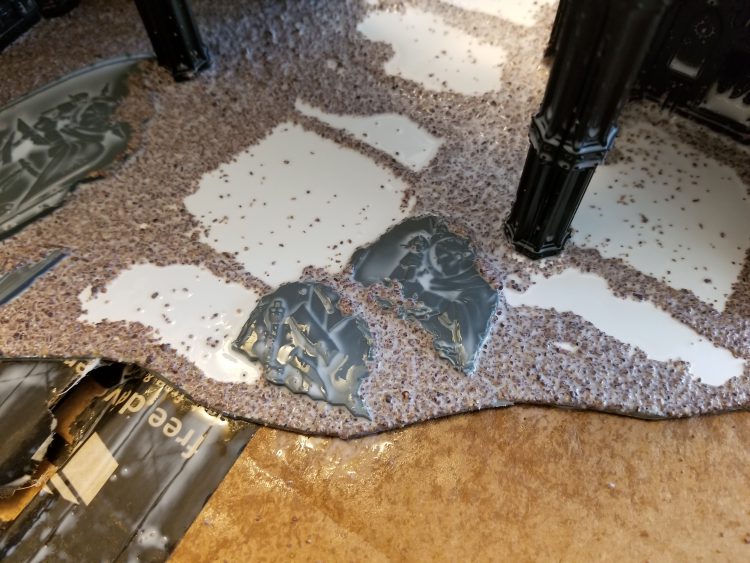
One thing I try to do is mix in a lot of basing details to break up the monotony and help create the visual reminder that these were buildings with taller walls and ceilings. Plasticard sheets also work well here to create flatter base textures that suggest proper flooring and tiles.
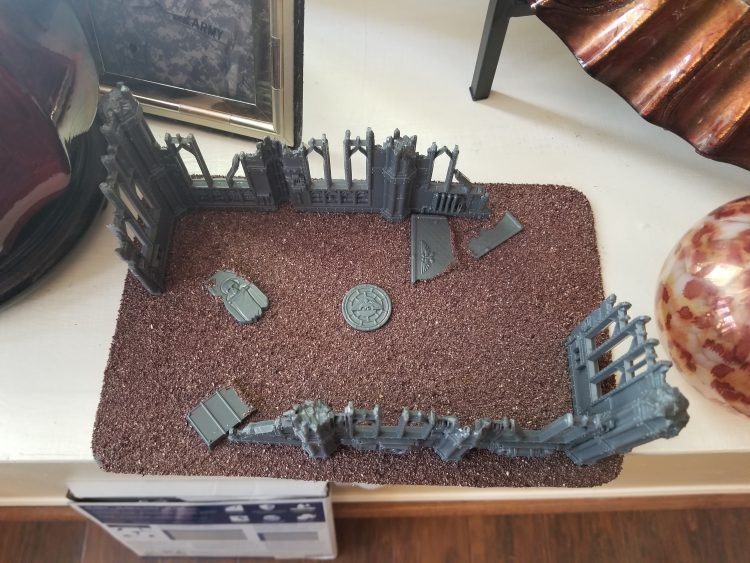
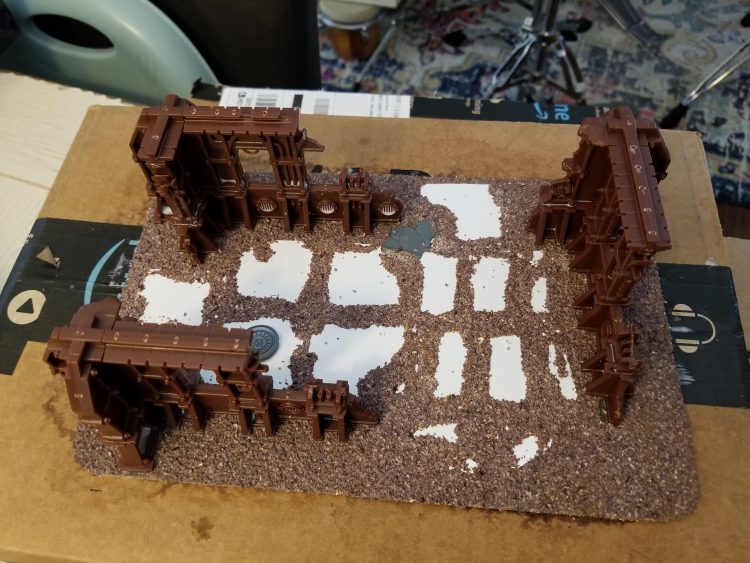
Once the glue dries, prime the thing as normal, then paint it and drybrush it to match your table. I’m currently doing more of an ash wastes theme, so my ground was painted Astrogranite gray (I had a hardware store mix up a can of the color a while back by color matching from the pot) and drybrushed Celestra Gray. Then I add a lot of little details like blood spatters, snow patches, and static grass tufts. These also add a lot of character and help the terrain blend in with the bases I’ve done for my army.
Next Steps
Regardless of whether your painting terrain for competitive play or casual play, adding bases to your terrain can both improve the play experience and create a much more cinematic table experience. There are a number of ways to approach this, and as you go, don’t be afraid to experiment. If you find some cool new methods, feel free to share them!
Have any questions or feedback? Drop us a note in the comments below or email us at contact@goonhammer.com.


