
In our How to Paint Everything series we look at how to paint well, everything, with different techniques and approaches. This week Rich is looking at how to take on the Sorcerer Kings, the latest faction for Conquest: The Last Argument of Kings by Para Bellum Games.
Rich’s Method – Contrast, Layer, Highlight, Shade
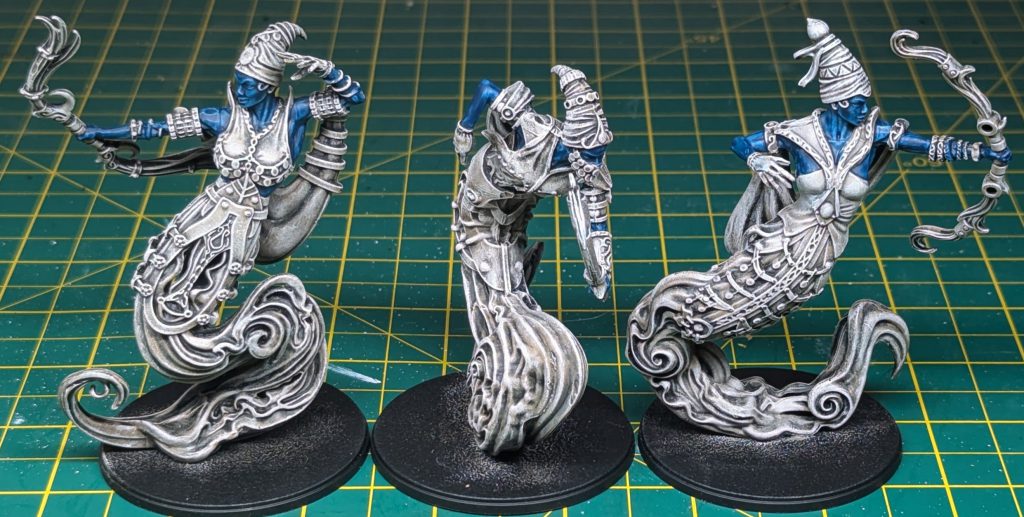
Recently I’ve been tackling the various brute units from the Sorcerer Kings, namely the Efreet Flamecasters, Windborn Djinn, and Steelheart Djinn, as well as a bonus Maharajah character. One of the potential joys of this faction is that you can really go all out on each unit, creating a carnival of colour that still looks coherent on the tabletop. I’ve got a lot of them to paint though, so I’ve opted for a more muted scheme that hopefully feels at home in the Sorcerer Kings’ desert locales and still makes space for spot colours and details to draw the eye.
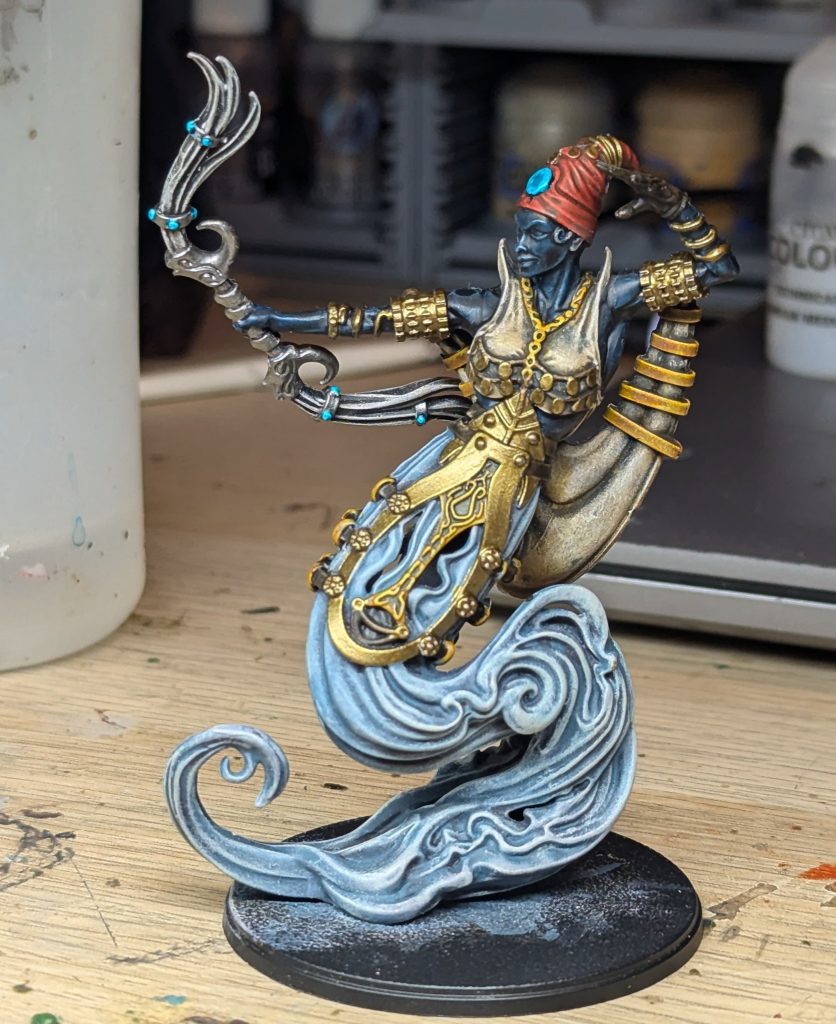
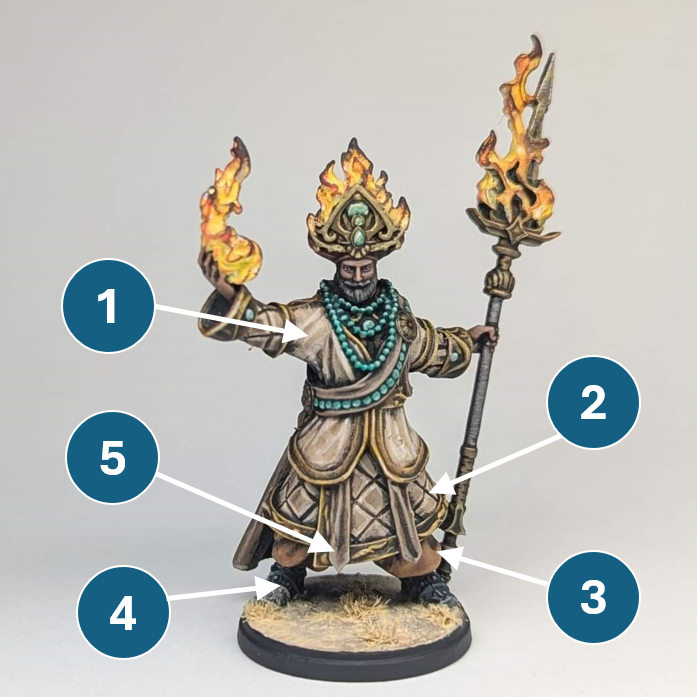
There’s a lot of crossover between units so I’ve split these sections up by material rather than model, apart from where something is specific to a unit like the Efreets’ flaming protuberances. Before we jump in, here’s a photo of a Maharajah as some visual reference for the kind of finish we’re working towards.
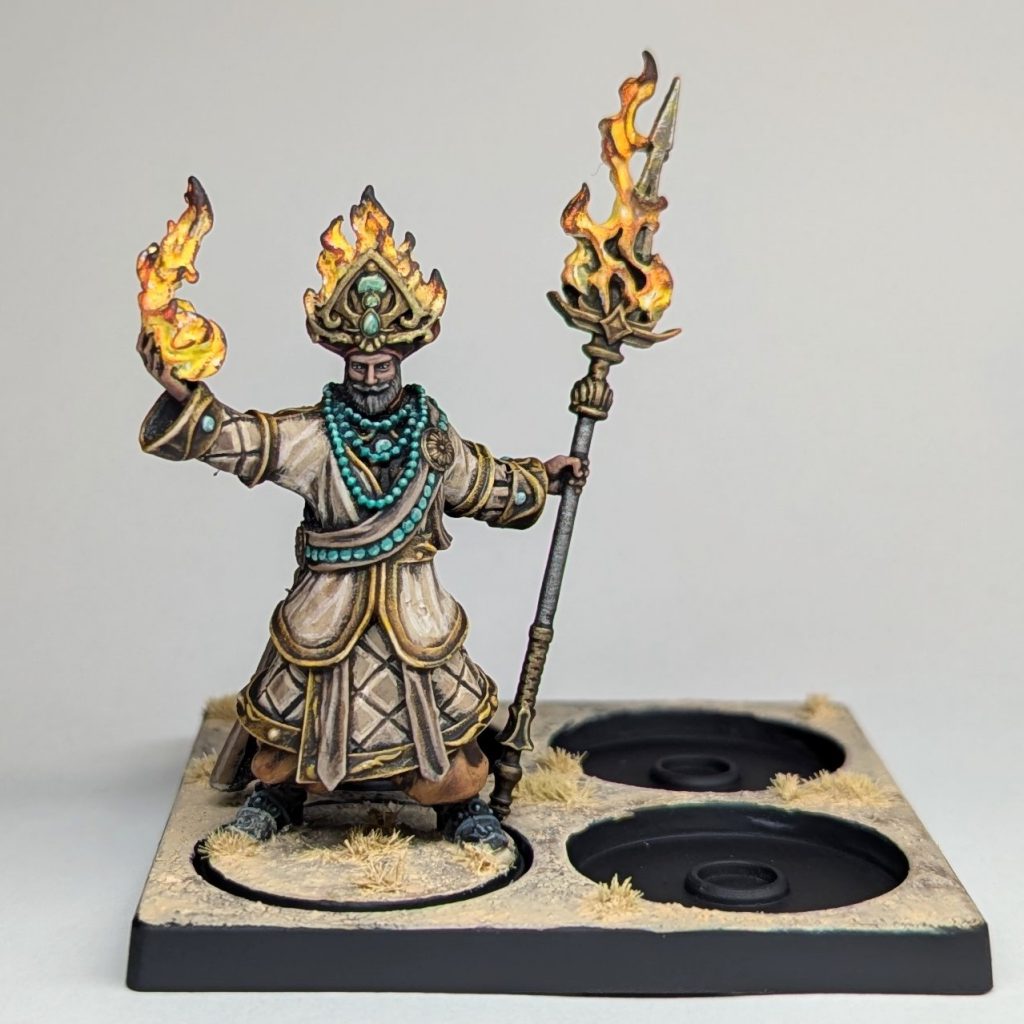
Lovely! A lot of the work-in-progress pictures in these steps you’ll probably look at and think “that looks messy,” and frankly, you’d be right! So just a couple of notes:
- There’s always some amount of unseen tidying up that I’m not talking about in the article itself.
- This method in particular relies on a final dark-lining wash, which helps to clean up any overspill between areas.
- We’re army painting, not painting for display! It is hard to make things look truly impressive when they’re blown up to twice their real-life size on the computer unless we’re painting to a competition standard, which just isn’t conducive to getting an army finished. Hopefully you agree that the final unit shots look great.
In short, be kind to yourself and keep half an eye on what you’re trying to achieve with your painting!
Underpainting
In all cases models were primed black (I like Colour Forge sprays) before being drybrushed with Vallejo Cork Brown then Vallejo Ivory. This creates a nice warm starting point over which to lay our semi-transparent thin paints when blocking in the model’s sections.
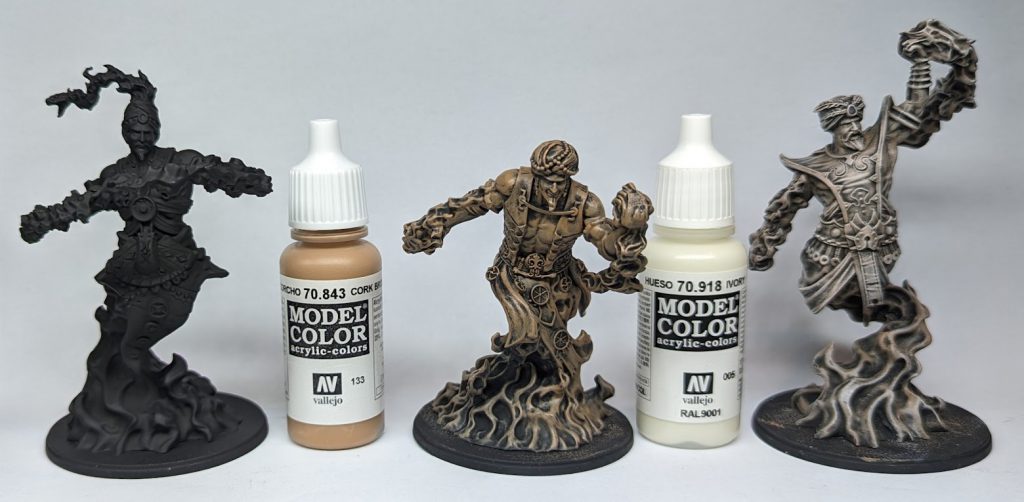
To be honest, in the future I might consider just spraying the models a flat ivory colour, or perhaps a cork colour followed by an overspray of ivory. Conquest models are big enough to make this drybrushing stage feel like it’s taking a very long time, and ultimately not much of it will end up showing through. Do whatever makes sense with the tools you have available!
This scheme would also work fine over a flat white prime, or a “traditional” black-grey-white slapchop. I opted for the brown and ivory based on the warmth of my final scheme, but it won’t make too much difference.
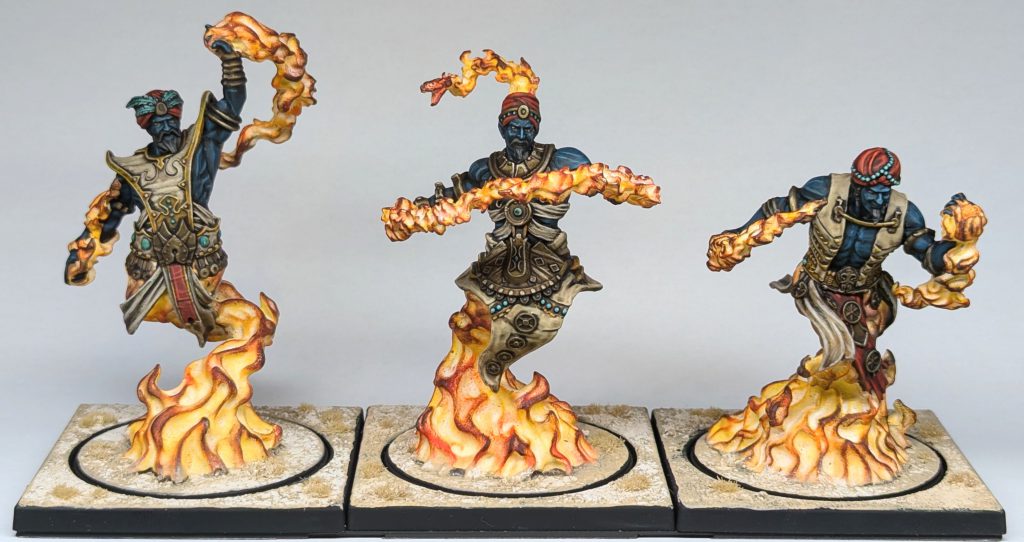
Efreet & Maharajah Fire
I won’t go into too much depth here other than to say go and watch Byron’s excellent Artis Opus video on the same topic, because I used that almost verbatim and don’t want to pass it off as my own creation.
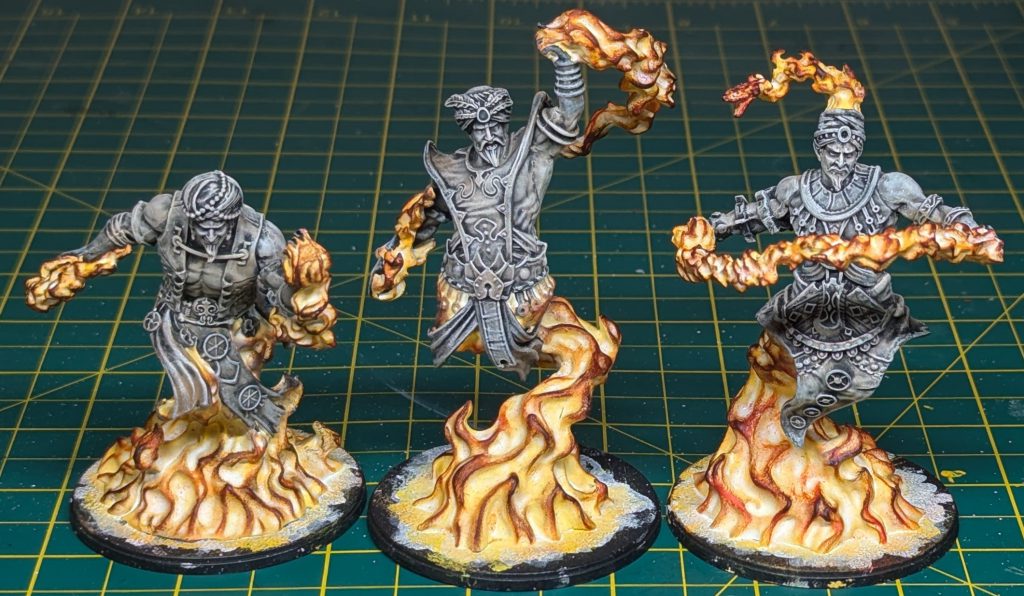
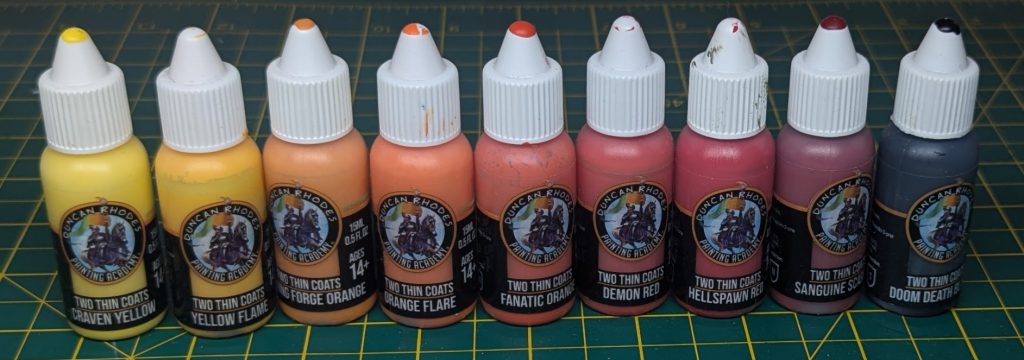
In short we’re basecoating our flame white, then all over (or almost) with a very bright yellow, before drybrushing up through a spectrum of yellow-orange-red-black and washing some thin white back into the hottest spots. I used these Two Thin Coats colours.
I suggest you do this bit first! I did it last on the Maharajah and it was a real pain to try and be careful around finished areas. On the Efreet I did it first (after the underpainting drybrush) and was able to be much messier, and then just tidy up the underpainting quickly afterwards.
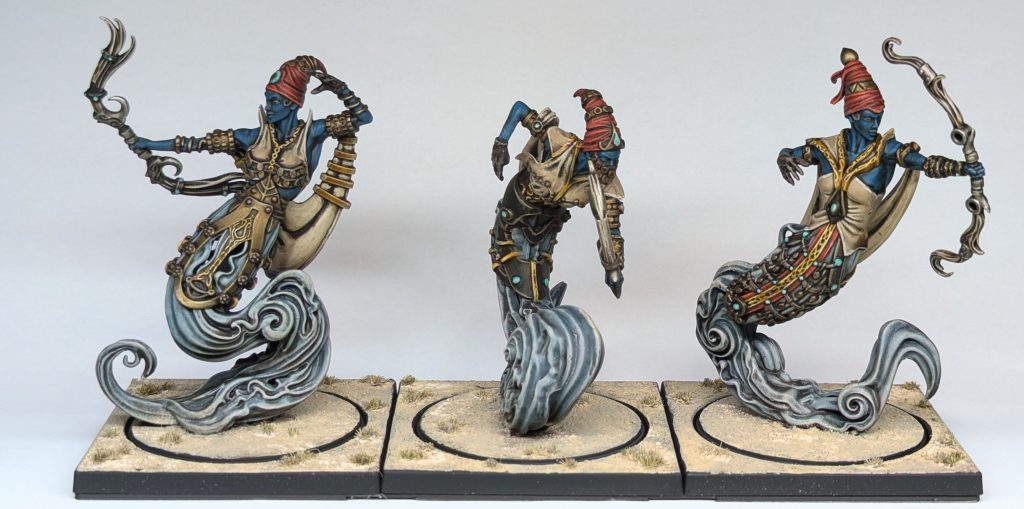
Djinn Smoke Trails
I decided that the Djinn units’ smoke didn’t need to be basecoated white like the fire, as it would be more subtle. From the initial underpaint, I started out with a coat of Gryph-Charger Grey, before layering with Space Wolves Grey and blobbing on some Tyran Blue wash while it was still wet to get some colour variation.
I then drybrushed up through lighter colours – first Russ Grey, then Fenrisian Grey, and finally Deepkin Flesh.
I was hoping that the Deepkin Flesh would give more of a green tint for a nice blue-green transition, perhaps I should have used Ionrach Skin or Gauss Blaster Green. Still, I think they look cool overall.
Skin & Eyes
I wanted to make sure my elemental forces felt otherworldly. I was initially going to lean into either a pale blue, similar to some depictions of Hindu gods, or a deep black to imply a kind of void in space. In the end I settled on a midpoint – a blue black that would be striking but not too bright.
To start, the skin was basecoated in Stormfiend Contrast paint.
After this, it was washed all over with Black Templar, thinned roughly 1:1. I can’t remember what I thinned it with, either Lahmian Medium or Contrast Medium. It doesn’t really matter, use whatever. I stuck with Black Templar here rather than Black Legion or Nuln Oil because it has a nice blue undertone.

With this base established I then worked the skin up to its final colour. This was done with a mix of black (Pro-Acryl) and Thousand Sons Blue (Citadel), starting with more black and moving through to more blue over the course of 3 or 4 layers. I finished with an edge highlight of pure Thousand Sons Blue.
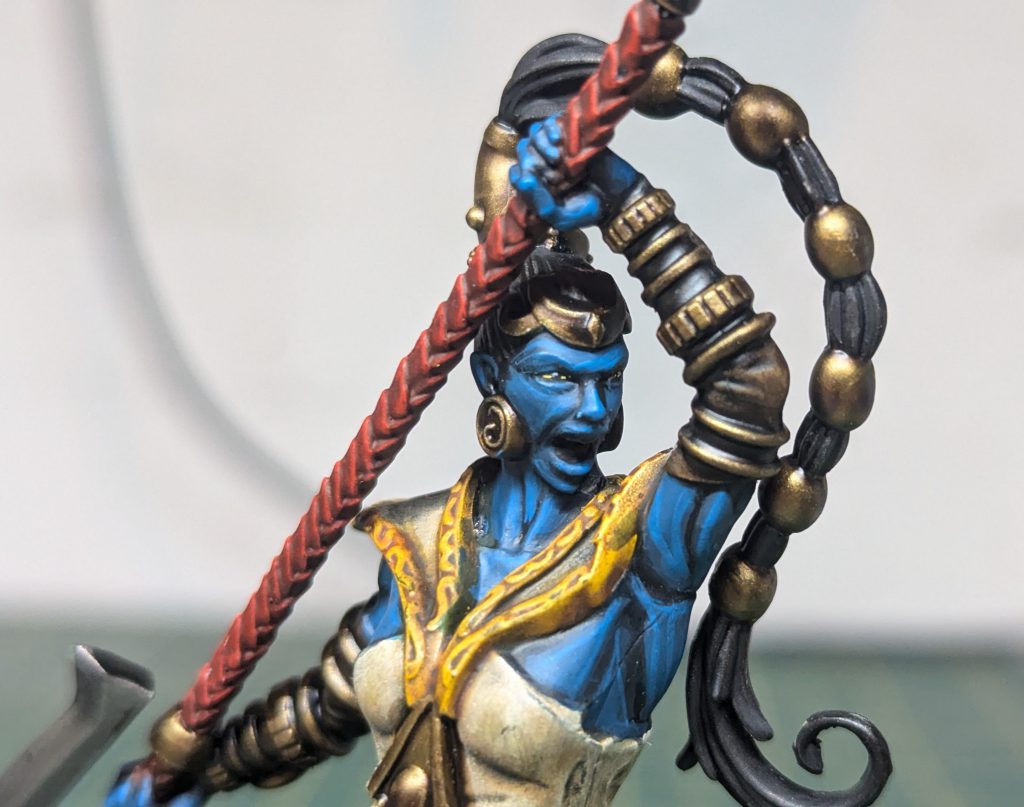
The eyes were a variation on my standard method – the eyeball was blocked in with black, before dotting either side with Phalanx Yellow (Citadel). As these sculpts are reasonably big, I opted to do a tiny dot of ivory in the pupil to look like a reflection.
For the Maharajah pictured above, the eyes were a similar method but using ivory in place of the yellow to avoid him looking rather jaundiced. The warm South Asian skin tone is one I find quite hard to paint, but I think I got close here with a mix of Gore-Grunta Fur and Guilliman Flesh, highlighted with various dark flesh tones like Knight Questor Flesh.
Cloth & Leather
I was very keen on pale, sandy cloth colours like you might see being worn in the desert, so I knew it would be important to add some variation across the different areas to avoid models being too one-note. Here’s a marked up photo of the Maharajah:
-
- The pale cloth is based with slightly thinned Skeleton Horde Contrast, before receiving a layer or chunky highlight of Ushabti Bone, then a highlight of Screaming Skull.
- The alternate pale cloth is basecoated with the same Skeleton Horde, layered with Karak Stone, and edge highlighted with Pallid Wych Flesh.
- The warm brown cloth is based with Gore-Grunta Fur Contrast, layered with Skrag Brown, and highlighted with Deathclaw Brown.
- I wanted to make sure the black leather looked different to the blue-black of the elemental skin, so it’s basecoated with Black Legion contrast before being highlighted with Eshin Grey and Dawnstone.
- This set of desaturated brown colours serves double duty as leather/cloth depending on location. It’s a basecoat of thinned Garaghak’s Sewer Contrast, with a thick highlight of Steel Legion Drab and an edge of Baneblade Brown.
I use the different materials across all of the models in the army, trying to keep to the lighter cloth colours for the main clothing.
Red Details
The red mostly appears on headdresses and other small flashes of cloth, but I also opted to use it on the wrappings of the Steelheart Djinns’ weapon hafts as they were fairly bereft of other places to put it.
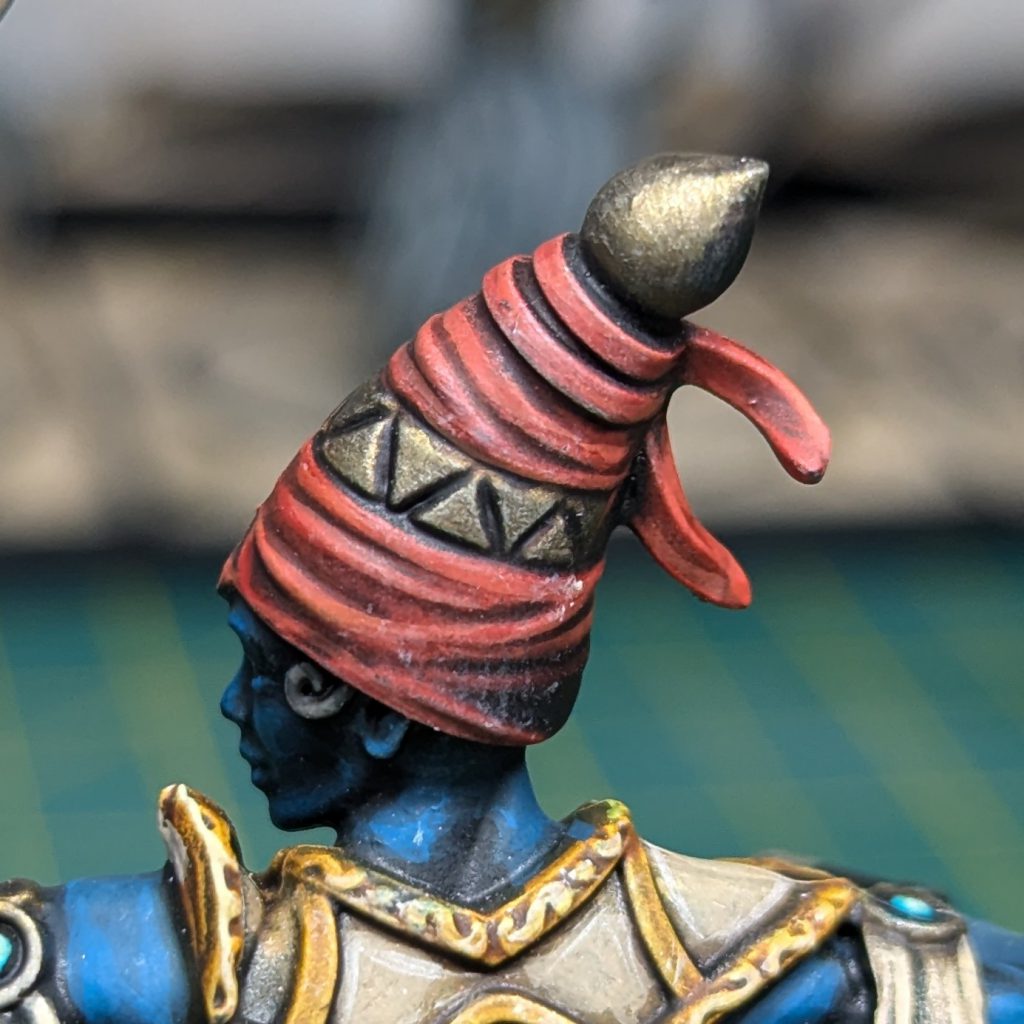
I started out with a base coat of Blood Angels Red, before a first highlight of Evil Sunz Scarlet, a second of Wild Rider Red, and in a couple of places a final highlight of Trollslayer Orange. I applied this with a regular brush on the cloth, but for the nicely textured weapon hafts I could drybrush it on in a matter of seconds.
Jade Gems/Details
We’ve all done it. Nearly finished a unit, before realising there are 15 gems to paint on each model. For these, I wanted to keep the gems simple and quick to do.
They’re picked out in ivory to tidy up any mess, then coated in Kroxigor Scales contrast paint. Once that’s dry they get a thin coat of Sybarite Green covering most of the gem, then a highlight of Gauss Blaster Green. On some of the biggest gems I’ve gone back and added a pair of white winks to really sell its gem-like appearance, but I mostly decided that was too much effort. I feel like these have the look of opals or jade, precious but not incredibly shiny.
Metallics
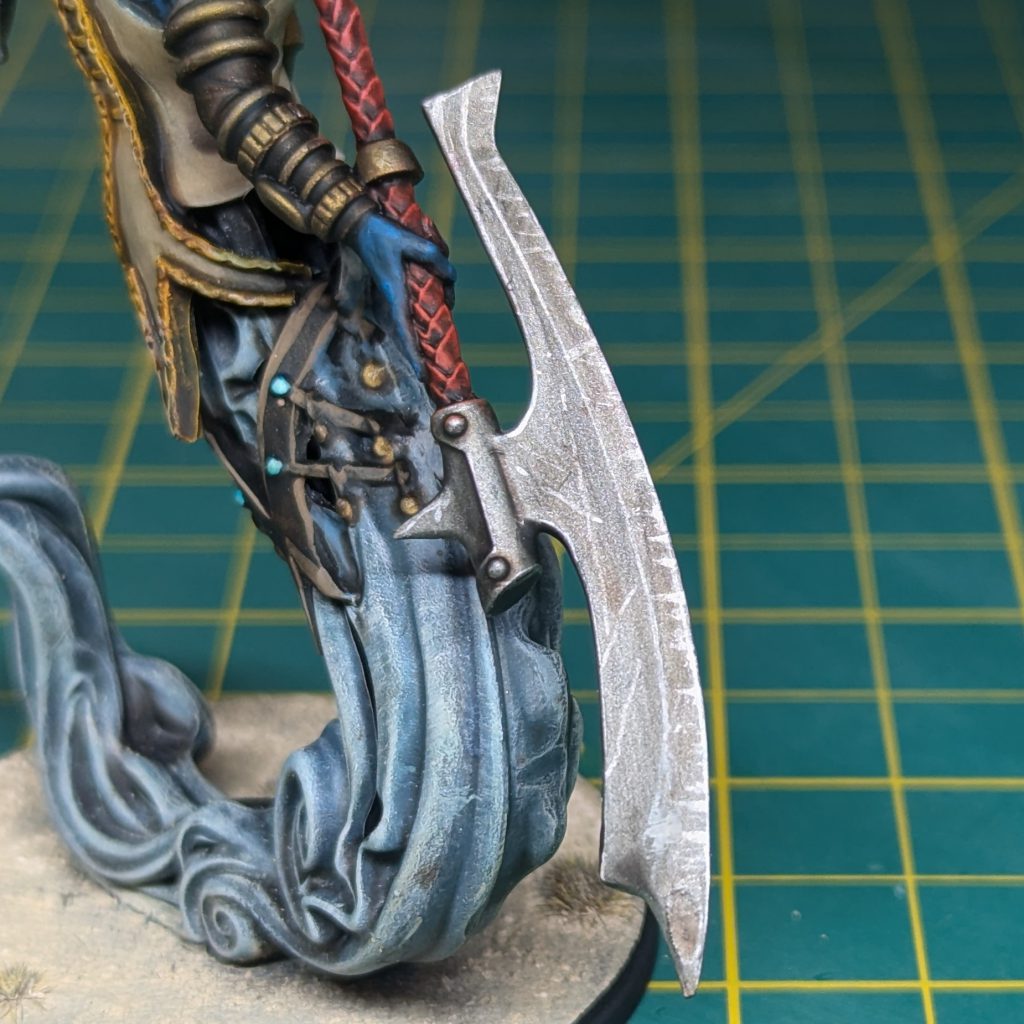
For the silver, it’s a tale as old as time. Leadbelcher, Nuln Oil, a touch up with Leadbelcher, and some highlights with Stormhost Silver. A familiar, comforting recipe, like it’s 2015 and you’re just getting back into Warhammer. On the Steelheart glaives I dropped in a few scratches and dings along the edges.
The gold is a basically the same principle. Gold armour and trinkets are basecoated with Scale 75 Necro Gold – Scale products aren’t generally my favourite, but their metallics are great and this colour in particular is standout. In my opinion it’s a much more realistic aged gold than any of the Citadel colours. After being washed down with Agrax Earthshade, the areas get touched up with Necro Gold again to bring back some shine, and then get a highlight with a 50/50 mix of Necro Gold with a bright silver. I normally use Vallejo Game Air Silver, but this time I used Stormhost Silver as it was already on my palette. See the next section for a photo of the gold metal.
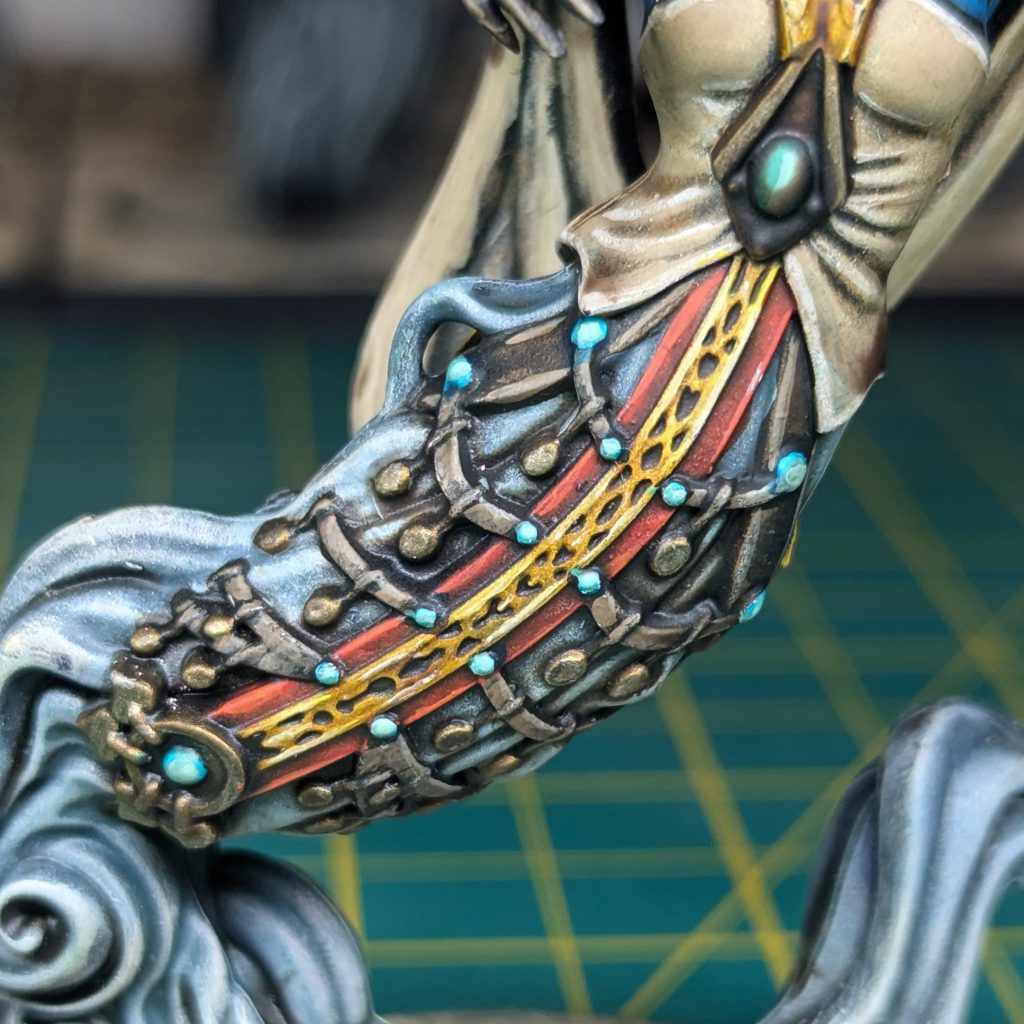
“Gold” Cloth Trim
I love doing what I call “cheater’s NMM” (non-metallic metals) on models with metallic cloth trim, like the tassels on a cloak or, in this case, a ton of trim everywhere. The goal here really is to give the impression of carefully constructed non-metallics, without actually really worrying about where the light is coming from, what areas are in shadow, and generally actually being competent. I imagine if there’s one area of the models that people don’t like, it might be this, but personally I do quite like it.
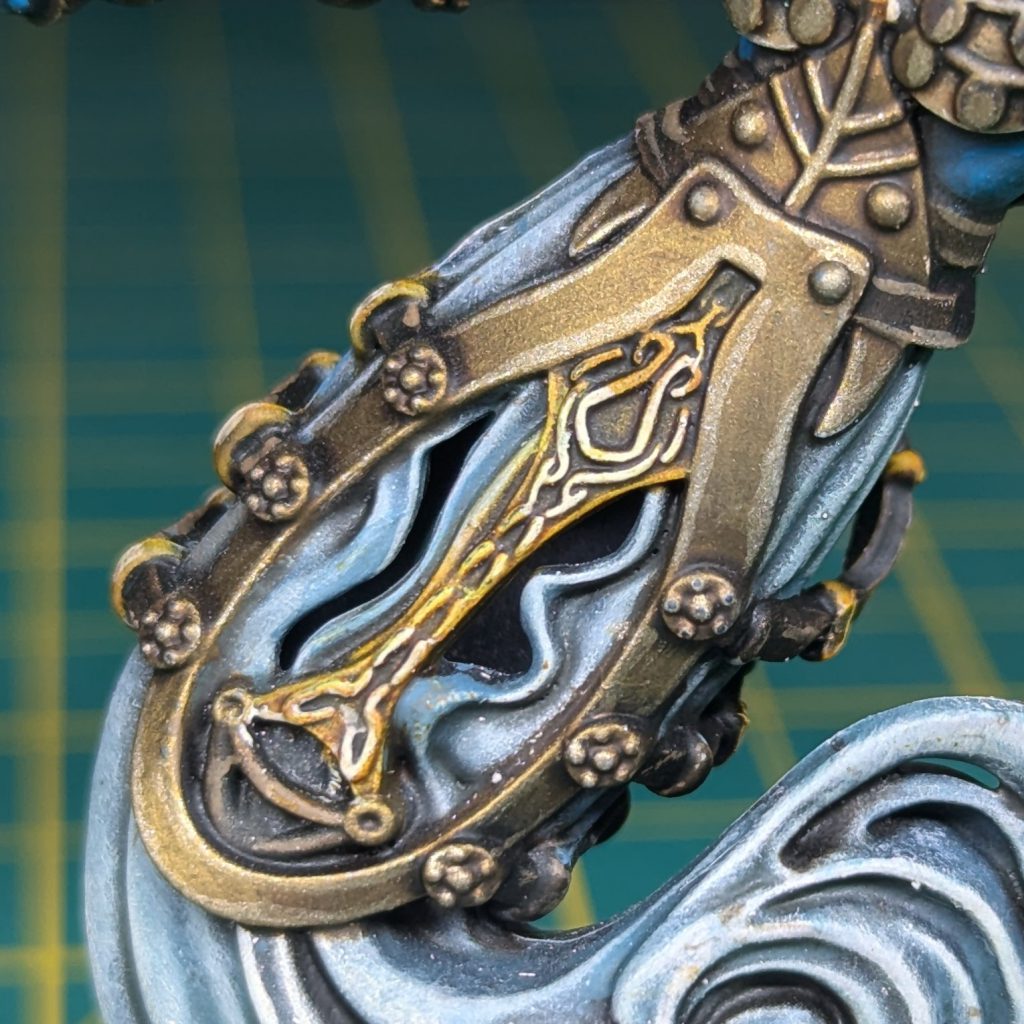
The trim is basecoated in Nazdreg Yellow, before getting a gentle wash of Aggaros Dunes to reinforce the darker parts. I then highlight raised areas and edges with Flash Gitz Yellow, followed by Screaming Skull. When placing the highlights I do try to give half a thought to where the high points are, or failing that at least try to leave alternating areas of dark or light to imply a kind of shimmering or catching of the light.
If you wanted to go a step further you could come in here with some spot highlights of ivory on the brightest points, and drop some dark brown into the deepest shadows, but frankly I didn’t want to.
Final Details
That was pretty much it! The bows on the Windborn got a coat of Seraphim Sepia and a highlight of Wraithbone, and I tidied up any egregious overspill (mostly yellow somehow making its way onto the Djinns’ smoke trails).
Mysterious “Marine Juice” Magic Wash
This has become one of my favourite things to do when painting armies. A thin wash that doesn’t stain the surface too much, but pulls back into the recesses nicely, darklining the model and tying it all together nicely. I find this is great for covering up minor bits of overspill and tying the model together cohesively.
It’s been through a few iterations, but my current favourite is one pot of Citadel Reikland Fleshshade, one pot of Army Painter Dark Tone, and one pot of Lahmian Medium, all mixed together in a big pot. This is a nice warm but still pretty dark tone, with a slight dirty edge.
The name “marine juice” originates from one of the Games Workshop studios using a mix like this to grime up Horus Heresy armies. If you’d like to know more about the various things you can do with it, I highly recommend checking out Sonic Sledgehammer’s YouTube channel – he has various videos on the mix.
No pictures of this step because it somewhat spoils the final reveal!
Desert Basing
The bases are pretty simple. I start with Armageddon Dust texture paint, drybrushed with Screaming Skull and washed with the marine juice from above. Once that’s dry I place down some plants, in my case tiny tufts from Gamers Grass. I haven’t been consistent with colour, because of the next step.
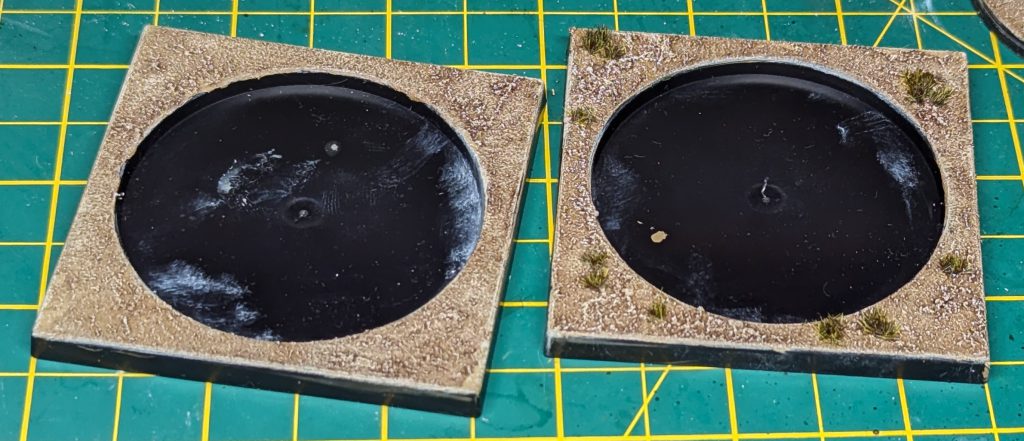
The bases then get a liberal coating of a sand-coloured weathering pigment, kind of jabbed on with a big brush. This is then sealed in – I’ve tried all sorts from water to isopropyl alcohol to dedicated pigment fixers. Nothing really fixes it perfectly, but I’ve found the Scale 75 Pigment Fixer to be one of the best.
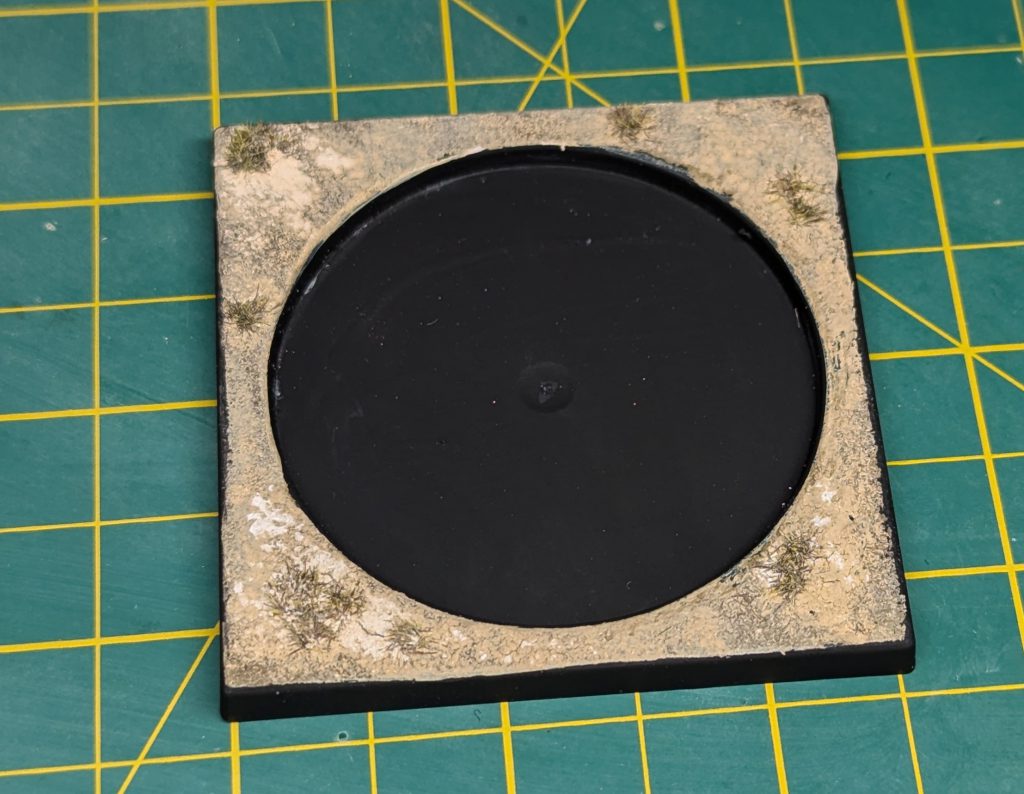
After that, the base rims and the insides of the trays are painted black.
Varnishing
I have gotten into the habit of always varnishing models these days. It’s not really needed from a protection point of view, but I find that with the combination of a lot of washes and Contrast potentially drying glossy it’s really worth getting a consistent surface finish to push your models a step further visually. Plus it can’t hurt to seal all of that powder a bit more.
My varnish of choice is Tamiya TS-80 Flat Clear spray. It’s the only spray can of varnish I truly trust, and I’m also a bit of a freak for a matt effect and it gives the best one I’ve found – other canned matt varnishes look practically satin by comparison. If you want an airbrush or brush-on solution that gets close, I’d recommend MIG’s matt/ultra-matt, or Instar’s Varnish+ product. For a more satin finish, I quite like Games Workshop’s Munitorum Varnish, as long as you’re careful not to spray too much at once.
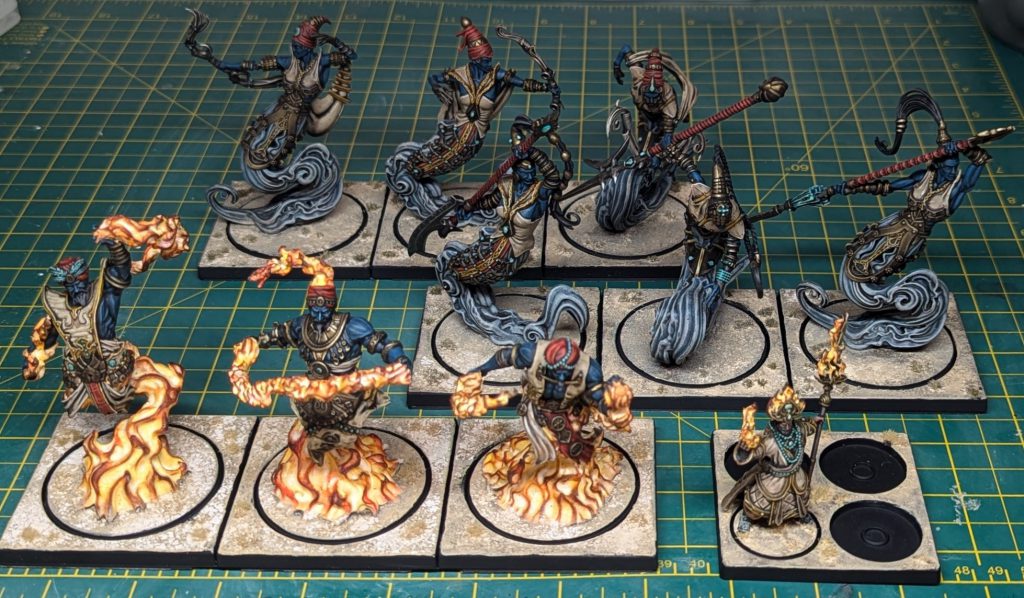
Final Photos
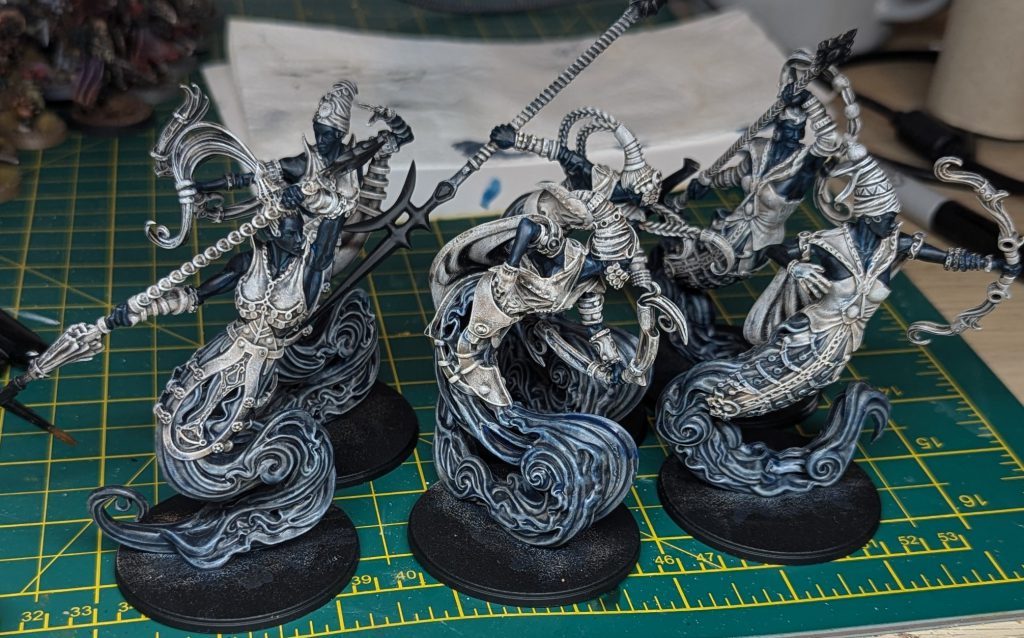
Enough talking – here are the units finished using the above steps!
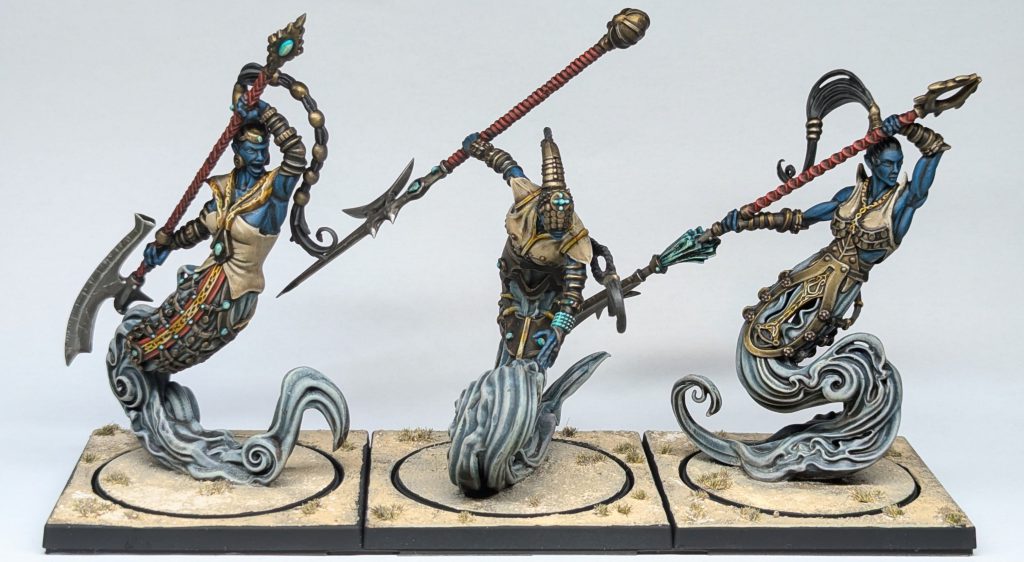
Honestly, I’m pretty thrilled with these. At some point during each unit I was quite frustrated with how they were going, aware that I was pushing quite hard to get them done in time for this article and worried about how they’d look. If I have one criticism it’s that I think the fire effects kind of overshadow the models without flames, but hopefully that will balance out with more normal infantry in the army. In the end, I’m really happy with how they worked out! And hopefully you’ll agree, they’re looking fantastic as an army project so far:
Up next I’ll be adapting those steps to the infantry I have, plus the Rakshasa monster. I’m really looking forward to replicating that fire effect on a larger scale! I also have a Mahut to paint, which might require a different approach due to its bevy of smooth surfaces. Look out for a pachyderm painting project post in the future. Also look out next week for Musterkrux’s take on some of the other models in the faction!
You could adapt the above steps to any of your projects, really. The principle is just to get a basecoat down quickly with Contrast so that we can spend longer on highlighting and layering, and cover our sins with a wash at the end. Let me know if you give it a go, and share your pictures in the Goonhammer Discord!
As always if you want to get 10% off and support Goonhammer you can make your Conquest purchase by clicking here for US/Canada or here for EU/rest of world. You’ll also need to enter code “goonhammer” at checkout.
Have any questions or feedback? Drop us a note in the comments below or email us at contact@goonhammer.com. Want articles like this linked in your inbox every Monday morning? Sign up for our newsletter. And don’t forget that you can support us on Patreon for backer rewards like early video content, Administratum access, an ad-free experience on our website and more.
