In our How to Paint Everything series we look at how to paint well, everything, with different techniques and approaches. This week Rich is back to paint a Mahut, a colossal elephant statue brought to life by the Sorcerer Kings, the latest faction for Conquest: The Last Argument of Kings by Para Bellum Games. Thanks to Para Bellum for providing the models used in this painting guide.
In our previous articles on painting the Sorcerer Kings we’ve focused on characters, troops, and brute units, but this time we’re tackling something a whole lot bigger. The Mahut are stone replicas of the Sorcerer Kings’ last elephant to fall, the beloved steed of Hormus, Who Lays Mountains Low. Infused with dread animus, they are shared with his followers to stride the battlefields amongst them and offer some protection. In game, the Mahut is a very resilient monster that can put out a suprising amount of damage between combat and its crew of bow-wielding Dhanur Disciples. Alternatively, it can serve as a mount for a Favored of Hormus, a Maharajah of particular renown. We’ll be looking at how I painted both of these, in addition to the elephant itself.
The Mahut – Stonework
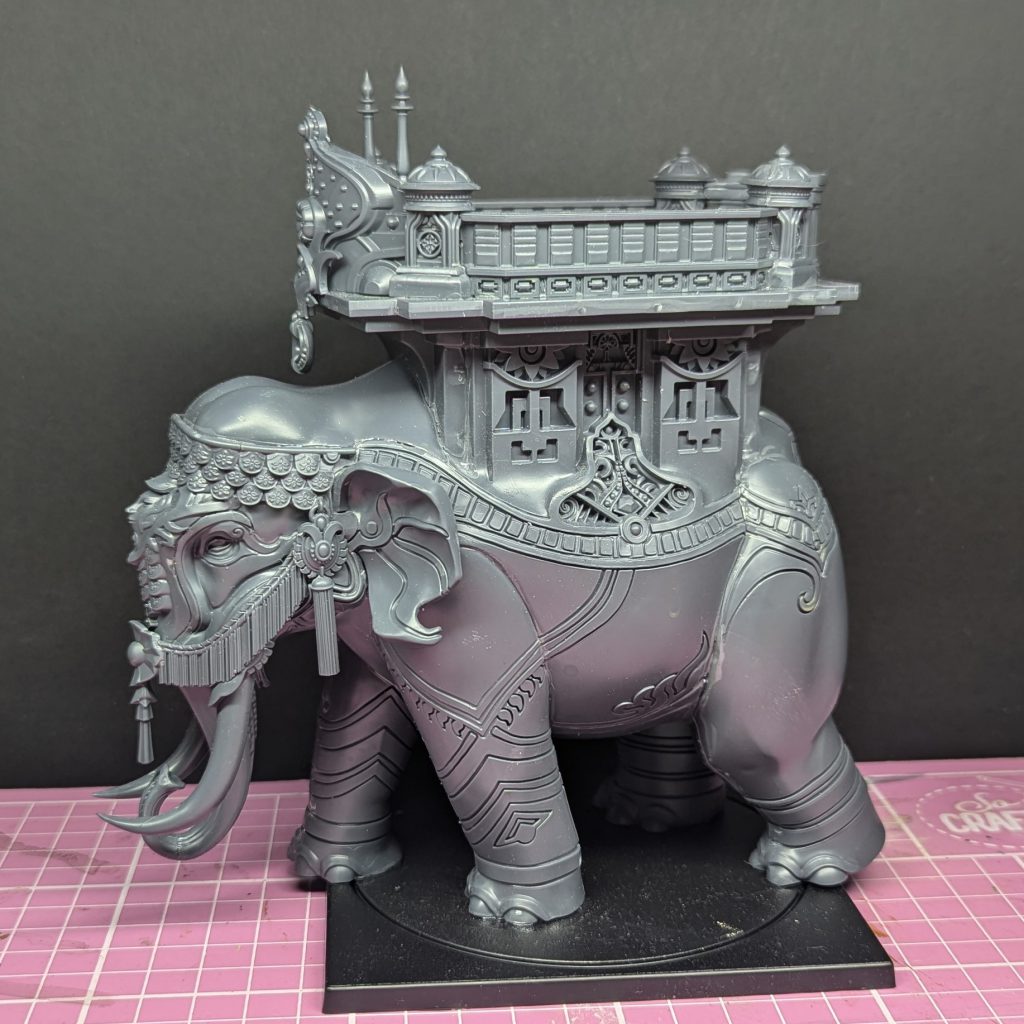
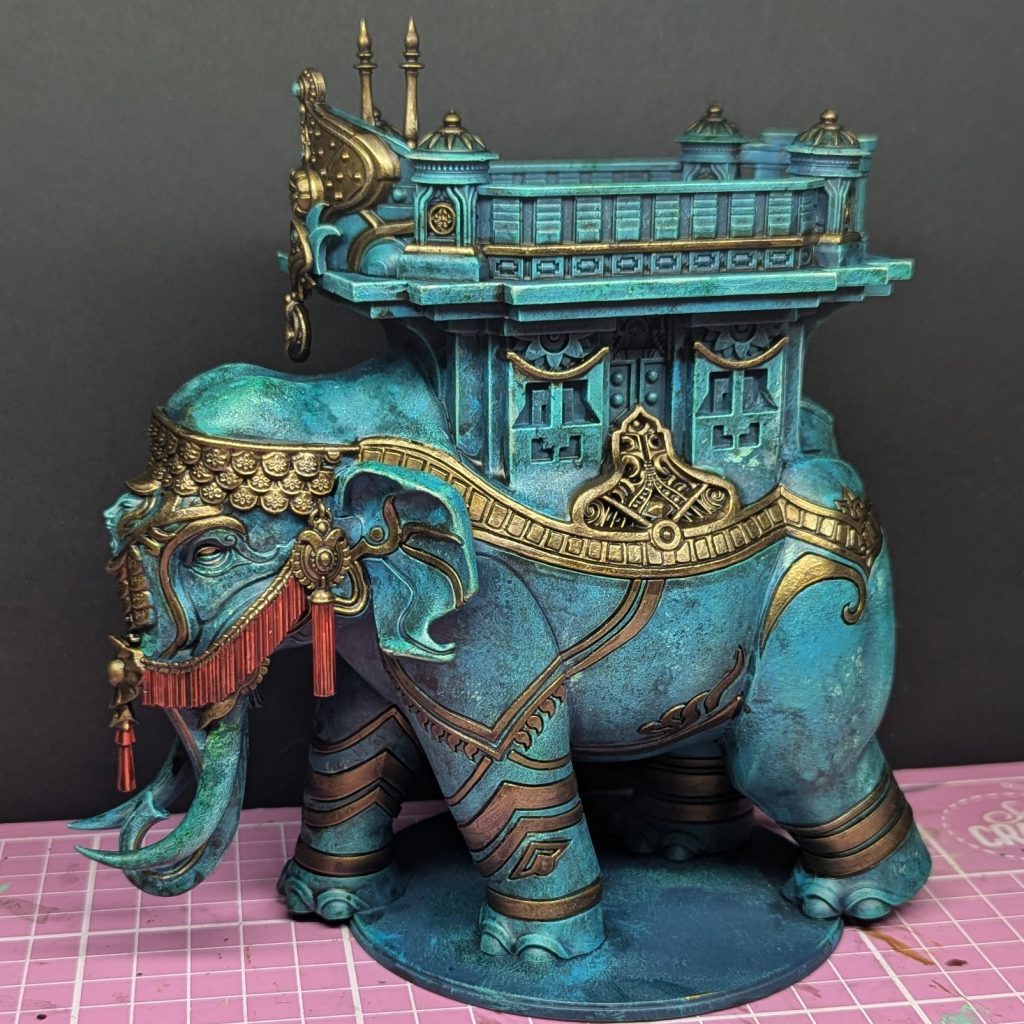
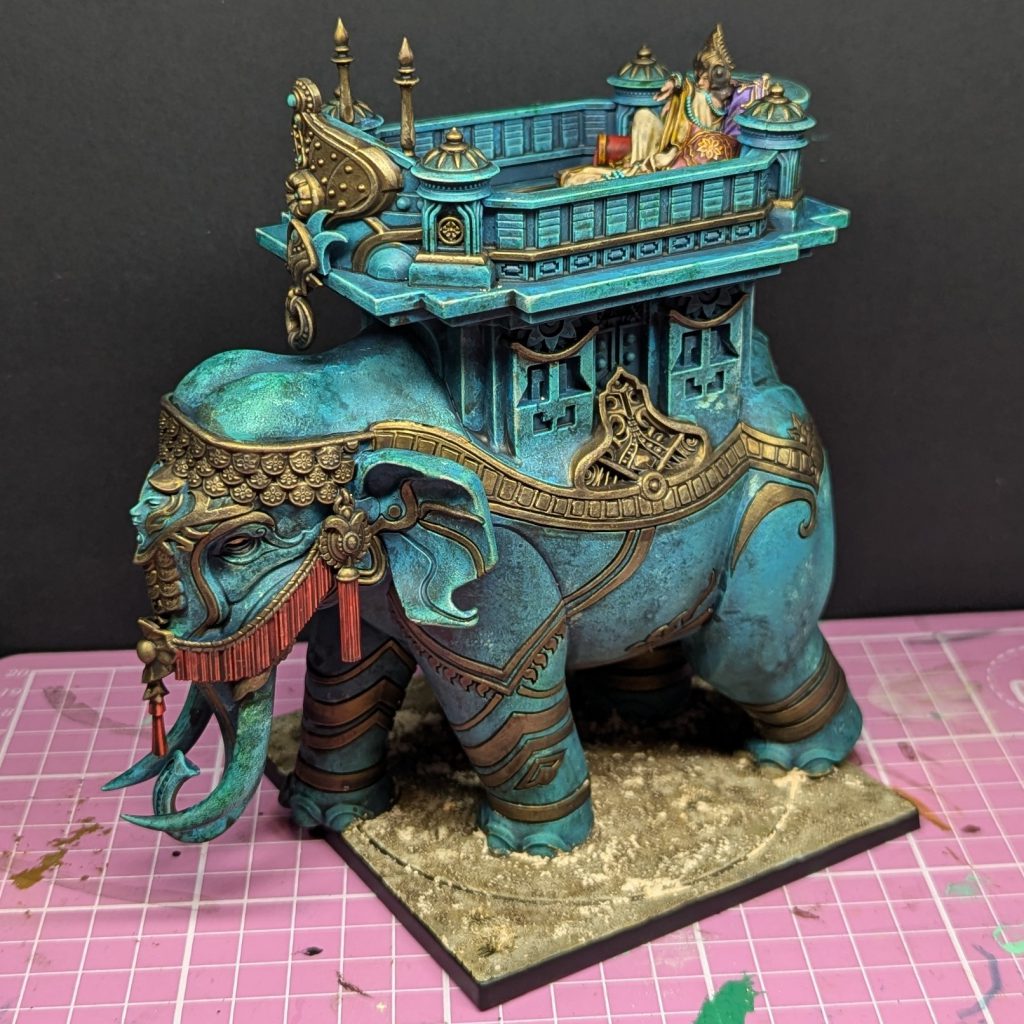
The Mahut is a truly imposing model. It’s huge! Para Bellum’s studio model is beautifully painted in a smooth off-white scheme. However as I’m still trying to get this army painted, I’m going to focus on some techniques and shortcuts to get it to the table in a decent amount of time rather than go all-out on a parade-ready piece, and step one of this plan is choosing a different colour for the main body. My Sorcerer Kings wear a lot of blue-green gems that could be jade or malachite, and it makes sense to me that they might also choose to build a devotional statue to a beloved steed out of similar semi-precious materials, so I settled on a blue-green stone scheme. To save time at the start, I basecoated with a spray of Drake Scale Green from The Colour Forge (which I think they might have discontinued recently).
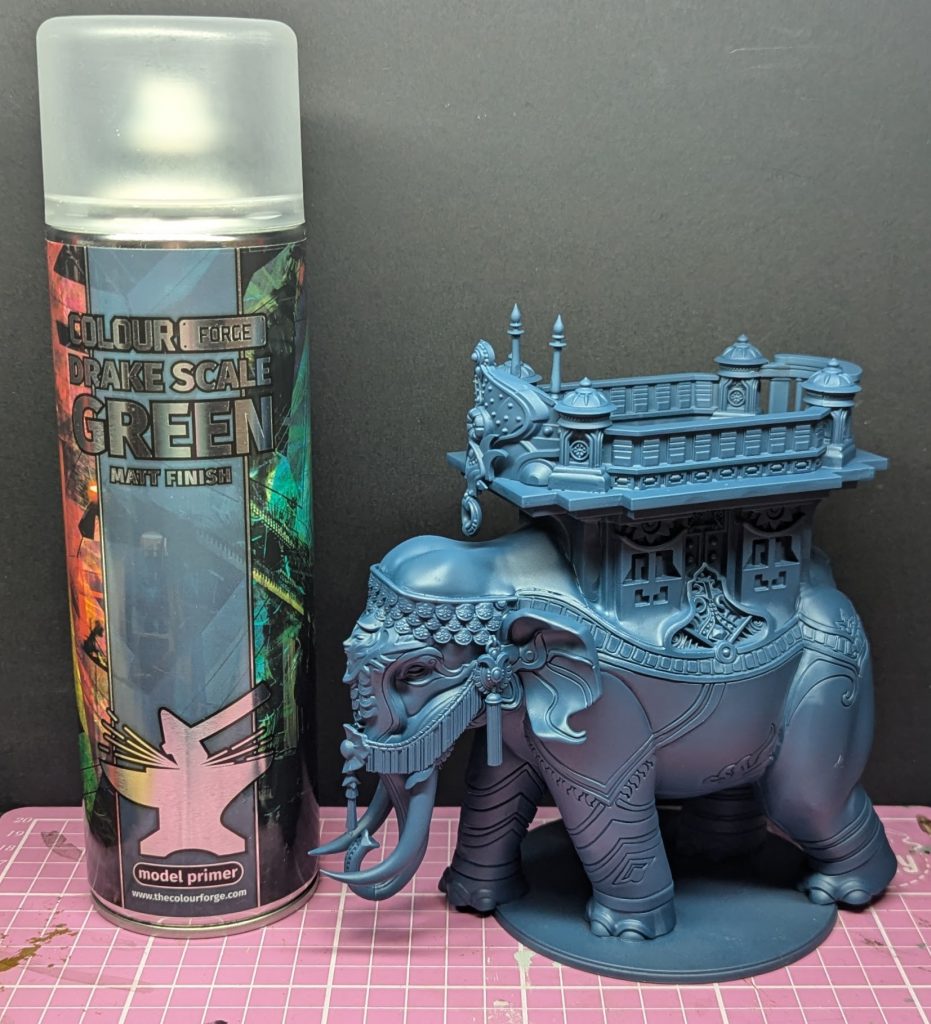
I normally lean on a lot of Contrast paints for my models, which I can’t really do here with something so big and smooth. Normally I would basecoat my gems with Kroxigor Scales before highlighting with Sybarite Green and Gauss Blaster Green. The spray I’ve used is roughly equivalent to Stegadon Scale Green, so there’s quite a big gap to make up between that dark tone and the mid-blue of the Kroxigor Scales.
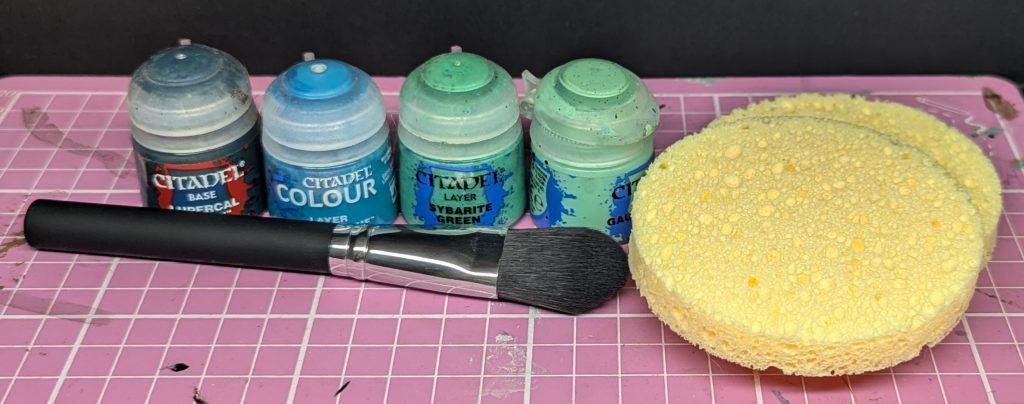
I opted for Lupercal Green followed by Ahriman Blue to fill the gap, before moving back into Sybarite and Gauss Blaster. I was keen to replicate a marble or stone like texture, but didn’t really want to spend a long time doing this by hand, so I opted to dab on colours with some natural sponge, supplemented by a big drybrush for some of the sharper areas like the howdah. This is a great way of covering large areas quickly, and also adds some interesting texture to the flatter parts of the model. After the Ahriman Blue it was already feeling very blue (go figure) so I switched to the big drybrush rather than sponging all the way.
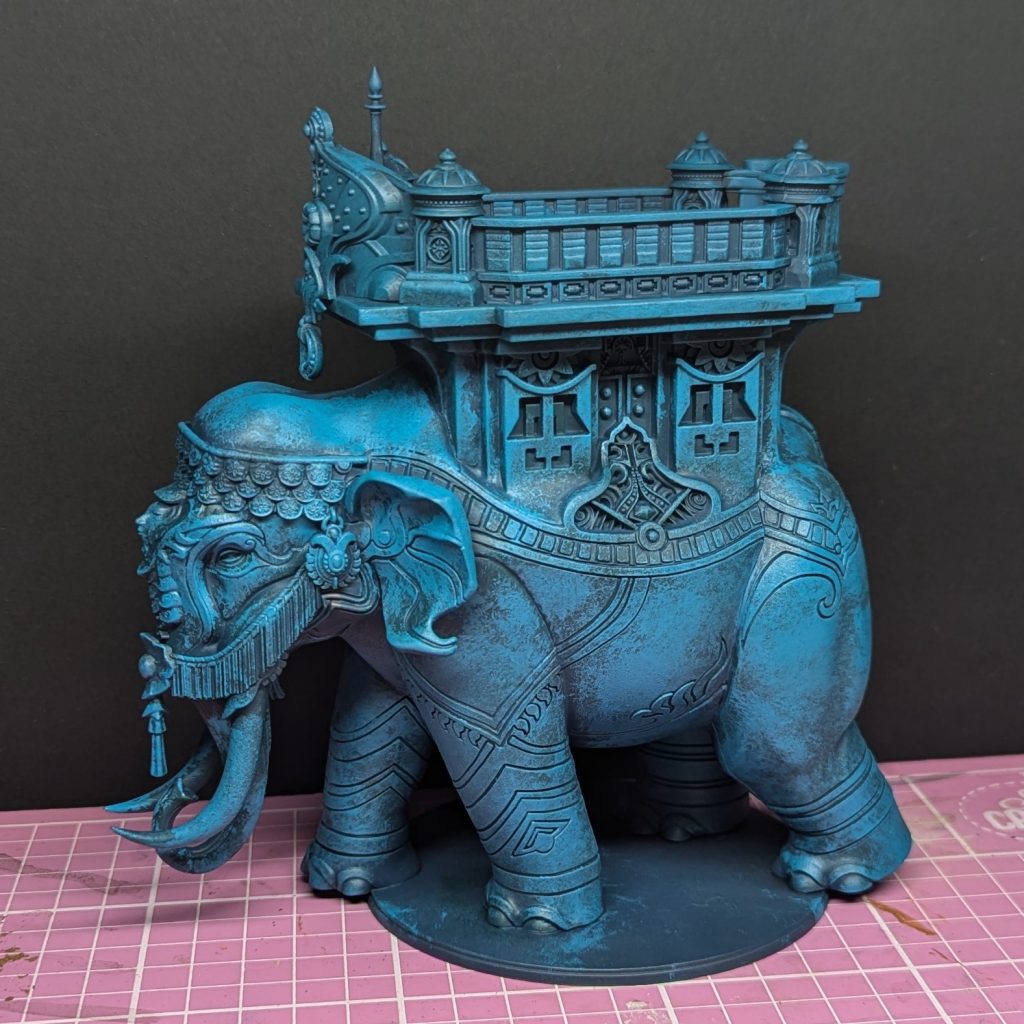
After this process I added some final thin highlights to some sharp edges and focal points, first with the Gauss Blaster Green and then with an ivory colour. I find reintroducing a warm tone at the highest point can really sell the idea of the model being stone. I opted to dab on some Coelia Greenshade and Biel-Tan Green shades (with a sponge again) to add some colour variation across the big panels, and the stonework is done. This is a huge amount of the mini, obviously! We’ve got to tackle the metallics, the inlay in the howdah, the eyes, and the cloth tassels, and then we’re done.
The Mahut – Metallics
With the stonework done, I jumped into doing the metallics. Very simple here – it’s old favourite Scale 75 Necro Gold, washed with Agrax Earthshade, and highlighted up with a mix of Necro Gold and a bright silver (I used Game Air Silver, from Vallejo). There’s quite a lot of gold on the model, so I used the store page as a guide for where to place it, opting to keep some bits as sculpted stone instead.
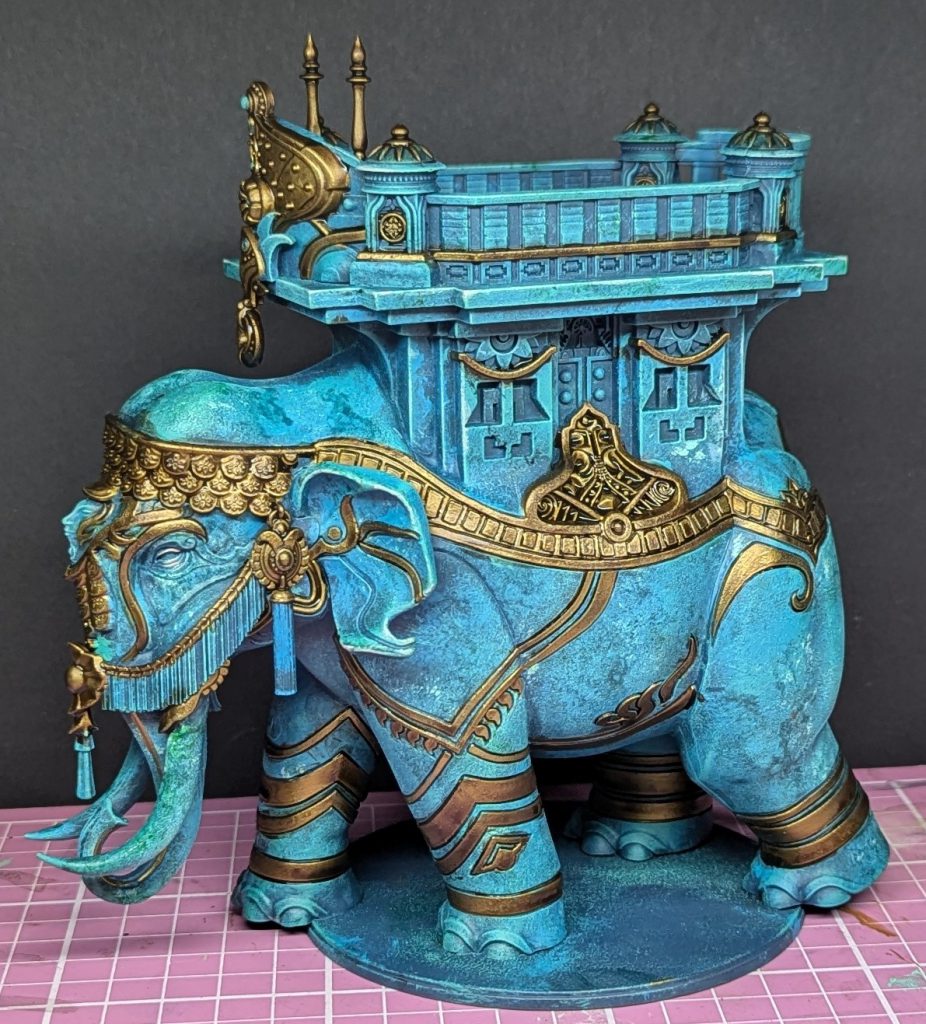
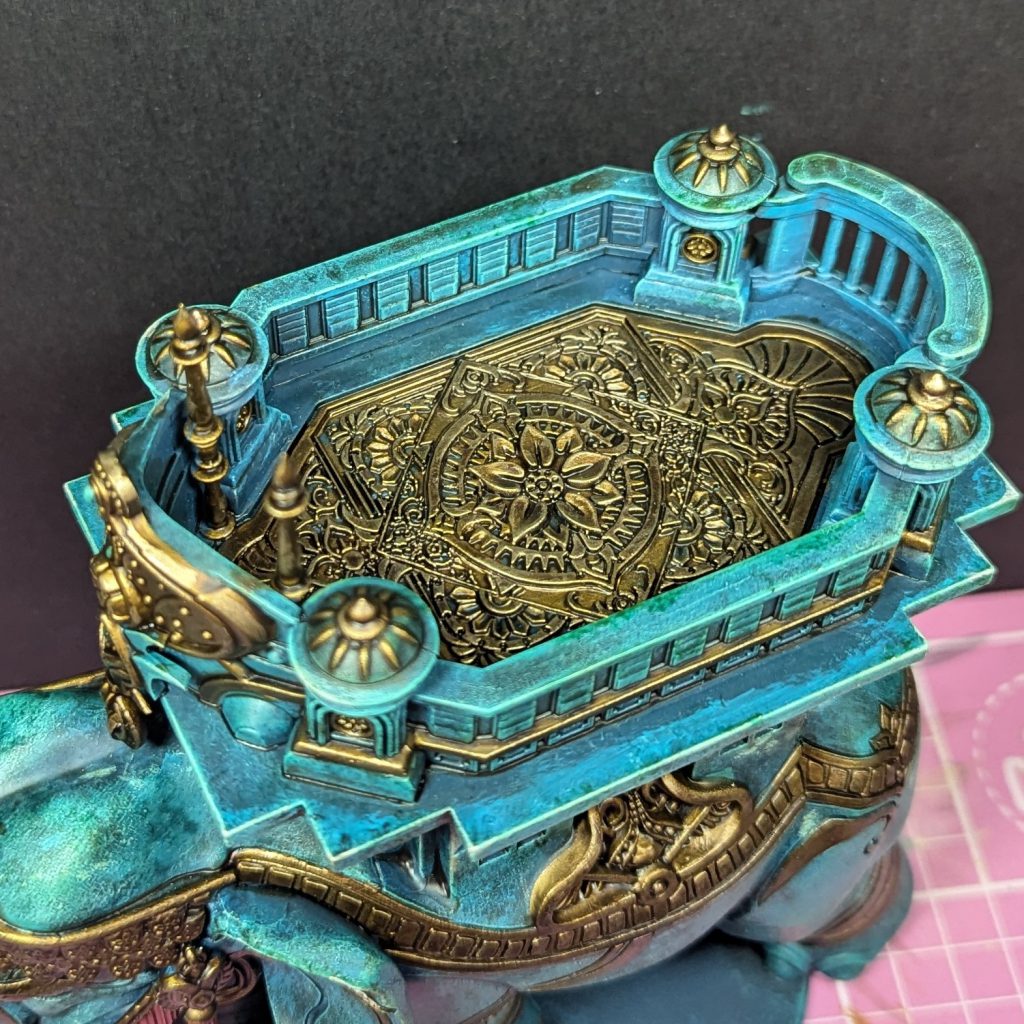
After doing the gold, I decided to paint the inlaid pattern in the howdah in the same way. I was tempted to do a bright multicoloured mandala effect, but in the end I thought it might clash with the green of the body and so I settled on something that would definitely match.
The Mahut – Eyes
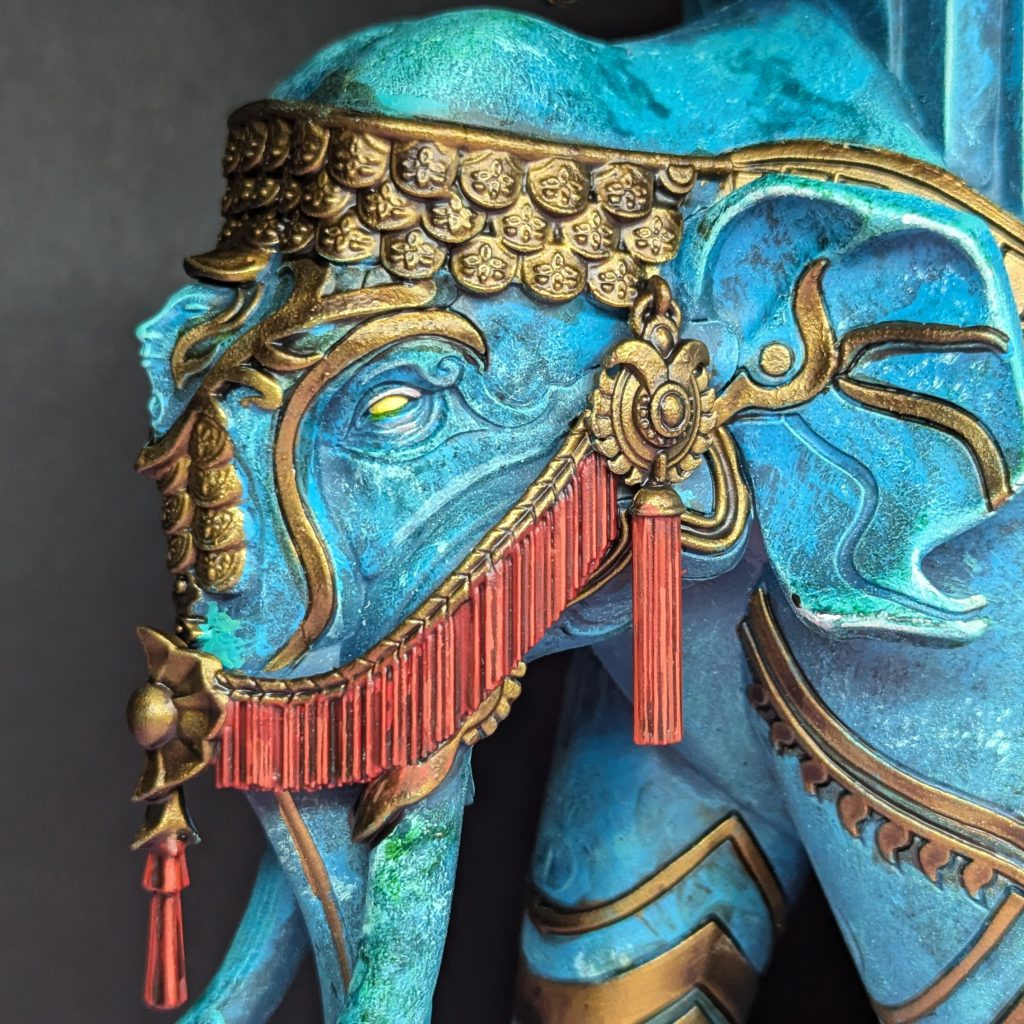
Nice and simple here – the eyes were basecoated white, filled in with Imperial Fist contrast paint, then highlighted with a mix of yellow and white.
The Mahut – Tassels
The tassels were basecoated with Mephiston Red, washed Agrax Earthshade, then highlighted with Evil Sunz Scarlet and Wild Rider Red. And with that, the body itself was finished!
Dhanur Disciples
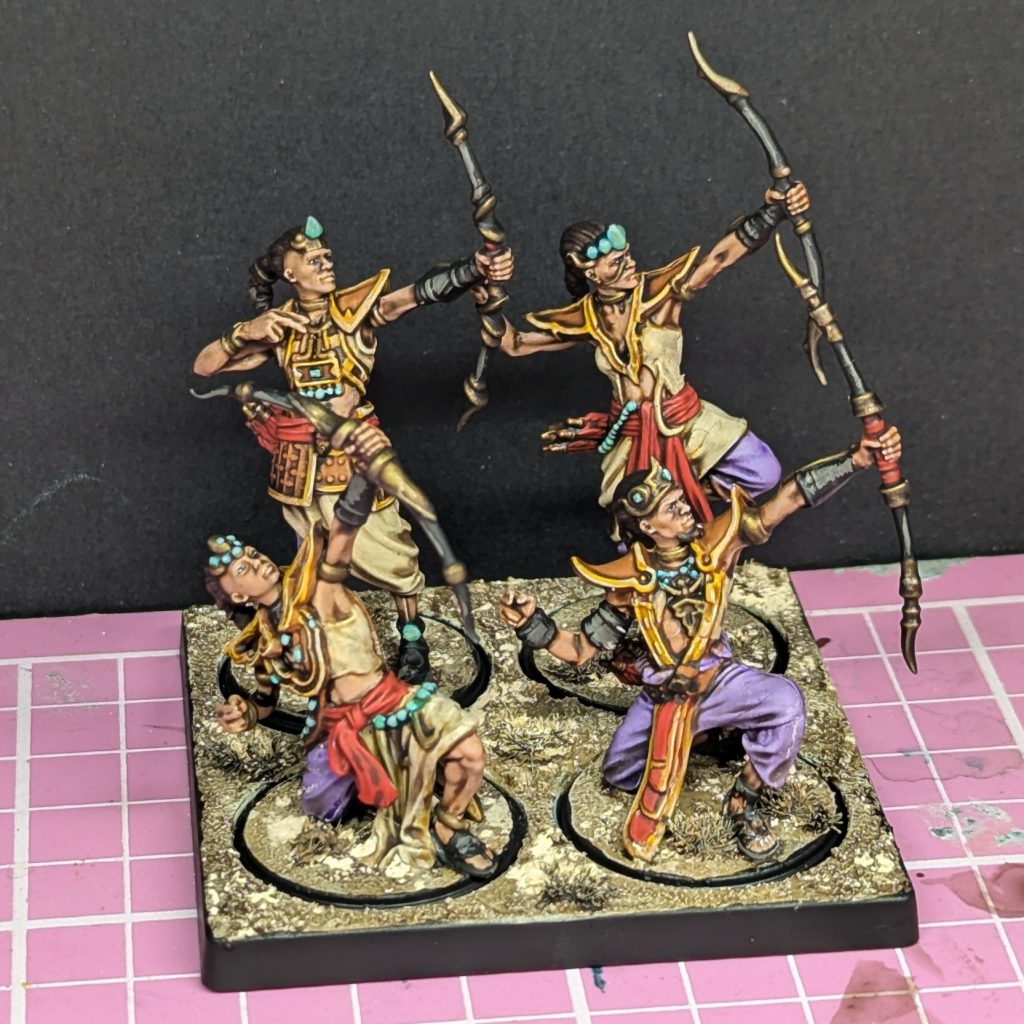
Normally the Mahut is crewed by four archers, which are models from the Dhanur Disciples kit pulling double duty. These are included in the Mahut kit, and the box also comes with a square sabot base for them, so they can also be used to expand another unit of archers if preferred.

I painted these more or less following the steps from my previous article, basecoating with contrast paints before layering/highlighting and washing. The Disciples are quite colourful in their studio scheme, so I opted to give them some purple trousers alongside the usual light coloured robes and non-metallic trim. These were basecoated Luxion Purple, before being highlighted with the same mixed with some pure white.
Favored of Hormus
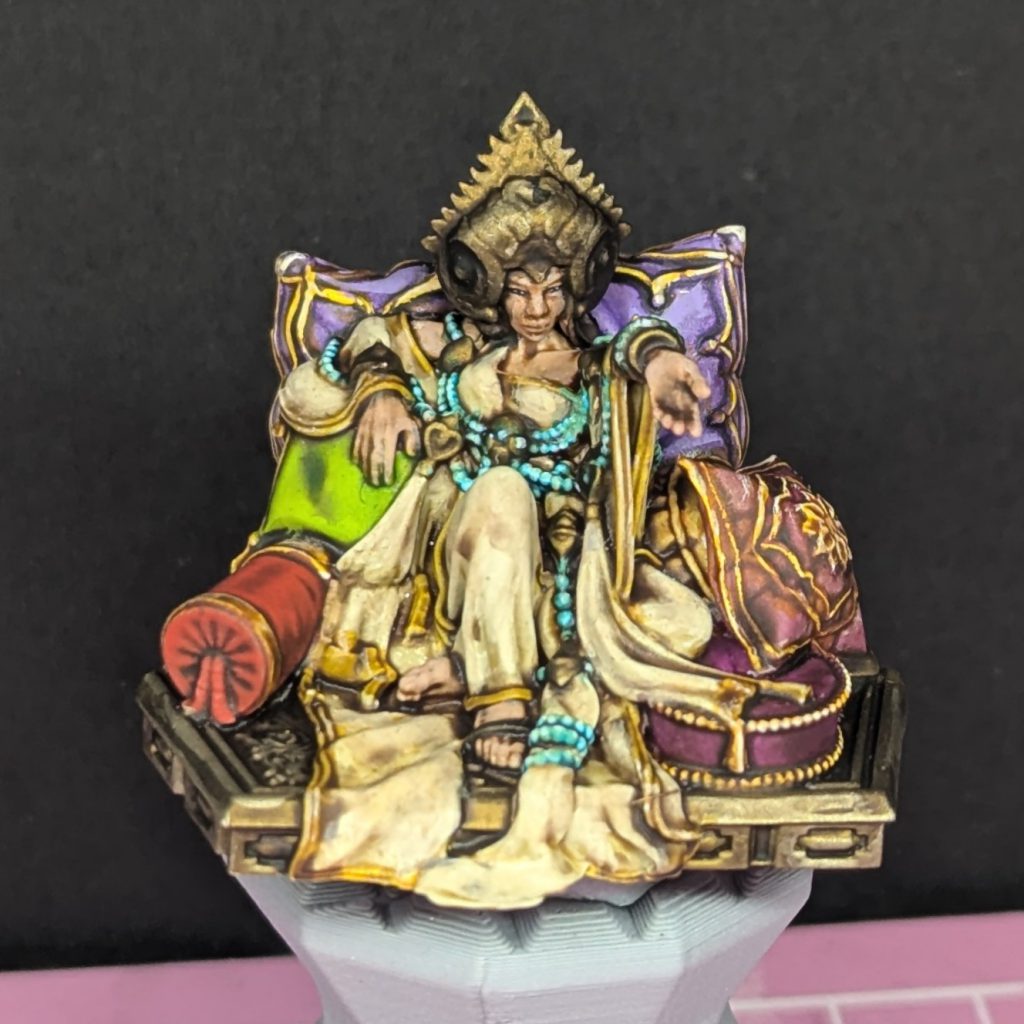
The Favored are Maharajahs of the highest calibre, reclining atop their animated Pachyderm thrones. This model has a really commanding air, reclining on a pile of cushions whilst her troops do her bidding far below. This model is a resin upgrade sold separately, and lets you use the Mahut as a mounted character.
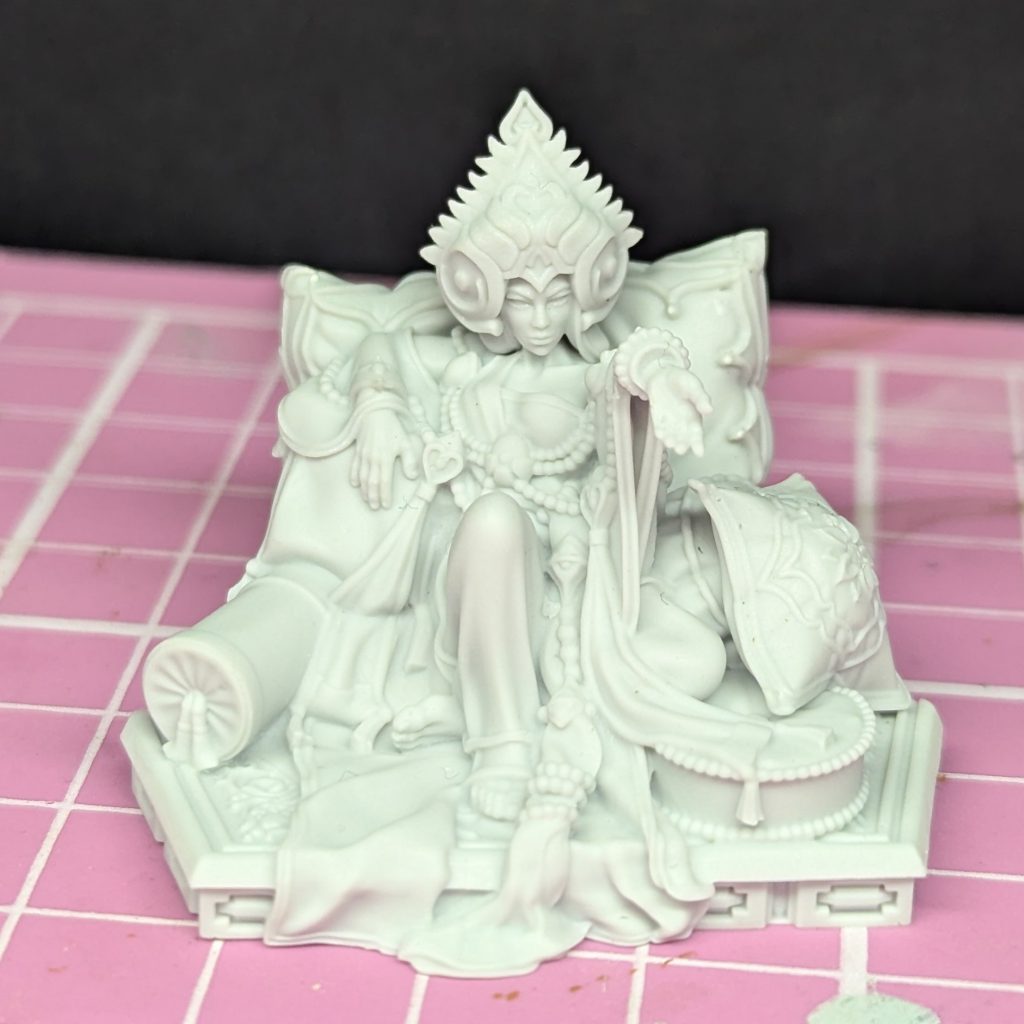
She was painted like my Maharajah on foot, with light robes and plenty of malachite gems and beads. The plinth is painted the same gold as the rest of the detail on the elephant, so that it fits in when the model is slotted into the howdah. I opted to put some brighter colours around her on the cushions – I picked a variety of bright contrast paints, then mixed in a bit of white to each for the highlight step.
Basing and Final Thoughts
The Mahut was based in the same way as the rest of my army – sand texture paint, followed by a light weathering powder. Everything was sealed together with some Tamiya Flat Clear varnish, and we’re ready for final photos!
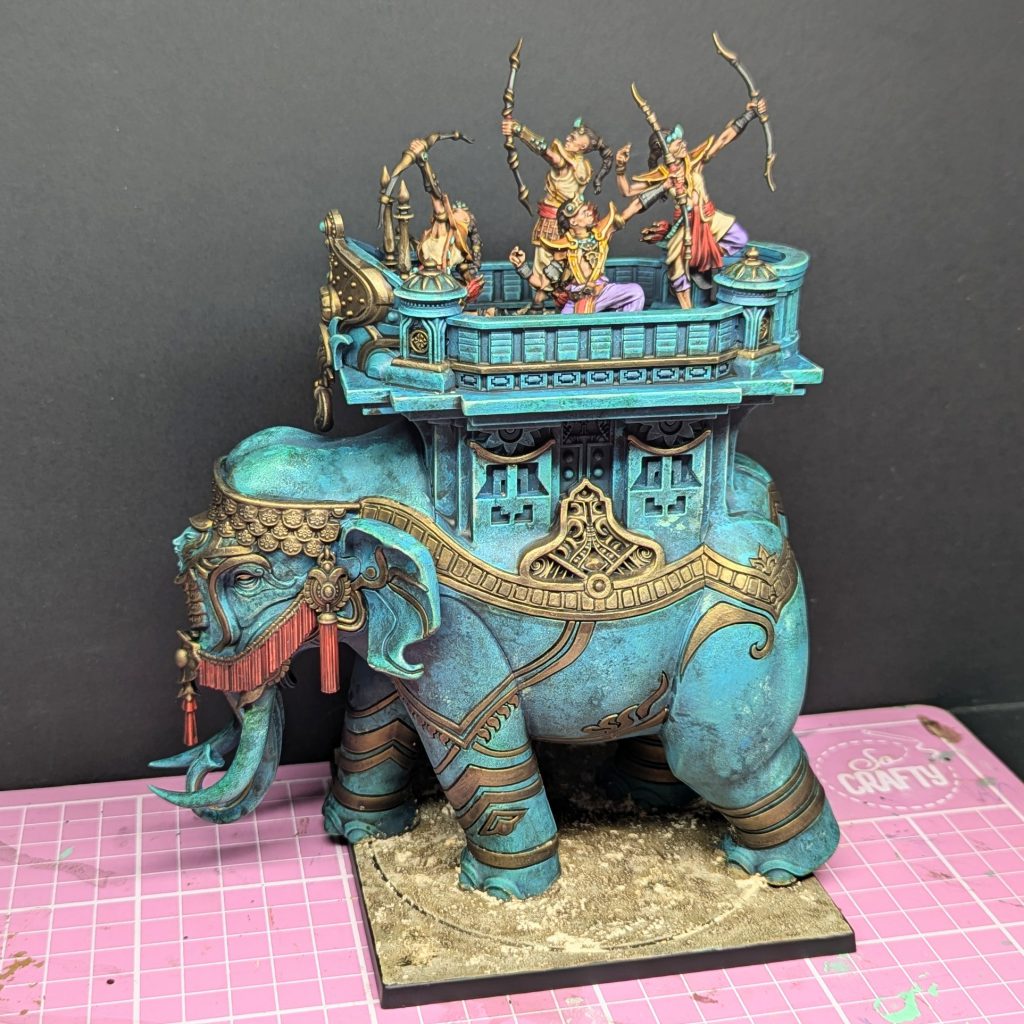
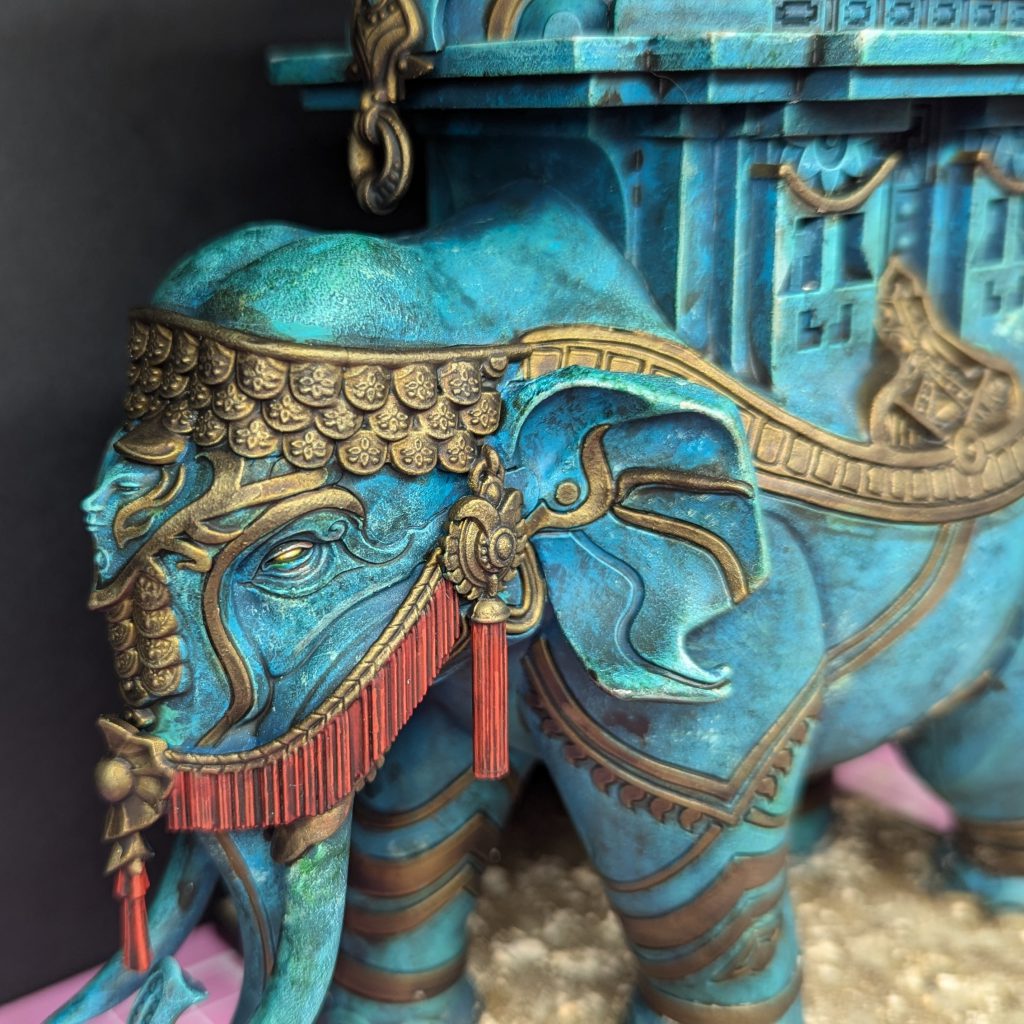
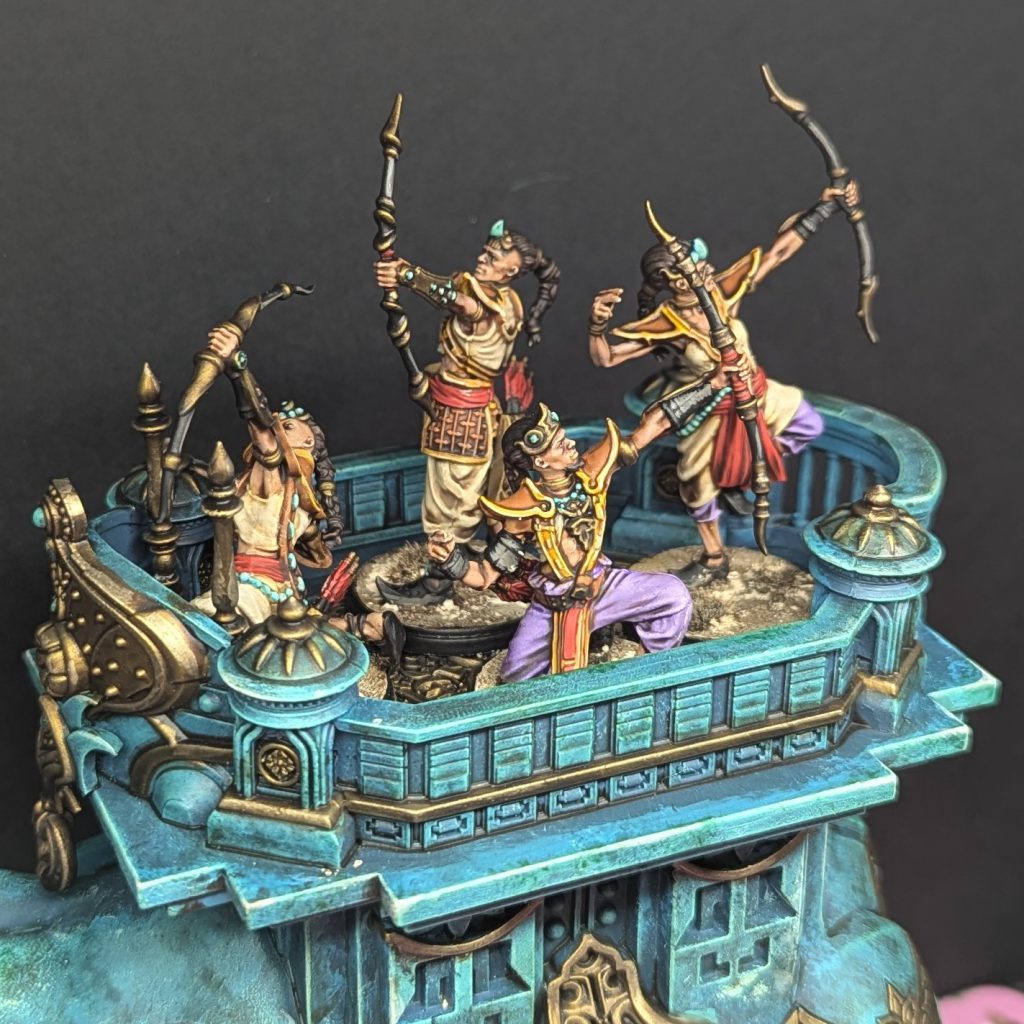
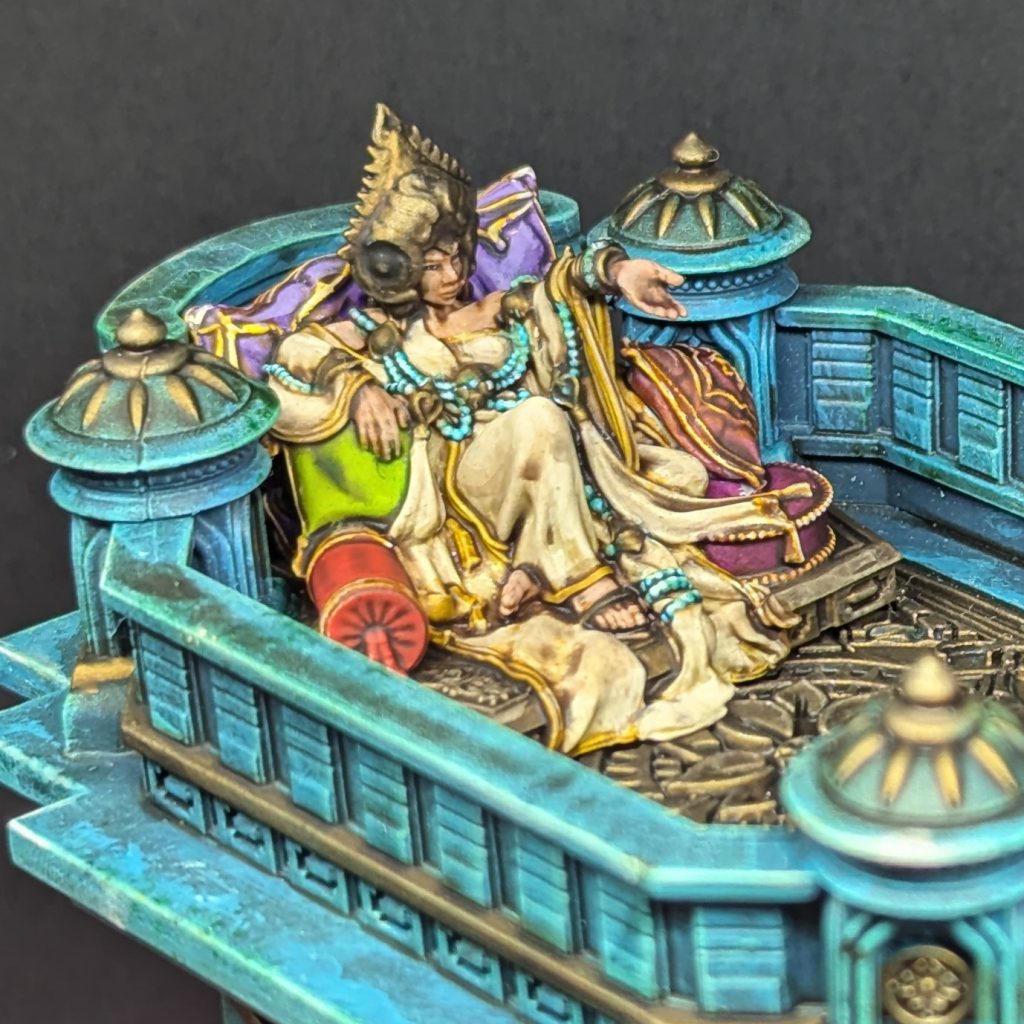
I had a great time with this model – I’m really happy with how the stonework turned out, and I love that it can fulfil a dual purpose on the battlefield. If I had more time I think I’d have liked to spend a bit more time on the crew options, I worry that they’re a bit messy compared to some of the rest of the army, but they aren’t really the focal point of the mini and after all, painted now is better than perfect at some point in the future!
As always if you want to get 10% off and support Goonhammer you can make your Conquest purchase by clicking here for US/Canada or here for EU/rest of world. You’ll also need to enter code “goonhammer” at checkout.
Have any questions or feedback? Drop us a note in the comments below or email us at contact@goonhammer.com. Want articles like this linked in your inbox every Monday morning? Sign up for our newsletter. And don’t forget that you can support us on Patreon for backer rewards like early video content, Administratum access, an ad-free experience on our website and more.
