
In our How to Paint Everything series we look at how to paint well, everything, with different techniques and approaches. This week we’re looking at a simple but effective black, red and white Hundred Kingdoms army scheme.
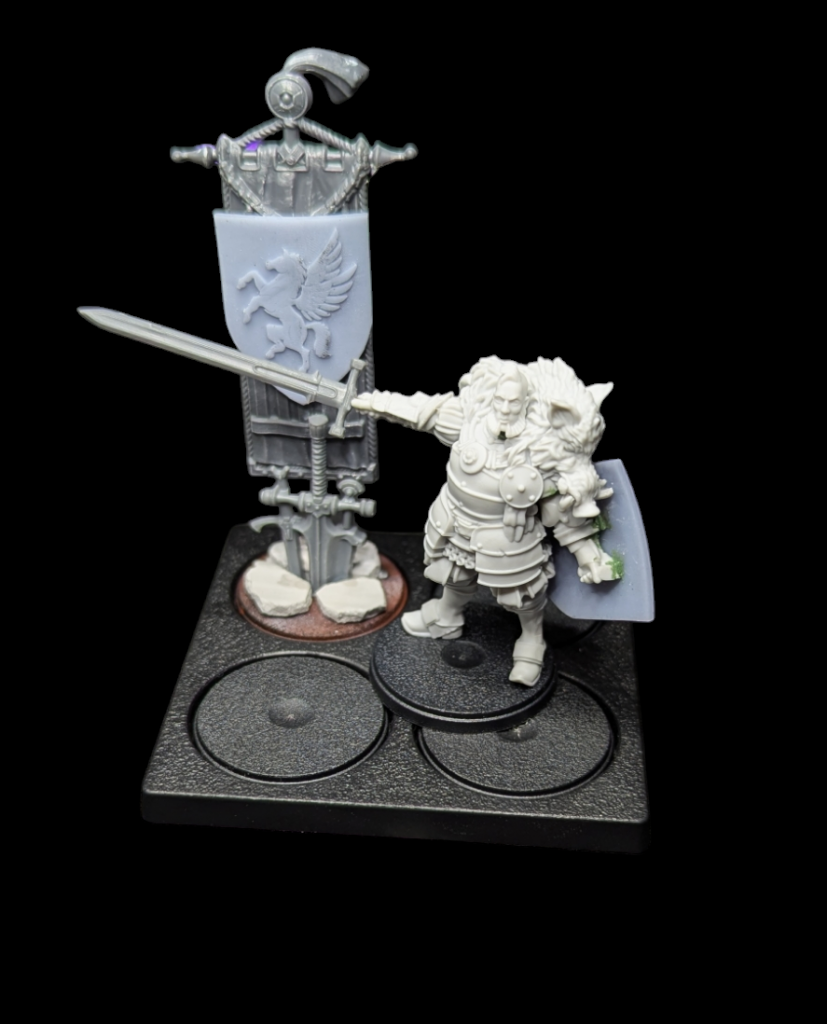
In this tutorial we’re covering the steps I use to paint my Hundred Kingdoms. Unlike my previous armies, this scheme is a fairly traditional scheme, trying to make the best use we can of washes and weathering techniques to limit the amount of edgework and detailing. We’ll be starting with this gentleman, my converted Eric Schur.
If you’re interested in this conversion, it’s mostly a cut and repose, with a 3D-printed shield and a sword donated by a steel legionnaire. The model is otherwise unaltered, and retains its most important feature: puffy imperial-style pleated sleeves and breeches. More of these please, Para Bellum.
Step 1 – Basecoat
For the basecoat, we’re going to work in two steps: airbrushing, then basic fill-in brushwork. Airbrushing isn’t a panacea when it comes to basecoating because there’s a strict limit to how detailed you can be before returns start sharply diminishing, but we can use it to block out colours and in particular get the metals down. Brushpainting metals is always a bit of a pain due to the high friction metallic pigments tend to have, so getting that done at the airbrushing step helps speed things along.
If you don’t have an airbrush, don’t worry. You can just use the colour mixes below and apply all these steps with a brush. It’ll be a little slower, but not by much.
Either way, basecoat the following colours over your black undercoat of choice to match the above scheme:
- Leather, cloth, fur and earth textures: a mix of Flames of War Cavalry Brown and your choice of Black. Vary the ratio across different parts of the model for some visual variety (for example, the boar above mixes these two colours in different quantities to create agradient).
- All metallic areas: an equal mix of Vallejo Metallic Black Primer and Army Painter Grim Black Speedpaint. This gets you a dark blackened metallic undercoat that we’ll be darkening even further in subsequent steps.
- Any white cloth: an equal mix of Vallejo Model Colour Ice Yellow and Vallejo Game Colour Warm Grey. Then, highlight the all the white cloth with a second layer of Vallejo Model Colour Cream White. We’re doing this now because we won’t touch it again until the very end.
- Any red cloth, plume or feathers: basecoat pure Cavalry Brown.
- Cobblestones: Vallejo Game Colour German Grey. Then, fill in the middle of each cobblestone an equal mix of German Grey and Vallejo Game Colour Glacier Blue
Step 2 – Washes
We’re going to make a lot of use of washes at this stage, and it’s where the bulk of the heavy lifting will come from. There’ll be some inevitable detail work to follow, but 80% of the surface area will be done by the time we finish this step.
Apply the following washes:
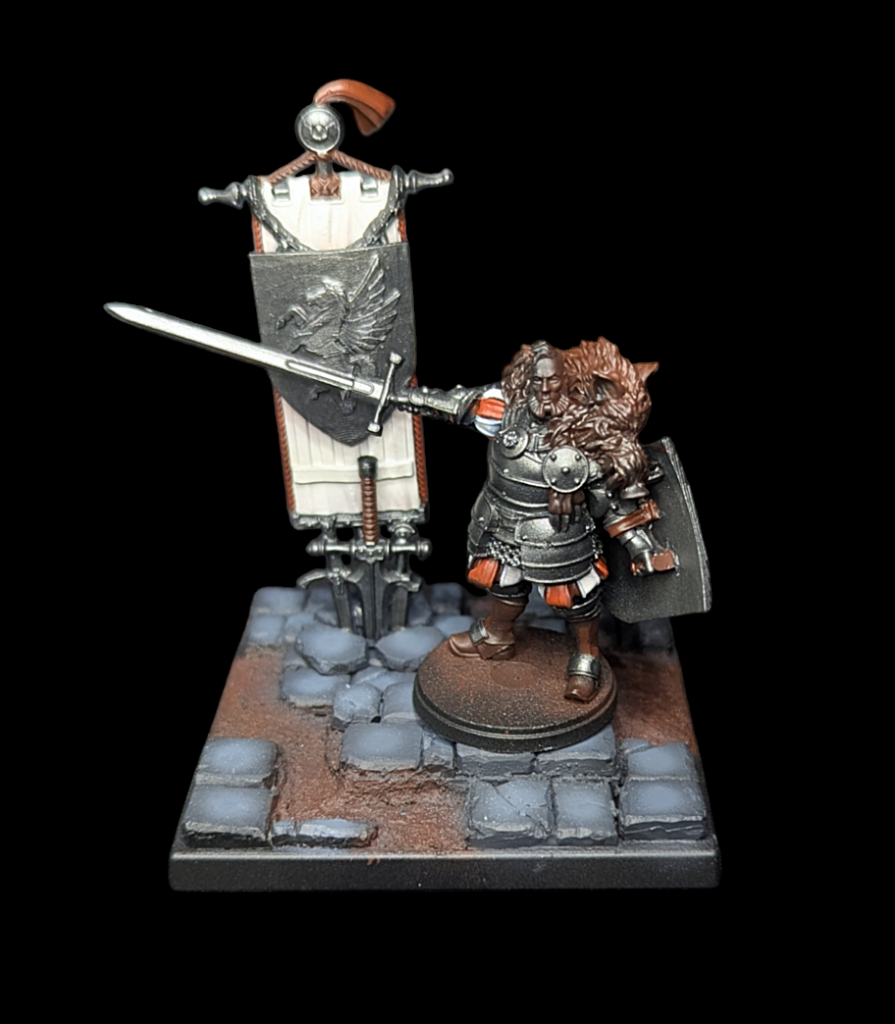
- All metallic areas: wash a mix of Army Painter Speedpaint Grim Black and Vallejo Glaze Medium. By adding the glaze medium, we do a few things; we make the end result a touch smoother and more matte, but we also change the surface tension so it clings to broad surfaces better. It will still pool away from really raised edges, but will blacken out the plate areas of the armour nicely. Look at the ornament on Schur’s chest above to see this effect in action.
- All leather: wash Army Painter Speedpaint Burnished Red. This is a really rich red-brown.
- All red cloth, plumes, braid etc: wash an equal mix of Army Painter Speedpaint Burnished Red and Army Painter Speedpaint Carmine Red.
- Black leather (shoes etc): wash Army Painter Speedpaint Grim Black.
This isn’t captured in the image above as I tend to prepare the bases as part of the final step, but this is also a good time to wash any old black into the earth colour, and more precisely into the cracks in and between the cobblestones. Try to maintain the colour of the stones themselves and clean up any overpainting from the wash.
Step 3 – Detailing, Weathering and Basing
This is going to feel a bit like a ‘draw the rest of the owl’ step, but there’s no individually difficult step and we’re not going to highlight anything if we can avoid it.

Faces and hands:
Paint these whatever your preferred method of skin is. I use a Scale Colour set I picked up somewhere ages ago, but any classic Games Workshop colours are fine here too, depending on your army’s makeup.
Gold Trim:
Over the existing black, first paint the areas you want to be gold with Citadel Contrast Snakebite Leather, then highlight Warpaints Tainted Gold.
Red Cloth, Braid, Etc.:
Highlight a mix of Army Painter Speedpaint Carmine Red and Vallejo Model Colour Light Orange. Use unmixed carmine red to recover any areas you over-highlight.
White Cloth:
It’s time to break out the weathering pigments for this one. To apply these, I use an Army Painter Miniature Drybrush, the smallest one in the set. This is basically just a makeup brush anyway, which means it’s ideal for applying pigment. I use MIG Rocket Exhaust for the weathering, which you can see most notably on the banner above. You can’t much this up too much because anywhere you apply it will just look dirty, so apply it wherever you think dirt would gather (the hems of cloaks, etc). If you think you stuffed up, just repaint over the top with the Cream White we used to highlight the cloth.
Okay, but where the heck did you buy those flowers on the base?
Those are Gamer’s Grass Pink Flowers that I’ve heavily overpainted with Speedpaint Carmine Red. This is probably the one step you can’t do without an airbrush, unfortunately, but it’s necessary to get that vividness of colour. Speedpaints paint on just fine out of an airbrush and will really saturate the flowers with a couple of coats.
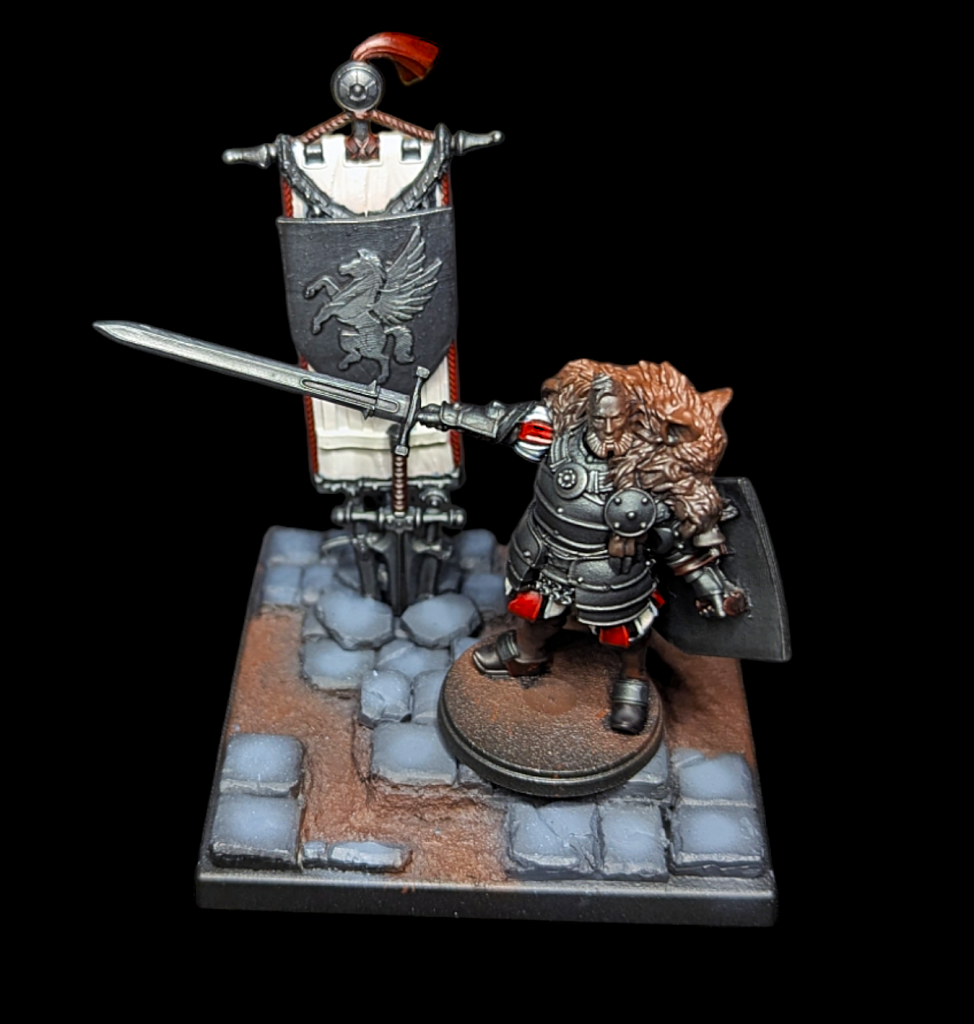
Once the flowers are added, no other work is needed – add the model to the base and you’re done!
As always if you want to get 10% off and support Goonhammer you can make your Conquest purchase by clicking here for US/Canada or here for EU/rest of world. You’ll also need to enter code “goonhammer” at checkout.
Have any questions or feedback? Drop us a note in the comments below or email us at contact@goonhammer.com. Want articles like this linked in your inbox every Monday morning? Sign up for our newsletter. And don’t forget that you can support us on Patreon for backer rewards like early video content, Administratum access, an ad-free experience on our website and more.
