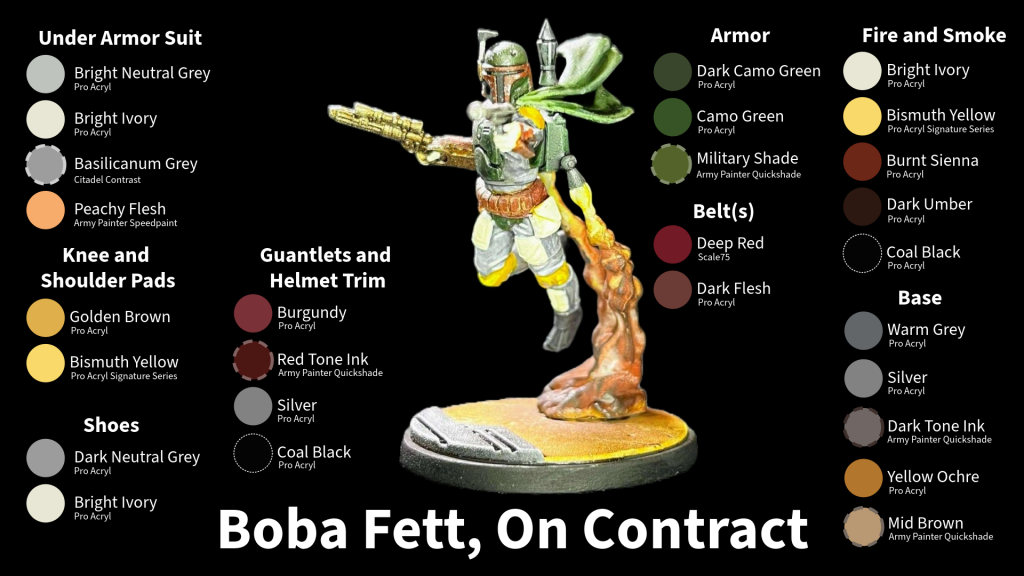
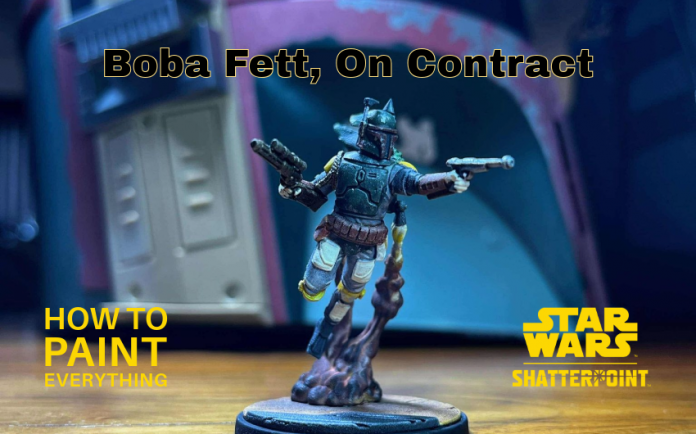
This is Boba Fett, On Contract from We Don’t Need Their Scum Unit Pack. This is the first supplement pack with all secondary units. Thank you to AMG for a review copy so we can get this out before the release on November 1st, 2024.
Preparation:
I primed my Boba Fett in grey with a bright white dry brush, aiming for brighter colors but nothing comical. I kept Boba in three pieces: the base/smoke/jetpack, the cape, and the body. This allowed me to do some detailed dry brushing I would not have been able to reach otherwise.

Painting Guide
- Under Padding and Suit
- A basecoat of Bright Neutral Grey (Pro Acryl – MPA-045) captures the soft cloth texture under the armor.
- Basilicanum Grey (Citadel – 29-37) can be used as a wash to deepen shadows and contrast folds and creases. I watered this down to a 50/50 thinning agent to avoid coloring the neutral grey.
- Highlight with Bright Ivory and blend in a bit of Peachy Flesh (Army Painter – WP2037) for realistic skin tones, if any are visible.
- Arm Guards and Helmet Trim
- Basecoat with Burgundy (Pro Acryl – MPA-069). This deep red sets the tone for Boba’s rugged, battle-worn gear.
- Highlight the edges with Silver (Pro Acryl – MPA-025) to simulate metal wear and damage on the helmet trim and arm guards. I use my worst brush and stipple the tips into the Silver, brushing off access as if I am dry brushing, then redip just the tips of the bristles.
- The Visor can be achieved with Coal Black (Pro Acryl—MPA-002). You just need to thin the paint and lay it into the crevice. You will need to repaint the Burgundy base coat.
- Wash using Red-Tone Ink (Army Painter Quickshade). Gently apply this to the Visor trimming and the arm gauntlets to achieve the desired effect.
- Shoes
- Dark Neutral Grey (Pro Acryl) works well as a base for the boots. I then added Bright Ivory (Pro Acryl) to bump up the highlights for dry brushing.
- Wash using Dark Tone Ink (Army Painter Quickshade).
- Armor Plates
- Dark Camo Green (Pro Acryl – MPA-036) is perfect for the main armor areas; use it as your base coat.
- Layer with Camo Green (Pro Acryl – MPA-020) for highlights, focusing on each armor plate’s raised edges and corners. This layering will enhance the iconic green tones of his armor without overpowering the model.
- Weathering: Add tiny chips or scratches with Silver to mimic metal showing through the paint. Use stippling or sponge to dab the edges for a more natural, worn look.
- Belt
- Use Deep Red (Scale75 – SC35) as the belt’s base color. This color gives the belt a rich, leather-like effect.
- Dark Flesh (Pro Acryl – MPA-068) can be used for subtle highlights, particularly on the edges of the belt and pouches, to bring out detail. This combination keeps the belt from looking too flat or freshly painted.
- Wash using Red-Tone Ink (Army Painter Quickshade). This will keep a consistent red tone throughout the mini. Even though it’s not the same red base, it can give a different tone.
- Wrap and Utility Under Belt
- These elements break up the darker colors on Boba’s uniform. Try layering a thinned-down Deep Red over a Bright Ivory (Pro Acryl – MPA-022) base to add visual depth and texture to the wrappings and fabric components.
- Knees and Shoulder Pads
- Begin with Golden Brown (Pro Acryl – MPA-017) for the primary color.
- Use Bismuth Yellow (Pro Acryl – MPA-S36) for edges and scratches, building a gradient to make the armor pieces stand out. This combination of warm tones complements his suit’s gritty color palette while adding a pop of brightness.
- Weathering: Add tiny chips or scratches with Silver (Pro Acryl) to mimic metal showing through the paint. Use stippling or sponge to dab the edges for a more natural, worn look.
- Smoke and Jetpack Fire
- Brightest First: Begin with a Bright Ivory (Pro Acryl) layer at the fire’s center or smoke effect. This color will represent the hottest, most intense part of the flames. You want to make sure this is the base in the crevices. You usually try to achieve the darkest tones to create shadows; in this case, we want the white to show through the dark.
- For this effect, you also want to make sure you leave the fire coming directly out of the jetpack as light-colored as possible.
- Gradual Darkening: Moving outward, layer Bismuth Yellow (Pro Acryl) followed by Burnt Sienna (Pro Acryl). Keep each color closer to the edges as you go, leaving the ivory visible in the center.
- Darkest Areas: Apply Dark Umber (Pro Acryl) around the outer edges of the effect, blending it into Coal Black (Pro Acryl) for the smoky parts. Coal Black should be used sparingly to add depth without overwhelming the fire effect.
- Use Bismuth Yellow to add final highlights along the edges of each color transition. This step will make the flames look hotter and more realistic, giving the effect extra depth.
- Base
- The metal part of the base is Warm Grey (Pro Acryl) and then Dark Tone Ink (Army Painter Quickshade). Let dry and come in with a dry brush of the Warm Grey.
- I painted the Sand/Desert Yellow Ochre (Pro Acryl) as the base color. I allowed some of the second-to-last colors of the jetpack dry brushing to blend into the ground coloring. Then, I used the Mid Brown (Army Painter Quickshade), bringing all the colors on the sand together.
- Weathering: Add tiny chips or scratches with Silver (Pro Acryl).
Finishing Touches
- Weathering: Once everything is dry, apply weathering sparingly, focusing on the edges of armor pieces. Using a sponge with Silver is an effective way to create a chipped effect without overworking the model.
- Sealing: Seal the miniature with a matte varnish to protect your hard work and reduce shine on armor pieces, which suits the rugged look of Boba’s gear.
Boba Fett was an absolute pleasure to paint. I enjoyed the contrast between his outfit and the fire and smoke. Boba Fett has a special place in my heart as the dark, brooding gunslinger from my favorite childhood movies.
I’m looking forward to painting the rest of the bounty hunters.
Have any questions or feedback? Drop us a note in the comments below or email us at contact@goonhammer.com. Want articles like this linked in your inbox every Monday morning? Sign up for our newsletter. And don’t forget that you can support us on Patreon for backer rewards like early video content, Administratum access, an ad-free experience on our website and more.


