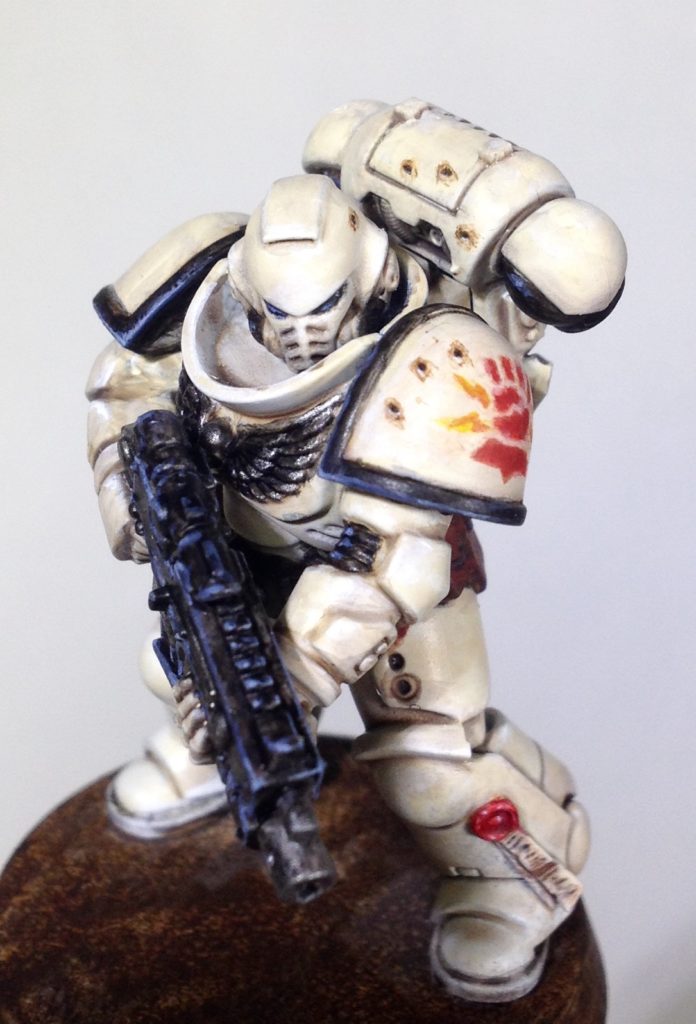
In our How to Paint Everything Series we look at how to paint well, everything, with a look at different methods and techniques. In this article we’re looking at how to paint battle damage, from cuts and bruises to impact craters and frag scarring.
Battle damage is a natural part of war, and while the standard ‘Eavy Metal style of minis painting calls for bright, edge-highlighted models of gleaming metal and regal armor, that particular style often removes the blemishes and craters that mark post-battle armor. If you’re looking for a more gritty visual style then you’ll need a guide to painting these marks, from bruises and bullet pings to impact craters.
There’s a bit of a tendency to group battle damage in with weathering but in practical terms there’s a big difference – specifically, weathering is usually something that can be done after you paint a model, adding powders or doing chipping in the process, while damage tends to need some pre-paint work for best results. Things like bullet holes typically need some work from a modeling knife before you start priming things. Though as we’ll see, that’s not strictly necessary – smaller damage can be done purely with paint and some clever highlighting tricks.
Painting battle damage covers a wide variety of techniques and situtaions – there are, after all, many ways things can become damaged – and the best way to start with any damage is to start with reference photos. Whether you’re trying something in this article or something new we haven’t covered it’s worth doing a quick image search before you get started to help understand what kind of damage you’re trying to create and what it looks like.
Covered in this Article
- How to paint different types of combat damage in armor – frag scarring, bullet holes, and impact craters.
- How to paint heat staining on metal and burns on cloth.
- How to paint combat damage for skin, such as bruises, gashes, and minor cuts and scrapes.
Bullet Holes - Click to Expand
Skails is going to run through how to straight-up paint bullet pings in a way that doesn’t require mauling your models down below. It’s a more impressive and detailed tutorial, and worth a look. Most of the bullet holes I do are actual holes in the model, and that does a lot of the heavy lifting when it comes to how to paint them. That’s also way more suitable for terrain and vehicles and casualties on a base.
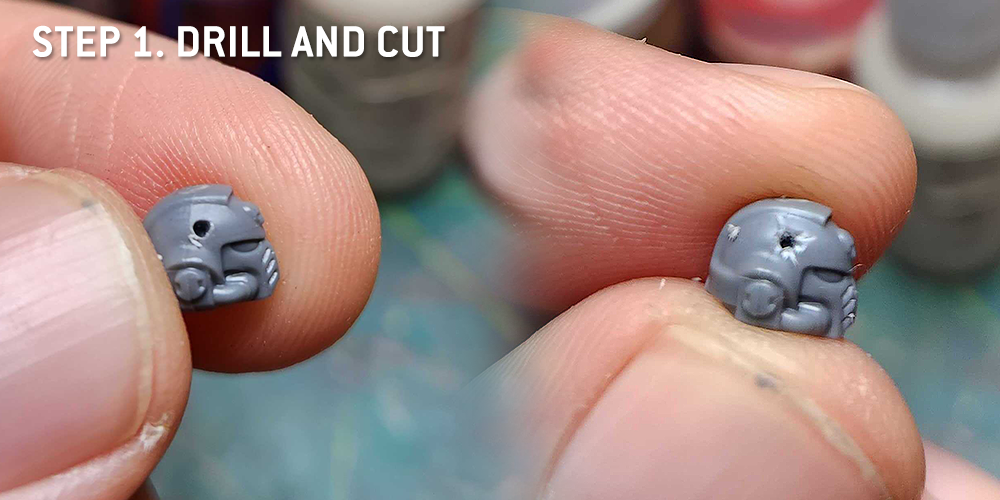
Step 1. Drill and Cut
I start by drilling a hole into the spot I want to be a bullet hole. You can (and should) do this with the same size drill you use for gun barrels. After that, it’s time to make the hole a bit messy – I use a hobby knife to cut a few scars coming out of the hole, and I’ll rotate the knife in the hole to make it more like a crater. I’m just looking to make this a tiny bit messier. If you want to get real fancy you can do entry and exit holes, but in my mind projectiles lack the force to clear the other side of marine armor and instead shrapnel bounces around inside.
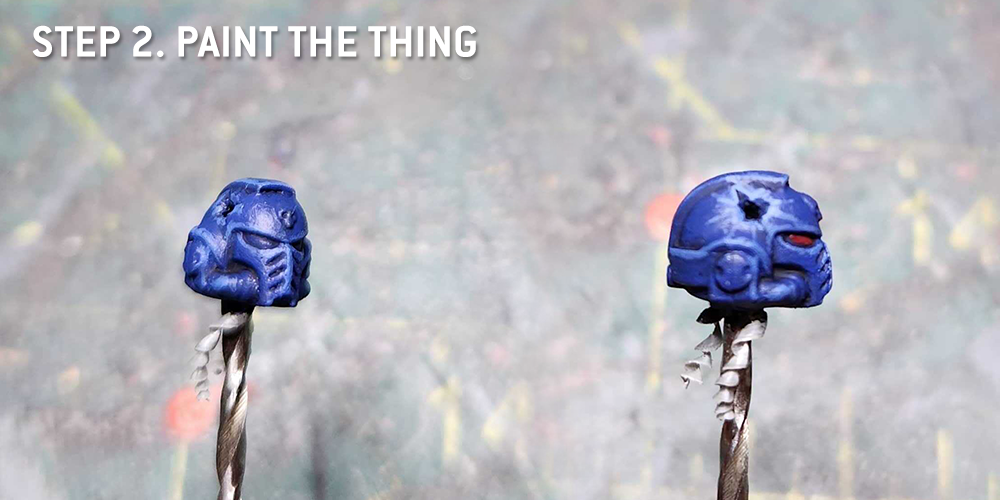
Step 2. Paint the Thing
This isn’t really a tutorial on painting the thing that’s being damaged so much. Here I’m making a dead Ultramarine head, so I painted it Macragge Blue, washed it with Drakenhof Nightshade, and then highlighted it with Macragee. I then did edge highlights with a 50/50 mix of Macragge Blue and Reaper Snow Shadow. The big thing here is that I did extra edge highlights and painted crackes going away from the hole, to give more of an impression of the armor cracking apart and chunks flying off.
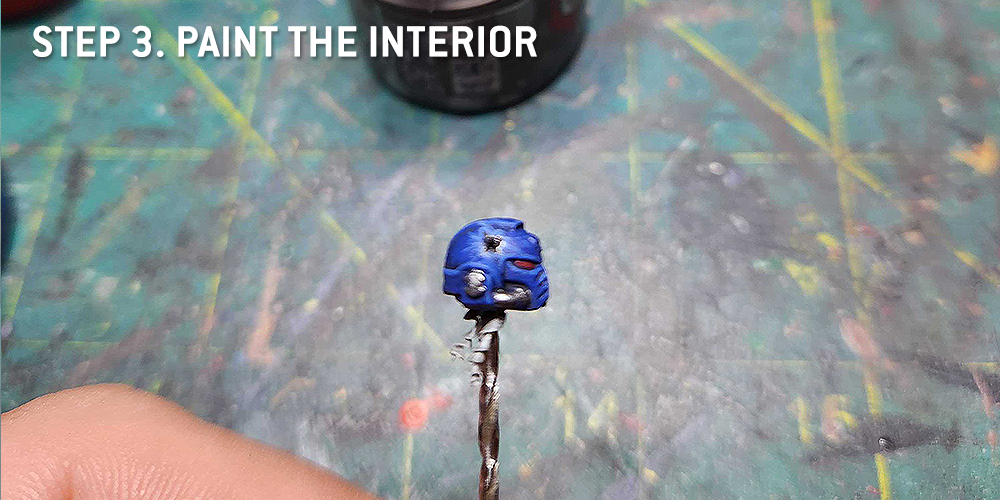
Step 3. Inside the Hole
Next comes the hole interior, which I’m just painting with Leadbelcher and washing with Nuln Oil. Nothing too fancy – you want to cover the spots where the paint has chipped. This doesn’t have to be leadbelcher; it can be whatever the material under the paint on the armor is supposed to be.
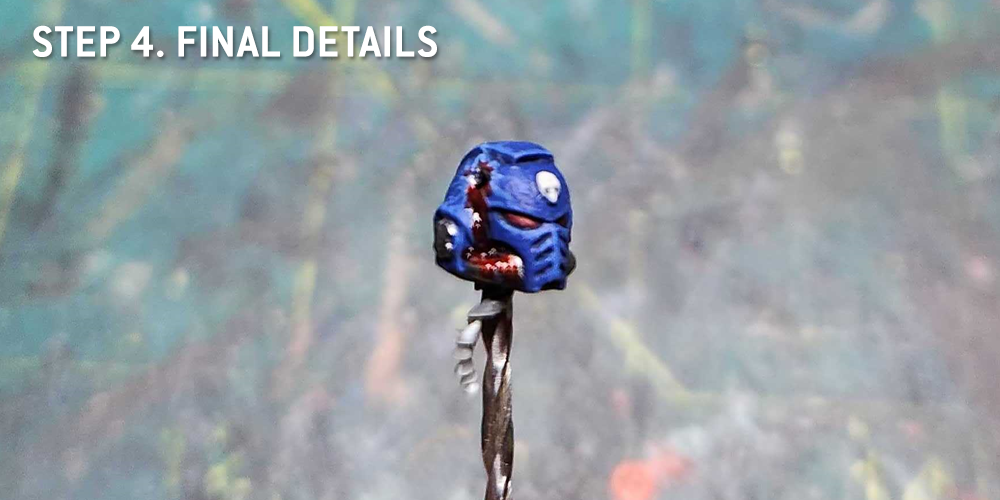
Step 4. Final Details
Then the final details. Mostly this is where I add blood – specifically, Blood for the Blood God technical paint, pouring out of the wound.
Bullet Pings - Click to Expand
This step-by-step is for minor bullet pings on armor. My base color is unbleached titanium, which looks like it falls somewhere between screaming skull and ushabti bone in GW paint. The brown is burnt umber, it looks like it could be between Rhinox Hide and Mournfang Brown.

1. I laid down Rough spots of brown with irregular spacing. On darker or more colorful armor I would try gray or Leabelcher on this step, depending on the look you want.
2. Smaller spot of black (thinned 1:1 w/ satin glaze medium) put in middle of brown spots.
3. Thinned base color dabbed on bottom edge of black spot.
4. Another dot of black put in center of mark. Dot of white put underneath black. This is to pop the contrast a bit.
Cuts, Bruises, and Scars - Click to Expand
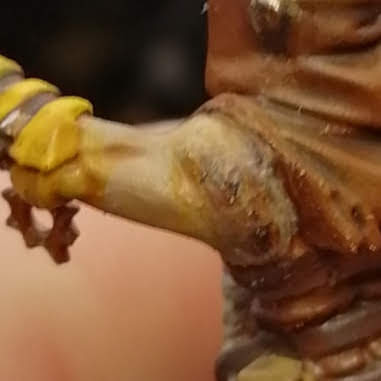
Despite the fact that we tend to paint models that spend their time in pretty dangerous places (grim dark futures, mortal realms hewn from chaos, and yet more heretical locales) a surprising number of miniatures reach completion without blemish or hurt showing on their skin. I aim to correct this, by beating the hell out of them.
So let’s look at some minor injuries: cuts, scrapes, bruises, and burns. All the techniques here assume you have already painted your skin to a standard you are happy with.
Fresh Cuts
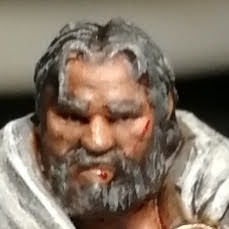
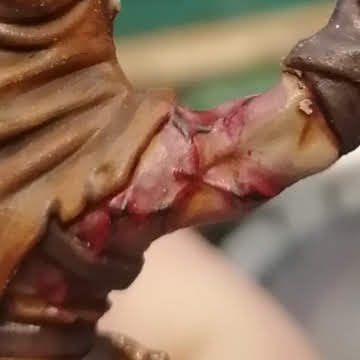
A slash of a sword or the edge of a knife, or even the trail of a bullet that just clips you, can leave minor injuries as well as those more severe. Before the healing process really begins these gashes and scrapes are red and raw.
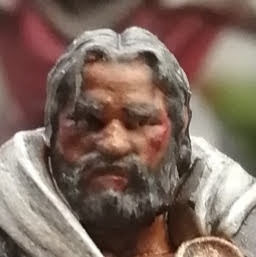
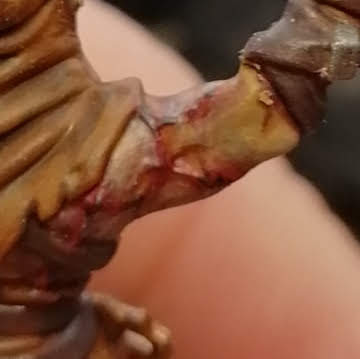
Odysseus above is modelling some cuts, with a fresh cut suffered in the last few minutes. If we instead look at a cut that happened within a couple of hours and had time to heal, it might look more like this:
For fresh cuts I start with Blood for the Blood God, thinned until smooth with water (1:1 or 1:2 depending on the age of your paint). A fine line will work will for a shallow cut, while a little blotch is good for an impact or scrape.
Soon the area around the cut will become inflamed. A simple glaze of Carroburg Crimson around the cut will bring this out nicely.
Cuts and Bruises
Any serious cut is likely to also leave considerable bruising around the area affected. As the cut heals over, the bruising heals as well. As bruises develop their colours change. Generally the pattern is red -> blue -> purple -> yellow -> brown.
Here you can see the steps used to create a genuine looking bruised area around a recent but not fresh cut (1-2 days old). The process here is:
- Original skin tone with cuts picked out in Pink Horror
- Layer the cuts with Khorne Red and then Abaddon Black:Rhinox Hide 1:1 only where cuts would be deepest/widest sub as crossing points or the centre of gouges. On largest areas of scab (the dark) pick out the bottom of the area with Skrag Brown to give the illusion of raised surface.
- Carefully shade around the cuts with Carroburg Crimson to represent inflammation.
- Add Druchhii Violet in a rough ring around the largest areas of Carroburg – this is the bruise healing and moving away from the site of the injury.
- Now shade around that with Cassandora Yellow, the widest area of healing that will have happened at this point. Move back to the centre and in a rough manner dab small amounts of Cassandora and Seraphim Sepia to break up the constituency of the bruising and introduce more variation in colour.
- Now using your median flesh tone (Kislev Flesh for me here) and a medium (I used Vallejo Matt but lahmian would work if you’re careful) glaze over everything that’s not the immediate cut and inflammation, just to soften the colours and blend it back into the skin tone.
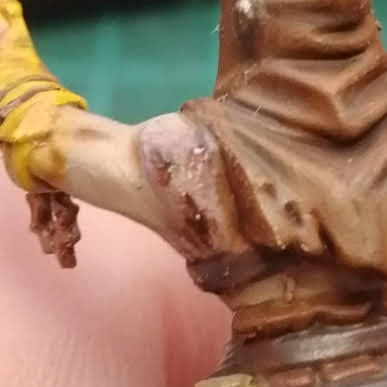
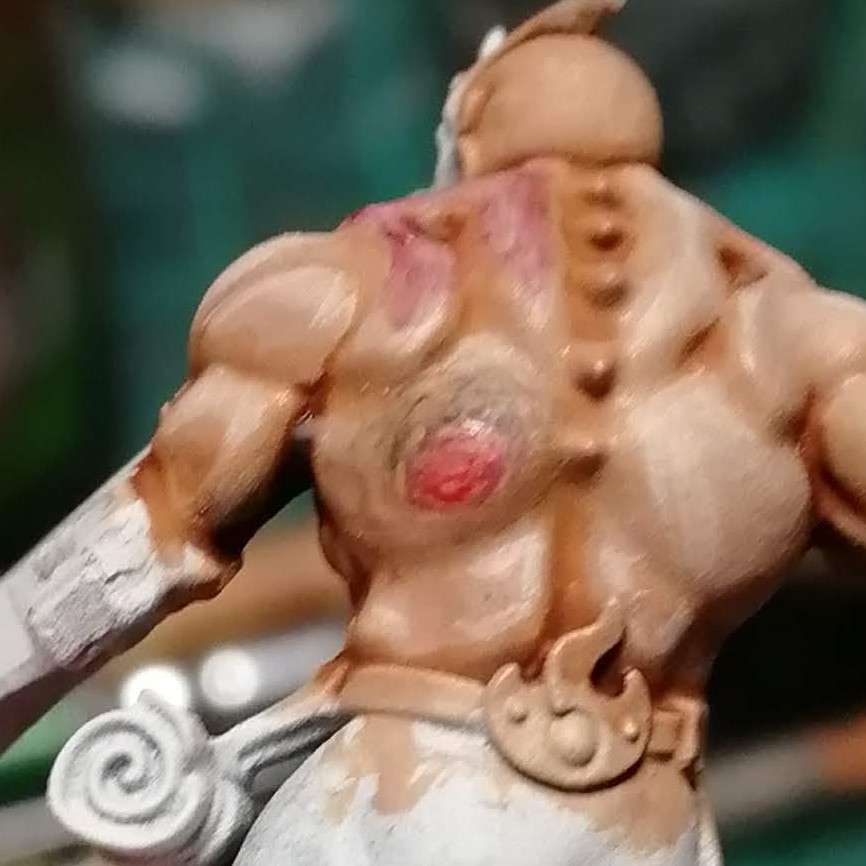
This is a more ragged wound that happened 5-7 days ago, and so has healed a lot more than the other one. I did this because these were reclaimed minis and so this area of the shoulder was ragged and rough.
The process here is:
- Using the rough areas as a guide I paint in some scabs. This time as they’re older I jump straight to rhinox: Abaddon 1:1 and then underline them for depth with Skrag. If they were older than this I’d mix some grey in too.
- Now the primary bruising where it was most severe, no red this time as the bruise is healing, so I start with Druchii Violet
- Cassandora Yellow next, for the bulk of the bruised area, in a soft area
- Now I darken in a rough ring around that with Seraphim Sepia – the last stage of bruise healing is a brown. I also return to the main wounds and darken them with a little more Druchii, drakenhof nightshade and Carroburg Crimson. Instead of soft areas, I almost stipple to create an uneven surface.
- Now to bring everything softer to the skin I glaze with my mid tone as in the other example
Bruises
Not every bruise comes with a cut. This is a simple impact bruise, probably 3-5 days old.
Starty by painting over the unblemished skin with a simple soft shade over the affected area with Cassandora Yellow. Next, take Druchii Violet or Drakenhof Nightshade (or a mix) paint a soft ring around where the impact point would be. Use a tighter thick ring for fresher bruises with Drakenhof, or a wider softer ring with Druchii for those a day or two later bruises.
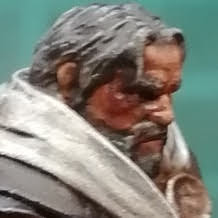
A common injury suffered is a black eye – a bruise over the eye itself. The process here:
- Shade over the extent of the black eye with Druchii Violet
- Add a dark ring just below the eye with Drakenhof Nightshade
- Using Carroburg Crimson stipple the are or Druchii Violet to create tonal changes
- Use Cassandora Yellow to soften the effect into the surrounding skin
The final effect
If you want the blow to have damaged the eye, simply glaze the white of the eye with Blood for the Blood God.
Scars
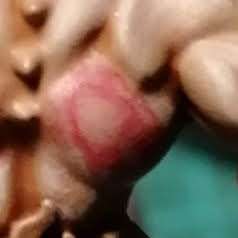
Deep cuts can create a very distinctive form of scarring after a relatively short amount of time called a hypertrophic scar. These are distinctly ridged and pink and a great add to a mini that has scars modelled onto the skin (as normal scars do not raise as much as is usually portrayed).
These are two examples of hypertrophic scarring. As hypertrophic scarring forms relatively quickly and is mostly found on wounds with greater impact strength, still healing scarring is common. These were created using similar techniques to those shown previously
The scarring itself is painted with a basecoat of Khorne Red, and then layered with Pink Horror and highlighted with Emperor’s Children. Then the bruising is worked in around it as normal, with a little Carroburg Crimson just used to glaze the area and soften the effect.
More normal scars are easy to achieve with freehand paint. Kislev Flesh (the lower scar) is good for older or less severe scars, while Administratum Grey (upper scars) works well for larger areas or evidence of more severe injury.
Burns
There are different severities of first degree burns – burns that are restricted to the very upmost layer of the skin. Redness is the only symptom, but the intensity indicates severity.
- For very mild burns: This is simply Carroburg Crimson glazed over the area
- Significant burn (including bad sunburns): Now add a second shade, this time made from Mephiston Red and Lahmian Medium, mixed 1:3, is glazed over the area. Second degree burns are more severe, with the skin pulling away from the area worst affected. Cadian Fleshtone is mixed 1:1 with Emperor’s Children to create a light pink, which is applied in the area of the skin loss.
- Severe Burns: Finally the deepest red or a first degree burn. To really strengthen it, Khorne Red mixed with water 1:3 is glazed carefully over the worst areas. For the dark streaks – the mid skin tone 1:1 with Dryad Bark is a good start. Here we’re building up where the skin had pulled away and is folded. If you wanted to push the effect you could actually sculpt this with putty.Next shade the pink with Carroburg Crimson towards the bottom to give a sense of depth, and work with Baneblade Brown to give more defined depth to the skin build up. Shade and highlight to give depth and glaze the open wound with Blood for the Blood God thinned with water. Finally shade the whole area with Carroburg.
If you want to add even more brutal effects, note that significant burns will cause the skin to blister. Build up the redness in a significant fashion but leave a rough area in the center of the red area clear of the glaze, then use Nurgle’s Rot to paint a blister. When dry, apply a second layer to give more depth, and apply a little thinned Blood for the Blood God around it.
Frag Scarring - click to expand
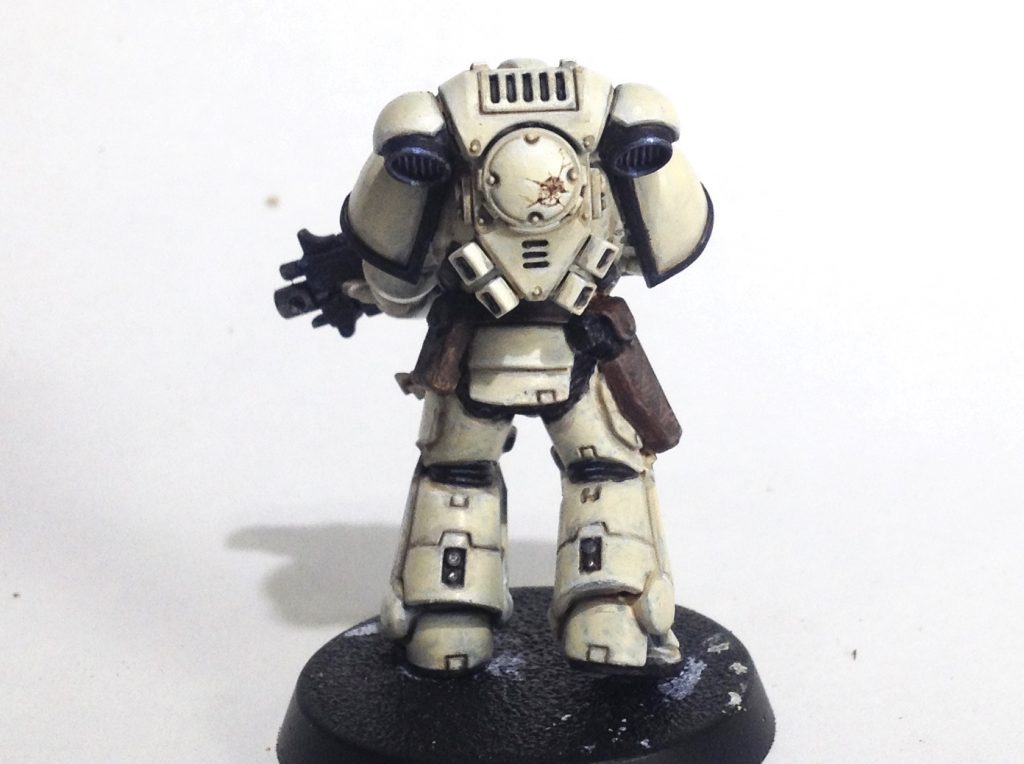
This is a short step-by-step for painting on an explosive blast mark. It’s based on the effect of a mortar shell impact on concrete. It could also represent acid spit/splash corrosion with some green or yellow mottled into the scarring. Here is the visual reference I’m working off of for this process:

My base color is unbleached titanium, which looks like it falls somewhere between screaming skull and ushabti bone in GW paint. The brown is burnt umber, it looks like it could be between Rhinox Hide and Mournfang Brown.

1. Body of scarring laid out in 1:1 base color and brown. I try to keep it irregular.
2.pitting added around main scar in same color. Most of the pitting is pointing in direction of main scar.
3. Mixed black and glaze medium (using Golden brand satin glazing liquid) 1:1 and traced top edges of scarring. Also added some to top half of main scar in from edges. Pitting has a black dot or line on top edge. A few more pits added with black+medium.
4. White line added to bottom edge of scarring and pitting, basically like a type of “false” edge highlighting to give the impact a three-dimensional appearance.
Heat Staining - click to expand
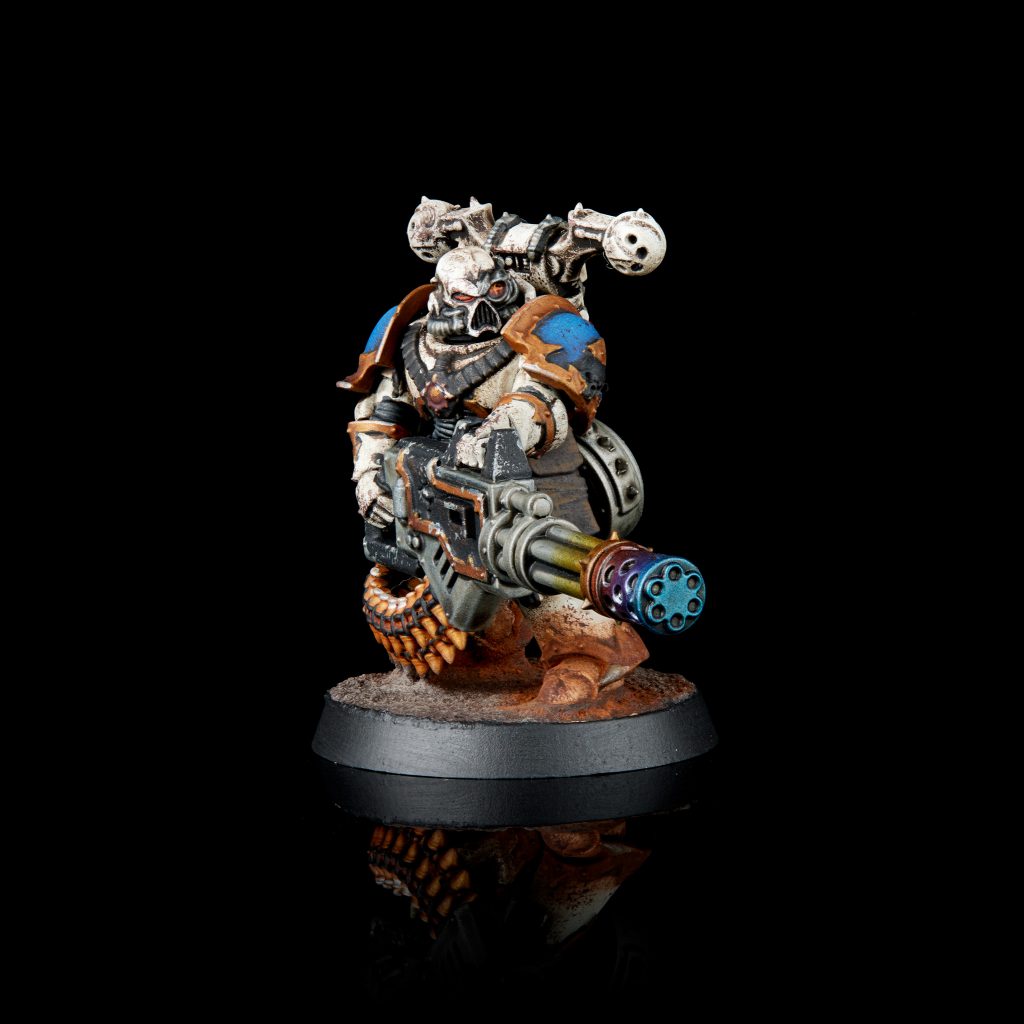
Heat Staining can occur with any material, but here we’re primarily interested in how it affects metal. When you heat steel you create a chemical reaction between iron and oxygen. This creates a thin oxide layer on the metal, the thickness of which will determine the color you end up with – the thicker the layer, the deeper the color you’ll end up with. In Warhammer 40k you’ll most commonly see this on weapon barrels, where the heat from something like a melta blast or sustained fire with a gatling gun will cause the barrels to heat up and then cool rapidly, creating the same kind of heat stains you’d see if you held them to a torch.
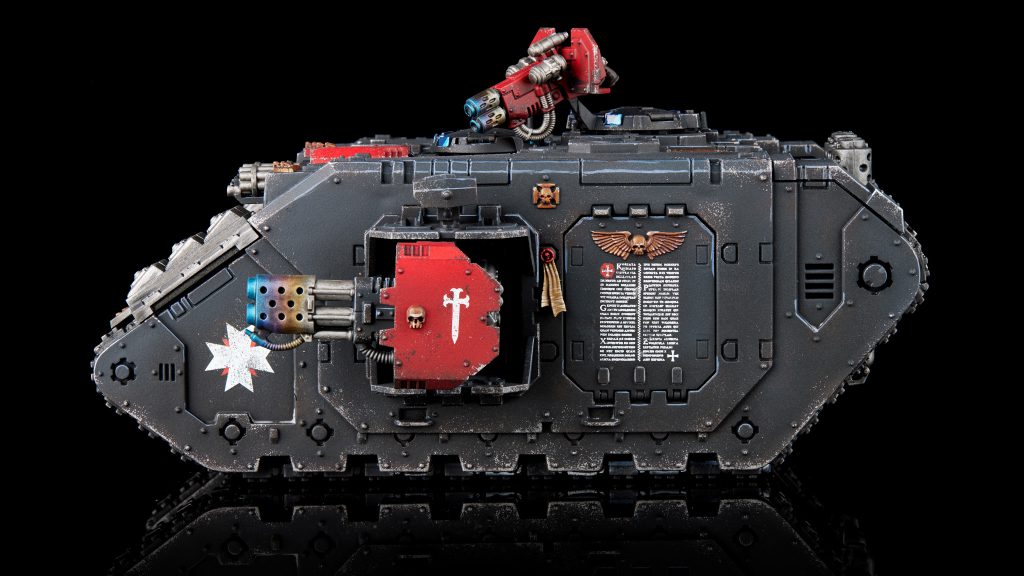
Heat staining is one of the last things I’ll do while painting weapons, and only takes me a couple minutes with an airbrush. I start by masking off the rest of the model as far down the gun barrel as possible (I want to avoid as much as possible any chance that my masking creates a seam). Usually I’ll do this by cutting a small hole in a nitrile glove, sticking the gun through, then taping off the glove to hold it in place. I use clear paints for the heat staining – start with Calth Blue, then Eidolon Purple, Angron Red, Pyroclast Orange, and Sigismund Yellow. Each gets a single loop around the barrel, slightly overlapping the previous color, and I make sure they have time to dry so the overlapping colors don’t cause any pooling. When finished if needed I’ll go back in with Nuln Oil to very carefully re-establish any lost definition.
While I can still find blue, purple, and red clear paints in the GW online store, the orange and purple seem to have been removed. Tamiya makes a clear yellow and orange, or you could try using contrasts – I’d probably use Gryph-Hound Orange and Iyanden yellow.
Impact Craters - Click to Expand
I originally came up with this method while painting my Excoriators space marines, who mark the date and place of damage done to their armor. Their plate becomes a shrine to the times they have put themselves between the Emperor and the weapons of his enemies.
This is a step-by-step tutorial of how I’m doing impact craters on their armor.
My thought was for the impact to resemble concrete or ceramic plates. A few visual images helped. Particularly the top right.

Some helpful tools in this process are:
- A good quality kolinsky sable brush that can hold a sharp point (Windsor Newton Series 7 #1)
- reading glasses +2.5, these allow me to hold the mini closer to my face which is practically magnification.
I’m using Liquitex heavy body acrylics with a wet palette made from tupperware/paper towel/parchment paper.
Burnt Umber looks close to Mournfang Brown, and the model has a basecoat of Unbleached Titanium which is close to Screaming Skull best I can tell.

1. Made a rough circle with burnt umber.
2. Added rays across circle of random length/spacing. A mix of short and long lines gives a dynamic look.
3. Colored top half of circle with about a 1:1 mix of unbleached titanium and burnt umber, then bottom half with 1:1 mix of unbleached titanium and white.
4. Added a rough spot of burnt umber near to middle of circle and connected the inside ends of rays to spot.

5. Put a dot of black where the rays touch the circle and a dot near the middle.
6. Here I put a line of white along the bottom edges of circle and rays (photo is unfortunately on blurry side, blame phone).
7. Did a mix of 1:1ish unbleached titanium and burnt umber- dabbed around top edge inside circle and top edge of bottom half of circle. also added a couple secondary cracks to rays.
Final thoughts:
The secondary cracks in step 7 aren’t necessary, I like the look without them. The inside of the circle can also be broken up with more lines at random.
I will add another smaller layer of white to the underline I did in step 6, especially close the the black dots.
Any lines that look too thick can be made thinner or with the base color. Fading the ends of lines with base color can make them look sharper too.
But I Get Up Again
That wraps up our look at battle damage, but check back in the future as we’re always adding more techniques and tricks to these articles. In the meantime, if you have any points of your own, questions, or feedback, drop us a note in the comments below or email us at contact@goonhammer.com.


