
Just pick up a Star Wars: Shatterpoint Core Set, or working on that backlog? If you’re looking for inspiration to paint your Assaj Ventress, here’s one Goonhammer contributor’s approach.
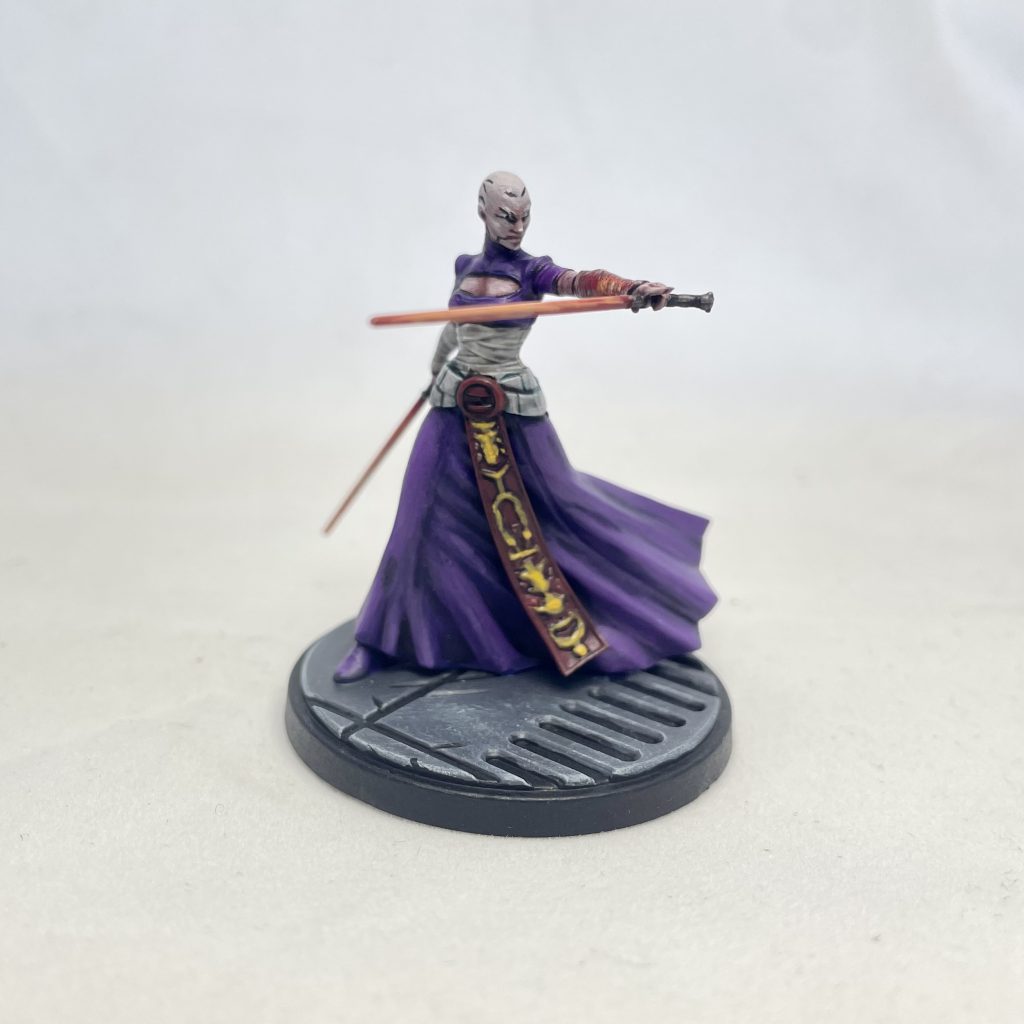
The Assaj Ventress model for Star Wars: Shatterpoint provides an opportunity for painters to apply a variety of techniques and colors, which is a refreshing change of pace from, say clone troopers or stormtroopers.
Robes
There all all kinds of opinions on where to start painting a model. For me, I tend to start on whatever the dominant color will be. Since most of this model would be purple, I started with that. I also knew any stray paint from other areas would be more easily covered up in the end, so added bonus there. Here’s how I approached the robes.
- I based them with AP Alien Purple.
- I then washed all the purple areas with GW Druchii Violet.
- When the wash was dry, I started highlighting by mixing GW Genestealer Purple into the original base color, and painting raised areas or other spots that would receive more light.
- I mixed in successively more Genestealer Purple until switching to pure Genestealer.
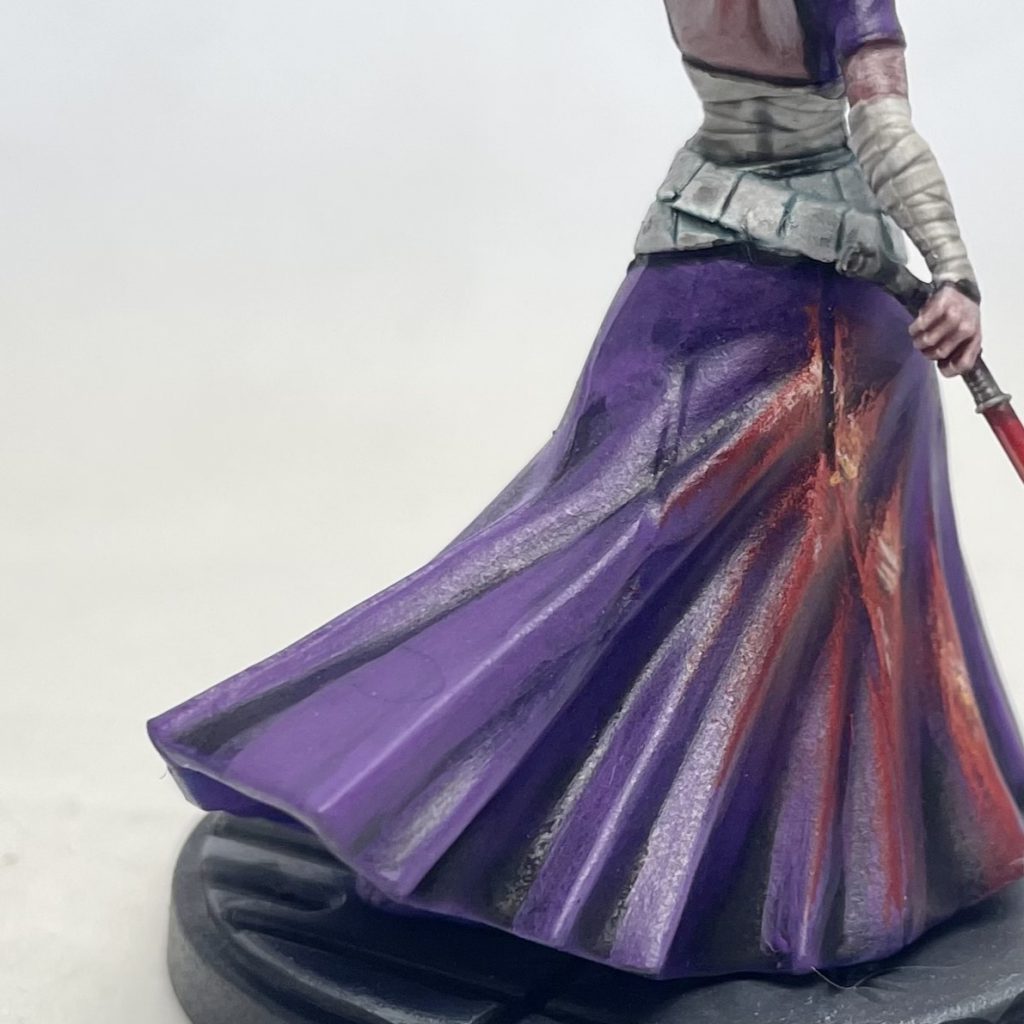
- For the final, most sparing highlights, I mixed the Genestealer Purple with AP Oozing Purple
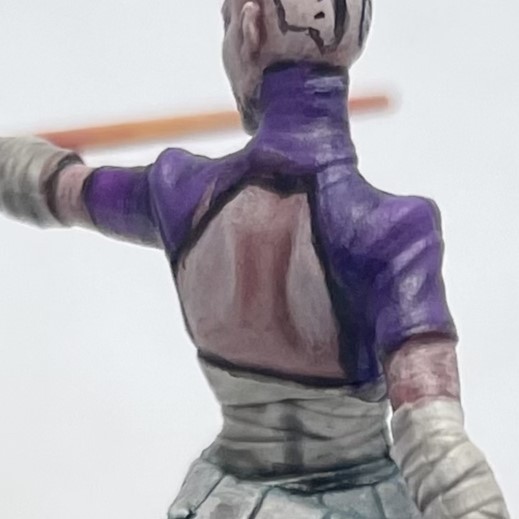
Wraps and Belt
The belt and bandage-like wraps are similar in color and right next to each other, so I wanted to avoid this by giving them different undertones.
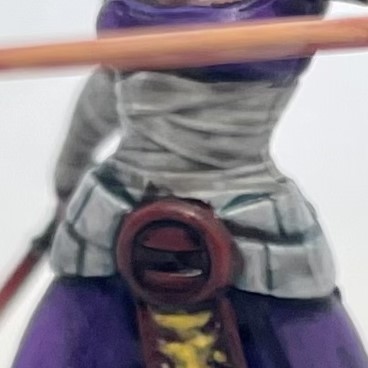
- Both were based with VGC Stonewall Grey.
- The belt was washed with the Cool Grey wash from the sadly closed Secret Weapon Miniatures. This is a lovely wash I use for cool-toned whites. It’s sort of a sea blue with hints of gray and green. I haven’t found a replacement for it, so feel free to shout one out in the comments if you have a suggestion!
- The wraps were washed with SWM Softbody Black. Again it’s no longer available, but you could water down GW Nuln Oil or find a less strong black wash as replacement.
- Both were highlighted by mixing VGC Offwhite into the Stonewall Grey, as well as some final sparing edge highlights with just Offwhite.
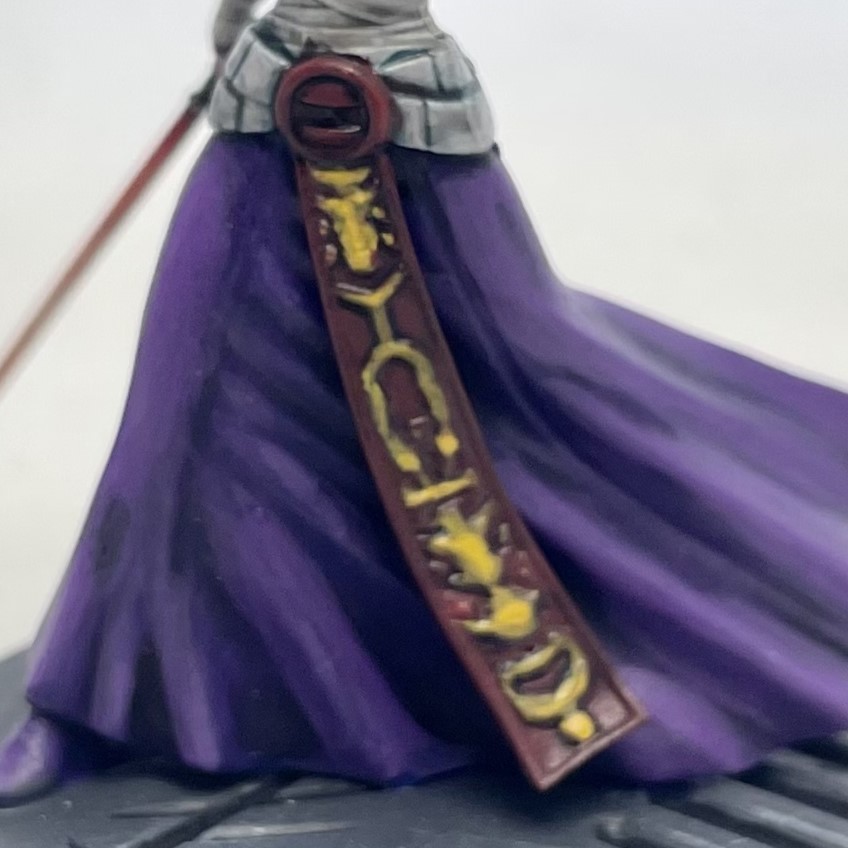
Sash
The sash is a little tricky as the rune details are shallow. So keep your paints thin and take your time!
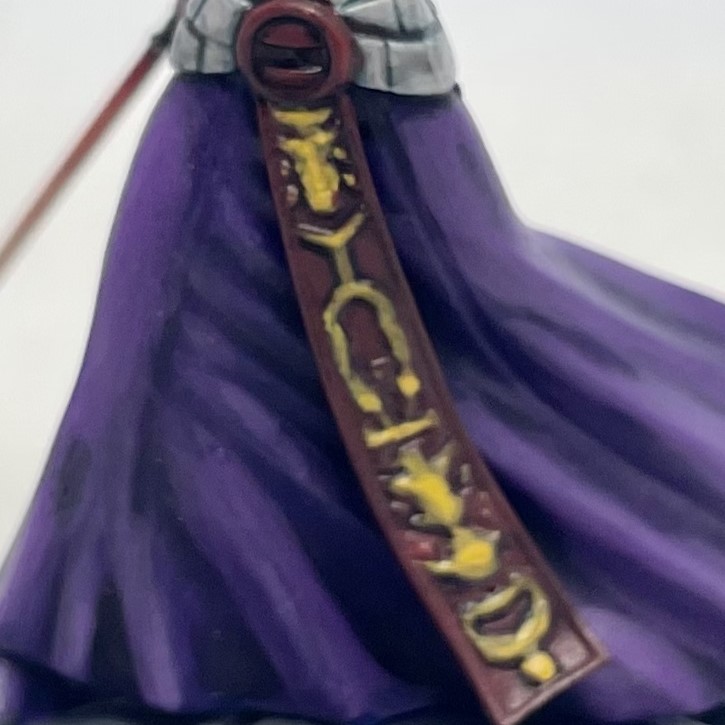
- I based the red portions with P3 Sanguine Highlight. Try to avoid getting too much red on the runes here. It’s hard to cover it back up with yellow, and those shallow details will get obscured in a hurry.
- I washed the red portions with GW Carroburg Crimson, but that gave me too warm and vibrant a feel. So I quickly did a new basecoat and washed with the SWM Softbody Black. That darkened the recesses without turning everything else too dark as well.
- I highlighted raised areas by mixing in a little P3 Menoth White Highlight (still the GOAT for mixing highlights) with the Sanguine Highlight base shade.
- The medallion/buckle (that looks a lot like a purity seal actually) got based with Khador Red Highlight to help it stand out a bit, then treated like the rest of the red sash, except I highlighted with just the KRH basecoat.
- The yellow runes were basecoated GW Averland Sunset. I carefully washed those with GW Seraphim Sepia, then highlighted with P3 Moldy Ochre.
Skin

Asajj’s skintones are probably the most difficult to approximate. I used what paints I had available, but I will also suggest below some alternatives that might get you close. I’m also borrowing much of this from my core set speedpainting article from last year, for full disclosure.
- I started with a roughly 1:1 mix of Scale 75 Pale Skin and Huge Miniatures Pale Rose.GW Slaanesh Grey and Pallid Wych Flesh would get you close, but would probably be much darker. Depending on your painting style, that might be a good thing, but I like to start bright and shade down. Mixing in a bit of the palest flesh tone you can find might help, or even just a tiny bit of an off-white color.
- I then washed all the skin with a 1:1 mix of GW Reikland Fleshwash and Druchii Violet washes.
- After that, I layered back up with my base color mix then slowly mixed in small amounts of P3 Menoth White Highlight, highlighting increasingly small areas of the skin. At some spots, it’s almost pure MWH highlights, such as on her face.
- Tattoos were done by mixing the base skin mix with VGC Blackgrey. I did a rough sketch of the tattoos with this, then went back over top with a thinner line of just the Blackgrey. In hindsight I wish I had used a slightly less dark color here. Pro Acryl Blue Black or P3 Coal Grey would work great here, I think.
Saber and OSL Glow
Lightsabers are surprisingly tricky to paint- there’s a lot more than just painting the whole thing red or whatever, at least. I’ve approached them in several different ways. Here’s how I did this early attempt with Asajj.
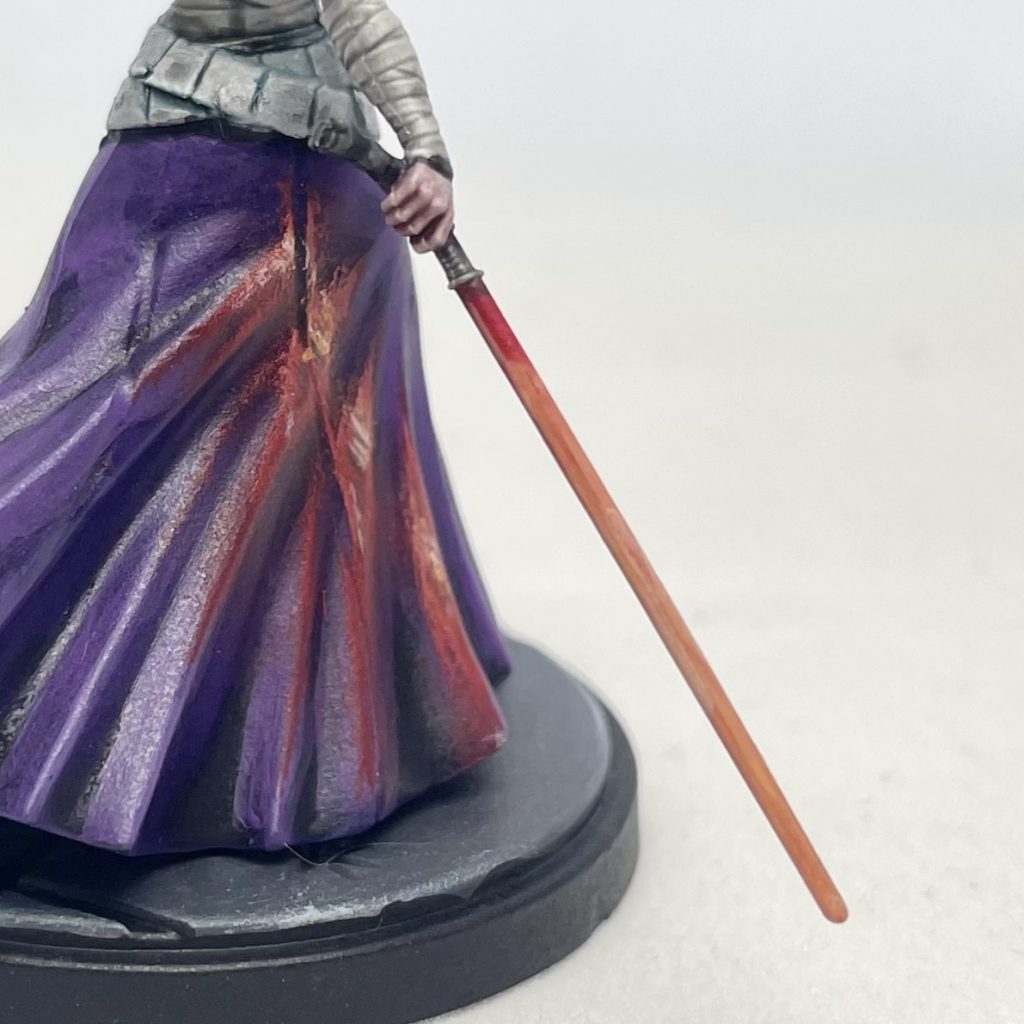
- Here I started by painting the hilt with GW Dawnstone, then washing it with Nuln Oil.
- The blade itself was basecoated with P3 Khador Red Base.
- From there, I painted smaller and smaller areas by mixing in P3 Khador Red Highlight into the base color. The brightest areas got a small amount of P3 Menoth White Highlight as well. A tiny bit of GW Carroburg Crimson was done
- The glow effect is mostly drybrushing: start with a darker red (here I used GW Mechrite Red). This will represent the most diffused light, so should make up the largest area. From there, focus on the center of the effect, drybrushing increasingly smaller areas with the same colors used for painting the blade. At the end, I did a few small painted highlights of Menoth White Highlight with some orange mixed in, placed right in the center of the effect. It looks pure white in the picture, but that’s in relation to the color all around it.
I finished the model by using a good brush and thinned down black paint to black-line the model for a higher contrast cartoon/comic book look that’s become my personal style. Luckily, I think this style works especially well for Star Wars: Shatterpoint and Marvel: Crisis Protocol. If you’d like to know how I do my bases, you can find the steps here. Thanks for reading, and I hope this article helps you with your hobby goals!
Have any questions or feedback? Drop us a note in the comments below or email us at contact@goonhammer.com. Want articles like this linked in your inbox every Monday morning? Sign up for our newsletter. And don’t forget that you can support us on Patreon for backer rewards like early video content, Administratum access, an ad-free experience on our website and more.
