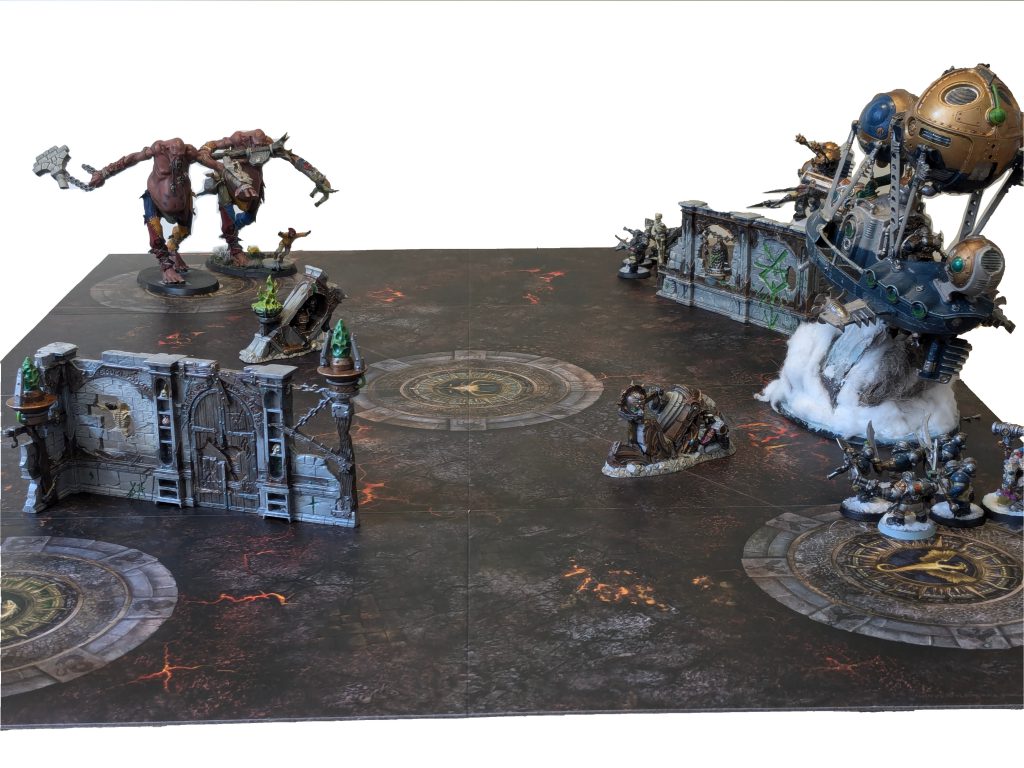
Whether you’re a die-hard fan or the launch of the 4th edition has made you Sigmar-curious, one of the most exciting additions to Warhammer Age of Sigmar has been the introduction of a new way to play: Spearhead. Simple enough to learn in an afternoon but with enough depth to reward clever tactical play, it’s no surprise that it’s generating lots of buzz. Part of the strategic depth comes from the player-placed terrain included in both the Skaventide box and the Fire & Jade gaming pack. In this article, we’re going to break down how to make your terrain stand out on the table and turn your games of Spearhead into a visual spectacle.
Painting, Fast and Slow
To give some background, I consider myself a journeyman painter: I have a handle on the basics, but struggle with some more advanced aspects of miniature painting. Given that Spearhead is very much marketed as an accessible entry point into the hobby, I decided to take two approaches to painting up this set of terrain. For two of the pieces I’ve used a bunch of speedy tips and tricks that should let you get them done with a minimum of fuss while still looking great on the table, and for the other two I pushed myself with some more advanced (or at least time-consuming) methods. Many of these techniques I picked up on this here website: I’ve provided a comprehensive breakdown of resources at the bottom, and will link to these throughout the article. This hopefully means that, regardless of your skill level, there’ll be something here that you’ll find suited to your experience.
At the end of the day, remember that any painted model will always look better than grey plastic, and this goes double for terrain, so don’t sweat the details! For something that you’ll mostly be trying to measure charges around, ‘perfect’ is the enemy of ‘finished.’ With that in mind, let’s get started!
Assembly
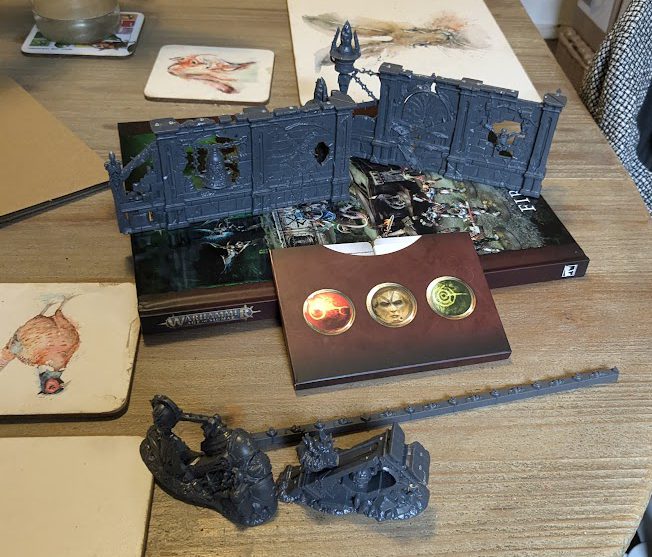
Like many of Games Workshop’s recent terrain kits, the sculpting team have absolutely knocked this out of the park: they’re packed with detail but the push-fit construction makes them very straightforward to put together. While removing from the gates I found very few mould lines in awkward places, apart from on the skeletons – using a mould line remover was much better for these than the back of a craft knife. The push-fit holds were fairly solid, but I glued mine anyway for extra security. I did find that there were a few awkward gaps that needed filling, especially on the corners: plastic glue just wasn’t doing the job, so in the end I tried to fill these with milliput, but the location on the corners made this awkward. Ultimately it’s not very noticeable on the table so I wouldn’t sweat it too much. If anyone points it out during a game, you have my permission to call them out for being an absolute freak.
Priming
Because I knew I wanted to go for a speedy approach using Contrast paints on at least two of the pieces I decided to prime first with Colour Forge’s Matt Black followed by Wight Bone. Living as I do in the temperate climes of Terf Island, I find Colour Forge rattlecan primer to have excellent coverage and a single can lasts ages. My personal Top Tip for anything involving spray cans is to bathe them gently in warm water for a few mins first: this brings them up to temp and helps with consistent coverage.
While I could have just used the white primer, as mentioned the terrain is extremely detailed: by priming first in black it essentially pre-shaded or underpainted the details, discussed in-depth in this article here. Focusing on raised areas / those that I would be painting with Contrast with the white primer made them much easier and faster to paint later. You could do this even more effectively by drybrushing lighter and lighter shades over the black (a technique you may have heard called slapchop), but I am lazy and it’s only terrain. If you do use multiple sprays, be careful to keep them light so you don’t obscure detail with thick layers of primer.
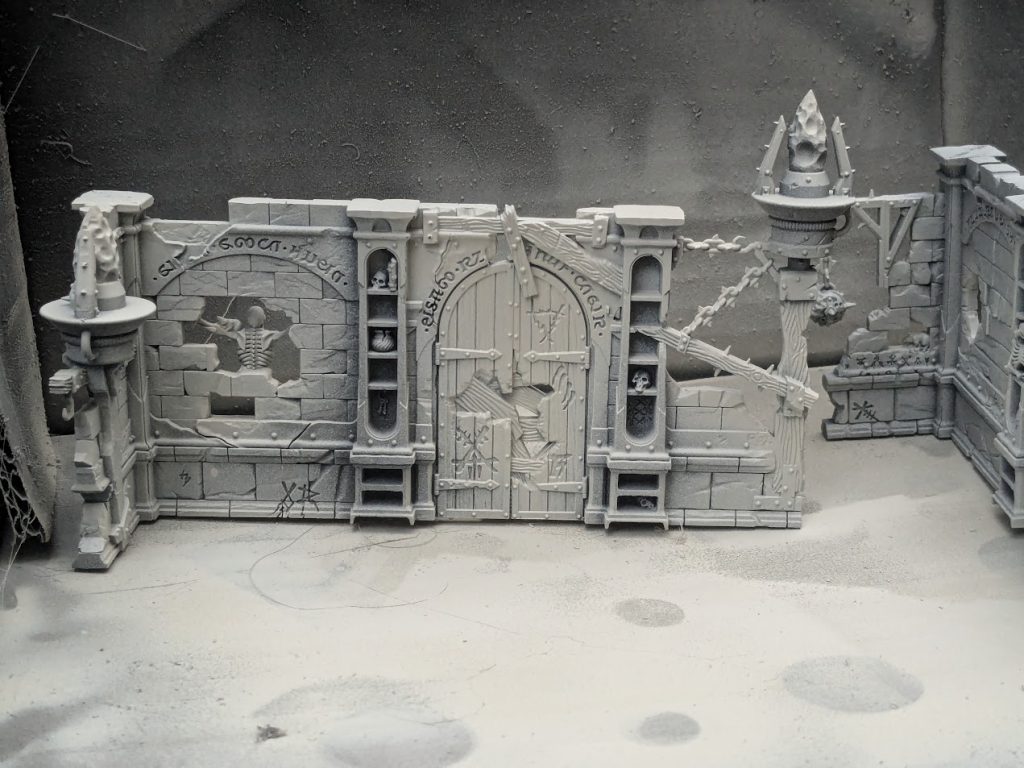
A word of warning: using spray cans for this leaves ‘spotting’ of white paint on the fringes of where you’ve sprayed, which will show up through paints and especially through contrast. You can see this on some of the flat panels below. Again: it’s terrain, who cares. For individual models you can avoid this using airbrush priming or by following the underpainting techniques in the article linked above.
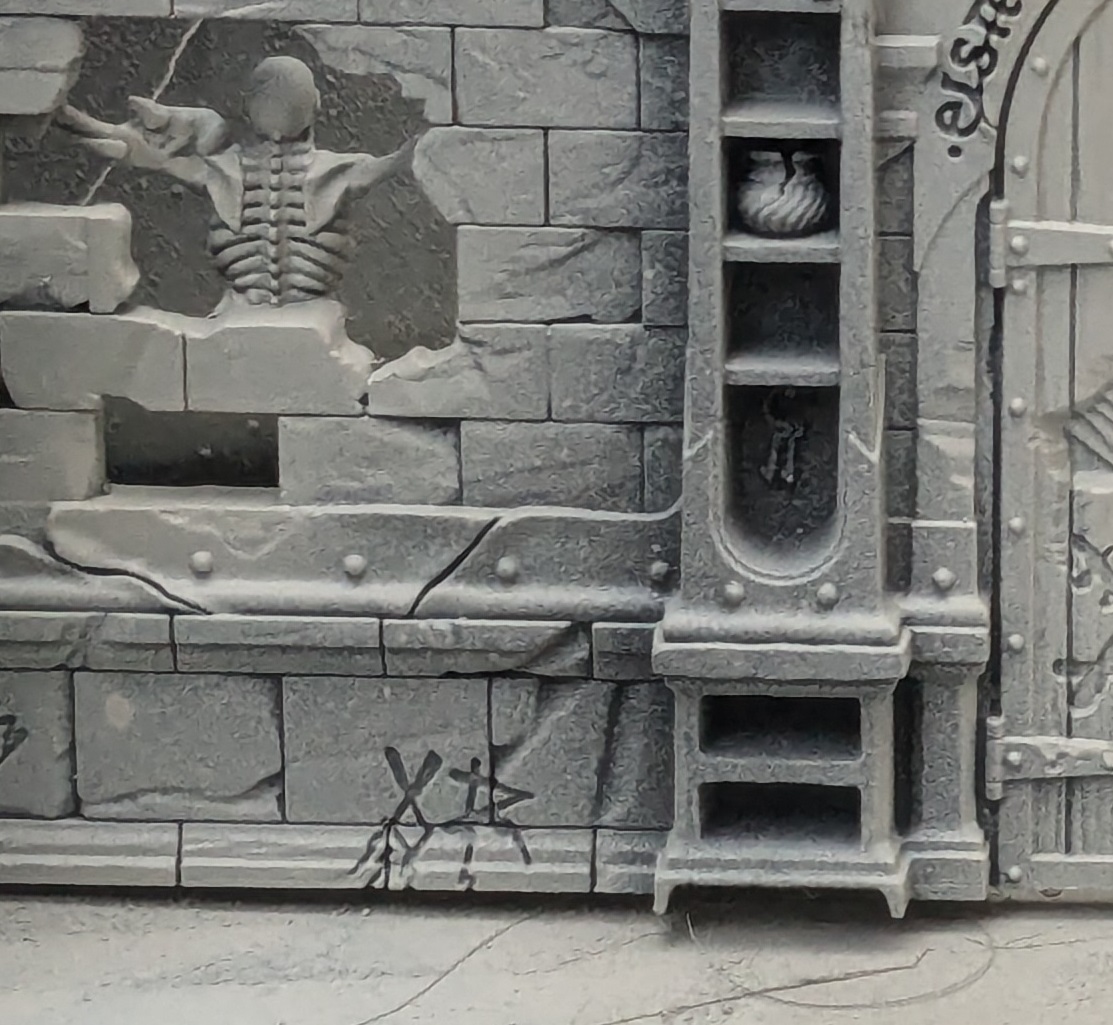
All in all, I would estimate that mould line removal, assembling and priming the models took about 3-4 hours, which would have been much faster without the gap-filling or pre-shading.
Gotta Go Fast: Bell Wall, Smashed Icon
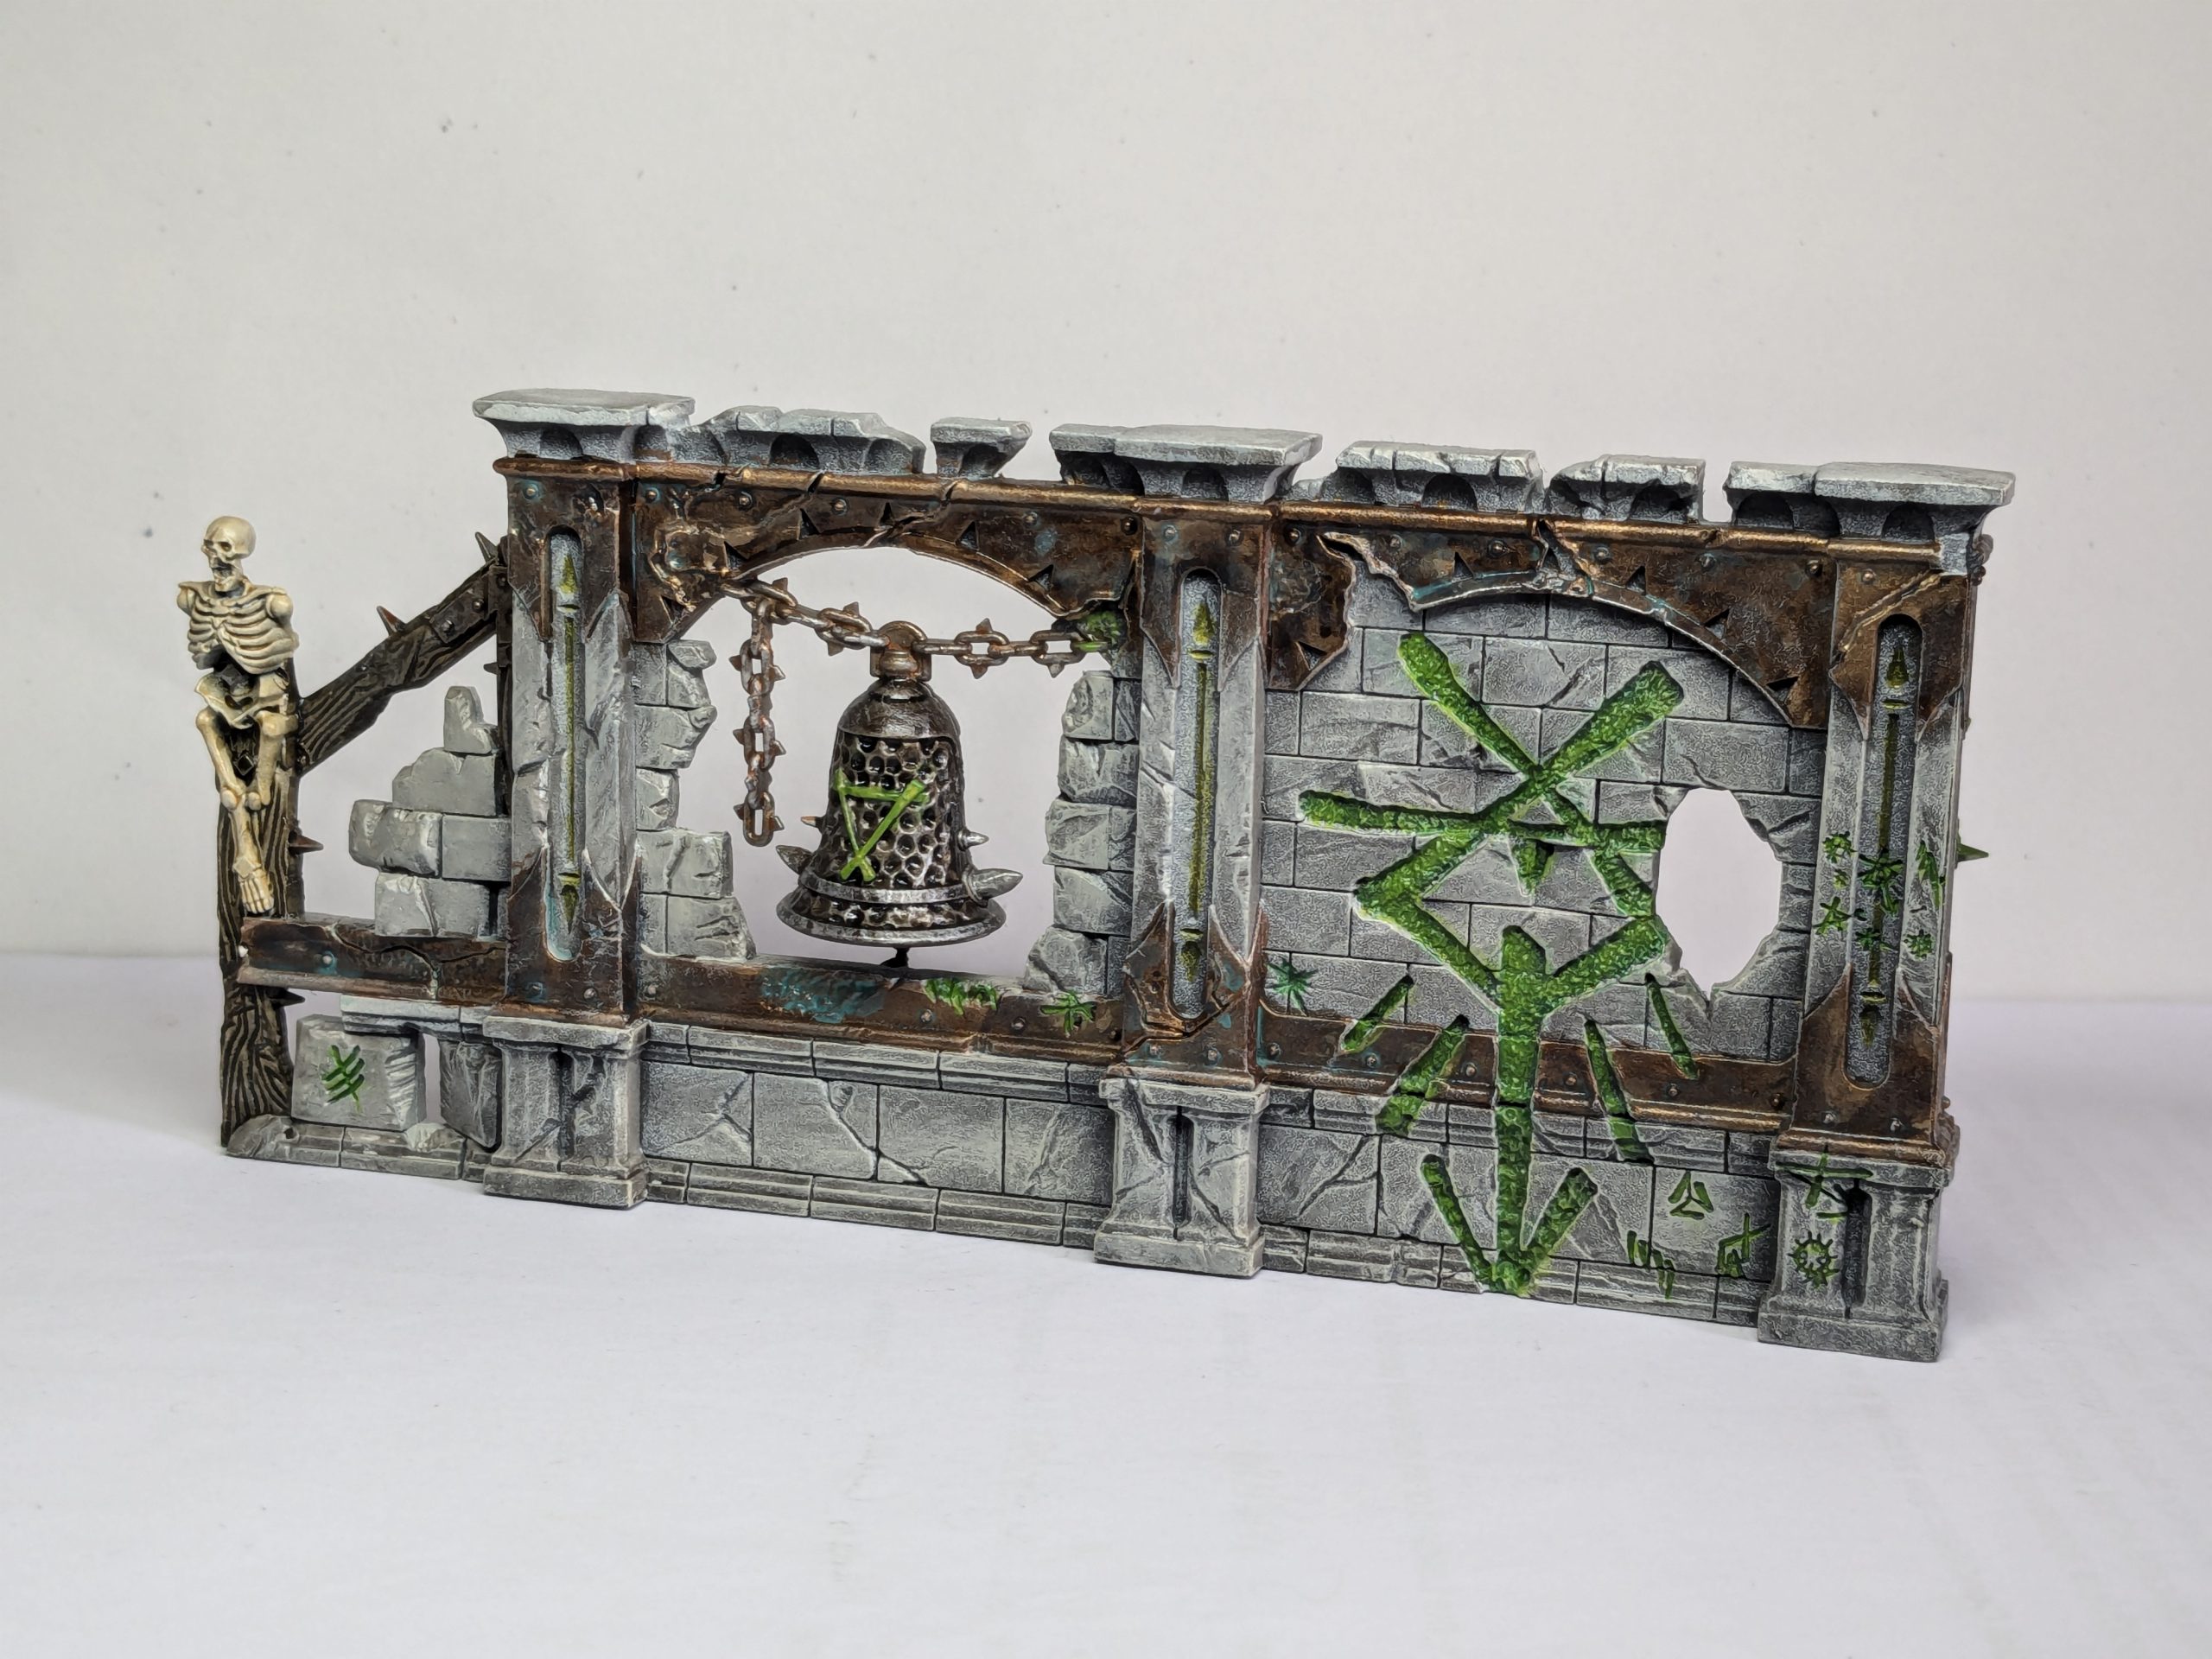
All paints used are by Citadel, unless stated otherwise.
Now, you might look at the list of paints above and immediately think “that’s far too many paints”, and you would be correct: I have a brain disease that means I am unable to use fewer than ten paints on any given project. You could cut out almost all the highlight steps above and use many of the paints interchangeably (Basilicanum Grey and Nuln Oil, or Garaghak’s Sewer and Wyldwood), or totally ignore the trim and the end result would still look fantastic! Even so, painting both of these pieces didn’t take longer than 6 hours, including correcting mistakes. By cutting out highlight steps you could probably bash both of these out in an evening.
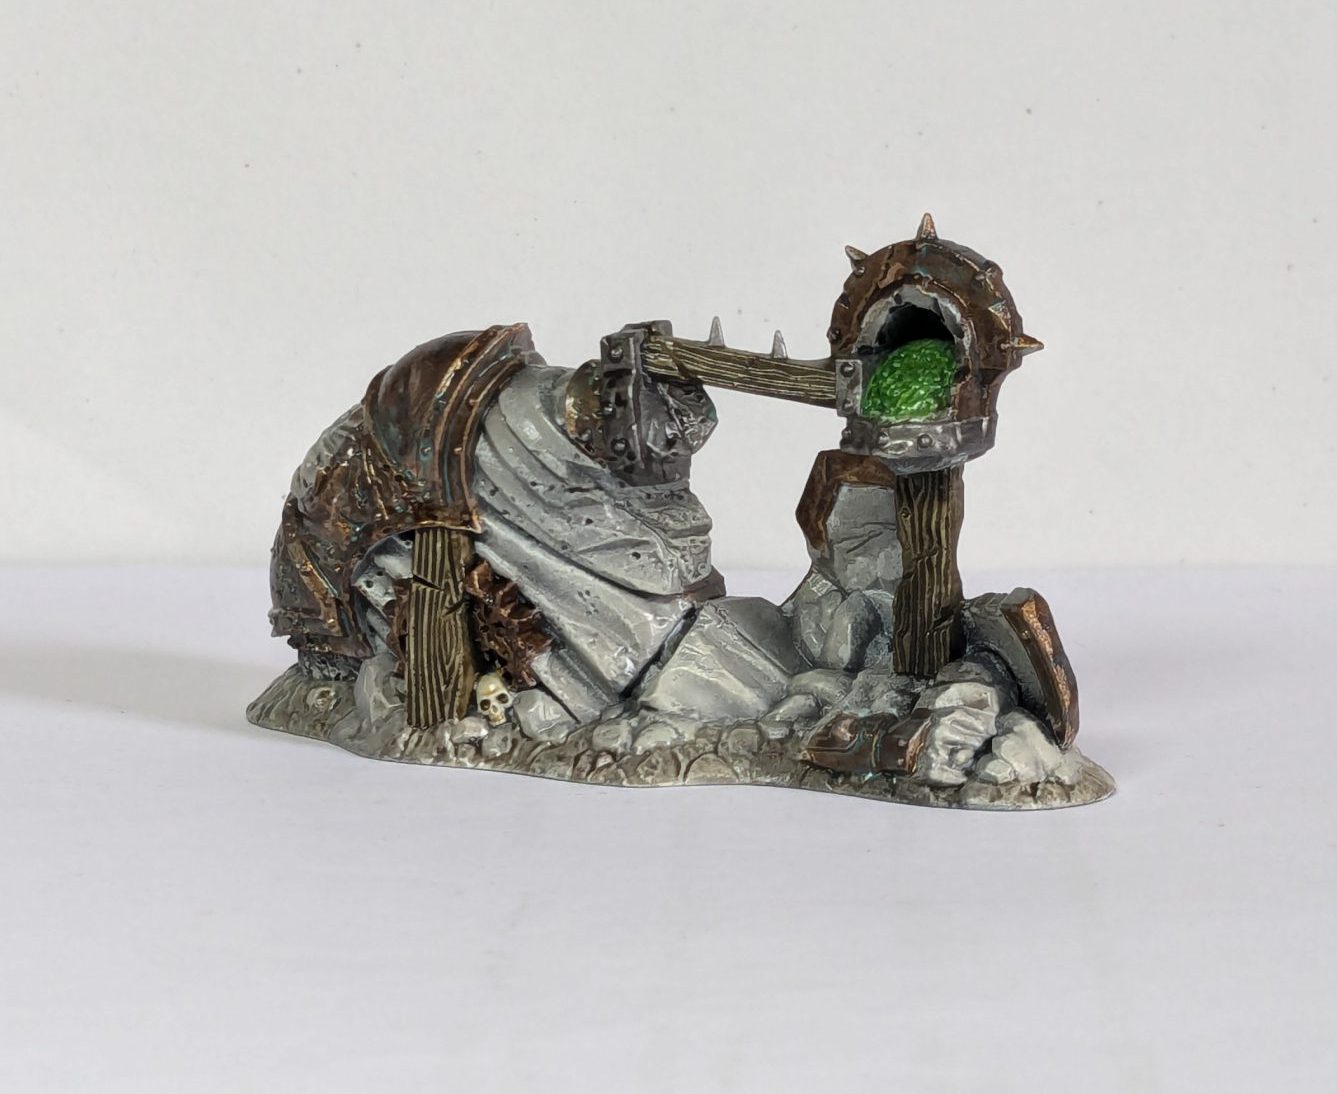
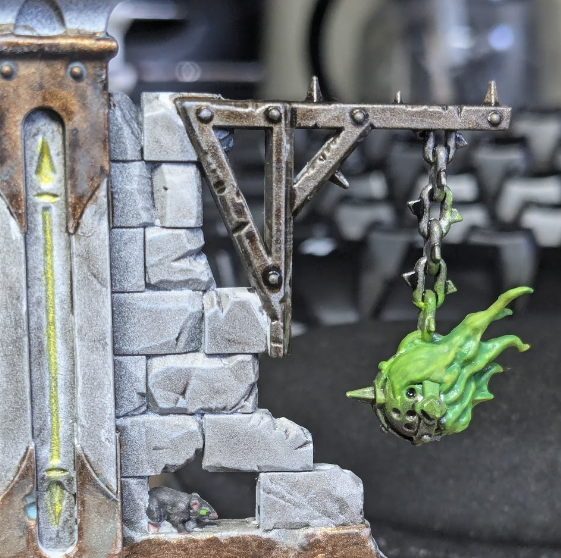
I started by shading the stone with thinned Basilicanum (again, Nuln oil would work here too) and this was the real timesaver: over the primer it immediately gave me an excellent neutral grey stone that wasn’t too blue or brown. Try to focus on the recesses and joins in the stone, you can keep a moist brush handy to mop up any excess contrast. I added Agrax Earthshade to the bottom of the rubble for the statue, though I’m not wholly convinced by the effect, and probably wouldn’t bother in future. For the metal trim I used Darkstar Molten Metal Bronze as a good mid gold, though Retributor Gold would also work well here. Painting trim is often miserable, but I knew I would cover it in contrast later so I wasn’t too fussed about getting thick coverage, one or two coats is fine. The hardest part was deciding where the metal stopped on the damaged areas and on the statue: for some of these I covered them up with my green recipe, to make it look like it had been blasted by warpfire. I used Leadbelcher for the metal beams, supports and the bell, and Garaghak’s sewer for wood: I find Wyldwood to be a little dark (though as we’ll see this has its uses).
One of my favourite techniques is using contrast over metallic paints, and in this case I used liberal amounts of the aforementioned Wyldwood over both the bronze trim and the metal bell. As you can see the different base metallic has totally changed the end result, making the trim look weathered and beaten while the bell has more of a tarnished steel look. The Nilakh Oxide shading leaves a chalky residue behind that results in a matt finish, which really sells the dull and weathered bronze. If I owned a nice luminous green Contrast / Speedpaint then I would have used that for the warpfire / warpstone / graffiti, but I don’t, so I didn’t. Don’t stress too much about keeping green in between the lines for these, you can wipe excess away with a moist brush or just leave it (like I did on the brazier) for a slightly glowy effect. I ended up painting the rubble in the back of the statue’s head as warpstone, the official ‘Eavy Metal paintjob makes this look like earth which I don’t quite understand – maybe it’s meant to be rat droppings? Skeleton Horde contrast is extremely good for, well, painting hordes of skeletons and it made the bones here a doddle. Gryph-Hound Orange over metal is a good rust effect but is wholly unnecessary, and I only used it here because of the previously discussed brain disease.
The highlights were almost all achieved by using successively lighter drybrushes, which you can read all about here. You don’t need them on the stone if speed is of the essence. If you do follow my recipe just bear in mind that Celestra Grey can be a little blue, though drybrushing Screaming Skull over this will knock it back again. Finally, we come to painting details, by which I almost entirely mean painting rats. There are many, many rats. Once more I will bang my drum and say that this is terrain, it’s perfectly acceptable to paint them all one colour: Garaghak’s Sewer or Basilicanum Grey would be great for this. Personally I wanted to make them distinctive, so I added a little variety. The black rats were done with Basilicanum Grey, the brown with Steel Legion Drab, and the white with thinned (1:2 paint:water) Basilicanum followed by Screaming Skull highlights. The key was to catch the little adorable paws, noses and tails with P3 Midlund Flesh (a darker pink, somewhere between Bugman’s Glow and Kislev Flesh) and use Warpstone Glow for the eyes. Accuracy doesn’t matter too much, but giving pops of colour like this really helps them stand out on the table. I used a little Talassar Glow over leadbelcher for some of the details, and that was that.
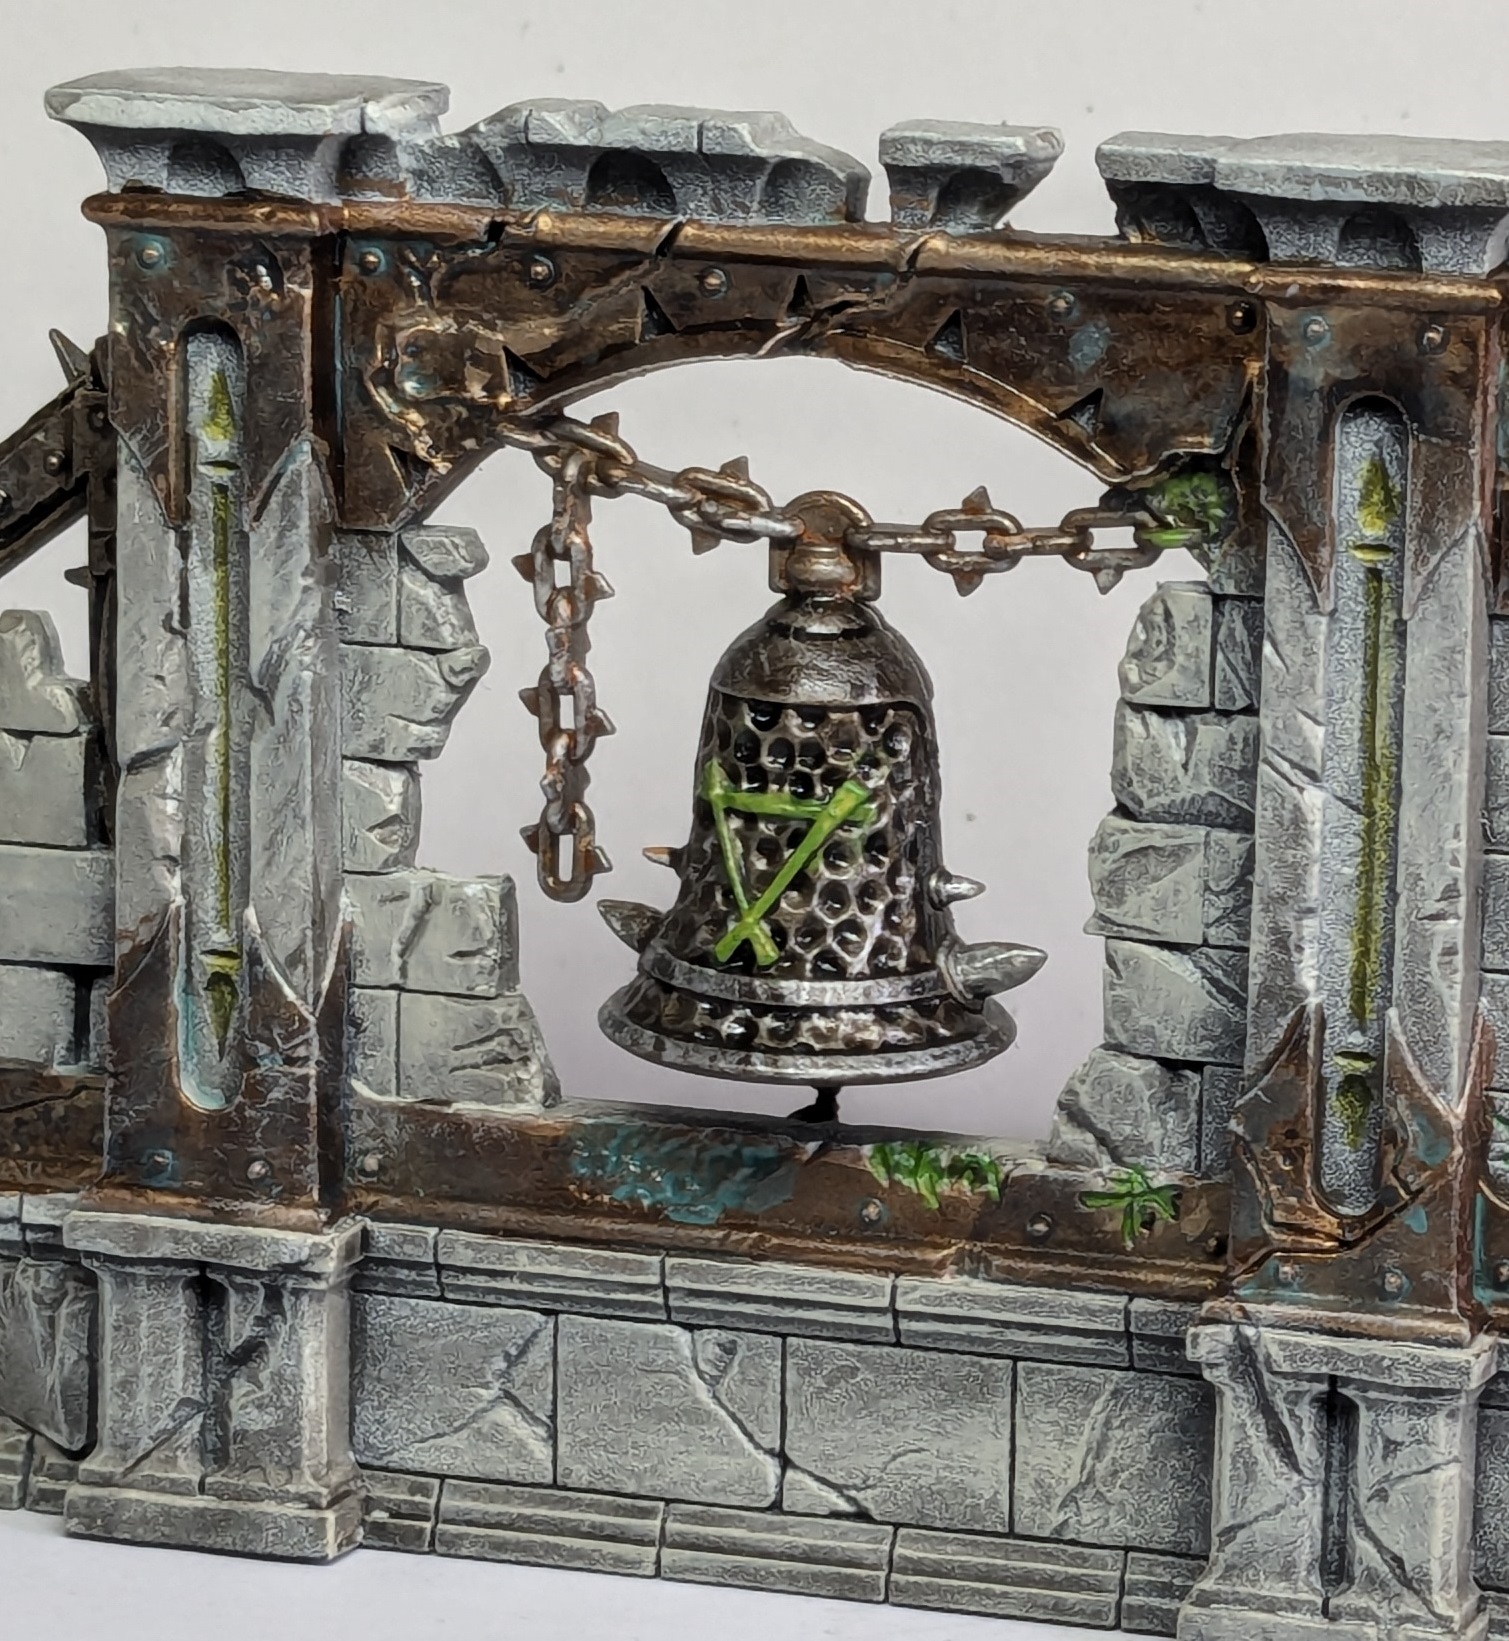
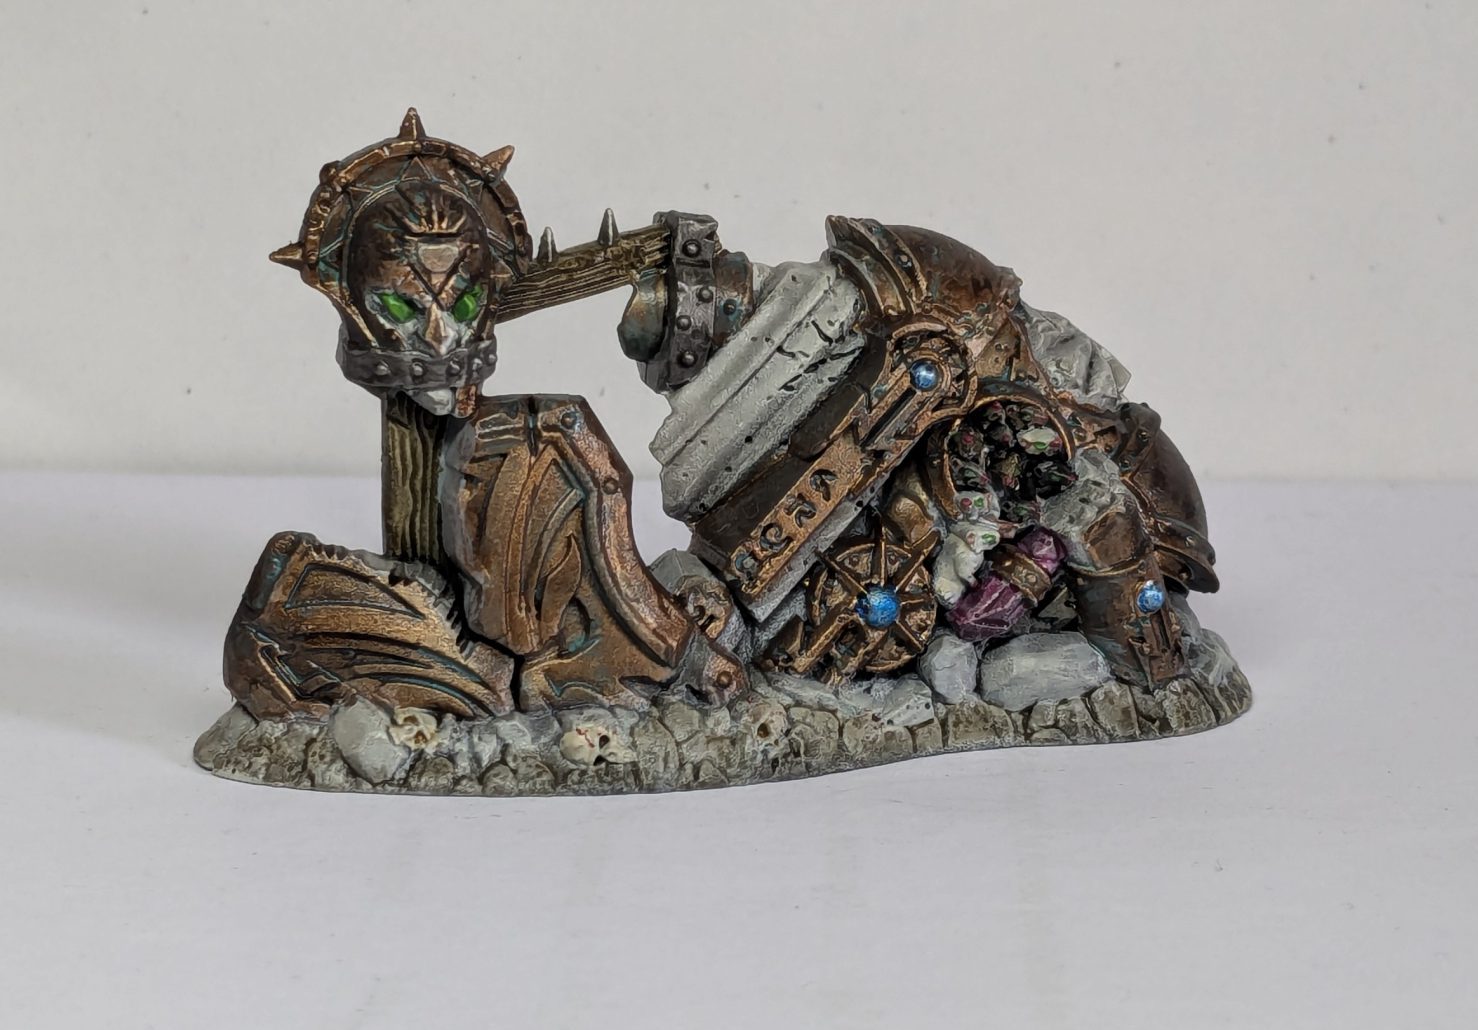
Come On, Step It Up: Warpstone Brazier Wall, Collapsed Niche
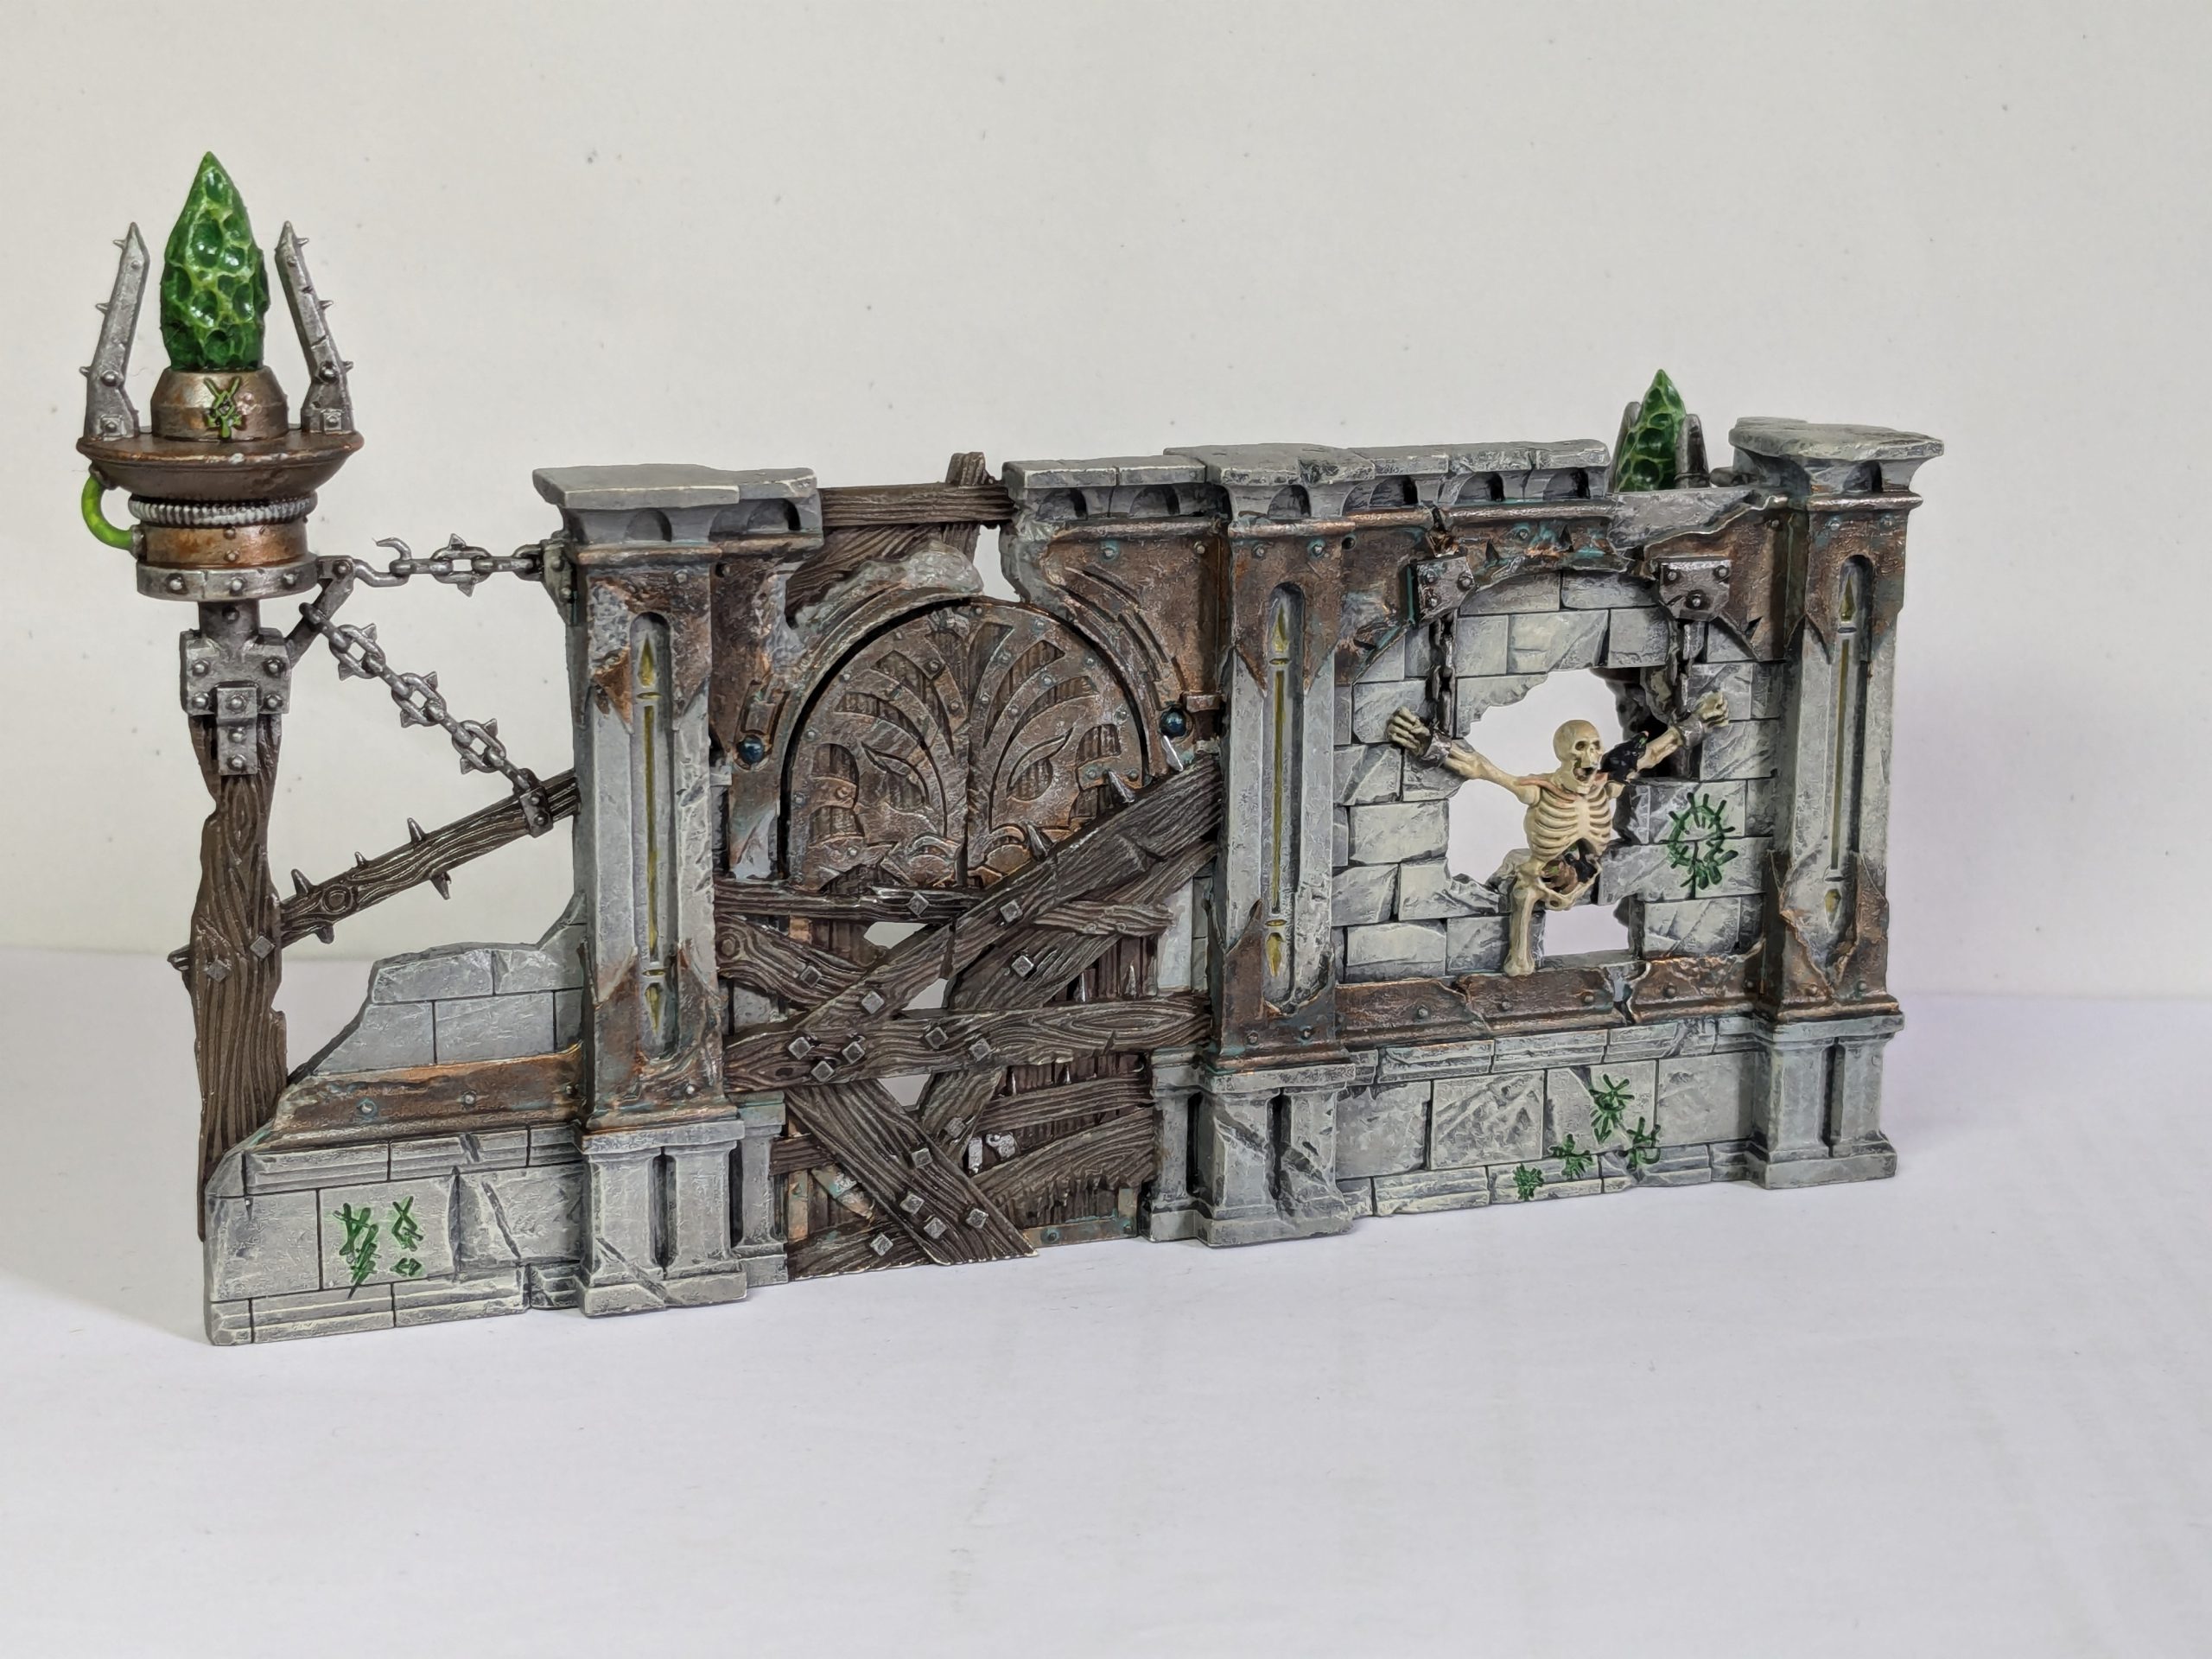
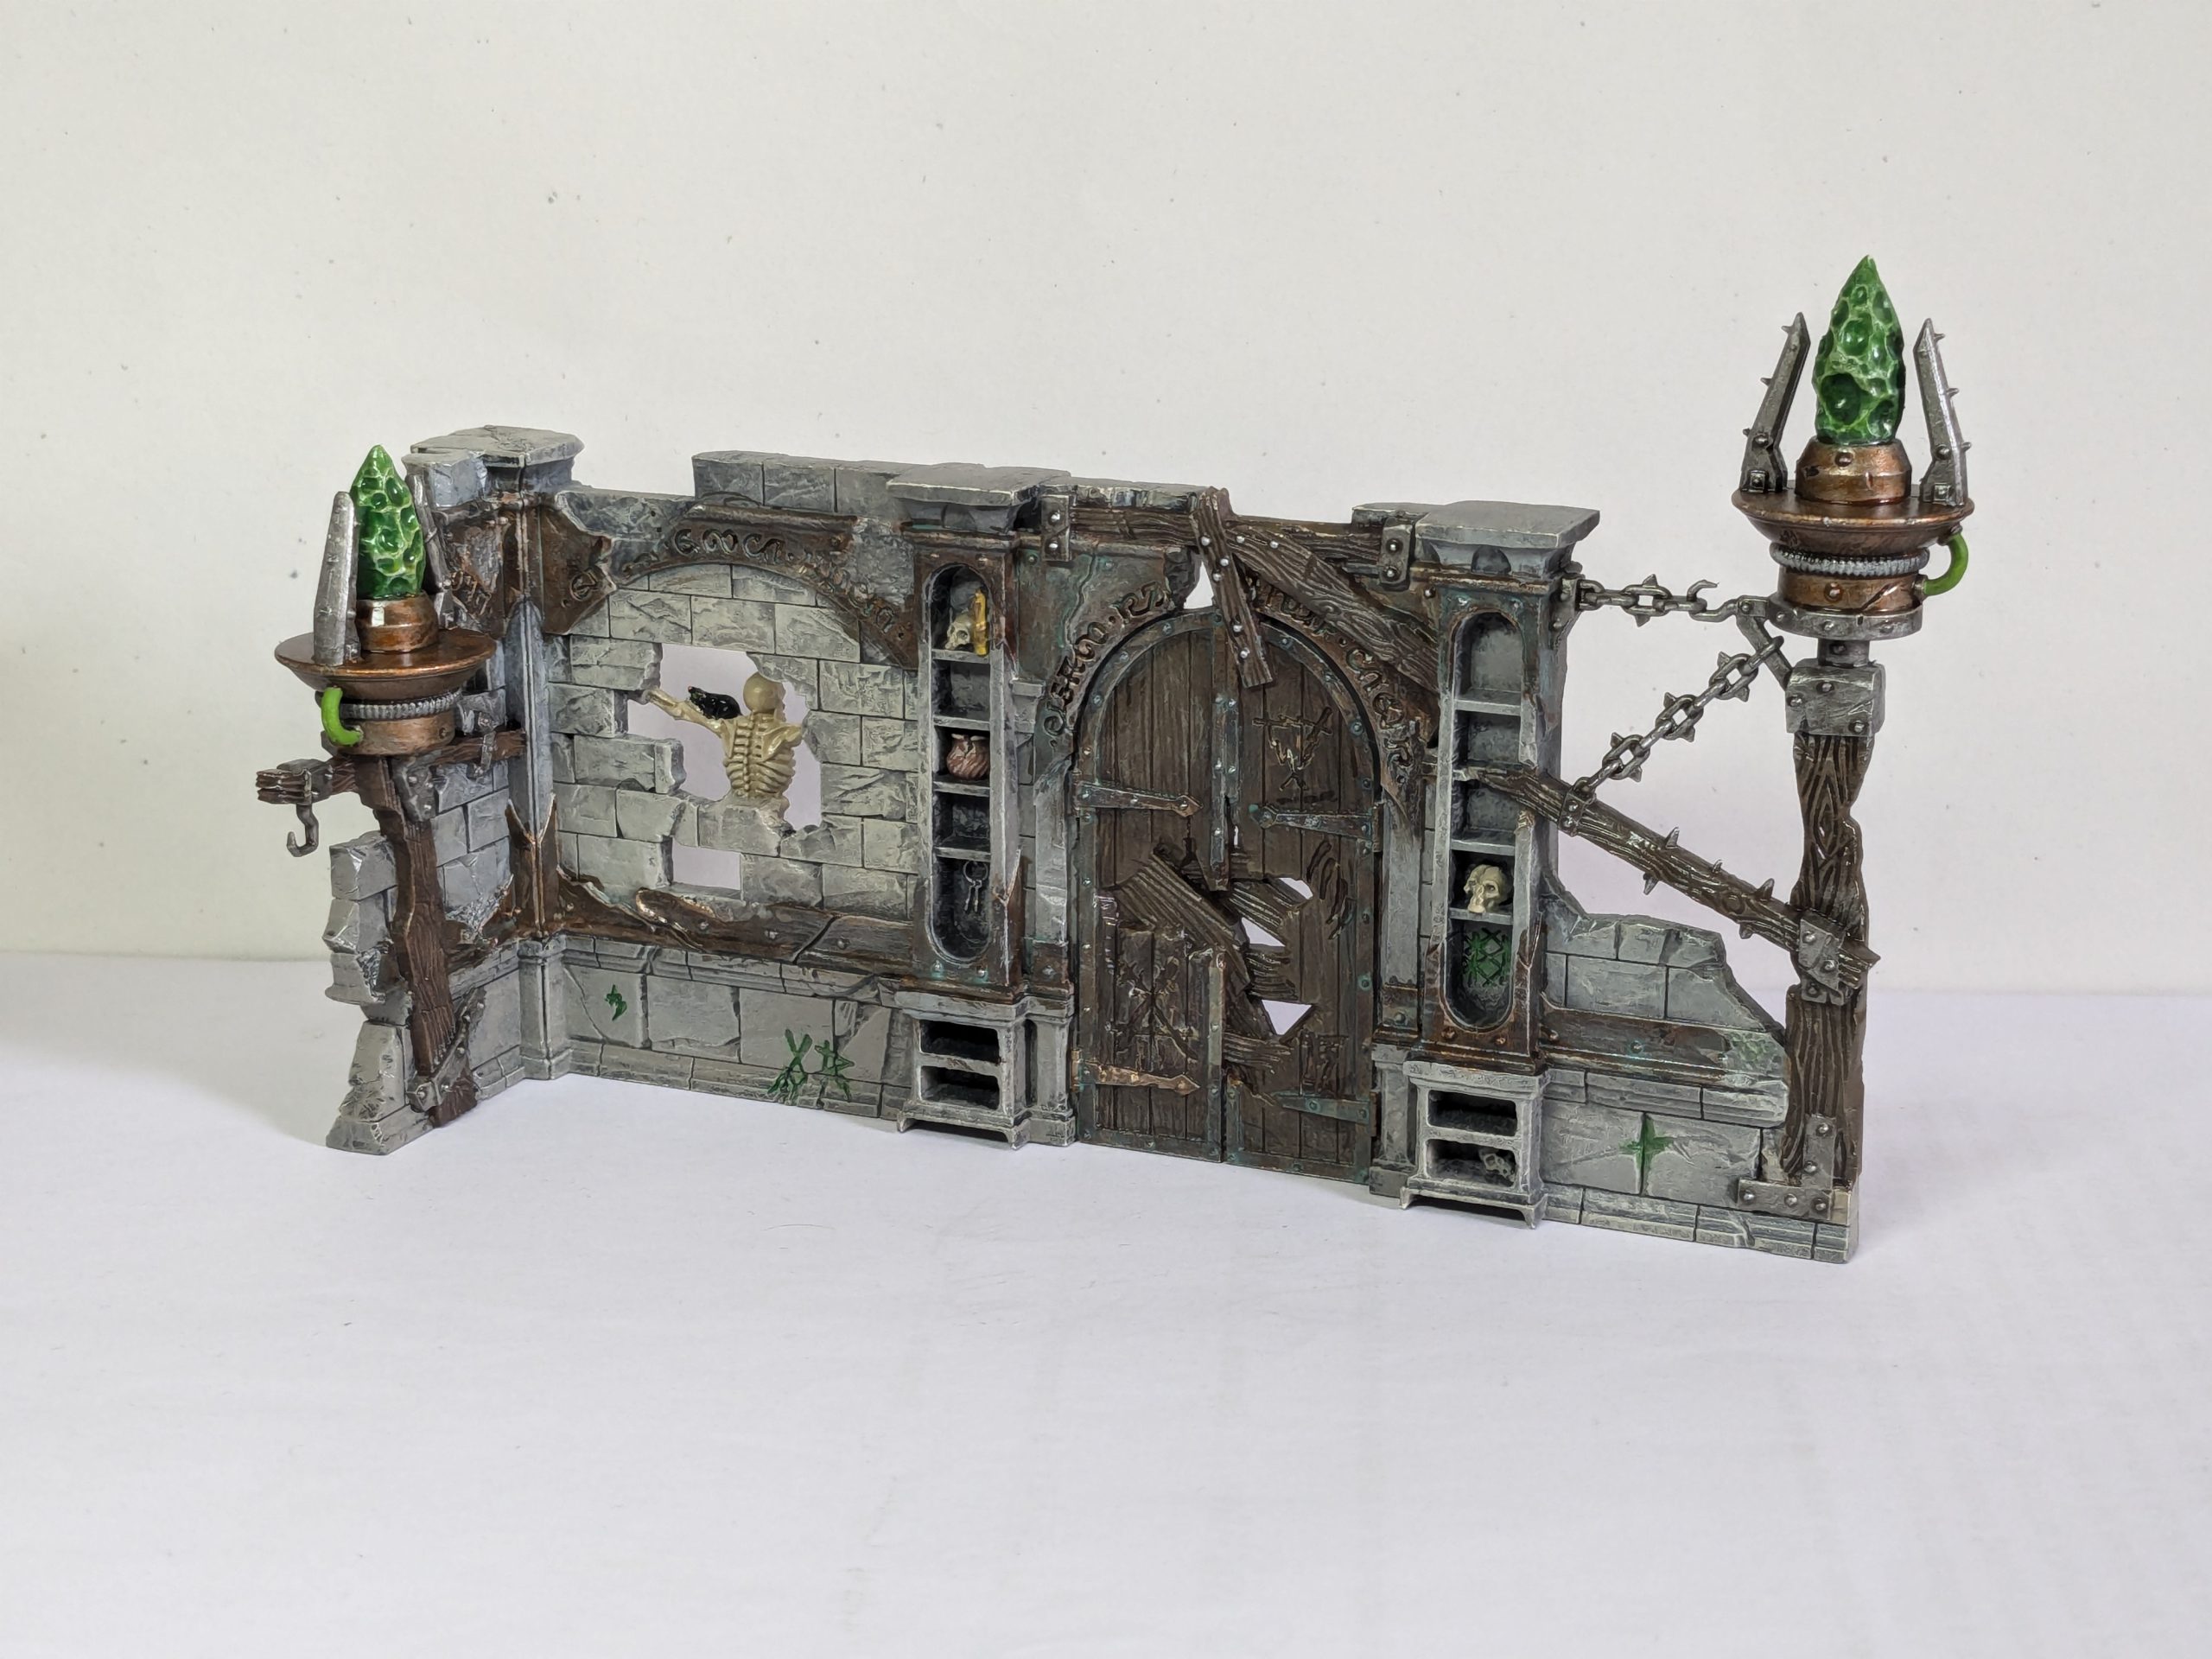
Fundamentally, the paints I used for the more ‘advanced’ techniques are pretty much the same as when painting at speed, it’s more about different application and taking time on details. One of the big differences was the stone, as here I started with a comprehensive drybrush of German Grey from Vallejo and then gradually moved up through lighter tones. German Grey is a fantastic paint that provides a good base to build lighter colours over, giving the impression of black while allowing for deeper recessed tones (here provided by the black primer). Rakarth can be a little tan, so if you want the grey to stay neutral keep it fairly light. Frankly I think that the gradual accumulation of drybrushed tones makes for a better weathered stone look, but it’s much more time-consuming than the Basilicanum contrast method: I’ll let you be the judge as to whether the end result is worth it. The metal trim recipe is identical, but instead of drybrushing Stormhost I tried to edge highlight where I could, which again I think looks better at the cost of far greater effort. Stormhost is incredibly bright, so if you do apply highlights this way just make sure not to rush and overdo it The wood is an area where I’m not sure the additional effort was worth it, if I was to do this again, I’d blend my browns to give more gradual transitions rather than leaping directly to lighter shades.
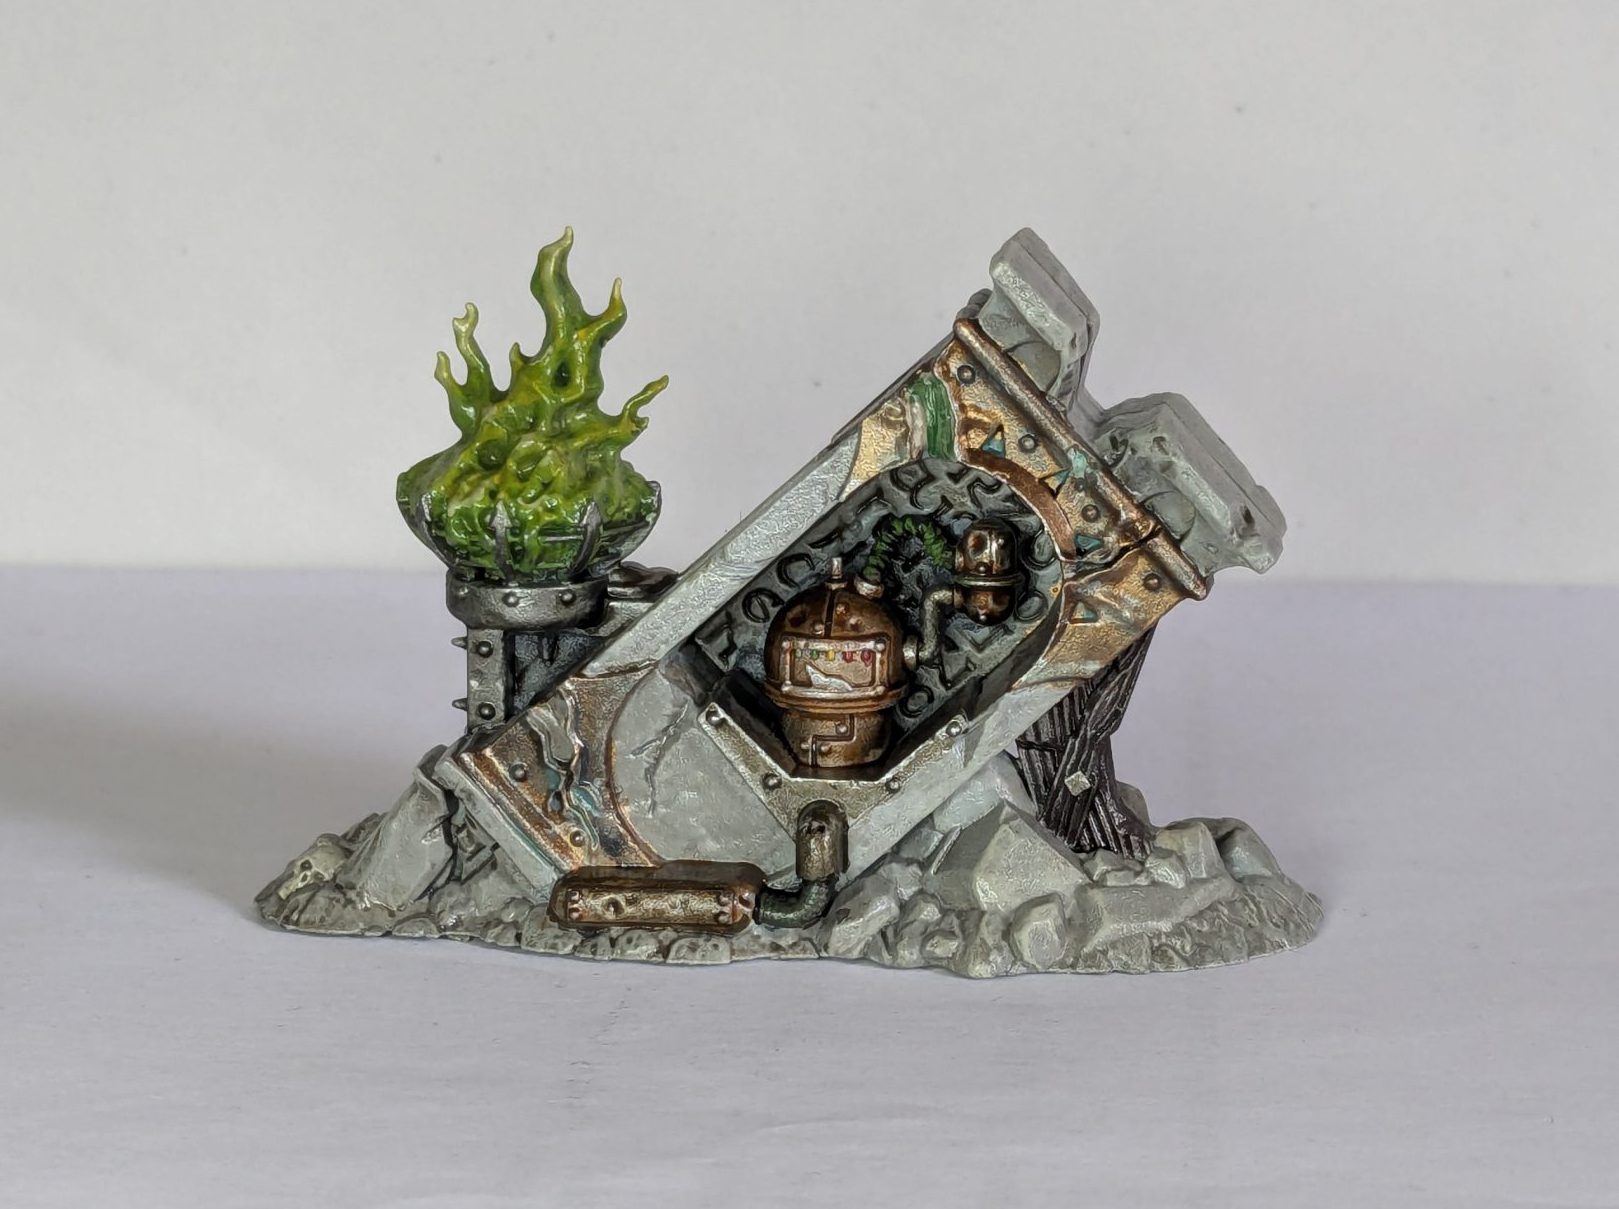
The brass machinery on the pillar and the warpstone braziers did give me an opportunity to try one of my favourite recipes, which is Gryph-Hound Orange over Leadbelcher. While it can be used sparingly to give a rusty effect, here I sploshed it on to get a warm copper. I think it doesn’t look so good on the flat surfaces of the braziers, but on the kettle and other Skaven machinery it looks fantastic for very little effort. In this case, I highlighted the raised surfaces with Stormshost before the contrast step, dulling the highlights and keeping a smoother transition. It’s Garaghak over Leadbelcher on the piping, and again you can see the difference that varying the base metallic paint can make.
Much as I love Skeleton Horde, it shades recesses very orange, so by using Ushabti Bone and then shading with thinned Reikland Fleshshade I was able to control this to a degree I was much happier with. My Top Tip for the friend in the chains is that there are many, many rats inside of them (big same, buddy) so be careful with your brush control here.
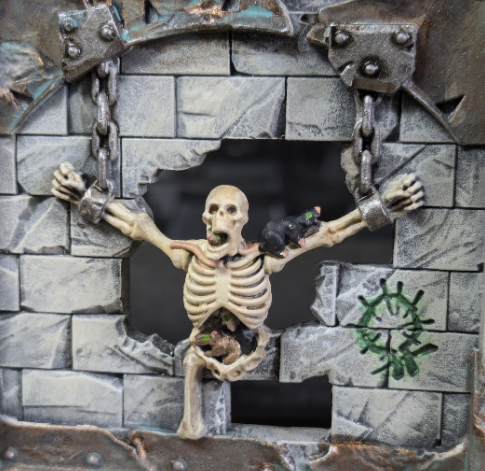
Finally, the details. I found the door challenging: if you’re just starting out, I’d recommend blasting it with contrast and not sweating the metal trim because it’s quite fiddly in places. I slightly overdid a Stormhost Silver drybrush but mostly brought it back with Agrax Earthshade. Iyanden Yellow contrast looks very desaturated (unless you’re using a pink undercoat), which is exactly what I wanted for the recessed detail and some of the raised decoration on the pillar. After that, it was da rats – german grey for the black rat, steel legion drab for the brown with highlights of pink and green, you know the drill.
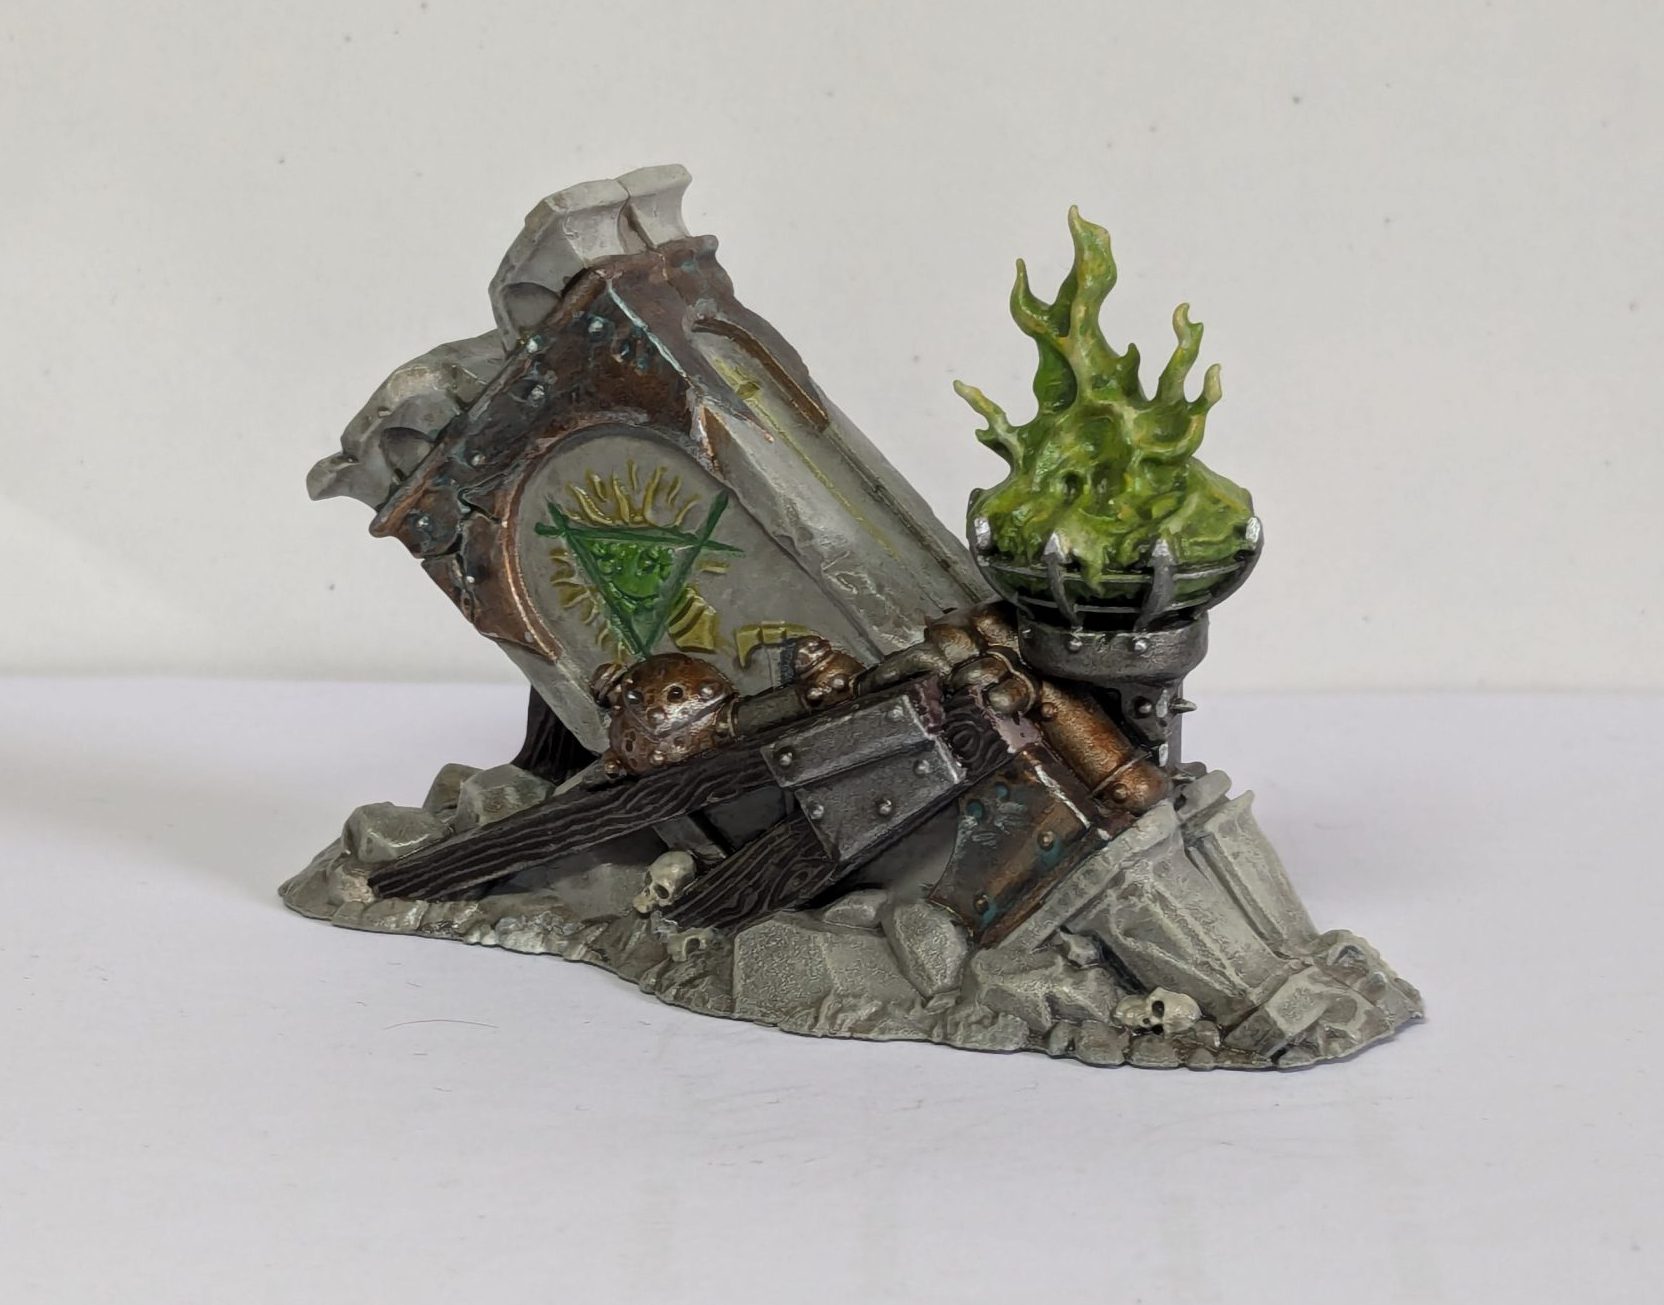
If I had really, really wanted to push myself here I could have gone for some glazes to smooth transitions or Object Source Lighting / OSL on the brazier, but (say the line, Bart!) it’s only terrain and life is short.
Varnishing
If you’ve been painting along with this guide, you might notice that as you’ve been picking up and putting down the model during painting you’ve rubbed off some paint, especially around the edges. This is especially true if, like me, you are afflicted with clammy Gamer hands. Generally terrain is stored and treated with a lot less care than precious miniatures, so before too long you might find that all your hard work has been dented and battered by the cruel vagaries of uncaring wargamers. The solution, of course, is varnish.
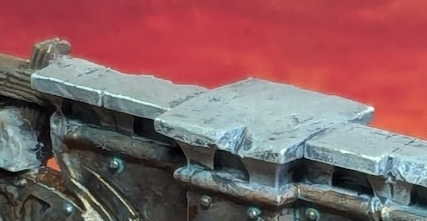
This excellent guide here will give you the lowdown, but ultimately varnishing allows you greater control over the finished look of a model as well as providing protection. Normally I varnish using a combination of brush-on ‘Ardcoat (glossy) and Stormshield (matt), but I’ve said it before and I will say it again – this is terrain! Who cares! I sprayed the whole thing using cheap craft matt sealant. As with anything to do with spray, you’ll get better results if you lovingly bathe your cans first and apply several light layers. In my case, I beefed this slightly and overdid it in one or two places, leading to a marginally glossy finish in some areas that is imperceptible to anyone who isn’t me.
Final Thoughts
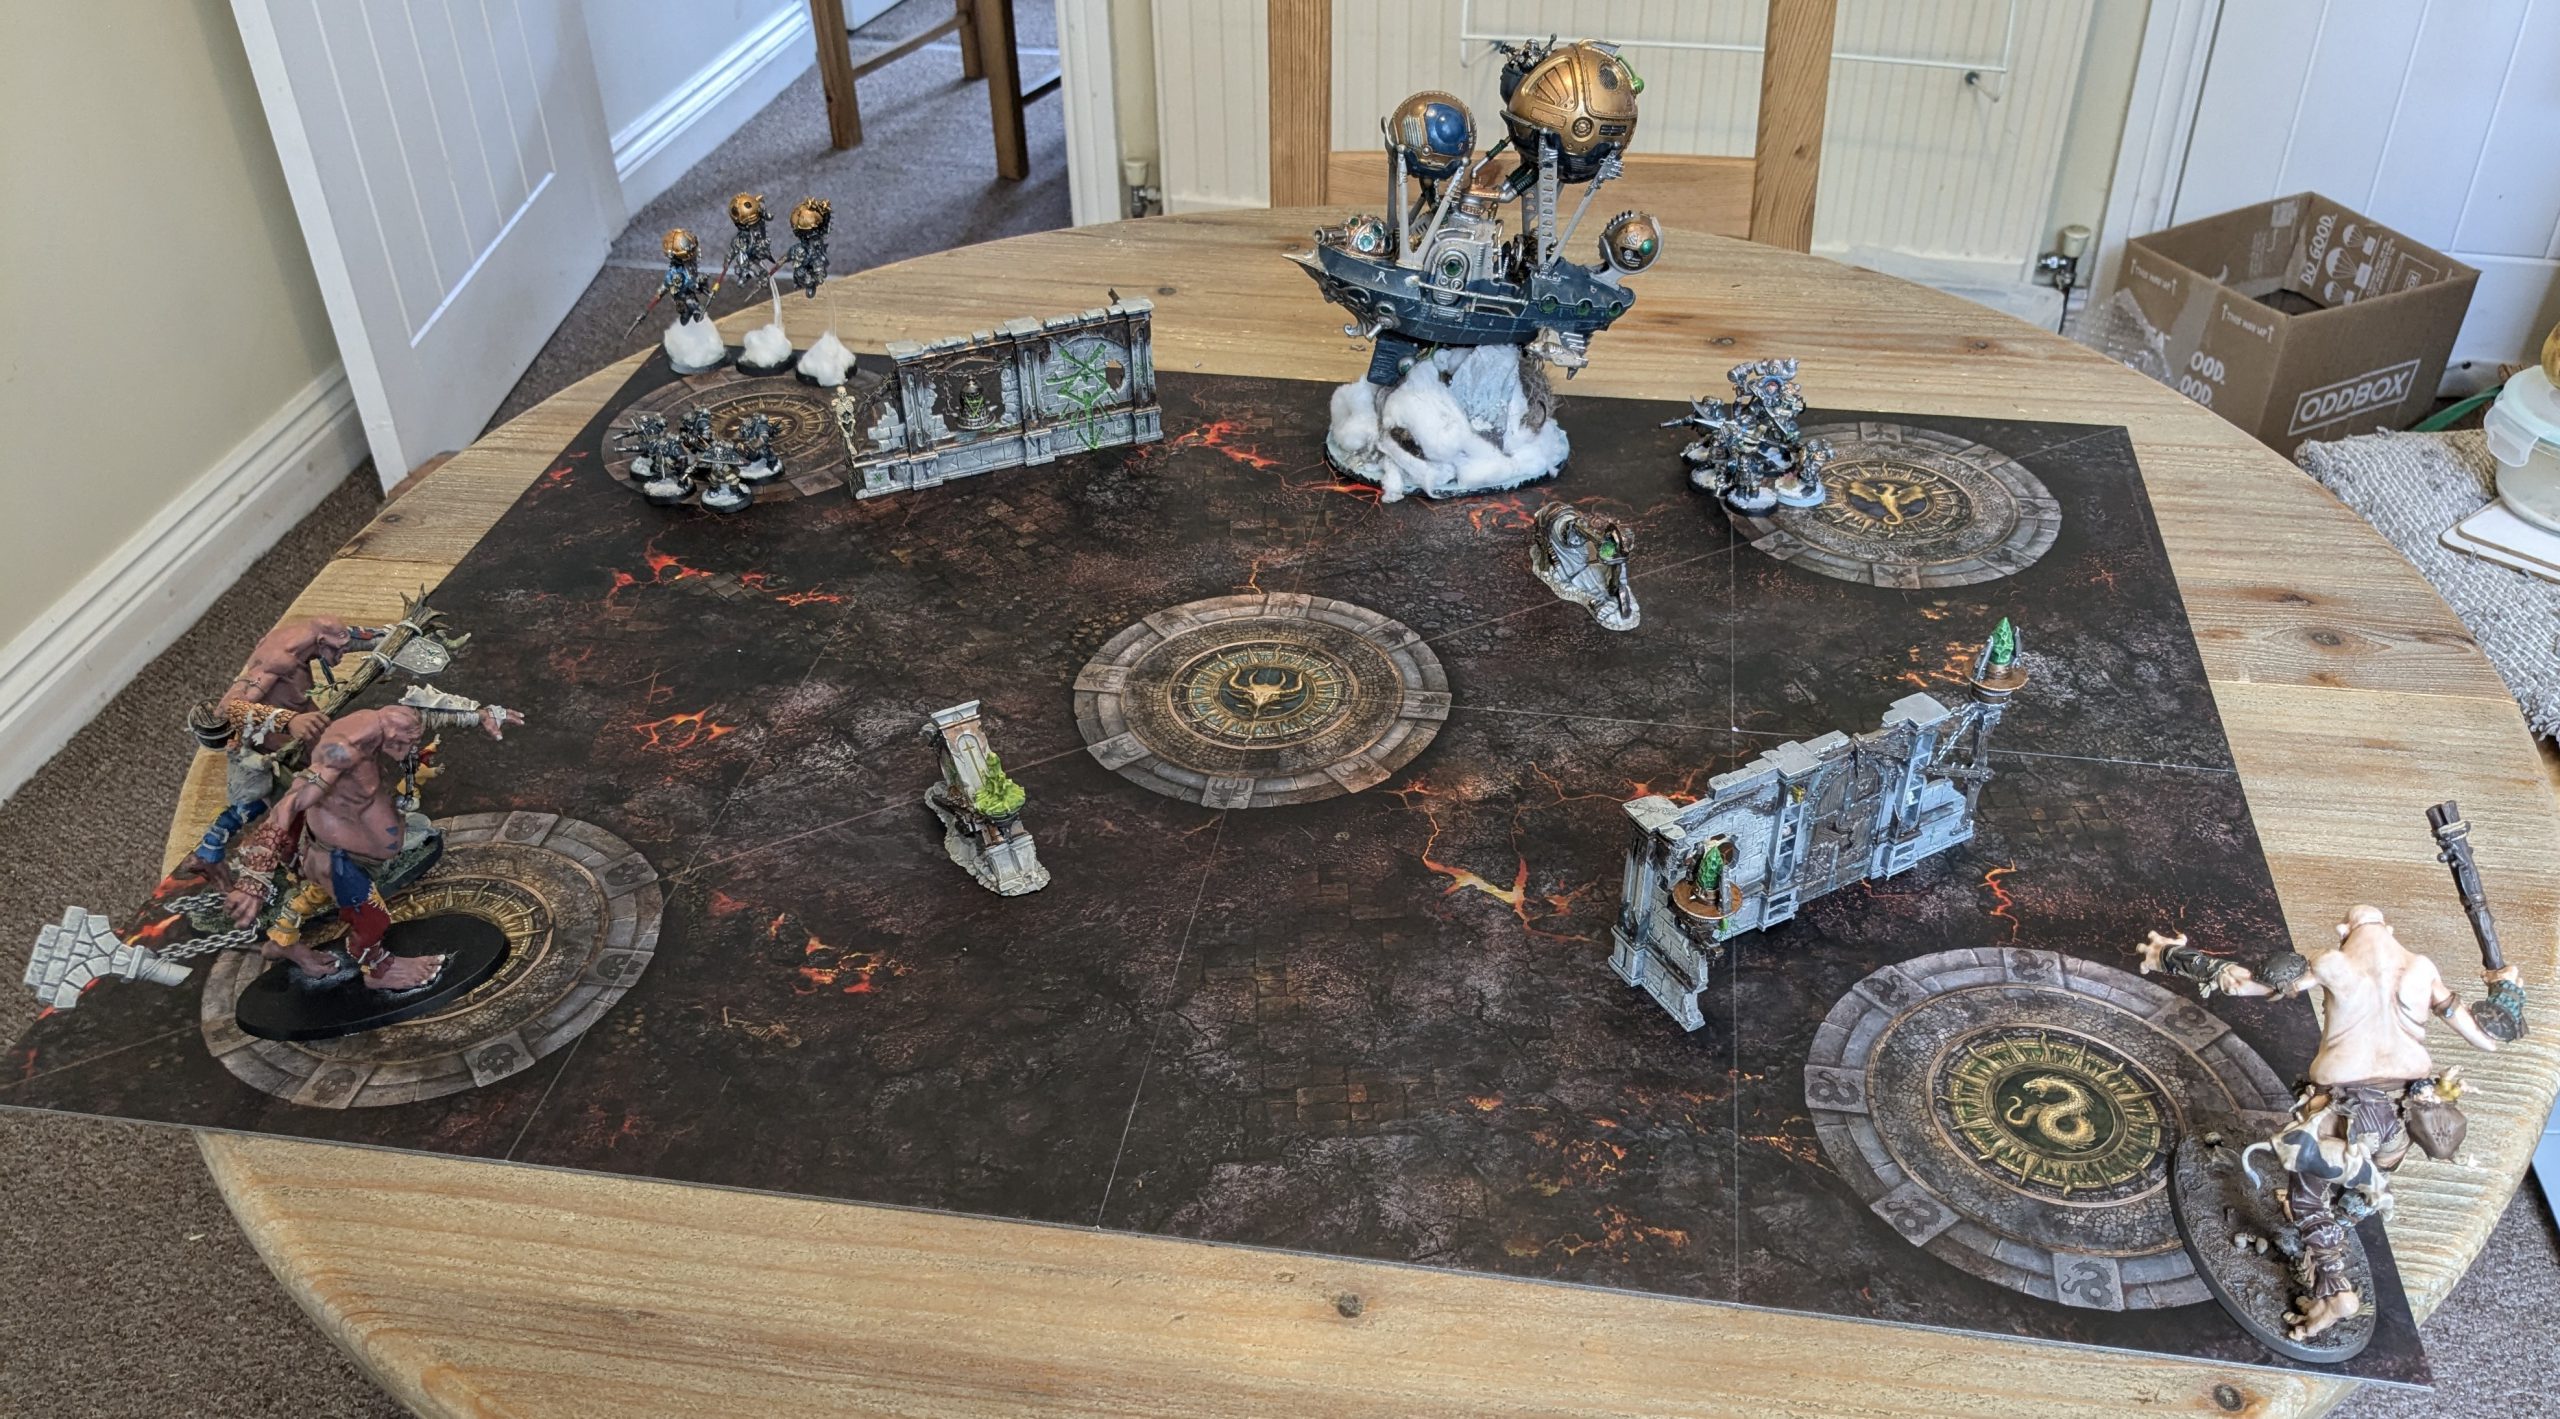
If there’s one point that I’ve tried to hammer home throughout this article, it’s that with terrain you don’t need to beat yourself up over minor details. This is an extremely detailed kit, which can seem really daunting if you’re just starting out, but a quick search for “spearhead terrain” will demonstrate a ton of low-effort methods that still achieve fabulous results. Hopefully the basic principles I’ve outlined here give you a good sense of where to start, while some of the more advanced techniques can give you something to aim for or an idea of how to push yourself in future. Above all, put some paint on a model, find what works for you, and enjoy yourself!

Resources
Used in this article:
Hobby 101: How to Assemble Miniatures
Hobby 101: How to Prime Models and the Basics of Priming
How to Paint Everything: Underpainting
Hobby 101: Painting Basics – Traditional Acrylic Paints
Hobby 101: One-Coat Painting – Speed Paints, Contrast, and More
Hobby 101 – How to Use Varnish with Miniatures
Not used, but worth a read:
How to Paint Everything: Drukhari (for glazing tips)
How to Paint Everything: Object Source Lighting (OSL)
Have any questions or feedback? Drop us a note in the comments below or email us at contact@goonhammer.com. Want articles like this linked in your inbox every Monday morning? Sign up for our newsletter. And don’t forget that you can support us on Patreon for backer rewards like early video content, Administratum access, an ad-free experience on our website and more.


