This article is part of a larger series on how to paint the Death Guard. To return to the parent article, click this link.
The Death Guard are a fun army to paint, offering not just large, detailed models but a ton of different textures and colors to play with. You can do a lot with them and even if you go with the basic green there’s a ton of ways to work in more colors via things like mushrooms, clouds of noxious gas, and pus-filled buboes.
My own Death Guard scheme hews relatively closely to the Games Workshop standard scheme, but with a few twists I’ve developed as part of a method to paint the models faster. This method is partly designed to help make batch painting easier, and partly designed to create solid results in a short time.
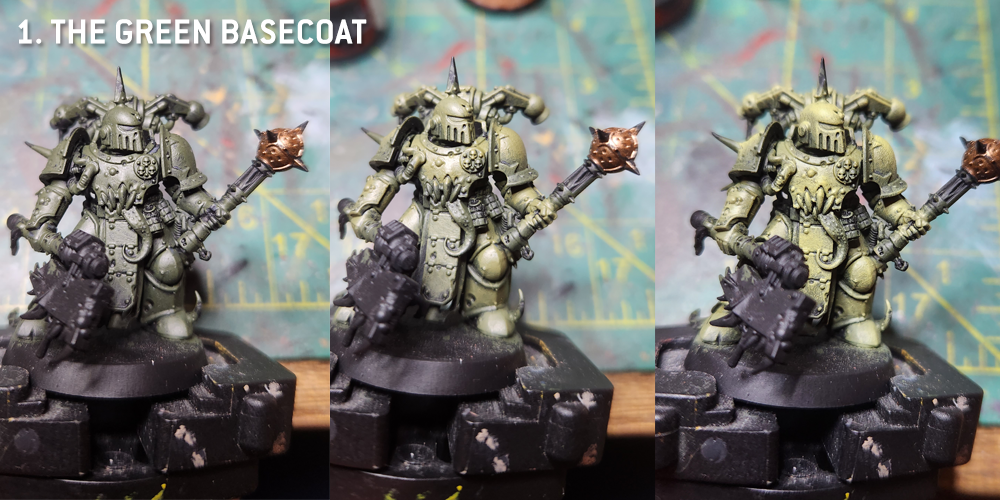
Step 1: The Green Basecoat
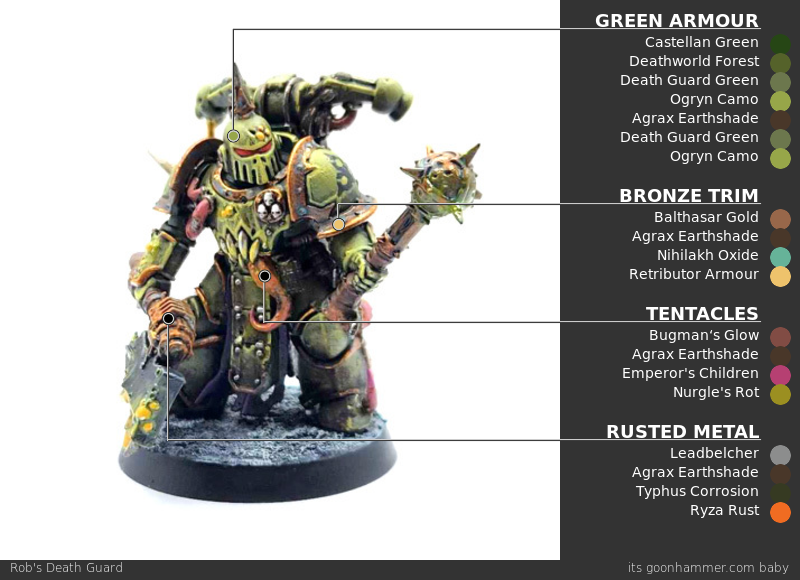
I prime my Death Guard black, then start by laying down the model’s green basecoat. This is a four-step process (so, sub-steps I guess). I start by painting the model with a coat of Castellan Green, after which I do a highlight layer of Death World Forest and another of Death Guard Green. In the final step, I drybrush the model with Ogryn Camo. This is all going to be hit with wash later, but it’s good to lay down the color depth now.
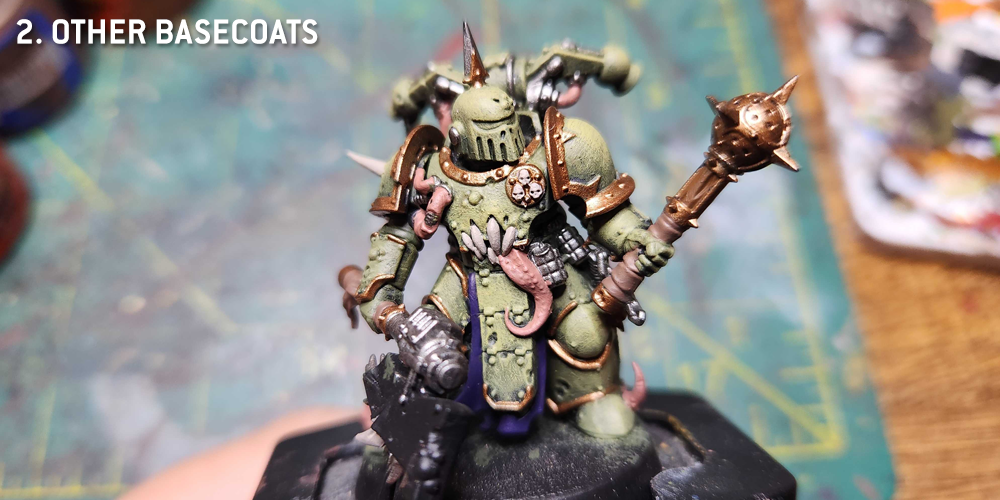
Step 2: The Other Basecoats
One fun thing about this process is that the model goes from 50% to 100% completion very quickly. At this next step I lay down all of the other basecoat colors. Nothing gets shaded at this point, it’s just the base color. Here’s the quick rundown of what’s what:
- Armor Trim: Balthasar Gold
- Tubes, Tentacles, and Tongues: Bugman’s Glow
- Metal Bits: Leadbelcher
- Wood Bits: Mournfang Brown
- Leather Bits: Gorthor Brown
- Tabard: Naggaroth Night
- Bone, horns, and skulls: Rakarth Flesh
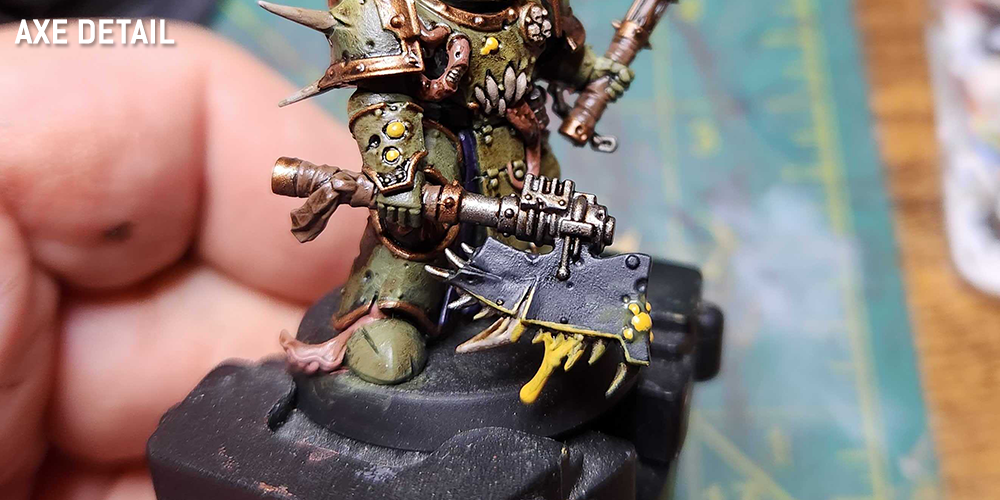
For the Axe head and other dark bits I paint them Abaddon Black, then highlight with Corvus Black. Finally there’s the buboes, which I paint with Averland Sunset and highlight a small amount with Flash Gitz Yellow. We’re going to hit that part of the model later as well.
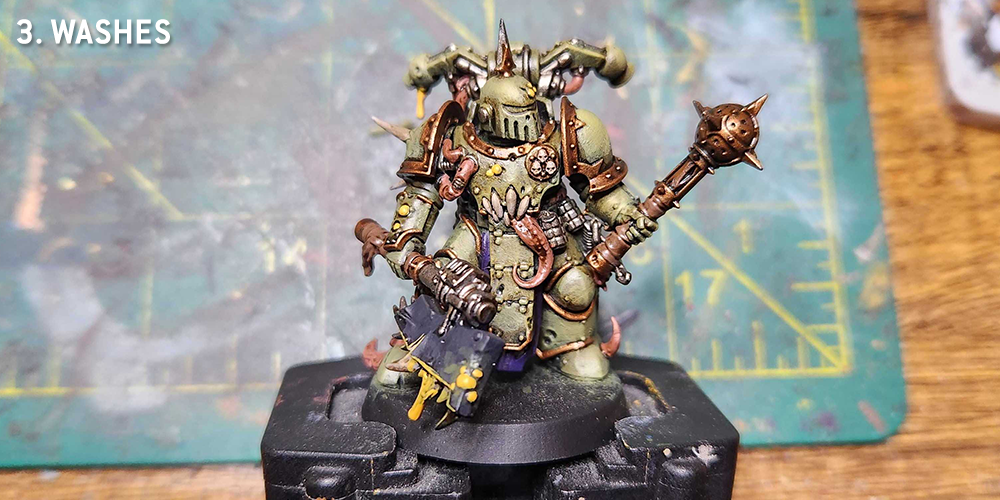
Step 3: Washes
Now it’s time for the only bath this guy is ever going to take. With all the basecoats down I wash the model pretty liberally in Agrax Earthshade. I especially want to get any cracks and crevices on the green armor plating, and I want to apply it liberally to the armor trim and horns.
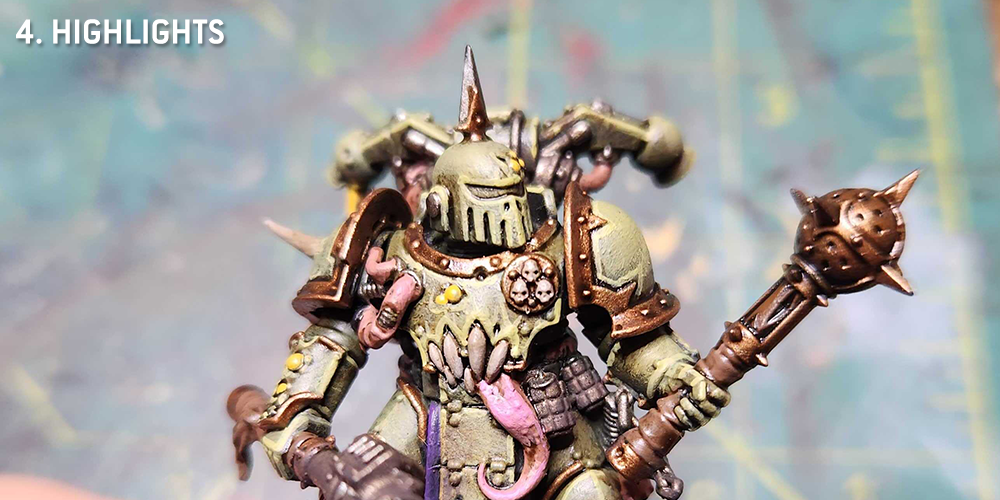
Step 4: Highlights
Once the washes are done I go back through with some Death Guard Green for raised areas that are a bit too stained with wash, and then using a smaller brush I edge highlight the mode with Ogryn Camo. This gives the model some really sharp highlights and will help it pop later. I also highlight the cables with Bugman’s Glow and the tongues/fleshy bits with a mix of Bugman’s Glow and Emperor’s Children to make them pop.
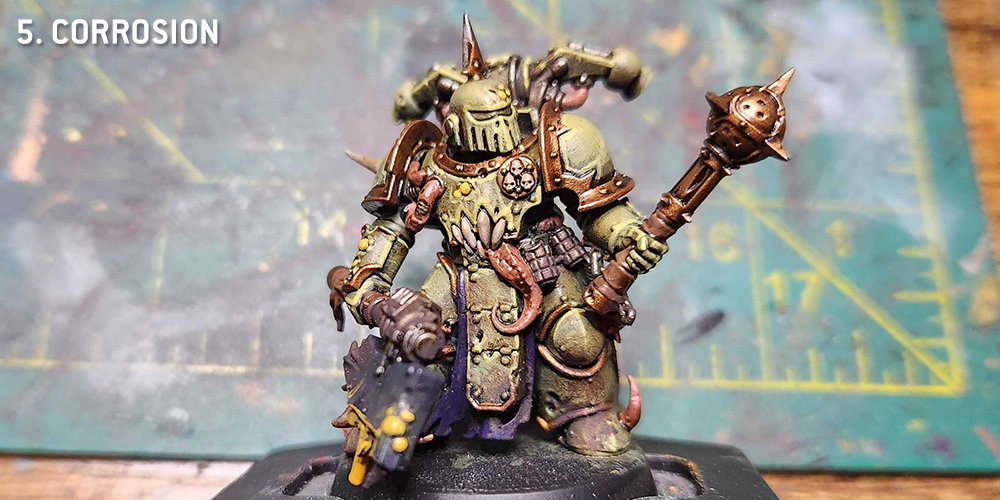
Step 5: Corrosion & Weathering
Now it’s time for the weathering. I more or less sponge Typhus Corrosion onto the model around the legs and on any exposed Leadbelcher parts. I want to generally keep more of the corrosion toward the bottom of the model. Either way it’ll look stained and crustier.
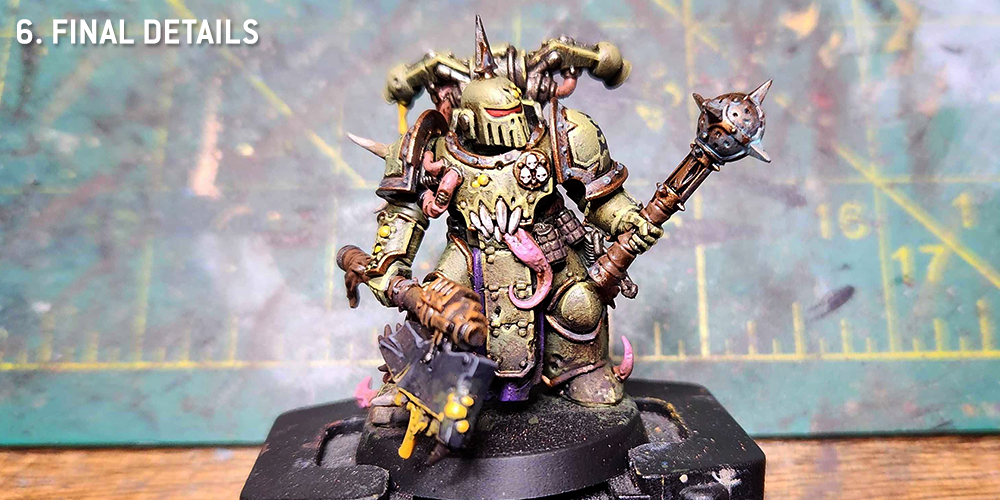
Step 6: Final Details
There’s a lot to pick out at this stage, but none of it’s too complicated. Let’s run through the elements and how they’re handled:
- Tentacles and Tongues: Highlight with Emperor’s Children, doing a blend with Bugman’s Glow. These will later get slathered in Nurgle’s Rot. The power cabling I will also hit with Bugman’s Glow again as a highlight. The pink in these spots really stands out and looks appropriately gross against the green, and it’ll take a sickly color if I hit it with Nurgle’s Rot later that can be effective, but will make the colors more muted.
- Rusted Metal: I’ll drybrush the Typhus Corrosion spots with Ryza Rust, then if it’s a plague weapon I’ll cover it in Nurgle’s Rot. later on.
- Teeth and Horns: I highlight these first with Rakarth Flesh, then later with Reaper Polished Bone.
- Gold/Bronze Trim and parts: This is a two-stage process. First is was parts of the metal – usually the areas around rivets or anywhere water might pool on the surface – with Nihilakh Oxide, going light on the paint here (less is more). Then I’ll come back and hit the raised edges of the trim with a small amount of Retributor Armour to have a few spots of classic gold poking through.
- Buboes: I put a dot of Flash Gitz Yellow on these, then cover them in Nurgle’s Rot so they take on a slimy, green look.
- Visor: Not all Death Guard models have this but when they do I paint the visor with Mephiston Red and then highlight that with Evil Sunz Scarlet.
At this point the model is basically done. Base the model to taste and then you’re all set. I added a bit of freehand to the open shoulder pad, but most of the Death Guard kits don’t give you this much open space – this is a guy I had left over from a Black Legion conversion project and so he has a Chosen shoulder pad. The end result is pretty striking and it’s easy to line up several of these guys at once – lay down all your greens, then all your metal, all your gold/trim, and all of your tentacles/buboes, then wash them all with Agrax and come back and pick out details and do weathering on models individually.
This article is part of a larger series on how to paint the Death Guard. To return to the parent article, click this link.

