In the Fabricator General, we talk about the finer points of construction, conversion, and hobby projects that require a bit more elbow grease and technical know-how. From adding shelves in your display case to building an army display board to making a wet palette, there’s on project too big or small for the Fabricator General. This week, we’re covering how to build a Forge World Warhammer 40,000 Reaver Titan.
Welcome back to our How to Build Everything series in which those of us who own big stupid models explain how we built them and any common pitfalls you might encounter while doing the same. Last episode saw Greg and Rob building Warhound titans, and here I’m looking at their bigger brother, the Reaver. Unlike a warhound, which you can proooobably fit on a shelf, the reaver is 16″ tall and has about a 12″x12″ footprint. Before even considering purchasing it, find somewhere to store it. But you’re not here for me to give you sensible ideas about whether you should buy gigantic blocks of resin, you’re here because you already made that poor great decision and are now staring at a pile of parts.
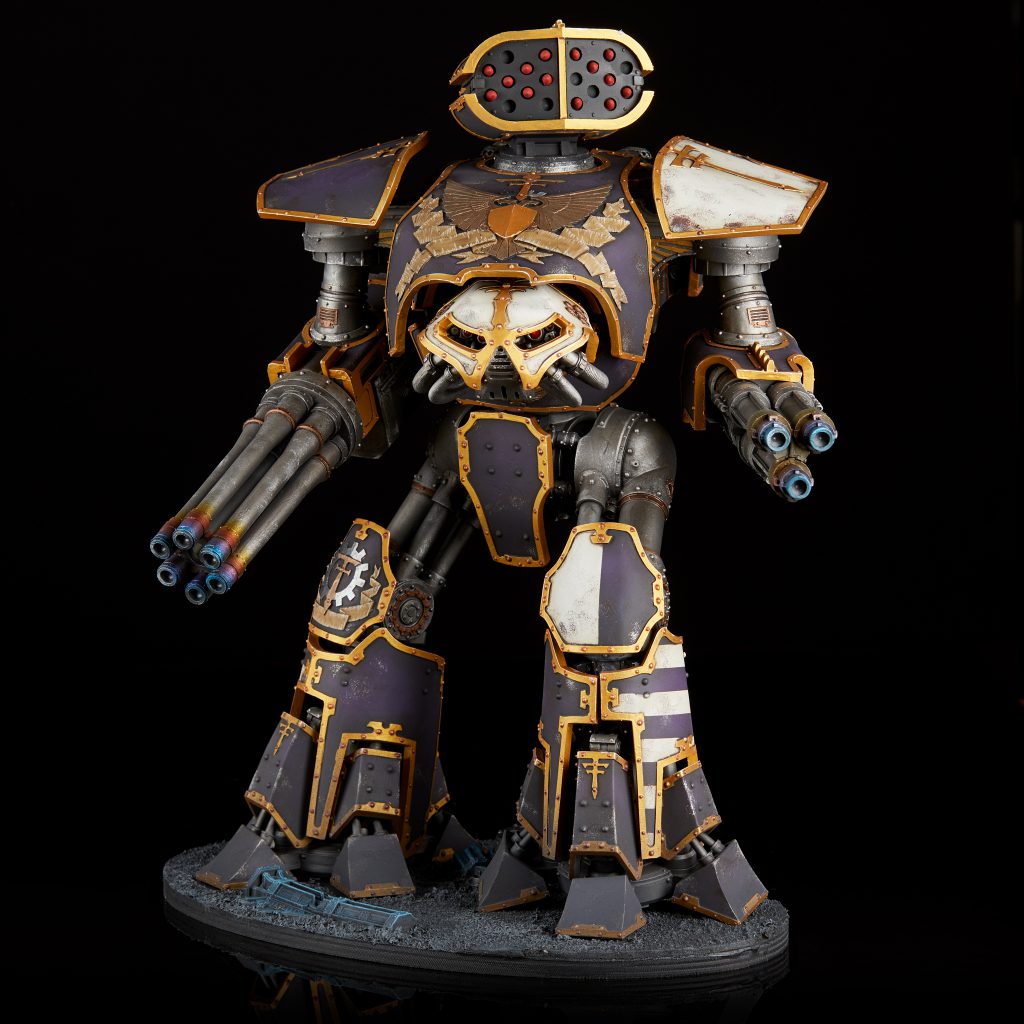
I built and painted my titan in just under two weeks. A little bit insane, but I had a deadline to hit. This isn’t going to be an exact story of my build, but how I’d do it again if I was building a second. Hopefully you can learn from my mistakes. Greg and Rob go into some detail on working with resin in their post about the warhound, and the same holds true for the Reaver. It’s not fundamentally different, just bigger. In addition to their list of materials, I found the following helpful:
- A set of chisels. Big ones from 1/4″ up to 1″. A lot of the gates on titan parts are large, on a flat surface, and have a clear separation point. A quick hit with a chisel gives a clean and flat cut without all the dust of cutting with a saw. They’re also great for cutting pistons to length and flattening out and weird edges from things you do need to saw.
- Big magnets. Gun arms on the reaver are incredibly easy to magnetize (melee arms somewhat less so), so even if you haven’t already purchased additional arms magnetizing pays off. It’s also easier to paint and transport with removable arms. I use 1/2″x3/16″ n52 magnets for the arms and waist. These are heavy parts – go for overkill.
- Forstner drill bits. Not generally available under 1/4″, these are the best kind of bits for magnets as they create a flat bottom hole (except for a small pilot in the center). This both gives better adhesion for the magnets and lets you maximize depth if you’re drilling into a thinner area. Not vital, particularly on chunky models like a titan, but nice to have.
- Threaded inserts. I used one of these and a spare bolt I had floating around to attach my reaver to the base rather than gluing it, leaving me options to swap it between a large display base and smaller gaming base.
Building 7 pounds of resin
The first thing you’re going to want to do is to go buy a Titanicus-scale Reaver. It builds in pretty much the same way as the full size titan, and will give you a chance to test out poses and color schemes before you start gluing and pinning together a huge titan. The only major difference is that all the toes on the Titanicus model are flat, while they’re posable on the full size model. Once you’ve pinned some things together (particularly the knee joints), they’re not coming apart. I didn’t do this and I regret it; my pose is a little unbalanced. Once you’ve figured out a pose, get your base set up. I started by purchasing an oval plaque, but you could also cut your own if you’re handy with woodworking tools or find a local trophy shop and ask them for help. From there I figured out foot placement and anything that the feet would be stepping on, and got everything assembled. With any model with posable legs I like to work from the feet up, making sure everything stays well anchored.
The Feet
Having built the base, we can start on Greg’s favorite part, the feet. On the base, I marked out the foot position for the foot that would be completely flat, clamped the foot onto it, and drilled out a marker for the bolt.
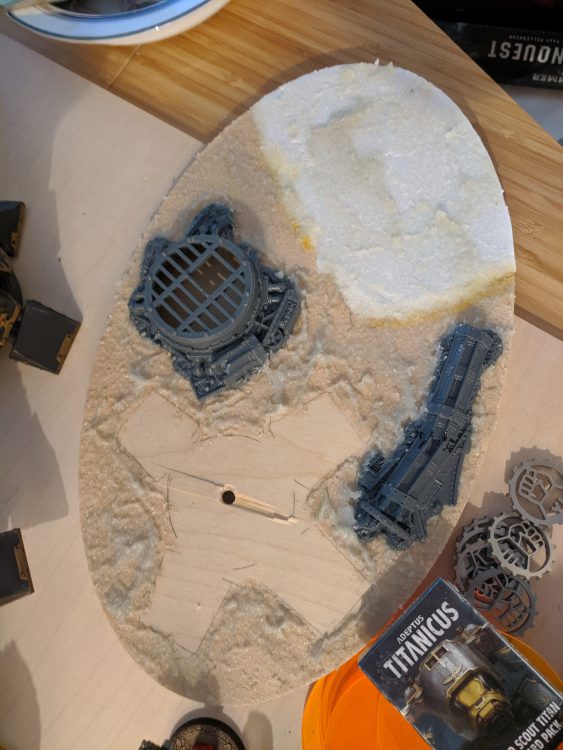 From the pilot hole left in the resin from that I was able to drill a larger hole for the threaded insert and screw it in. Nice thing about resin is that it behaves pretty similarly to wood, and the insert went in no problem. Assembling the toes was straightforward, their pistons go up into the ankle pistons rather than into the rest of the foot, so you can hold off on them for now. Once you’ve got both feet built (taking a look at your small reaver for reference). take a break from building structure to put together the leg armor. We’re not going to glue them on until after we’ve started painting, but we want them ready to go to test the positioning of the leg as we build it. It’s far too easy to pose overly aggressively and not have the armor be able to attach. Keep track of which piece is which – while they look nearly identical the inside piece of the left leg is not a match to the outside of the right leg. If you don’t track this and try to paint a pattern (like my chevrons), you’ll end up with it mismatched across both legs.
Thicc Thighs
Assembling the legs is the most painful part of the Reaver by a huge margin. Use 5-minute epoxy for all the gluing here, you need the extra work time before it dries. After assembling the three pieces of each ankle piston (the piston guard, the cylinder, and the piston itself), remembering not to glue the piston in, dry fit it and measure the toe pistons. It’s better to go too short than too long here. Glue them into the toe, and while that glue is still setting glue the top and bottom of the ankle piston assembly to their respective mount points. I found doing this much easier than following the instructions and gluing the pistons up before assembling the toes.Once all 48 parts across both ankles are assembled have another well deserved beer.
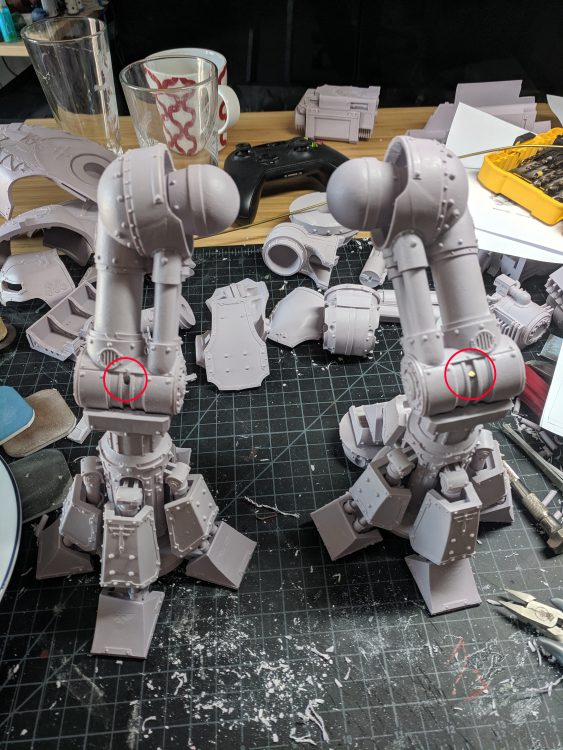
Tackling the knee joints is your next step moving up the titan, and to do this you’re going to want to assemble both the knees and the pelvis at the same time. Otherwise you’re liable to end up with an awkwardly twisted and unbalanced torso, as the waist joint only has a couple of degrees of mobility. If you’ve got a friend, this is a good time to ask for help. If not, make sure you’re using the 5 minute epoxy so you can tweak the position, and have something good playing on TV that you can watch while holding everything in place. Keep in mind while posing it that titans are heavy, and if you draw a line between the feet the pelvis should be pretty close to right above that. If it’s much in front of or behind that line it’ll look like its falling over. This is where I put the only two pins that I used into the model, sinking them straight down through the knee joint. I didn’t have to be super clean about it, as they got hidden by the knee armor anyways. I picked this spot for pins because it’s a flat surface with a lot of sheer forces acting on it – all the other joints have a lot more tension or compression, both of which the glue handles better.
The Upper Body
Assembling the torso is straightforward. Leave off as many panels as you can so you can paint them separately from the structure (particularly any that’ll be a significantly different color like the parts I painted white), but there really aren’t any decisions to be made or gotchas to deal with here. If you want to be able to break the titan down for transport, a magnet between the pelvis and waist is easy to drop in and more than sufficient. It holds well even without a magnet, but I like having one there for peace of mind.
Sun’s out, guns out
The arms bring you to the last thing to really think about in assembly. All of the guns attach to the upper arm at roughly the elbow, so you can shave off the alignment pin on the weapon portion and drop a big magnet in there and in the arm.
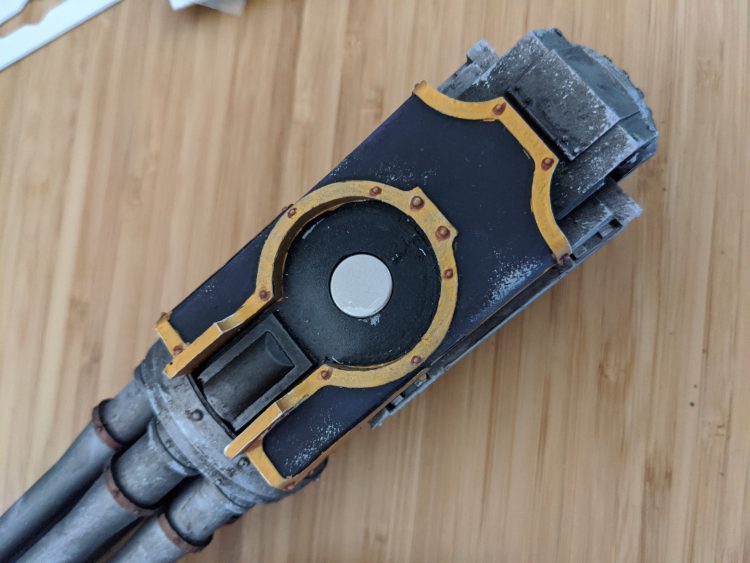 As long as you don’t mind not having the cabling, you’re good to go. Awkwardly, the power fist arm mounts completely differently, connecting flat to the bottom of the shoulder rather than with a ball and socket joint. While I haven’t built one myself, I think the best solution probably involves more magnets. Position the arm where you’re going to want it for when it’s a gun, then mark the edge of the shoulder.
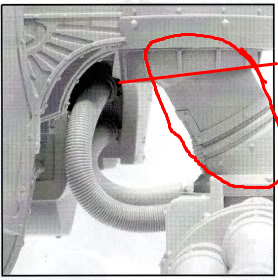 Cut through the whole joint just above that line, glue the ball half into the shoulder, then magnetize both parts and the upper arm on the power fist. In theory, this should let you swap between shooting things and punching them. If you give it a shot, let us know how it works.
Painting
Painting the titan with my scheme isn’t really in the scope for this article – keep an eye out for an eventual HTPE Legio Xestobiax or Adeptus Titanicus Legion Focus article for more details, but there are a few general titan painting tips to keep in mind.
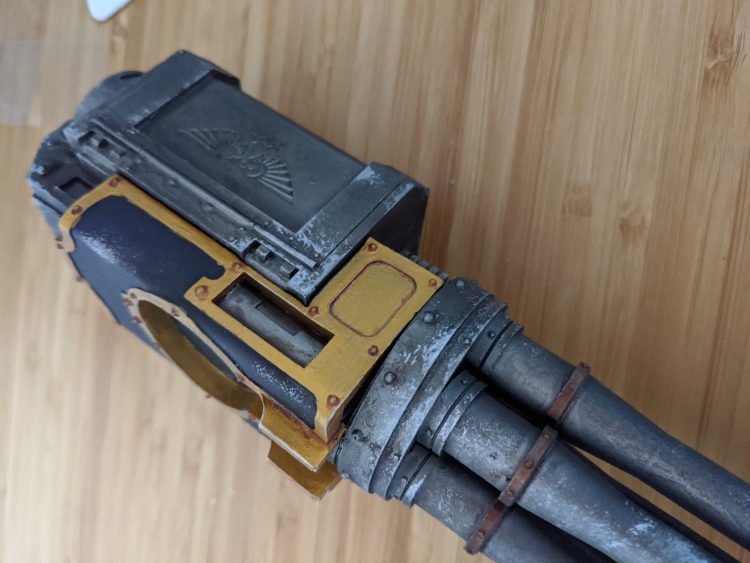
- Focus on texture. Titans don’t have a ton of fine details beyond rivets, so you end up with a lot of big areas of color. On the armor panels, I’ve broken this up with some simple weathering – just sponging on rhinox hide and leadbelcher. To take this a step further you can highlight the bottom of any larger chips with whatever you’d be using to highlight the armor. On the metal areas, I tried to find bands that I could swap from silver metals to a brass, and I brought a sponge into my highlighting arsenal. Rather than painting highlights on entirely with an airbrush, brushed edge highlighting, or a drybrush, I stippled them on with a sponge. The super inconsistent and splotchy results from this look great, as though the metal keeps getting beat up and chipped.

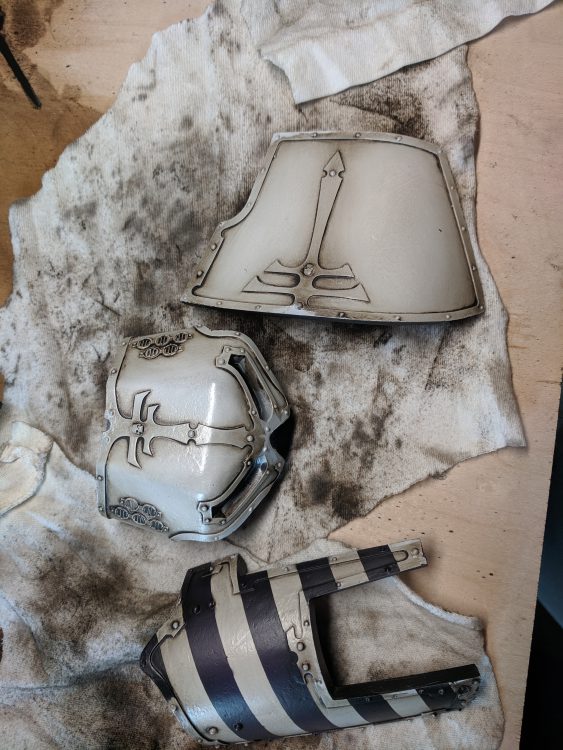
Chipped Metal Highlighting - Use minimal washes. This stems from the same issue as above, where all the surfaces on a titan are huge. With an acrylic wash it’s almost impossible to avoid having unsightly tide marks all over the plates. You can still use washes, just carefully paint them just into the recesses you want to shade. If you’d normally be using a wash to add some overall shading, consider swapping it out for an oil wash. I coated the entire titan in a fairly thick coat of mixed lamp black and burnt umber oils, then buffed it back off. This process darkened the recesses and gave me natural blends to the raised areas without any of the tide marks from an acrylic wash.

Oil Washed Whites
Stomp Stomp
Now that you’ve completed the third largest war machine in the Imperium, go crush your enemies underfoot. In 30k. Or in 28mm titanicus. Or in Apocalypse. Don’t try to play it in 40k, it’ll just leave you disappointed. Fortunately, despite being ineffectual in combat, the Reaver is extremely effective at looking rad as hell, and deserves a place of pride in your display case.
And as always, if you have any questions or feedback, or want to show off photos of your own titan, drop us a note in the comments below or email us at contact@goonhammer.com.

