In our Fabricator General series, we talk about hobbying techniques and tricks, and ways to build, model, shape, and fix everything, with an eye toward information for both beginners and veterans. This week, Chris “head58” Tatro and Michael “Pvt_Snafu” Bettle-Shaffer discuss how to magnetize models, while attempting to keep their Insane Clown Posse references to a minimum.
An Introduction to Magnets
One day, not long after I got drawn into this black hole of time and money called miniature gaming, I came across a model where I couldn’t decide which of two weapon options I wanted to include. I knew whichever choice I made I would forever lie awake at night regretting not taking the other option, certain that WYSIWIG bullies would circle around me, laughing and pointing. I started to look at internet guides on how to magnetize limbs and was more than a little intimidated. I was certain I would turn a perfectly good model into an unrecognizable mess of drill holes, random magnets and glue
Now, years later, I magnetize with reckless abandon. With the right tools it’s one of the easiest customizations you can make, and my sleep is only haunted by thoughtless things I said 40 years ago rather than fears of inflexible gaming nerds.
But What Can I Do With Magnets?
As mentioned above, arm or weapon swaps are probably the most common reason for magnetizing. Can’t decide whether to attach a Power Fist or a Chainsword for Space Marine? Throw a magnet in the shoulder and flexibility is yours! Apocalypse Missile Launcher or a Vulcan Mega Bolter on your Reaver? Magnets! Some T’au weapon or a different T’au weapon that nobody else can tell apart anyway? You guessed it, magnets are the answer again.
But the glory of magnets isn’t limited to changing out arms or weapons. Particularly tall models can be magnetized at the “waist” or other midpoint for easier storage and transportation. You can change out heads for cosmetic effects. You can secure large models to bases, so you can remove the model to check arc lines on the base that might be hidden by the model itself. Really, if you ever looked at a piece and said “I’d like that on sometimes but I don’t want to permanently commit to it” magnets have your back.
You can also use magnets to hold your minis down. Put one or two in the base and get a cookie sheet or cake pan and you have a super easy carry tray. Or if you’re designing a board with some scatter terrain that you don’t want to get bumped out of place, put a magnet on the bottom of the terrain piece and put another into the board itself (covered with some flocking maybe).
Alfredo’s Note: Sometimes I magnetize minis just because I want to paint them in subassemblies but don’t want to have to deal with glue after I’m done. Primaris Intercessors are a good example where I do this. I want the bolter-holding arms off for painting so I can paint the chest emblems easily. But rather than deal with the pain of keeping the joins clear and then risk ruining my mini with a glue mishap at the end as I try to put the arms on, I just magnetize from the get go and snap the arms back on when everything is finished.
Tools of the Trade
You’ll need a few things to get going with magnetizing, the most essential of which are magnets themselves. For any kind of hobbying you’re going to want neodymium or rare earth magnets. Many gaming or hobby stores carry these, but often you can find them for a better price at a hardware store or online. Many online shops sell rare earth magnets in bulk and you can get a couple hundred for a very reasonable price. You may not think you’ll need that many but trust me, you will.
So you’ve found a source for magnets, the next consideration is the size and shape. Most of the time discs are what you want, but balls or rings (often with a countersunk center hold for nestling a ball bearing into) can also be useful. For size you want the smallest you can get away with, as these will be tucked into shoulder sockets or weapon hardpoints and you don’t really want them visible. For arm or head swaps I usually use 2mm diameter by 1mm thick (or 1/16” x 1/32” for those of you using Freedom Units). For larger models use larger magnets obviously, so they can bear the weight of the larger parts. Many of the Adeptus Titanicus models were made with divots for 5mm x 1mm magnets on the arms and carapace weapon points so you don’t even have to drill, all glory to the Omnissiah!
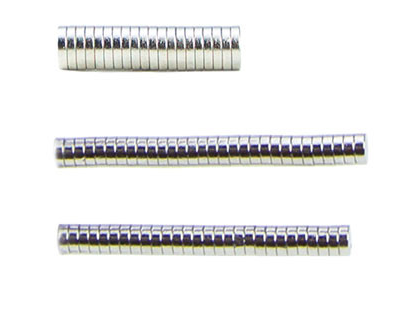
The last consideration is the magnet’s strength. Rare earth magnets are rated N35 to N52. What that means exactly doesn’t much matter, but the higher the number the stronger the magnet. I tend to buy N52 so they will be strong enough for whatever I need them for, but N42 aren’t terrible. I wouldn’t go for anything lower than that.
The next tool you’ll need is something to make the little holes to put your magnets into. Dremels or power drills will be too fast and will wreck a model, so what you want here is called a pin vise. That’s a very small hand drill, almost like a small cylinder. You can find all different models and styles but I very strongly recommend getting one with a ball or some kind of shaped knob on one end, so that it can rest against your palm comfortably. I did not get one with this option, and after drilling magnet holes in a dozen pewter models my palm was very very sore. Learn from my mistakes, young one.
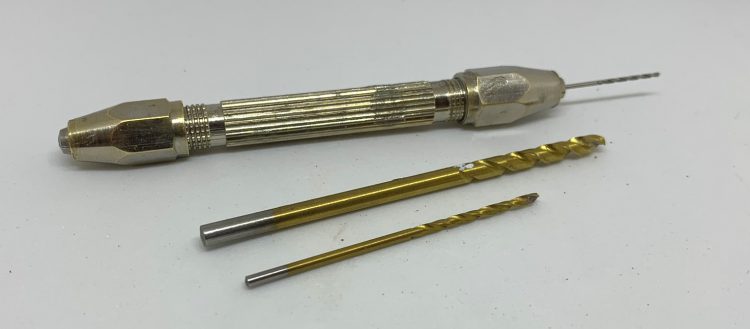
You’ll need some very small bits for your pin vise drill as well. Hobby stores or online are your best places for these – your local hardware store won’t have anything near small enough. Drill bit sizes are referred to as gauges just to be more confusing, and of course the gauges don’t match up with the sizes of the magnets you just bought but everything is going to be okay! You can google up gauge charge to check how many millimeters a #45 bit is. Or you can just buy a set of a bunch of bits – as long as your hole is a little bigger than the magnet you want to put into it you’re all good.
Next you need something to hold the magnets in place. You probably have superglue or some such around from assembling your models, so you’re all set there. A little Green Stuff can also be handy – there may be times when you make a hole too big or for whatever reason your need to anchor a magnet in a space, and those times Green Stuff or your favorite nondenominational Green Stuff equivalent is your best friend.
How to Do the Thing
You’re all set – you have your magnet and you have your hole and a little dab of glue. How do you put the magnet into the hole? With something ferrous of course! I have an old hobby knife that couldn’t cut Jell-O on it’s best day, and I use that to position my magnet and push it into the hole. But what you should make sure you also have handy is something NOT ferrous, like a plastic rod or a coffee stirrer or something, to hold the magnet in place in the hole while you pull your hobby knife away. I mean, you could wait until the glue dries enough that its bond is stronger than the attraction of the magnet to your knife but that might be a while. And don’t use your finger to hold it in place unless you want the magnet glued to your finger and then you have another whole set of problems. If you want to get really fancy, you can pick yourself up a set of ceramic tweezers.These have been popularised somewhat by people in the vaping hobby and they allow you manipulate the magnet without it being attracted to the tool. I also learned super glue scrapes right off them, so they have that going for them too.
Once you have put the magnet resist the urge to futz with it. Don’t hold something ferrous or another magnet up against it until the gue has completely set. These are very strong magnets and they could well pop right out and then you have to start all over again. I’ve found it helps to protect the surface of the magnet, a little dab of runny super glue will help make sure it isn’t going anyway and stop the surface from becoming degraded over time.
Alfredo’s Note: I like to use greenstuff to reinforce the magnet bond so usually for me it goes, super glue > green stuff > super glue > magnet > (optional green stuff cover). This will help prevent your magnets from pulling out of the socket and also gives you a bit more working time for when you screw up (see below).
How to Not Mess Up
The biggest mistake with magnetizing is getting the polarization wrong. You remember from your middle school science class that the positive and negative sides of a magnet will attract, but if they’re the same they repel. And the magnets are just these shiny silver discs without any indication of which side is which.
One neat trick you can do is mark one side of the magnets with a permanent marker. Keep them all stacked up in a tower like a magnet centipede, color one side, put that magnet aside, mark the next, continue. Eventually you will have a bunch of magnets all with the same end marked, so you know when putting them into bits that you want to match marked to non-marked.
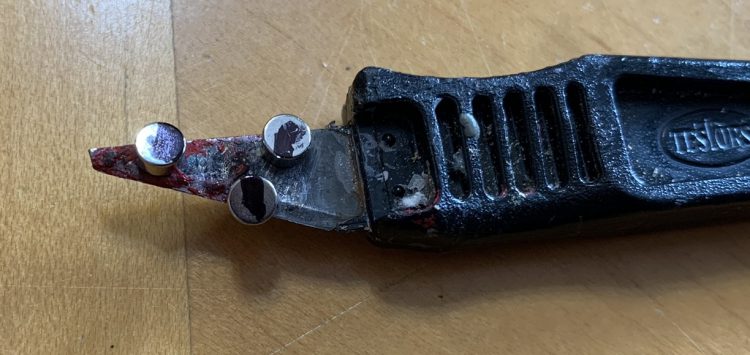
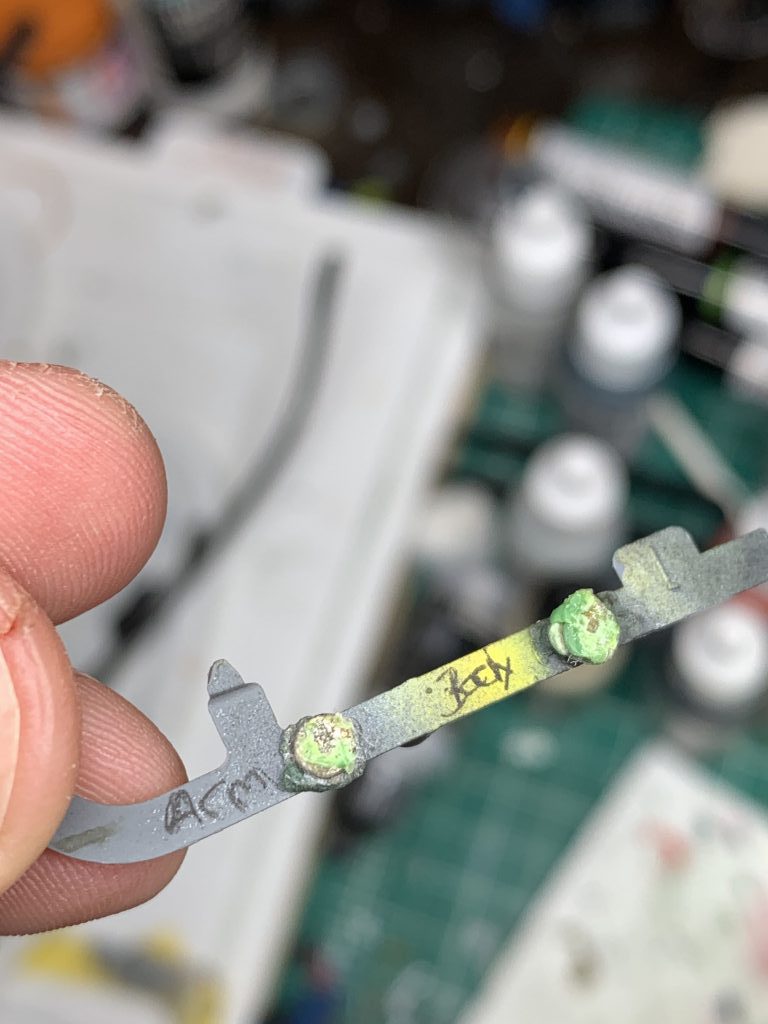
Sometimes though even a permanent marker rubs off. I don’t know why, maybe the metal is too slick or maybe magnetic ions repel Sharpie particles, get off my back Mom, I just know sometimes it happens. But even in this case, all hope is not yet lost. Take one of your magnets, preferably a larger one, and glue it to the top of your hobby toolkit or something. It doesn’t matter which side up you place it, what matters is now it is fixed with one polarity up. Any time you need to put magnets into something, attach both of them them to your fixed magnet. Put one on those magnets into one part right side up and the other into the matching part upside down. I’m embarrassed to say how many years I had been building models before I learned about this. You can go one step further than this, and make a magnet stick. Get an old piece of sprue or something similar and glue two magnets to it, with different polarities facing out. Now pick which polarity will be “the body” and which will be “the arm” and mark this on the sprue. This way every magnet you install from now on will be interchangeable.
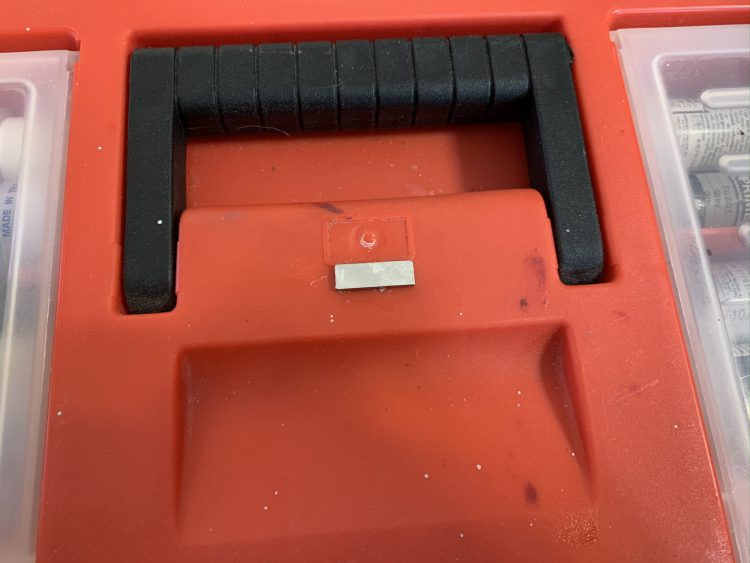
Alfredo’s Note: It only took me a couple of frustrating evenings digging out magnets I’d glued in improperly to look for a better way to match polarity and I did exactly what Chris suggests in creating a ‘magnet stick’ that has reference magnets marked as “body” and “arm”. I’d like to say that since I did this I’ve never screwed up a magnet’s polarity again, but that would be a lie.Still, it helps immensely.
So You’ve Messed Up
Inevitably, due to distraction or alcohol or household gnomes, you will fuck up and put magnets in the wrong way. The bad news is that once the glue has set there is no easy fix for this. Most of the time you will need to work an xacto blade in around one of the magnets and just gouge away at that beautiful plastic/resin/pewter until you can dig it out. Then turn it over, maybe fill the hole with a touch of Green Stuff, and glue it back in, hoping you haven’t been an idiot twice in a row. If both pieces are really small and you’re not going to be able to dig one out without ruining the piece, consider if you can live with those pieces glued together, and if not go hunting for replacement bits on the internet I guess.
Droopy Bit Syndrome
Sometimes if you have a piece that is weighted off-center and after magnetizing it spins or falls in an awkward manner. Magnets are great for holding things together, but round magnets aren’t great for holding them in one position. For this I use both a magnet and a pin – the magnet holds the pieces together and the pin holds them in place. Look for more on pinning in a future Narrative Forge article, but the basics are essentially the same as putting in a magnet. Find a paper clip or some other piece of rigid metal or plastic, drill a hole about the size of the clip in both pieces (usually just above or below your magnet) so the two holes line up, then glue the clip into one side and snip it off so just a little bit sticks out. The pin will stick into the hole on the other piece and keep it from rotating or flopping.
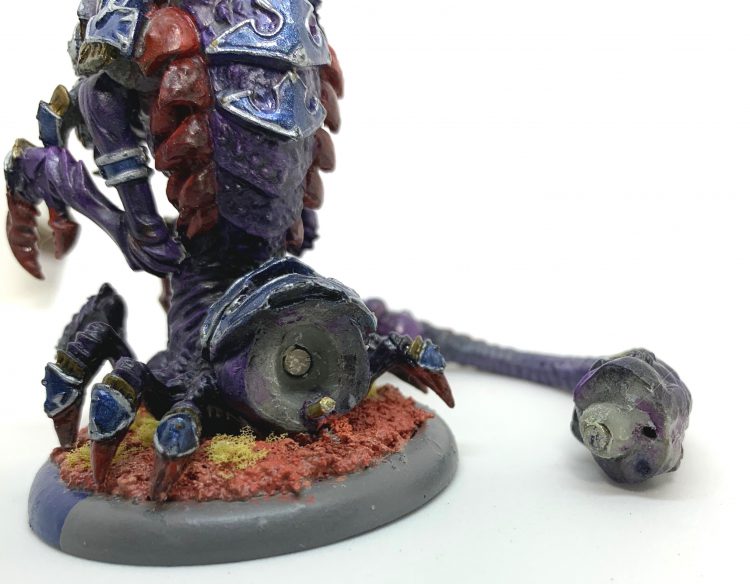
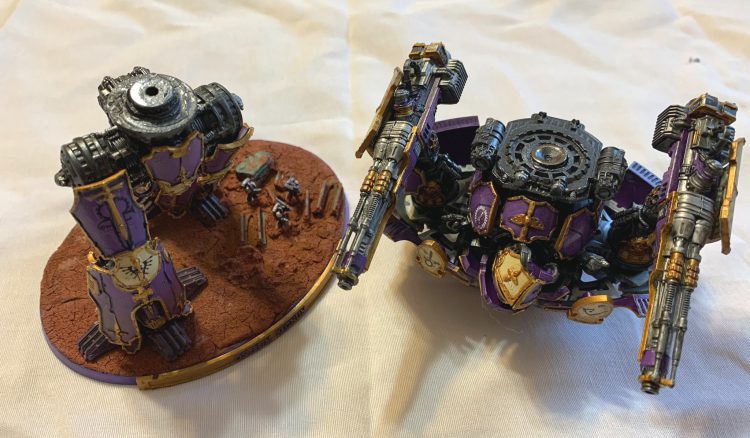
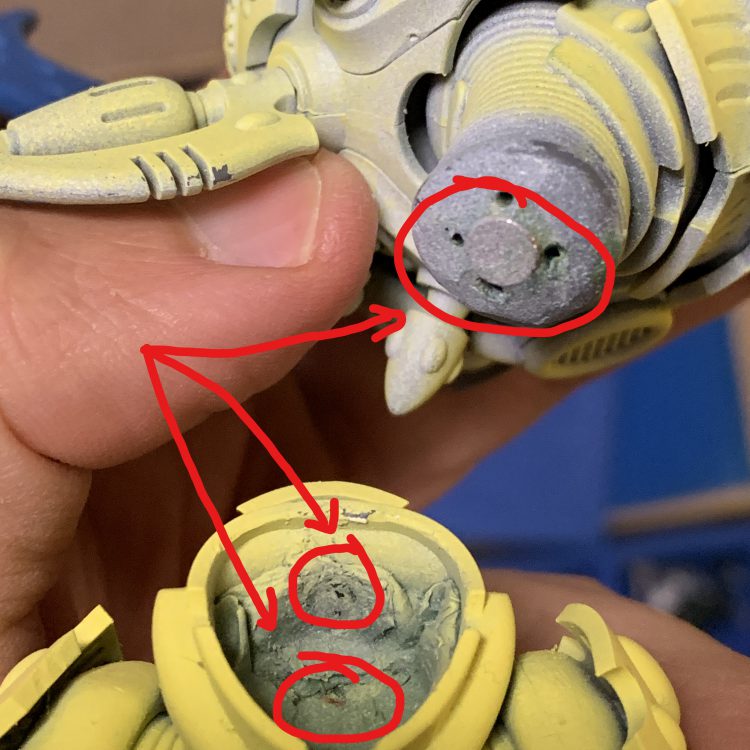
Alfredo’s Note: Another option when you have the right kind of join, is to use two magnets on different planes, which will hold your piece in a fixed position (no more rotation allowed). This isn’t really an option for typical arm and body magnets but it can be a great approach for when you magnetize large models at the waist for example. In the picture below, you can see how magnets were added on perpendicular planes of the Wraithknight’s waist join, which reinforces the connection and prevents rotation.
Hopefully that’s given you the knowledge and the courage to start magnetizing your models. It’s really not very difficult at all and it greatly increases your cosmetic and functional options for your models. Give it a try and banish decision paralysis once and for all! In future weeks we may look at particularly difficult to magnetize units or options, but for now you should have everything you need to get started.
As always, if you have any questions, comments, or tips of your own, feel free to share them in the comments below. Or email us at contact@goonhammer.com. Happy hobbying!
