
This week we’re reviewing the second wave of plastic Mechanicum releases for Horus Heresy, going up for pre-order today in the Mechanicum Heavy Support Force box. Our thanks to Games Workshop for sending us a preview review copy.
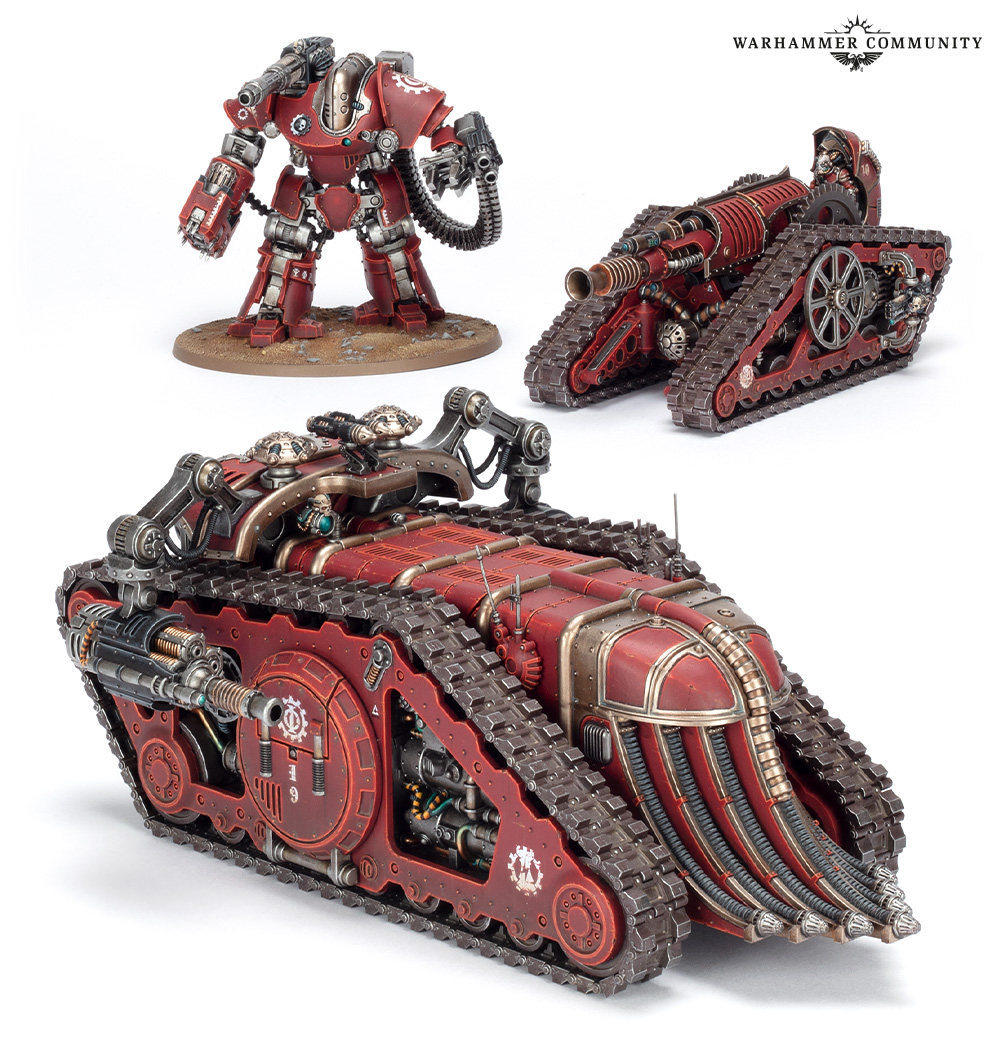
Unlike the Mechanicum Battle Group box, which was made up of the core Troops choices which make up a Mechanicum army, this box is a trio of Mechanicum greatest hits:
- Krios Battle Tank/Krios Venator Tank Destroyer
- Karacnos Assault Tank
- Thanatar-Calix
If you’re a new disciple of the Machine-God or unsure where these units might fit into your Mechanicum army, check out our extensive faction focus.
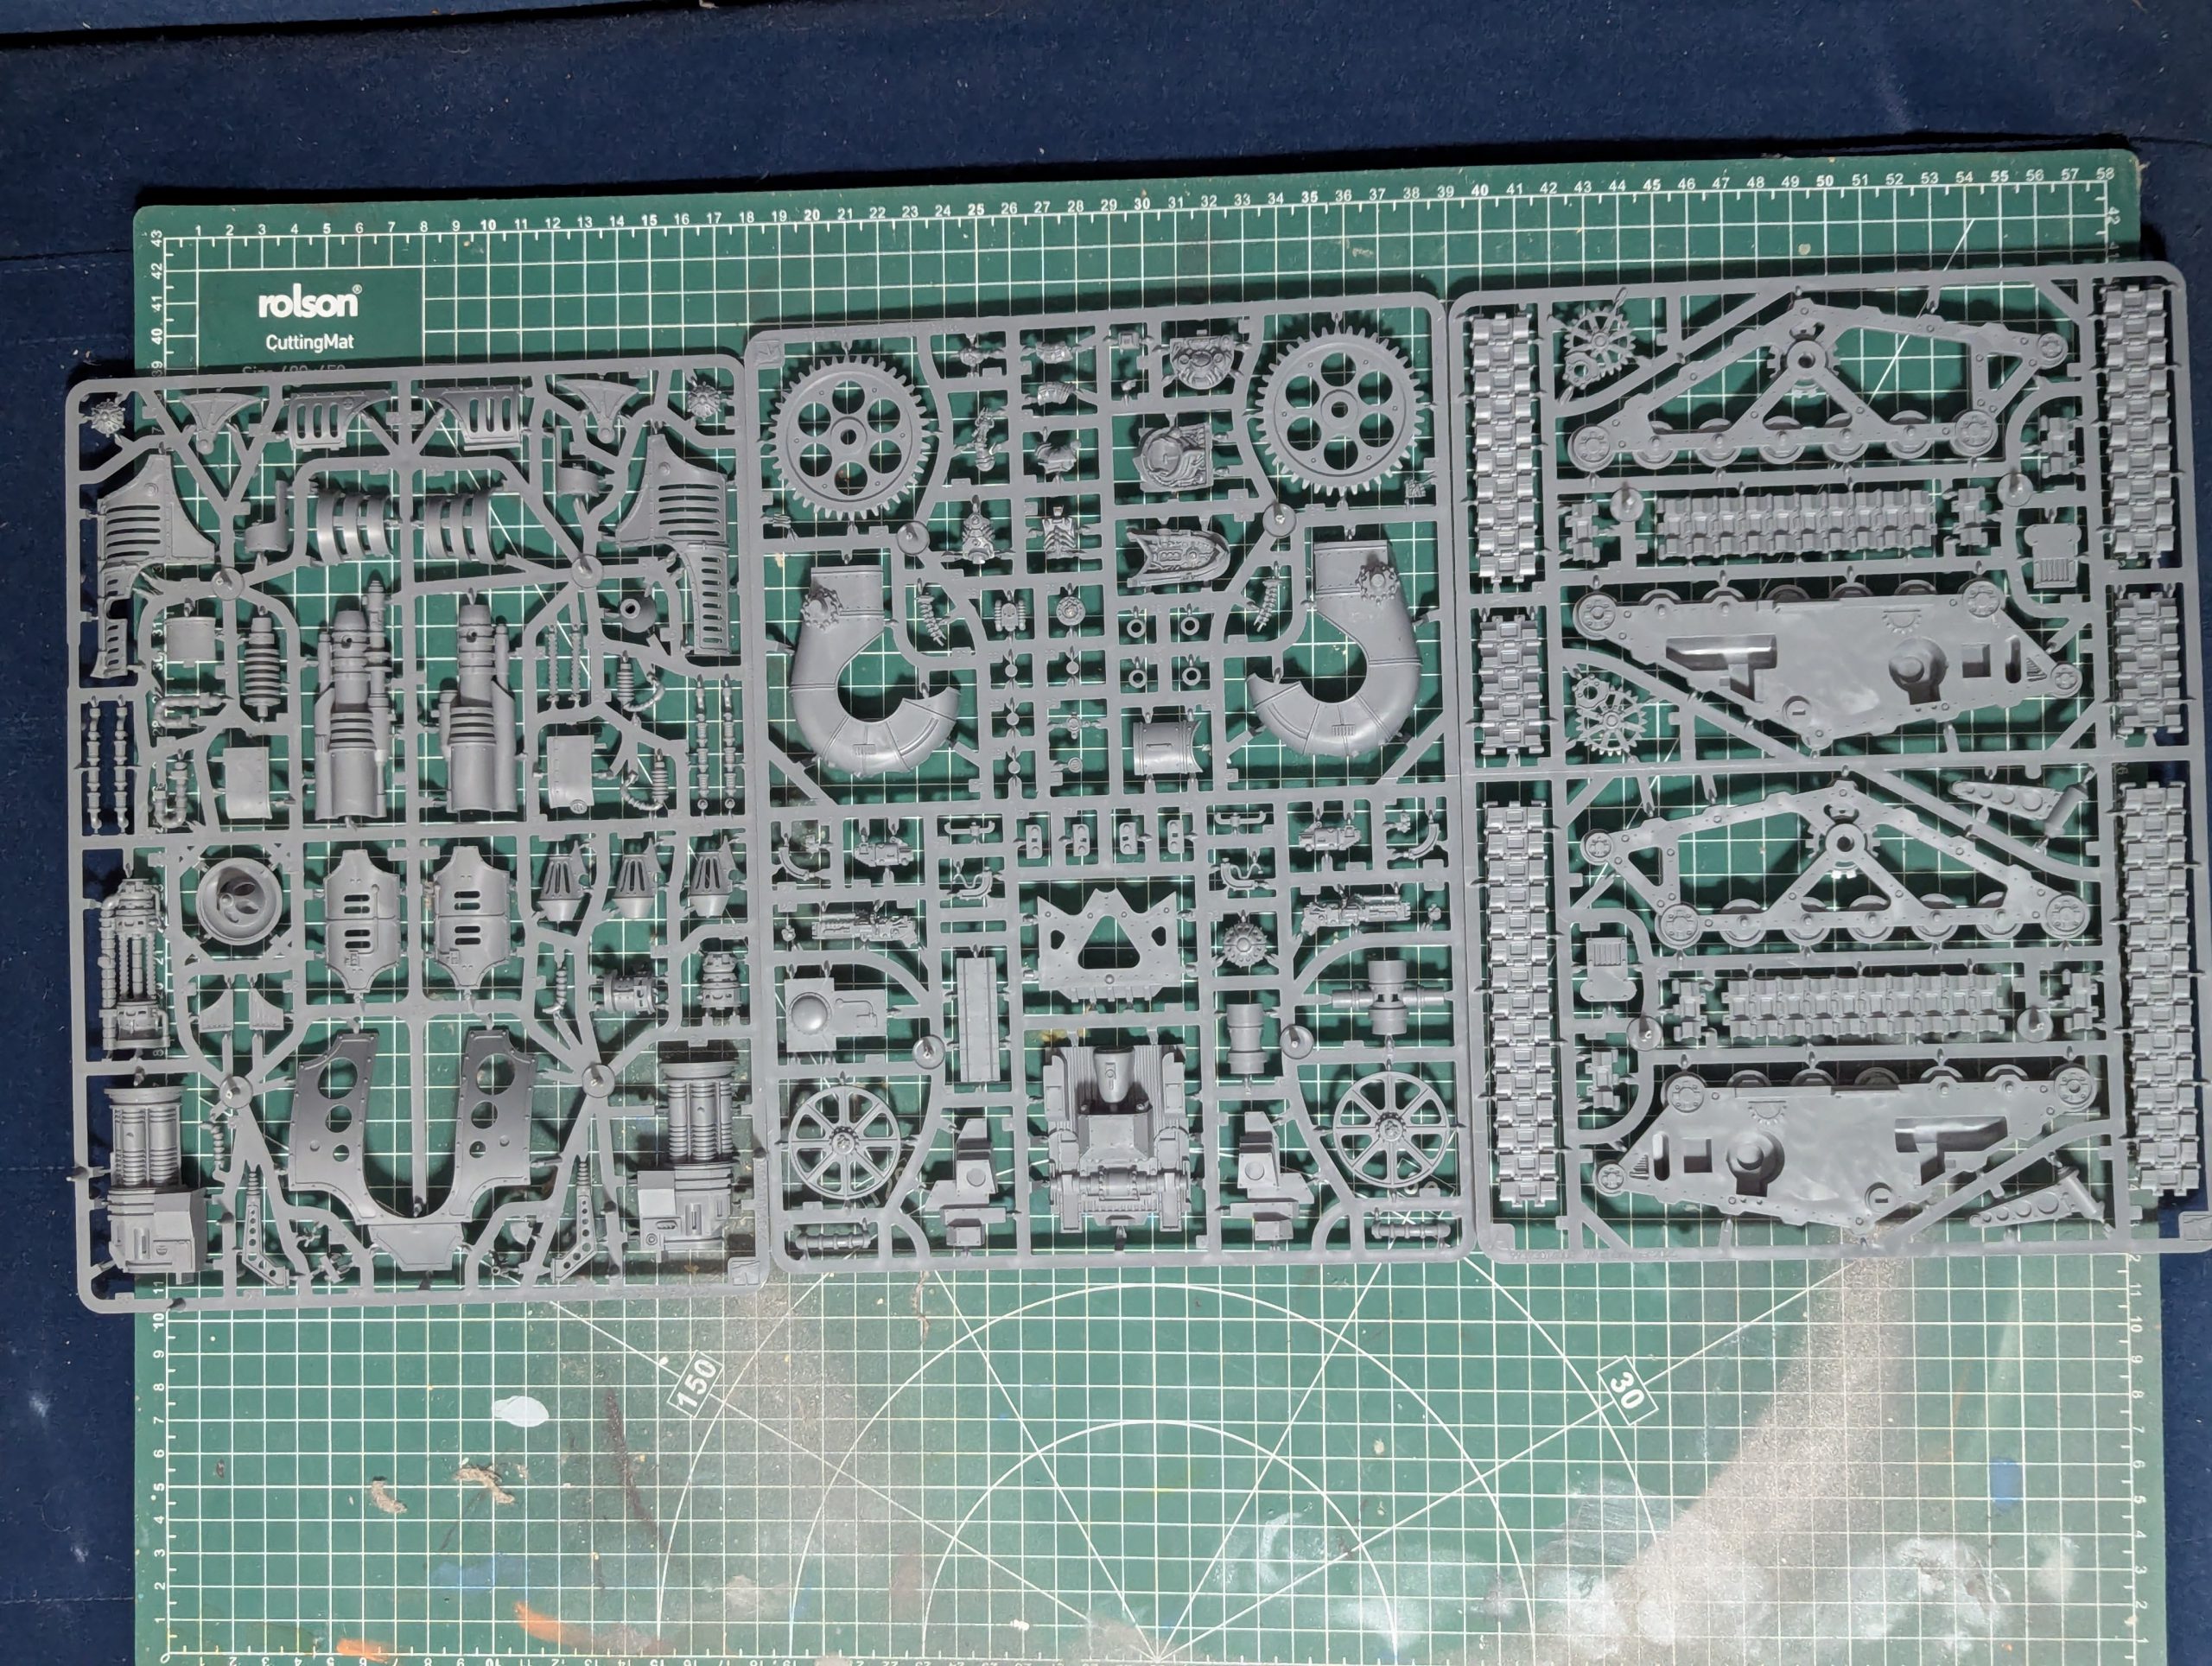
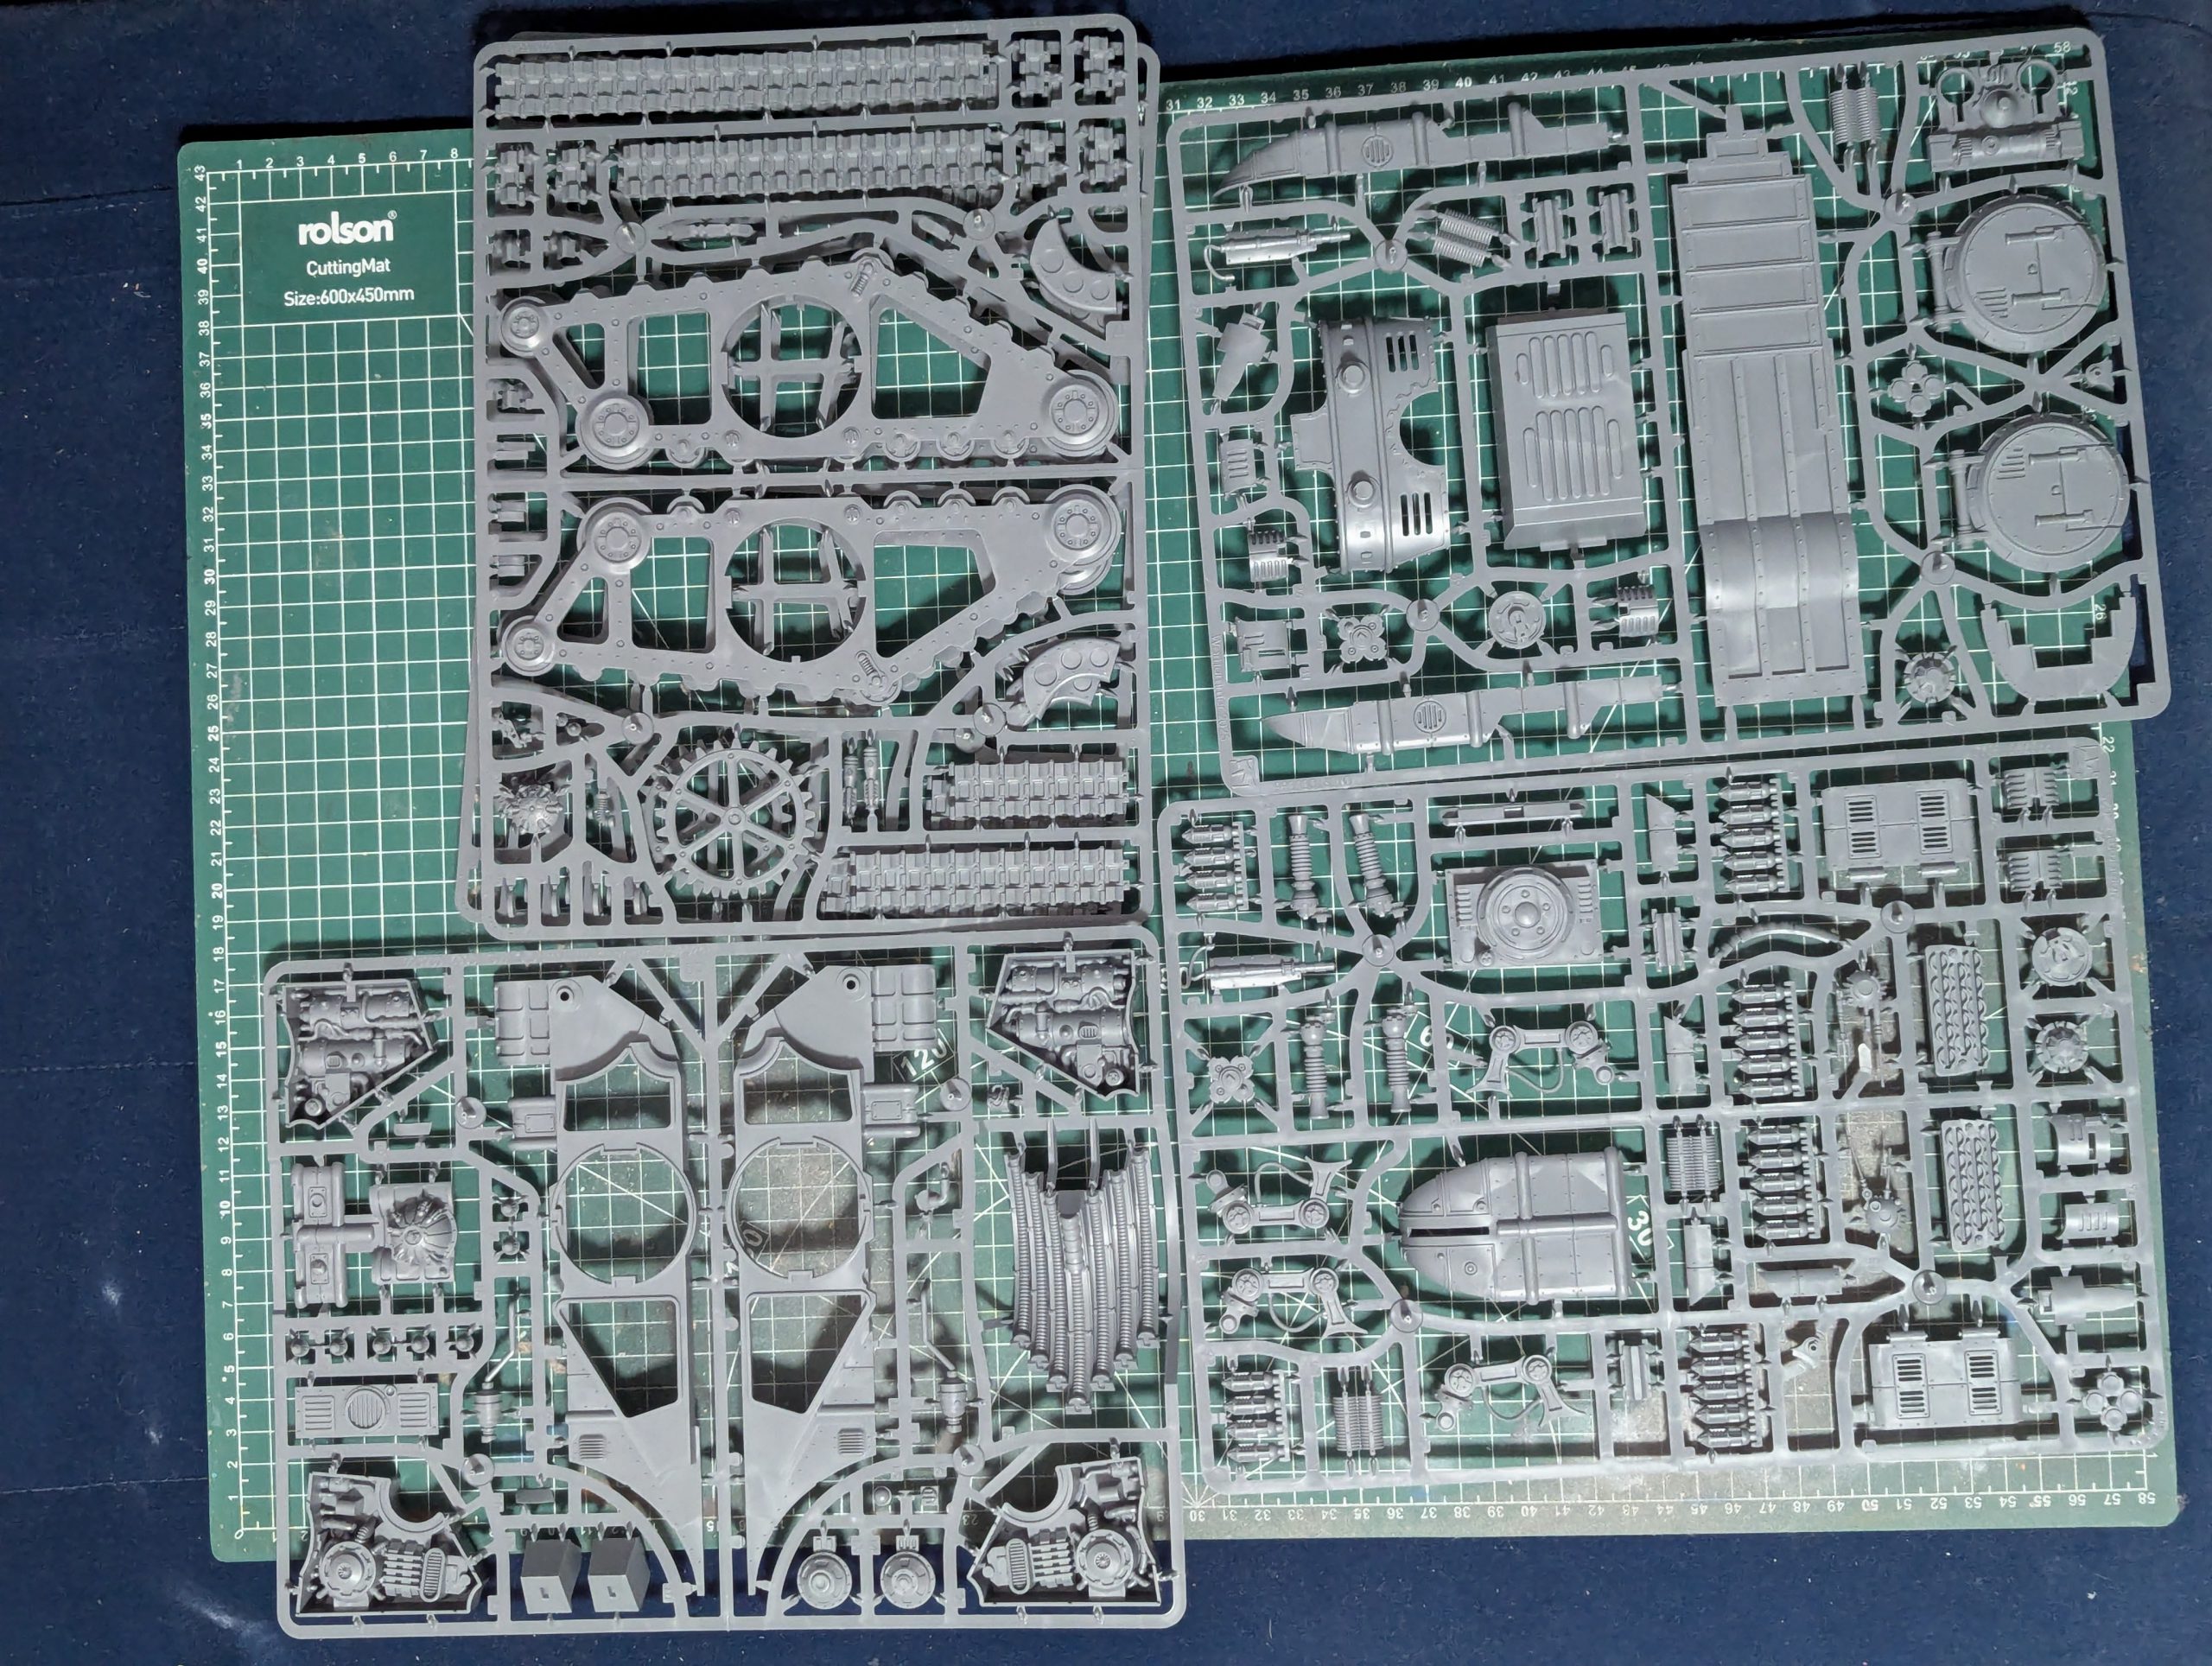
While merely containing three kits, the box contained a mountain of sprues within. In addition, three Mechanicum Macro Construct decal sheets are provided, which are more than enough to give you spares for something else.
The Models
As two of the three models contained within are variants on previous releases, let’s focus on the entirely new (in plastic at least) release in this kit, the Krios Tank.
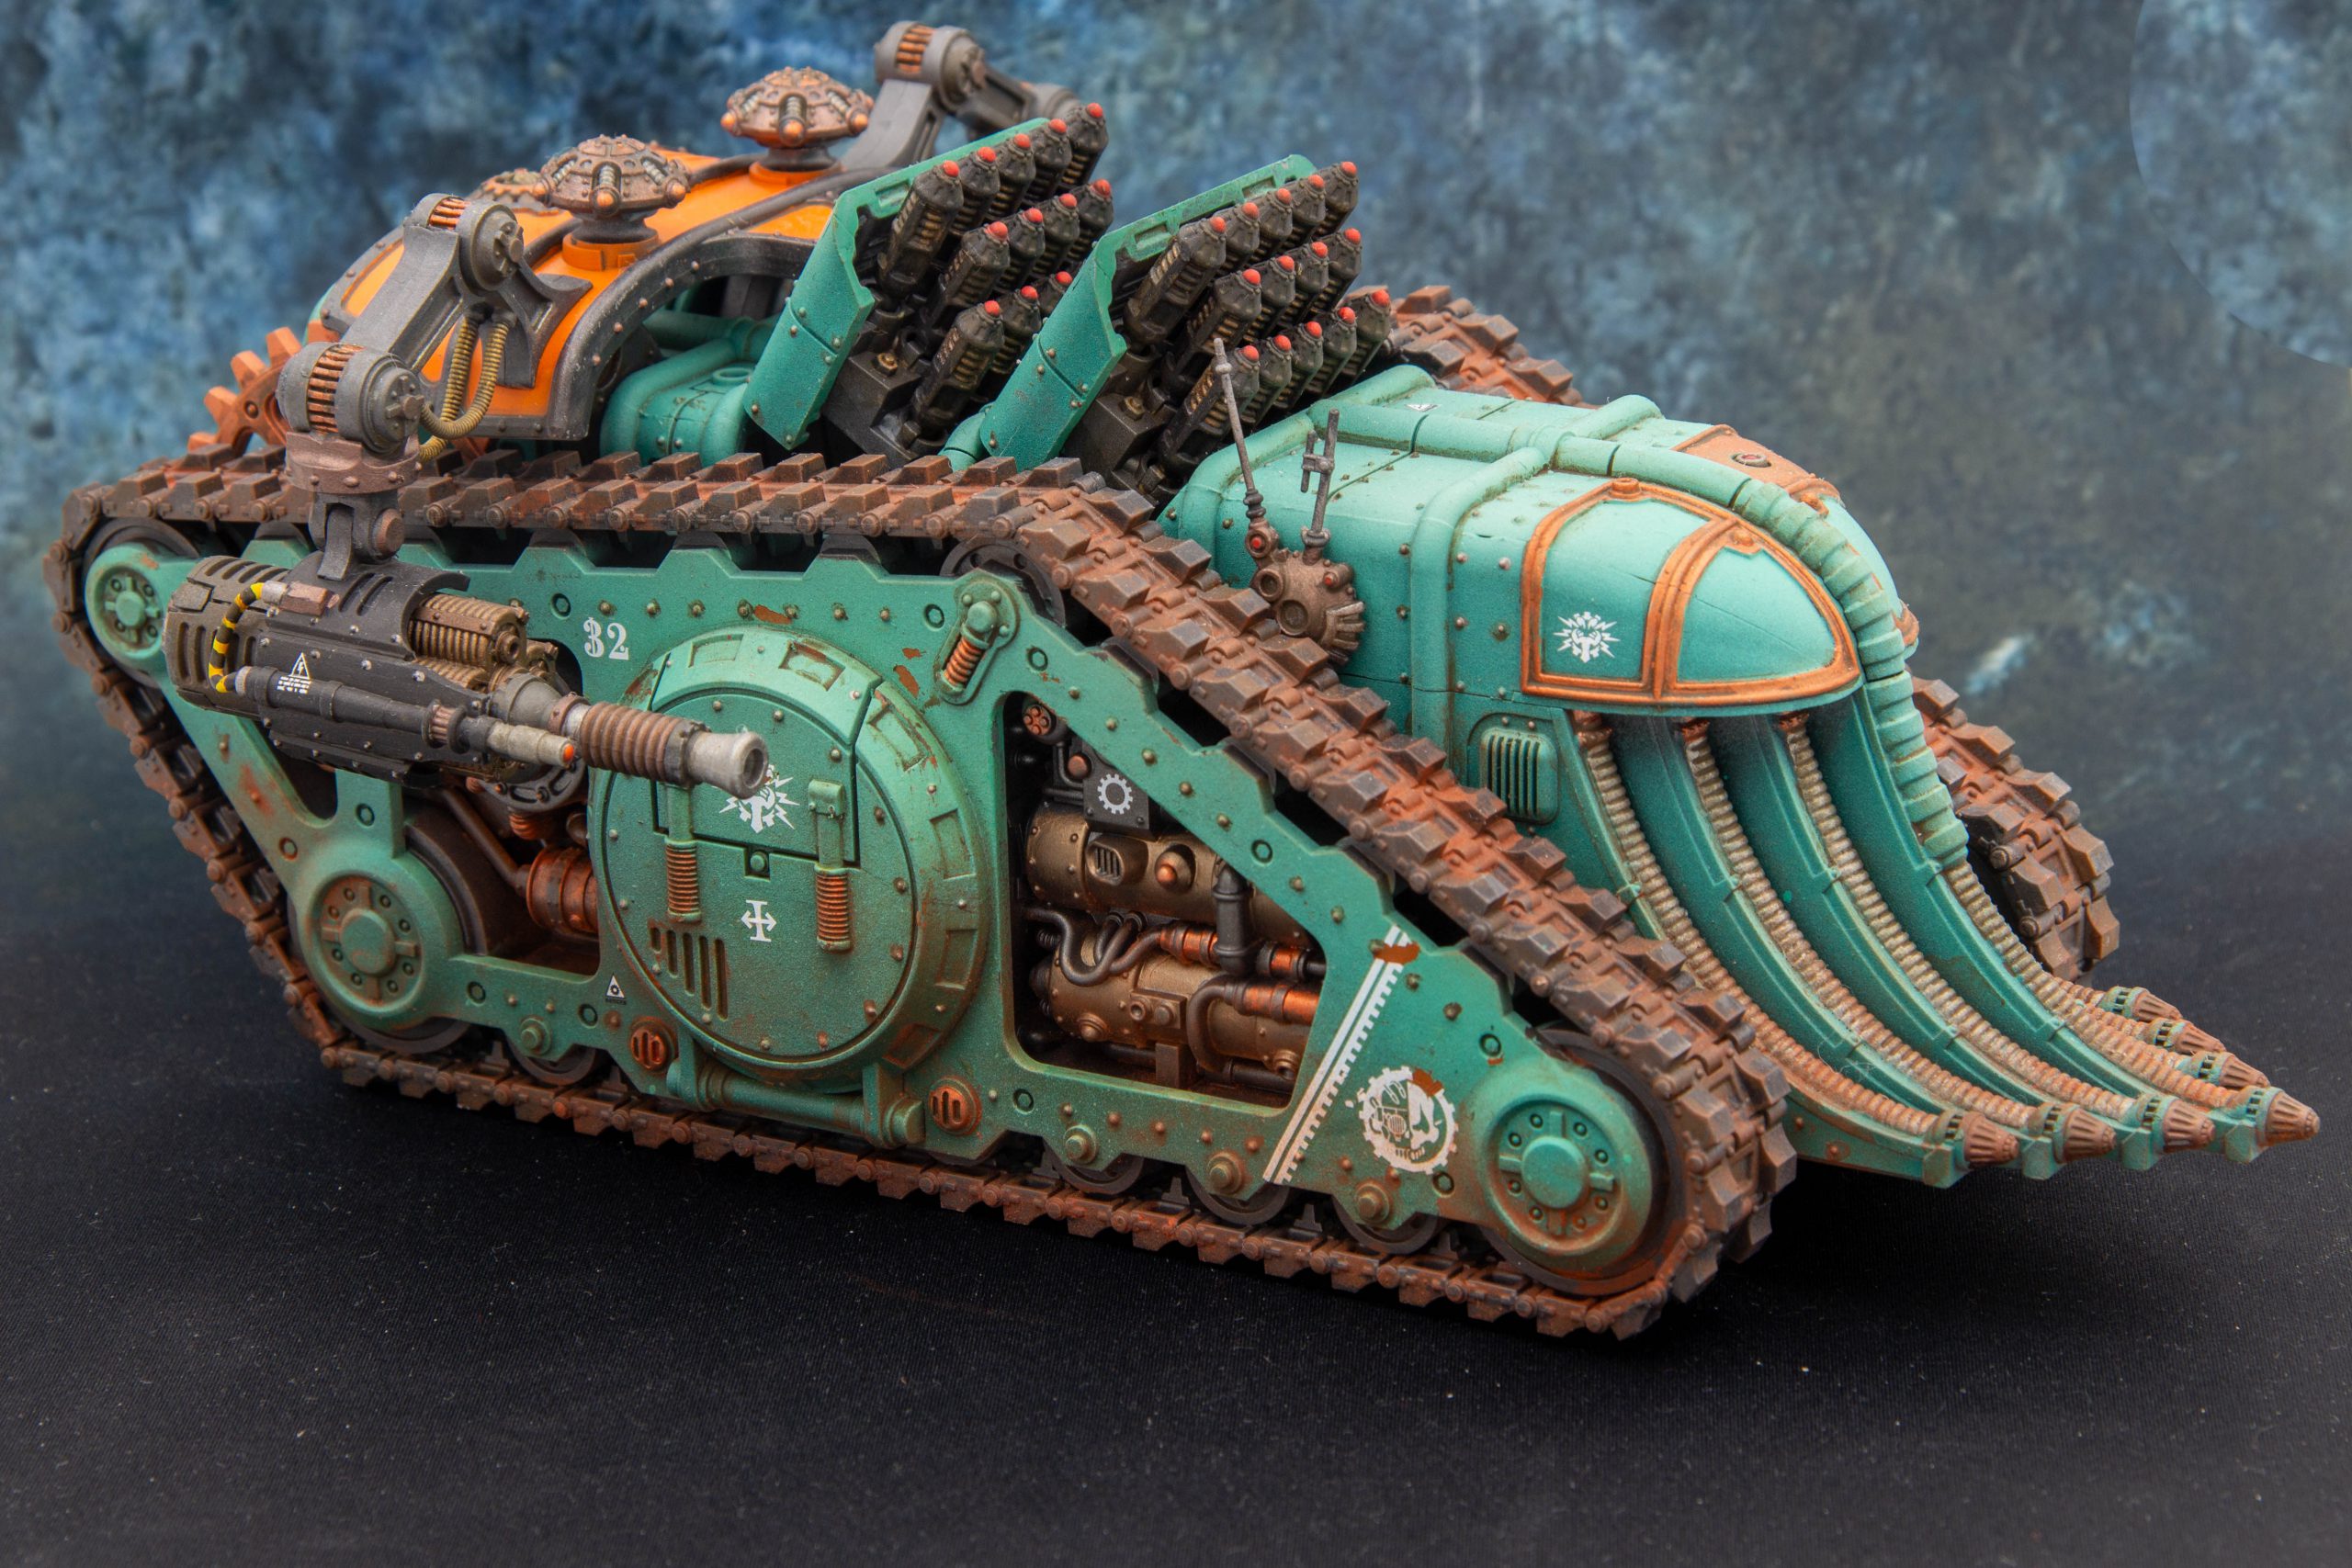
Krios Battle Tank


The plastic Krios Tank kit comes with all three main weapon options: the default lightning cannon, the Venator’s pulsar-fusil, and the Irradiation Blaster – which was added in the recent Martian Civil War supplement (review here)
The optional volkite sponsons are present, although strangely the hunter-killer missiles aren’t. No big issue though, as you could borrow those from elsewhere like the Karacnos or Triaros if you had them spare. That said, I’m not exactly sure where you would mount these nicely.
This kit was the quickest and most straightforward to assemble in this box, with no surprises or particularly sensitive seams to join where we over trimmed – although that could be due to being mindful from past experience on other kits.
For ease of painting, I opted for several sub-assemblies – leaving the tracks off and opting to glue everything at the end. As otherwise, trying to hit the underside of the pilot compartment would have been incredibly awkward.
realSnice: The frames that come together to create the two track assemblies leave a painter with a decision to keep them separate to easily paint the inside, in my approach i maintained my base color on the inside and outside of the combined parts but the classic Mechanicum scheme of having a metallic interior makes it difficult to reach some of the inner details if you glue them together before painting. I was heavily inspired by @meddersminiatures and his desaturated green scheme and I look forward to applying this to a full army in 2025.
I echo Soggy’s thoughts that this kit is a breeze to build, the tracks come together perfectly and there are no problematic joins. I love this tank and can’t wait to pick up two more to create a full unit.


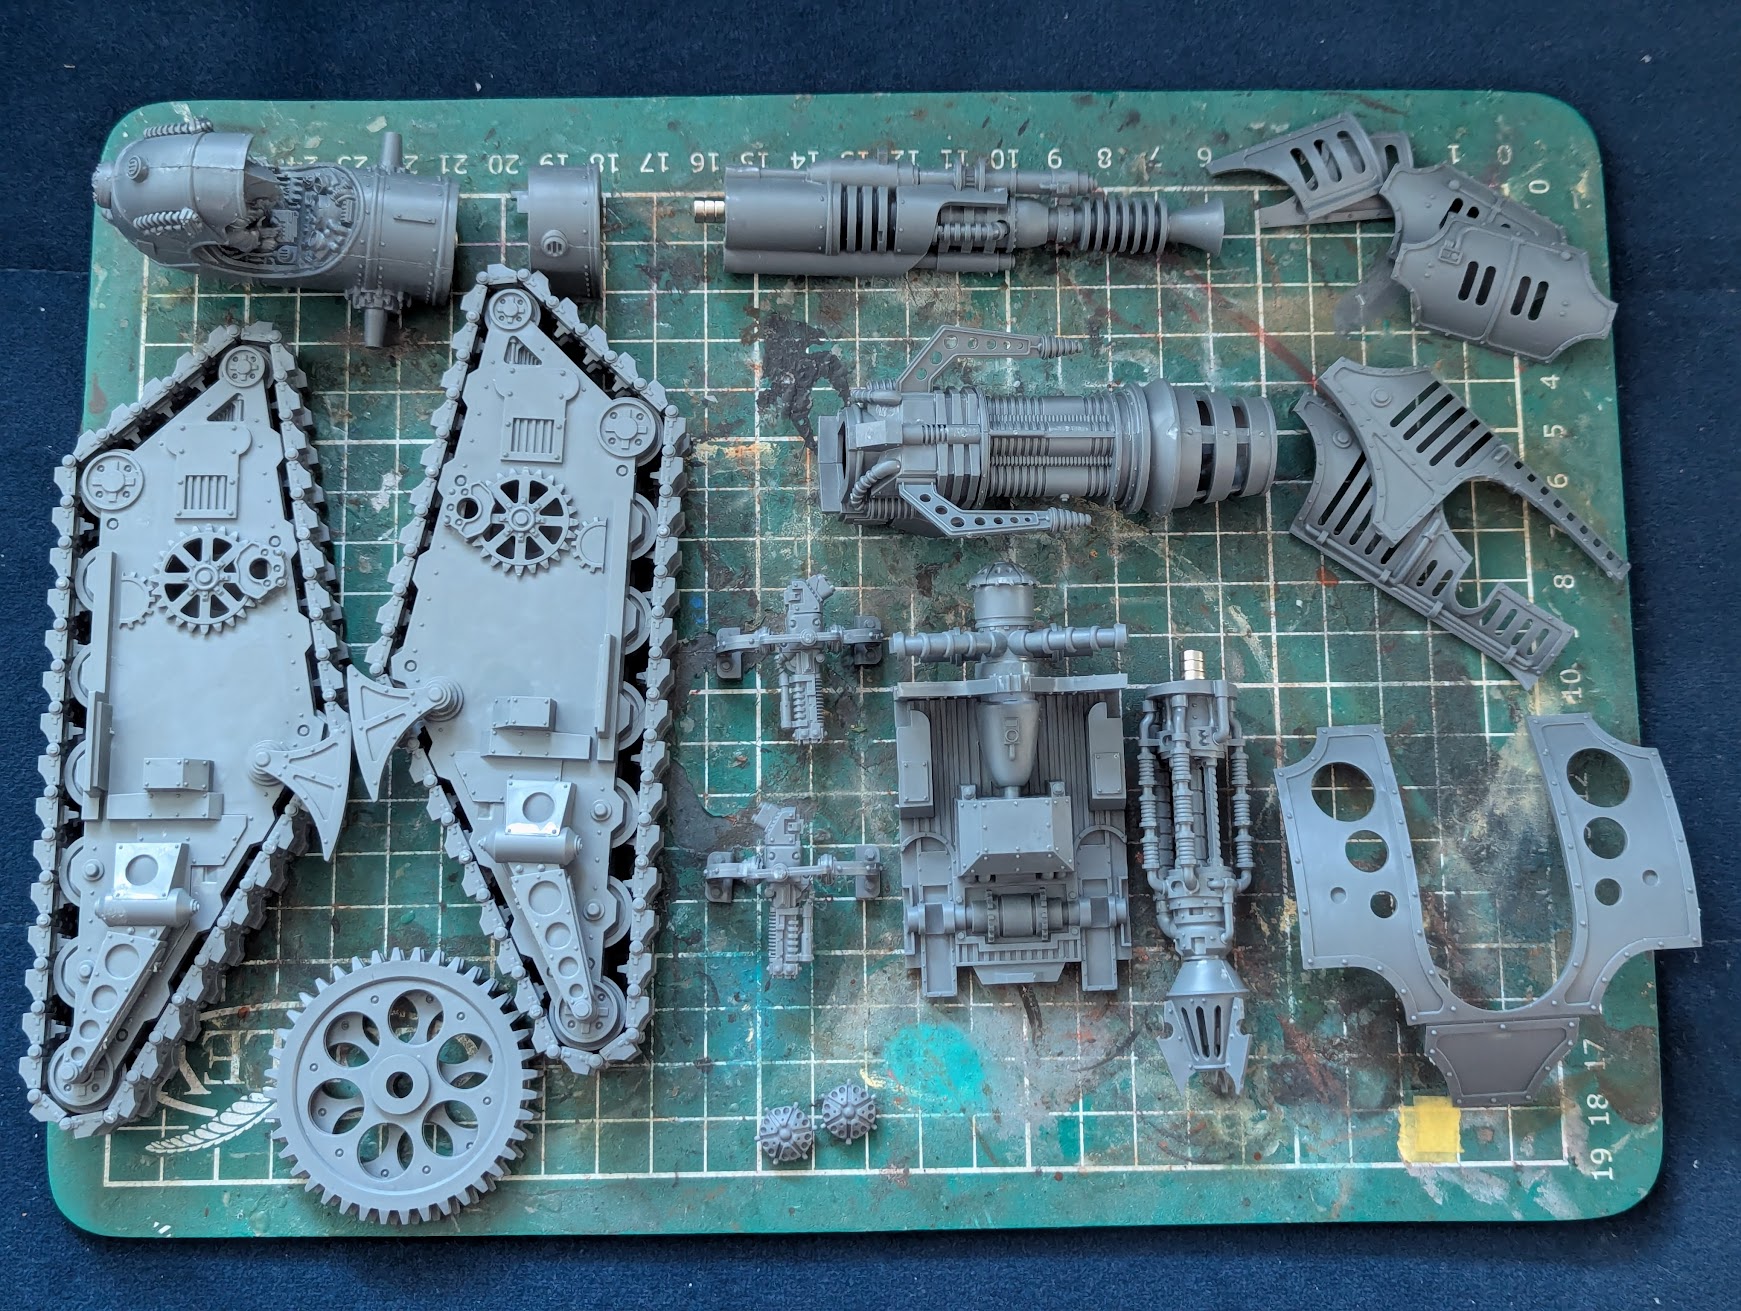
Magnetizing the Krios
The main thing which everyone is here to see – yes, the main gun is easily swappable. Let’s break this down and look at how this can be achieved.

During your assembly, you’ll get to around this stage, which is the crossroads where you would decide on what main gun to glue in place. But what if you were indecisive like me?
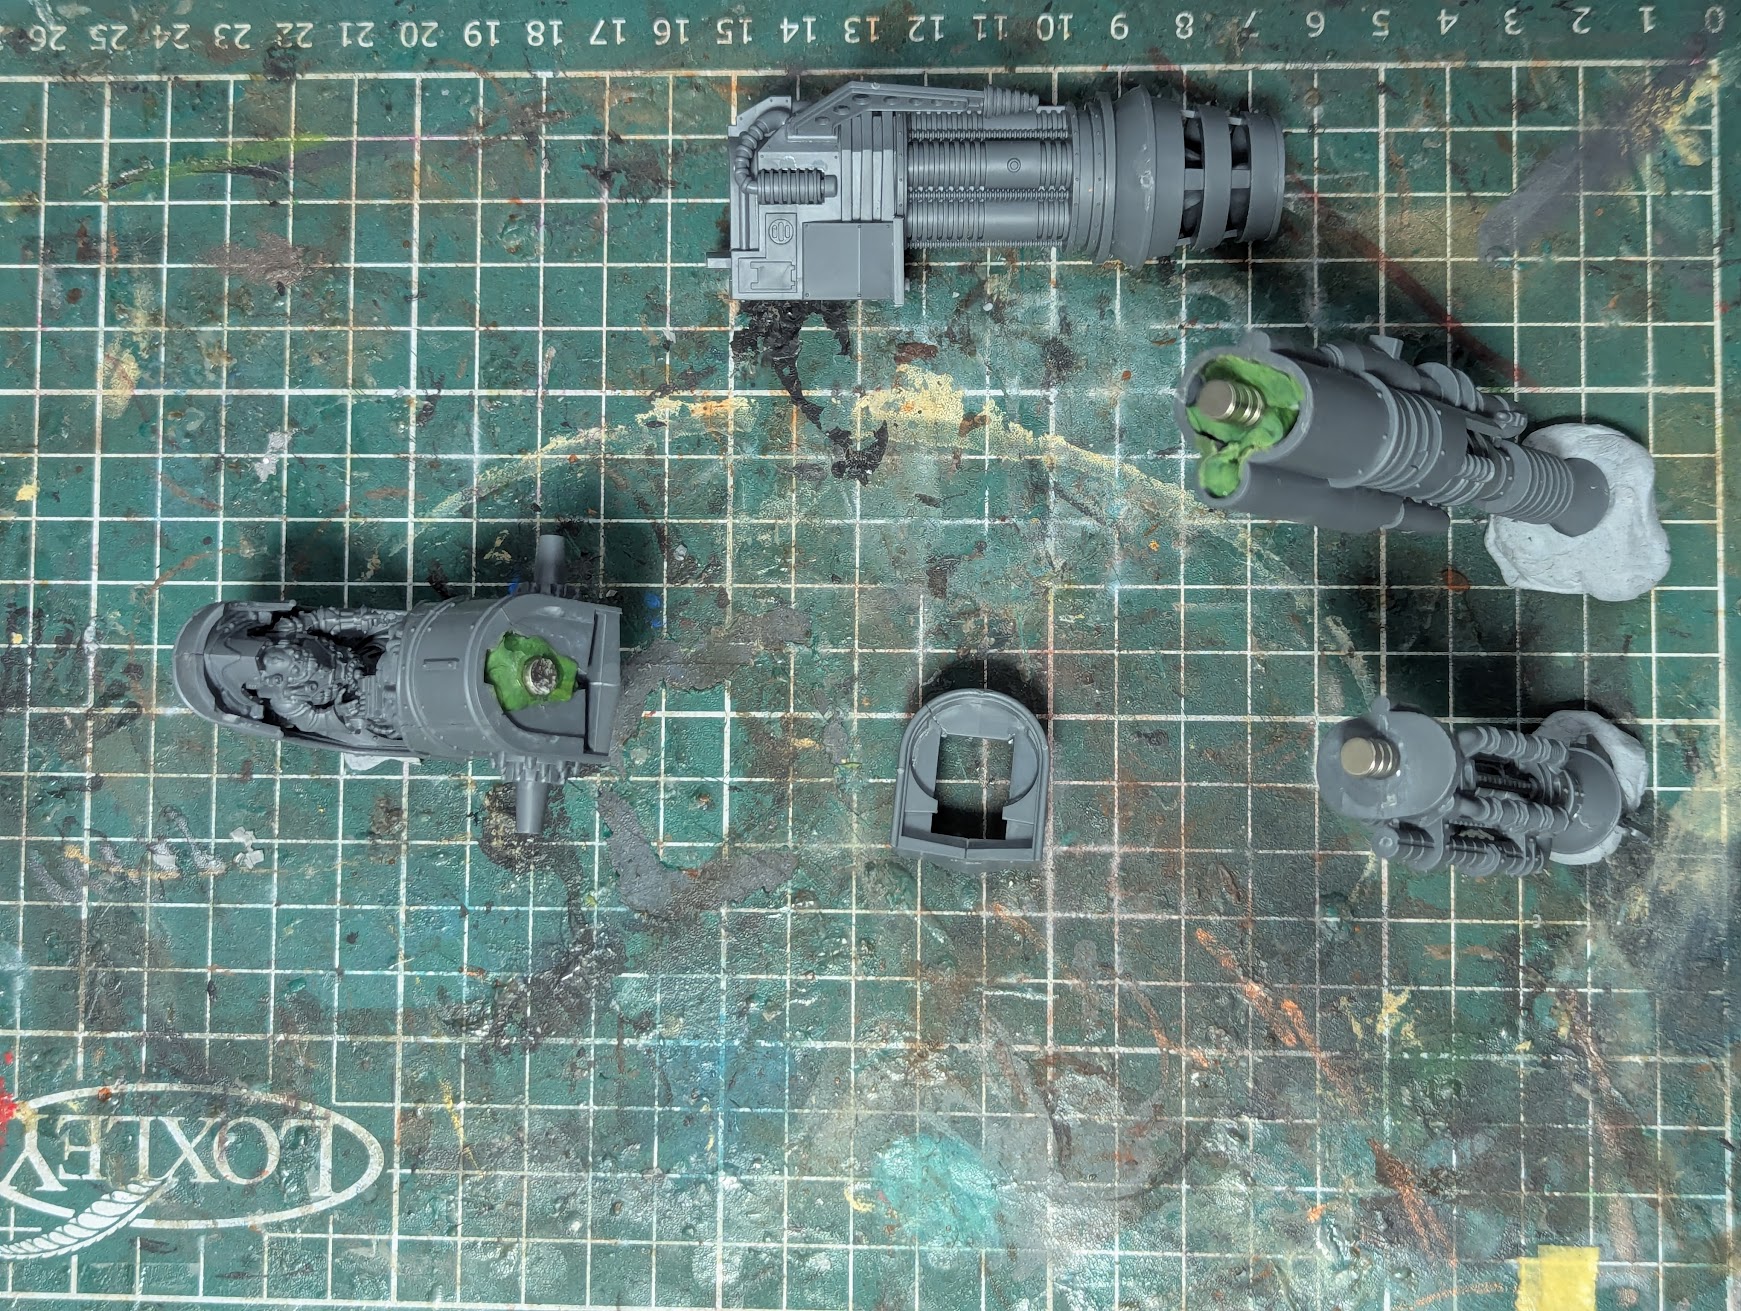
The central hull has a slot along the bottom, which is a solid friction fit for the plasma fusil which plugs into this. The complication or trick comes with the other two main guns, which go into a small adapter (pictured centre) which is quite floppy and not up to holding this in place firmly.
This is where magnets come to the rescue. To make this process a bit easier, it would be best to do this before you put the cap/top part of the hull just in front of the pilot – or you can bodge it which is what I did.
Soggy’s Approach
Being a longtime magnet pervert thanks to Adeptus Titanticus, I had plenty of magnets lying around to use here. In this case I simply shoved in a foundation of greenstuff in the hull with a 5x2mm magnet in the middle, and stacked a couple of 5×2 mm magnets on the lightning gun and irradiation blaster. The force from the magnets here is strong enough to keep these guns true through the adapter piece.
As earlier mentioned, the friction fit on the plasma fusil requires no magnets at all. That said, I did glue in the flaps which support the gun shield which stand out a little when using the other options which I was fine with.
realSnice’s Approach
Similar to Soggy I have a bunch of various magnets lying around but opted to use 8×2’s instead. I used pieces of extra sprue to create a frame inside several of the parts and then glued the magnets to them. They fit perfectly and maintain a very solid hold.


It did take a couple dry fits to make sure the frame did not add a gap to the components when they all come together but after doing it the first time, I think this is a very repeatable and approachable process. I opted to not use a few pieces that are unique to the Venator so that it’s easier to work with all of the options.
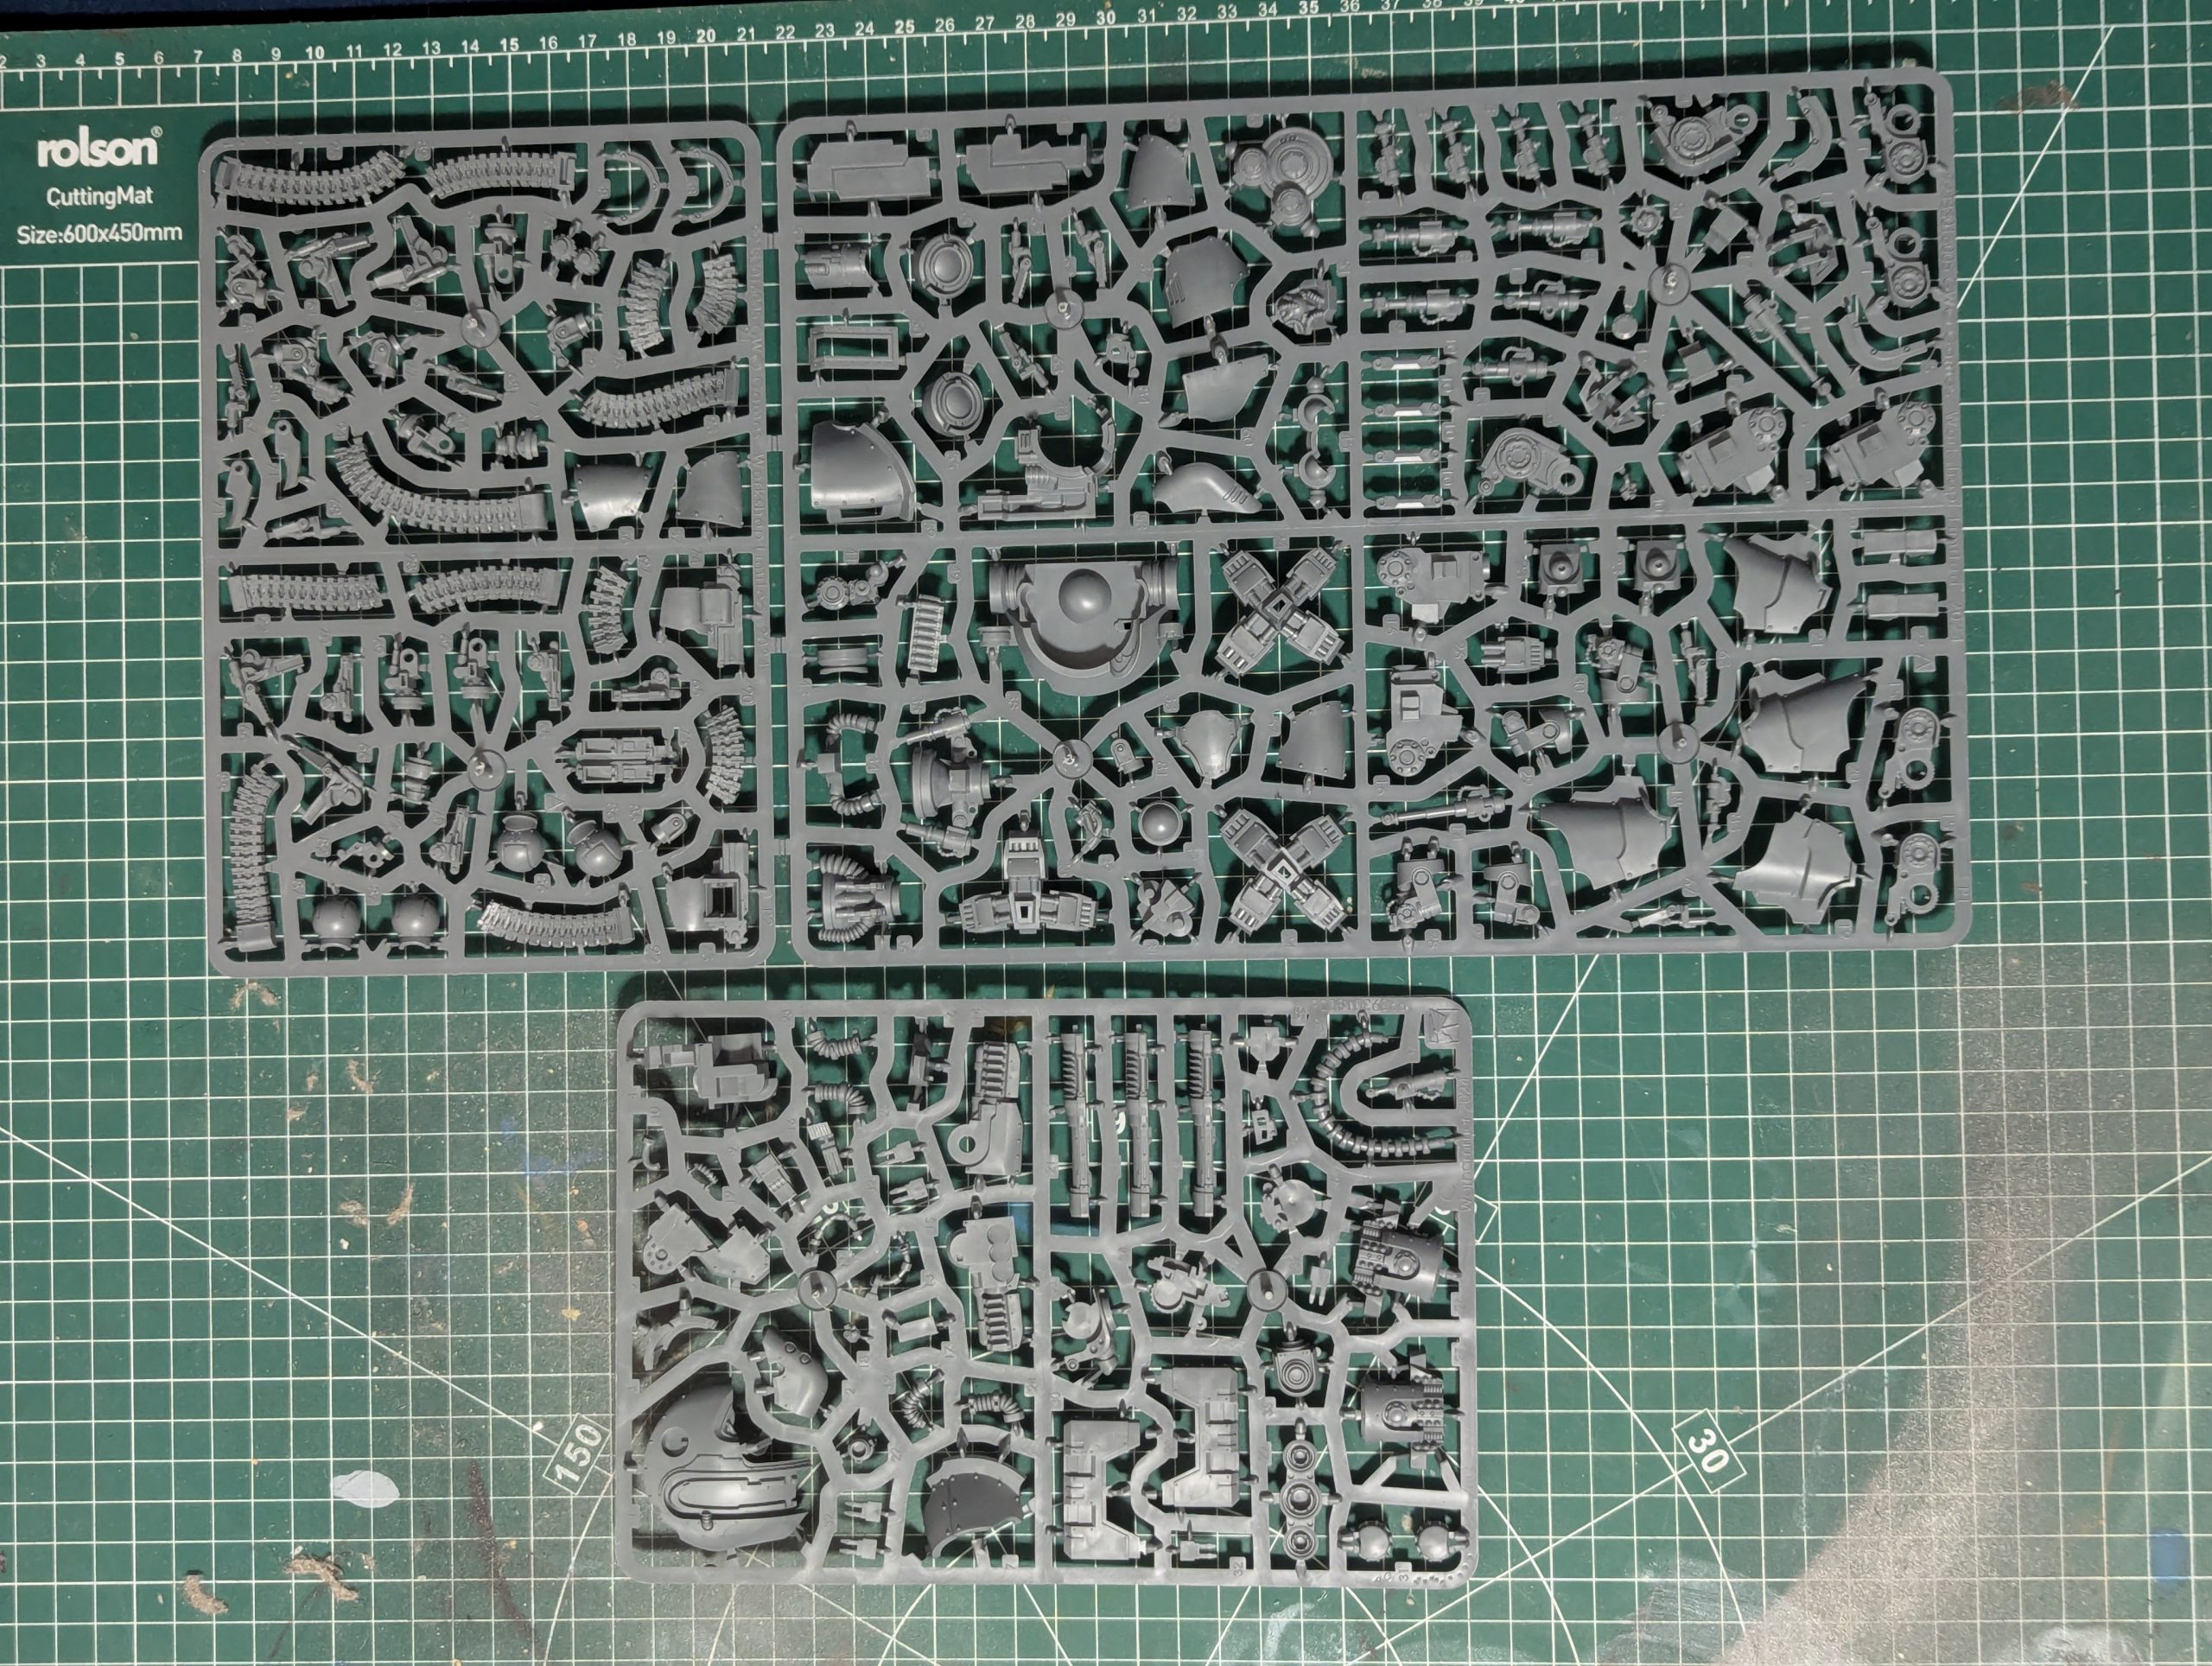
Karacnos Assault Tank
The Karacnos kit is made from five full size sprues, accounting for most of the volume of the box, only one of which is different to the earlier released Triaros. As a result the build experience will be familiar to anyone who has made a Triaros and despite having the most sprues, I found it to be the quickest build.
Each mortar battery bay can be modeled open or shut. I do find it a bit amusing that the default location for the optional searchlights are obscured by the rear launch hatch, although a little impracticality is part of the charm of the Mechanicum’s creations.
This kit is very sub-assembly friendly, if you would like to do the tracks separately for ease of painting. The only potential part to be careful when the build is when removing the front roof of the hull from the sprue, as these join on an angle and you want to avoid trimming too much. Second time around I think I glued this slightly worse as a seam is visible if you look closely on one side – but looks perfectly fine from the other side of the table which is where most people will see it from.
Thanatar Calix
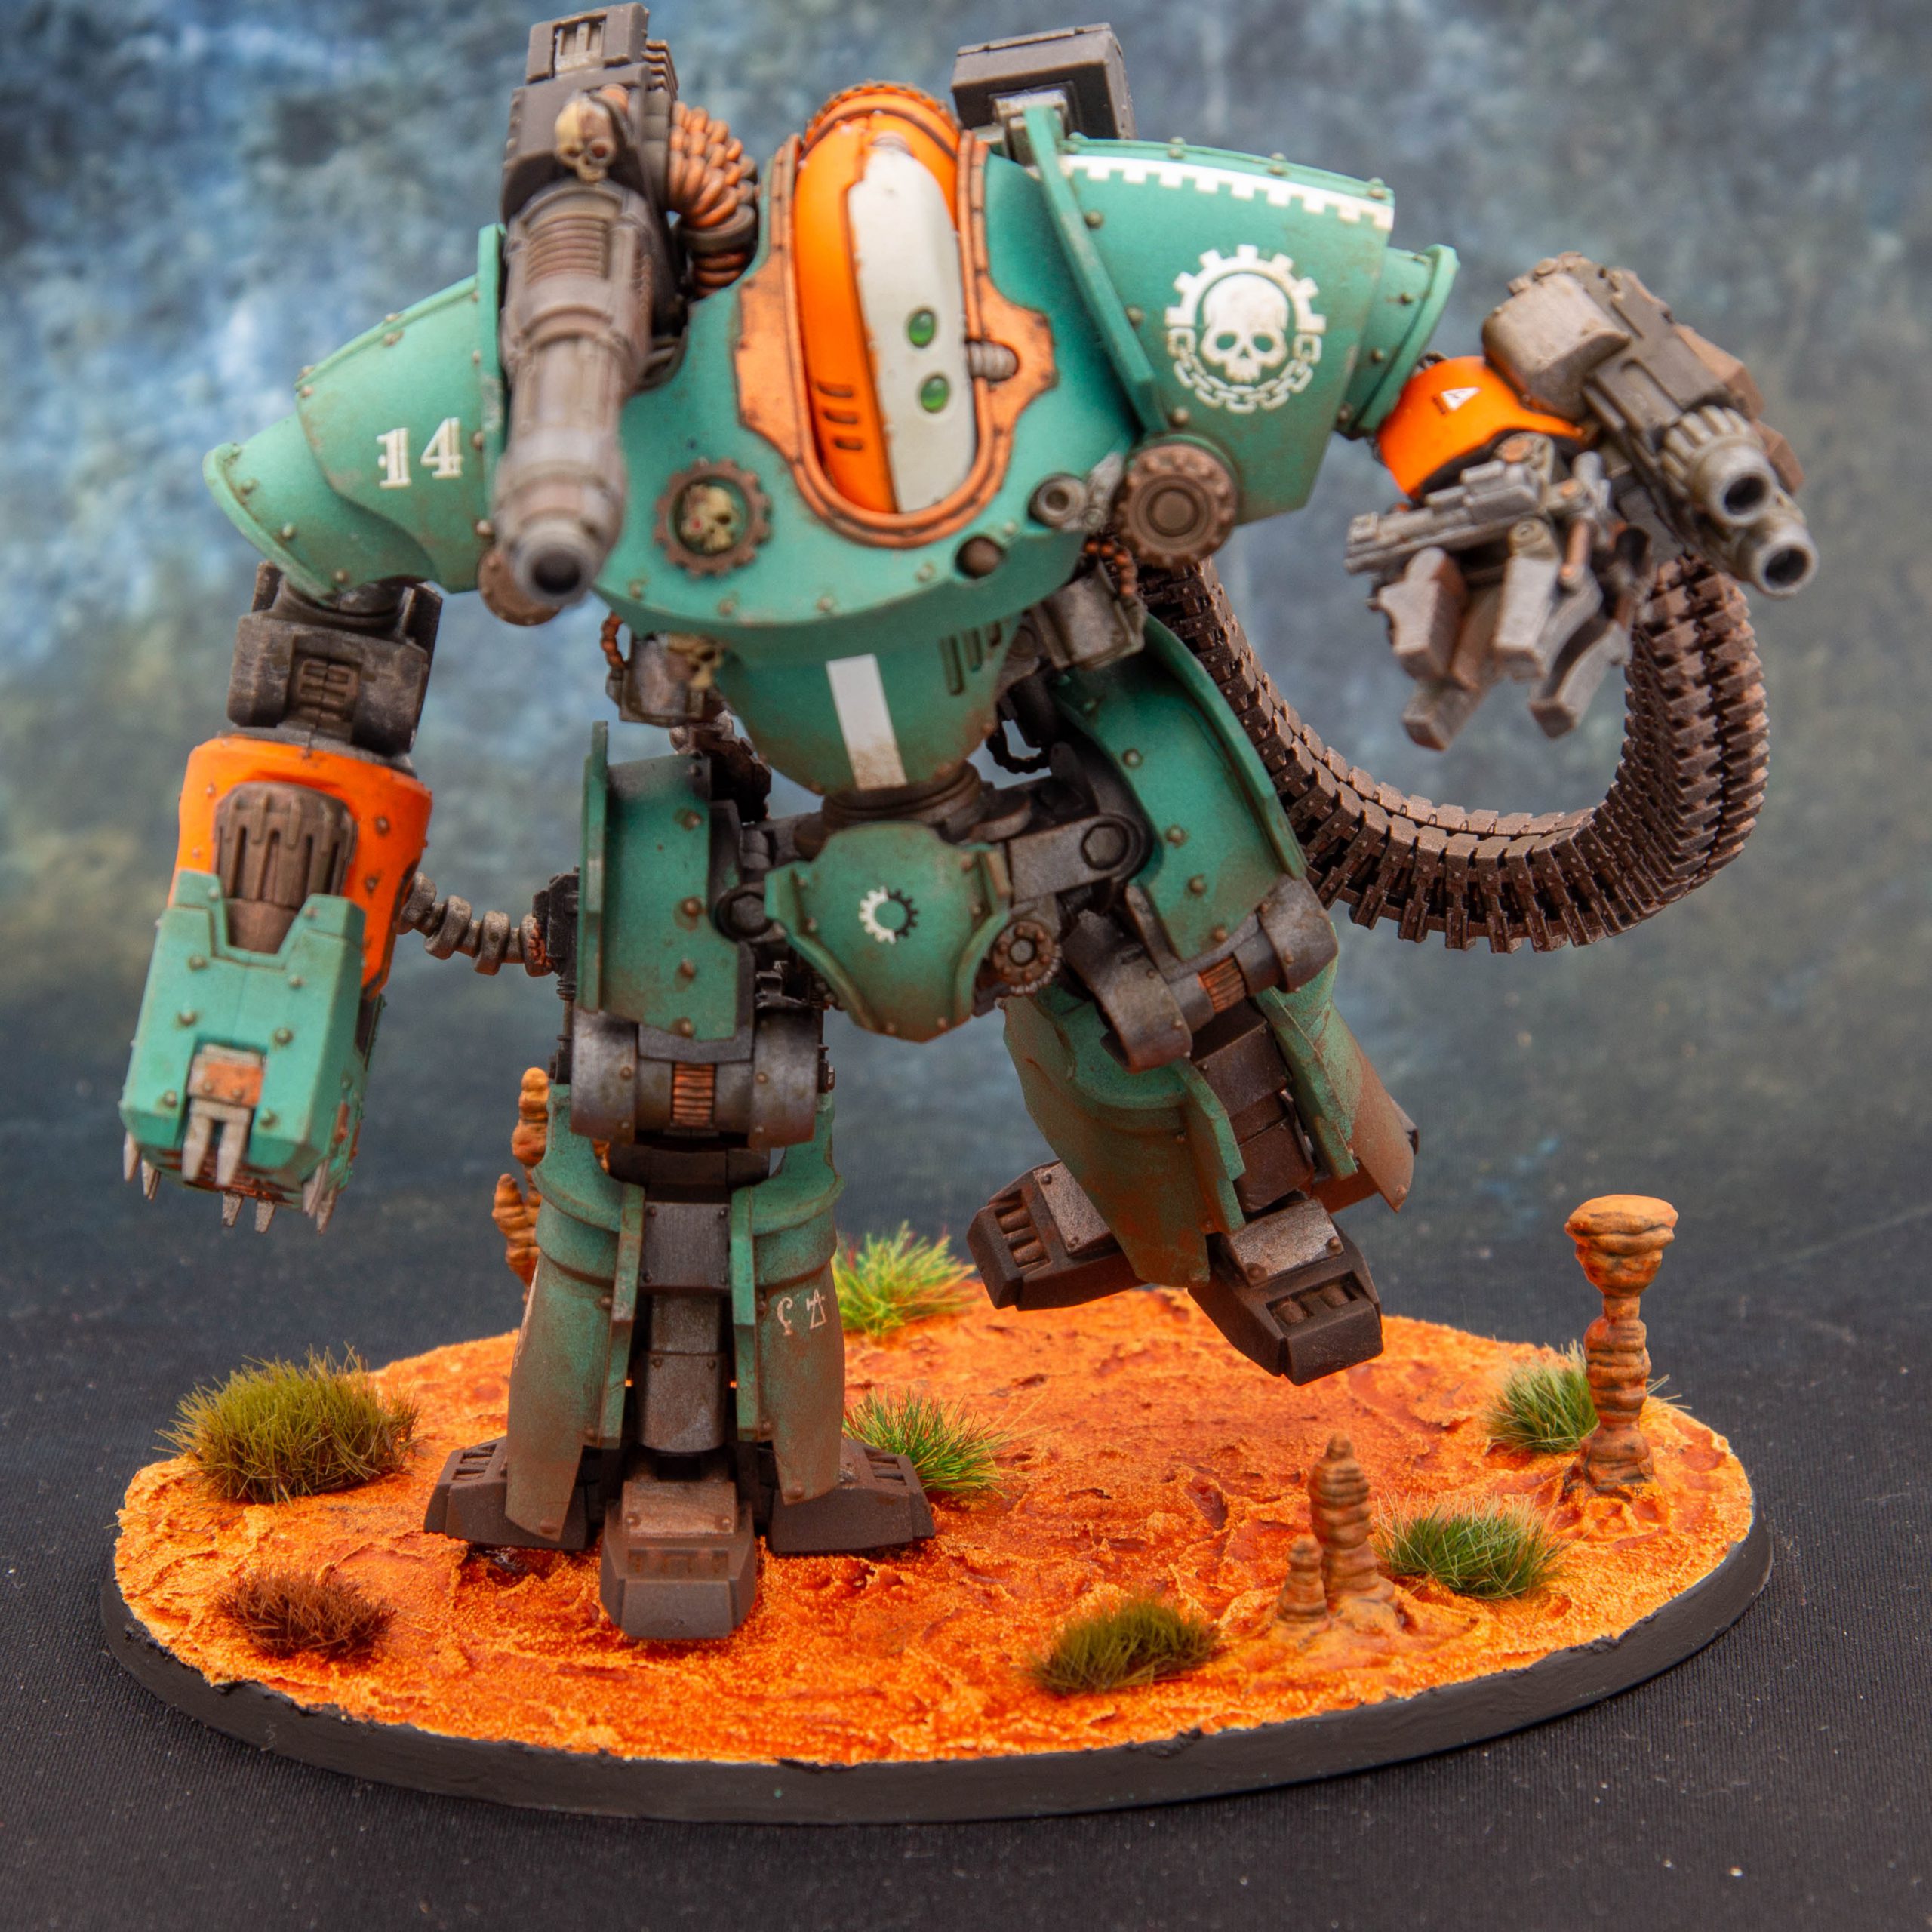
Similar to the Karacnos, this is a variant of the previously released Thanatar Cavas and is more of the same. I was quite down in my first hands experience in our review of the Thanatar Cavas, finding the lack of posing quite limited compared to similarly sized Adeptus Titanicus kits and running into issues with joins along the seams. On the second time around I was very mindful of those seams and everything went together well.
When it comes to pose flexibility, the arms are very static, with the Graviton Ram only having one position and the bolter arm having two different locations. This time around, I thought I would go off script a little to make a pose that suggests a bit more movement, which has come out reasonably well. While the joints in the legs are flexible, they are held in place by pistons in the back which decide their angle – I found by trimming the catch on one side of each of these I could play around with the legs until I found something I was happy with.
When it came time for painting, given how static things are you can paint most things separately – such as the arms, torso, legs and faceplate. Unlike with some Titanicus kits, not all the armour plates are separate from the skeleton, so you can’t airbrush all of these separately – although you can do the skeleton first and then use masking putty to do the plates.
Show Your Colours
Funnily enough, both I and RealSnice were inspired by Medder’s Mechanicum speedpainting video, which is worth a watch if you are tossing up what scheme to go. I went a bit of script using paints I had to hand and introduced orange as a spot colour. Below is what I ended up using if you wanted to try something similar:
- Greens:
- Army Painter Ruinous Spell, hit with Vallejo Cockpit Emeral Green “Faded” and zenithaled with Army Painter Potion Green
- Orange:
- Vallejo Game Color Orange Fire (that’s it, I’m lazy and hate painting orange)
- White:
- Army Painter Shark White -> Army Painter Yeti White
- Metals:
- Vallejo Gunmental
- Darkstar Blue Steel
- Darkstar Aged Copper
- Darkstar Copper
- Darkstar Polished Copper
- Darkstar Old Silver
- Darkstar Baroque
- Oil pinwash/wash
- Mix of Black and Sepia oils applied generously at the end to give some more depth.
The bases are the same usual lazy method as my White Scars – Vallejo Desert paste, with a Fuegan Orange wash and a Tau Light Ochre drybrush.
End of Line
realSnice: While this “Battle Group” only contains three kits, its basically a set of must haves for a Mechanicum army and isnt padded with Techthralls or the “Tzaangor” of a faction range that so many box sets contain. While its not necessary for a player to pick up three of these kits, it’s a great option for any player trying to add some teeth to their army. I really hope this continues to set a trend for future releases as more factions get new waves of plastics.
It’s great to see the Mechanicum range continue to more accessible via plastic kits, the introduction of this kit makes plastic only Mechanicum viable with the serious punch it brings. I would not be surprised to see this release doing well with lots people swapping with one another to fit the theme of army they are doing.
We’re still missing some of the melee options for the range, although only two days ago Games Workshop announced that Ursurax kits are on the horizon, showing that they are committed to following this through.
Have any questions or feedback? Drop us a note in the comments below or email us at contact@goonhammer.com. Want articles like this linked in your inbox every Monday morning? Sign up for our newsletter. And don’t forget that you can support us on Patreon for backer rewards like early video content, Administratum access, an ad-free experience on our website and more.
