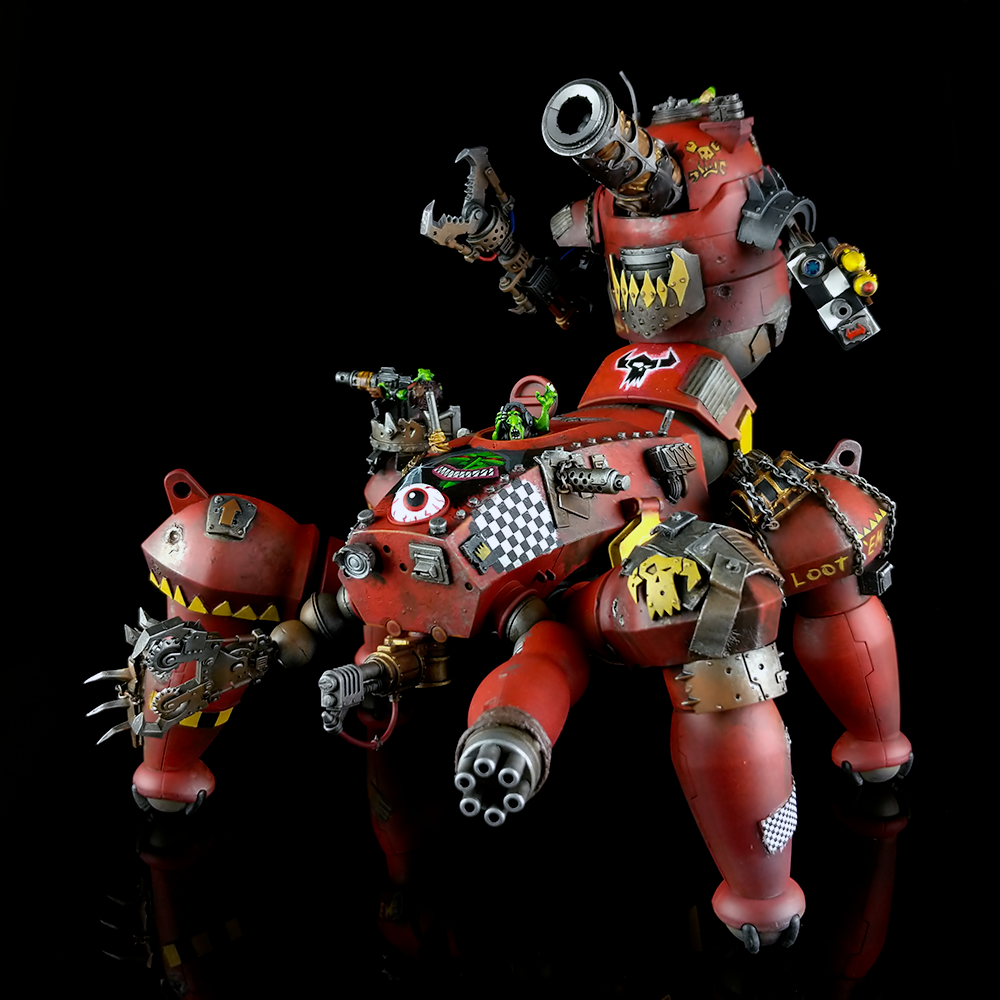
A few weeks after finishing my Morkanaut and Killa Kans incorporating Gundam model kit parts, I was feeling the kitbash itch again. There were a couple of units at the front of my mind that I was looking at adding to my slowly growing Ork Mekka army: a Gorkanaut to pair with the Morkanaut, a couple of Deff Dreads and a Stompa. I took a look through my gunpla backlog and my box of built gunpla kits for inspiration but didn’t find anything that really sparked anything. I ended up assembling a second MG Ball and a HG Guntank kit to make a treaded Gorkanaut but as I stuck the basic parts together to get a basic silhouette I couldn’t really feel the energy to continue. I had already kitbashed four mechs with Gundam Ball kits as the base so you could say I was a bit tired of balls.
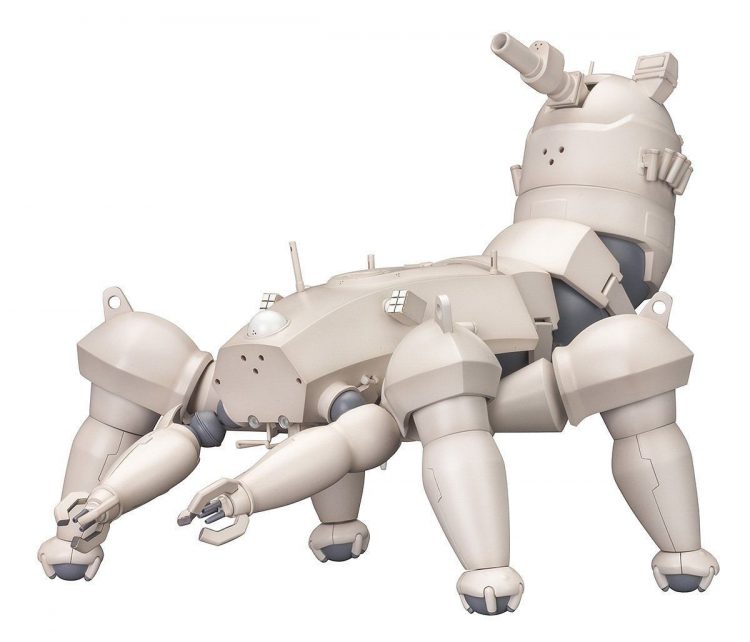
Looking through all my assembled but unpainted gunpla one kit caught my eye, the Kotobukiya Ghost in The Shell HAW206. The big ol spider tank from episode 2 of Ghost In The Shell: Standalone Complex (great anime by the way). It was a perfect foundation for some rowdy goblins looting it up and it ended up being roughly the same dimensions as the Forgeworld Ork Kill Tank. Initial experiements with replacing legs or arms with parts from other Warhammer or gunpla kits ended up looking too off from what I wanted to do so I ended up keeping the original model relatively intact while breaking up the smooth curved silhouette with the classic Ork scrap, weapons, and goblins.
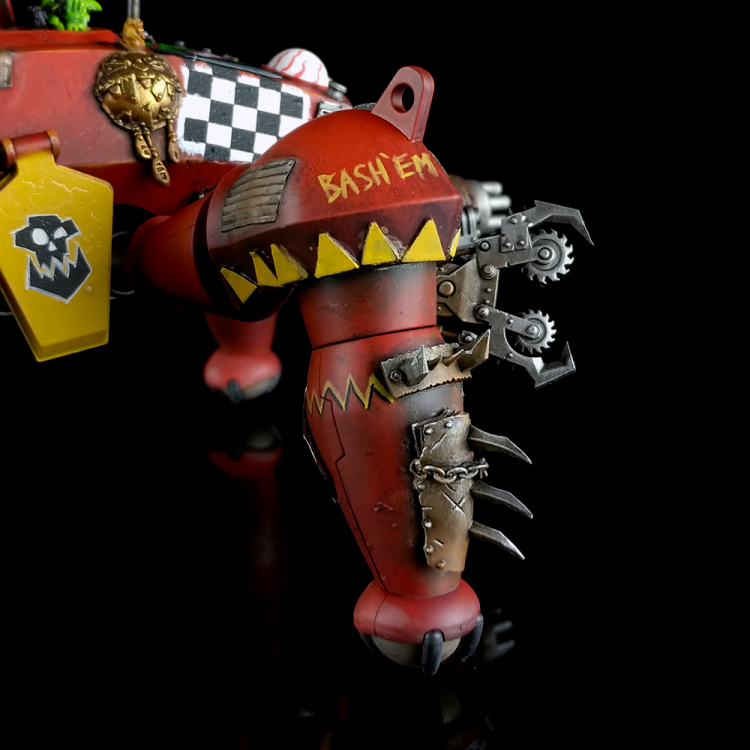
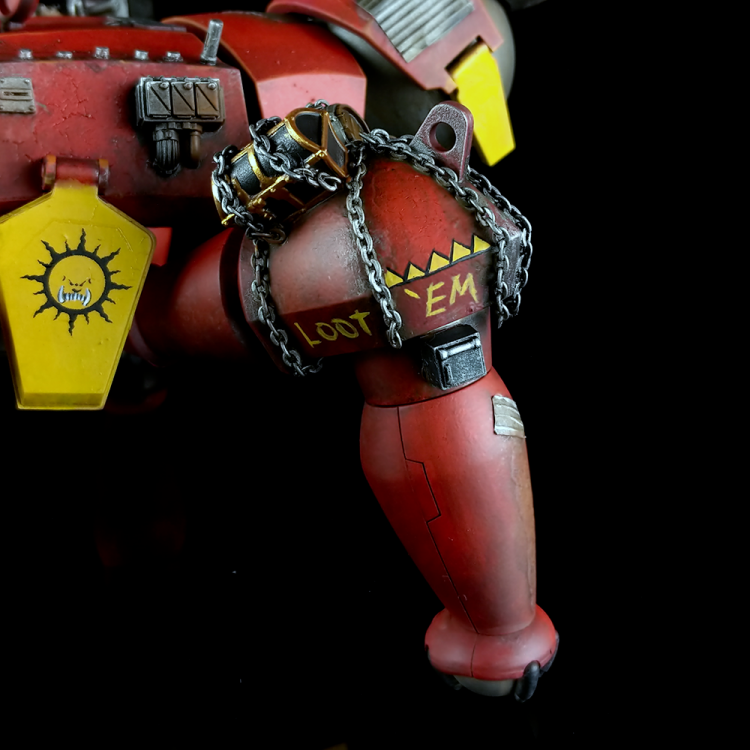
Going into this build I wanted to incorporate a few new materials I had picked up as well as figure out printing my own custom decals. Near the start of this build Miniac did a video at my local hobby shop where he looked for materials for a scratch build model which this ended up showing me some awesome metal sheets I had passed by dozens of times. The big one for my kitbashes was corrugated metal sheet in multiple different scales which works super well for the slapdash repairs that the grots do on their mekka. In addition there was also some flat smooth metal sheet that when overlaid over thin cardboard stacked up gives the impression of thicker armor or stacked metal plate. Finally, I picked up some chain so that these grots can use something a bit sturdier than rope to secure their well earned loot. You should be able to find different sizes of chain at most any hobby store.
For custom decals I used waterslide decal paper for my black and white laser printer and found a couple of designs I’d end up using on the spider tank. You can check out the How To Paint Everything on decals for more details on how to do this yourself! I used them in a few different ways as regular decal designs and as freehand templates. In particular they were useful for different scales of checkers, though the larger scaled checkers needed a bit of cleaning up due to the lower resolution of my printer.
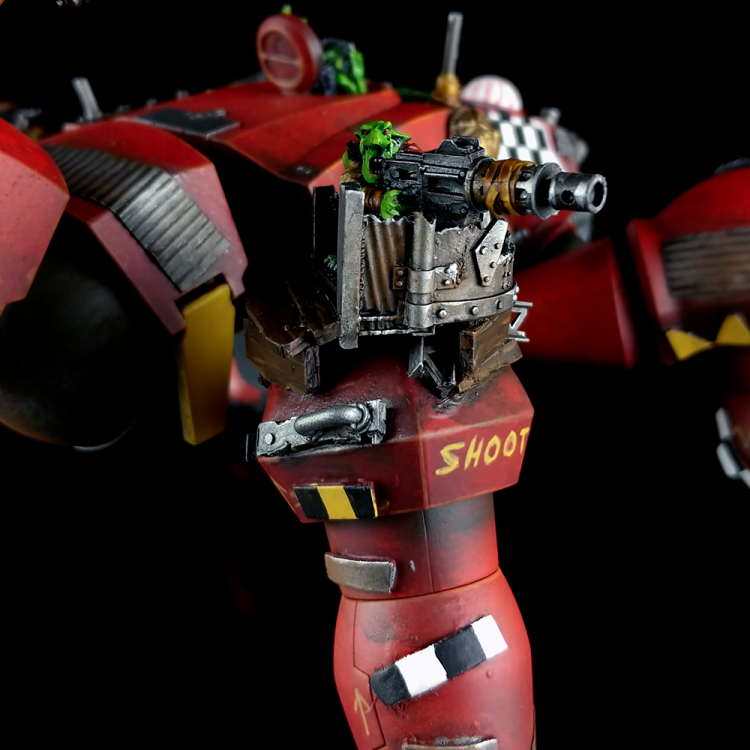
For me kitbashing is a continual process of trying out different ideas and pieces until all the parts are satisfactory. For this spider tank I broke it up into the main body, the cannon tail, and the legs. Each of the legs got something a little bit different like a grot gunner, a stack of loot chests, or spikes and armor for smashing. Sometimes little details add a lot. For the grot turret a ladder made of scrap going up the leg helps provide more reality to the model and I love the idea of goblins scurrying up and down, arms full of scrap for repairs.
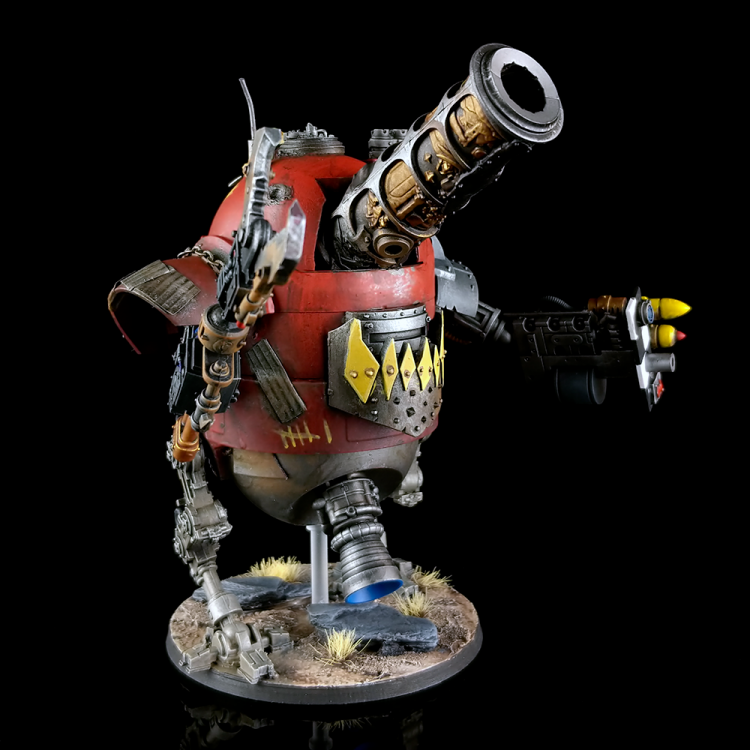
The original cannon on the tail was pretty cool… but it could be bigger so I hollowed out the opening and stuck the giant cannon from the Ogor Ironblaster in there with a little grot hanging on for dear life on the back feeding ammo. The idea of magnetizing the cannon tail to become a separate Deff Dread came up a few times in the initial stages and it was too dumb not to do. This ended up with two magnets on the lower sides of the cannon piece with some sentinel legs on a base with a clear rod for more support. There were probably better ways to set it up to avoid the extra rod with extra magnets but sometimes Good Enough is good enough.
The painting was basically the same as my previous kitbashes. A drybrush stipple from dark red to red-orange for the armor and dark steel for the metals with black/brown oil washes and brighter drybrushing. I attempted to vary up the armor and metals with a bit of orange/brown stippled for rust. The goblins were painted with a simpler version of Brin’s HTPE Orks skin with just a dark green instead of a purple basecoat. Generally nothing too crazy, lots of drybrush stippling, oils, and inks. The more interesting stuff happened with the freehanding.
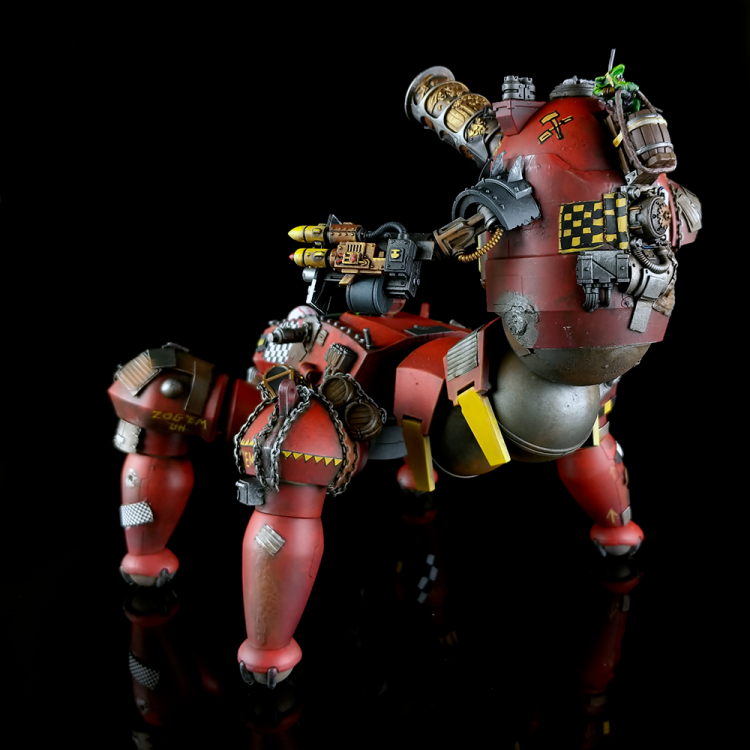
My kitbashing left a couple of areas pretty clean and flat so they were perfect for adding some freehand. I added a smattering of simple words, symbols, and checkers around the tank. This where the custom decals I had printed earlier came in handy. They made checkers easier to put down as a template to cover over with black paint as the white bled through and they needed a little bit of clean and dirtying up to read a bit more as goblin painted. Honestly I’m a little mixed with how they turned out so in the future I will likely keep their usage to the very small scaled checkerboards. Similarly, I used decals of Ork symbols like the Evil Sunz as freehand templates. With these I generally outlined them to make them pop a bit more as real graffiti. They turned out okay but like the checkerboards I’ll likely keep them to a minimum in the future.
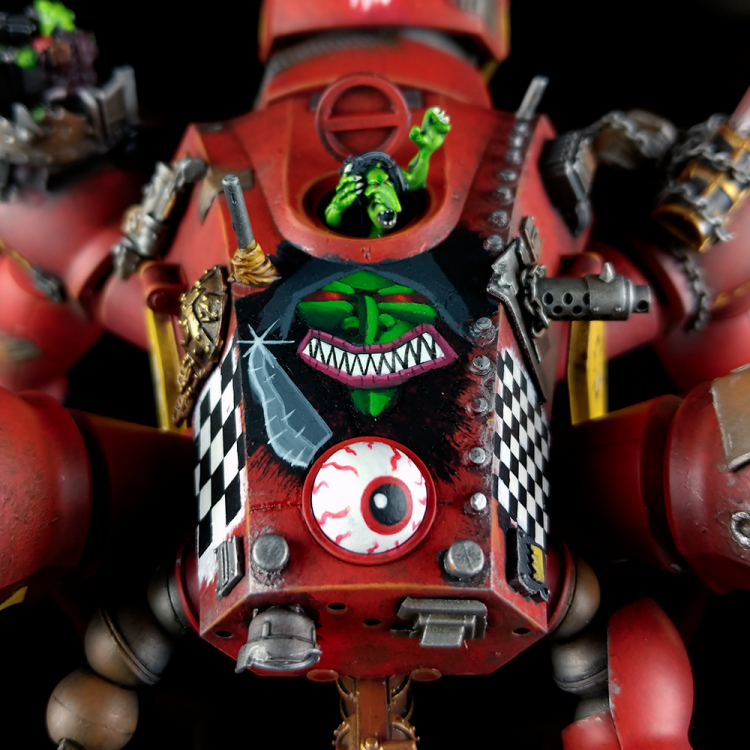
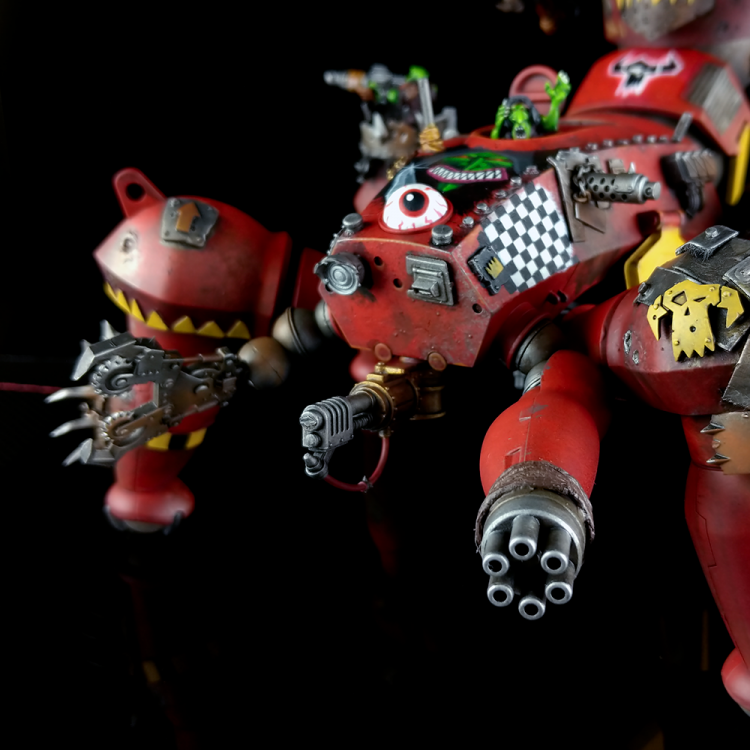
The most fun part of painting the spider tank was the goblin mural on the top front panel. I knew I had to add something a bit outrageous so I pored through old Orcs and Goblins codices for inspiration. There were a couple of illustrations I came across that were interesting but I knew instantly what I was going to do when I saw one for a Goblin Netter. It had a big toothy smile and a sinister and goofy energy of older Warhammer illustrations that was just perfect for something like this. Painting freehand from a reference like this is relatively easy, start with simple shapes defining the different areas of color, shade, and highlight and work up the transitions and details as you go. Because this is a mural painted by goblins I wasn’t too concerned about making sure everything was perfect. After I had finished the face there was a little bit of extra space left over for a glinting knife threatening the viewer to hand over their bag full of teef.
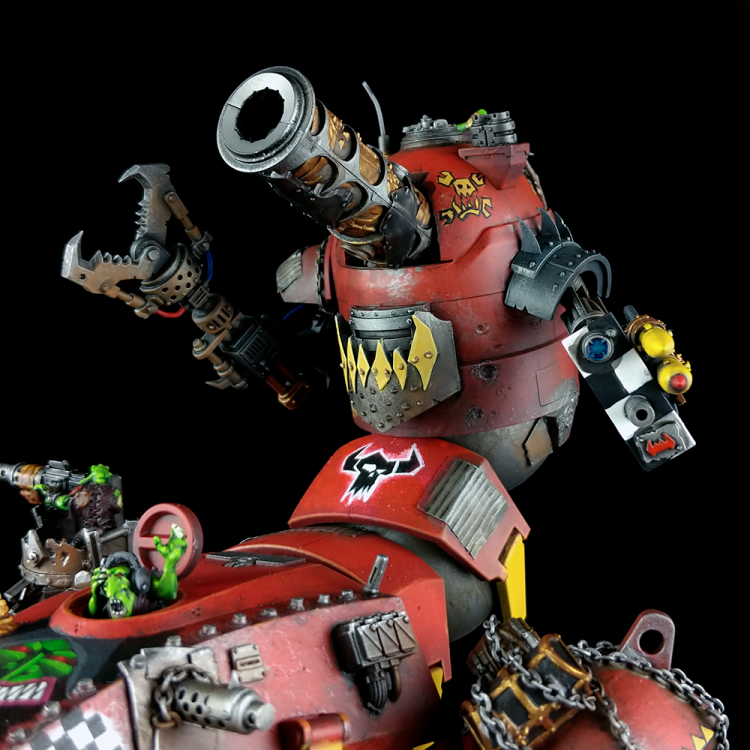
Overall this was a pretty fun build that took a long time to finish painting with how large and varied the painting was but I’m happy it eventually came together. I’m really happy with how some of the new materials, like the corrugated metal sheet and chain, was incorporated and look forward to using them going forward. The decals were kind of mixed but at the very least I have an easy way to create more complicated freehand templates now.
What’s next? It’s getting about that time for me to start another kitbash and I’ve got a few ideas in mind already. The Dom is my favorite mobile suit in Gundam and I’d love to do a Mega Dread kitbash that keeps the general silhouette of the original kit with a grot looted aesthetic. I’ve also got the monster HG Psycho Gundam kit that’s just screaming to be turned into a Stompa. Lastly, an Ork plane could be a welcome change in my kitbashes with the Star Wars Bandai kits being potentially really awesome foundations for them, maybe a Millenium Falcon stuffed full of guns and turrets? What would you like to see?
Have any questions or feedback? Drop us a note in the comments below or email us at contact@goonhammer.com.
