Sponge painting often gets relegated to adding texture to terrain, or for doing a bit of quick weathering on tanks, but it can be a valuable tool to all sorts of painting schemes from gritty blanchitsu-esque grimdarkness to helping with fine blending work in high colours. I love sponge painting, and it’s coming close to replacing the brush altogether for everything other than faces and eyes and it’s only a matter of time until I use it for those too.
In this article we’ll go over “traditional” sponge painting for weathering and texture, using sponges to highlight and how to use a sponge to paint a marine in record time.
What You’ll Need
Sponges. Plural.
That’s a simple answer but as you try out sponge painting you’ll find different sponges are useful for different things. For our purposes, sponges are (at least) semi-flexible materials with air pockets that hold liquid. They’re usually made out of some kind of plastic foam. That foam creates air pockets give them a textured surface. Depending on the size, shape and rigidity of those pockets, sponges will have different effects when used to apply paint to a miniature.
The sponges I use for painting vary from a “standard” kitchen sponge (large air pockets, lots of give) through packing foam (smaller air pockets, lots of give) to makeup sponges (tiny air pockets, fairly rigid). The general rule of thumb is that the larger the bubbles, the more variable the paint when applied gently. More variation = more texture applied to the model. You can see the difference between three grades of foam for sponges below:
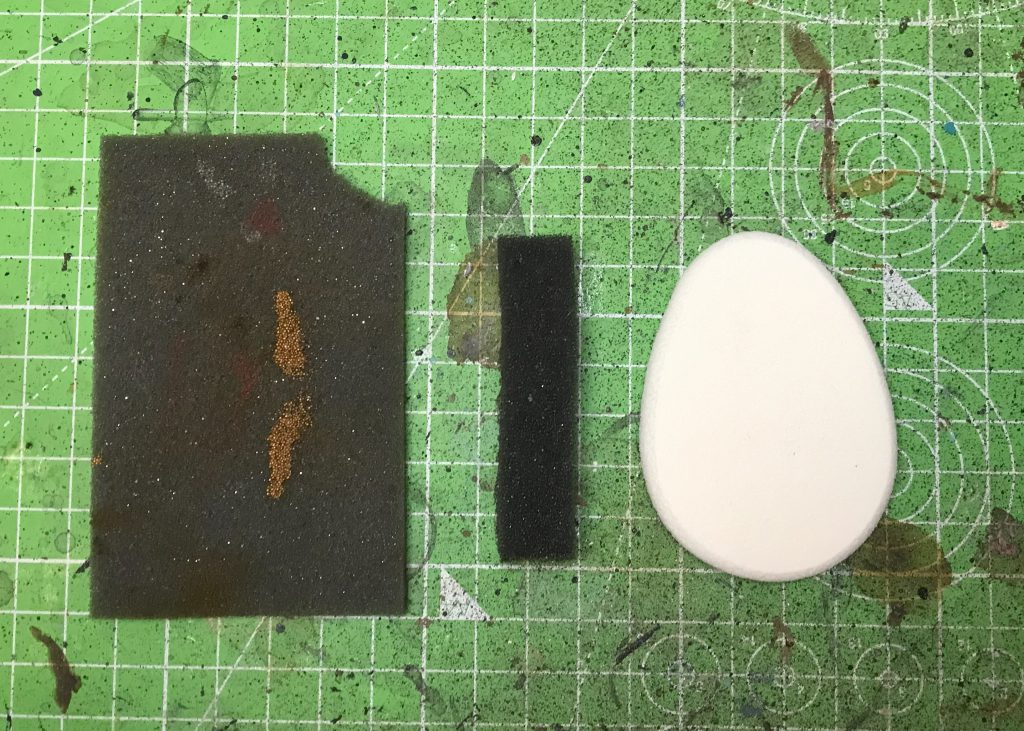
My “go to” basic sponge is the foam packing material left over from a pluck case for transporting miniatures. This is essentially a bit of a waste product, but don’t go ripping out bits you need just to paint. You can pick up similar grade sponges from a Pound shop (or regional equivalent – Dollar Store? Euro boutique?) in quantities that will last a lifetime for virtually nothing.
How to Paint with a Sponge
Before going into weathering, blends and highlights, sponge painting is essentially very simple. Apply the paint to the sponge; apply the sponge to the model. The air pockets in the sponge will retain paint, and this gives the unique uneven painting pattern that sponges give. You should still be able to see random little pockets of the underlying paint, creating visual variation across the model that as you apply it forms shadows, highlights and the effect of light scattering from an imperfect surface. Unlike a brush, you’re aiming to see the passage of the sponge across the model – brush marks are horrible, but sponge marks are excellent! With me so far?
Using sponges to get good results rests on a few key principles:
1. Get your paint consistency right. You want a slightly thicker paint than the milk-like consistency of two-coats fame. Too thin and you’ll just be smearing paint across the model. Too thick and you’re going to leave too much raised texture (How much is too much? Up to you!). Straight out the pot for the Army Painter Fanatic range works really well.
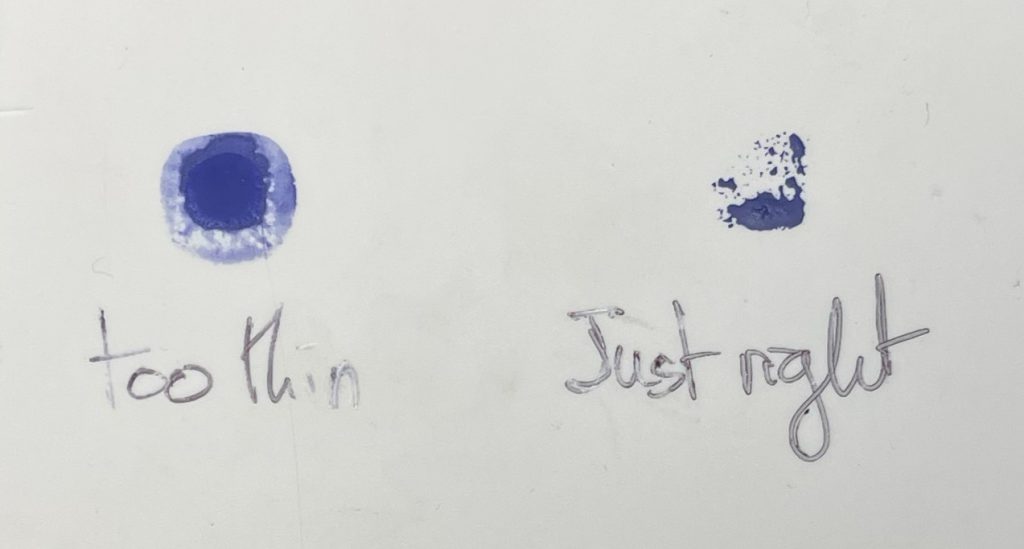
2. Don’t overload the sponge. Too much paint and the slightest press will just leave a block of colour. That’s not what we’re here for. Your first press or two should be on the bottle, or a palette so you can gauge the amount of paint the sponge is leaving before applying it to your model.
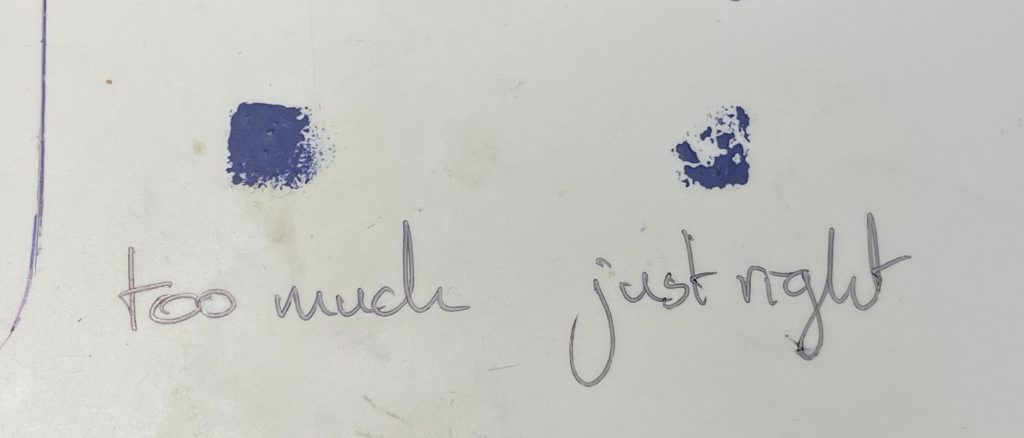
3. Control your sponge. Ripping off a long piece of foam and then using that by holding the far end is going to get paint everywhere, including places you might not want it. Hold your sponge like a brush, leaving at most a centimeter between your fingers and the model. The more you pinch and hold close to the paint, the more control you have.
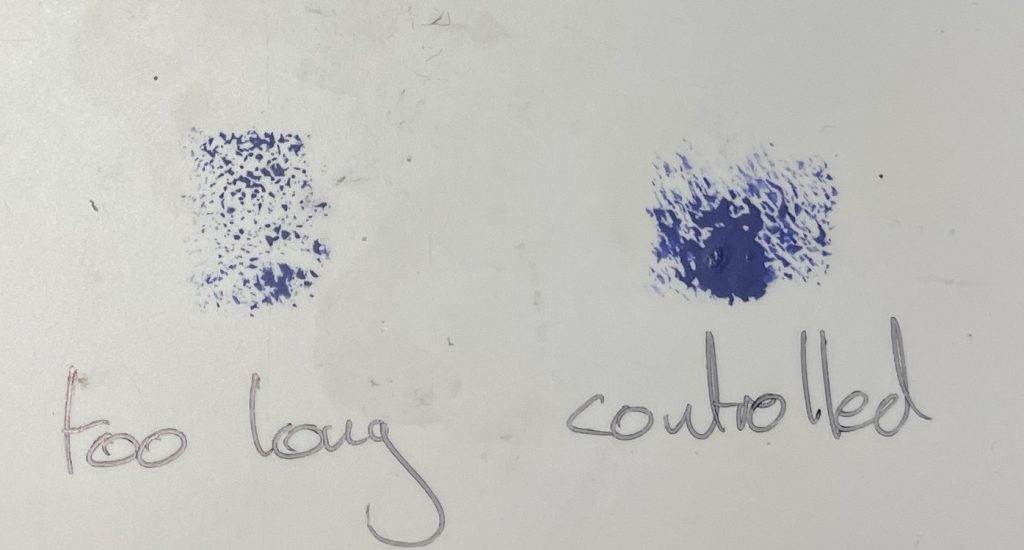
4. Don’t press too hard! If you smash a fresh sponge into a model you’re just going to leave a blob of block colour. If you want block colour, go use an airbrush or a brush like a normal person. You’re sponge people now.

There are ways to usefully use each of the “bad” examples in the photos above, so do experiment with what, for example, using “too much” paint gives you. For following the below examples I used “just right” for each model.
Basic Sponge Painting
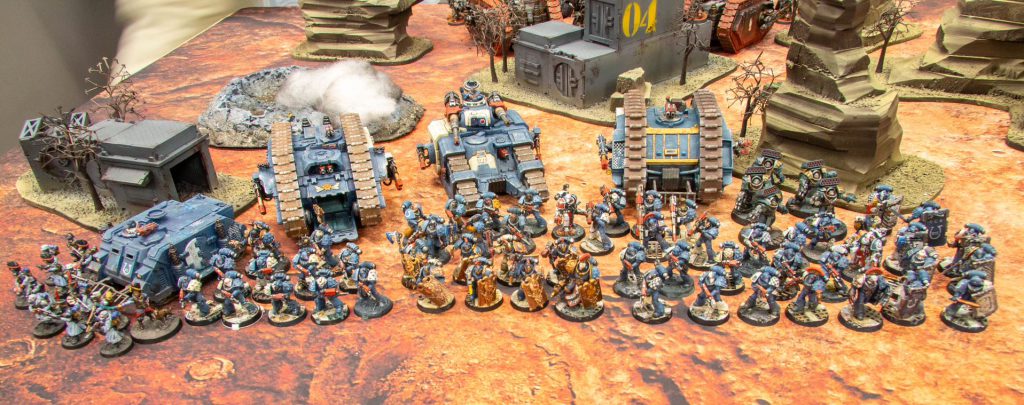
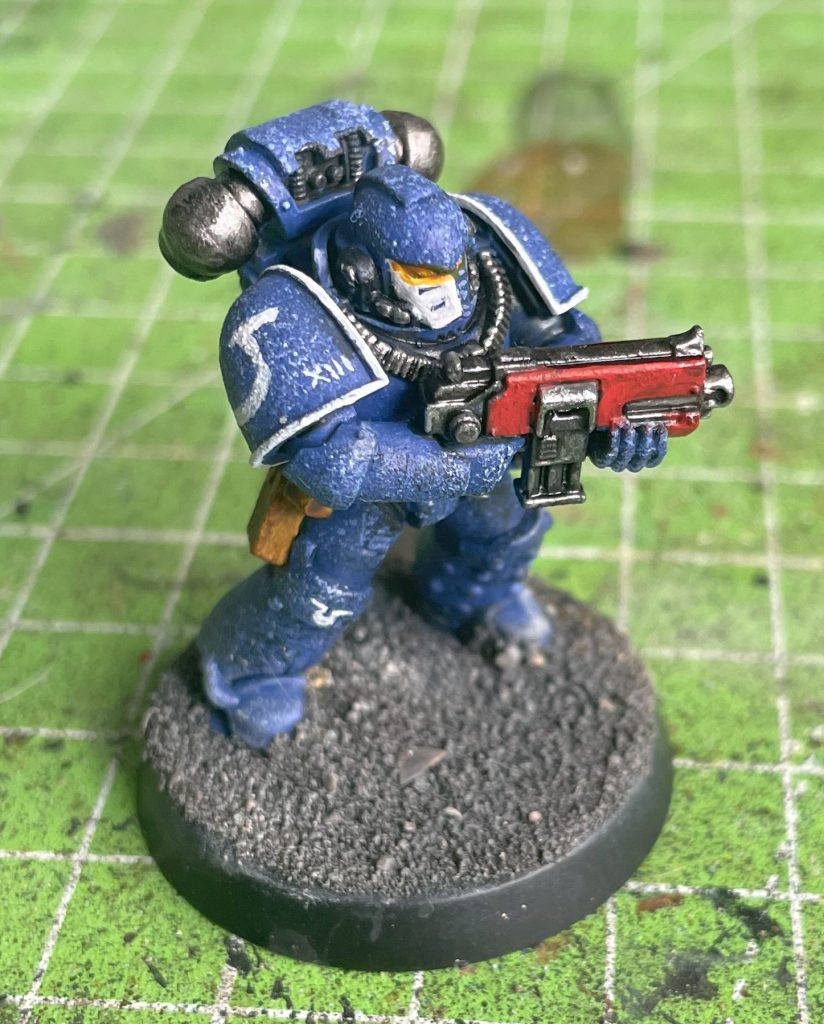
A common thought with sponge painting is that it’s only suitable for large models and open surfaces. Not so! Let’s use the Mark 4 marine we assembled in Hobby 101: Clipping and Model Preparation to show off the basic techniques you use to sponge paint infantry. I’ve painted around 3k of Heresy Ultramarines like this and can attest that it works!
I’m using the Strong Pale Blues Triad from the Army Painter fanatics range – a similar range of tones in any colour will work for this technique.
Step one: We’re going to start off with (Shock Horror) a brush for this, using the Gothic blue as our mid-tone over the primer:
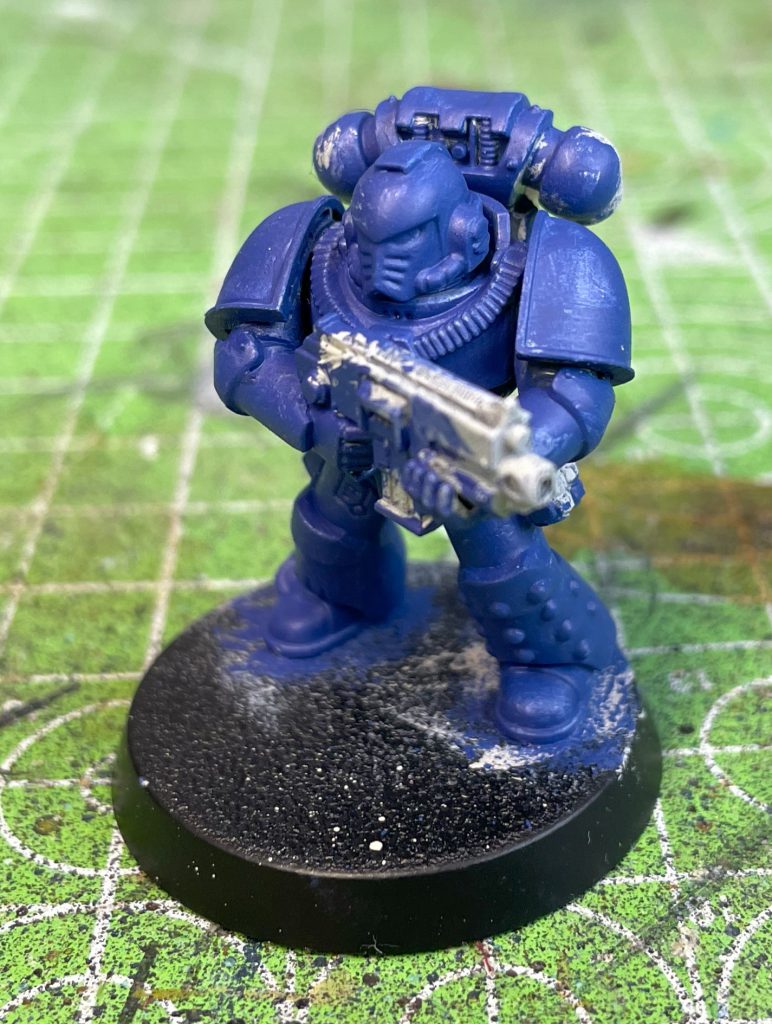
Step 2: It’s time for the sponge. Use both a tone lighter and darker (Ultramarine and Triumphant navy Blues) and apply this fairly liberally. You’re not aiming for highlights yet, just to add some different colours to the model to break up the monotone blue:
Step 3: Highlighting. Using less and less paint on the sponge each time, apply the lighter tones in sequence (Alpha and Baron Blue) towards the top of the model and on any prominent areas. Be gentle with these (or whatever lightest tone you’re using) as too much will cover the previous coats:
Step 4: Extreme highlights – in this case Augur Blue. You’re aiming for only the very lightest touch with your lightest tone, picking out the extreme edges of the model. A little on rounded surfaces is good too, adding more lovely visual texture to otherwise fairly boring block colour.
Step 5: Knocking back. It’s going to look a little dotty at this point, so grab your base colour back out and lightly dab paint on the areas with too much highlighting to tie it back together:
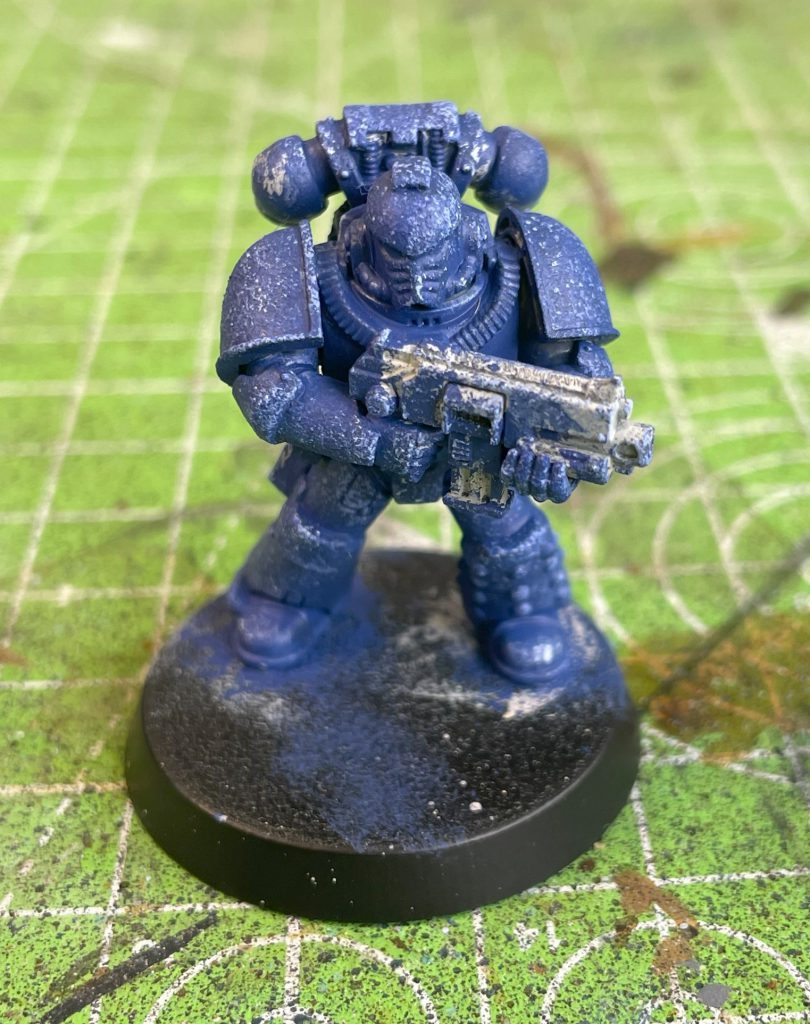
Step 6: Shadows and Budget weathering. Once you’ve done that, use your darkest tone mixed with a little black in about a 1:1 ratio. (Triumphant Navy Blue in this case) to add lightning-quick shadows, weathering and chipping all in one. For a Space Marine I usually just do around the feet, but again will tap the shoulderpads to finish them off:
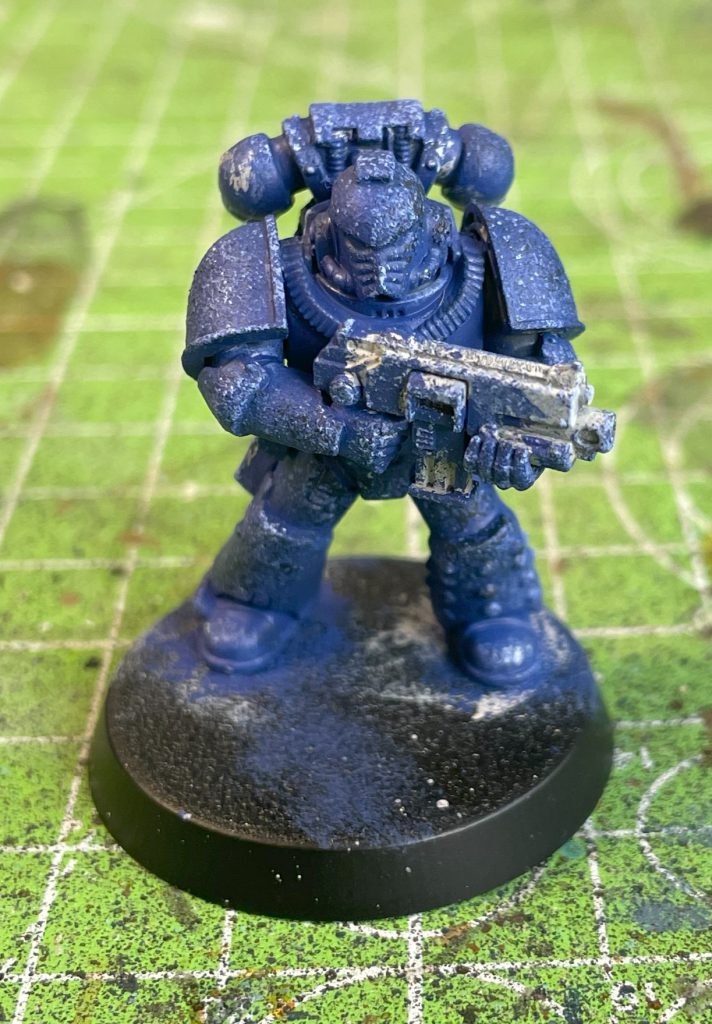
Step 7: Paint the Rest of the Owl. After the sponge has done it’s work, get the brush back out and add in your details and you’re done! This might seem like a lot of steps, but its very quick and perfect for batch painting. The sponge has covered the Basecoat, Highlights, Chipping and Weathering, and it’ll take you less than a minute or two. All the more time for some lovely freehand.
Sponge Painting Large Surfaces
Sponge painting is often used for large flat surfaces like tank sides or terrain. Here, you’re simply applying paint via sponge over a suitable base coat, using a range of tones in the colours you’re painting. This is about taking advantage of the uneven sponge application in order to create visual variety over a large surface in a realistic, slightly chaotic, mix of tones and colours.
In this example I’ll paint and weather the armour at the same time, a massive advantage of using a sponge. To start, take your base colour (I used a previous generation of Army Painter paints for much of these, so I’ll give the new Fanatic range colours), and two lighter shades of the same colour and your weathering colour. For this example that would be:
Bony Spikes (Base)
Pale Sand (Light 1)
Matt White (Light 2)
Fur Brown (Weathering )
Step One: Weathering. Over your primer, add your weathering colour to the areas you’d like to look particularly beat up. In this case, the leg armour for my Knight Lancer, I wanted the bottom, around the “ankle” of the knight, to look like it had been mud stained. Concentrate on the lowest point and get a nice opaque look with only a little black showing through. Don’t try to make this perfectly even, move up and down across the piece you’re working on instead. We’re all about visual variety here.
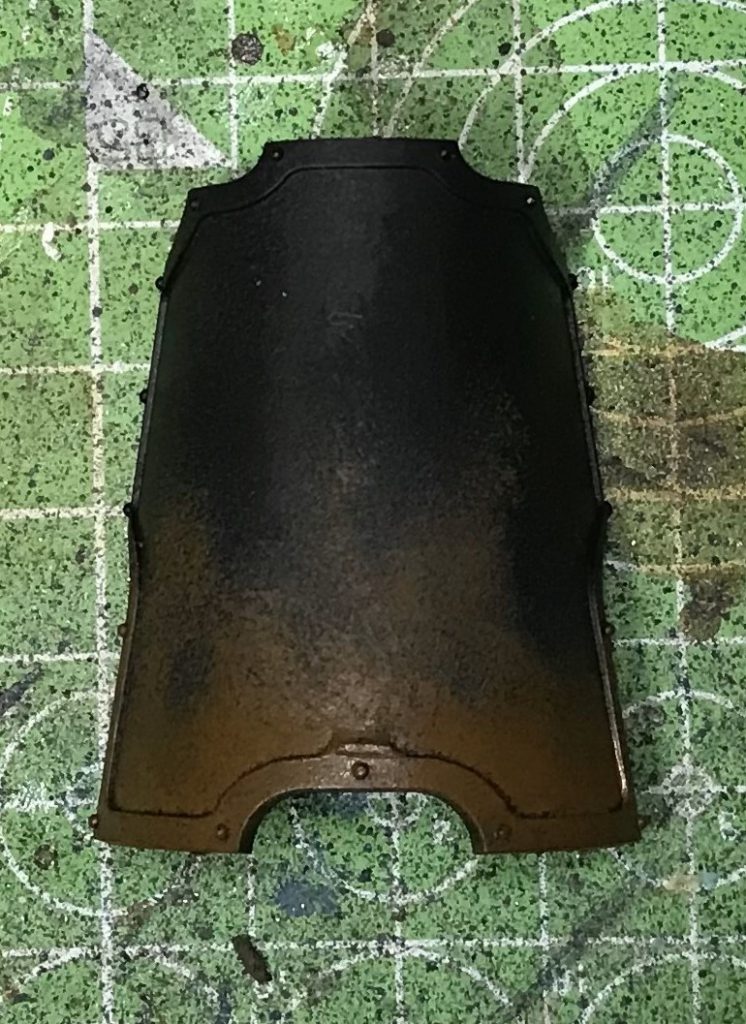
Step two: Base colour. Add your base colour, overlapping with the weathering tone areas and generally getting a good consistent (but not perfectly even) coverage over the model. You want to let the weathering colour show through solidly at the bottom, and less so as you move up away from the weathered area. Primer showing through is fine for my scheme, but depending on your primer colour you may want to obliterate it altogether.
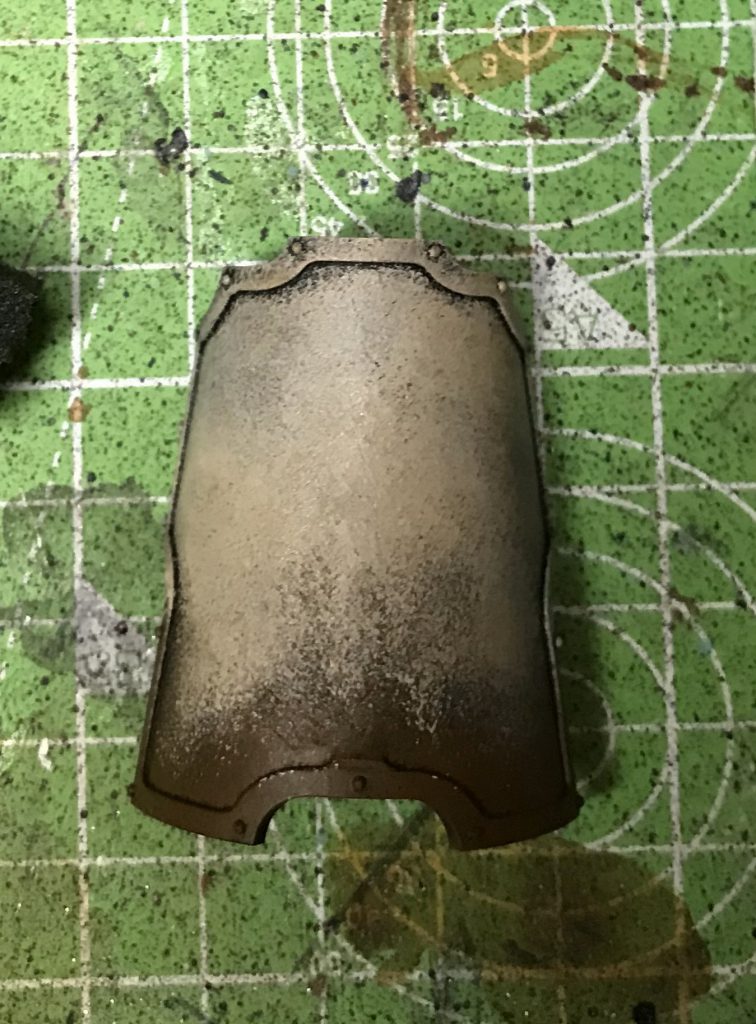
Step Three: First Light tone. Add Light tone 1 to the model, concentrating on the top and wherever light might reflect off the model. In this large curved piece that means the top of the armour plate and in a rough line down the middle to accentuate the curve of the armour. You should still feel free to move around, leave base tone showing through and even dabbing at the weathered area, but make sure there’s a clear difference between the areas you’re showing light reflecting from and the rest of the model.
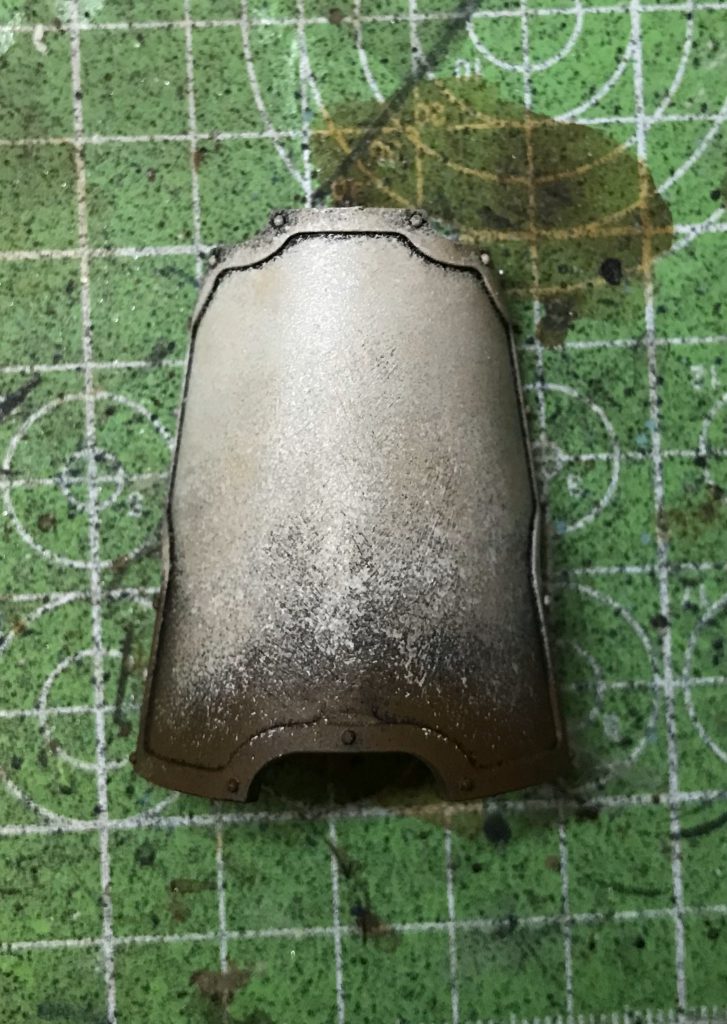
Step 4: Second Light tone. More highlighting here, concentrating on the very top and any particularly prominent areas. Still add this extreme light tone elsewhere, but very sparingly. You can see here that adding two layers has almost completely obscured the primer in the top third while leaving coverage slightly patchy elsewhere. This not only provides highlights but also makes the armour look weathered and dirty, with only a very small area pristine (ish).
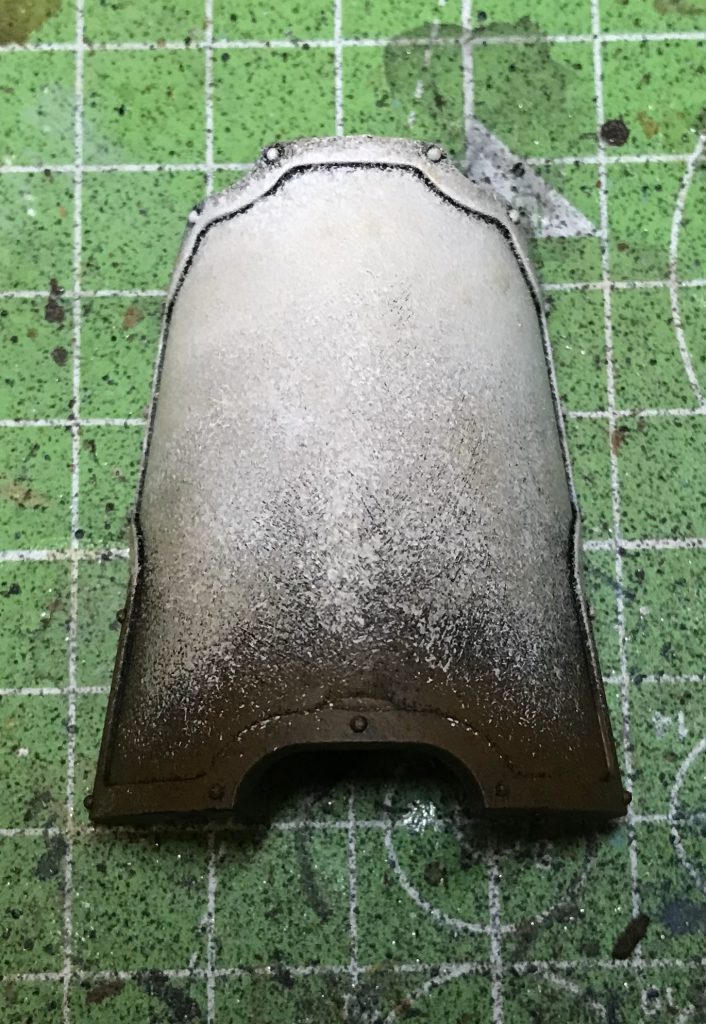
Step 5: Return to Weathering. If you like models to look a bit battered but not completely, you could leave it there and move onto painting trim or other details. If you like at least semi-realistic weathering, get out your weathering colour and reapply sparingly. I use much less paint on the sponge for this step (see the “too long” example above for the kind of coverage I’m after here). Concentrate on the bottom third, but do apply sparingly elsewhere to show sprays or kicked up mud.
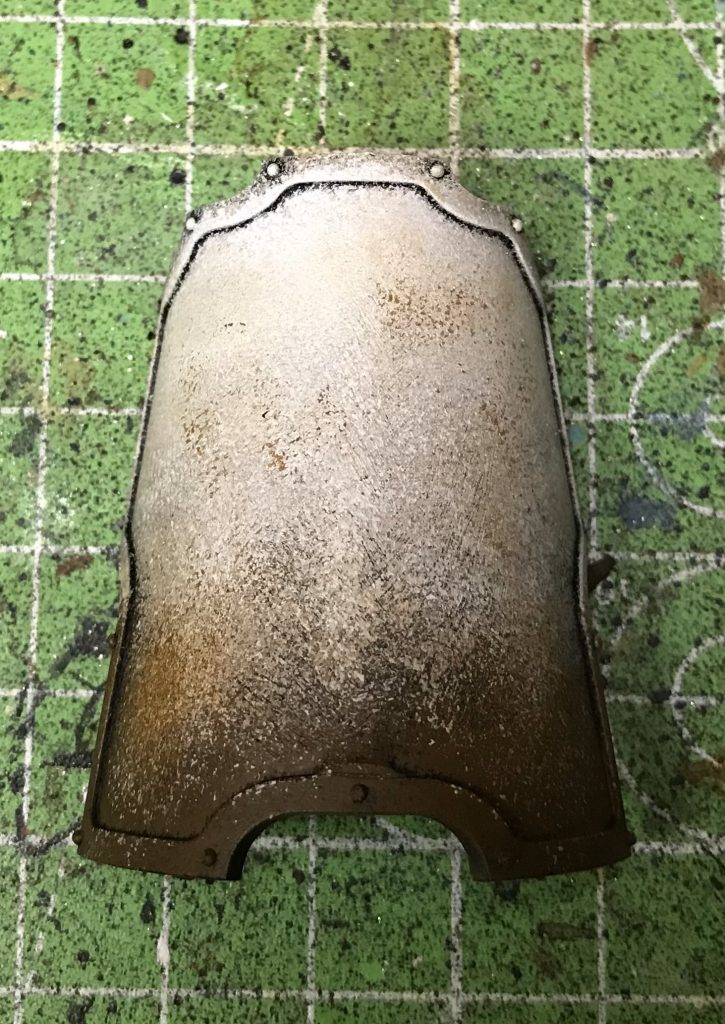
You can scale this up as you like! On this Leman Russ example, I’ve gone with a base coat of Augur Blue, added a brown weathering colour, then sponged Brigade Grey and White all over it. After that I picked out some panel lines with watered down Dark Tone and moved on to the details.
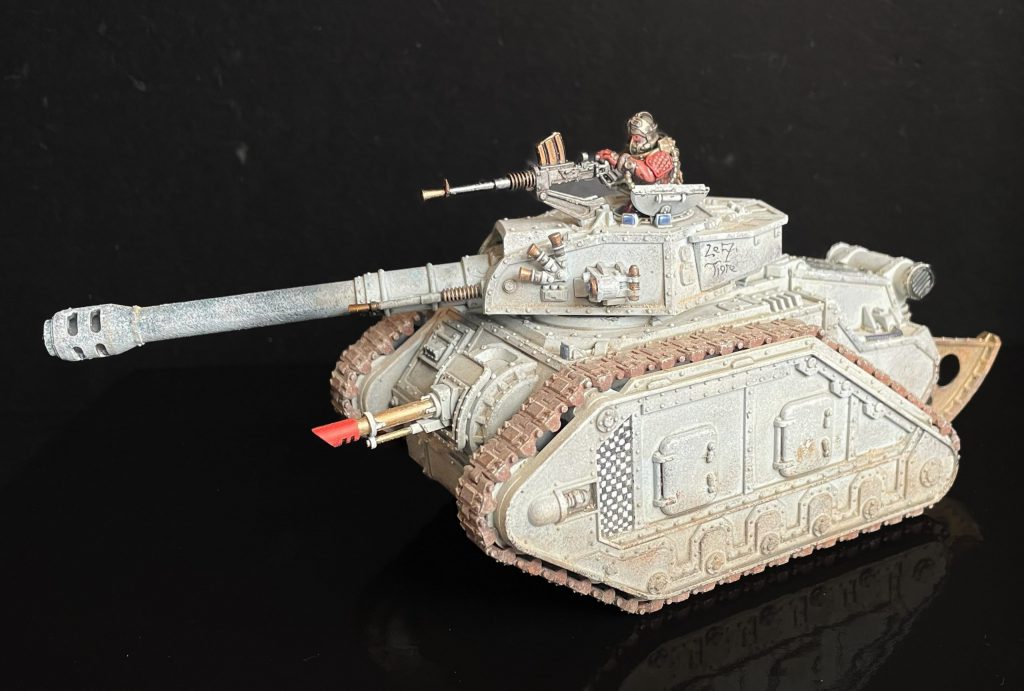
Skipping the weathering tone if you wish to not have grimy models is totally understandble and a legitimate aesthetic in and of itself. That keeps things nice and simple, while breaking up the solid base coat with complementary colours. The Army Painter triad system will work very well for this, picking three paints in a triad and following the above steps. As you work in the brighter colours, apply paint increasingly sparingly, with a heavier emphasis on the final “overall” tone that you want. When you’re done, go back to the original colour to bring it all together.
Sponge Weathering
Where sponges are often even the most die-hard brush wielder’s go-to is in the weathering and chipping stage. The uniquely uneven semi-random print left by a sponge lets you cut the tedium out of armour chipping and depending on the effect you’re going for can be as easy as a one stage process.
For very basic Sponge Weathering you’re simply applying a suitable metal colour (for steel try the Army Painter Mithril to Gun Metal range) to the edges of your model and anywhere else you think might get chipped and weathered. This very simply and easily shows that paint has worn off surfaces, exposing bright metal underneath. For chipping and weathering dark colours this is incredibly simple.
Let’s take this Modiphius Brotherhood of Steel T45 Power Armour as an example. Once you’re at the fully painted stage it’s ready for chipping:
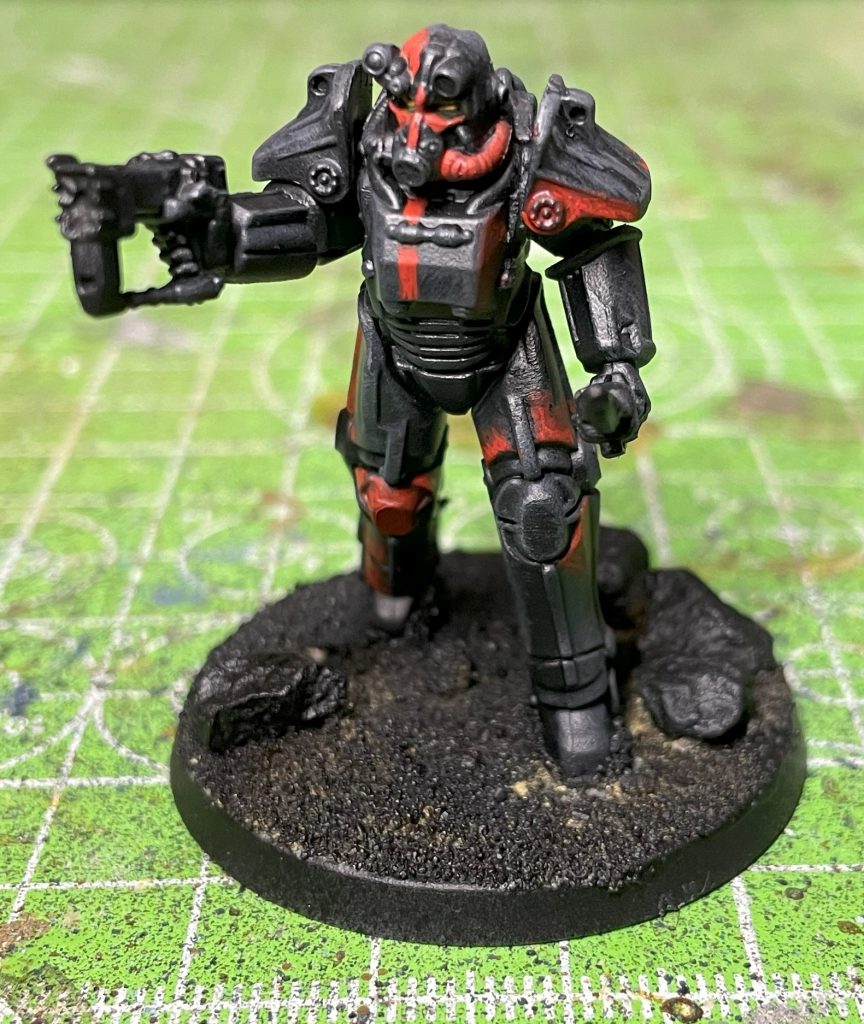
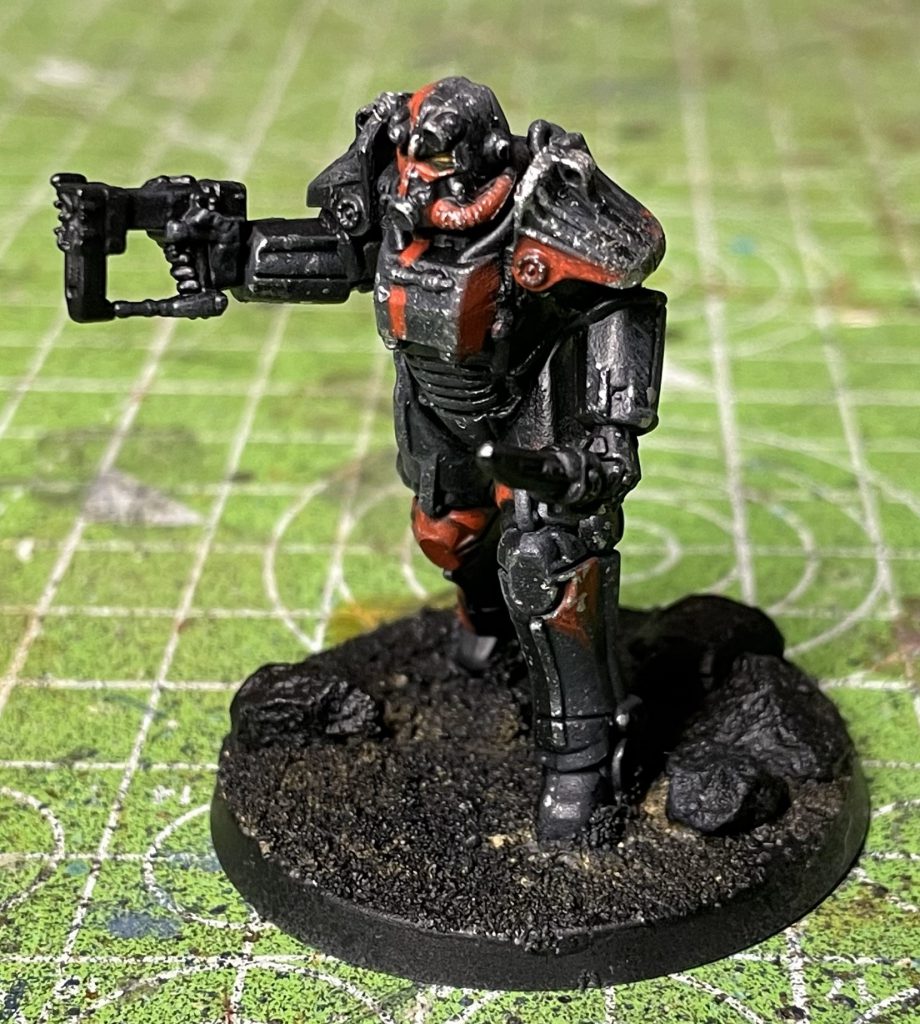
Then, because this is a fallout model and I want it to look beat up, I’m just going to smash the sponge into it with a light silver paint, and that’s literally all there is to it. Focus on edges but do let the sponge stray a little – edges first then elsewhere once the majority of paint on the sponge has been used on the edges.
Sponge Weathering Mark 2
Okay that was perhaps too simple! Weathering on brighter colours presents different challenges, but the mighty sponge can deal with everything. When you’re chipping any colour other than black, I like to use a light tone to represent worn paint, then black, then silver/bronze depending on the colour of the underlying metal. Here you’re wanting to show the way paint tends to flake – lifting off or wearing (exposing a lighter tone) and then exposing base or oxidised metal (black), then bright unworn metal (silver/bronze).
Let’s use this Imperial Knight pauldron as an example. First step is to paint the piece to completion following the painting with a sponge steps above:
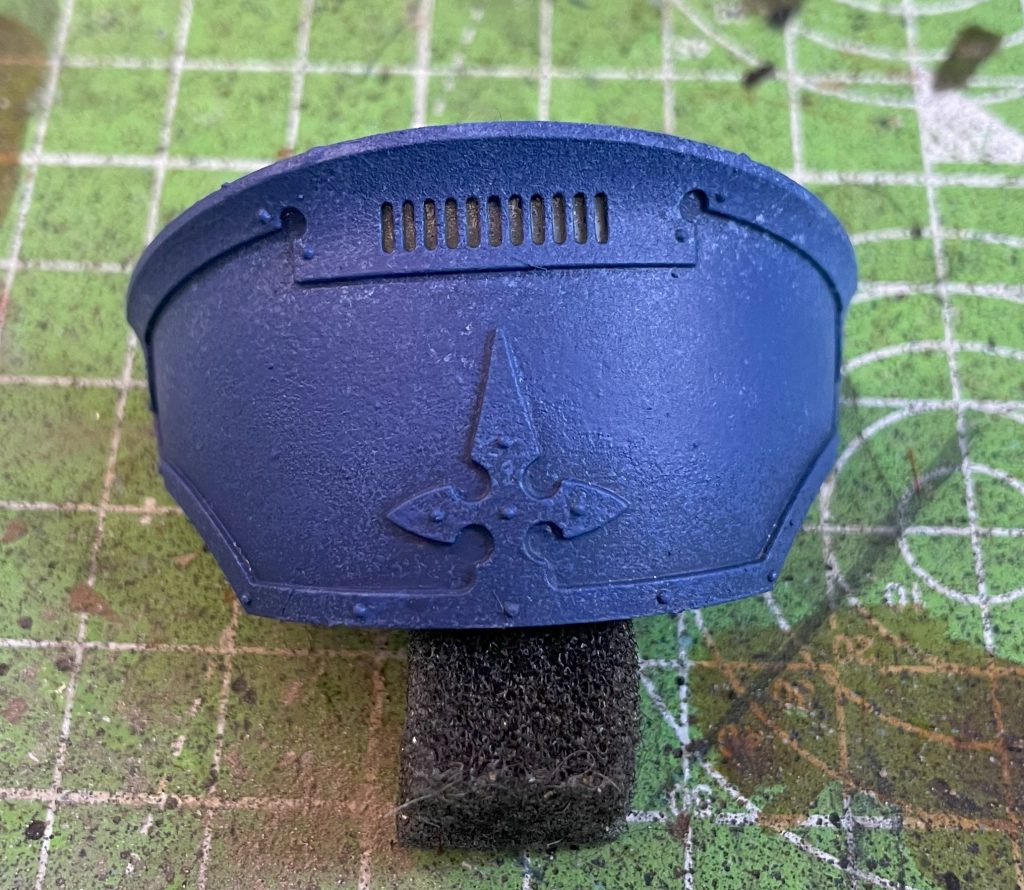
Step one is to add your light tone. I’m using the same colours as the Marine above, so this is Army Painter Augur Blue. Use a dense sponge (like a makeup sponge) for this, as you want fairly solid colour with a bit of sponge texture:
Add this tone to edges and anywhere else you want to look worn and weathered. I’ve added two patches onto the curved plate to break up a block of colour and represent a direct hit.
Once the light tone has fully dried, sponge on black within the light tone area. You don’t have to be too careful, but ideally each area of black will be surrounded by the Augur Blue. Leave some of the Augur Blue without black so that you’re seeing different levels of wear across the model.
Once that’s done, add the silver within the black areas – again, try to make it so that each exposed metal area has a little black around it. Leave some of the Black as well, giving you four levels of wear and a nice amount of visual variety.
There you have it! Simple, effective weathering. You can use this technique for any type of wear or weathering. If you wanted to add mud instead of chipping away to bare metal, just use a darker version of your base coat instead of the light tone, then a dark brown and a lighter brown while following the steps above.
Mastering Sponge Painting
Mastering Sponge Painting and taking it further is a really rewarding, very tactile, process of trial and error. If you lean into it and embrace the controlled randomness of the sponge you’ll find it quick to pick up and interesting to master as different sponges, consistency of paints and ways of applying the sponge to the model create wildly different effects. I now paint pretty exclusively with a sponge, and it’s quick, fun and produces some really stunning effects. Just as a little show off, here’s some of my knights – everything on these apart from the freehand is fully sponge painted. There’s a lot you can do, including fine blends, mixing on the model and even Object source lighting, oils and non-metallic metal are well within your grasp and significantly easier with our friend, the Sponge.
Hopefully the above examples of quick and easy ways to add a new tool to your repertoire get you to pick it up and have a go, and you’ll help me put an end to the tyranny of the brush forever!








![[40k] Competitive Innovations in 10th: Warping Time pt.2](https://d1w82usnq70pt2.cloudfront.net/wp-content/uploads/2020/01/Analysis_Banner.png)
