Pinning
Taking pins/wires and reinforcing the joints and connections of the miniatures to strengthen and create durability.
I have always been a massive proponent of pinning models. Reinforcing any joint with anything other than glue can only benefit it. Pinning helps prevent parts from breaking off on larger, delicate, or miniatures where weight and gravity can stress the joints. Pinning can be utilized on metal, resin, and plastic miniatures and is accomplished with a list of tools you most likely have for assembly.
Materials needed
- Unassembled miniature
- Pinning material (paperclips, push pins, metal wire)
- Army Painter Miniature and Model Drill
- Army Painter Drill Bits
- Army Painter Plastic Frame Cutter
- Army Painter Model Files / Sandpaper
- Super Glue
- Hobby Knives
- Army Painter Green Stuff
- White Primer
- Industrial Snippers (optional)
- Clamp (optional)
We highly recommend the Hobby Tool Kit by Army Painter for beginners.
Pinning Miniature Joints
Step 1. Assess the Miniature
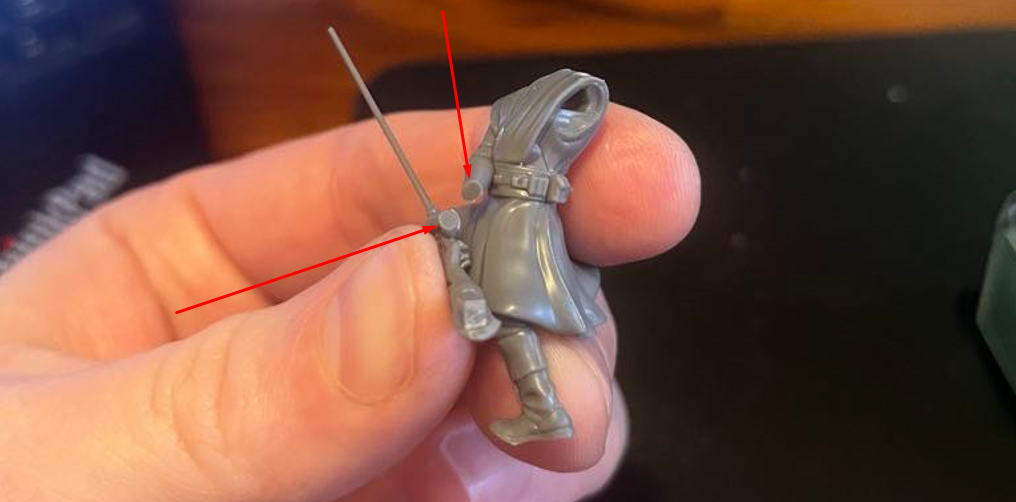
Looking at this miniature arm join, we can see it is a unique hole with a unique piece that fits perfectly. Not all joints will operate like this; that is where you can take a look and plan out the weakest areas to pin. In this image, the red arrows indicate a point on the miniature’s right wrist that will connect once the left arm is in place.
Seeing that they are flat surfaces, we can surmise that this joint may be best served with a pin to ensure that it does not shift during the shoulder’s gluing.
Step 2. Clamp/Hold and Drill
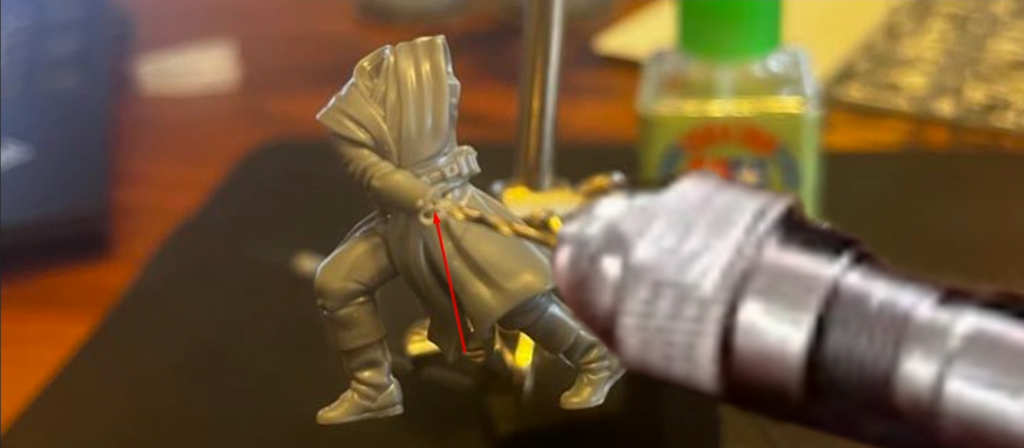
You want to take the center point of the area you are drilling and start with small bursts of the drill. In this case, the center of the right arm’s wrist. I normally eyeball it, but strips of tape could work to make sure you are dead center.
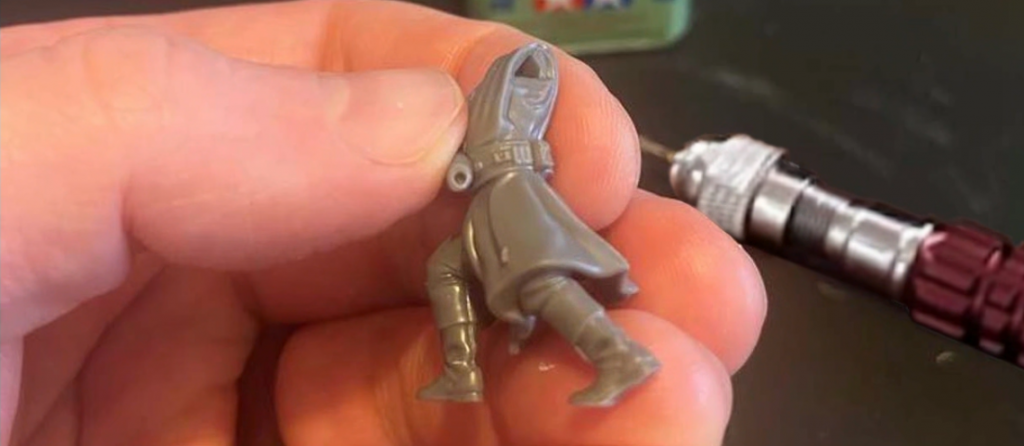
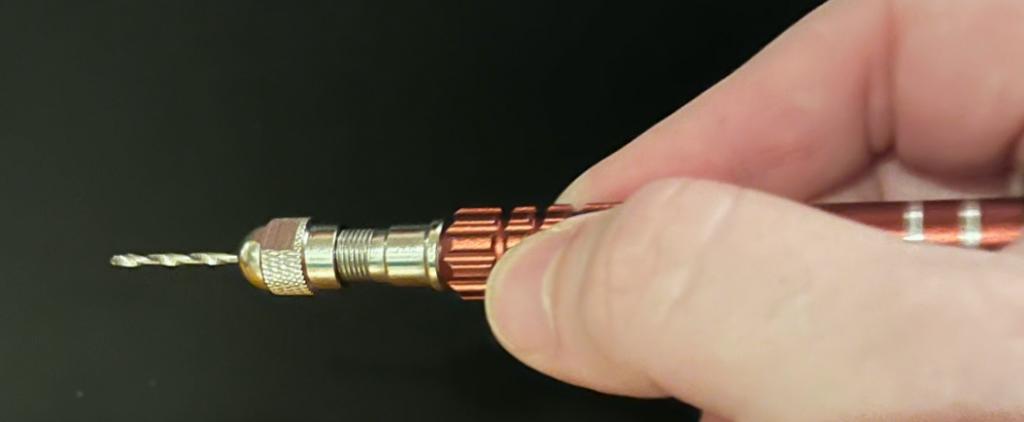
HOW TO USE THE DRILL:
- Gently lean the drill in the center of the palm of your hand.
- Using your thumb, index, and middle finger, twist and turn the drill while keeping it stable
- Apply light pressure while turning until you have created a mark, and the drill bit will follow
Step 3. Cut and Glue Push Pin
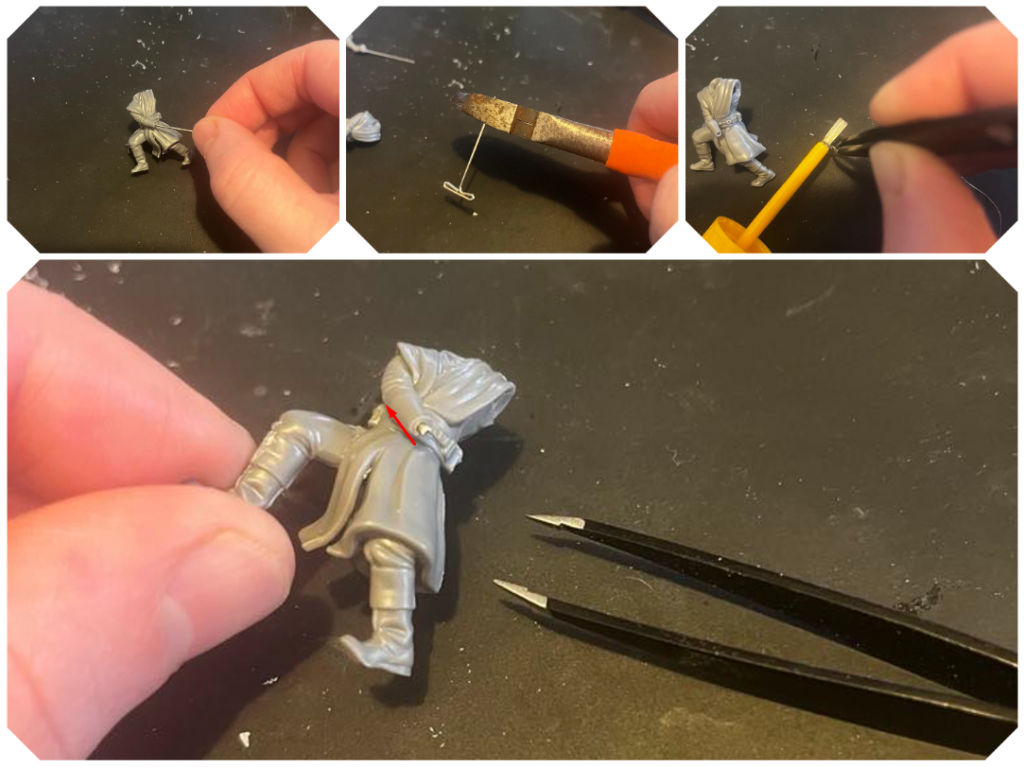
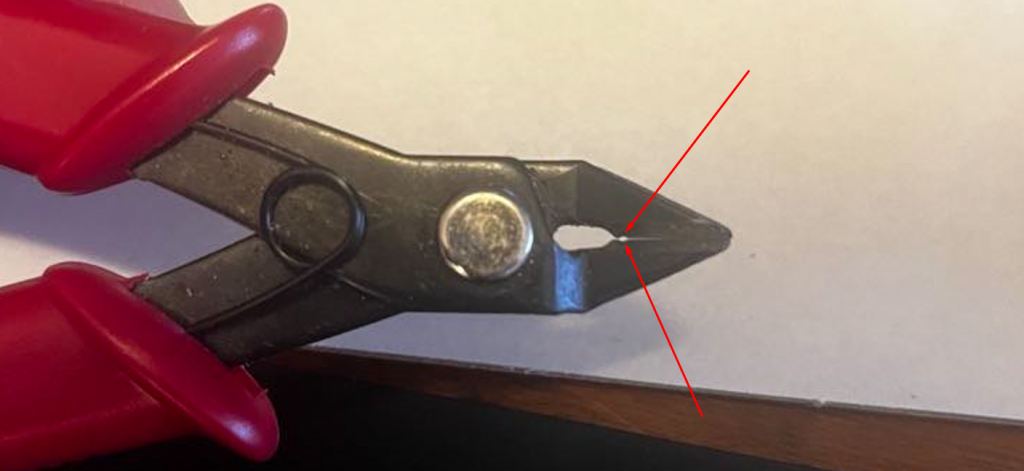
After your first hole is at a depth you feel will provide support, you can move on to cutting the pin. This is where the industrial snippers come in handy. You can eyeball it or use a Sharpie; it will be hidden, and it does not matter. When cutting the pin, use your other hand as a shield to catch the tiny bit of metal you are cutting. It has a tendency to go flying from the force.
Once you have tested the fit and size, use tweezers to dab one end of the pin into the glue. Then, put the pin in your first hole, glue the side first, and let it dry. You will need to occasionally check to confirm the pin is straight and the glue is not drying in an odd direction. When I pin, I go with the flow of the joint, having the pin along the axis of the forearm.

We recommend using industrial snippers to avoid ruining your plastic frame (sprue) snippers. If you MUST use your plastic snippers, make sure you are not cutting in the center but near the butt of the snippers, as it will bend and begin to ruin the plastic frame snippers.
Step 4. Plan for Joint 2 and Drill
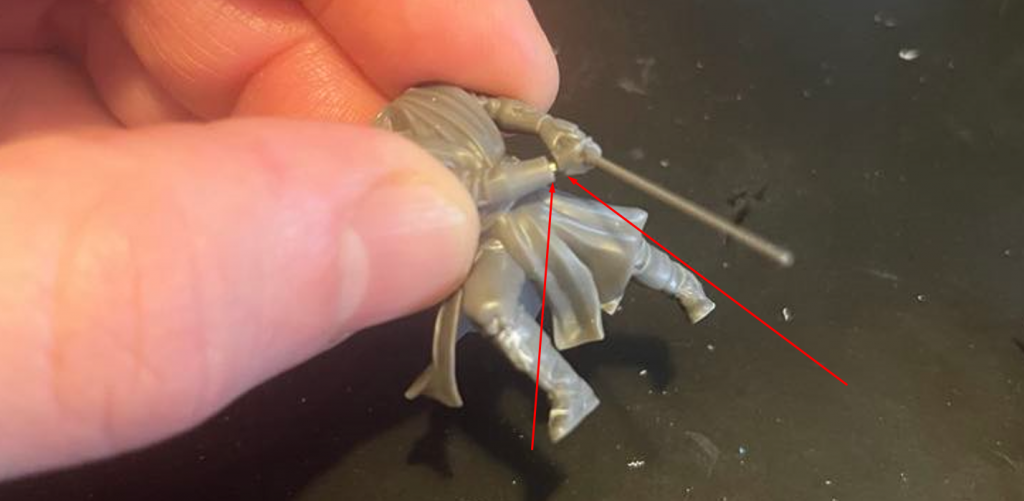
Place the second joint you plan on pinning to verify that it fits and the depth you need for the second hole. The above image shows that we are speaking to millimeters here. You are creating a secure joint, not adding rebar to concrete.
Clamp the arm down and begin drilling. The drill bit should go as far as the metal pin sticking out on the other side. You can always go deeper to verify that they will fit properly.
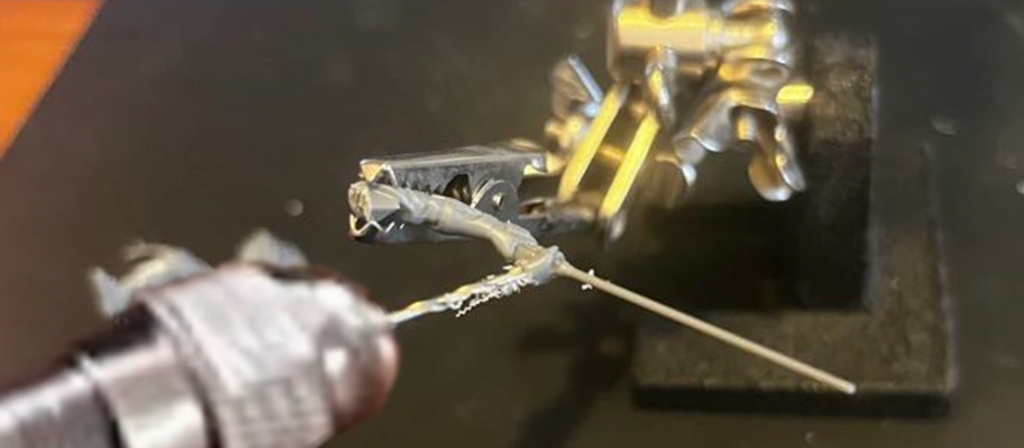
Step 5. Gluing Joints
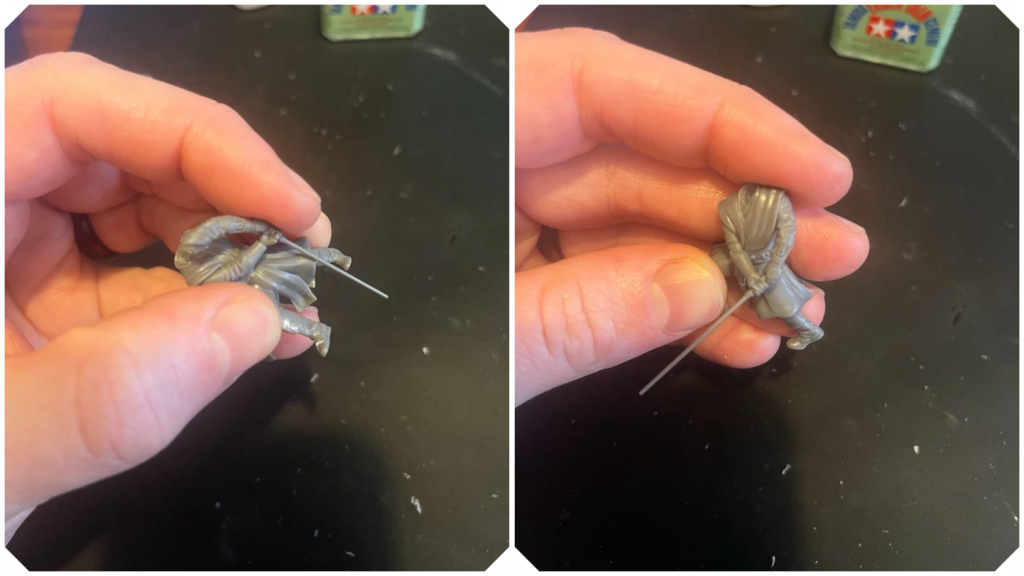
If the joint does not fit together perfectly, this is an excellent opportunity to utilize the Green Stuff. Mix the two colors of Green Stuff and roll them into a little ball of tacky. Once completely integrated and mixed, roll into a skinny rope. Cut to the desired length and ‘wrap’ around the joint. Using your finger and a pin, you can secure the thin rope to the gap you are closing. Once the green stuff dries, you can sand it to smooth, and when primed/painted, you will not see a difference.
Always verify fit, then glue.
Pinning to a Base
Step 1. Sand the Feet
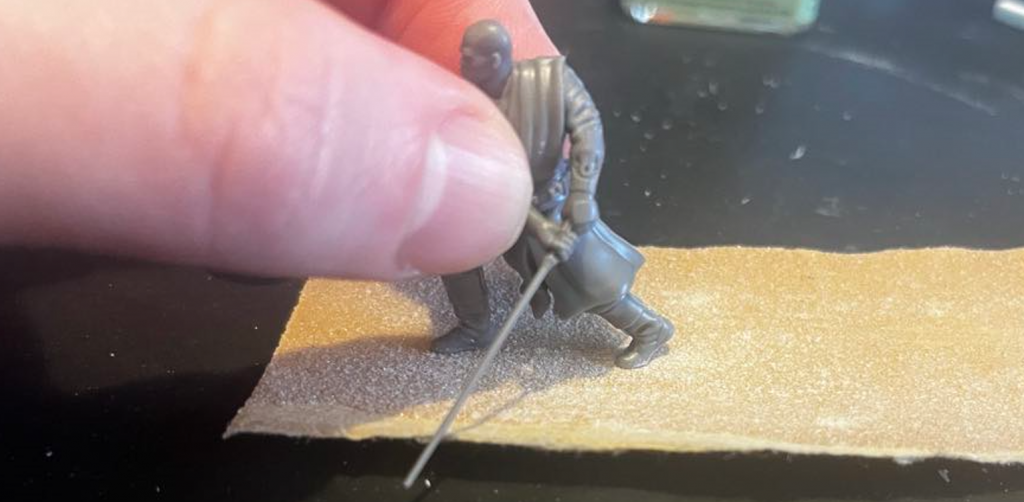
Once the miniature is fully assembled, lay down a piece of sandpaper. Then, move the miniature back and forth while holding the sandpaper on the flat surface. You only need to do this briefly until you see some plastic dust. This will create better long-term adhesion and give you an idea of where your pins should be placed.
Step 2. Drill Holes
Using the same idea from the previous instructions, you want to take the center point of the area you are drilling and start with small bursts of the drill. The feet will be a lighter color now due to the sanding, and you want to center your drill on the parts of the feet that will make contact with the base.
Step 3. Cut and Glue Push Pin
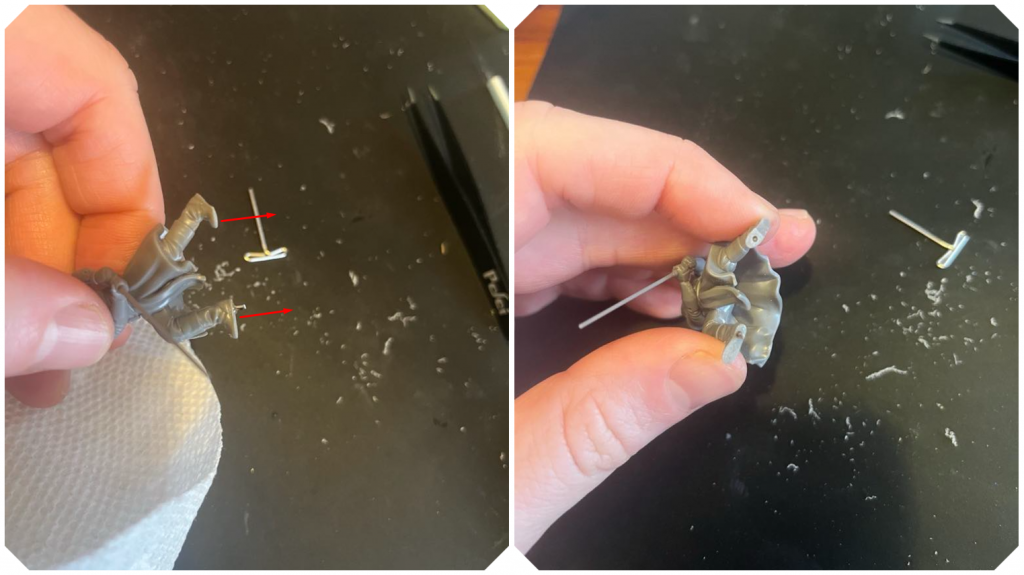
These can be shortened after glued into the base, so measuring for the base is a step you can skip. It would be best if you had a long enough pin to make it through the thickness of the base plastic.
When gluing, make sure the pins are perpendicular to the feet you have drilled. On this miniature, one foot is flat on the ground, and the back foot is on the balls of their feet. I chose to pin both feet, making the back toes a bit trickier. The front foot is drilled into the heel, where you could go deeper due to the ankle/leg connection, but on the other foot, you can only go as far as the top of his boot. Having a little support is better than none.
Step 4. White Primer Planning
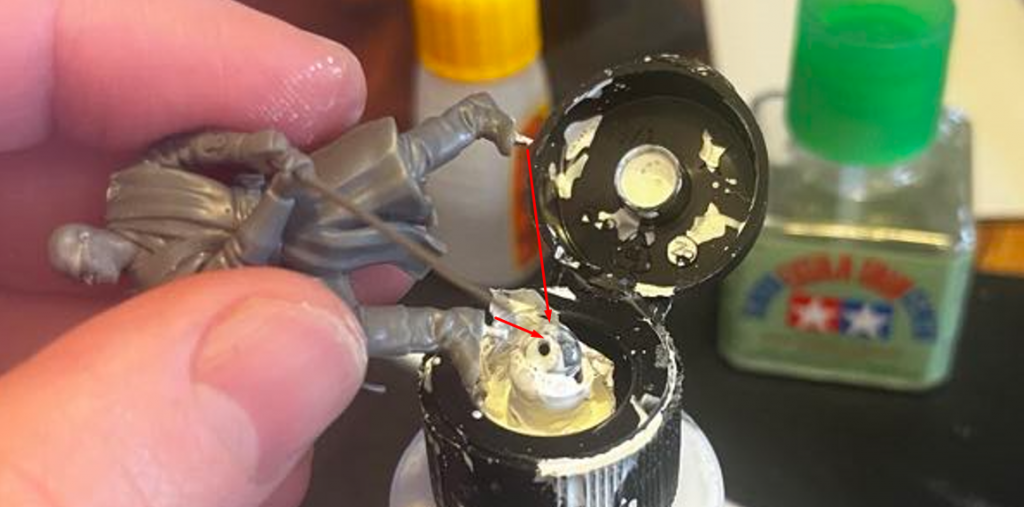
Once the pins are completely dry, get out your favorite white primer. Any color paint will do, but white primer dries quickly, can be scraped off if needed, and will be covered up. There is no need to waste expensive paint for this.
Lay your base flat on the table with the bottle of primer next to it. Then, dip each pin in the white primer and hover over the miniature and base to adjust how you want the figure placed on the base.
I like them centered with minimal basing, so I attach my miniatures before painting. In my interpretation of’ centering, ‘ I chose overhangs on both ends of the model. I wanted to create a center mass on the base for more accessible gameplay. This will create two white paint dots where you must drill on the base.
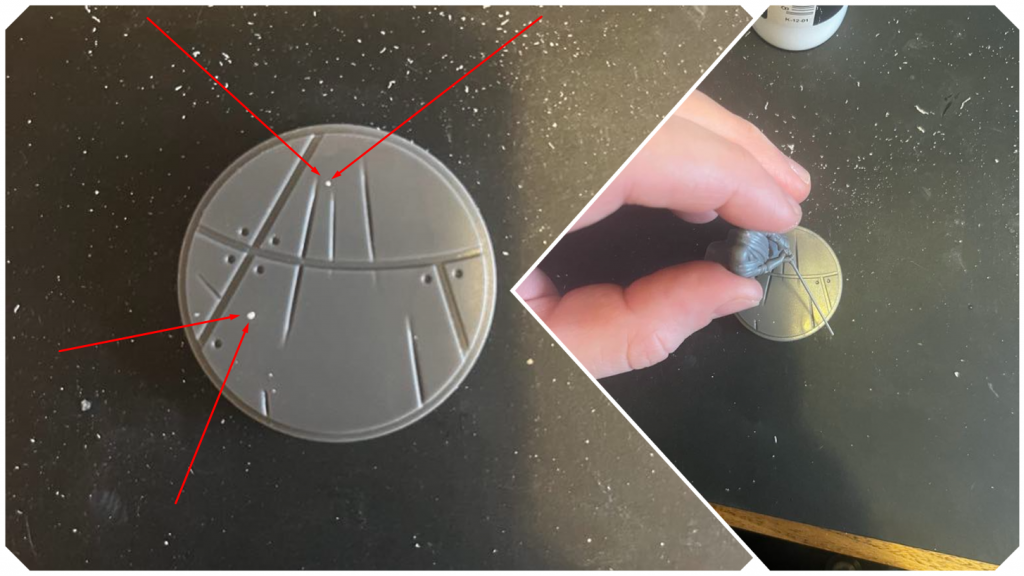
Step 5. Drilling Base and Adhesion
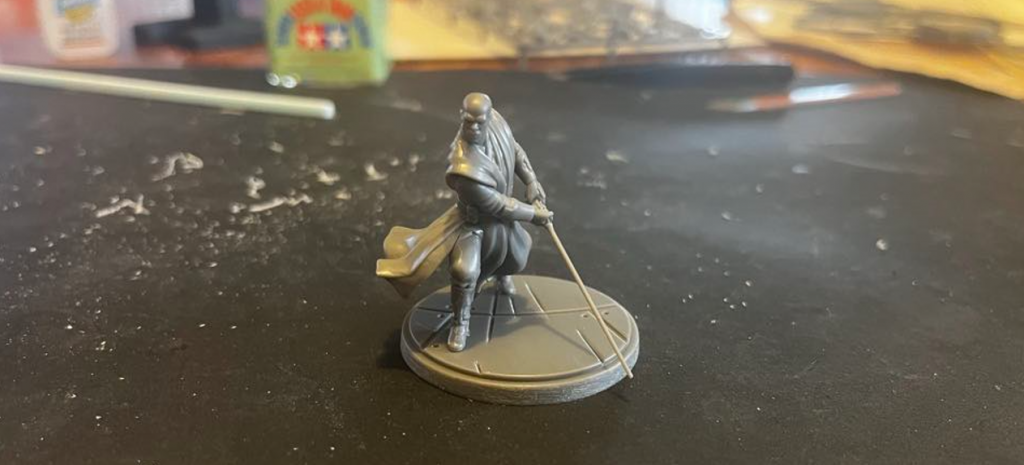
Once the holes are drilled through the base, test that the pins line up to the holes and begin attaching. Use your choice of glue to adhere the flush feet parts to the base; press firmly and respect the model’s fragility. Once you can tell the glue makes contact, flip the model and base over and apply a few brushes/dabs of super glue where you see the pins coming through the base. This will create extra adhesion so the model’s pins stay put and the feet are glued to the base.
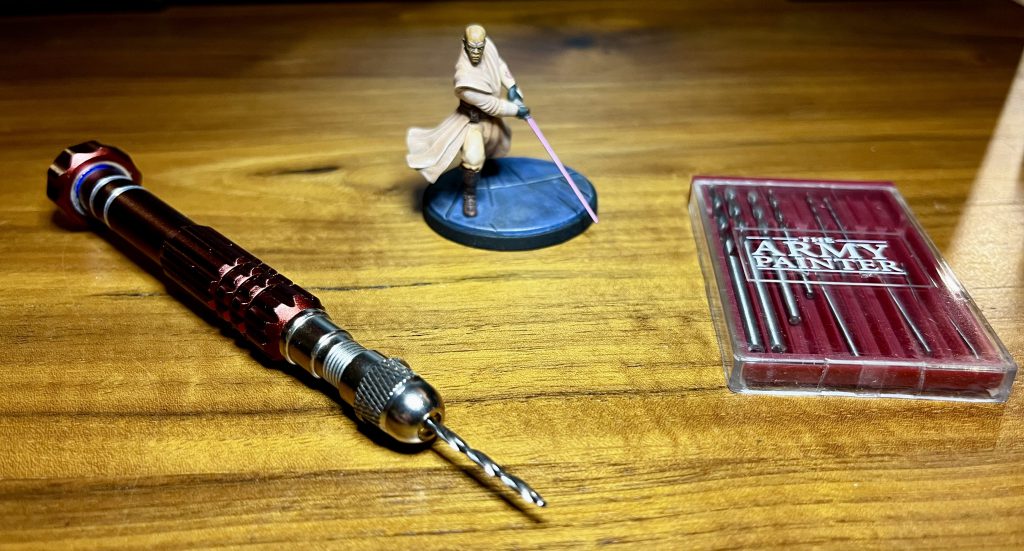
The Army Painter hobby drill is easy to hold and comfortable in my hand. It spins and drills with ease. It is designed for small-scale work and completes every pinning task I have thrown at it. I have also used it for putting new holes in belt latches. The butt cap comes off to hold three different heads to fit the many sized bits. It also includes an small wrench to fully torque the bit and head in place for a tight fit that is not coming loose.
With the addition of different-size drill bits, you can step up your pinning game even further to start fitting magnets and more advanced kit bashing. If you take the time to assemble a miniature, ensure it’s secure and stays intact!
