Over the years the Goonhammer crew have put together a vast and expansive library of painting guides. Appropriately titled “How to Paint Everything” we’ve got schemes and recipes for 100s of models. They all, however, assume you know the difference between wet blending and glazing or what the hell “zenithal” means. Welcome to Hobby 101. This series will lay the groundwork to teach you the fundamentals and best practices to make your models shine.
The Hobby 101 series is sponsored by The Army Painter.
Welcome back, my friends. Last time I was on Hobby 101, I had the pleasure and privilege of telling you all about the dark and arcane art of priming. Now come, once more, sit around the fire and learn of the mysteries of varnish.
Where are you going? Come back! It’s interesting, I promise!
In order to properly get into the weeds on the matter of varnish, we’ll have to start with the finish. How’s that for a confusing sentence? What we mean by finish is the way that light interacts with the surface of the model and thus it’s smoothness and reflectivity. Although they’re just really points on a spectrum, there are typically four different types of finish when it comes to miniature painting.
- Gloss: As the name suggests, this is the shiniest of the finishes. Light bounces off the surface without any interference or diffusion. A glossy surface is super smooth, paint will flow over it almost as easily as it would bare plastic, which is pretty useful when it comes to getting washes or panel liner into recesses without staining the flat surfaces too much.

- Satin: The mid-point between gloss and matt, not particularly shiny but not dull either. Reflection is semi-diffused but far from completely. The surface is relatively smooth, paint will flow across the surface, but without beading up.

- Matte: Dull, the surface will diffuse most of the light that hits it, lowering the reflectivity a great deal. Paint will move over the surface in a more sluggish way, the surface is rougher and therefore “stickier”.

- Ultra-Matte: Very dull, light is massively diffused to such a point that natural specular highlights barely exist. Display painters like this, because it lets them precisely control the highlight and shading of the model. The surface is very rough and “chalky” and so paint struggles to move over it.

So, for the purposes of our hobby, these are the four finishes. Every paint you buy will dry with one of these finishes, although this isn’t always written down. For example, your Citadel and Vallejo paints are essentially satin in finish, while Scalecolor paints (which are advertised more towards display painters) boast of their ultra-matt finish in marketing material. Some paints, like GW washes, have an unfortunate habit of drying glossy even when you really don’t want them to, with the end result just looking quite bad.
Since each finish has its own pros and cons, how do we change the finish of a model without changing the colour? For that, we’re going to need to use a Varnish.
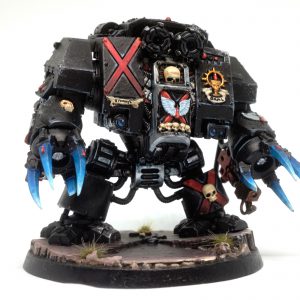
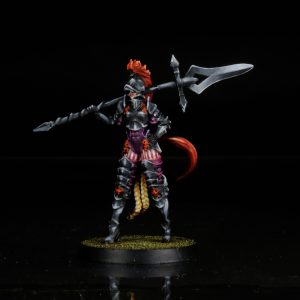
On the left: A Death Company dreadnought painted with satin-finish GW paints, notice how the black on the right shoulder and chestplate are reflecting the light from the lamp (Specular highlights). On the right: An Eldfall Chronicles Slayer Dragoon painted with ultra-matte Scalecolor paints, all the highlights are exactly where I placed them, with no interference from the light-bulbs illuminating the miniature for photographing.
What’s A Varnish, Anyway?
Although there are different types of varnish for different uses, from woodworking to fine art, but for the purposes of miniature painting we’ll be talking about Polyurethane varnishes, hard, transparent coats of plastic that can be thinned with water and applied with a brush, or sprayed from an airbrush or aerosol can.
As mentioned earlier, we can use a varnish to alter the finish of a model (or just part of a model, if you want), but varnishes are also really useful in protecting the integrity of the paints they sit on top of, now, if you’re a display painter, you probably don’t need to worry much about that aspect (and also, why are you here? You already know all this, surely?) but if you primarily paint models for gaming, they’re going to need to stand up to a little handling and occasional knocking into one another. The oils on your fingers and the impact of other models will play merry hell with your paintjob and might even cause the paint to chip or rub off, which is a nightmare for everyone concerned. By sticking a hard layer of this Polyurethane between your paint and your fingers, you can protect it more readily from this unsightly damage.

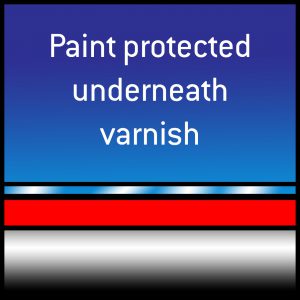
It’s taken as something of a given in online hobby spaces that gloss varnish is more robust than the other kinds of varnish. This is wrong! Let me explain why. To make a varnish more or less matt, a compound known as a Matting Agent is mixed into the varnish base, the amount of which dictates the glossiness or otherwise of the finished result. Think of it like this: The unadulterated gloss varnish is like Lahmian Medium, while the matting agent is like pigmented paint. Mixing paint into Lahmian Medium will change the strength of the colour, but it doesn’t affect the behaviour of the paint itself, or its fundamental composition. An Ultra-Matt varnish is simply a gloss varnish with a whole lot of matting agent mixed into it.
Using Varnish
Alright, so that takes care of the what and the why, so let’s have a look at how.
Warning: There are several ways of applying varnish to your model, each with their own potential pitfalls, each of which has the potential to go very wrong if you’re not careful. If you make a mistake, I’ll tell you later how you can fix it, but even so, tread with caution, my friend.
Probably the most straightforward way of applying varnish to a model is with an aerosol can, like the ubiquitous Testor’s Dullcote of which every hobby YouTube influencer seems to have a dozen cans. This method is fraught with peril, however, with the same kind of risk as priming with a spray can. If you don’t pay very close attention to the heat and humidity of the environment in which you’re spraying, you can really screw up your model. Too hot and particles of varnish and binding agent will dry in the air before they hit your model, too humid and the varnish will pick up water droplets on its journey to your model. In either case, this is bad news, forming a weird crystalline surface structure that’ll result in your model having a foggy or frosted appearance. Pick a day that isn’t too warm, and isn’t too humid, and spray your miniature with short, light passes, neither beginning nor ending your stroke with the spray can pointed directly at the model. Easy does it!
Varnishing with a brush can have these problems too, but in a different way. If you’re using a matt varnish, it’s extremely important to give it a very very good shake, as the matting agent will easily fall out of suspension in the bottle as it sits on your desk or paint rack. Once you’ve got your varnish on your wet pallette, paint it onto your surface taking very great care not to let it puddle in any of the recesses as thick matt varnish has a gap-filling effect, and will effectively plug in these details if you’re slapdash or put the varnish on too thickly. You’ll notice if your varnish is collecting too much, as it’ll begin to look milky, simply use a damp brush to move varnish out of these areas and you won’t have to deal with the pain of a clouded, messy miniature.

My colleagues fondly reminisce about using Future furniture polish to varnish their miniatures, you can do this if you like, it’s a very cheap way of getting some strong gloss varnish in your hobby arsenal. Just be careful not to slap it on too thickly, yeah?
If, however, you screwed up, all is not lost. Varnish is fully transparent, after all. A bad matt varnish job can largely be sorted out by coating the area in gloss varnish, allowing it to dry fully, and then trying the matt varnish again, albeit more carefully this time. It’s also been suggested that you can repair a bad varnish job by applying olive oil to your miniature and letting it seep through the varnish, but I’ve never actually tried this for myself, so there’s a caveat for you.
One Last Trick
Varnish can also be used for a quite surprising off-label purpose: Gap-filling! Say you’re painting your model and you’re so happy with the way it turned out, but then out of the corner of your eye, you see it.. a gap! You goofed when you put the model together all that time ago, and now there’s a small space between two of the parts, and suddenly it’s all you can see when you look at your beautiful miniature. Don’t worry! As long as the gap is relatively slight (we’re not talking about the Grand Canyon here) you can totally fill it in using nothing more than the humble bottle of Matt Varnish you’ve got on your desk.

- Get a little of the varnish out of the bottle onto a tile, your desk, whatever, and grab a generous dollop of it with your brush.
- Blob this undiluted varnish onto the crack, fiddling with it until the liquid tension bridges the gap.
- Once it’s dry, have a close look, you’ll probably need to go again with the varnish, but once you’ve got a smooth even coat across the top, you’re done!
- Paint over it and it’s like the gap was never even there, no need to fiddle with green stuff or Milliput.
That wraps up our look at varnishing minis but there’s still more to cover in our Hobby 101 series so check back next week for more tips. And as always, if you have any questions or feedback drop us a note in the comments below or email us at contact@goonhammer.com.
