Introduction and Victrix Austrian Grenadier Review
Hello, Goonhammer historical readers,
You all may have read a lot of well-written but undue adorations of that rotten disruptor Napoleon Bonaparte over the past year. My fellow writer Lenoon has good taste in war games and a good hand and eye for miniature painting, but he disgraced himself by siding against the rightful monarchs of Europe.
I’ll try not to dedicate too much time to the obvious flaws of Napoleon. Some people might talk about his occupations of northern Italy Spain, or his dictatorship, but I’m going to get to the real evil.
Bringing about the destruction of the Holy Roman Empire.
If a single user comments under this article with “Neither Holy, Nor Roman, Nor an Empire” I track your IP address and trample you from horseback like you’re a peasant who simply wants to eat their own food.
So about actual games…
So, this is going to be my own series about dipping into the world of Napoleonic war gaming. Right about the time I decided to buy my first Space Marine, I knew I wanted to play historical war games, especially the Napoleonic Wars. Napoleonics are the Ur-wargame. Hundreds of models moving in formation across green felt fields, little torn up cotton balls representing billows of gunpowder smoke. I didn’t even know much about the era, but I knew I needed to get in.
When I saw that two hobby shops in my area had started up groups playing Warlord Game’s Black Powder, I knew I had to dive in. And I needed to know where to start. I wanted to play 28mm, but I also wanted a force that would be easy to paint.
And as with all things in my life, the House of Habsburg provided the answer.
The Habsburgs are engaged in the wars of Revolutionary and Imperial France from 1792 to 1815, even featuring an alliance with Napoleon after 1809. Getting into the details of the foundation of the Austrian Empire out of the decaying Holy Roman Empire is neither easy nor the duty of Goonhammer.com, but it’s important to remember this transition happening in the turmoil of Habsburg wars against the French. After Napoleon, Austrian statesman Clemens von Metternich becomes continental Europe’s premier archconservative until 1848. There’s a rich history to dive into.
Also, Austrians are easy to paint. They’re in white jackets and white pants.
White? Easy to paint?
Sicko shit, right? First, props to Sonic Sledgehammer for the video that showed me how easy this would be to do, and Games Workshop for inventing a white spray primer (White Scar) that applies without making the model look like a weirdly shaped frosted donut.
So, I went to one of my local stores and knew I was going to grab either a Victrix or Perry box. Both of these companies make fantastic plastic models for the Napoleonic war. I’ve already painted a lot of Perry plastics and metals, and I have yet to do more than prime my Victrix Roman Legionaries, so I decided to go with Victrix.

You’ll probably recognize their packaging if you’ve ever looked at your store’s historical section. They come in a huge plastic bag sealed at the top with a cardboard piece that normally has the instructions. This box also comes with the paint schemes for Austrian infantry: the colored facing and cuffs on their jackets (provided their Austrian infantry, and not Hungarian. More on this later.)

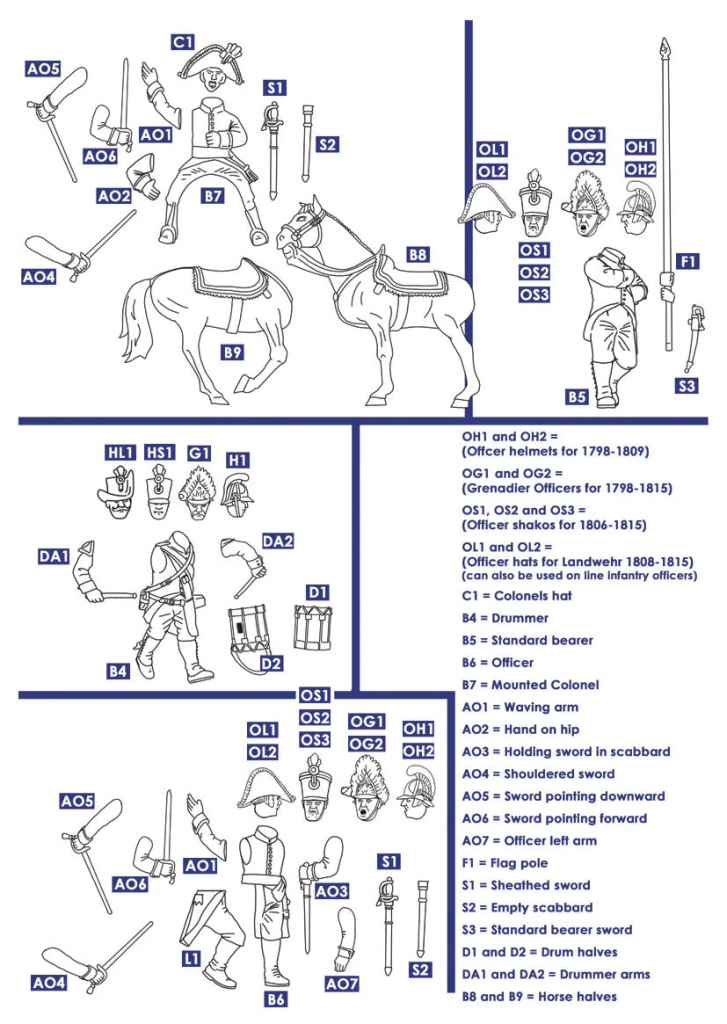
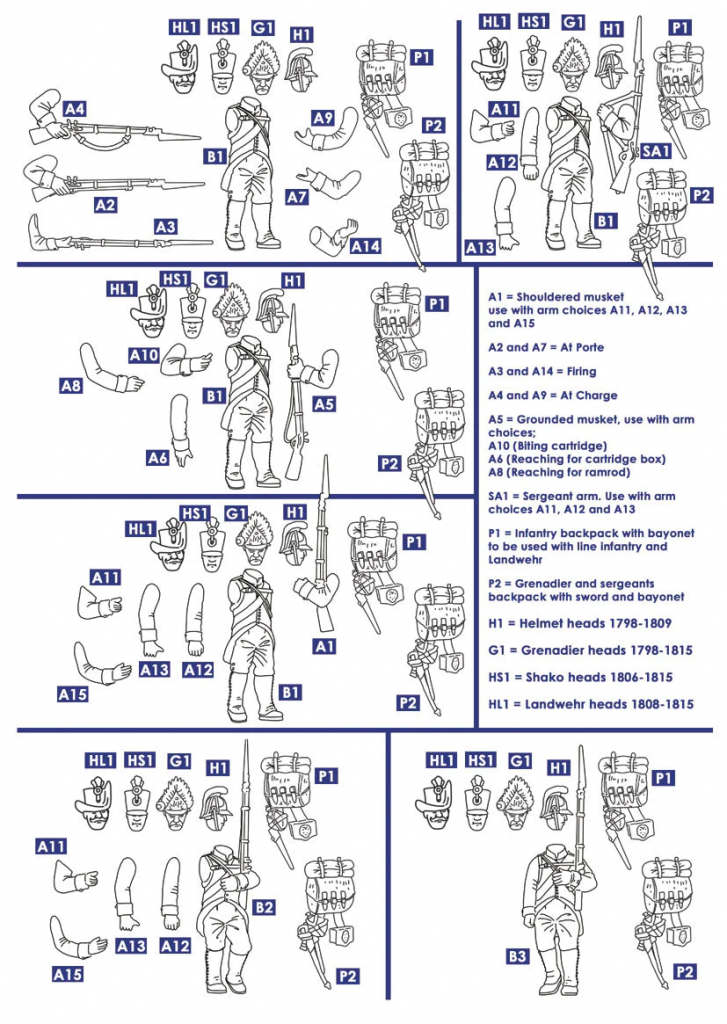
This set contains 56 models, 48 of them being grenadier infantry, 8 of them being command staff models—two officers on foot, two mounted colonels, two drummers, two color ensigns. This breaks down into eight sprues of infantry, and two officer sprues, so you can be excited for or dread the task in front of you as you build. The models are simple: a headless torso and legs, with two bodies per sprue already having musket arms attached, one with both arms. This kit comes with the heads and backpacks to make these models normal line infantry, light infantry, and Landwehr border militia. The crested helmets are for infantry 1792–1809, and the shako cap for infantry 1806–1815. The side-billed top hats are for Landwehr. But if you bought this kit, you probably want to build them as grenadiers. The instruction sheet lays out these options. Side note: do not toss the sheet. You can cut out regimental flags from it when you’re done.
Along with the bearskin cap, the other identifying grenadier kit part is the backpack that has both saber and bayonet. And now we come to the one issue I had building this kit: there is no real connection point for getting the backpack onto the model. It almost rests atop the shoulders, but it’s not flush. I normally use Tamiya Extra Thin Plastic Cement for all plastic kits, but here I needed heavier than normal applications of plastic glue (and sometimes superglue) just to get this backpack on. I almost regret gluing on the backpacks at all, because by the time I had painted 35 of them, I wanted to get past the backpack. Troops of the era did drop their packs before battle, so it wouldn’t look too off on the tabletop. However, the sword and bayonet and the extra bulk of the pack make them stand out even more as grenadiers.
If I may, a little sidebar about grenadiers. For years I wondered how these shock troops got that name. I know that in the early modern era, iron-cast bombshell grenades (honestly, just picture a Looney Tunes cartoon bomb with the long fuse) were used, but I never saw much mention of that from the American Revolutionary War to the Napoleonic era, despite “grenadiers” still being a unit. As I did my research on this era, I figured it out: the use of bombshell grenades was phased out to tactical issues—fuses didn’t stay lit, they were either prematurely or never detonating, etc—the same type of men who made good bomb throwers also made good shock troops: tall, muscular men who could break through the weak point in an enemy line or lead the fight in urban combat.
The kit goes together relatively easily, beyond the backpacks. You have the option to build a couple men per sprue as either aiming/charging with their musket, or having it resting on the ground. It’s a nice way to break up the front ranks. If you’re going to play Black Powder¸ it’s recommended you communally base them, normally four men on a 40x40mm square base. If you want to play both big battle games and skirmishes like Sharpe’s Practice, you can individually base them and get sabot bases. I go this route for most of my historicals.

The details are solid. There’s good texture on the uniform and the cap, you make out the fittings on the muskets. I can’t really make out an eagle or anything on the cap’s metal plate, but it’s enough to hit it with gold and a wash to make it stand out. The backpack is also well-sculpted: ammunition pouch, sword and bayonet sheath, straps, and an overcoat.
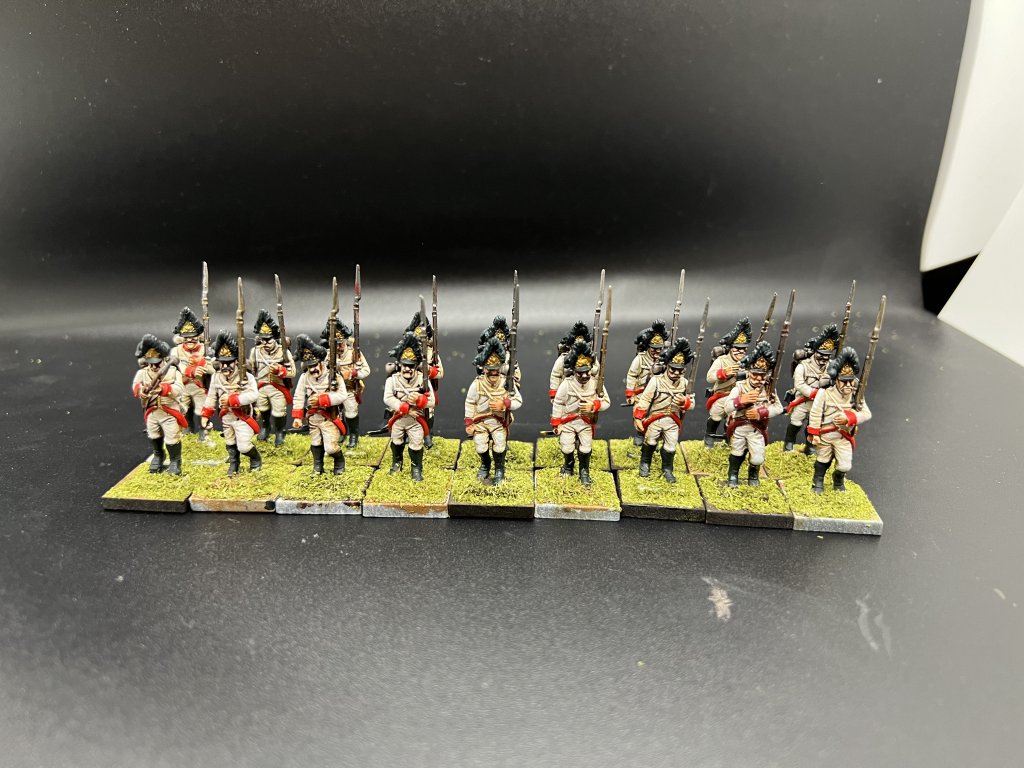
I changed just a little bit from the painting video I linked about. I used pure white spray with Citadel White Scar, then washed with thinned down Army Painter Strong Tone, about 1:1 with water. I’m painting this army with Vallejo Model Color Scarlet facings, to represent the Austrian First Regiment. If you want to paint your infantry as Hungarians, you paint their paints a shade of either light blue or light grey blue. I think Contrast Talassar Blue highlighted up or Vallejo Model Color Light Blue Grey would look great, but I’ll come back to this when I have some Hungarian infantry. I will note that these men are wearing boots and gaiters, which I’ve painted black. Hungarian infantry did not wear these
Some Button-Counter Details.
It’s bad form to point out to other folks if they made “mistakes” when painting a historical model, as 1) uniformity in reality is a lie 2) not everyone cares. But if you’d like your toys to have that little extract bit of accurate detail, there’s a couple things I’ll point out. The 1798 musket issued to Austrian troops had distinctive brass fittings—the metal bands around the barrel and stock. These are easy to notice and paint on the Victrix minis if you so choose. Button color on infantry jackets was determined by regiment: my First Regiment forces have gold. I haven’t found an entirely authoritative list yet, but I’ll have one soon. If you know any, leave them in the contents or reach out at contact@goonhammer.com. Better yet, become a Patron and bully me on our Discord if I got something wrong!
A Must-Ask about Mustaches
So, there’s not a lot of skin to paint on these models, just hands and the lower part of their faces, which are mostly covered by the brim of the bearskin. But there is one vital detail in these minis that I insist everyone be a button counter about. It defines the Imperial and later Austrian Imperial military: mustaches.
All privates were REQUIRED to have a mustache. And these sculpts lovingly have a variety of bushy lip warmers for you to paint up. I used a range of Vallejo Model Colors, from Black Grey, to Saddle Brown, to Beige to break up my whisker diversity. As someone who’s always cleanshaven because my facial hair resembles that of Shaggy from Scooby Doo, I guess I’ll have to give up my dream of being conscripted into the Austrian military, and then blow in half by a cannonball at Austerlitz.
Mounted Officers
As mentioned above, this kit comes with two mounted officers. I’m surprised at how well these horses glue together. Most cavalry kits have the horse in two pieces and building often leaves big caps from their neck to their rump. The character model doesn’t have a lot more detail than the accompanying infantry, but there are several head options and various poses for his sword arm. And he’s accurately clean shaven!
Basing these Baddies
These miniatures, like so many scale 28mm models, have an integrated base. It rises about 2mm off the ground. It’s relatively to smooth this out. When building the model, you can apply sand or some other texture to the base, or after painting, apply copious amounts of textured paint like Stirland Mud and Battlemire, and maybe some grass flock.
Final Thoughts and the Rest of this Project
So, I love these models, and I love how many you get for about $25–$35. Victrix minis are a remarkable deal.
Which will help me assemble my target goal of about 200 infantry and 50 cavalry, plus artillery. It’s going to be a daunting task, but someone has to push on to Paris and hang that bastard from a gibbet.
Have any questions or feedback? Drop us a note in the comments below or email us at contact@goonhammer.com.


