This week, with the help of a pair of brave Goonhammer Patrons we bring the Totensonntag Pint-Sized Campaign to an exciting close! If you’d like to catch up, previous episodes can be found here:
Part 1: Introduction to “Totensonntag”
Part 2: Let the Battle Begin!
Part 3: A Delaying Action
Part 4: Flank Attack!
Part 5: The Fortunes of War
Part 6: Attack on Brigade HQ
Part 7: A Renewed Assault
In the last installment of the series, the Germans recovered from their initial set-back in attacking the 5th South African Infantry Brigade’s HQ and managed to eke out a hard-fought win – made desperately necessary by the temporary immobilization of Leutnant Krauss’s command tank.
This game saw the German forces continuing their headlong advance, essentially unsupported by infantry. Though the South African force is suffering from significant confusion and demoralization, gone are the rear-echelon units that the Germans had ripped through in the early hours of the battle; now the Afrika Korps would be facing combat troops willing to put up a fight. Who would come out on top?
To help us answer this question, two generous Goonhammer Patrons stepped up to play the game as a virtual scenario. The game was run over MS Teams, with the table set up on my kitchen island (conveniently just a hair bigger than 4′ x 6′, almost like I planned it that way when we built the house…) and broadcast with three different camera feeds showing the table (though my phone on a tall tripod showing the overhead view kept overheating and had to be turned off to give it a break several times). Using just their Discord handles to protect the guilty, the South Africans were captained by @MarquisOfPeaches and the Germans were ably led by @redwolf6879.
The Mission
This mission represents the final scenario in the six-rung campaign ladder, and the scenario itself is a repeat of the second rung – A Delaying Action, which is mission #4 from the main Chain of Command rulebook. But unlike the first playthrough of this mission (in which the bulk of the South African force is still rated as “green” and subject to the dreaded Enforced Deployment campaign special rule), by this late stage in the day the Germans are up against combat troops who won’t just surrender at the first sign of an enemy tank.
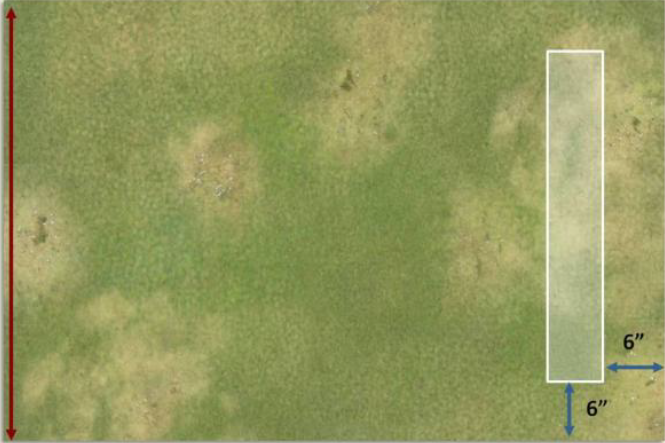
If you will recall, one of the defender’s JOPs will be placed in the shaded area and the attacker’s primary objective in this mission is to capture that particular JOP and end the Turn. Capturing that objective JOP is a much taller order now, however; you can’t capture a JOP that has its own troops still in contact with it. So whereas in the first go-round the South Africans were vacating the objective to avoid capture, this time the Germans will need to actually blast them off it. Tricky!
The difference in circumstances, as well as the much more cluttered table (by this point the game starts with a whopping six burning wrecks on the board), make this a very different game even though the base scenario is identical. This is another aspect of Chain of Command that I find really fun and interesting – even relatively small changes in unit composition or table state can lead to games with a very different “feel.” This helps keep the basic scenarios from feeling too stale and really helps with replayability. And after you get a feel for the game (and campaigns in general), adding a few minor tweaks here or there can let you really tailor your games to deliver a particular kind of play experience.
Setup
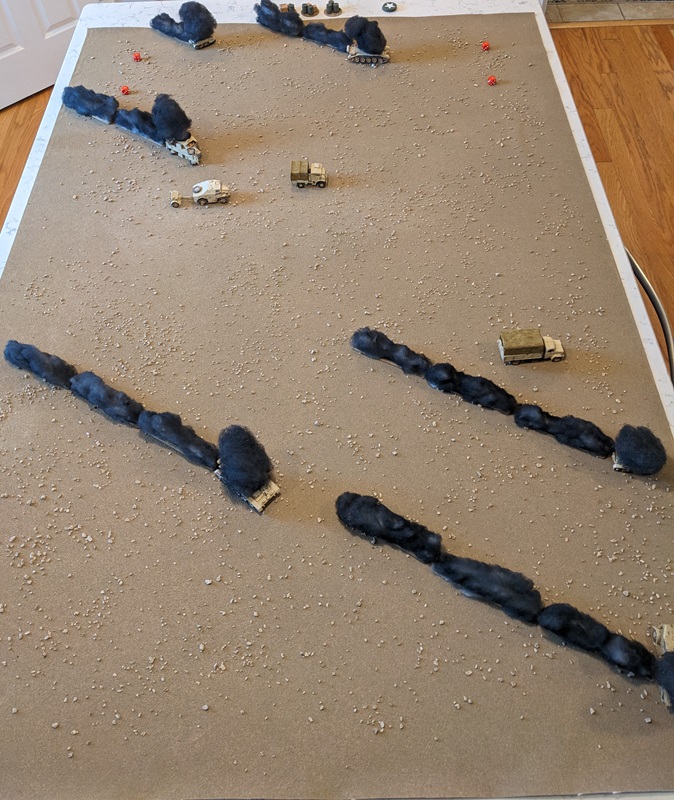
This turn sees us add a sixth burning wreck to the table to start the game. Randomizing their locations and the wind direction (which has swung around to blowing from the southeast) yielded a table that effectively cut off the southwestern corner of the board behind a nearly unbroken line of smoke. There was a narrow gap between the end of one plume and the beginning of another, which would have ramifications for German plans in the Patrol Phase. Additionally, there were three smoking wrecks toward the northwestern corner of the table, which would become critically important later in the game.
As always, the additional complication of the three objective vehicles trying to make their escape complicated things for both sides. This time, the results were two transport trucks and a Morris Quad towing a water bowser. This combined to a potential 8 (3 + 3 + 2) Campaign VP for the South Africans if they escaped and 7 (2 + 2 + 3) Campaign VP for the Germans if they were captured. Though absent much infantry, capture seemed much less likely than destruction. As such, the Germans were no doubt thanking their lucky stars that there were no ambulances present.
The location of the vehicles was interesting, and one of the transport trucks was screened by smoke and quite close to the eastern edge of the table. The other two vehicles were fairly centrally-located and would have farther to travel before they could make their escape. With all of the randomization finished, the stage was set!
Choosing Supports
Jumping into the commander’s seat for the German tankers, Redwolf was given the option of pausing the onslaught as a way to re-set the cost of his infantry supports (i.e. burn a Campaign Turn), but felt that the orders from higher-ups in the OKH had been clear – maintain pressure on the South Africans! That pretty much priced the infantry supports out of his reach (as even the cheapest is now 9 of his available 13 points!). In the end he decided to go with exactly the same support choices as I had taken in the previous mission and for exactly the same reasons – it gave the best combination of HE, speed, survivability, and tactical flexibility (even though it also left a single unspent point on the table). That gave him:
- A pre-game barrage (2 points)
- A Pz IV D (5 points)
- A Pz II C (4 points)
- An Adjutant (1 point)
Taking the lead for the South Africans, the MarquisOfPeaches had a comfortable 10 points to spend. With the entire core platoon now “upgraded” to regular, the whole candy store is now pretty much open to the South African player. Reasoning that more AT guns = better, he chose to stack the deck in his favor. Ultimately deciding that quantity sometimes has a quality all its own, he left the 25-lb gun at home to shave off a point and leave space for a few other niceties. As such, he chose:
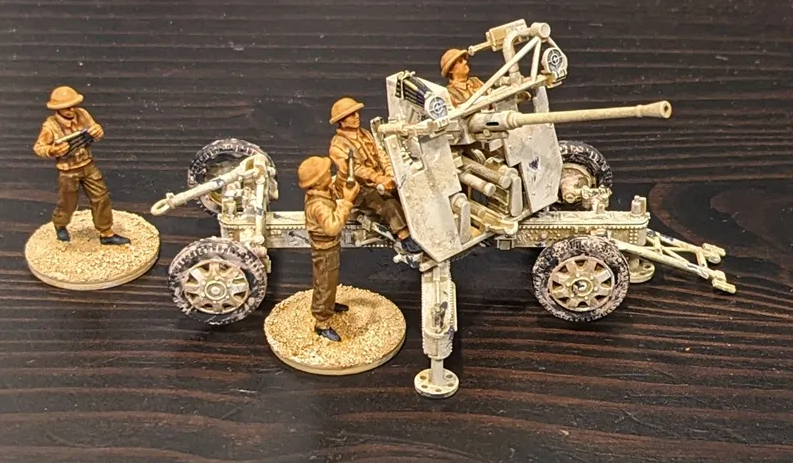
- A 40mm Bofors AA/AT gun with 5 crew and Junior Leader (4 points)
- A 2-lb AT gun with 5 crew and Junior Leader (2 points)
- A 2-lb AT gun with 5 crew and Junior Leader (2 points)
- An entrenchment for a single team (1 point)
- A Medical Orderly (1 point)
This last option was an interesting one, and was in part a response to the previous game in which keeping leaders in the game and functioning was key to the South Africans putting up such a stiff resistance.
Force Morale
Though the Germans were operating with a +2 to the roll (from the Men’s Opinion and Krauss’s attitude) and the South Africans were saddled with a -2, the outcome was much closer than one might expect; the Germans started with a Force Morale of 10 to the South Africans’ 9. This was already shaping up to be a battle of wills.
Patrol Phase
In this particular scenario the attacker places 4 Patrol Markers on their table edge and will use them to place 3 Jump-Off Points. The defender uses their 3 Patrol markers to place 2 Jump-Off Points as normal but places a third one anywhere in the shaded area. The South African player started with his three markers shifted more towards the eastern edge, whereas the German player started his markers in a stack about a third of the way in from the left (western) flank of his starting board edge. Both players seemed to pick things up pretty quickly, and there was some cagey play by both.
MarquisOfPeaches: If I had the game to do again, I’d like to think my patrol phase would have gone a little better – as soon as we placed JOPs, I said “ooooh!”
Aside: This is a very common reaction – the first time you do it, it’s not until the JOPs get placed that everything “clicks.” I mentioned it in a prior article in this series, but for in-person convention demos with new players I’ll often give them the opportunity to run it twice if time permits, because it makes way more sense once you see what the final effect is.
With only three markers, the South African side can lock very quickly if they so choose, but it’s very hard to screen both flanks. The Marquis did a pretty good job of keeping Redwolf from being able to run up the eastern flank and completely cut off the objective vehicles’ path to safety, but in doing so was forced to allow an enemy JOP to be placed fairly far advanced up the western edge of the table. The final German JOP was near the middle of the southern board edge, which took advantage of a narrow gap in the smoke – a tank deployed to one side of it would see one of the transport trucks, while one deployed to the other side of it would see the water-bowser. Good placement, bets were hedged.
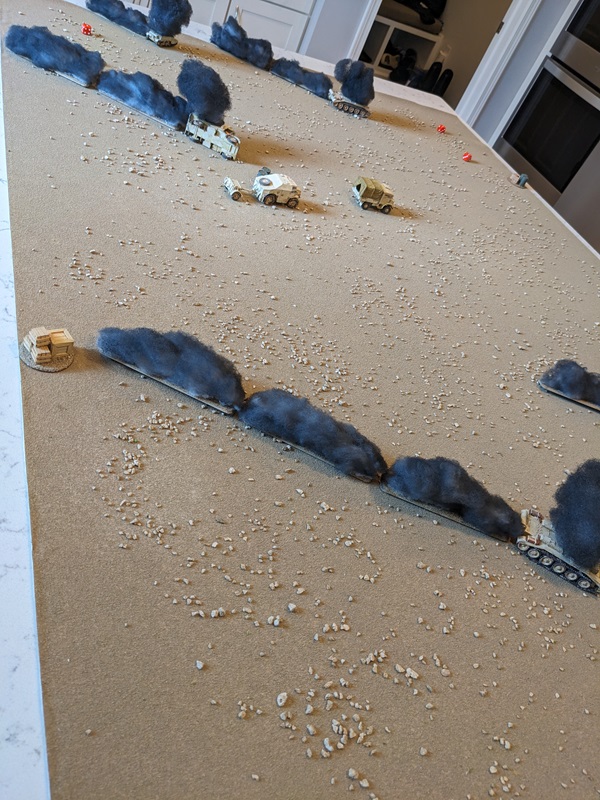
For their part, the South Africans did pretty well too. With a JOP sited right behind the water-bowser they were in a good position to get both it and the nearest transport truck moving. On the eastern board edge, their second JOP offered a pretty good field-of-fire across the middle of the table. And finally, their objective JOP was tucked in by a smoking wreck where it could (and would) serve as a last line of defense.
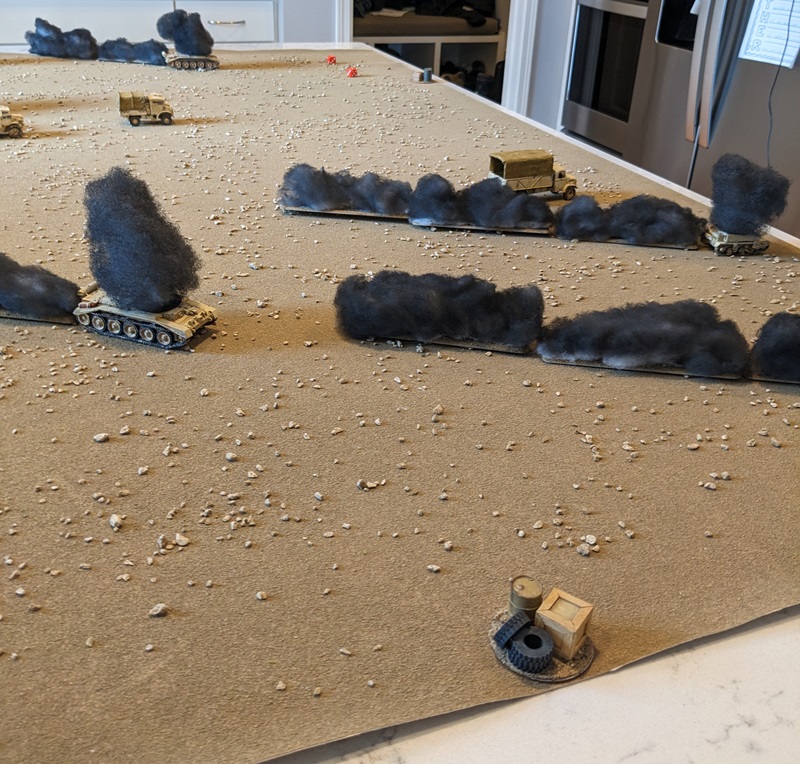
With all of the preliminaries out of the way, it was time to fight!
The Battle
Turn 1, Phase 1 (German): 55441 – Okay, I’m glad it’s not just me that has horrendous luck as the Germans with the opening phases in this campaign! This roll netted two pips towards a Chain of Command die, but once again left the Germans with their only deployment option as Krauss’ command tank. With one of the South African transports close to the board edge it was a risk, but Redwolf chose to trust his pre-game barrage and pass play to the South Africans with no action taken. Gutsy!
Turn 1, Phase 2 (South African): 55542 – Everyone’s racking up the pips! This was a similarly lousy opening hand of Command Dice, as it didn’t include a 1 to get the easternmost transport moving towards safety. The Marquis opted to deploy an infantry section from the centermost JOP (tucked in behind the water bowser) as a way to screen any potential leader deployment, but they failed to come on through the barrage. This left him with a difficult decision – bring on the leader solo, and cede the initiative back to the Germans. Deciding to risk it, he attempted to bring on a Senior Leader, only to have that roll also fall short and be disrupted by the barrage.
Absent accumulated pips, it’s like the first two phases didn’t actually happen!
Turn 1, Phase 3 (German): 66333 – Woof, this made up for the previous roll, and was great from the perspective of the Germans – it allowed for the deployment of three tanks and was a double-phase to boot! Suddenly it looked like the objective vehicles were in for a bruising!
Dieter Bauer’s tank deployed from the westernmost JOP, and while both the 50mm cannon and hull MG were directed at the water bowser, neither had any discernible effect. Gehrhart had better luck, deploying from the easternmost JOP, where his tank was just able to spot the nearby transport truck around the edge of a smoking wreck. A high-explosive shell from the 50mm cannon connected and destroyed the enemy vehicle, adding more smoke to an already cluttered table. Finally, Klaus Wessel’s panzer deployed from the southernmost JOP, where it could draw line-of-fire through a narrow gap in the smoke to the water bowser. Again the soft-skinned vehicle’s luck held and there was no effect.
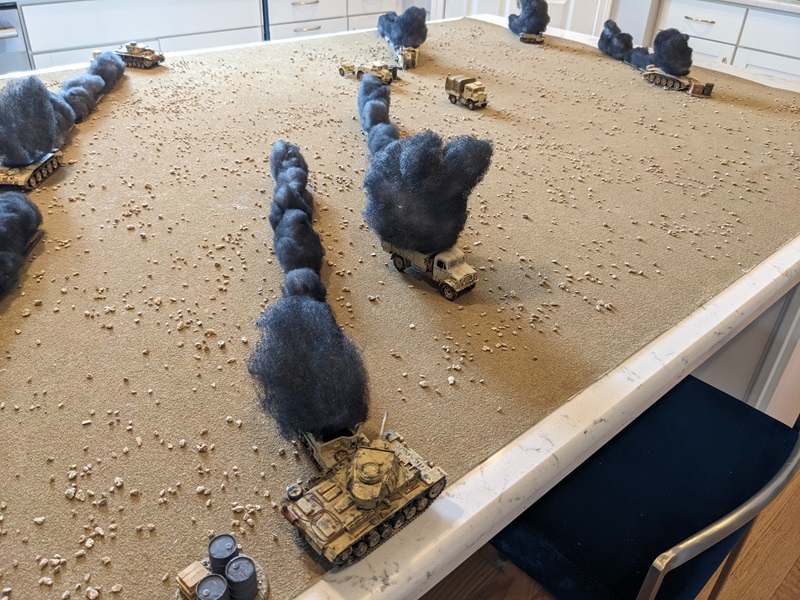
Turn 1, Phase 4 (German): 3311 – Another great hand of Command Dice. With three tanks already on the table Redwolf wasted no time in deploying Krauss from the western JOP, who ordered his gunner to engage the water-bowser. This time the vehicle’s luck ran out and it too was destroyed. Via radio he commanded Wessel to move flat out, that tank’s driver moving northwest and ducking behind a convenient smoke plume. His last CI was spent ordering Bauer’s tank to advance slowly. The remaining 3 was used to activate Gehrhart himself, who directed his driver to advance slowly past the new smoke plume and get line-of-fire to the last remaining transport. He then commanded his gunner to fire at the sole remaining South African transport truck. Fortunately for the South Africans, this fire was ineffective. But there was no denying that this had been a brutal pair of phases and things were looking grim for the men of the 5th.
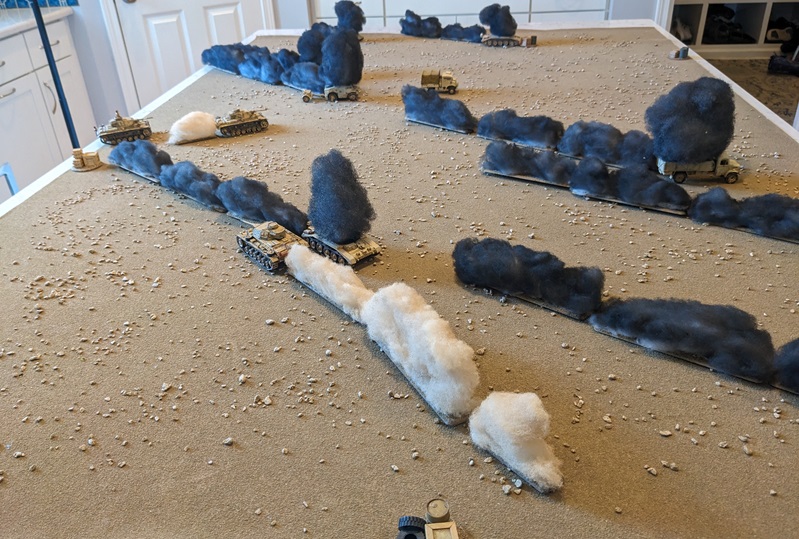
Turn 1, Phase 5 (South African): 66532 – And now with a double-phase of their own, here was the opportunity for vengeance! The Marquis wasted no time in trying to get some AT assets on the table, and the men manning the 40mm Bofors AA/AT gun were able to navigate the enemy artillery barrage. Their clearest target was Dieter Bauer’s panzer, and a hail of rapid-fire 40mm shells struck the tank. The fusillade added 2 Shock to the tank crew and Bauer himself was seriously wounded (reduced to a single Command Initiative). The Germans’ Force Morale dropped by one point to 9. Additionally, 1st Section successfully deployed from the central JOP, screened from enemy fire by a plume of smoke extended from the burning Morris Quad that had been towing the platoon’s precious water supply.
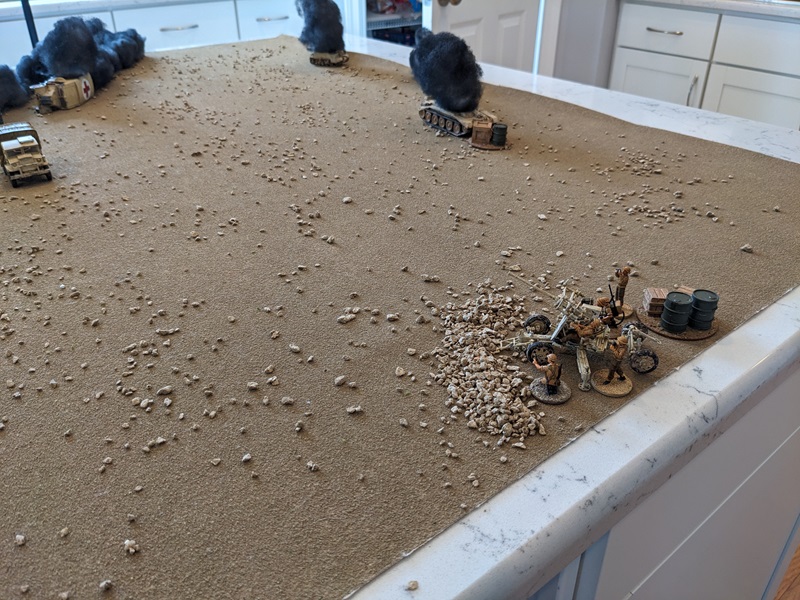
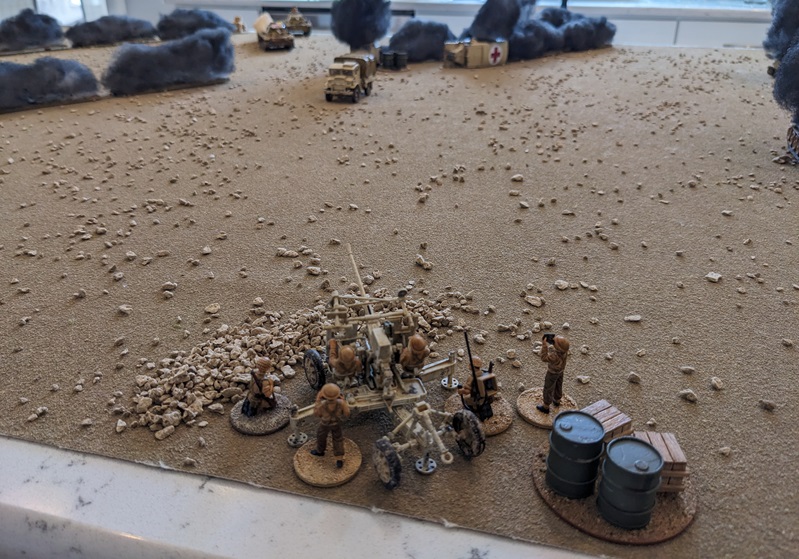
For the second time in as many hours, the interior of Dieter Bauer’s panzer was a flurry of shrapnel as the rapid-fire impact of 40mm rounds penetrated the armor and fragmented inside the turret. A rather large chunk lodged itself in Bauer’s shoulder and the pain was immense. Gritting his teeth and blinking rapidly to clear his vision, the veteran Unteroffizier clung to consciousness seemingly by force of will alone.
Turn 1, Phase 6 (South African): 3211 – Pausing just long enough for the busy crew to drop in more ammunition, the Bofors gun once again opened up on Bauer’s tank. The heavy 40mm shells hammered the front glacis armor, knocking out the main gun and stacking 2 more Shock on the crew. This was enough to convince them that discretion was the better part of valor, and they hastily tumbled out of the hatches and fled. German Force Morale dropped a further 2 points to 7. Suddenly things were looking dicey for the Germans!
Making matters worse, the South African Platoon Sergeant was able to come on through the barrage. Shouting at the driver of the nearby transport truck, that vehicle started its dash towards safety, trailing a long plume of fine dust in its wake.
Sergeant Martin VanSumeren knew that seconds counted. If the truck idling before him waited for the men of 1st Section to climb aboard before getting in gear, they would all die in a fiery wreck. No, for as much as the driver’s heart was in a good place and he didn’t want to leave his squad-mates behind, he needed to MOVE. Leaning in the passenger side window, he said “Get going, private, and don’t stop until you reach Egypt. That’s an order, son.” Nodding mutely, the driver wrangled the gearshift and the truck began to move. VanSumeren fervently hoped that this earnest young man would survive what was turning out to be a bloody awful day.
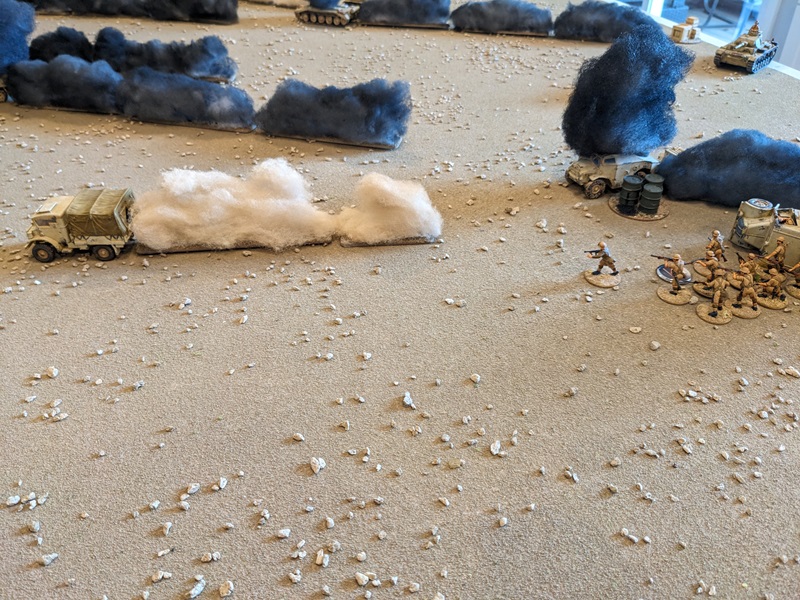
Turn 1, Phase 7 (German): 65541 – With only Krauss able to activate, his radio once again became invaluable. He commanded Gehrhart’s gunner to engage the fleeing transport with its 50mm cannon, but the round missed the now fast-moving vehicle. Redwolf considered whether he wanted to do anything else with his remaining two CI and decided to have both Krauss and Wessel start working their way to the north (and get some cover from the Bofors). Play passed to the South Africans.
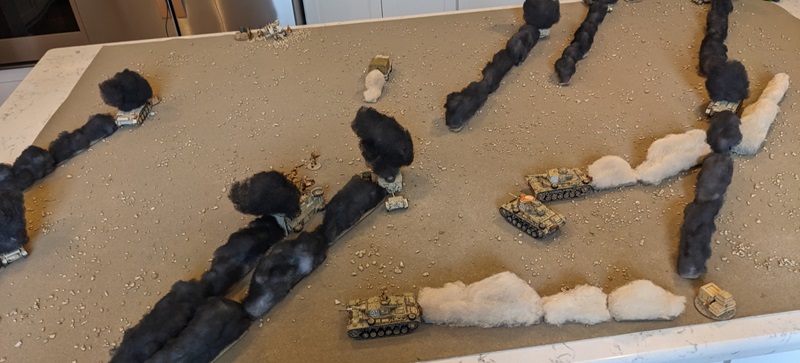
Turn 1, Phase 8 (South African): 64221 – Sergeant VanSumeren sprinted in the wake of the fleeing transport, shouting and gesticulating wildly at its driver to keep going. His efforts were rewarded, and with a fantastic movement roll the vehicle sped right off the table! Regardless of how the scenario played out from this point, this would guarantee the South Africans 3 Campaign Victory Points. Finally, slewing around to engage Gehrhart’s advancing tank, the Bofors gun once again barked out a hail of 40mm shells. A point of Shock was added to the crew.
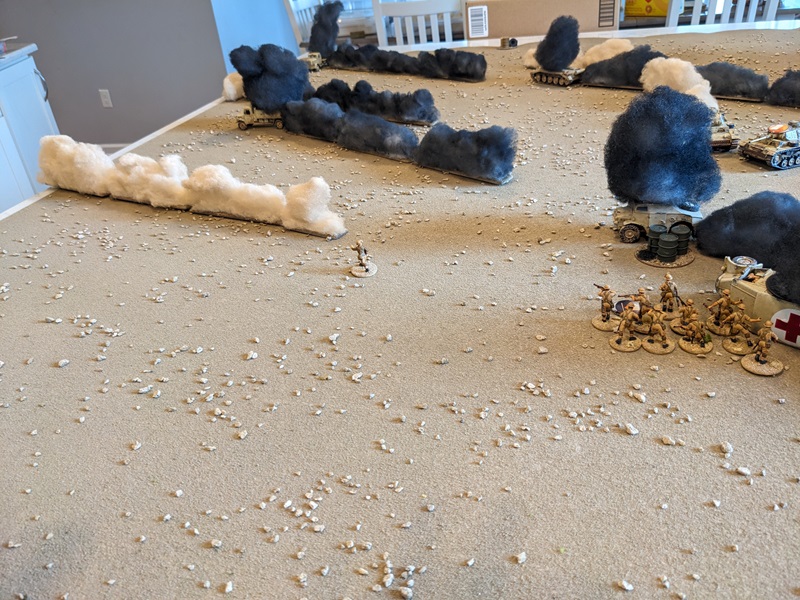
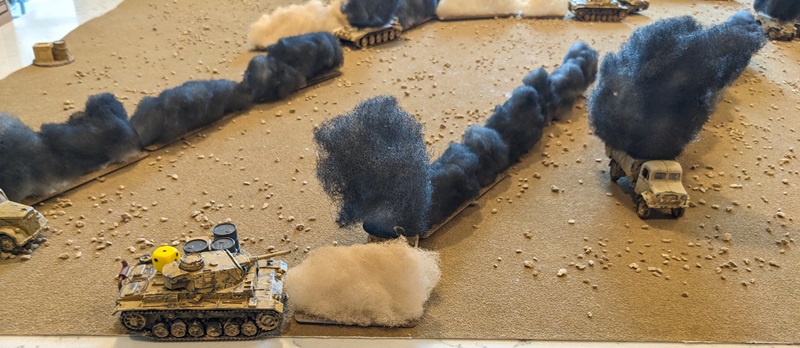
Turn 1, Phase 9 (German): 53311 – It seemed that the time had come to bring on the big guns, so the Pz IV D rumbled on from the JOP along the western table edge. Just able to draw a a line on the enemy Bofors, a 75mm HE shell was sent their way, killing one of the crew outright. The hull MG was directed at the conspicuous Sergeant VanSumeren, now all on his own in the middle of the battlefield. Fortunately for the South African NCO, this fire was ineffective.
Meanwhile, it suddenly seemed that sitting still was extremely ill-advised. Broadcasting across the platoon net, Krauss got all three still-operational Pz IIIs advancing, keeping up the pressure on the South Africans.
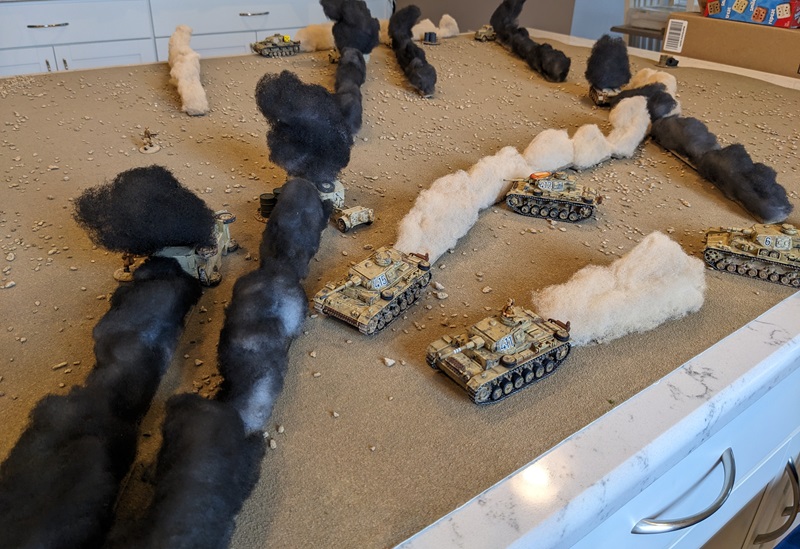
Turn 1, Phase 10 (South African): 65331 – Seeing German tanks making for the northern edge of the board, the South Africans successfully deployed one of their 2-lb AT guns and placed it on overwatch. This would allow them to act if Krauss tried anything funny. Meanwhile, the 40mm Bofors gun continued to hammer Gehrhart’s panzer, this time causing the driver to put it in reverse and start backing away. Finally, the Marquis took this opportunity to bring on the Boys AT Rifle team. They were able to drop down in a spot near the central JOP that gave them a side-armor shot against Gehrhart’s panzer. Sadly, while the shot hit it had no effect. It was at this point that the Germans used their complete CoC Die on an Interrupt, advancing Krauss 7″ closer to the South African base line and poised to conduct an Armored Advance.
Turn 1, Phase 11 (German): 43321 – Wow, this is about as good a roll as you can get with a tank platoon! Wessel’s Pz III advanced and brassed up the newly-deployed 2-lb gun with his coax, killing one of the crewmen. Gehrhart also advanced slowly (his driver once again moving in the correct direction) and sent a 50mm shell at the same target, though this had no effect. The thinking here by the German player was to stack as much Shock as possible on the 2-lb gun to make it harder for them to hit Krauss if he did try to shoot the gap and head north. Sadly, only a single kill was generated. Meanwhile, the Pz IV D focused its attention on the Boys team and killed both men, though the South Africans’ Force Morale held firm at 9.
Finally, Krauss activated and ordered his driver to head north going flat out – Redwolf had decided that there were entirely too many AT assets on the table for his comfort. The movement roll was sufficient to see him leave the table, but the 2-lb gun sprang its overwatch as the German command tank shot through a gap between two smoke plumes. Even with its target moving flat out, the shot was a hit in the vulnerable side armor. With 0-net hits on the armor penetration roll, it seemed like the South Africans would be unable to prevent Krauss from ending the scenario – until the result came up as “halt and engage firer next phase.” With echoes of the disastrous end of Campaign Turn 5 (in which a Pz II C racing to escape got similarly stuck), Krauss was now sitting in the open with his side armor exposed to pretty much everything the South Africans had. Uh oh!
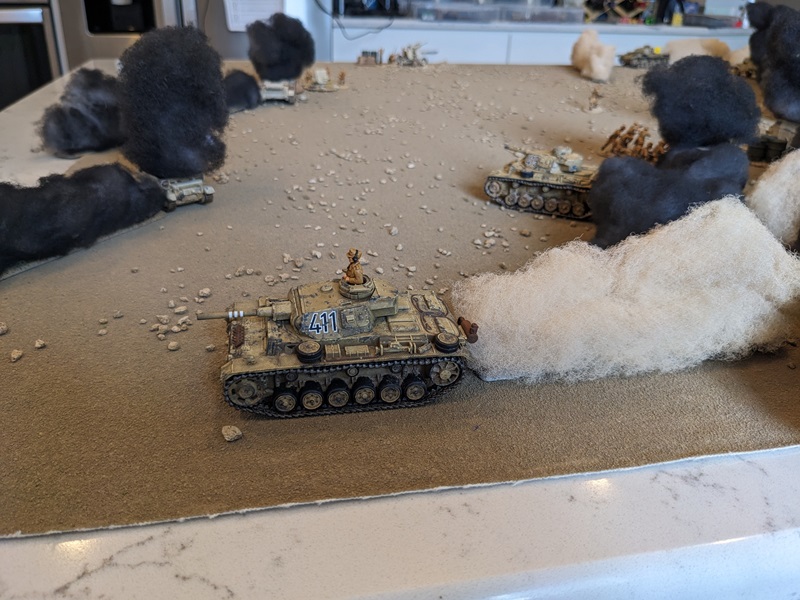
Turn 1, Phase 12 (South African): 65443 – Hoping to get better command-and-control going, the South Africans tried to bring on the platoon Lieutenant, but he was apparently still sorting out the confusion caused by the enemy’s artillery barrage. Instead, Sergeant VanSumeren needed to make a sprint. Here, the Marquis was faced with one of CoC’s beautifully difficult choices – a Senior Leader has a command radius of 9″ and with a single CI can move up to 3D6″. VanSumeren could have split the difference and tried to run between the Bofors and the 2-lb gun and be close enough to activate both. This would have let the 3 be used in an attempt to deploy the remaining 2-lb AT gun still in reserve. But to get to that spot would have required about a 12″ move, and if he failed he would fall short of both guns. On the other hand, if he raced straight for the 2-lb gun, a mere 4″ move would bring it within his command radius. He chose the latter, safer option and raced to activate the 2-lb gun, using the 3 to activate the Bofors.
He then promptly rolled a 15 on the movement roll, which would have been enough for the gutsier play, but alas. Adding insult to injury, both guns missed their intended targets. Sometimes it’s just not your day.
As if to compound the misfortune, the Marquis used his now-complete CoC die to perform an Interrupt, shooting at the exposed side armor of Krauss’ command tank with the Bofors gun. The rounds hit, but the tank’s armor miraculously bounced the incoming fire.
Turn 1, Phase 13 (German): 65321 – Krauss’ tank was obligated to remain stationary and engage the 2-lb gun, which forced Redwolf to combine the 1 and 3 to activate him. A 50mm HE shell was sent at the 2-lb gun and inflicted a kill. That kill turned out to be a hit on VanSumeren, who was knocked senseless. South African Force Morale took its first tumble, dropping by one point to an 8. A CI was spent to order the Pz IV D’s 75mm gun to engage the Bofors, which inflicted a kill and a point of Shock on that crew as well. Finally, Wessel’s tank was commanded to advance flat out. Moving 11″, the dust trail thrown up by its passage screened Krauss’ command tank from both of the dangerous South African AT guns.
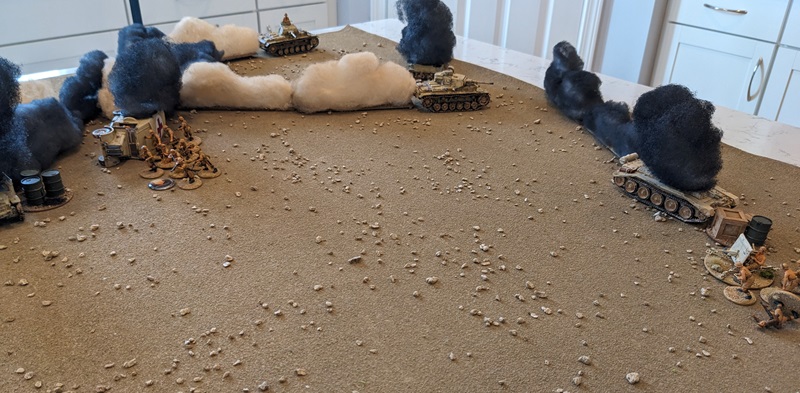
Turn 1, Phase 14 (South African): 65443 – With it increasingly looking likely that the Germans would be able to get off the table, this South African phase was all about maximizing the chances to inflict harm. With VanSumeren unconscious, even deploying the platoon Lieutenant would only allow one of the AT guns to activate, and there was a chance he would once again be caught up in the barrage. But there was another, risker approach, which was to attempt to bring on the Medical Orderly. Medics in CoC can deploy or activate on any Command Die with a result of 1 through 4. So if the medic came on with one of the 4s, he could pump VanSumeren full of drugs, return him to consciousness, and use the other 4 to activate him. It all came down to the barrage roll, and it was a success!
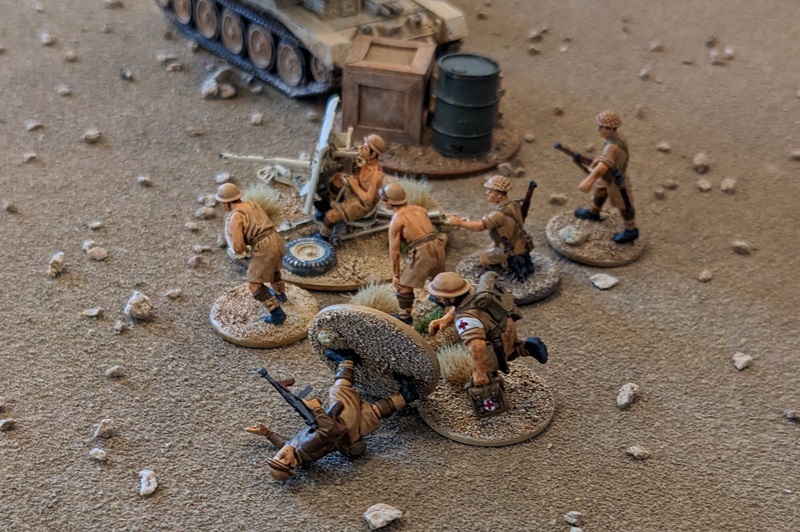
VanSumeren had no clear memory of getting struck in the head, but that was typically the way of things. And he didn’t know what corporal DeVliet had pumped into him – morphine, sulfa, amphetamines, all of the above – but suddenly he felt great! Then he heard the chatter of machinegun fire and recalled that he was still in combat! Knocking the startled DeVliet on his rear in the process, VanSumeren leapt to his feet – once again donning his helmet but not noticing the massive dent in the metal. Taking but a moment to get the nearby 2-lb AT gun sorted, he sprinted towards the Bofors gun. Ordering the gun-captain to switch targets and engage the Pz III racing past their position, he was almost forced to hit the deck again as the AA/AT gun slewed a few degrees to the right and let loose a hail of 40mm shells past him.
VanSumeren used one CI to activate the 2-lb gun, which once again engaged Krauss. Sadly, the obscuring dust from the passage of Wessel’s tank cause the round to fly wide. Not stopping to see the effect, VanSumeren ran towards the Bofors and got that gun firing as well. Even with its target moving flat-out, the 40mm rounds struck Wessel’s panzer, but again the shots ricocheted. It all came down to the final Command Die of 3, which the Marquis used to try to bring on his last 2-lb AT gun. Sadly, the confounding effects of the barrage proved too much to surmount, and play passed back to the Germans.
Turn 1, Phase 15 (German): 64322 – With this roll the Germans had plenty of options for activation, and both Krauss’ and Wessel’s tanks were poised to advance off the northern board edge and end the game (and the campaign) with an “Armored Advance.” Redwolf decided to keep with Krauss’ theme of leading from the front, and his roll to drive flat-out was more than enough to see his tank leave the table and end the scenario in a draw.
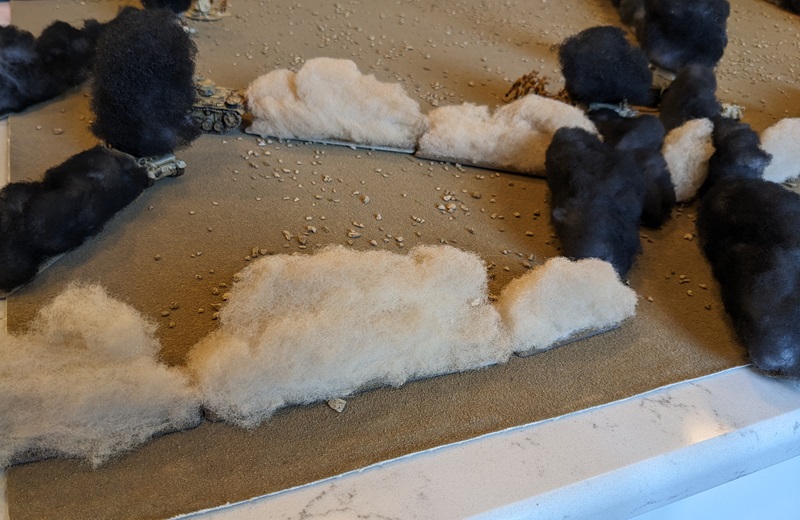
When regimental command called a halt that evening, Hans Krauss heaved a sigh of relief. Though they seemed to have pushed all the way through the South African formation and hadn’t encountered any further resistance for the last thirty minutes or so, things had gotten hectic there for a few hours. Over the next hour or so, more tanks from the regiment would continue to trickle in, all laagering in the vicinity of the airfield at Sidi Rezegh for the night. There were the regular after-action reports and debriefs, and it was clear that they had more or less cored the entire South African brigade, taking a huge number of prisoners in the process.
But at what cost? Of the men he’d stepped off with that day, none were still in tanks. Berndt Ehrenreich eventually rolled into Sidi Rezegh in his “requisitioned” Kubelwagen, and Dieter Bauer arrived some time later clinging to the side of a Pionier half-track escorting a gaggle of South African prisoners – his shoulder heavily bandaged and his previous “thousand-meter stare” looking even more haunted if that were somehow possible. But Lendt was still missing and young Wilhelm Mauser had burned up alongside his entire crew.
And already there were rumors that they would soon be moving again. Apparently Generalleutnant Rommel now wanted to strike eastward towards Sidi Omar in an attempt to attack the British supply lines, hoping to cut the enemy off at the knees. Krauss needed to inspect his machine and prepare his men. And it occurred to him belatedly that since the man had survived the most recent engagement, maybe he should actually learn his new driver’s name…
Postgame Campaign Stuff
For the Germans, the biggest benefit to ending the campaign now is that they receive 2 Campaign VP for every un-played turn after Turn 6 (so if they make a straight run of it and never have to replay a scenario they can max out at +8 VP for this condition). Since this is Turn 7 that gives them a very healthy 6 Victory Points for bringing the campaign to a close now. Tacking on the 2 VP for destroying enemy vehicles (one for each), they were able to pump their score up by a respectable 8 points this Campaign Turn.
Meanwhile, the South Africans managed to get a transport truck to safety for 3 Victory Points. And while the tank itself was not destroyed, the combination of Dieter Bauer’s crew bailing out and the Armored Advance means that the tank is left behind and thus considered destroyed. That bags the South Africans another 1 VP for a total of 4. This brings the final campaign totals to:
South Africans: 31
Germans: 34
Consulting the victory conditions for the campaign as a whole, we have the following:
- German score > 6 higher: Axis major victory
- German score > 3 higher: Axis minor victory
- South African score > 3 higher: Allied minor victory
- South African score > 6 higher: Allied major victory
- Any other result is a draw
Astute readers may notice the symbol is “>” and not “≥”, which means that in order to score any kind of win the Germans need to have a margin of at least 4 VP. But with a net of only 3 Victory Points, the final result of the campaign is a hard-fought draw!
Debrief
Wow! What a close finish! That last South African phase (where the medic came on through the barrage) had the potential to be a game-changer, but the dice just didn’t shake out in the South Africans’ favor. And for the campaign as a whole, to end within 3 VP after seven complete Campaign Turns is pretty much neck-and-neck!
Though the Germans will no doubt claim a moral victory, the end result being a draw actually squares pretty accurately with the historical outcome. Totensonntag was essentially a Pyrrhic victory for the Germans – though the 5th South African Infantry Brigade was effectively wiped out in a single day, the losses incurred by the Afrika Korps (and by the 15th Panzer Division in particular) were simply unsustainable at this point in the war.
That was borne out in this play-through of the campaign. Out of a starting full-strength platoon of five Pz III G tanks, at dusk that evening Krauss’ command tank was the only one that rolled across the finish line at Sidi Rezegh under its own power. The two reinforcement tanks were still with him, but presumably they were remnants of other platoons that suffered a similar fate. And while many of these tanks were “mission kills” that could have been brought back into service given time and resources, Rommel’s subsequent “Dash to the Wire” maneuver essentially ceded this battlefield to the Commonwealth forces and abandoned those otherwise serviceable vehicles. This was perhaps cold comfort to the roughly 2800 men of the South African 5th Brigade taken captive, most of whom would spend the next several years in Italian POW camps.
But in the following days the 2nd New Zealand Infantry Division would link up with the beleaguered defenders of Tobruk, finally breaking the siege on that city. By the end of the following week, Axis forces were in full retreat back to Gezala and Benghazi and Operation: Crusader – which had come so close to being an utter fiasco for the 8th Army – was a smashing success in achieving its aims.
While it laid bare many of the problems with the organization and existing operational doctrine of the Commonwealth forces, Operation: Crusader ultimately resulted in a much stronger formation. And though the Afrika Korps would come raging back in several months’ time (this time capturing Tobruk outright), they would be stonewalled at their high-water mark in the battle that Churchill famously called the “end of the beginning” – Second El-Alamein. From that point on, the campaign in North Africa would see one Allied success after another, ultimately clearing Africa of Axis forces entirely and paving the way for the invasions of Sicily and Italy.
Parting Shots
I asked both @MarquisOfPeaches and @redwolf6879 if they wanted to share any thoughts from the game, and both graciously agreed.
MarquisOfPeaches: This was my first game of Chain of Command ever, and I had an absolute blast! The system was incredibly fun and I picked it up within a couple phases – some of that was down to game design, and some of that was from Ilor being an excellent teacher. The game itself kept me on the edge of my seat – the German double phase had me seriously worried, but doubling him back was enough to stop the Germans from winning the campaign outright, since it was when I disabled a tank and got the troop transport off the table. Redwolf’s plan to rush off the table was absolutely the right one, and I ended up with simply not enough guns on the table to stop all of his tanks.
I also should have tried to bring on my last 2-lb gun instead of the Boys rifle. In my head, I was saving it to spring at the last moment, but I ran out of moments very quickly. Especially with the barrage disrupting my deployments, I should have been trying to deploy as many assets as quickly as possible.
Ilor: Yeah, that’s a common feeling in CoC – that things can all too easily slip out of your control and opportunities pass you by before you know it. In that sense I feel like it captures chaotic situations really well.
MarquisOfPeaches: I was very happy, though, with the performance of my Bofors gun. It did exactly what it was supposed to – sit in one place and scare the living crap out of some Nazis. I managed to deploy it with an excellent field of fire and activated it in every single phase. I could have traded up to a 25-lb gun, but would have had to go without the entrenchment, leaving the poor crew very vulnerable to the machine-gun fire that kept coming their way.
In short, I’d do this again in a heartbeat! Even the format of playing it by Teams took me by surprise – for a hobby that I always thought was about pushing toy soldiers around a table, I had a lot of fun for not being in the same physical space as the toys. There are a couple ways to take this: it’s a microcosm for how we’ve all had to learn to interact with each other through screens in the last couple years; but I choose to focus on how it shows that play can bring people together.
Two days after the event, this showed up in my Discord PMs from @redwolf6879:
“What have you done to me, Marc?”
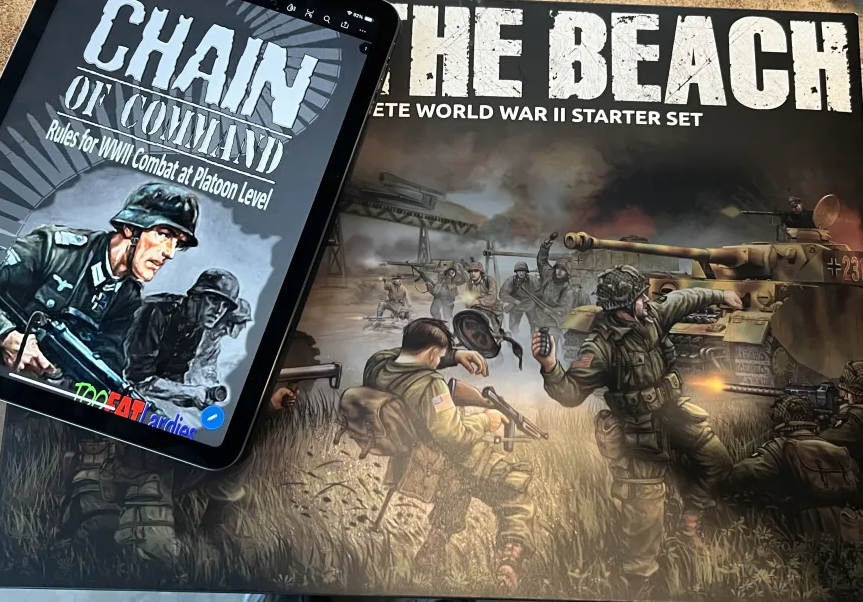
Heh. He followed up with some more in-depth notes:
@redwolf6879: On CoC: I enjoyed the game a lot. I am big fan of “managed chaos” style games, as not having total control over your force activation forces more creative and reactive thinking than games that allow you to do everything all the time with your forces. Marc did a great job walking the Marquis and I through the stages of each turn and the rules felt they helped the narrative along instead of “got in the way”.
I do really like how CoC is built around the narrative aspect of historical gaming. While some games want to provide the same “balanced all comers” experience a game like Warhammer provides, that doesn’t feel “right” to me in a historical context, because no competent general ever wants a fair fight. Instead, the balance is in asymmetrical scenario goals and in how you manage what’s thrown at you.
On the Campaign: I went into the scenario with a clear plan: destroy the 3 trucks and do a Thunder Run off the north end of the battle field; time had run out for the Afrika Korps and I didn’t think the tanks could handle a fair fight. No plan survives contact with the enemy, and those South Africans almost ruined the whole thing! Watching the campaign through the whole linked series was a lot of fun – seeing how the characters and story progressed as well as having to make choices for the sake of the long term instead of just “meat grinder everyone for victory at the single game level.”
On Virtual Lard format: I did a lot of gaming via TTS and similar during the pandemic, and my general rule of thumb is “any game that requires a tape measure will take too long via TTS”. However, the way Marc ran the game was smooth and efficient, and worked really well.
Wrapping It All Up
First off, a huge shout-out to Goonhammer patrons @MarquisOfPeaches and @redwolf6879 for their participation in this game. I always have a blast introducing people to Chain of Command and they were both great players who jumped into their roles pretty fearlessly. Thanks to both, you are the best!
This campaign is something of a departure from the typical games of Chain of Command (which was originally designed around infantry forces duking it out), but I think it really highlights how well the game handles asymmetric warfare. Ultimately, for both sides this campaign isn’t so much about inflicting casualties on the enemy as it is about time. The balance in this campaign comes not from how many the scenarios the Germans can win, but in how long it takes them and what losses they are willing to incur while trying to adhere to their (very aggressive) timetable. While the deck initially appears heavily stacked against the South Africans – green infantry with little support trying to hold out against an armored onslaught in the open desert – it turns out that the Germans are facing something of an uphill climb that gets decidedly steeper as the campaign goes on. This run-through definitely saw that play out.
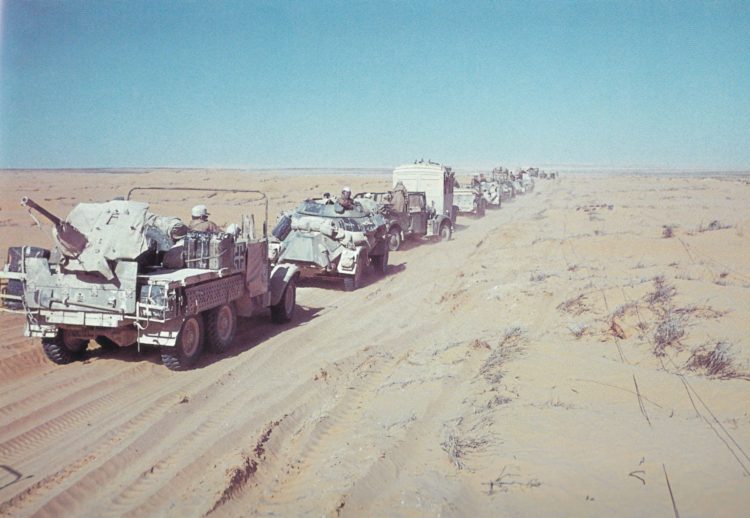
I’ve written a fair amount about gaming out WW2 in North Africa here on Goonhammer. If this campaign piqued your interest, check out my article on Getting Started with WW2 Gaming in North Africa. If you like the models I’ve shown here, head on over to my How To Paint Everything: North Africa Vehicles article.
Finally, thanks to everyone who has followed this series, I hope you’ve enjoyed it! If you liked this and want to see more Chain of Command content, just drop us a comment below with your suggestions!
Have any questions or feedback? Drop us a note in the comments below or email us at contact@goonhammer.com.
