
Painting vehicles is the bane of many a painter’s existence. The issues usually arise with getting any kind of color gradient onto large smooth surfaces such as on tanks and artillery. But when you are painting an army for World War Two or later periods, there comes a time where you can’t get around having to paint some artillery, a tank or a transport, especially if you want to play games and not get completely obliterated by enemy armour. I hope this guide will help you see how easy painting vehicles can be, and also give you a template from which you can make your own color variations to apply to non-German armies.
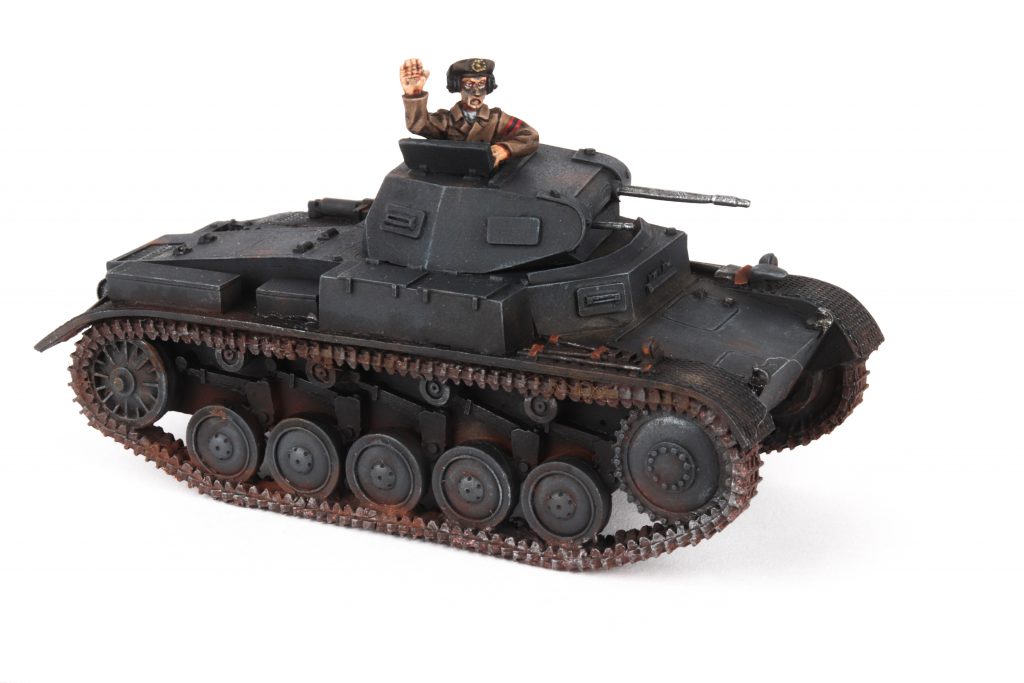
To start with a quick bit about myself, I have kind of avoided painting vehicles for the longest time. Back in 2021 a local store held a tank painting competition where I painted my first tank ever; it’s safe to say I completely overweathered it and I have no idea what I was thinking with the bases (see above). Despite it being my first tank, I ended up winning because no one else showed up. Two years later and I reviewed the re-released Panzer 2 and decided to paint it up, you can see a pretty big improvement in my skill over these two years.
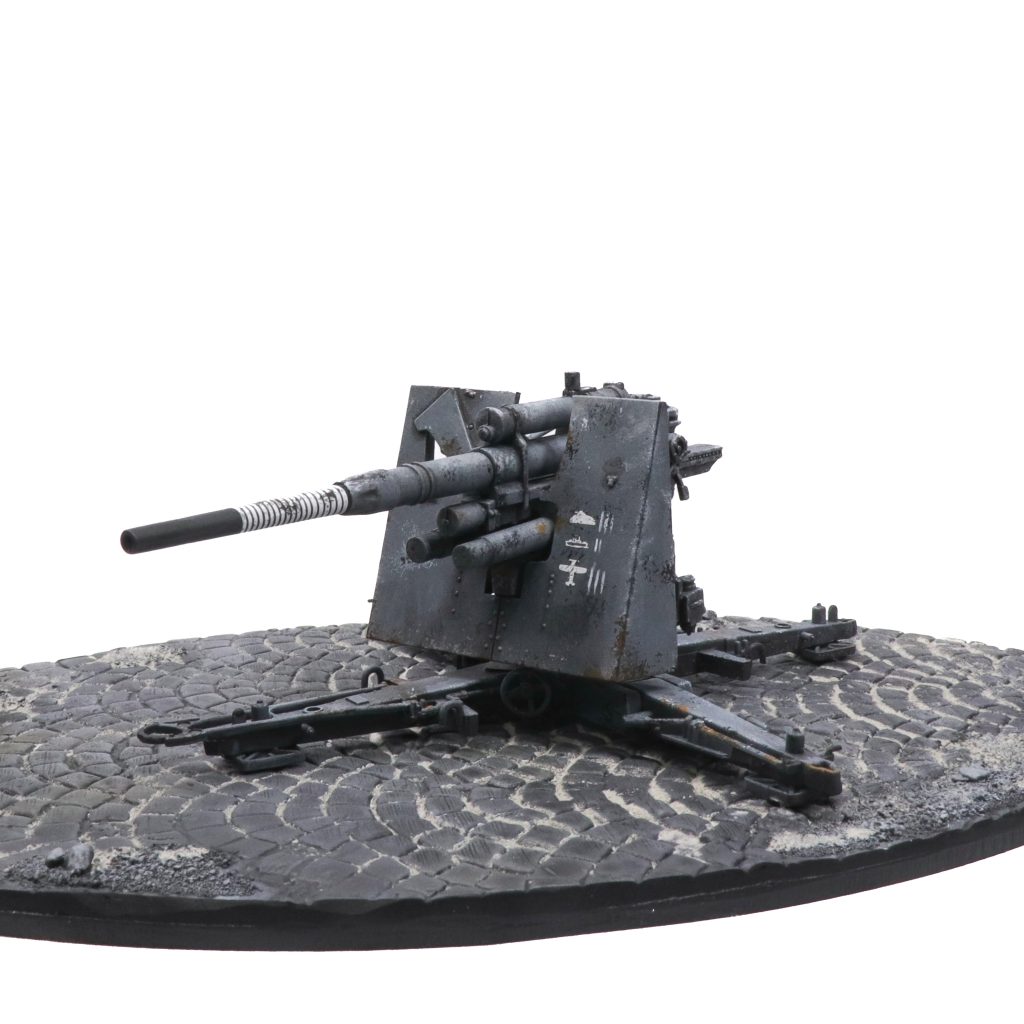
Fast forward to earlier this year, and in a bid to clear stuff off my desk I painted a Flak 88, trying out oil based paints for the first time in tandem with the drybrushing that worked so well on my Panzer 2. What I ended up with was a really good-looking artillery piece that took me less than a day to finish and mainly relies on drybrushing.
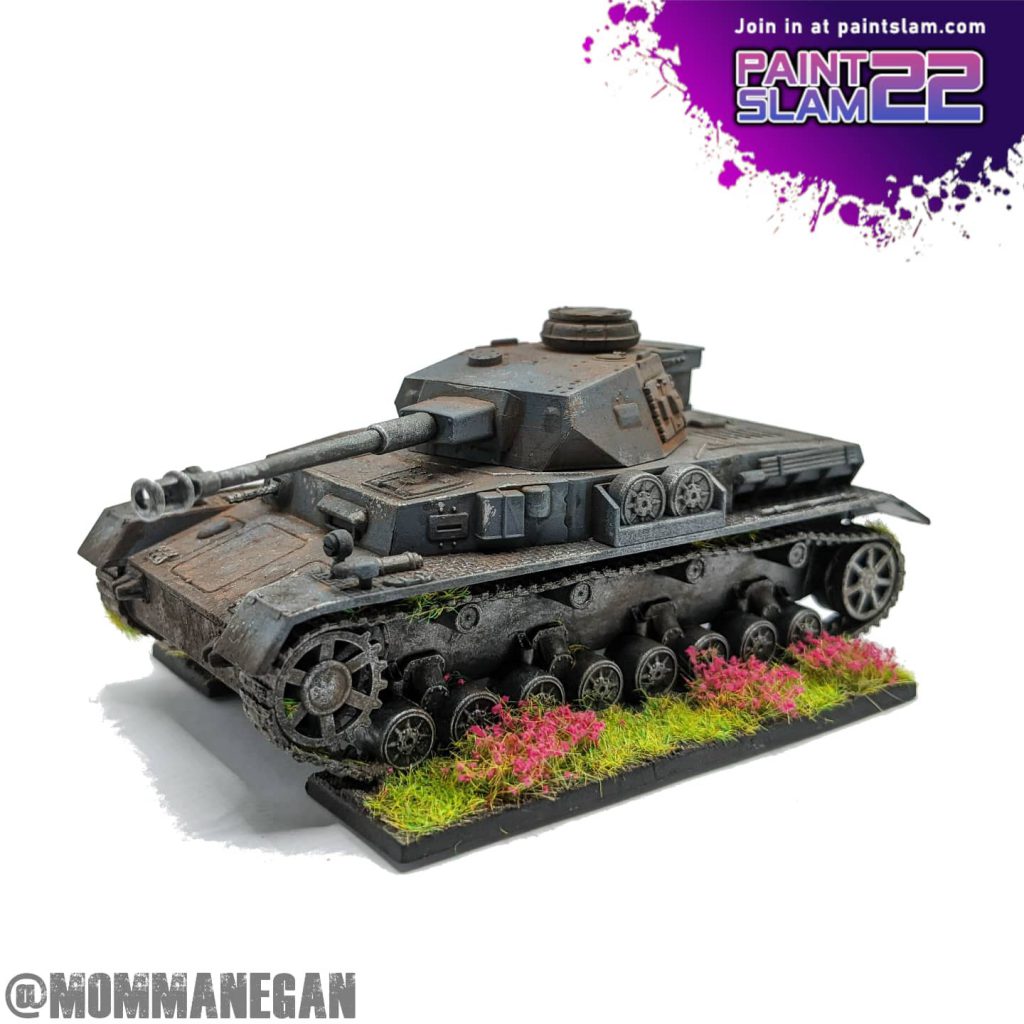
From there, I wanted to try out this light grey armour paint scheme more, this time on some actual tanks. So after some further experimenting I formulated a proper painting recipe for doing grey armour.
First off, some warnings. We’re gonna be working with oil based paints and white spirits, so you should make sure that your work area is well-ventilated. Also just like with metallic paints, you want to take a dedicated brush (one you won’t miss) and to switch out the water after you are done with the oil paints. Last and most obviously: do NOT lick your brush while working with oil paints.
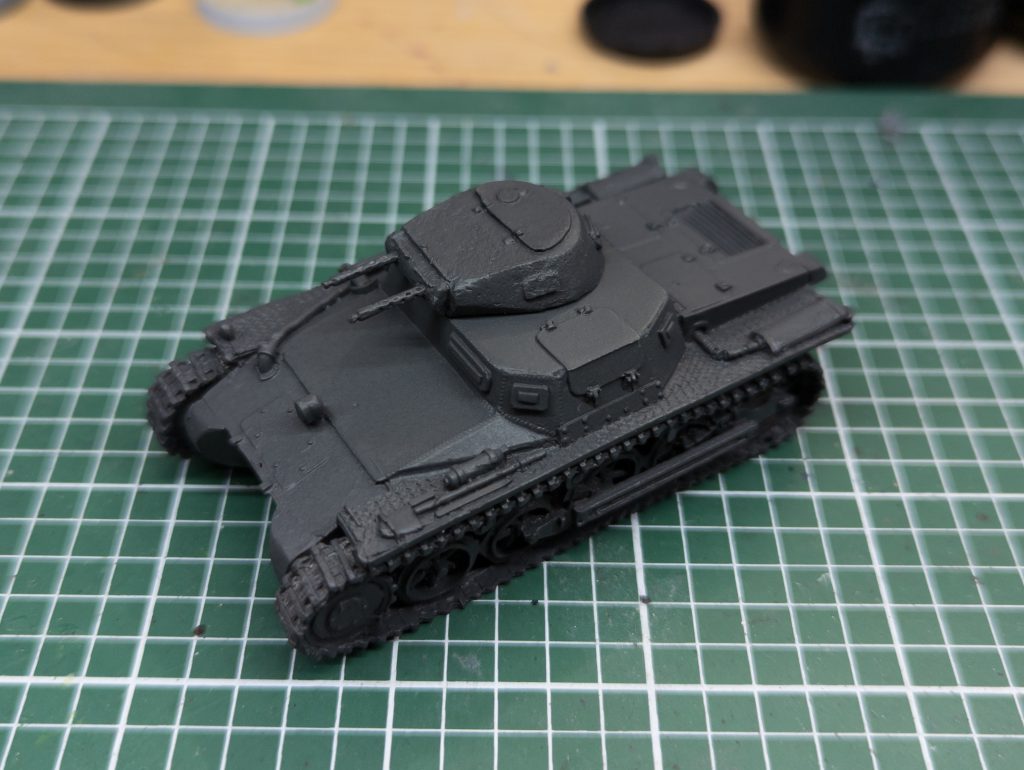
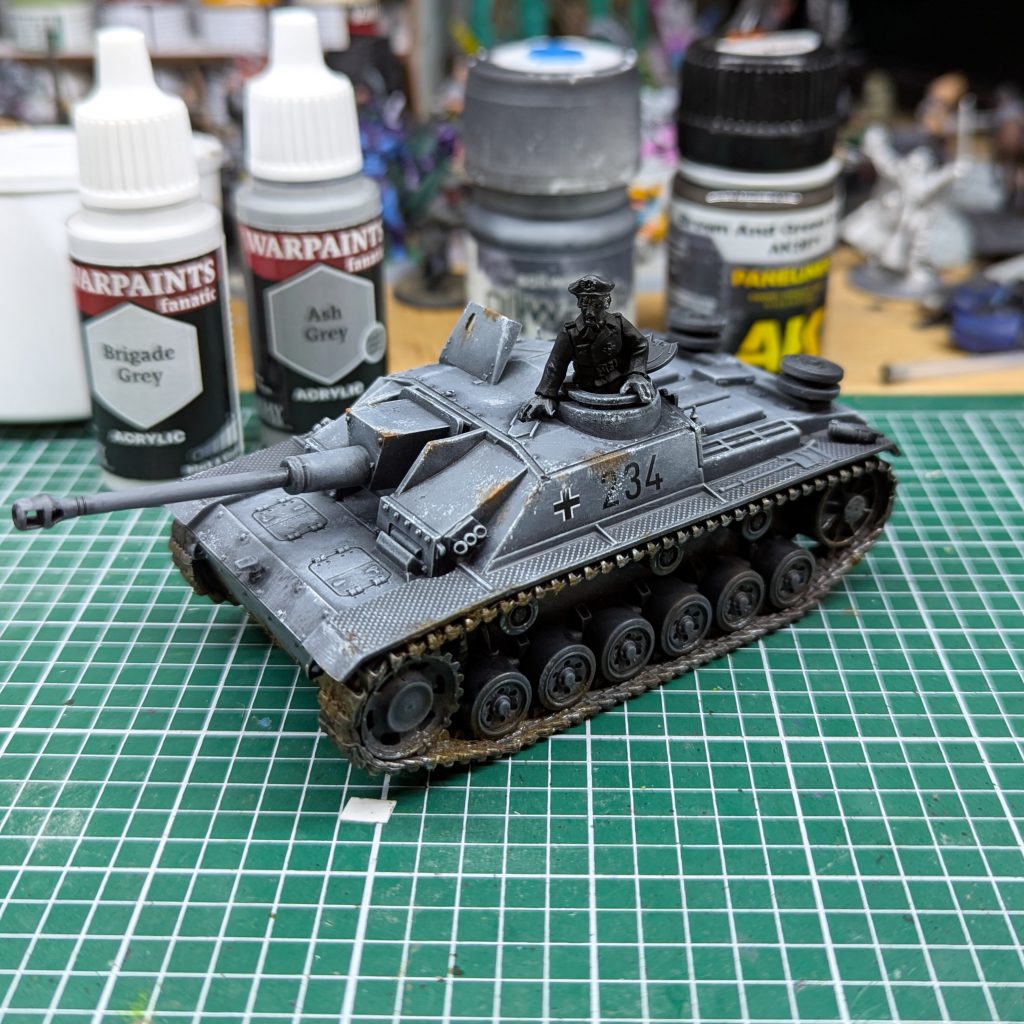
You want to begin with a primer coat of Vallejo’s Panzer Grey. Make sure this covers well, as it will serve as the shadow coat and bare plastic, metal or resin poking out in recesses is gonna look pretty bad. If your vehicle is made out of metal or resin, you can spray a lot more intensely since the primer can’t harm the material, but you also want to give the tank a layer of matt varnish after priming to strengthen the basecoat. If the vehicle is plastic, however, you want to use multiple careful coats, should you not be able to reach the deeper recesses, you can use Vallejo’s German Grey or a similar dark grey to cover up those areas.
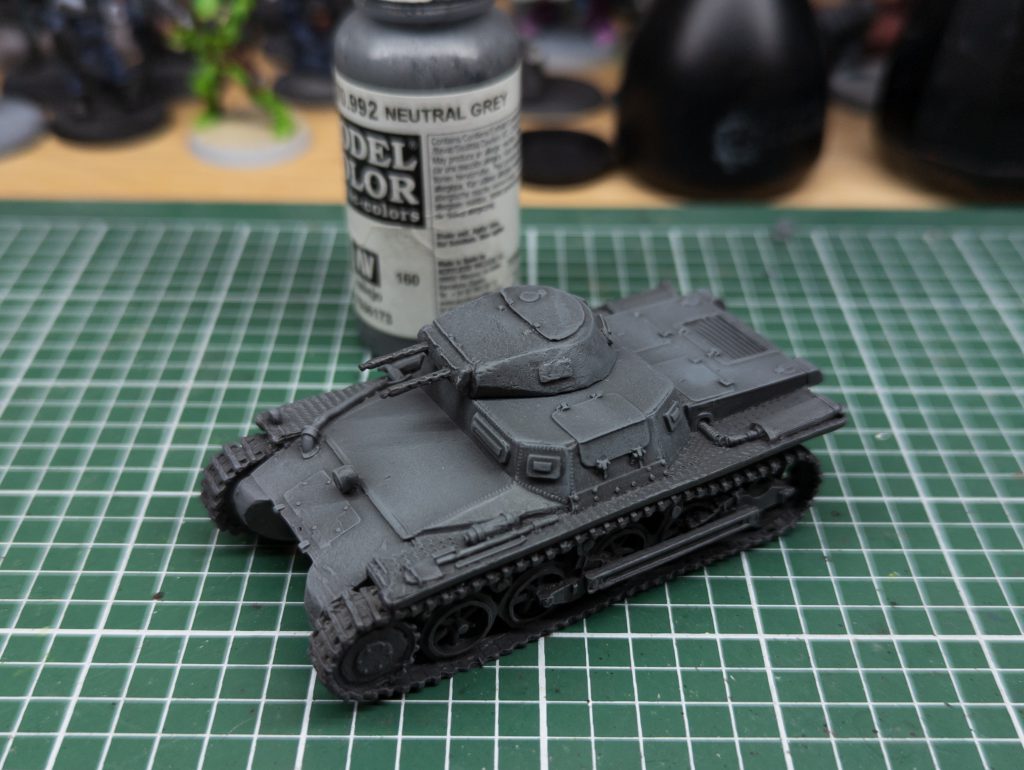
The next step involves drybrush. For this I use a circular soft bristled brush as it helps with applying more cohesive coats on large flat areas. We use Vallejo’s Neutral Grey and give the entire vehicle a strong drybrush, focusing on the large armour plates to build up an overall lighter color to the vehicle. Make sure that there’s no wet paint on the drybrush, otherwise it might ruin the effect. (Pro tip: If you want to increase the opacity of the Neutral Grey on the armour plates, you can take a small brush or even a bit of sponge and add a thin coat of neutral grey on the centers of the armour plate.)
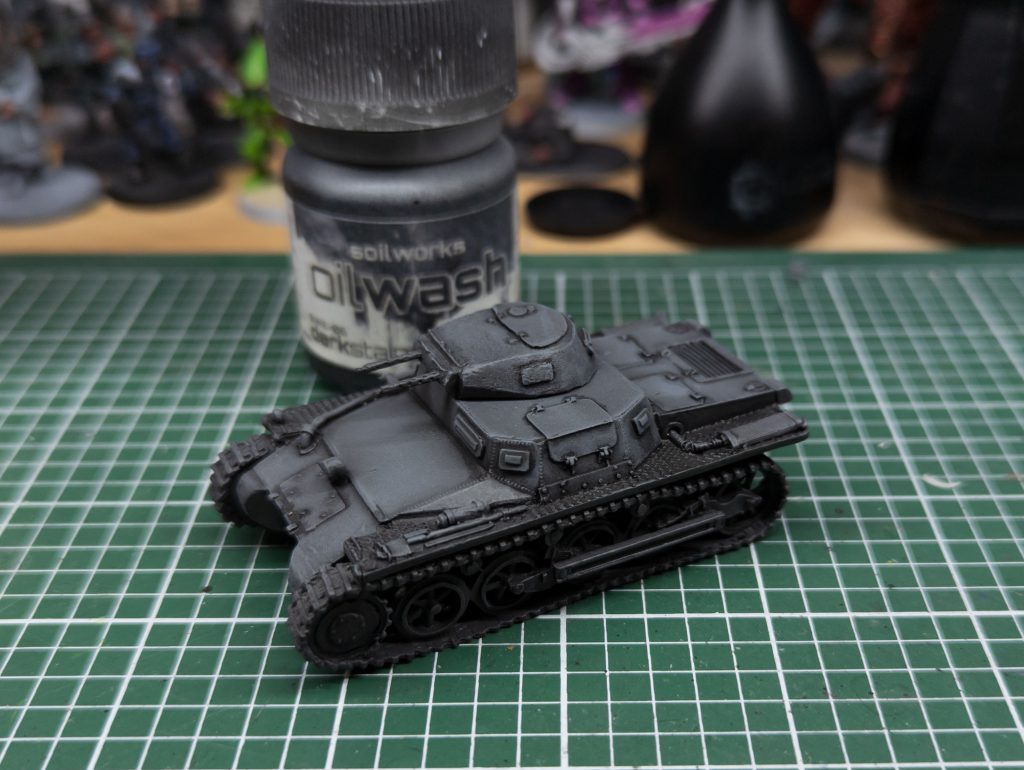
Now we get to the oils. It doesn’t really matter what oil colors you’re using, so long as they are somewhere on the dark and dirty spectrum. You will also need some White Spirit, because most oil paints do not come in a workable state for what we want. You want to get the oil to a classic shade consistency and the gently touch the tip of your brush right into the corners of recesses and watch as the capillary action sucks the oil down the recess. You will notice that texture buildup from either drybrush or priming draws some stains onto the flatter areas; generally you can leave those as actual stains, but if they become too much, you can take a bit of White Spirit on your brush and wipe it away gently.
Give the oil a good half hour to dry before you continue painting. Don’t forget to change out your water. After creating much deeper shadows with the oil, we want to begin lightening up the edges and armour plates by drybrushing a mix of Vallejo’s Neutral Grey and Army Painter’s Ash Grey.
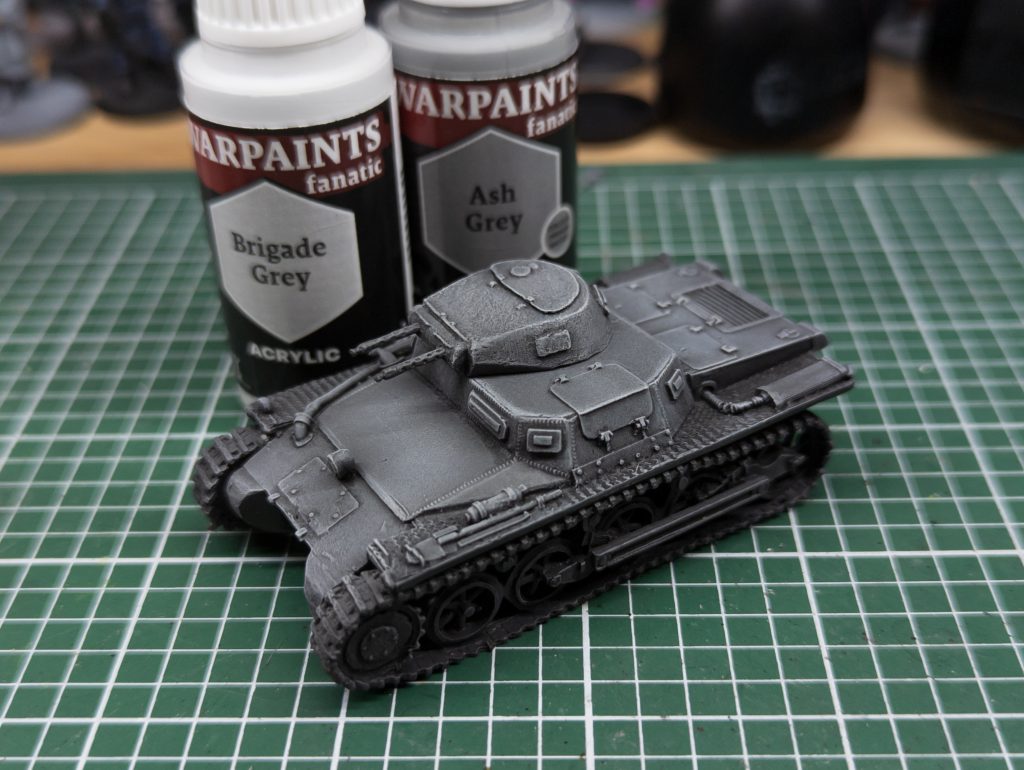
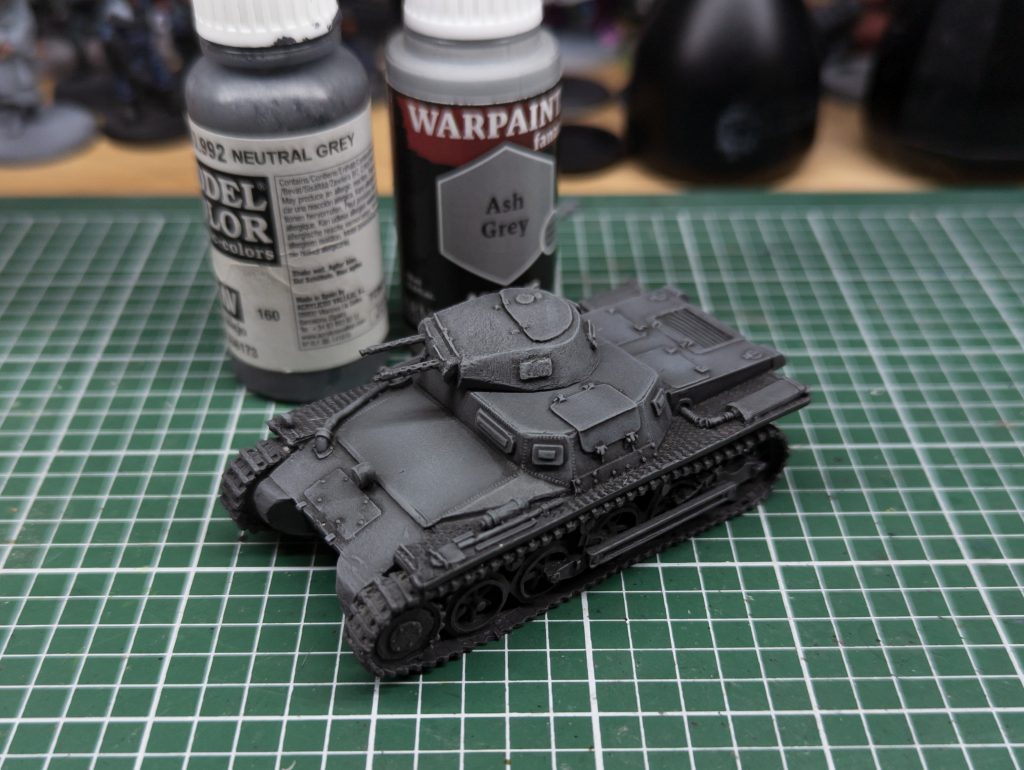
The last step for the grey armour plating itself is a small drybrush of Army Painter’s Ash Grey and Brigade Grey; just focus this on the edges and the very center of armour plates.
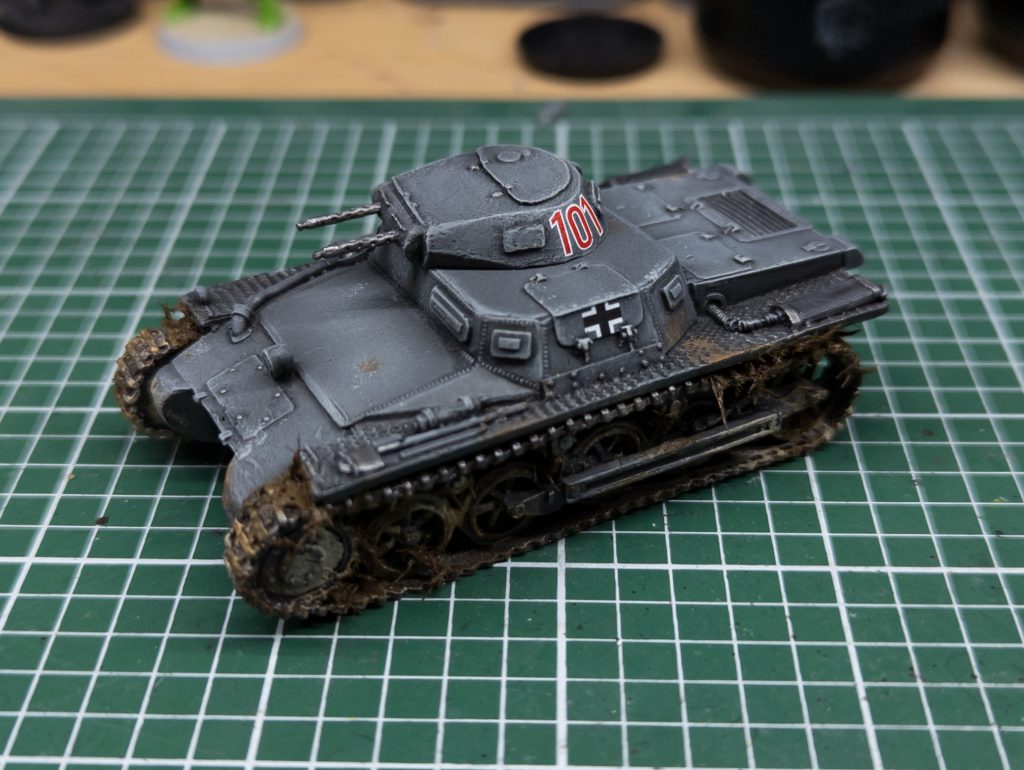
Now’s the time to fill out the details, such as painting the tracks and exposed metal parts, adding decals and battle damage. Tracks are relatively simple; you can just basecoat them in a dark reddish brown and then drybrush them with various metal tones. For decals I tend to use the Decal Fix and Decal Softener products from Vallejo. You can do some easy weathering by tearing a small piece off one of those packing sponges, clamping it between your tweezers and then stippling on small amounts of Brigade Grey, Vallejo’s Chocolate Brown and Vallejo’s German Grey.
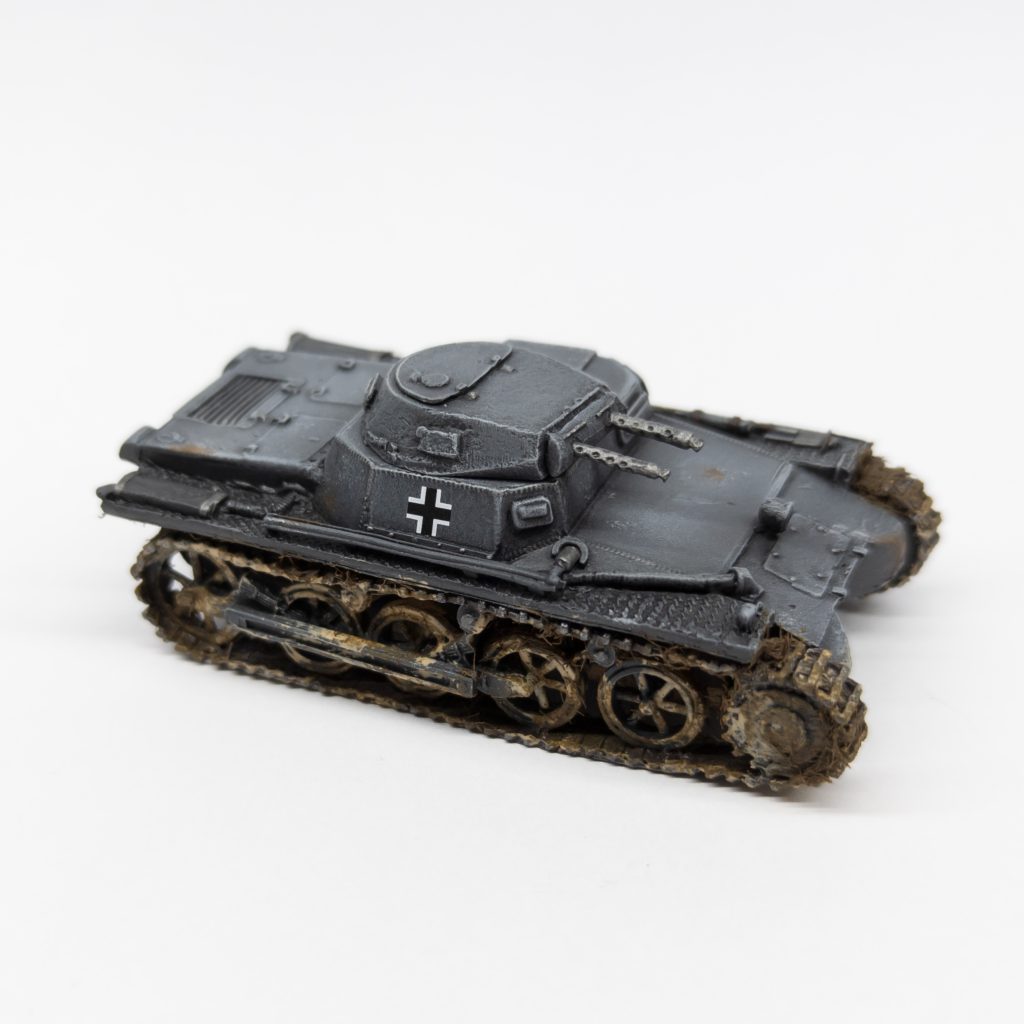
The final touches are different depending on what vehicle you are painting and how you assembled it; this is where you add stuff such as stowage, tank commanders and extra details like cloth canopies. Given that everyone will have very different stuff to paint in this step, I will simply skip it and move straight to the finished model.
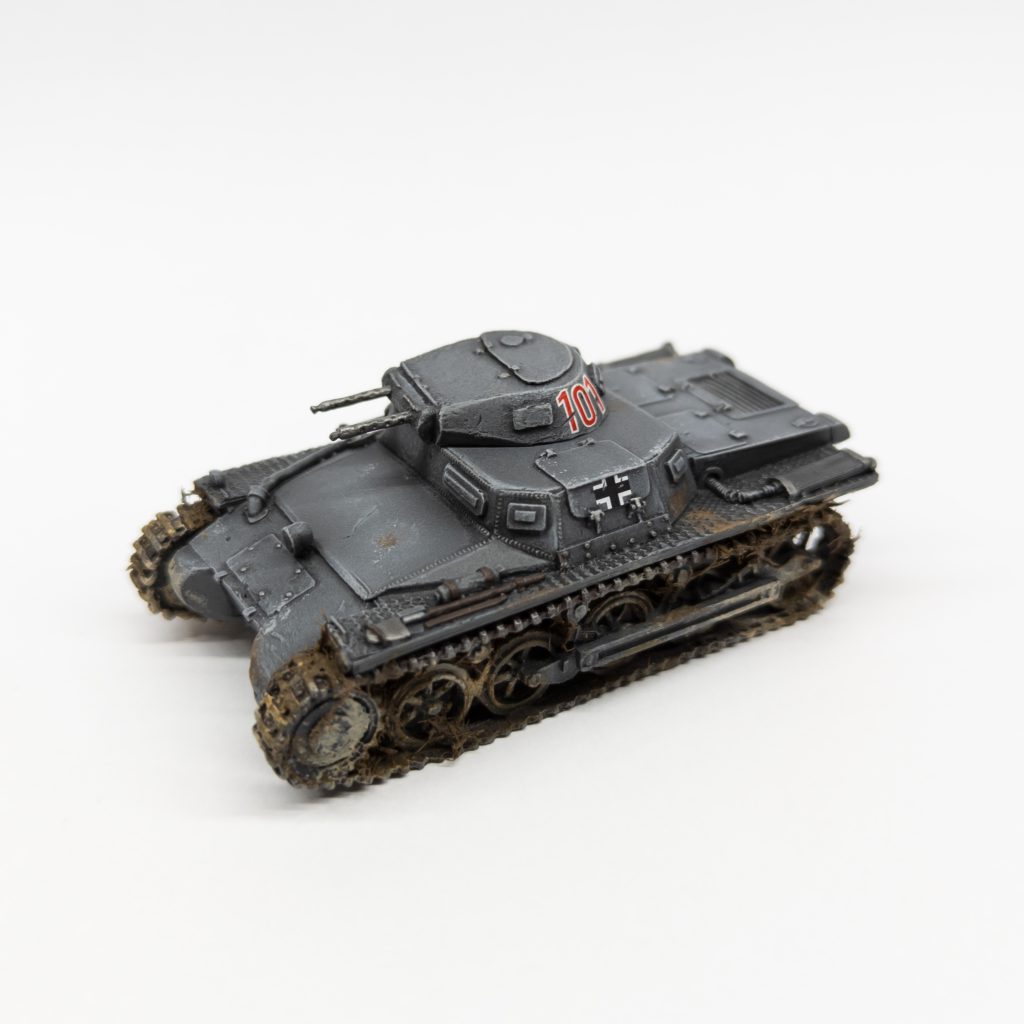
I hope you enjoyed this quick guide and maybe feel a motivated to give vehicle painting another try, or maybe this is a useful paint scheme you can put in your arsenal if you are already deep into painting tanks and vehicles. Either way, thank you for staying with me until the end and have a great day!
Have any questions or feedback? Drop us a note in the comments below or email us at contact@goonhammer.com. Want articles like this linked in your inbox every Monday morning? Sign up for our newsletter. And don’t forget that you can support us on Patreon for backer rewards like early video content, Administratum access, an ad-free experience on our website and more.
