In this week’s issue, Marc “Ilor” Renouf takes a bit of a detour from tabletop gaming into a closely-related activity – scale modeling!
The Conundrum
Model airplanes, y’all. Go into any model shop and chances are that there is more shelf space dedicated to model airplanes than anything else. They occupy a prominent place in the scale modeling world and are many peoples’ first entry into the hobby. I was no exception to this. When I was a kid I used to voraciously consume books on model-making and dioramas, and one of my first models was a 1/72 scale B-17. I had grandiose ideas of putting together a “ground crew” diorama around it.
But what no one told 10-year-old me at the time was that assembling and painting a model airplane takes patience, skill, and a not insignificant amount of specialized equipment (like an airbrush). I used Testors plastic cement squeezed by hand out of a metal tube to glue my plane together, with all of the associated blobs, overruns, and airy strands of glue everywhere that came with that approach. No one told me about painting in sub-assemblies, so I put the whole thing together in such a way that there were almost guaranteed to be parts I couldn’t reach to paint. I glued the canopy on first thing. I didn’t even know primer was a thing, and painted my enamel paints directly onto the plastic with a brush. This was long before the internet was a thing, so I had very little in the way of instructional material. And when the resulting monstrosity looked nothing like the picture on the box or in my beloved books (which were more “showcase” and less “how-to”), I became discouraged. I wouldn’t revisit assembly and painting of really anything until some dudes at the local hobby store (which sold RPGs) hipped me to this brand new game called Warhammer 40,000: Rogue Trader.
And I wouldn’t try another model airplane for almost 40 years.
Fast forward to my last birthday, when my father-in-law got me a gift certificate to the local model store (where even though they don’t sell stuff for the games I play, I buy all of my paints and modeling supplies). While I can always grab more Vallejo paints or Tamiya washes or Mig weathering products, I was pretty well set for all of the stuff I really needed, so I decided to make a foray back into the world of model airplanes. I had read somewhere that the new Airfix kits had taken a significantly positive bump in quality of late, something that the store owner (whose opinion on these things I have come to trust over the years) confirmed. So on a whim I decided to re-enter the fray, starting with a 1/48 scale Junkers Ju-87B Stuka.
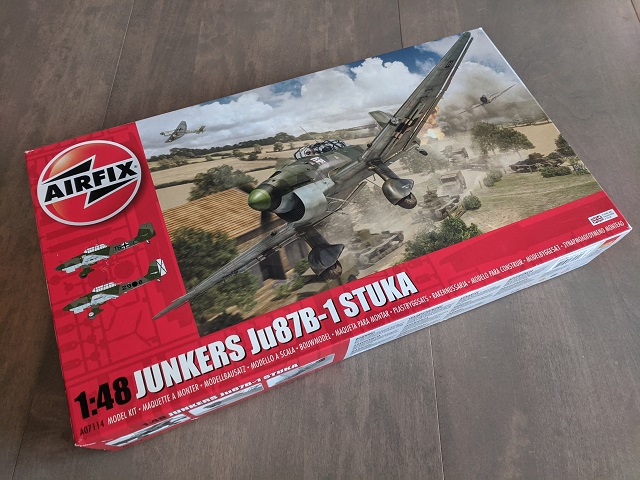
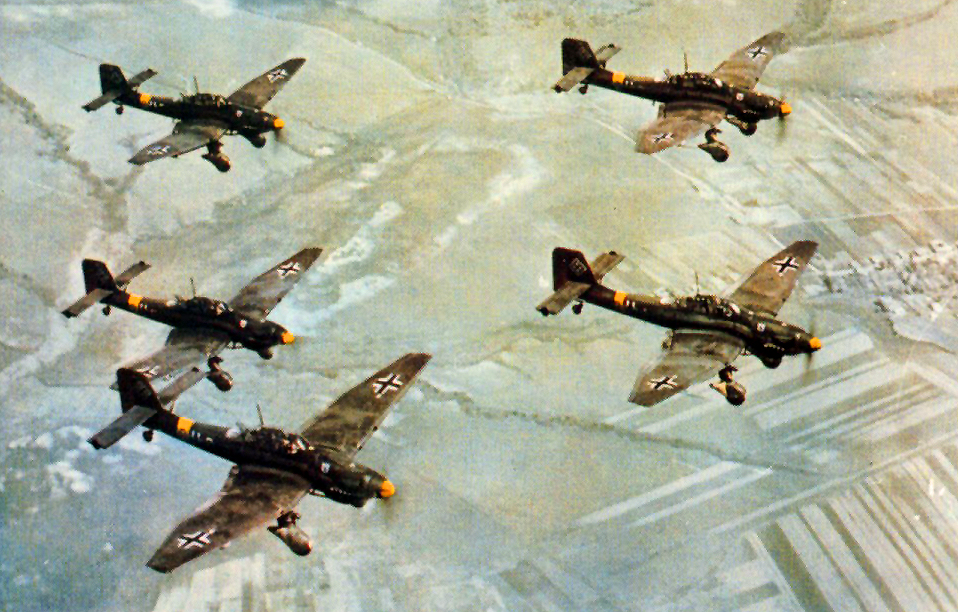
The Stuka is an iconic aircraft from the Second World War. A tactical dive bomber, the Stuka was designed to fly close air support for the Wehrmacht as the blitzkrieg raged across Europe. The plane included a special feature – a psychological weapon designed to strike fear into the hearts of its victims – the “Jericho siren.” As the plane entered its dive, air passing through the sirens (which were affixed to the aerodynamic shrouds around the landing gear) would make this high-pitched, keening wail. Ordinarily, diving planes don’t make much in the way of additional sound, but if you’ve ever watched a movie in which a plane made a dive – even if the plane in question wasn’t a Stuka – the sound-effect that is almost always used is the Jericho siren. It is so ubiquitous in movies that pop-culture has more or less defined it as “the sound that diving planes make.”
Assembly
I cracked open the box and was immediately reassured by what I saw. All of the sprues were well cast and there were virtually no visible spots of flash or mold lines on any of the pieces. The panel lines and rivet details were very nice, and the instruction booklet had this nice set-up where in the diagram for each step, the part you’d put on in the previous step was highlighted in red.
Now having many years of working with fiddly 40K vehicles – including the Catacomb Command Barge – under my belt at this point, I knew that I’d have to tackle this in sub-assemblies, especially because there was so much detail in the cockpit. As it turns out, there’s a sort of internal frame of the aircraft that allows you to work on the cockpit easily, and when you’re ready to assemble the rest of the plane the main fuselage just sort of levers on over it. Clever!
It was here that I had my first problem, however; fiddly details like the pilot’s control stick are super flimsy at 1/48 scale (no “heroic” proportions here, let me tell you), and I hadn’t even gotten as far as priming the cockpit before I snapped that particular bit off. But whatever, a few minutes with a pin-vise and a custom-cut length of steel wire later, I had a replacement that was much more likely to survive my ham-handedness. But I was eyeing the rear-facing machinegun (still sitting attached to the sprue) with more than a little suspicion, as it too was almost impossibly thin and spindly.
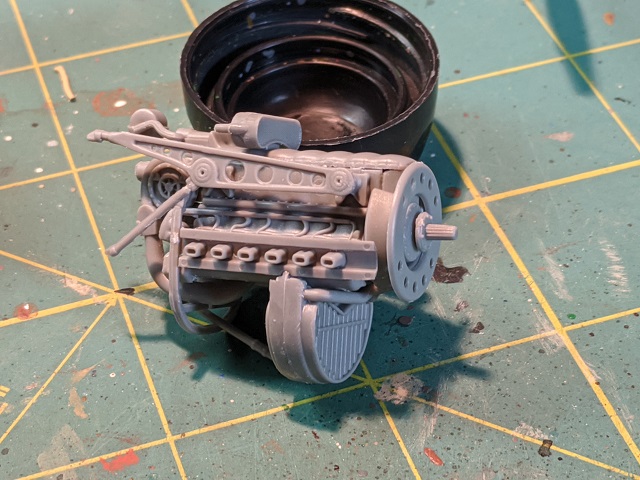
Once I’d painted the cockpit, I moved on to assemble most of the rest of the vehicle – fuselage, wings, tail, and engine cowling. One of the things that really impressed me about this kit was just the sheer number of options it provided. The thing has an entire, super-detailed, multi-part engine that you can assemble and use if you want to do an exposed motor build (say, because you want to do a diorama where a ground crew is performing maintenance).
Similarly, the landing gear can be assembled either for the aircraft on the ground (with the molded flat spots in the wheels on the bottom and part of the landing gear shroud cut off to model the gears’ hydraulics compressed from the weight of the plane) or in-flight (with the round spots of the wheels showing and the landing gear hydraulics extended/uncompressed). There are even two different tail wheels, one for each option. I was utterly blown away by this level of attention to detail.
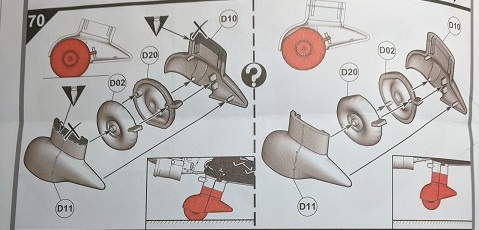
There are a bunch of other options too – you can model the tail and wing ailerons in a neutral or “mid-dive” position. There are multiple propellers and canopy bits, reflecting the designs of different eras of the war. The canopy itself can be modeled either open or closed. There are different possible bomb load-outs, as well as optional drop-tanks. There are internal bits for the wing-mounted machineguns if you choose to model those exposed as well. Most of these are separate bits, but a few of them require you to cut open panels in the wing, something that requires a careful hand.
Because I was intending this model to act as terrain, I grabbed my trusty razor-saw and cut off the landing-gear bits needed to model the aircraft parked on the ground (while Chain of Command does have rules for Stuka attacks as part of the game, it’s handled as a sort of pre-game bombardment and thus the model never appears on the table during the game – hence no need to model one in-flight).
Painting
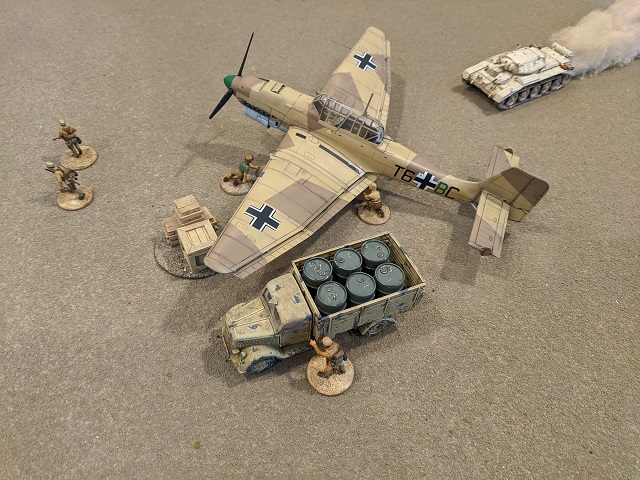
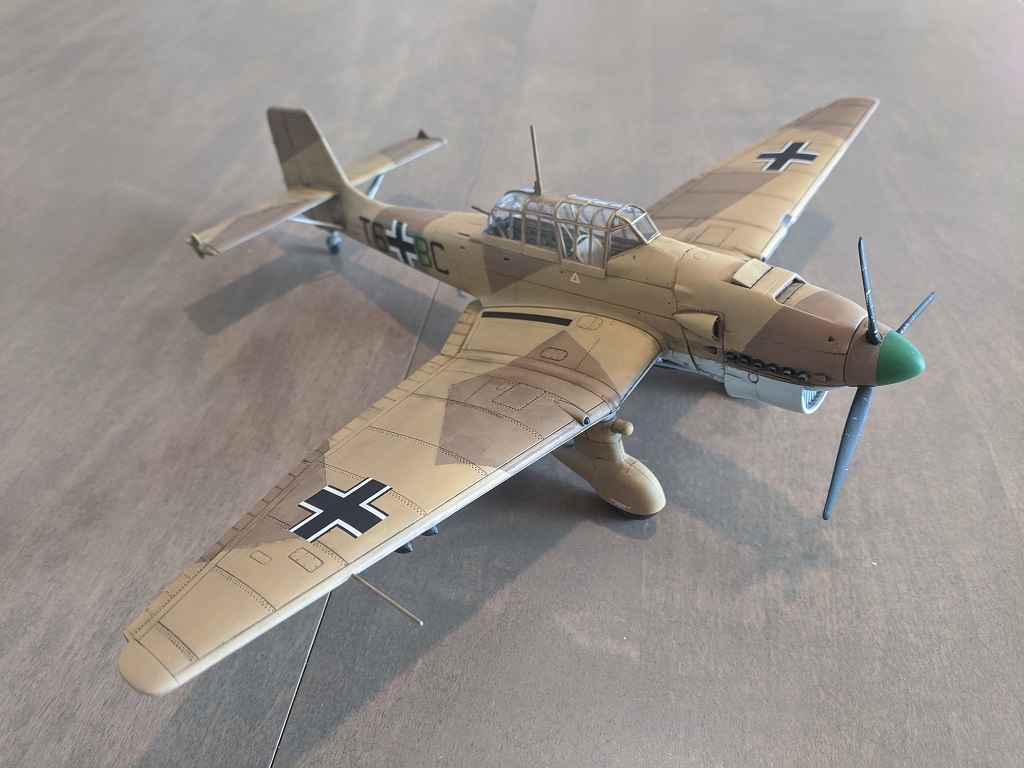
Virtually all of the WW2 German stuff I have is for the North African theater, so I decided to keep with that theme for this model as well. Almost all of the non-metallic colors I used were from Vallejo, though I used colors from several of their lines (Model Color, Model Air, and even Game Color).
The interior was painted with an airbrush using a base of Buff with some drybrushed highlights of Pale Sand. The rear gunner’s spent-magazine bin was done in my standard German desert trio – US Field Drab base, stippled with Green Ochre, and lightly highlighted in Buff. Cables and other components were picked out here and there in Neutral Gray, and the radio boxes behind the pilot’s seat were done in Black with Dark Grey edge highlights and White knobs/dials. All of the MG magazines at the gunner’s station were based in black and metallized with an ancient pot of Ral Partha Steel that I’ve been using for literally 35 years.
Once all of that was done, I sponged or stippled in a little bit of Citadel Leadbelcher on “high wear” areas like the seats, the floor of the gunner’s area, and some of the raised edges here and there.
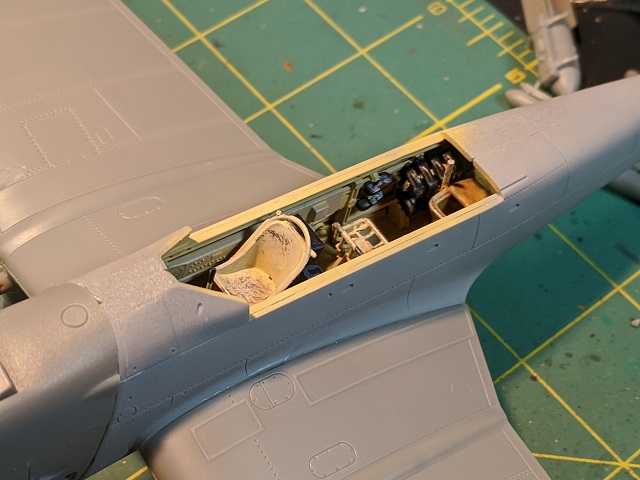
For the pilot’s instruments, there is a decal included with the kit, but there’s a lot of texture to the plate itself and I didn’t want to fiddle with the decal. I also knew I’d be putting this kit together with a closed cockpit, so I just hand-painted all the little dials, first with Citadel Runefang Steel, then Black with some teeny-tiny white dots here and there. Finally, I picked out a few buttons and knobs in the cockpit with Citadel Mephiston Red for a little bit of visual pop. I then hit everything with a blast of Testors Dull-Cote.
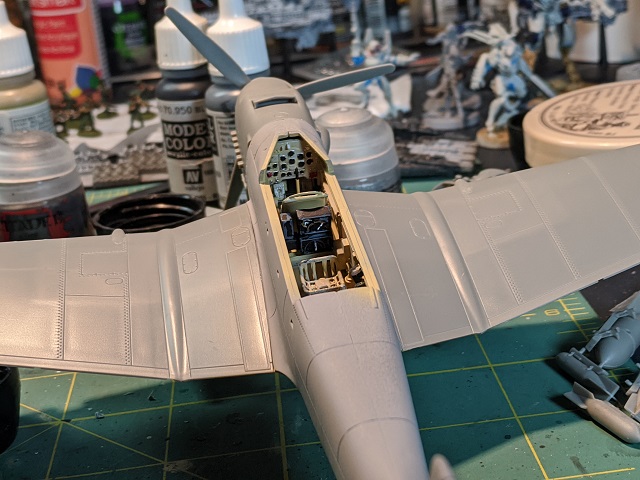
Once the cockpit was complete, I needed to assemble the rest of the aircraft around it. This was pretty easy, and the various components of the plane went together very cleanly (with the one exception of the side air-intake for the engine, which needed a little gentle shaving to fit properly with the closed engine cowl). With the bulk of the airframe complete, I was confronted with the part of this process I was least looking forward to – taping things off for priming (remember, the cockpit was already complete) and airbrushing. With the help of some 3mm flexible Tamiya tape, this wasn’t too terrible, although I did discover an important mistake I’d made in this process by already attaching the landing gear (which would be brown) to the underside of the model (which would be white-blue). This necessitated some extra taping, much to my chagrin.
Once I’d masked everything off to my satisfaction, I airbrushed the underside of the model with Vallejo Sky Blue. With this complete I needed to do another round of taping to airbrush-basecoat the top of the model in Iraqi Sand. Still more taping was involved in blocking out the camo patterns, airbrushed with Tan Earth. By this point I suspected that by weight my model was more tape than plastic.
But now was the stage of the process that was probably the most satisfying – pulling off all of the masking material to reveal the basic pattern. There were a few touch-ups necessary here and there, but on the whole everything came out exactly as I wanted. Fantastic!
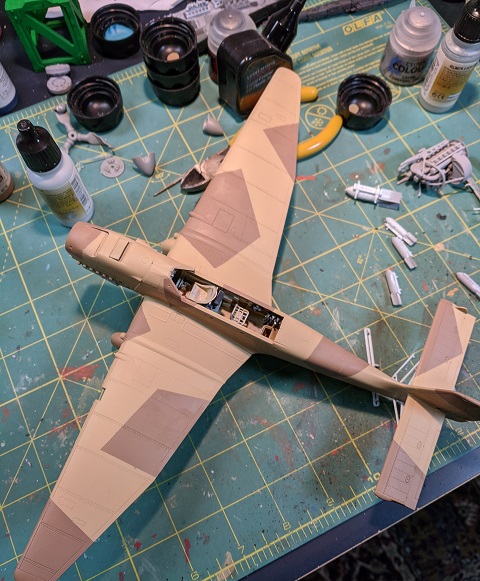
Once all the colors were blocked in, the last major step on the main airframe was the oil-wash. I had thought about mixing my own, but in the end I decided to just give the thing an all-over bath in black Tamiya Panel Liner, as I was very familiar with how that behaved. Once the oil-wash had dried, I used a napkin wetted with mineral spirits to wipe off the excess, with hard-to-reach areas done with a similarly dampened cotton swab. By the end of this process, I had a plane with nice, sharp panel and rivet detail, and a slight overall uneven tonal patina that gave just the right impression of “operational filth.”
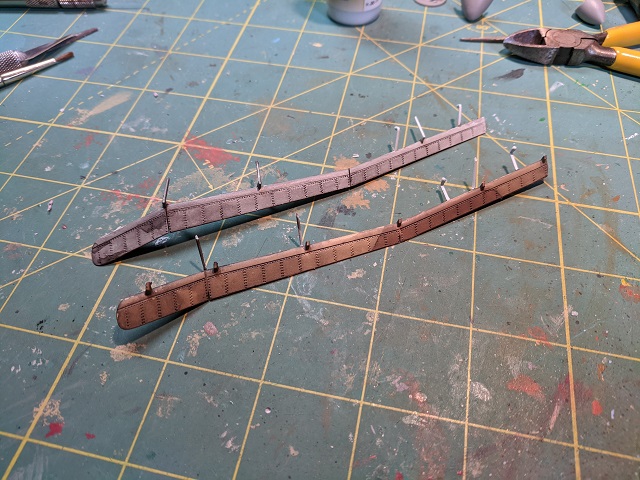
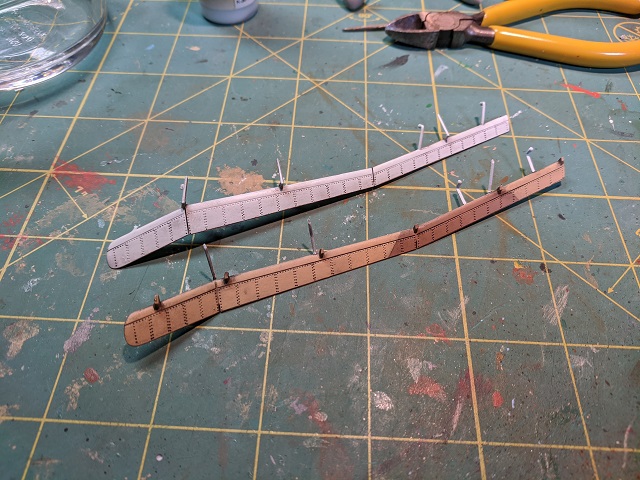
Details
With the paint on the main airframe complete, it was time to move onto the smaller details. I painted the various bombs black and once again metallized them with Ral Partha Steel. Then I moved on to the decals. There are those who contend that you should apply the decals before doing the oil-wash, but I don’t think it matters too much and I like the look of slightly cleaner markings.
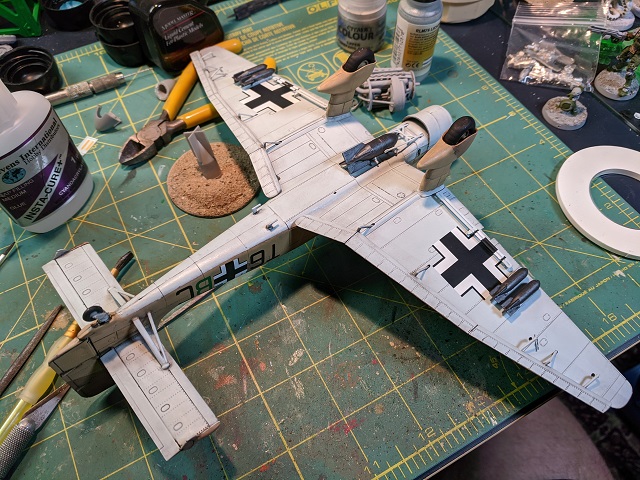
This particular kit comes with standard water-slide decals, with markings for both Spanish Civil War and WW2. Notably, there are no swastika decals (such that the kit can be sold commercially in Germany), and I’m OK with that – I’m cool having a historically inaccurate model because fuck Nazis. I’m also OK with the Balkenkreuz because its use predates Nazi control of Germany. The kit contains Balkenkreuz decals for both the top and bottom wing surfaces. For the underside of the wings, there is a sort of crash-bar that goes overtop the cross (which I glued on to the model after the decal was set), and while the kit actually includes decals designed to go on these bars, they are SUPER fiddly and almost impossible to get to lay properly. In the end, I ended up hand-painting them, seen here.
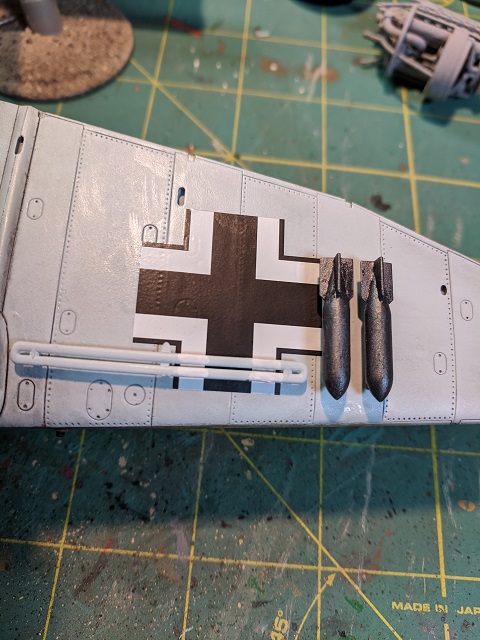
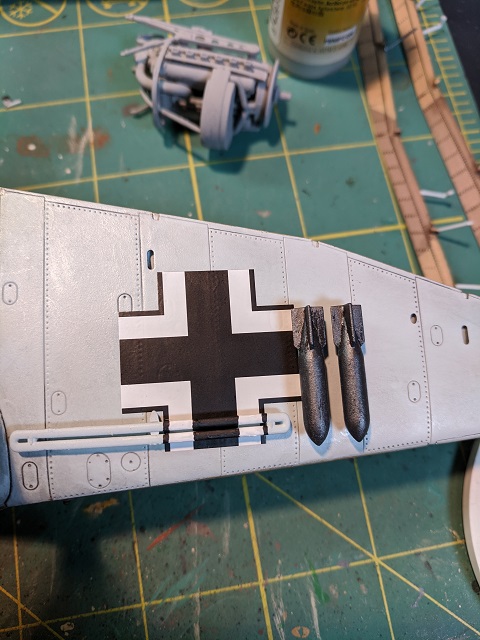
Additionally, there are a ton of other decals for various things – lift points, warning indications, tire pressure instructions, and the inevitable “don’t step here” warnings that have been a part of aviation since aviation was a thing. All of the decals are clean and easy to apply, but the backing paper is really thick and as a result it took longer than I was accustomed to to separate the decal from the backing. Finally, I attached the finished ailerons and bombs.
Once all the details and decals were in place, I hit a few “high-traffic” areas with Runefang Steel to show through aluminum under the worn paint. I decided to go relatively subtle with this, focusing mainly on the areas on the wing where the pilot and gunner would walk to climb into the cockpit. I also made a couple of metallic scratches on the propeller. Finally, I did a little extra weathering, including smoke-staining trailing back from the exhaust pipes, which was done using a black MIG Oilbrusher and a brush dampened with mineral spirits. The entire plane was then given the Dull-Cote treatment.
This brought me to the last and most complicated bit of the kit – the canopy. There are loads of YouTube videos out there that show good methods for this, but most of them are predicated on one particular detail – that the raised rib bits are on the outside of the canopy. Mind-bogglingly, some of the raised canopy detail for this kit is on the inside. I have no idea why, but essentially it meant that I couldn’t use some of the easy tricks and had to tape the entire thing. This was a laborious, precise, and time-consuming process that required a cutting mat, modelers’ masking tape, and a brand new and perilously sharp #11 X-Acto blade. I’m happy to report that not too much blood was involved.
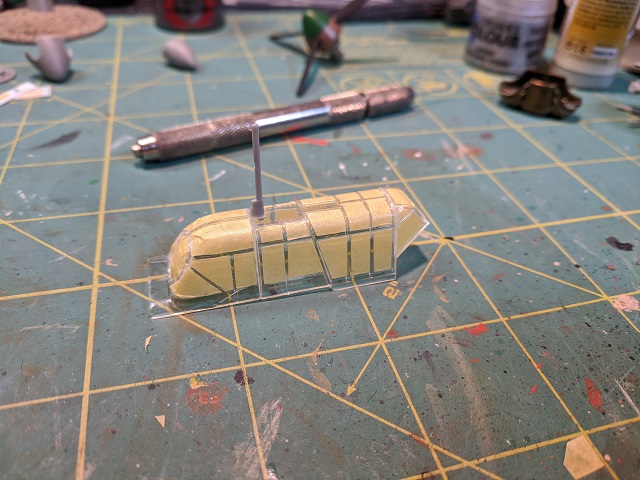
Here too I made a rookie mistake – once the canopy was masked, I did what I always do and primed it. I almost immediately realized that since the plastic is transparent, that gray primer would show through from the inside. Aaaargh. But whatever, I was committed at this point, and as it turns out it’s not really visible once the canopy is in place. Using my trusty airbrush I base-coasted the canopy in two coats of Iraqi Sand. All that was left was unmasking the thing and giving it an oil-wash such that it would match the fuselage.
Also, because I am a ham-fisted idiot, I had gotten a little messy with the plastic glue when I was mounting the round gunner’s window into the canopy during assembly, which caused a little bit of fogging. I decided to turn this gaffe into an opportunity for a little extra detail, using my pin-vise to drill a bullet hole in the glass. I thought about spattering “blood” on the inside of the glass on the opposite side of the canopy (like the gunner had been shot and killed), but decided against it. I then attached the gunner’s machinegun to the canopy and the canopy to the plane using PVA glue (which dries transparent and won’t “fog” like super glue will).
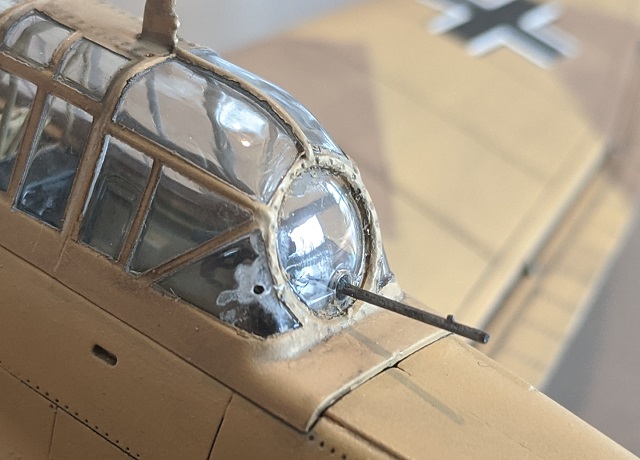
Boom, plane complete!
Extra Bits
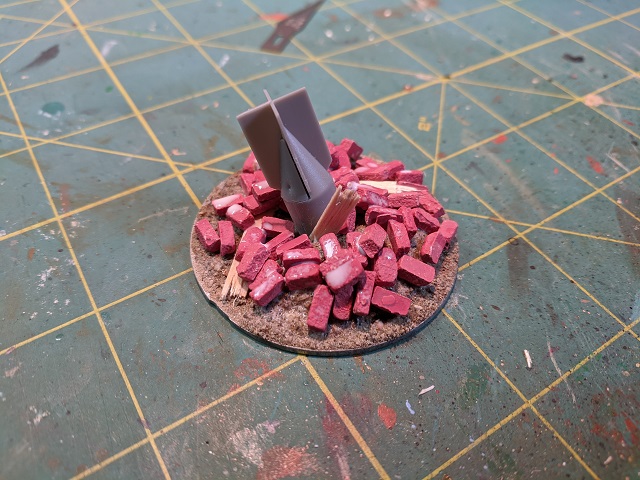
Because this kit comes with so many different options, you are left with a ton of extra bits. For instance, the fully detailed engine! Similarly, the kit comes with both a 500-lb and 1000-lb bomb. You only need one of these, so that leaves you with an extra bomb. One of the things that can happen with a Stuka attack in Chain of Command is that the target building can end up having unexploded ordnance in it. So I took the extra bomb and used my razor saw to cut the front of it off at an angle. I then used a little bit of styrofoam to build up some raised texture, then some scale bricks and broken coffee stirrers and voila! A bomb in a pile of broken timber and masonry, the perfect unexploded ordnance marker for my games!
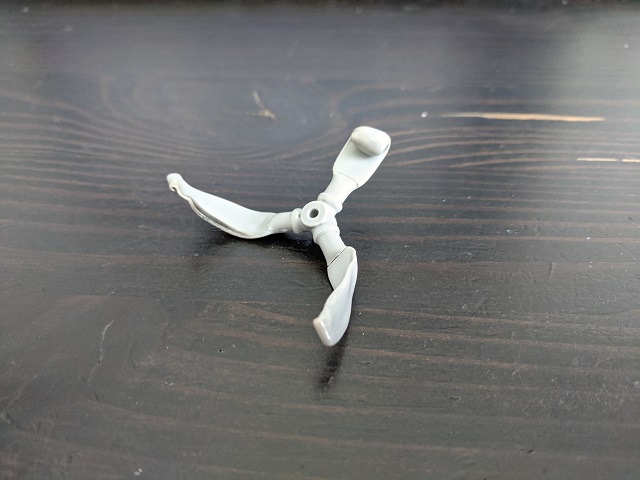
Similarly, I took the extra propeller to my stove, heating up and bending the blades to give the sort of bent and curled look that propellers get after a crash. Combined the the engine, some mangled sprue bits, and some custom-cut card, these will all make for a fantastic wreck site.
Finally, I’ll likely take the unused drop-tanks and make little carts for them, as you can never have enough scatter terrain on a wargames table.
Takeaways
It’s been a really long time since I’ve done a kit like this, and had I not done a ton of ground vehicles (both for 40K and WW2 games) in the interim, I’m not sure I’d have known where to start. The kit itself blew me away in terms of its detail. I actually learned stuff about the Stuka in the process of doing this kit – did you know that there are shutters on the main air intake to keep debris thrown up by bombing or strafing from damaging the radiator? Did you know that the aircraft has a hatch with a window on the underside so the pilot can look out between his feet and see the target prior to commencing the dive? Did you know that the central bomb is mounted on a swing arm to clear the arc of the propeller once it’s released? Neither did I!
All in all this has been a fun process with a great kit. I already have a Hawker Hurricane and Messerschmitt Bf-109 (both also 1/48 Airfix kits of the newer vintage) sitting on my shelf ready to go. Unlike the trepidation I’ve felt about model aircraft for the last four decades, I’m excited to give these a try!
