
With the Conquest ‘Road to Chios’ world series rapidly approaching the conclusion and climax of its first season, Australia has been hosting qualifying events for players across the country. CanCon 2024 was held in Canberra in January, The Coming of Kings in Western Australia in February, and Briscon 2024 in Brisbane in May. And, this weekend past, Canberra hosted its second world qualifier event: Conquer Canberra.
For those interested in the lists that were played at this event, I’ve separately done a full Tournament List Analysis video. Twenty-two players were present, playing five rounds over two days.
Preparing for the Event – List Construction and Practice
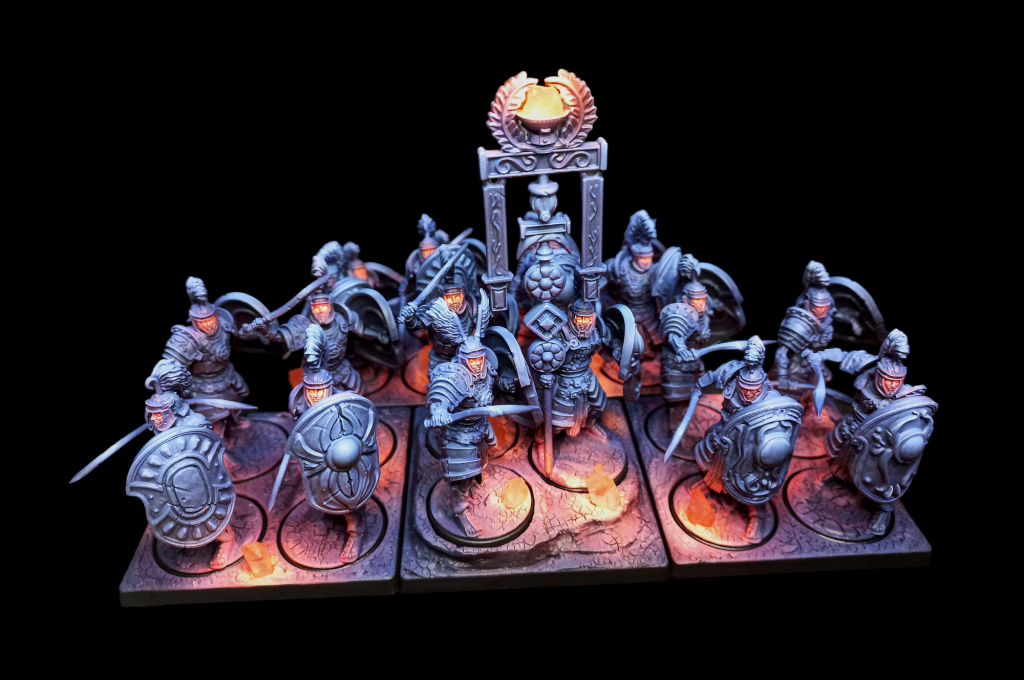
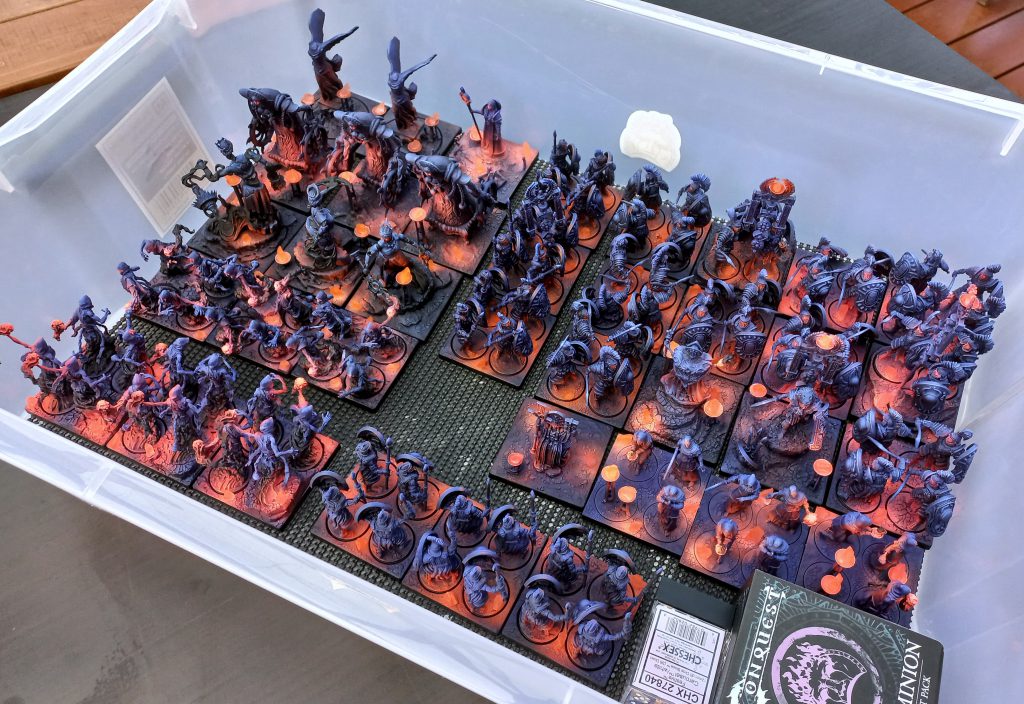
I knew for this event that I wanted to take my Old Dominion. In the February game update, Old Dominion received a glow-up so intense it had a blast radius, and unlike my Spires, my Old Dominion are actually… mostly… sort of tournament legal in events that are subject to Para Bellum’s modeling and conversion rules. After making a pre-order for cultists that I crossed my fingers and hoped would arrived in time (they did; Para Bellum’s e-store are incredibly snappy with their order processing and shipping), I settled on the following list for the event:
Army list – click to expand
The goal of this list is to utilise the Dark Power mechanic and regiments and characters that scale with it to maximise my strength across the early, middle and late game. Lists in Conquest typically need to make sacrifices on one area to be strong in another (to give a very simple example, taking more heavy regiments strengthens your late-game but weakens your early game), but the Old Dominion present an option to have your cake and eat it too thanks to Archimandrites, Heirodeacons and Kheres.
All three of these characters & regiments scale up to varying degrees as my army accumulates power. The Heirodeacon is relatively moderate, getting extra hits on her offensive spells, but the Archimandrites and Kheres both scale up powerfully. Kheres in particular have always been a great unit if you can have them survive into the late game, and while the February update made them uncomfortably swingy, the floor of their performance remains good and the ceiling is obscene. Casting spells in this list is also easier than usual, as many of the friendly target spells I’m looking to cast will be able to target Devout regiments, which typically guarantees success. This gives the list an incredibly consistent late game power, as healing and offensive spellcasting ramps up and saturates my opponent’s ability to respond. And because I’m using early game regiments to reach this powerful end state, I’m still able to aggressively posture and play the early game, and punish enemy overextensions with the flexibility offered by the activated component of the Strategos’ supremacy.
It also needs to be noted just how aggressively this list can pursue Dark Power. Because of the cultists, kheres and priest characters, the list can start using the Heirodeacon to use both Dark Shepherd and Dark Supplication to aggressively generate dark power and then heal it back with the Archimandrites. Under ideal circumstances, the list hits Dark Power Tier 2 early on turn 3, without having to use the Strategos supremacy ability or ever sustaining any permanent casualties. This lets me get online quickly and also means I would reach the Fourth and final Dark Power tier in almost every game, both in practice and at the event.
There is absolutely no question in my mind that, played correctly, this is one of the most powerful lists you can play in Conquest at the moment. It’s not unbeatable, and events will always be won by players, not lists – but very, very few lists are even remotely capable of engaging it in a war of attrition over a ten-turn game. Taking it down requires a lot of thought, skilled opposition, and a strategic and tactical approach that accommodates the fact that even other Old Dominion lists are unlikely to sustain into the late-game as well as it.
(This is what we call foreshadowing.)
Round 1 – Dan’s 100 Kingdoms – Echelon
Army list – click to expand
Round one was against Canberra local Dan Hundred Kingdoms. Dan’s list has an aggressive emphasis on multiple powerful heavy regiments, arriving and advancing quickly thanks to the Imperial Officer’s abilities (or simply by dint of being cavalry), sustaining with the Water mage, and generally looking to play a gameplan that isn’t dissimilar to my own. One of the strengths of Hundred Kingdoms is that it’s a very versatile army, and can pivot its list construction to adapt different approaches, and few factions would be able to even approach playing the same late-game sustain and grind style as well as Old Dominion.
With that said, Dan is a newer player with a lot of work responsibilities, so his list was slightly less optimised than it might otherwise be, and the game itself more of a teaching game. We talked through Dan’s choices and deployment, and the heavy presence in his list advanced toward my medium Praetorian regiments to try to secure his home objective zone and threaten my own.
The game was neck and neck on scoring for the first four rounds, and came perilously close to a collapse on my part in round four when I extended my Archimandrite’s Praetorian regiment toward his objective zone. My plan was to pin his Men-at-Arms in place and lock the Gilded Legion behind them, but then the Men-at-Arms went and collapsed entirely, opening up a full Gilded Legion charge into my regiment. Fortunately, I rolled as above average on my defence dice as I had to attack, and the Praetorians held with minimal casualties. The next turn, the Archimandrite was able to activate before the Gilded Legion and cast Dark Immolation, which increased the Praetorians’ Aura of Death and slapped the Gilded Legion with twenty hits as they went to activate. That broke the centre of Dan’s line, and the fights happening elsewhere were all going my way as the Water Mage simply couldn’t be everywhere at once.
Final score: 48-9
Round 2 – Matt’s City States – Melee
Army list – click to expand
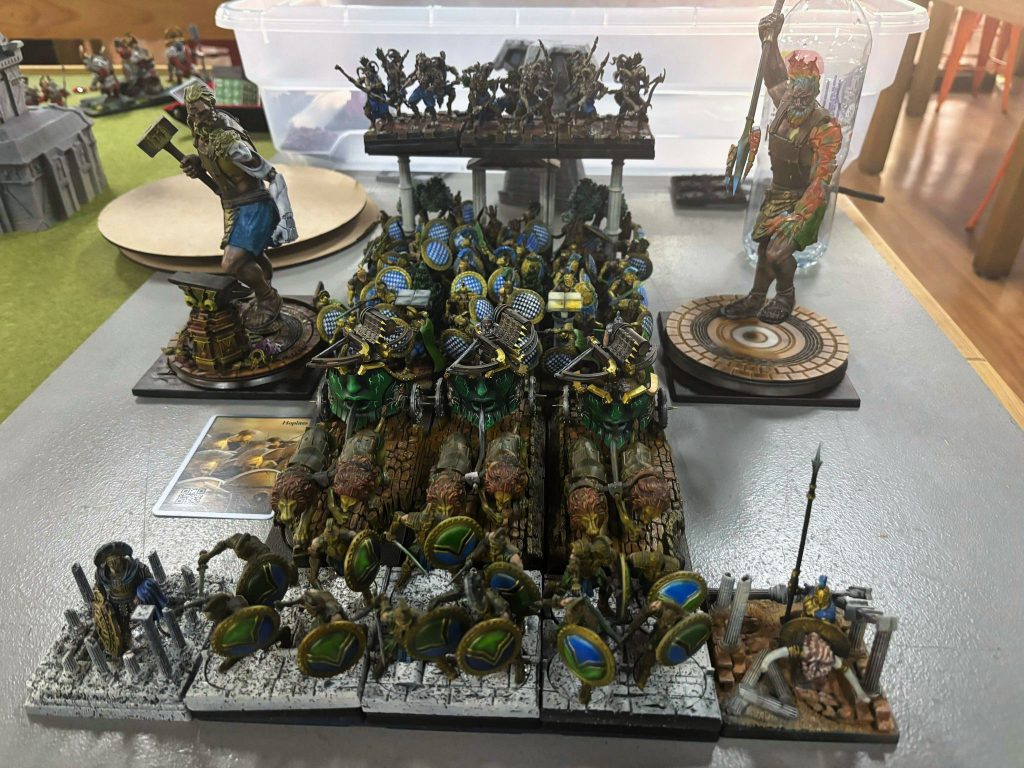
Round two was against a fast, aggressive and highly mobile City States list, eschewing the traditional hoplite block to anchor the army in exchange for maximising the ability to manoeuvre, find advantages and take picks against enemy regiments.
This game was something of a tragedy for Matt in that I’d played against exactly the same archetype multiple times during practice and knew exactly what it was trying to do and how to counter it. On his first turn, he pushed his Selenoi 21” up the field to set an extremely aggressive reinforcement line, which would enable his chariots to come in off the table edges with ample ability to manoeuvre and immediately start putting volleys into my regiments on the flanks. Because I knew this was coming, I was ready, and when Matt’s chariots arrived their available targets where Kheres on my left flank (which have loose formation and evasion to counter the Scorpios armour piercing volleys) and my Strategos’ praetorians on my right flank, firmly ensconced entirely within a forest that gave Obscured to the entire regiment, with Tenacious to boot. Matt’s opening alpha strike did two wounds to my entire army, and I could see the frustration set in to the poor guy in real time.
The game at this point was by no means over, but Matt’s only hope was to adjust his tactics and aggressively pursue scenario at the expense of everything else. Because his army was able to so aggressively claim space, Melee’s multiple zones were within reach of him scoring early in the game for some time into the midgame. He needed to claim space and stage fighting withdrawals (including preserving his regiments for as long as he could, as dead regiments give up scenario points in melee), looking to engineer a local victory against my left flank and then hold long enough to secure a decisive lead. This was definitely possible, mostly thanks to the ability of his units to turn and retreat from threatened engagements very easily using Fluid Formation, but instead he committed to his existing game plan of finding enemy flanks and hitting them hard with combined fire from Chariots and charges from the Agema regiments.
This, unfortunately, just doesn’t quite work against Old Dominion. A normal regiment being hit in the flank by those Agema unit can expect to take some pretty shocking damage, but Old Dominion are built different. My lines were layered in a way that let me capitalise any time a regiment of his hit mine in the flank, and charge after charge was punished by return assaults or return fire from the cultists, heriodeacon and kheres. The City States would eventually collapse on and destroy my Warlord’s Praetorian regiment (for an impressive 6 scenario points at the swing), but doing so required them to engage into the core of my army with (and subsequently sacrifice) two units of Agema, the Thorakites, the Polemarch, two chariots and the Haephastian. That wasn’t recoverable, and my remaining units marched over the remnants of the City State army to secure uncontested scoring for the final four rounds of the game.
This would be Matt’s only loss, however – he’d go on to place high in the event with a 4-1 result.
Final Score: 105-32
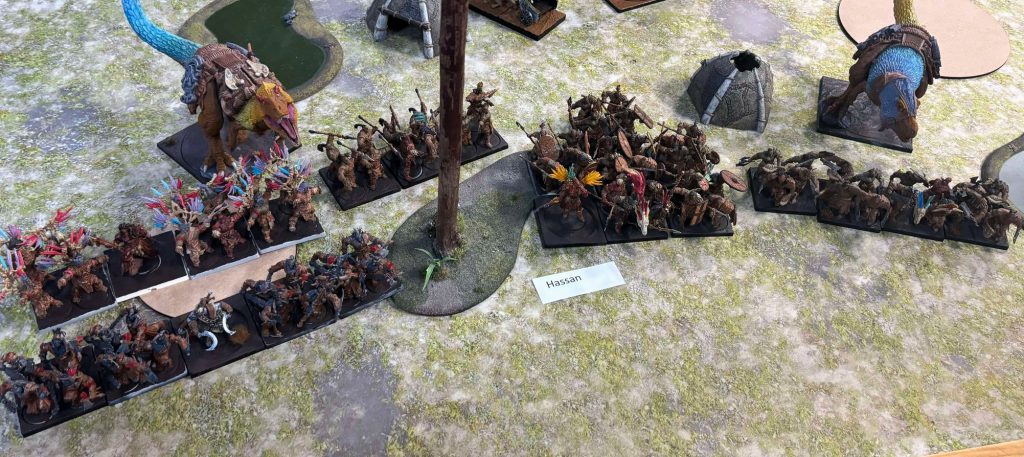
Round 3 – Hassan’s W’adrhŭn- Forlorn Hope
Army list – click to expand
An elite Wadhrun list with a powerful mix of ranged and melee, Hassan’s list also had one of the very few hard mechanical counters to my own list – the Scion of Conquest. The Scion has a variety of spells, some niche and some not, but the big one in this matchup is Dissonance, which (when combined with Essence of the Phenopteryx) allows the Scion to discard chant markers from the sequence to immediately and completely cancel any enemy spells cast by an enemy spellcaster within a massive 18”, or against a friendly or enemy regiment within the same range. This allows the Scion to potentially shut down my entire spellcasting game, if he’s positioned correctly and has the chant markers available. Even a partial impact from this spell is significant, as turning off healing, dark power generation of the Kheres casting Insanity is all extremely high impact.
Hassan would recognise this and would posture the Chosen of Conquest on my right flank where the Scion could interfere with the spellcasting of many of my important units. The activation advantage my list has over his is what got him here, however, as late on turn three I was able to bring my Bone Golems in on a position where they were ideally placed to execute a flank charge into the heavily-extended Chosen unit. Hassan wasn’t able to respond in time early on the next turn, and the Bone Golems crashed into his Chosen’s flank and would slowly grind them down over the next few turns.
With the Scion going down and such an expensive unit being engaged by a relatively much cheaper element, Hassan would struggle to bring the force he needed to bear to win individual engagements against the rest of my list. Apex Predators area dangerous, but a lot of that danger comes from being Terrifying, which Old Dominion aren’t affected by. A wide engagement across the centre of the table ensued, with Hassan’s ranged and monster regiments all engaged against my Praetorians, with Kheres offering supporting fire from the flanks and against the monsters. This would also jam up his Matriarch’s Braves for multiple rounds, and with so many points out of the game or neutralised, once the Scion went down and my healing came back online, the attritional engagement could only go one way.
Final score: 66-25
Round 4 – Geoff’s City States – Head to Head

Army list – click to expand
Round four was against a second City States list, with a similar emphasis on mobility to the round two game, but a bit less razor focus on maximising movement and aggression in exchange for a little more versatility and some interesting tech choices, like the fearsome Satyroi. My list can be particularly vulnerable to backfield snipers, especially if units like the Archimandrite in Legionnaires get engaged and destroyed, which turns into a lot of effective ‘damage’ over time as my healing turns off.
Geoff had a very clear game plan this game, which came very close to working. His Haspists contested the large objective zone in Head to Head, and he kept his Satyroi off the table until round three to force me to maintain defensive formations on the edge of the table, like so:
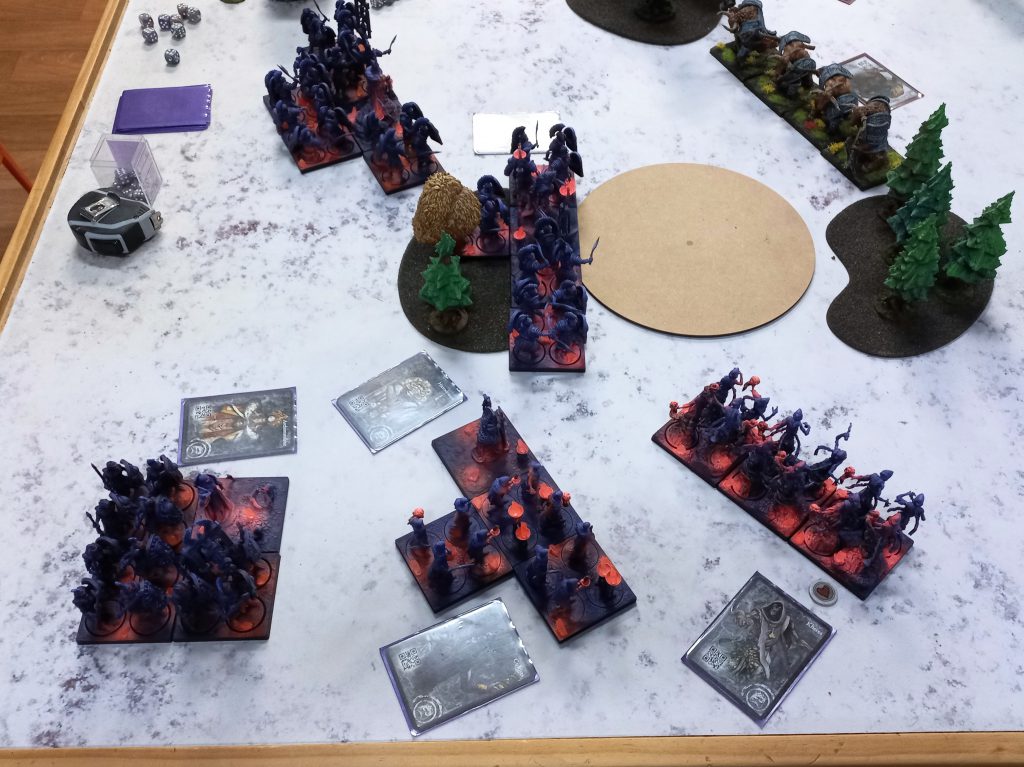
This kind of formation bars Satyroi from effectively entering the field, especially with the Strategos’ supremacy ability in my back pocket allowing for some very rapid responsiveness if needed. However, it also forces me to commit a large portion of my force to defend against a threat that hasn’t actually materialised yet, effectively pinning a chunk of my army in place while Geoff executed his master plan – a rush toward my near objective zone, which I couldn’t score but would be worth 4 points every round to Goeff.
This very nearly worked, but I was able to catch him in a trap at the end of round three that he didn’t see coming until it was just barely too late, and the jaws closed on round four. He had two relatively important units engaging my forces in that area; his Thorakites were engaged with my Kheres, attempting to destroy them before their spellcasting could ruin him (as his army had no sources of interference), and his Companion Cavalry were scoring the zone and preparing to charge whatever I brought in off the table edge. In response, I brought my Kanephors in to directly block his Cavalry, and my Bone Golems on a little behind them.
My plan was to activate the Golems first next turn; if the Cavalry hadn’t charged the Kanephors, I would use a Reform from the Strategos supremacy to get LOF, charge through the Kanephors and annihilate the Cavalry. If the Cavalry did activate before me, they’d be forced to charge the Kanephors who could relatively easily survive the worst of the attack thanks to Blessed, and my Bone Golems would instead reform to face left and hit the flank of the Thorakites, wiping them out and saving my Kheres. There was no good outcome here for Geoff. In the end, he won initiative, activated his Calvary, and the Thorakites died to my Golems. The Kheres and Kanephors finished off the Cavalry, and even with the Agema on the way, the flank turned into a rout and the City States’ fate was sealed.
Final score: 60-11
Round 5 – Ewan’s Sorcerer Kings – Bulwark

Army list – click to expand
Holy activation count, Batman! While Sorcerer Kings are still somewhat nascent as far as in terms of release schedule and Para Bellum dialing in the faction’s balance, this list is an excellent example of the kind of lists that Ewan plays across the three factions he owns, and which has seen him achieve significant success at events across Australia (in fact, if you go to any of the links in the opening paragraph, you’ll see his name on every podium at any event he’s attended). With a baseline fourteen activations plus the ability to add further cards to the deck with rituals, the list aims to aggressively out-activate any opponents and capitalise accordingly. Importantly, how this list capitalises on that advantage is highly flexible; the list can surge forward late in the turn and get aggressive picks against exposed enemy units, or it can turn that same responsiveness to scenario, securing territory and denying the enemy scoring opportunities.
This game was a showcase of how deep Conquest can be as a game and how much thought can go into a matchup. The scenario pack had been announced the night before the event, and from that moment onward, Ewan cooked. He spent any spare time he had working on the assumption that if he didn’t play me before the finals, he would play me in the finals, and prepared a game approach specifically for the matchup of our exact lists in this exact scenario. What followed was a masterclass in strategic foresight and careful, controlled execution of a highly technical plan.
For my part, the game is something of a blur. I sleep poorly around events, and while coffee is an elixir that cures a multitude of ills, there’s a limit to how far it will push a person that’s slept an average of three hours a night for multiple days in a row. This is why I practice for events, building muscle memory and fundamental practices that let me execute on a game plan and conserve the mental energy I have for solving the few novel problems that typically arise during a given game. That simply wouldn’t suffice here; Ewan’s entire approach was a novel problem, especially given my limited experience against the game’s newest faction, and the effort he had put into thinking through how to play the matchup was rewarded.
While I was able to get early picks against his Ghol units to keep his activation count down and prevent aggressive picks against my own units, Ewan positioned to establish a small but significant scenario lead. Bulwark is a scenario like Echelon that tends to encourage players to pick a ‘home zone’, but unlike Echelon, the zones are further apart and harder to pivot between. This meant Ewan could wait for me to deploy to a zone, commit reactively to the opposite zone, and then play to deny me a single round of scoring using the sorcerer kings’ Intrusive Thoughts ritual. Although I recognised this threat and was able to stop it on some of the turns he attempted to deny me scoring (since Intrusive Thoughts can only target one unit, I could counter it by having two or three scoring units in a zone), even an early lead can translate to a win in a scenario as static and linear as Bulwark, and Ewan made sure to establish and maintain that lead, spending the lives of his troops carefully and consistently to ensure the score advantage he needed never slipped out of his grasp.
Ultimately, and a bit disappointingly, I conceded the game and we shook hands over his win at the bottom of round six when Ewan looked over my shoulder to the event timer to let me know we only had fifteen minutes left in the game. I hadn’t been keeping track of time, but Conquest round limits are strict, and with multiple players needing to catch flights home after the finals, extending the round for anything like the time we’d need to finish was entirely out of the question.
Talking the game state out to arrive at a final tally, we determined that it would theoretically still be possible Old Dominion to win, but only if the game played all the way to turn ten and I was able overcome every remaining regiment in Ewan’s army as he spent them to deny me critical access to the his zone for the remainder of the game. If everything went right, and I made no mistakes, and I was lucky enough for each engagement to conclude decisively and on schedule, I would surpass Ewan’s score by a single point if I could secure his zone on the final turn of the game. And realistically, this was not something that would happen!
Ewan played the game incredibly tightly, knew exactly what he needed to do to pursue the narrow path to victory that was open to him, and did it. With a couple of actual nights’ sleep under my belt since the event, I can talk now about my own theory of victory and how I might barely have been able to recover the game, but in the moment, for all that I (technically) hadn’t lost a single regiment and Ewan’s army was backed into a desperate pocket, dying by inches to stall for time, I can confidently say that at the time there was no way I’d have had the mental resources left to chart my own course back into the game even if we’d had the extra hour we’d have needed to finish the game. The win was firmly Ewan’s, was reflective of the thought and care he’d put into preparing for and playing the game, and was extremely well deserved.
Final score: 19-28 (7-16 at end of round 6 concession)
Conclusion
With round five concluded, final placements were as follows:
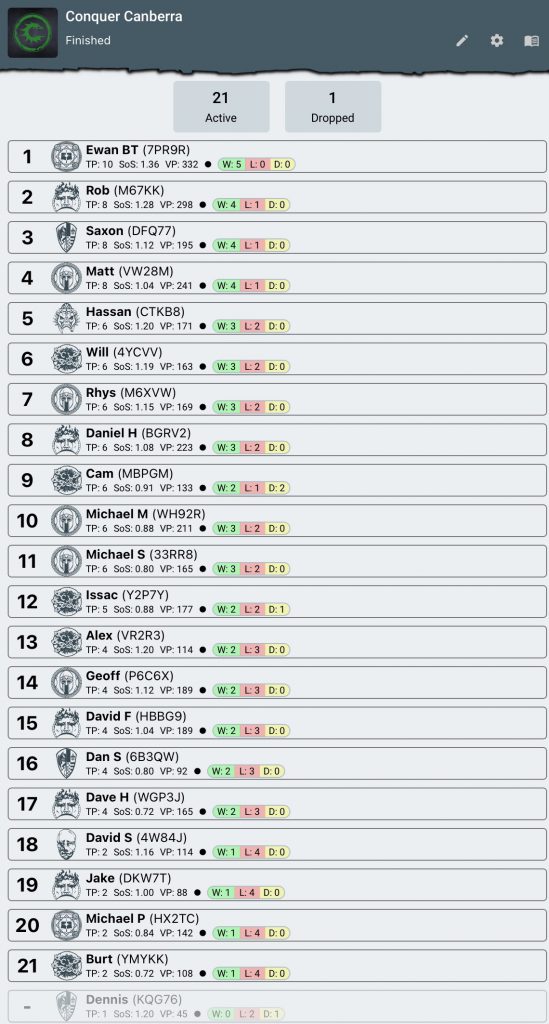
That’s a great mix of factions and placements, with a full six different factions in the top six positions. My rounds two and three opponents Matt and Hassan made it to 4th and 5th place respectively, and Ewan’s round four opponent Saxon made it to 3rd with his Hundred Kingdoms. That’s an outstanding amount of variety, and reflective of a really dynamic broader meta-game. As a reminder, if you’re interested in the lists you can see all of them in my video about them, or view them directly on the event list page.
Huge props to everyone who made it out, big thanks to the Tournament Organiser Tom for his tireless work preparing for and running the event, and huge congratulations again to Ewan for his win.
As always if you want to get 10% off and support Goonhammer you can make your Conquest purchase by clicking here for US/Canada or here for EU/rest of world. You’ll also need to enter code “goonhammer” at checkout.
Have any questions or feedback? Drop us a note in the comments below or email us at contact@goonhammer.com. Want articles like this linked in your inbox every Monday morning? Sign up for our newsletter. And don’t forget that you can support us on Patreon for backer rewards like early video content, Administratum access, an ad-free experience on our website and more.
