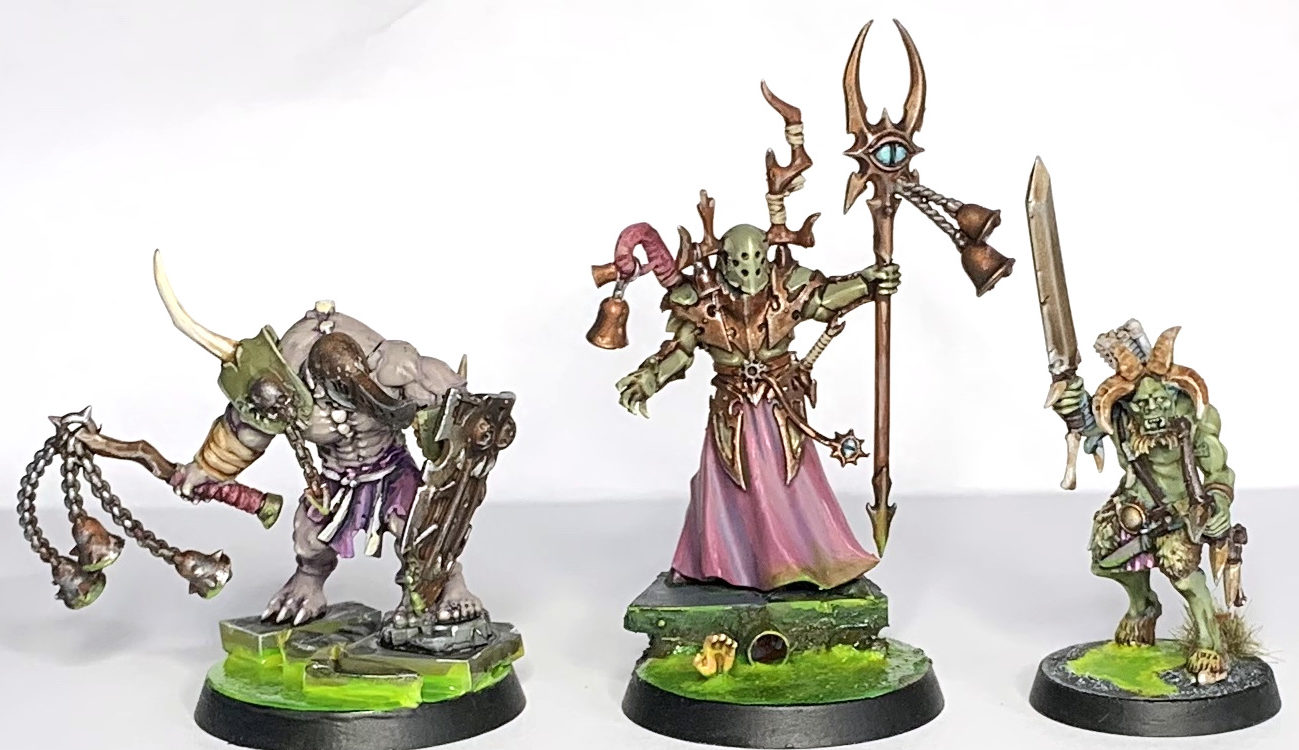
I’ve been painting up some Nurgle guys for an Age of Sigmar Skirmish Warband, not impressed with Nurgles Rot as a slimy base as it doesn’t push the edging enthusiast level to 11, so I painted up my own effect. So for the 2nd episode in a row, it’s green time.
What you’ll get is something like this:

Items Required

Gentlemen’s Wit – A nice English variation of Wheat Beer, add’s bergamont (as in Earl Grey) but in a good way. Chaotic and the perfect offering for Papa Nurgle.

Moot Green – This is your base green colour, starting from bright means we can only go one way… brighter

Flash Gitz Yellow – This is what you’re going to push into the green to make it brighter

Biel-Tan Green Shade – Bleed this into the darker areas of the wet paint for instant coolness

Ardcoat – Gloss varnish for full on level 11 shininess.
How to do it
No how not-to do it this week, lets keep that for Dry January. Instead here’s the true moot way to do it
Step 1
Paint the entire slime-to-be areas in one thick coat of Moot Green, that’s right, 1 THICK COAT, not 2 thin ones, 1 THICK COAT.

Step 2
With the Moot Green paint, still thick and still very wet, get some Flash Gitz Yellow (again thick and not thin) and brush it into the green, pushing it towards the edges of the slime where it meets other things, (rocks, floating debris etc..) so if there was something in the middle you’d want to push yellow towards the item from all sides forming a circle around it in yellowy-green goodness.

Step 3
Because the paint is so thick it’ll still be wet enough for this trick, which is to dab patches of Biel-Tan green into the areas you want some darkness or variation (deeper areas etc..)

Interlude
Because the last 3 steps are really quick, you’ll want to hairdryer the model until it’s dry, or go for a walk because it’ll take a few more minutes to dry otherwise. Once it’s fully dry it’ll look like this:

How depressingly matt
Step 4
Now get your Ardcoat, and absolutely smother the greeny-yellow goodness in it.

Step 5
Once that’s dry (again Hairdryer is the pal you need), wash any recesses and surrounding areas in Biel Tan

I also painted the base rim at this point, because I can hairdryer it dry the same time as the wash.
Step 6
Time to hit the edges of the rocks with some Moot Green, and a bit of Flashgitz Yellow for the bits you want to brighten.

et voila. Your new green swap is all shiny and nice. (Ignore the black bit on the edge I messed up with a stray hair on the brush)


