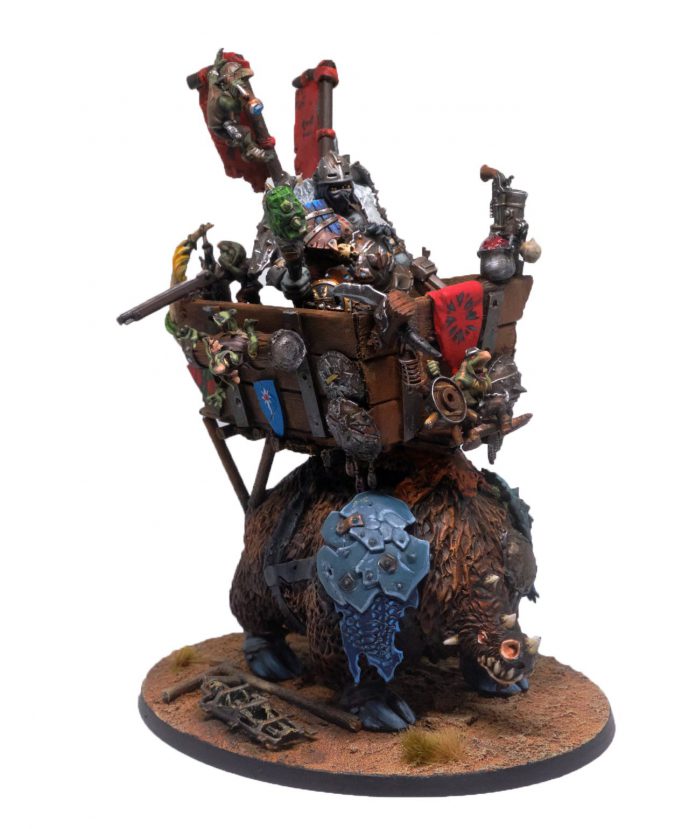
Hi everyone, Keewa here with another ridiculous homemade project, this time: kitbashing a custom Ogre Tyrant and making him a custom mount to ride into battle. This project was a bit of a monster in more ways than one, so let’s dive right in.
The Tyrant
First things first, the customised Tyrant, featuring parts from just about every kit in the Ogor Mawtribes/Ogre Kingdoms range. He really is a proper chimera. Here’s a breakdown of the parts and where they came from:
- Club, gutplate, hands, and pistol from the Mournfang Riders kit.
- Head and shield (Besagew) from the Ogre Blood Bowl kit
- Body, pauldrons (Sode), lion paw, gnoblar lookout, and arms from the Ironblaster/Scraplauncher kit
- Round shield from the Ironguts kit
- Fur mantle, shraps, and back banners (Sashimono) sculpted from green stuff
The underlying theme of this guy is a regular ogre Tyrant but with some elements of Samurai aesthetic, the back banners (known in Japanese as Sashimono) were particularly inspired by this one piece of Warhammer Total War III concept artwork. I would definitely have strung some skulls between them if I had any!

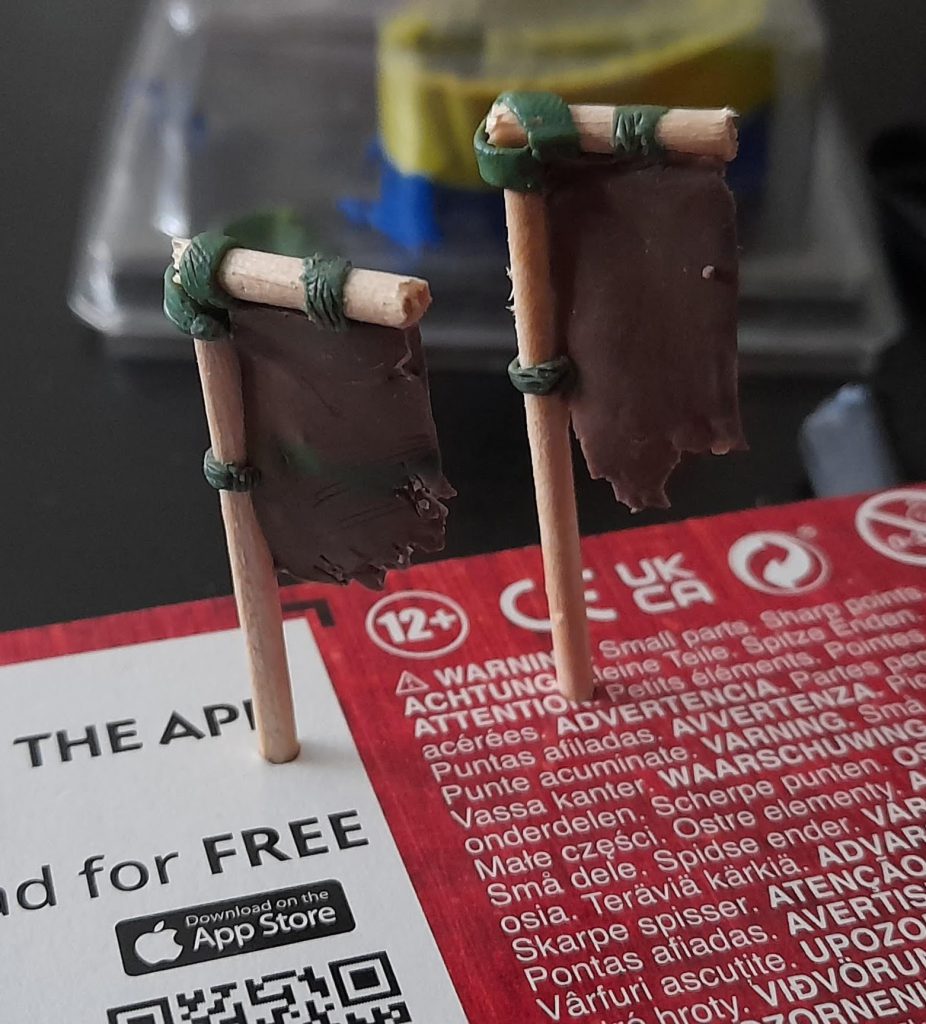
The Sashimono were pretty simple to put together, the poles are simply barbeque skewers cut and stuck together at a 90 degree angle in an L shape. The banner cloth itself was sculpted out of green stuff mixed 50:50 with some plasticene (hence why they’re brown in the photo), once that had sufficiently stiffened, some straps from pure green stuff completed the construction.
With the back banners complete, the next task was sticking the Ogre himself together, starting with a basic Ogre body, courtesy of the Gnoblar Scraplauncher set. Because I chose to build that kit as a Scraplauncher rather than an Ironblaster (although I made one of those too!) I had this left over Ogre body standing flat rather than striding like most of the other Ogre bodies. I feel like his standing firm pose gives him more of an aura of command, and although his boots are missing the fun iron toe-spikes that the other Ogres have, I think it’s alright as it is.
As you can see, there was an unfortunate gap between one of the arms and the body, which I padded with a little green stuff. It looked rough but later would be covered over anyway, so no worries. I really like the Ogres use of these huge pistols almost the size of a human being, it really emphasizes that these guys are massive and terrifying.
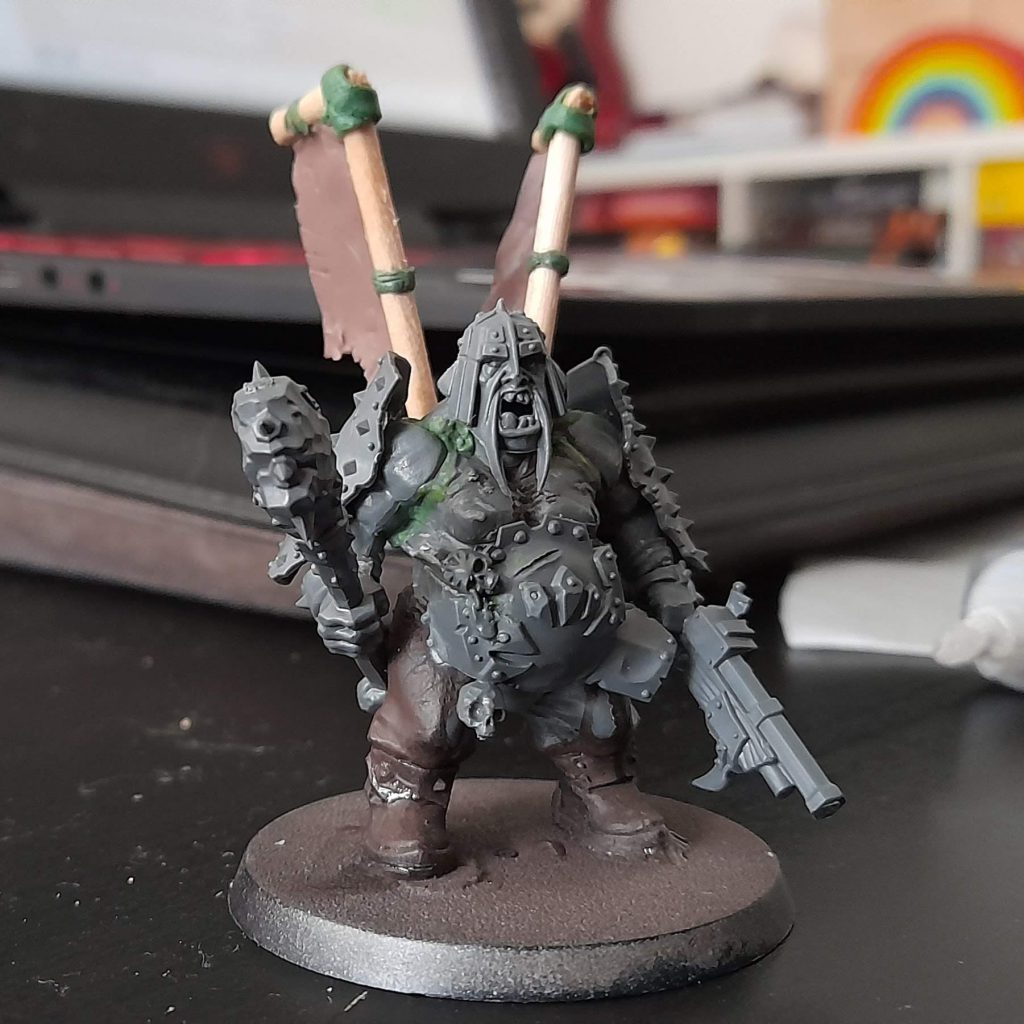
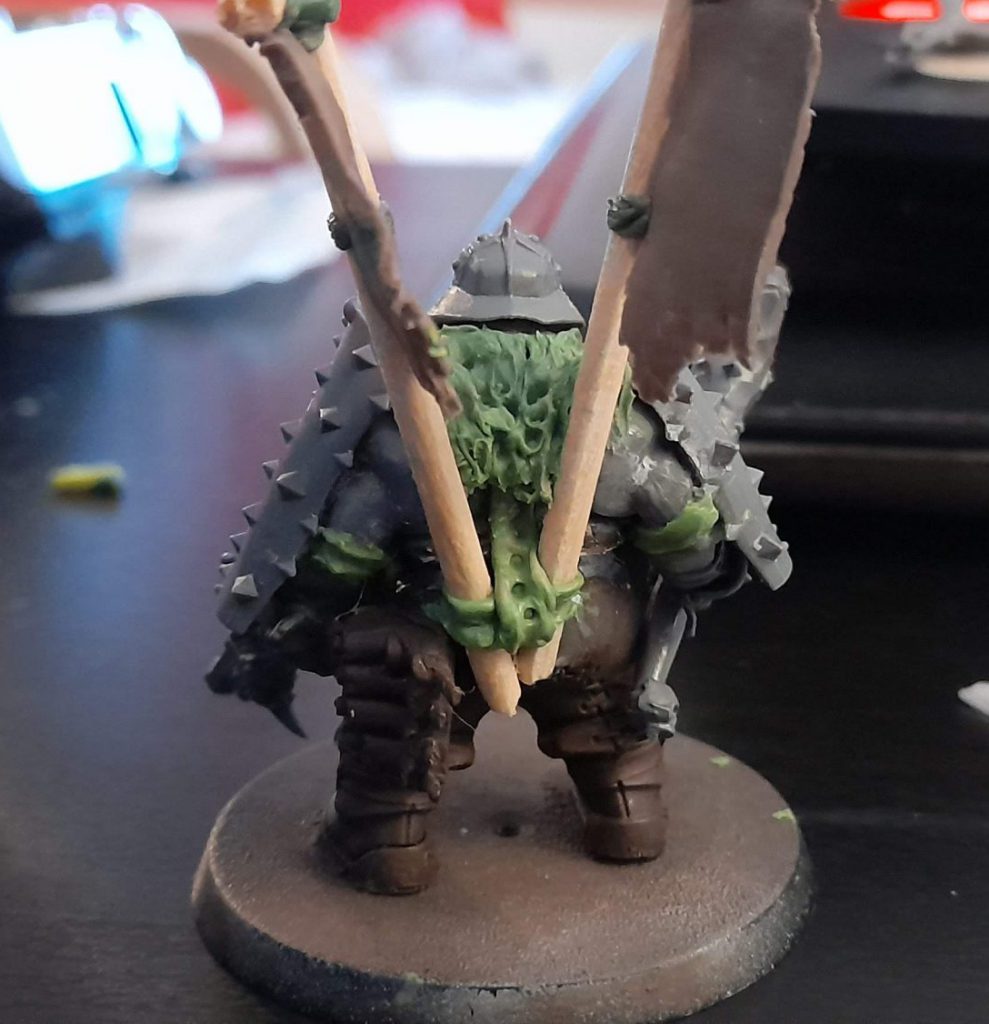
Next up: Straps and the fur mantle. The back banners needed some way of staying attached to our fella’s body in the heat of battle, and since he doesn’t have a suit of armour to hook them onto, I had to give him a harness made of some thick leather straps in a similar manner to the trouser-holding braces that your granddad has. I stuck a few leather straps on the Sode shoulder pieces as well, to hold them to the arms.
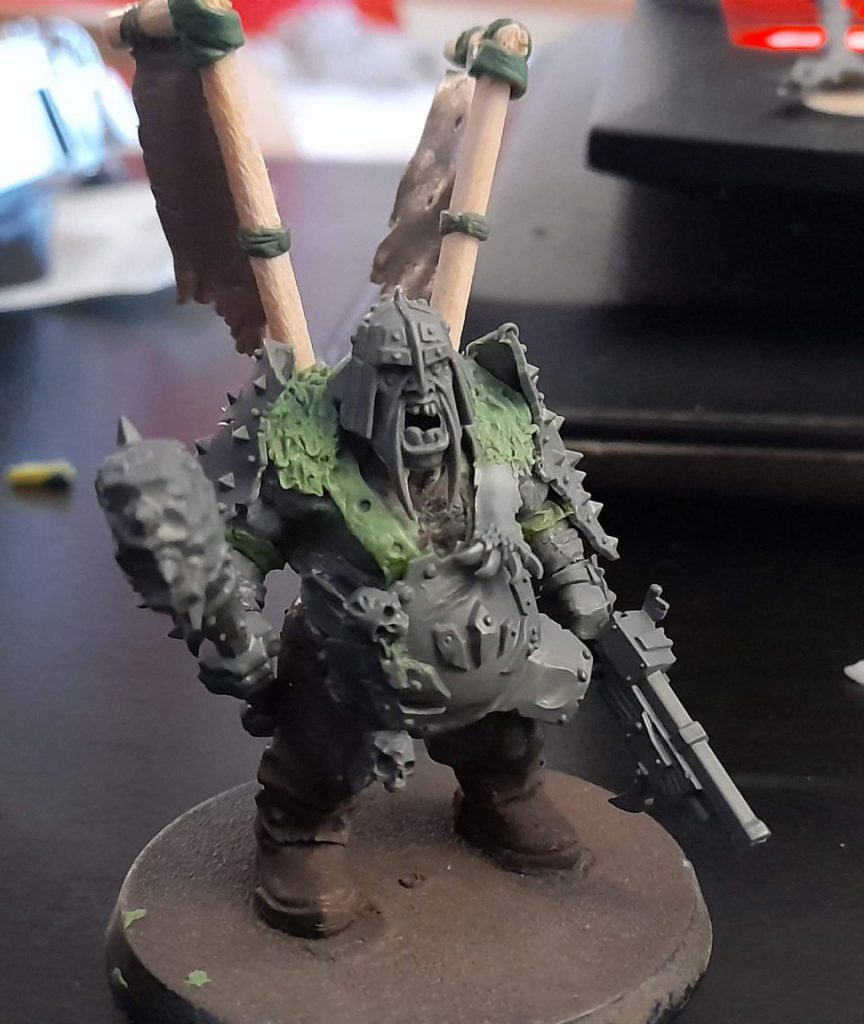
Once the straps had been put into place and given some time to cure I snipped the leg from the the lion pelt that graces the ironblaster cannon and glued it both to the strap on the left side as well as to the gut plate. With that in position, a blob of green stuff became a fur mantle by pressing in a furry texture in rows with a toothpick. It’s a little rough, but that doesn’t matter. Our Tyrant was taking shape, but I didn’t like that head.
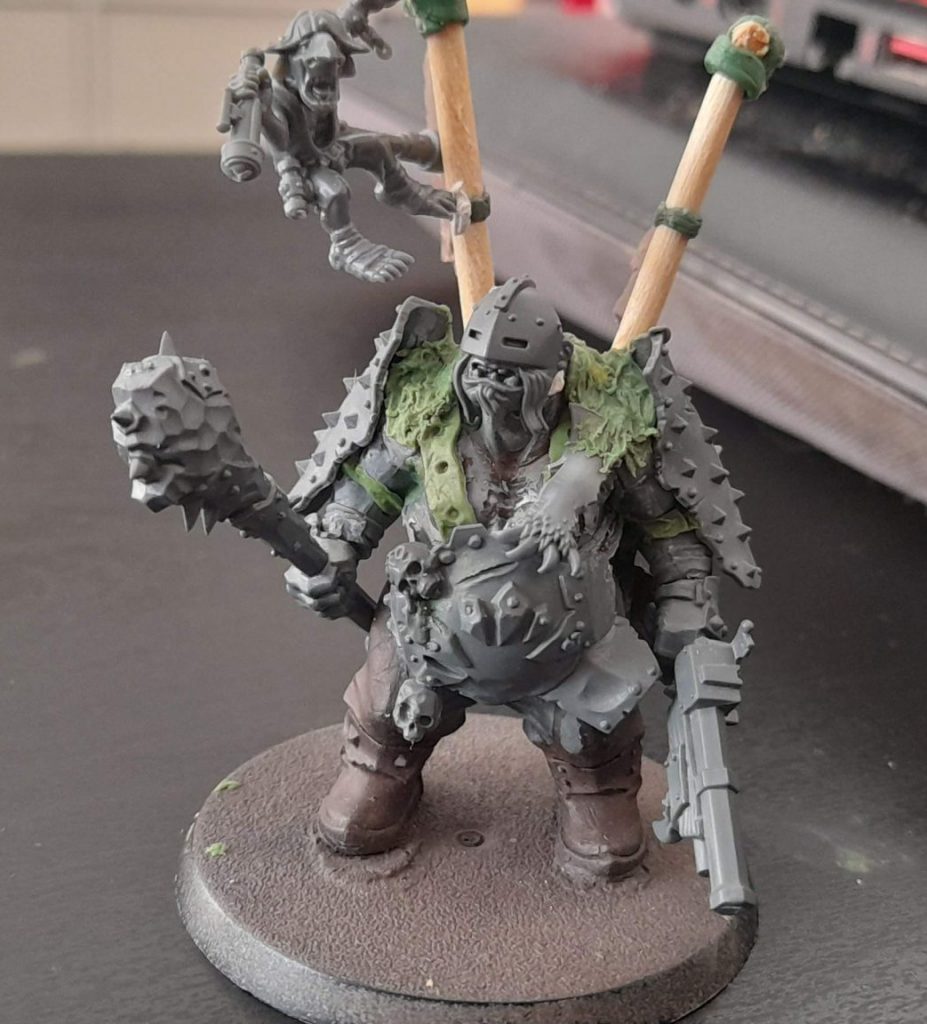
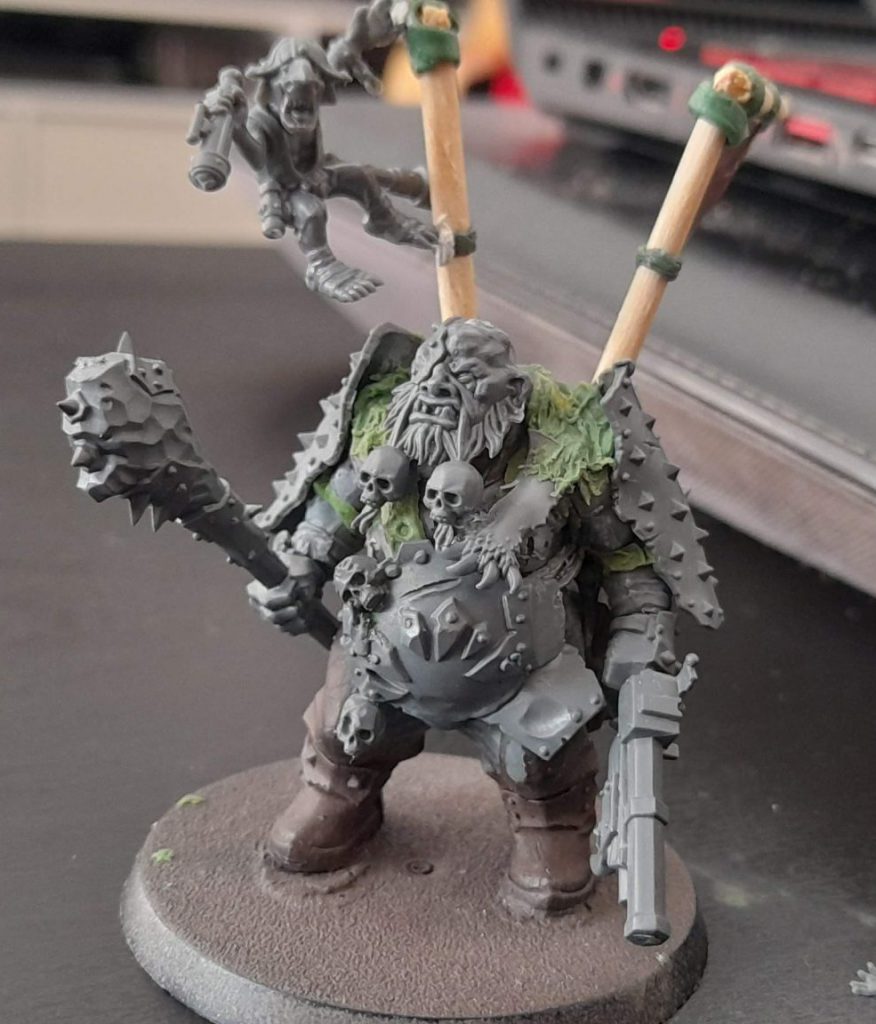
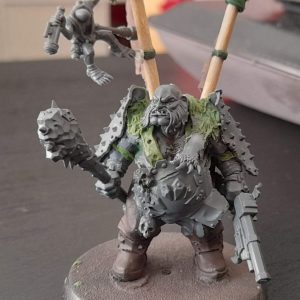
Since I didn’t like the head, I popped it off and chose a replacement via an Ogre Beauty Contest/Twitter Poll, of the four options presented, the overwhelming victor was the helmeted option from the Ogre Blood Bowl kit. Fine by me, that way I didn’t have to paint any eyes!
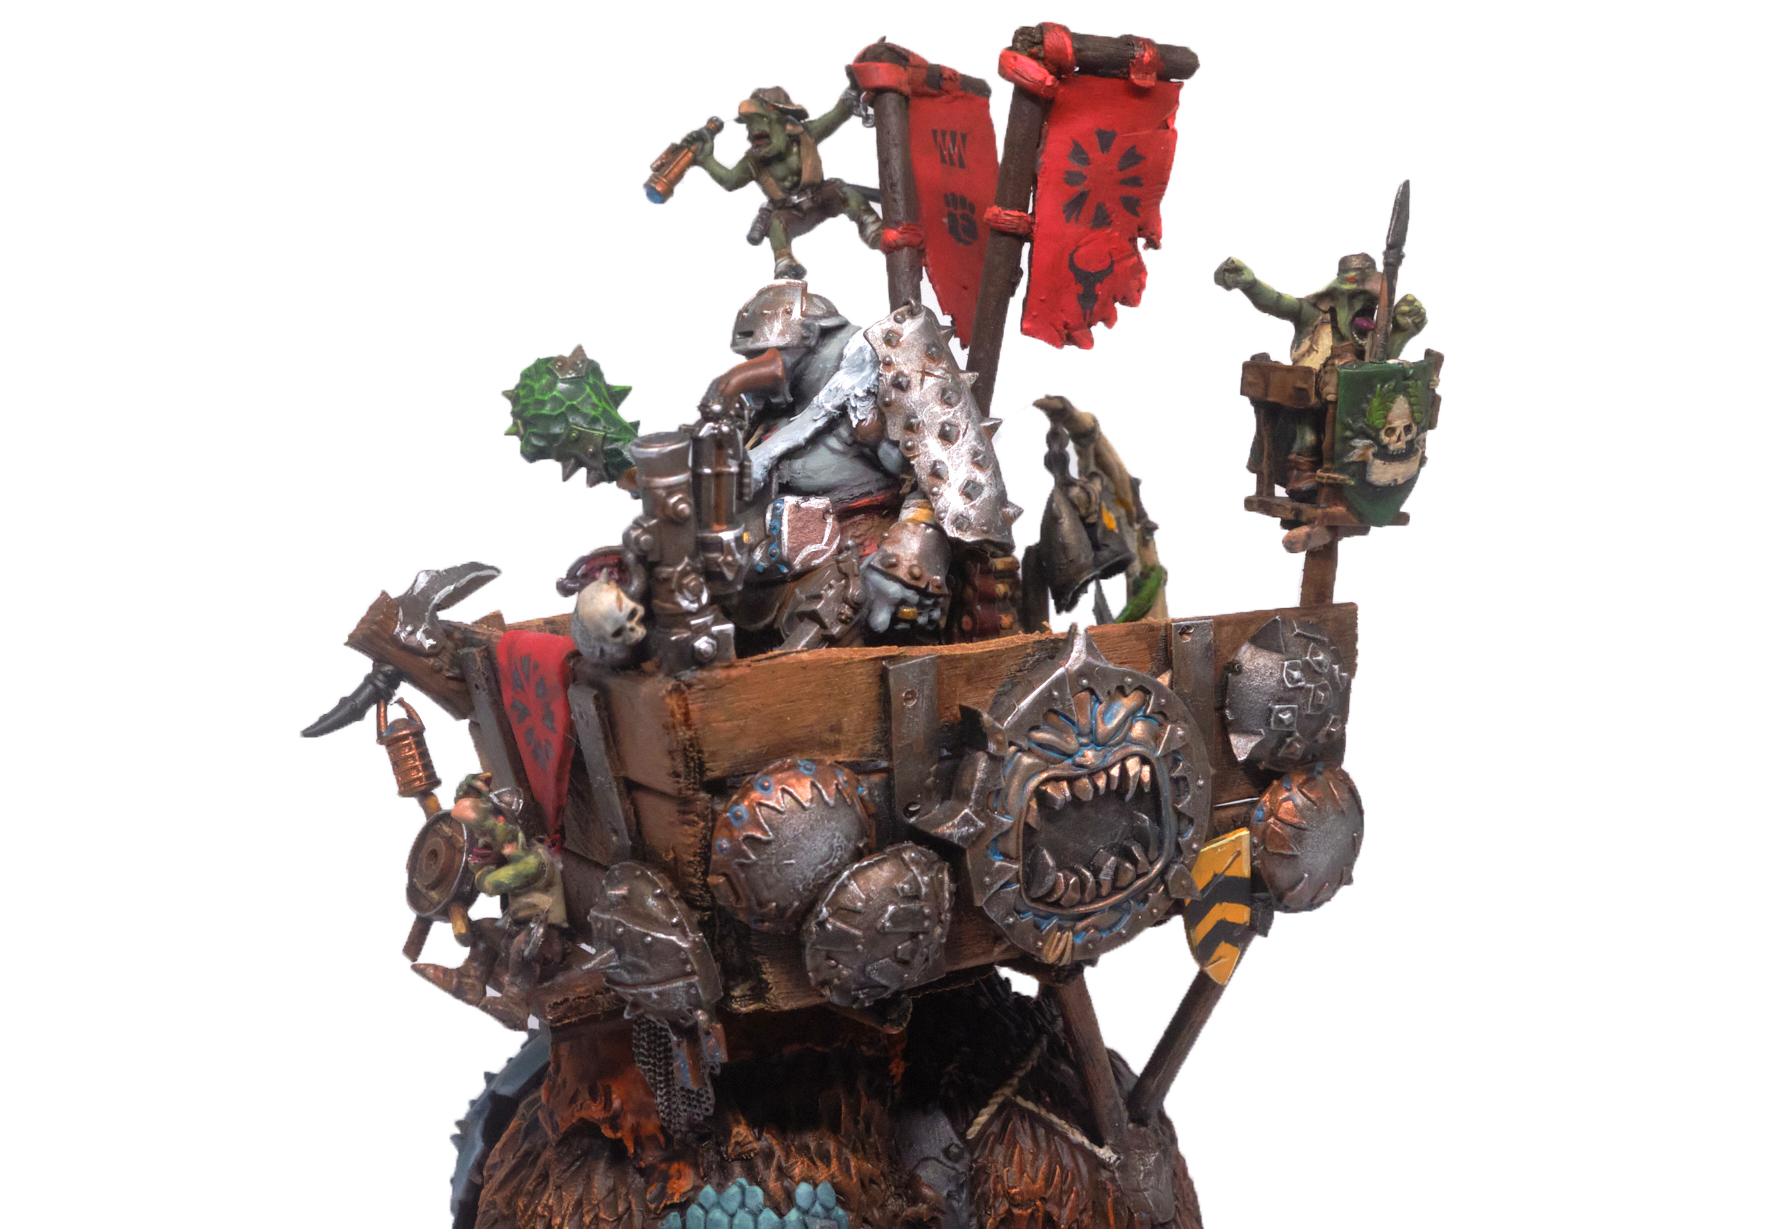
As you can see from the pictures above, at some point during the beauty contest I dug around in my Bits Box(tm) and found a spare Gnoblar from the Scraplauncher set, he’s holding a telescope in one hand and with the other he’s holding onto something. Onto the model he went, a new lookout/consigliere for our Tyrant, swinging haphazardly from one of the back banner poles!
The Rhinox
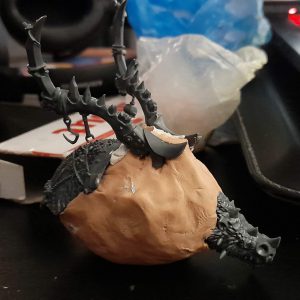
After the Tyrant was finished, I was struck with a flash of inspiration, why not make a mount for him to ride? I’d seen some pictures of the old Rhinox Cavalry models and really liked how they look, so why not? The core of the Rhinox is made from a ball of tinfoil, moulded into a vaguely animalistic shape and then covered with a 50:50 mix of Miliput and Plasticene. I stuck a Rhinox head (from the scraplauncher kit) and the rump and saddle from the Stonehorn kit onto the resulting blob. My comrades dubbed the resulting creature “Battle Potato”, I’m sure you can see why. Once he’d mostly gone together and begun to set, I poked four of the feet from the Chaos Gargant kit into his belly and left him overnight to cure properly.
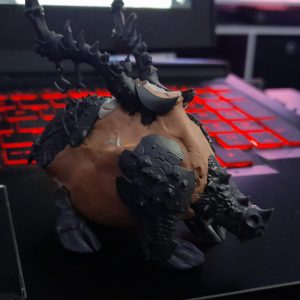
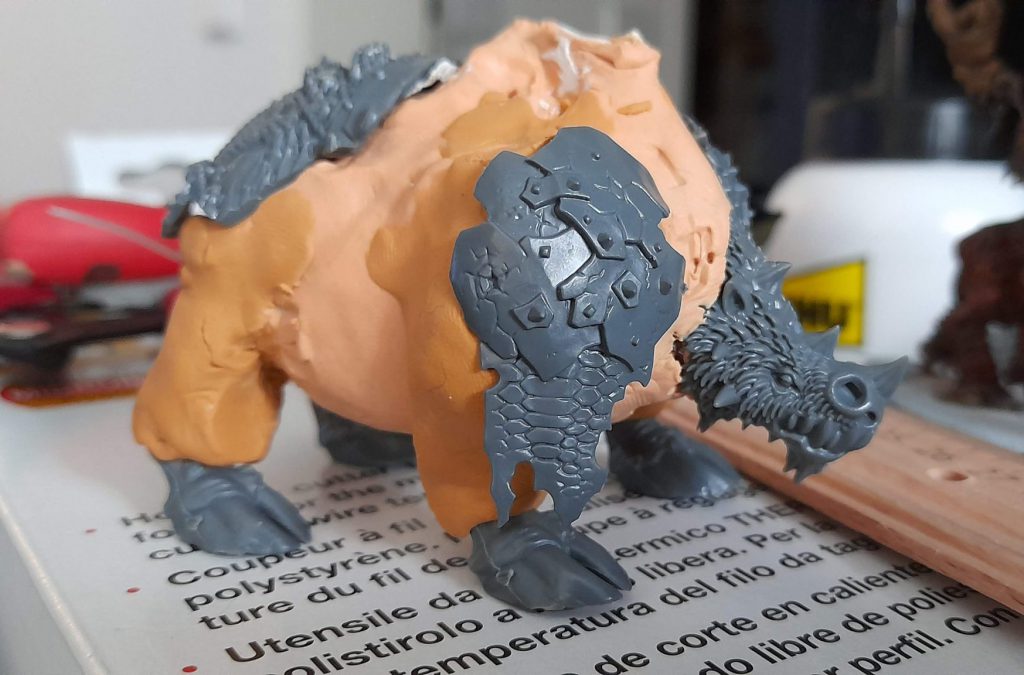
The next day, in the cold light of dawn, I took some more of the Miliput/Plasticene mix and moulded four rough legs onto the beastie, and added some shoulders, taking inspiration from the general body shape of the American Bison. These shoulders were then grace with the leftover forward armour parts from the Stonehorn kit, now the Rhinox had pauldrons too!
Once that was all set into place and set, I moved onto the next step. Miliput sets as hard as rock after only a few hours, and it holds its shape extremely well, unlike the more elastic nature of green stuff. Honestly, I think it’s by far the superior material, not only is it better at holding detail, it’s cheaper than green stuff. The main setback is that because it’s so hard and inelastic, it can be more brittle.
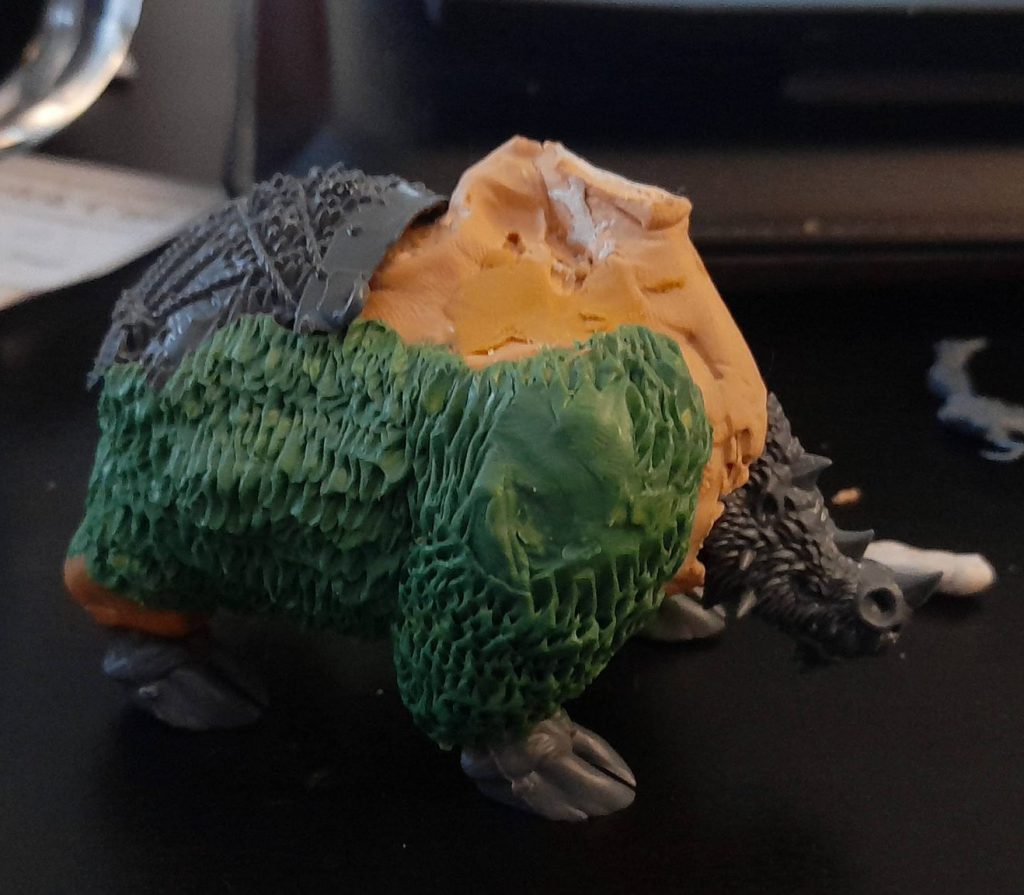
I mixed up a big batch of green stuff and plasticene and, working in sections, applied it to the body and sculpted in a furry texture with the bladed end of a sculpting tool. It’s far from perfect but when everything is put together it should be alright. I took extra care to blend the fur together with the parts that already had some fur on them, like the head and rump sections. Let me tell you, despite having used a core of tinfoil to keep the weight down, this thing is heavy.
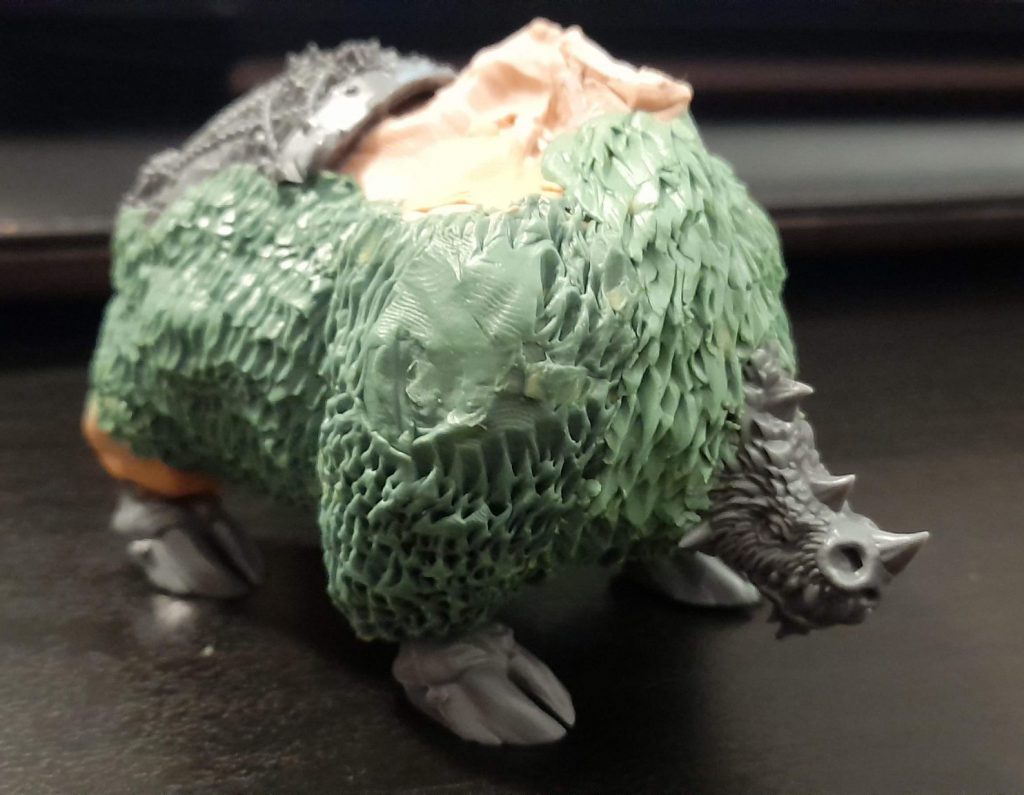
Had the arrow of the universe proceeded in a different direction, I would have sculpted some kind of saddle, arranged my Tyrant in such a way that he could have been riding the Rhinox, and that would have been it. But no, I had to ask Twitter what I should do next: should I seat the Ogre on a saddle, or should I lose myself entirely to madness and construct a Howdah on which he and some Gnoblar attendants could stand and survey the field of battle? Of course my horrible Twitter followers, who simply love to see me suffer, chose the elaborate Howdah construction.
The Howdah
A Howdah is a kind of elevated platform that is mounted on the back of an animal, typically an elephant. The position up on the back of an imposing animal was not only a display of might, but gave archers a vantage point from which to shoot. In the case our Ogre Tyrant, it gives him a great view of the battlefield from which to command his troops, nice.
Obviously this was going to be a wooden construction, so the first order of business is to create a floor, providing a solid base for the rest of the Howdah.
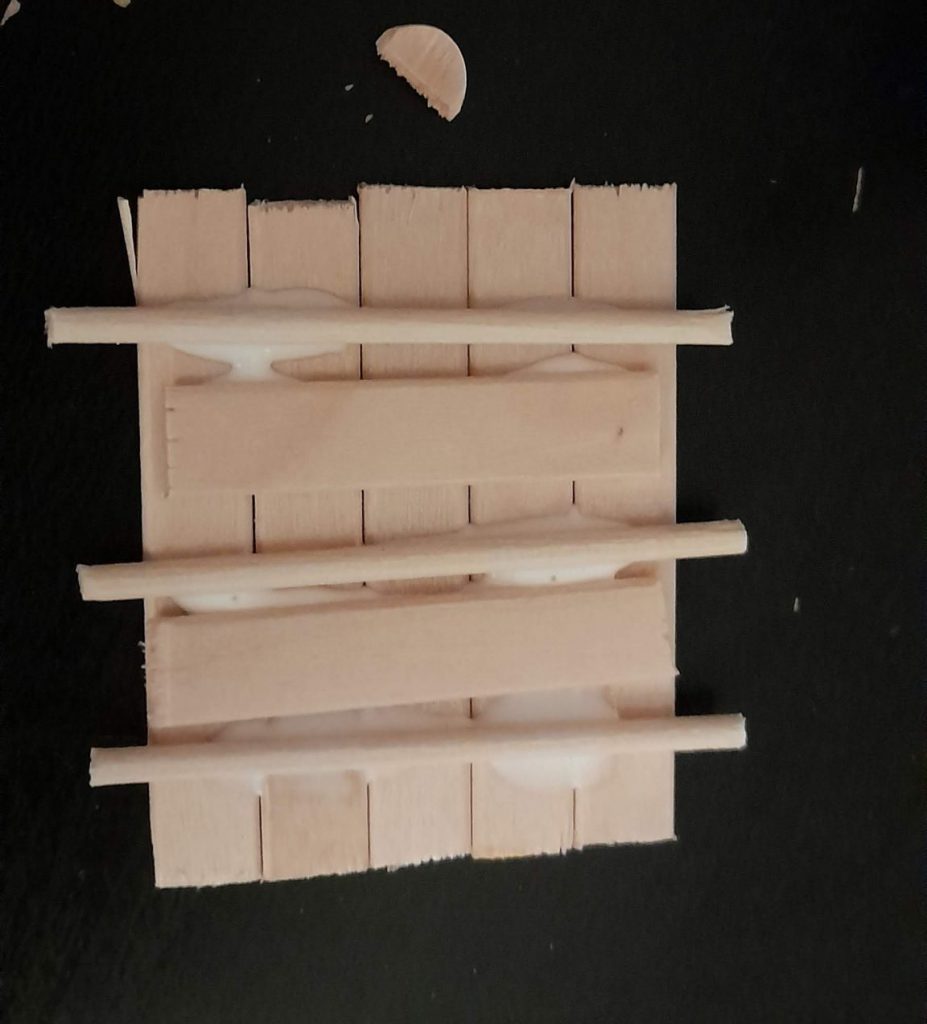
The chassis is made from five sticks, all cut to the same length and then glued together with two adjoining braces and three poles, plus lots of PVA glue.
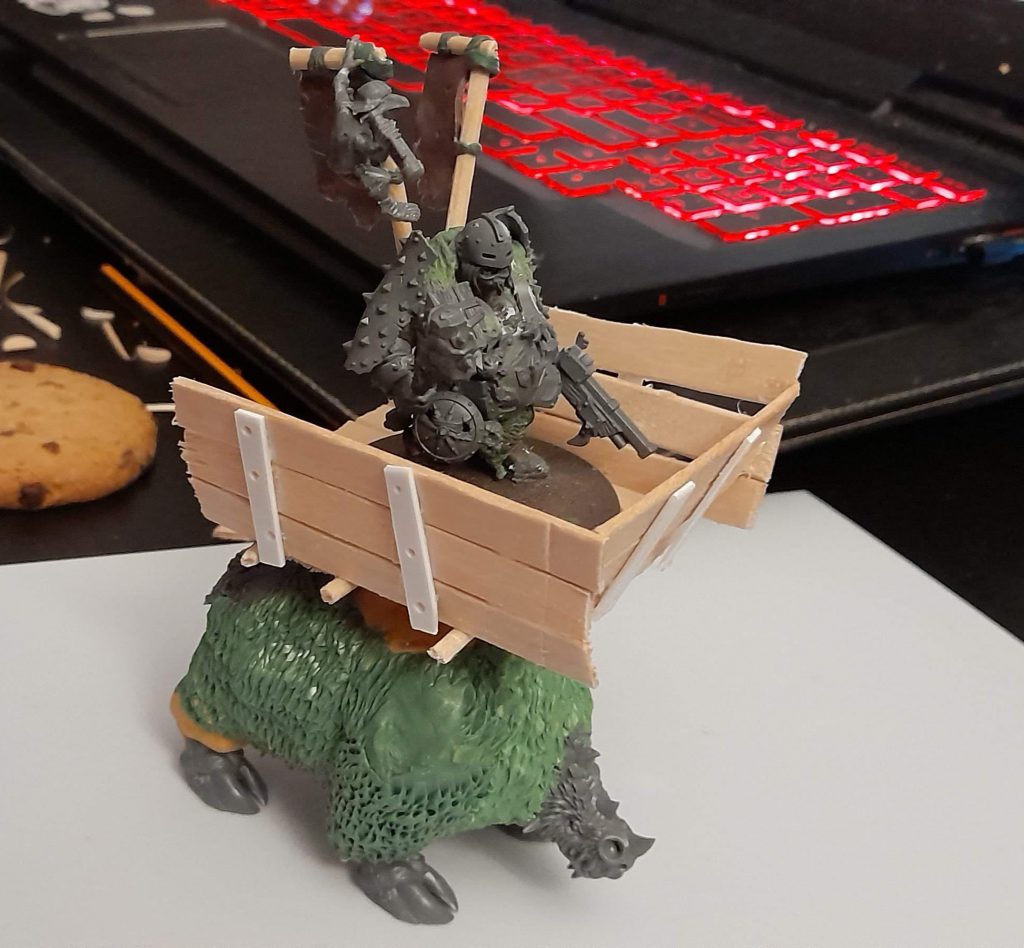
The sides were made in much the same way, but using plasticard “metal brackets” instead of the supporting beams. The construction is rickety but that’s fine, this thing was built by Gnoblars and is held together with spit and wishes. The front part angles downwards to make this thing look less boxy and more intentionally designed. First problem: This thing was far too big, it’s so large that it strained credulity that our Rhinox could actually carry it.
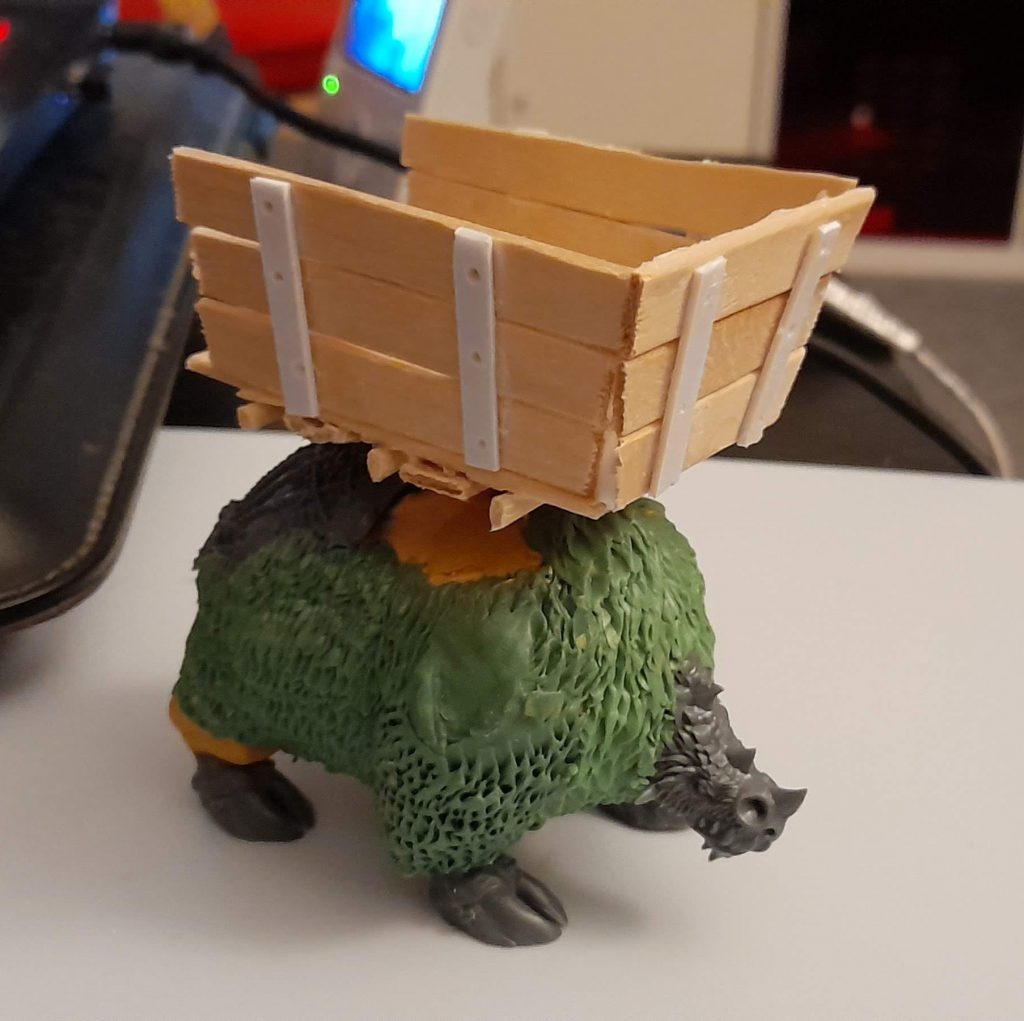
Simple enough to fix, I took it apart carefully while the PVA was still tacky and removed one of the floor beams, shrinking the overall “box” from 5 sticks wide to 4 sticks wide. Obviously, this necessitated trimming all of the beams and rods underneath as well to match the new width of the Howdah, no problem, I have clippers and they do their job well. In addition to that, I also shrank the angle of the front piece to be more vertical, which had the effect of shortening the length of the Howdah without as much clipping of wood as would otherwise have been necessary. The vertical parts of the construction were then reinforced with a pole at each corner.
With that, the general construction of the Howdah was complete, I added a “driver’s seat” by poking two rods out from underneath the front of the general structure and laying a small beam, not exactly comfortable, but Gnoblars don’t care. Time to decorate!
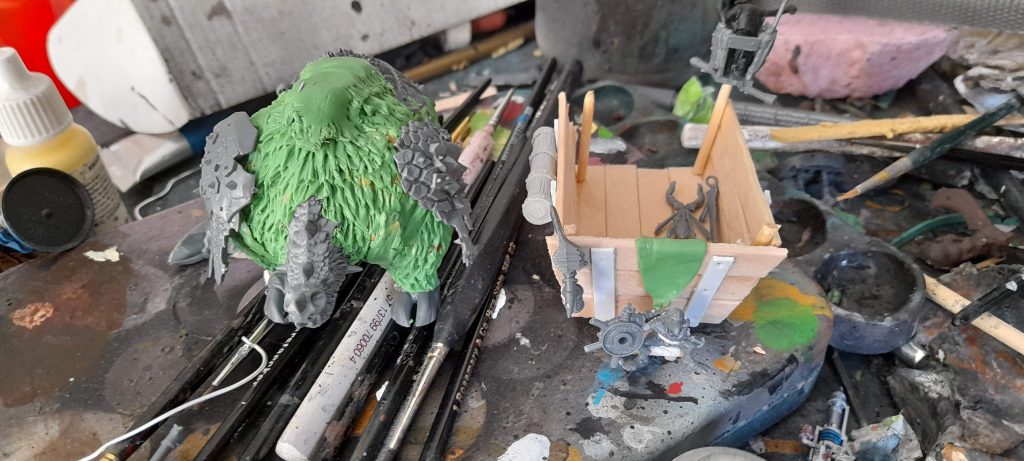
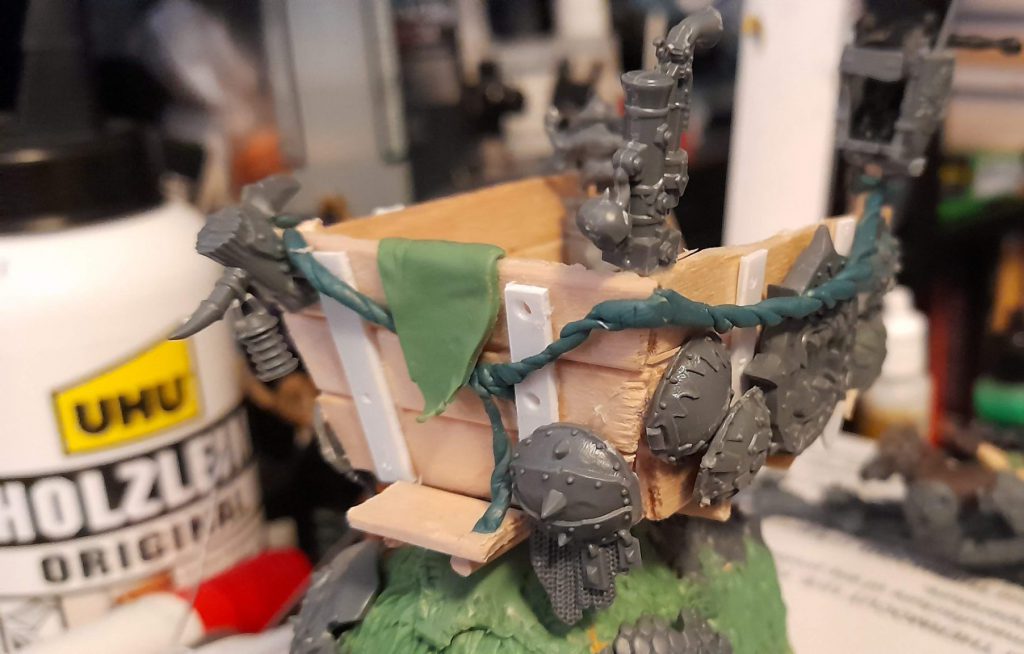
I went absolutely wild with leftover ogre bits, or should I say with… “left-ogre” bits! [Ed: No you shouldn’t]. Anyone who’s ever collected Ogres will know very well that GW provides you with about 20 times as many Gut-plates as you could possibly need, so I grabbed a random selection, flattened the sides off a bit, and glued them to the side of the Howdah. Trophies from the noteworthy rivals our man has slain, perhaps. Bits from the Scraplauncher kit, that has featured so prominently in this article, join the fray. A cool sort of pistol holding pole for our man’s backup sidearm, as well as a lantern to hang on a log, fit to hang from the prow and give a little light to our “driver”, nice. To round out the Howdah, I used the crow’s nest from the Ogre Gluttons banner pole, the rolling pin from the rather sexist old Maneater model, and stacked some barrels on top of one another, to give one of our little guys a firing platform, aww.
To make it look like the howdah is actually fixed to the beastie, I added some shoulder straps, formed out of green stuff. I think these actually look quite shit, so I tried to obscure them as much as possible, but nevermind.
I also made a straightforward little hanging penant for the front with some green stuff and attempted to add an encompassing rigging rope, ultimately this didn’t work, so I chose to take it off later.
Painting
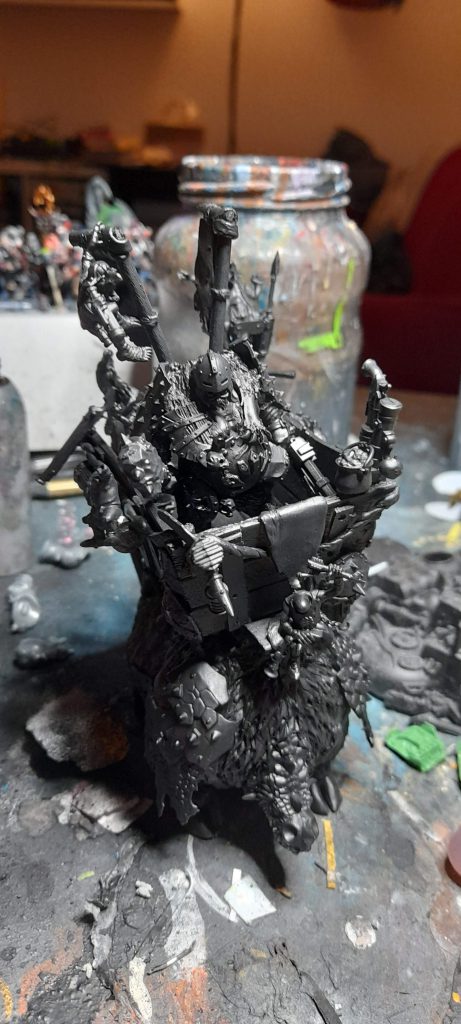
I stuck everything together with Blu-Tak and gave it a good blast of the Vallejo Black Surface Primer through the airbrush. There are many who criticise Vallejo Airbrush Primer for not being particularly good, rubbing off too easily, not making a strong enough key for the rest of your paint, and they are right. If it didn’t happen to be the only airbrush primer I can actually get in quantity, I wouldn’t use it. Alas, none of the shops in Vienna seem to sell any other kind of airbrush primer, more’s the pity.
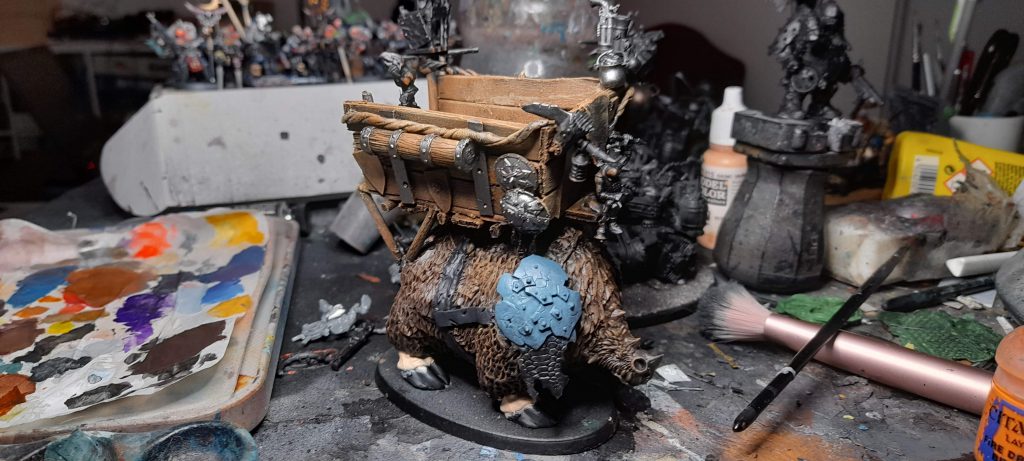
Once the primer was dry, I took all the crew off, with the exception of the one little gnoblar standing on the barrels, and got to work on the mount and howdah. Appropriately enough, I began painting the fur with Rhinox Hide, using an overbrushing technique. In situations like this I favour finishing the fur first (say that 3 times fast!), because it’s often a surface that is well suited to techniques like a heavy drybrush. Doing that right at the start means that when the paint inevitably gets on other parts, it’s no big deal. Following on from the Rhinox Hide, other progressively lighter drybrushes with some Army Painter Leather Brown and a 1:1 mix of Leather Brown and Screaming Skull. This brown is a bit desaturated, but I fixed that later on with transluscent paints.
The Howdah got an all over drybrush of Mournfang Brown, followed by various mixes of Mournfang Brown with the addition of some lighter oranges and reds. I was pretty free and easy with these, just trying to create variation and vague patterning on the planks. The leather straps were painted all over with Citadel Corvus Black, a really nice dark grey colour.
The feather of the helmet was painted with Wraithbone, washed with Casandora Yellow, and highlighted with Vallejo Model Colour Ice Yellow
All the metallics, whether silver or not, got a coat of Citadel Iron Warriors, then the bronze parts got an additional coat of Balthazar Gold. The little Empire shield hanging from the crow’s nest got a coat of Warpstone Glow.
The large shell fragment on the right shoulder got two coats of Thunderhawk Blue, while the other shell fragment on the left shoulder was basecoated with Sons of Horus Green. It took a few layers to get a smooth even coat of this colour over black. For the leg and pelt hanging down, Caledor Sky.
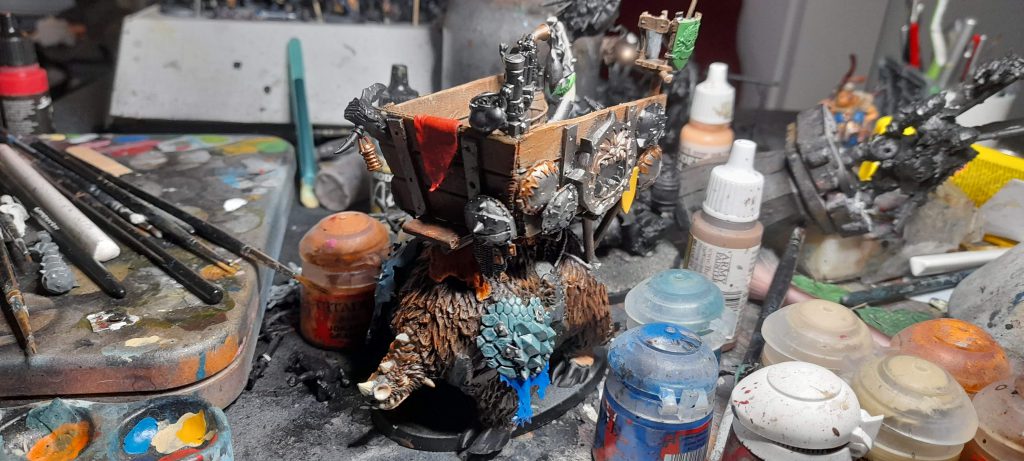
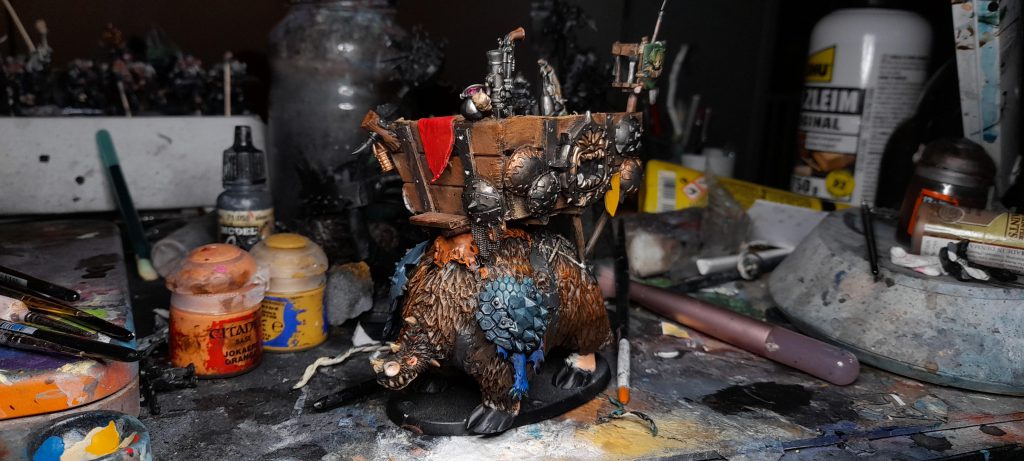
Shades shades and more shades!
First, Agrax Eartshade over all the metallic and brown parts
Coelia Greenshade on the left shell, Nuln Oil on the right shell.
Gore-Grunta Fur all over the fur to deepen the saturation of the browns.
Almost done!
Painting the Tyrant
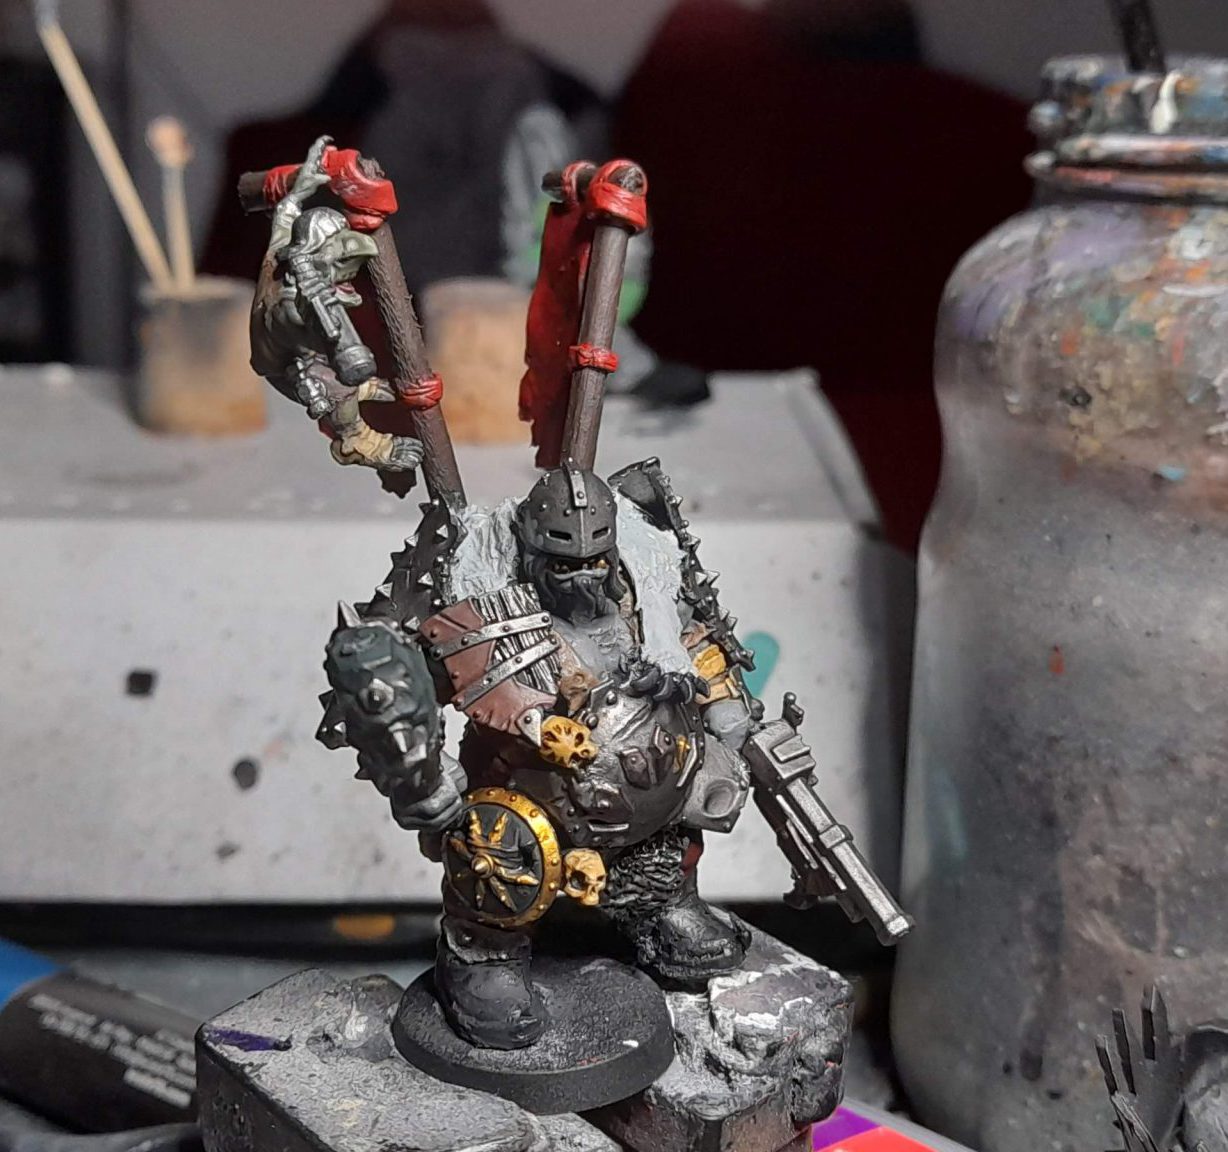
For his skin, I wanted to stick close to the original Ogre Kingdoms artwork, back in the long ago, Ogres were commonly depicted as having grey skin, in order to make it clear that they were not just large humans. In that spirit I created a base mix of Army Painter Leather Brown and The Fang (approximately 3:1) and he got an all-over covering. This was then highlighted by mixing more and more Pallid Wych Flesh into the base mix, focussed on any raised areas.
The trousers were basecoated with a 1:1 mix of Mephiston Red and Abaddon Black, straightforward enough.
All the metal details got the typical coat of Iron Warriors, shaded with Agrax Earthshade for a grimy look. Any bronze details was painted with Balthazar Gold at this stage and subsequently shaded with Agrax Earthshade. Some little spots of rust were added with very thin Mournfang Brown washed into the recesses.
The various skulls, bones, and teeth got some Wraithbone, washed with Agrax Earthshade, highlighted with Screaming Skull. As the Darktide Ogryn would say: Easy as breakfast.
I made the snap decision that the pelt on his back would be from some kind of white lion, so it got a basecoat of Grey Seer, a wash of Apothecary White, and highlighted with White Scar.
The skin on the shield was basecoated with Bloodreaver Flesh and highlighted with Bugman’s Glow, while the wood on the shield was basecoated with Wyldwood and highlighted with Caledor Sky and Teclis Blue.
The cloth of the Sashimono was straightforwardly Mephiston Red, edge highlighted with Evil Sunz Scarlet and Wild Rider Red.
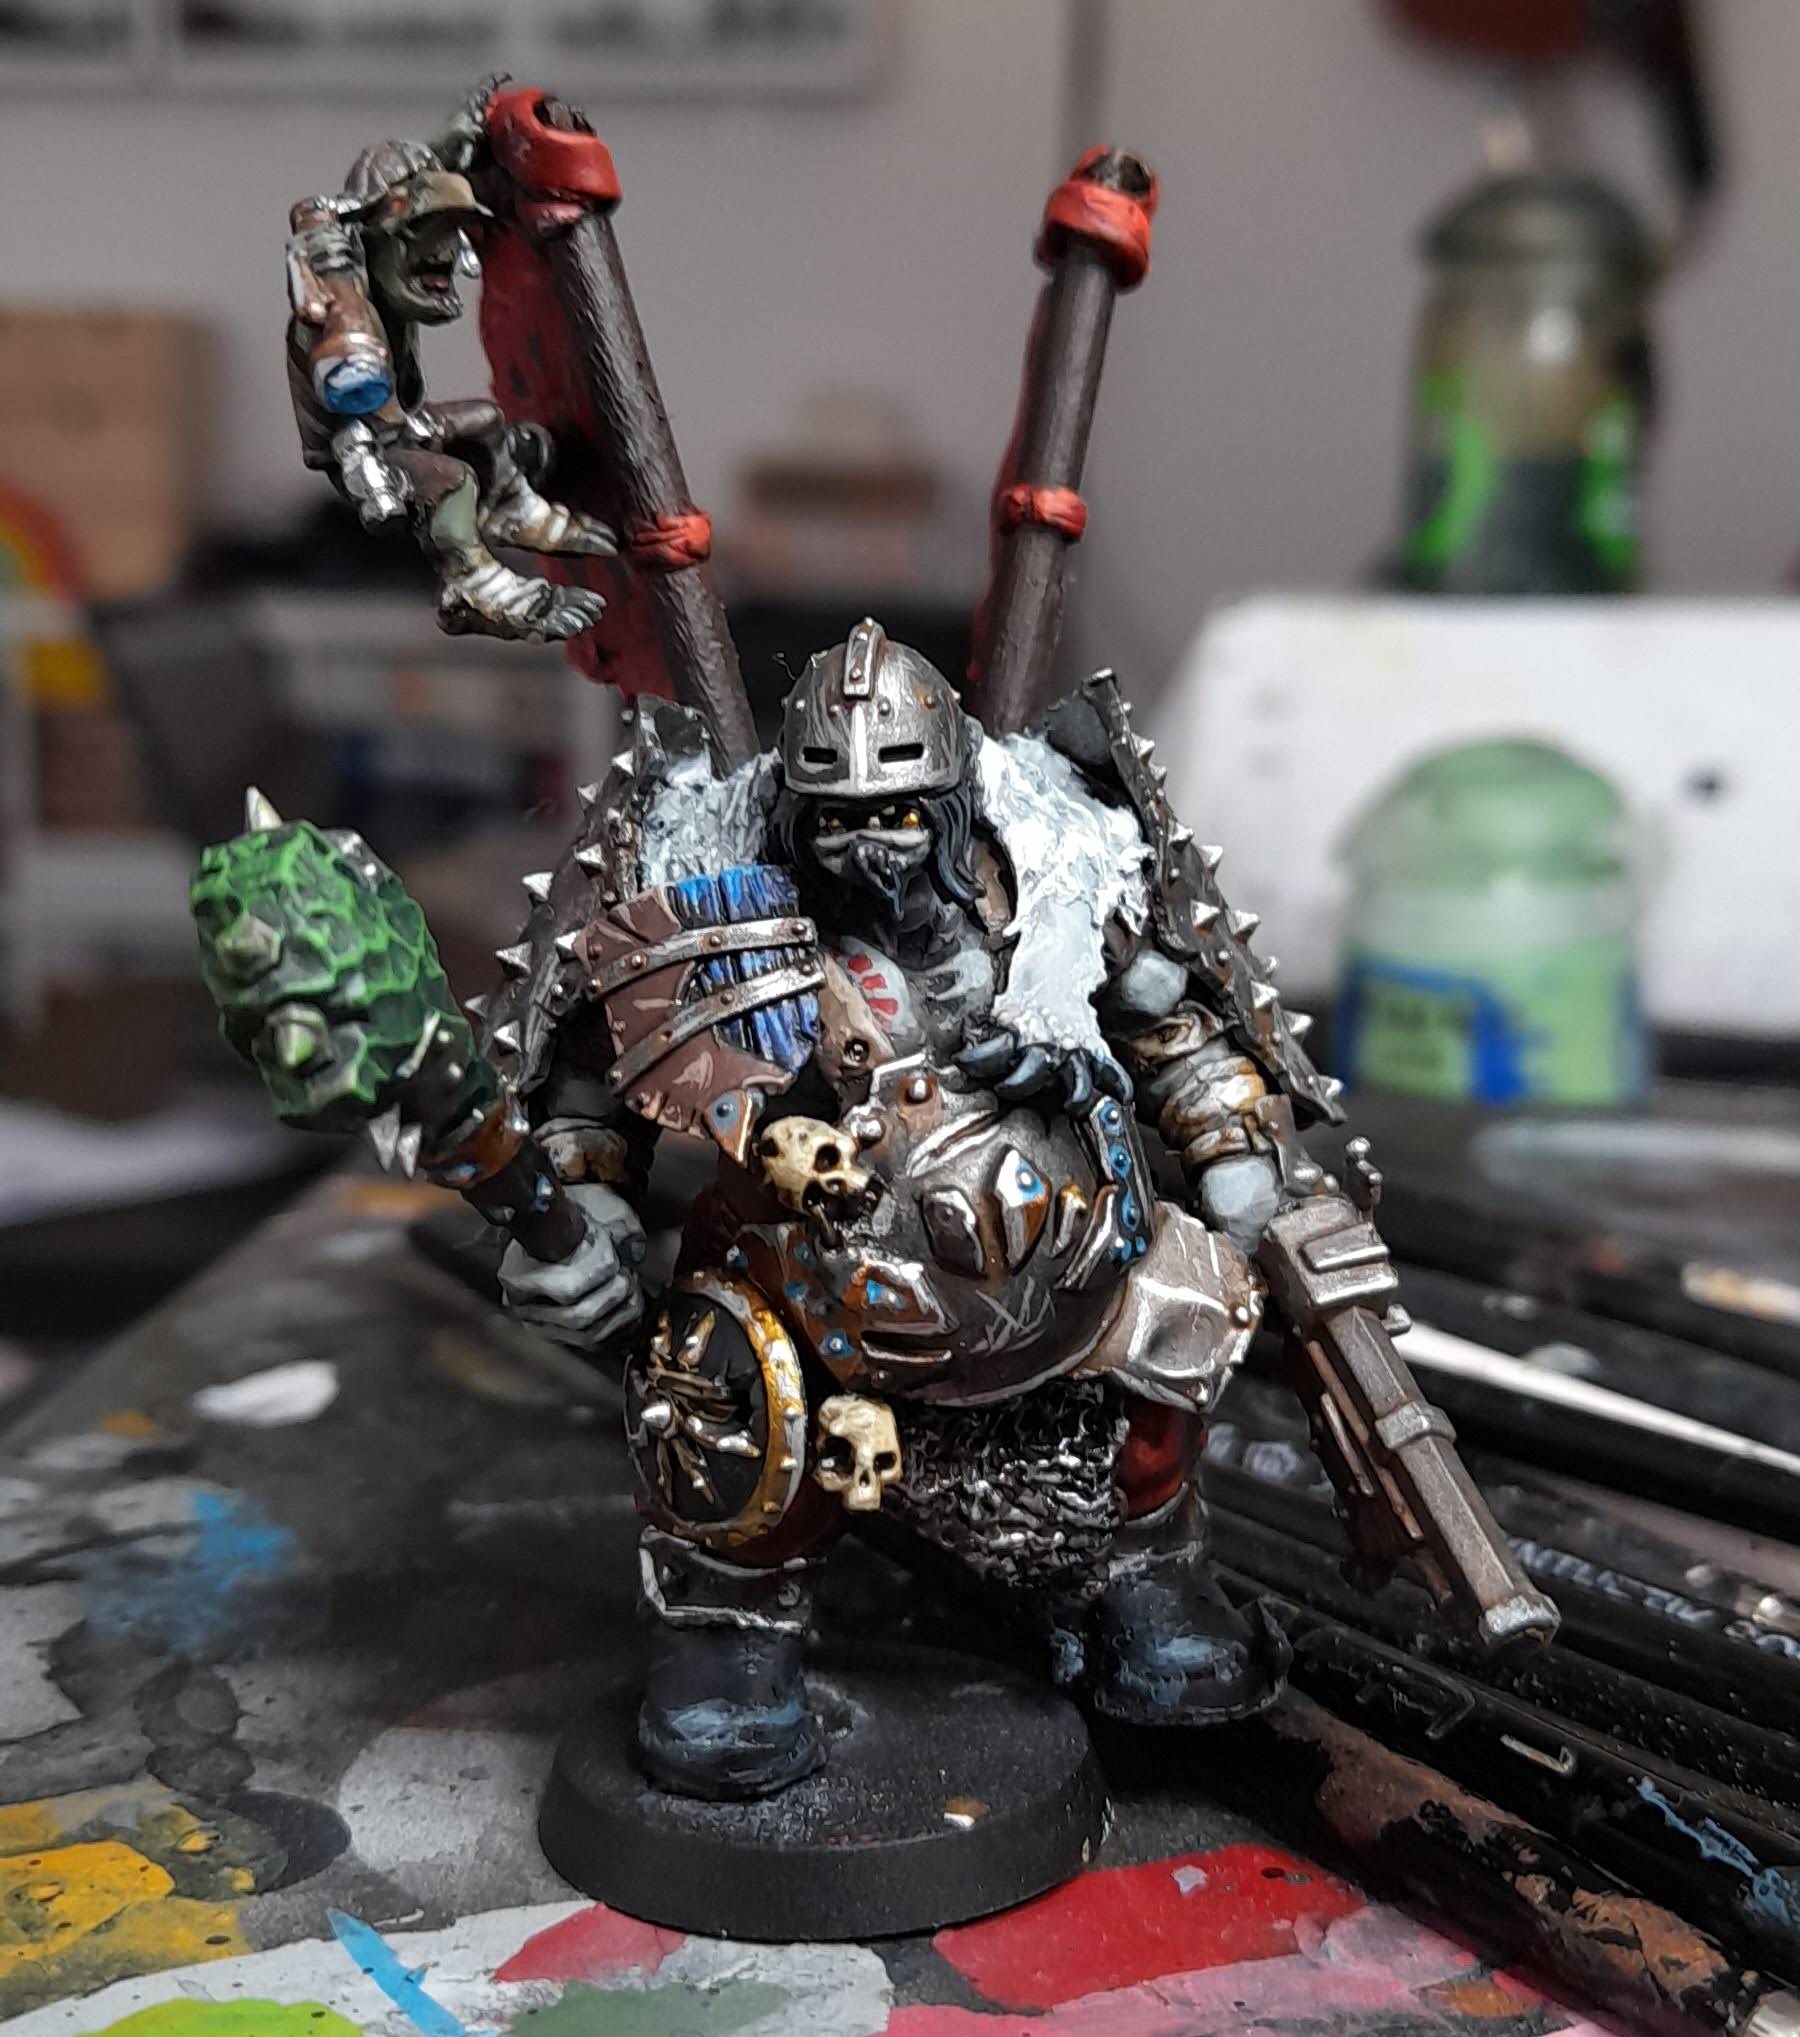
The metal was edge highlighted and given some scratches with Vallejo Model Air Steel, my favourite silver metal paint by far. To add a little interest, the rivets of the bronze panels were given a little dab of thinned down Temple Guard Blue to create an exaggerated verdigris effect. These little spots of strong colour helped to break up the otherwise drab areas of dirty metal.
Finally, the stone head of the club was basecoated with Caliban Green, and then drybrushed with Moot Green, giving it a kind of Warpstone look.
Gnoblars
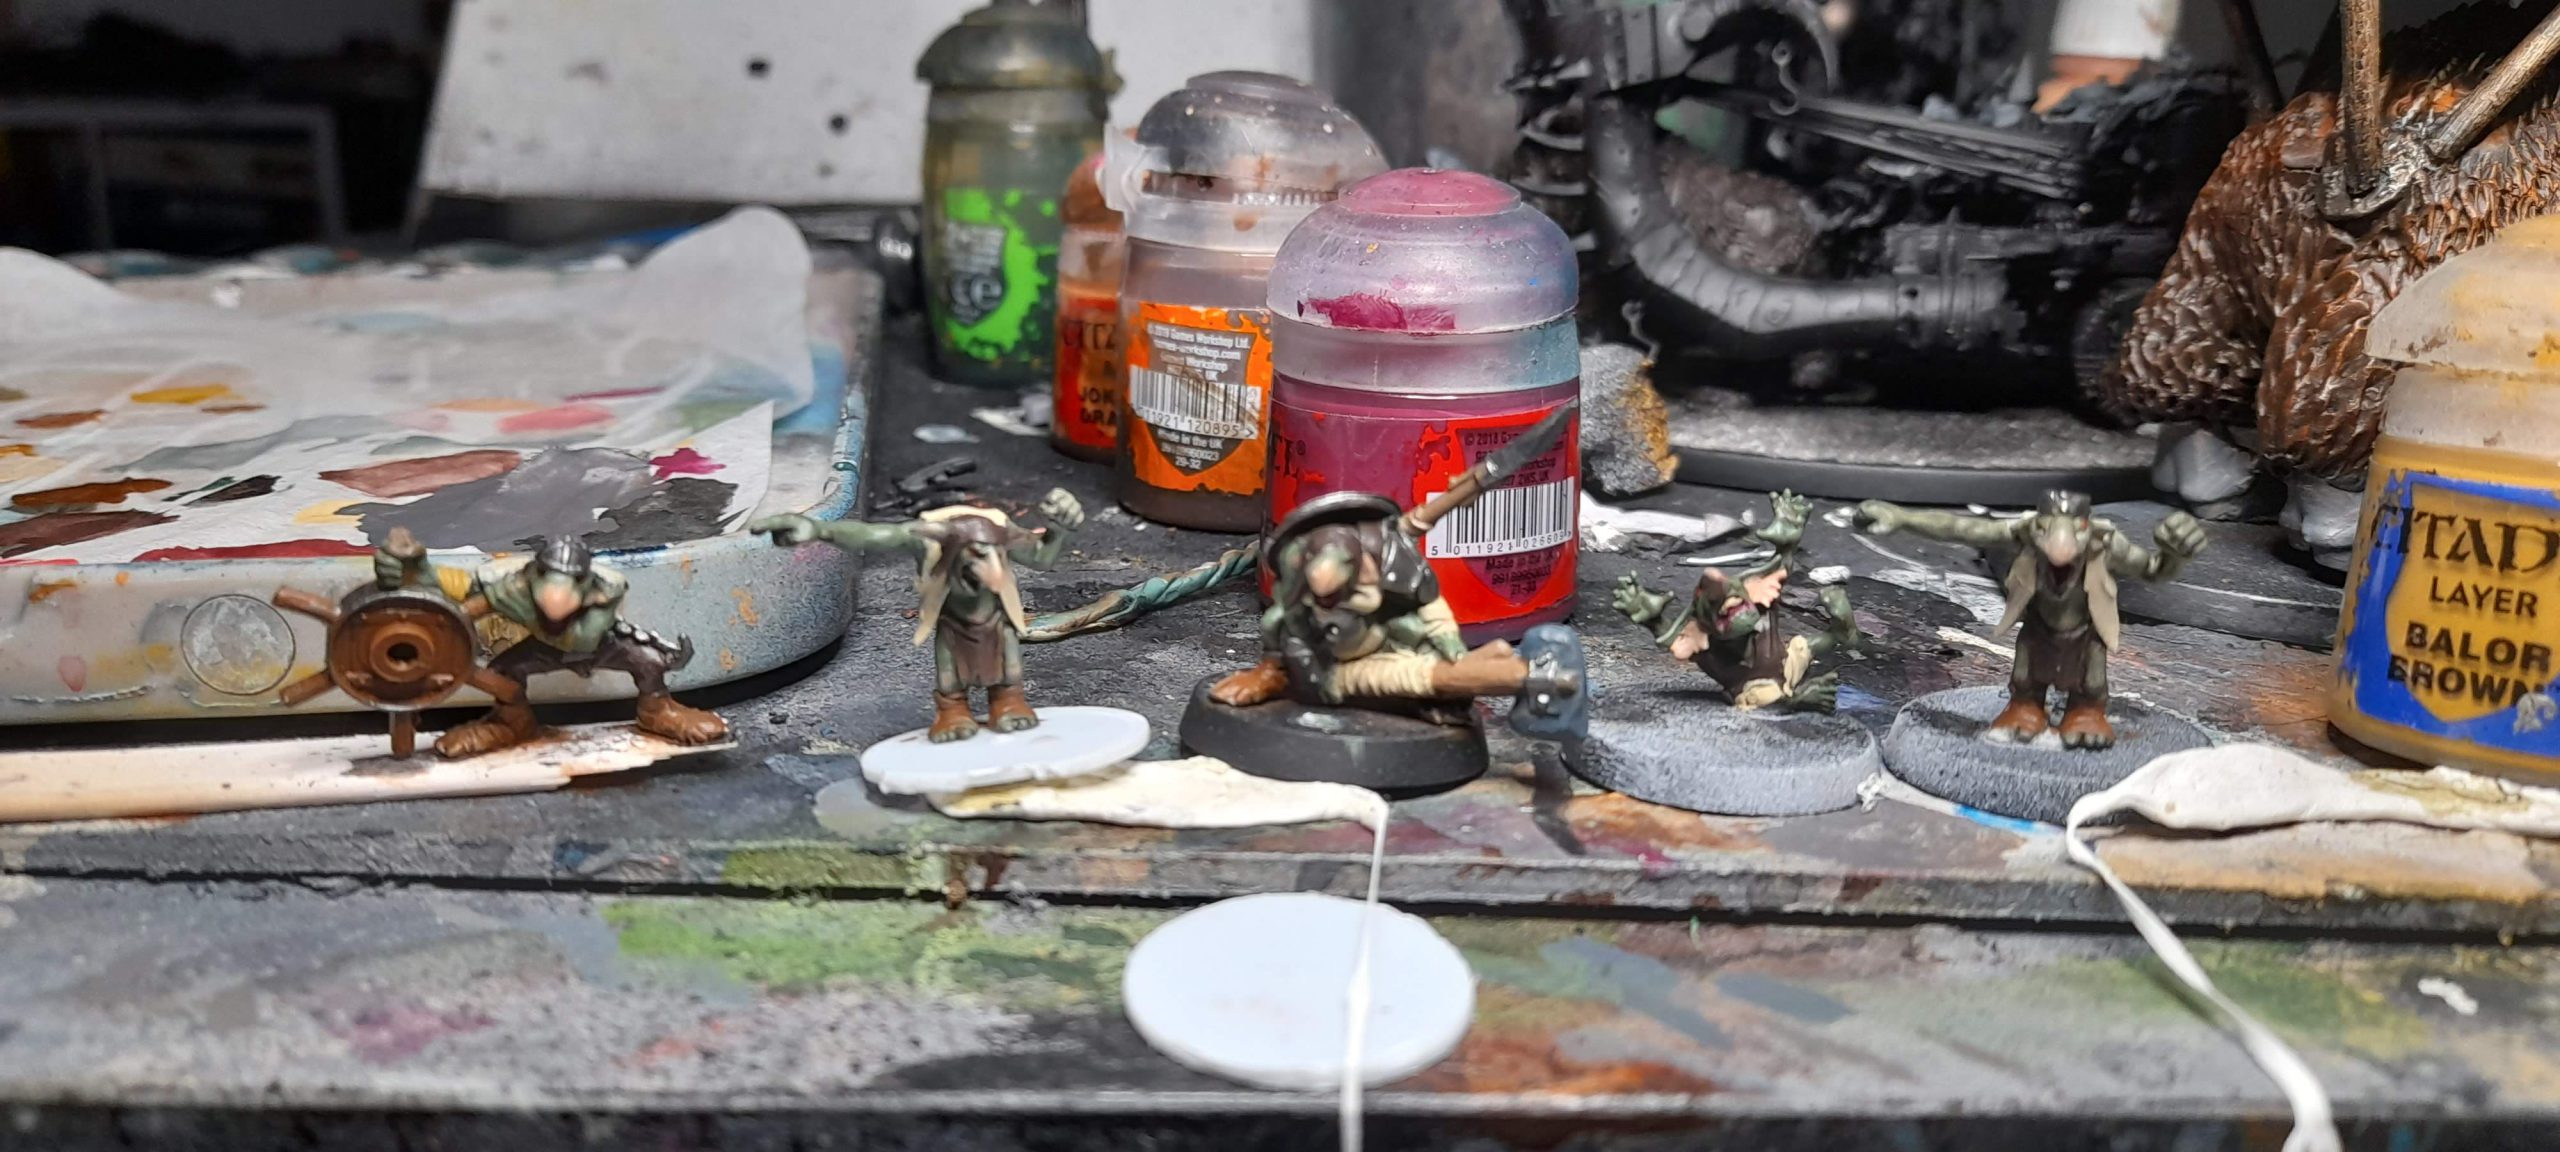
These cheeky little chappies are the crew of the Howdah, assisting the Tyrant in his command.
Their skin was basecoated with Loren Forest, a nice semi-saturated mossy green, this was shaded with Athonian Camoshade, highlighted with Loren Forest mixed with a little Ogryn Camo, and then a finer highlight of pure Ogryn Camo.
The insides of the ears and the ends of the nose were then basecoated with Cadian Fleshtone, washed with Reikland Fleshshade, and then highlighted with a little Flayed One Flesh. This addition of a human-like flesh tone to the Gnoblars adds a little variation to what would otherwise be fairly straightforward green skin.
The clothing was basecoated with either Rhinox Hide or Ushabti Bone, shaded with Earthshade, and then highlighted with either Screaming Skull or Bloodreaver Flesh.
Simple, straightforward, but I think it really works!
Final Details and Assembly
I added some Maw sigils to the Sashimono banners and the red penant, using both the Blood Bowl transfer sheet and some Abaddon Black. I kept these symbols as simple as possible, the sort of thing that an Ogre would paint roughly on his gear. I applied the decals using Vallejo’s Decal Fix and Decal Softener products, I like the way they add a “painted on” feeling to even complicated decals!
Finally, everything was stuck together with some superglue.
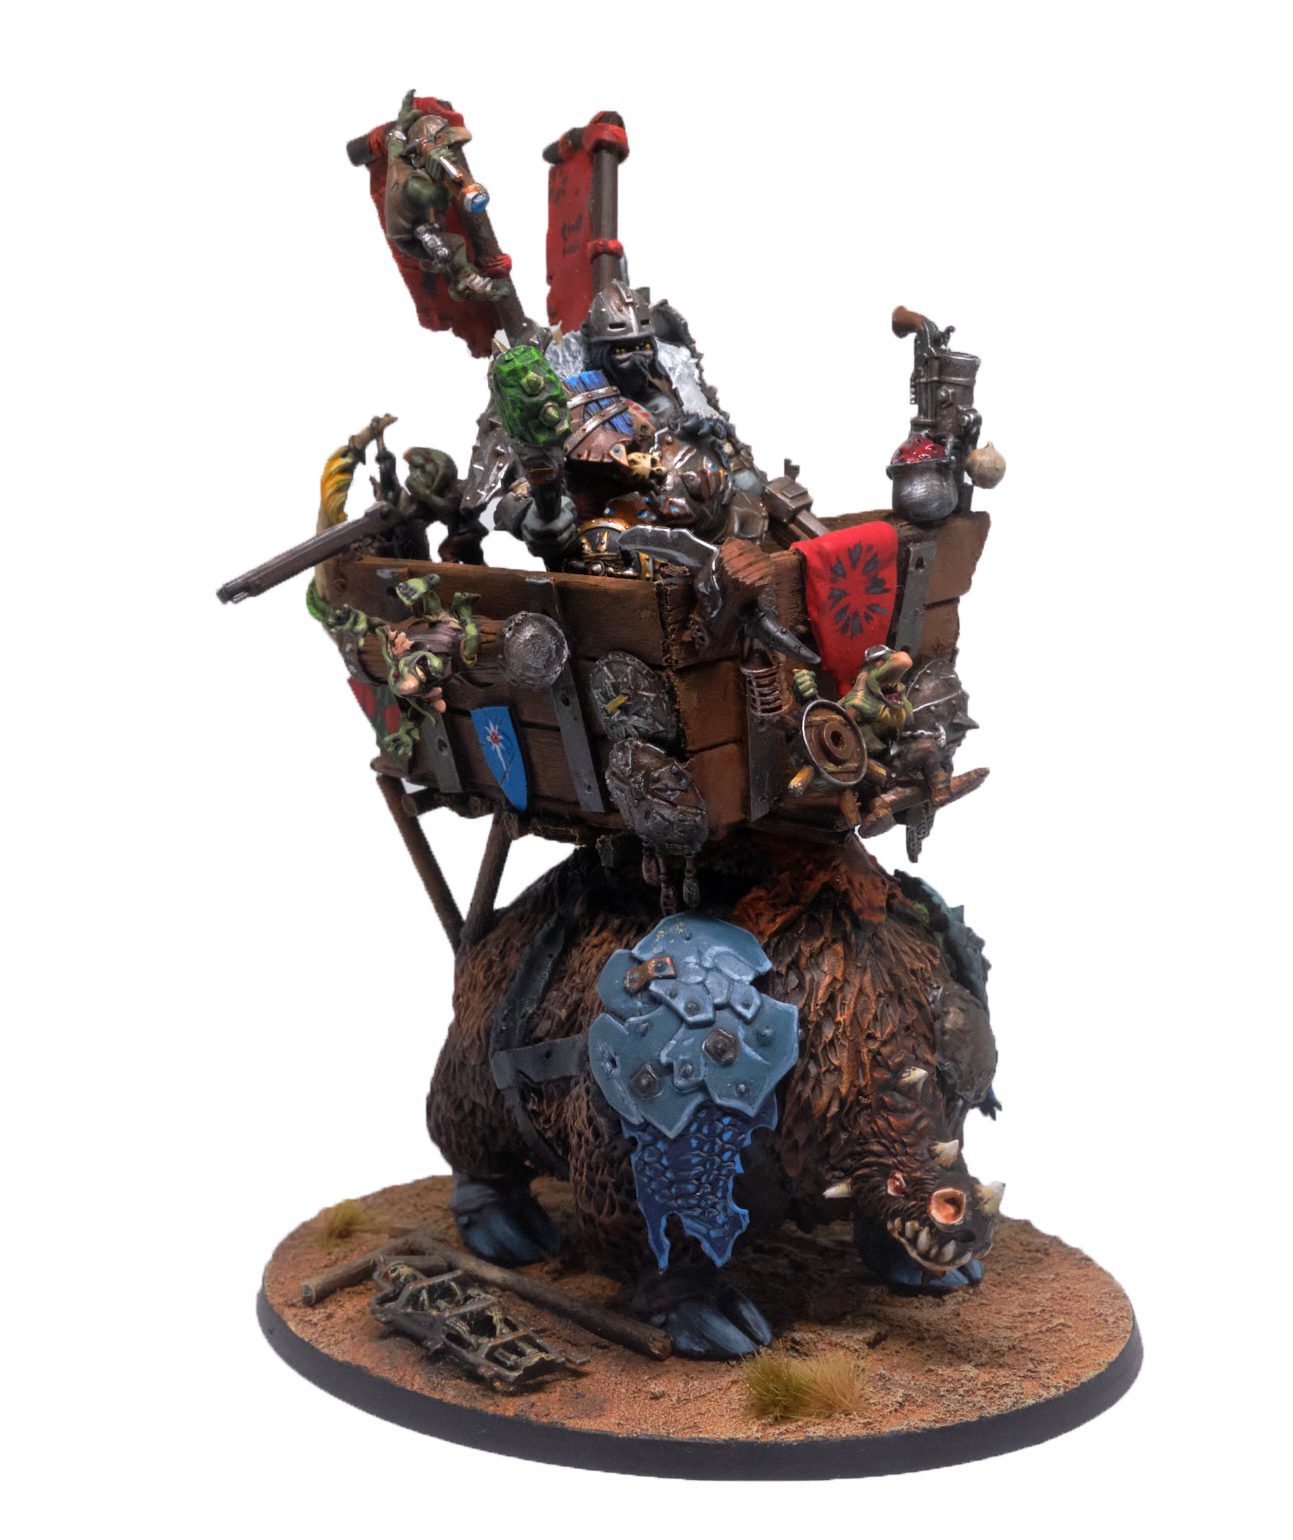
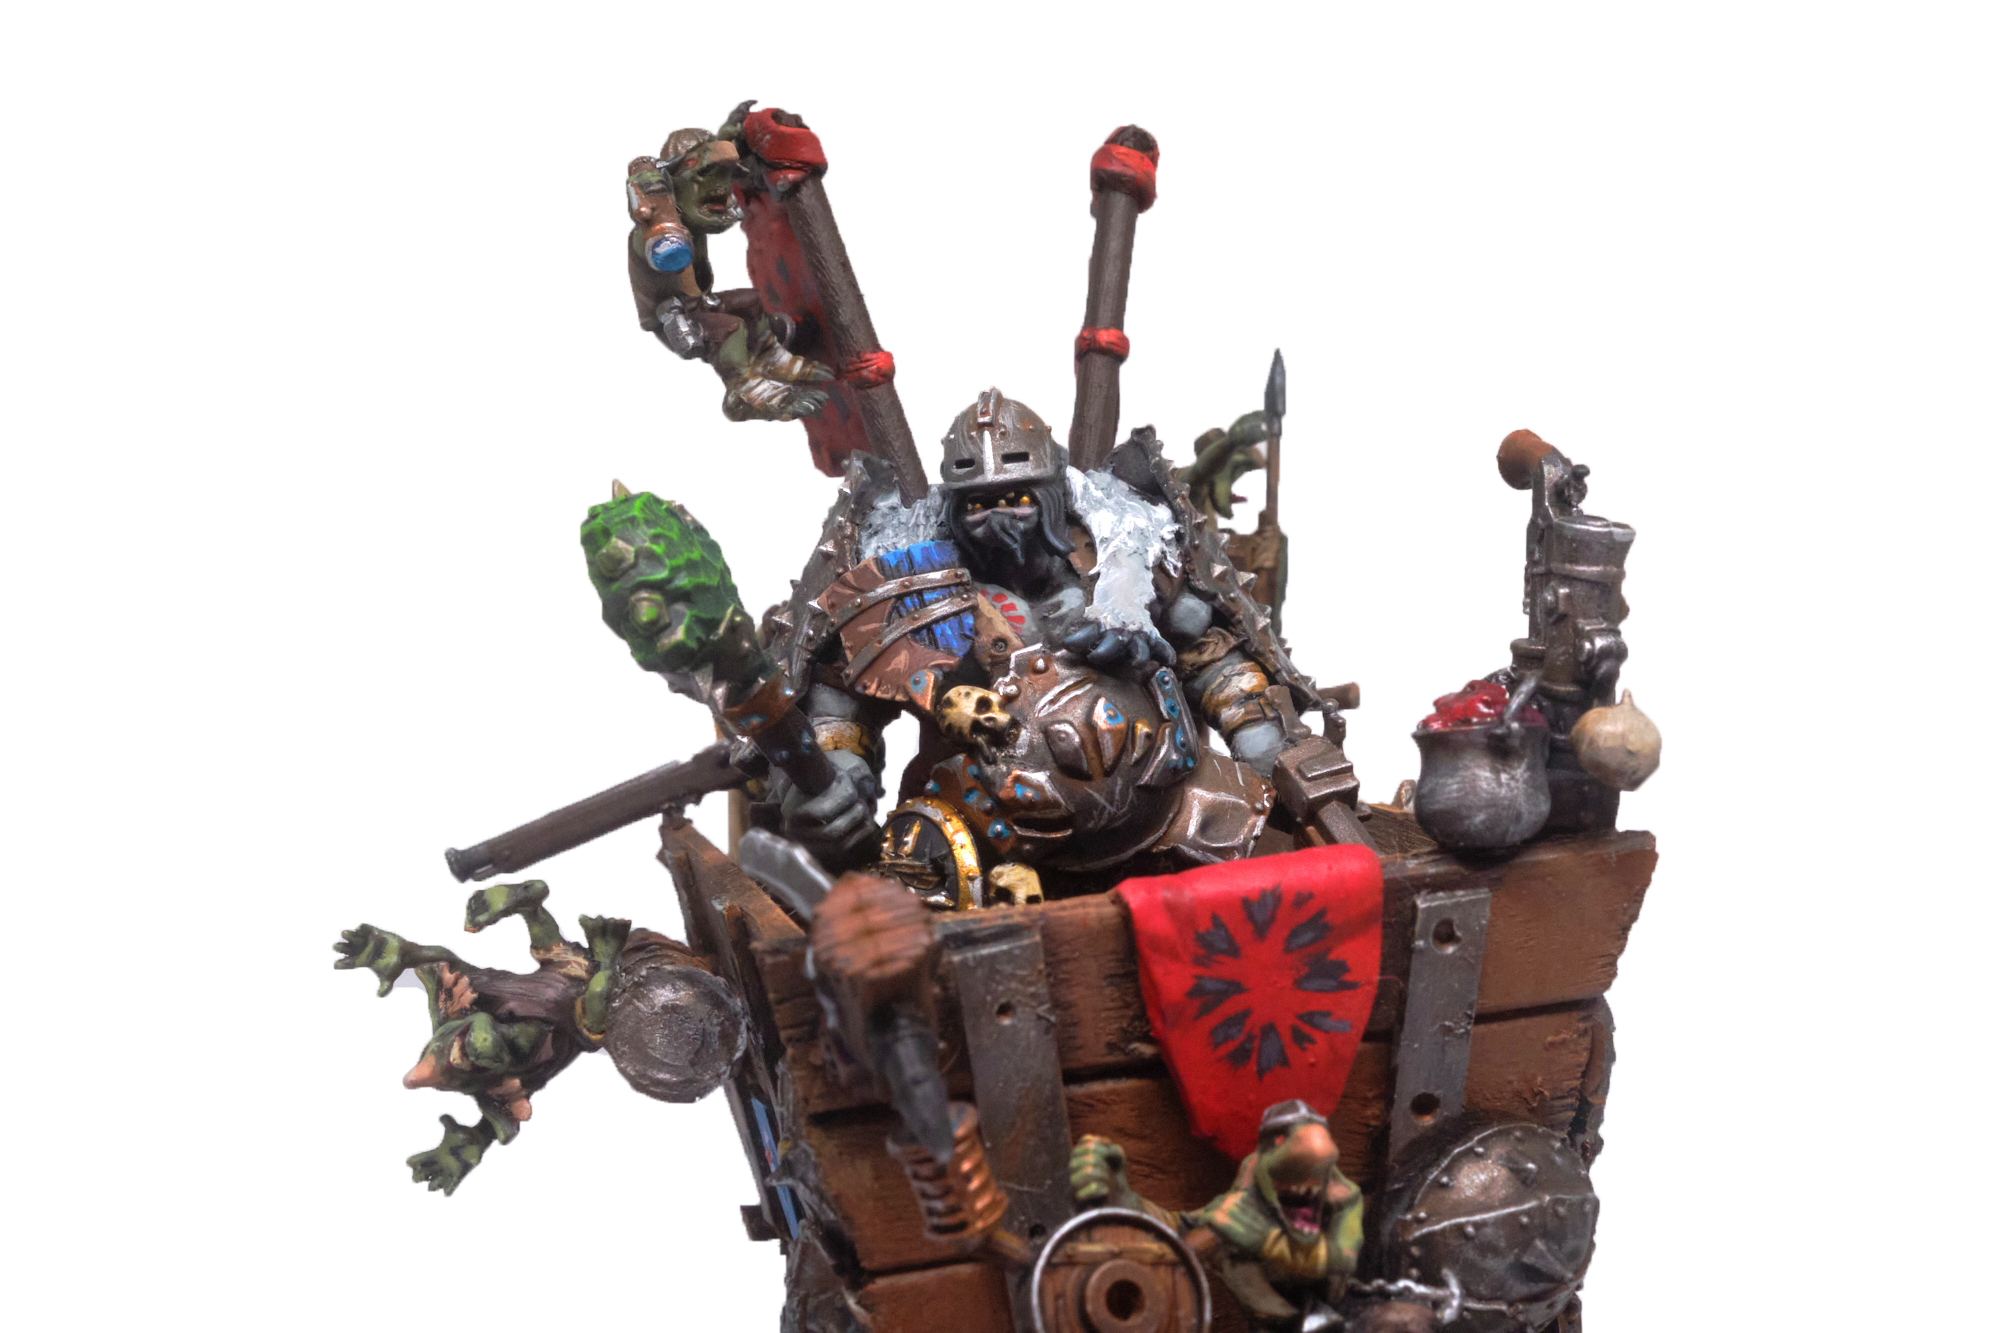
Here’s the finished article:
Have any questions or feedback? Drop us a note in the comments below or email us at contact@goonhammer.com.
