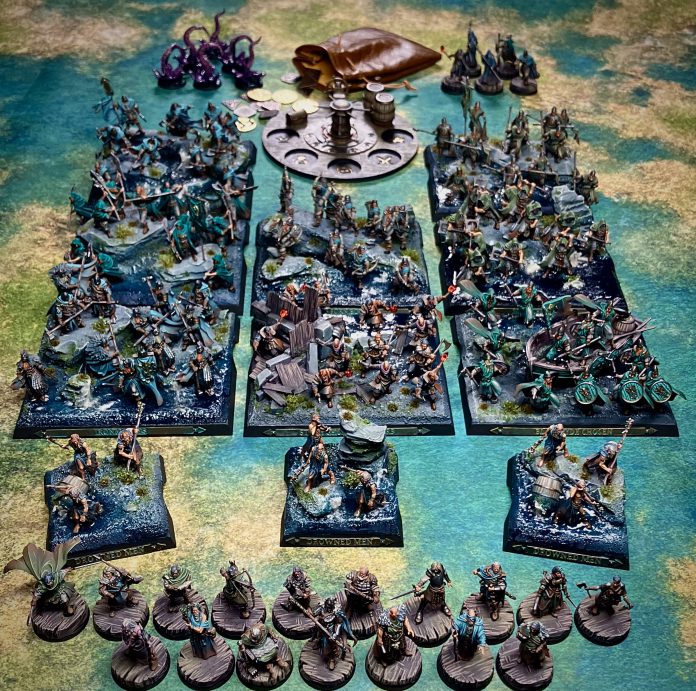
The miniatures for the ASOIAF Miniatures Game are very detailed and perfect for a painter to delve into, with several types of models for every type of painter, and the models keep getting better and better over time. There are some outstanding painters who have decided to take painting these minis to new heights, and we wanted to spotlight one of these painters today with Mitch Scribbles.
Mitch is one of the best and influential painters in the industry. Mitch has been asked by many about how he achieved his stellar work on the Greyjoy Army and the secrets about this diorama army will be revealed today by Mitch himself. Take it away Mitch!
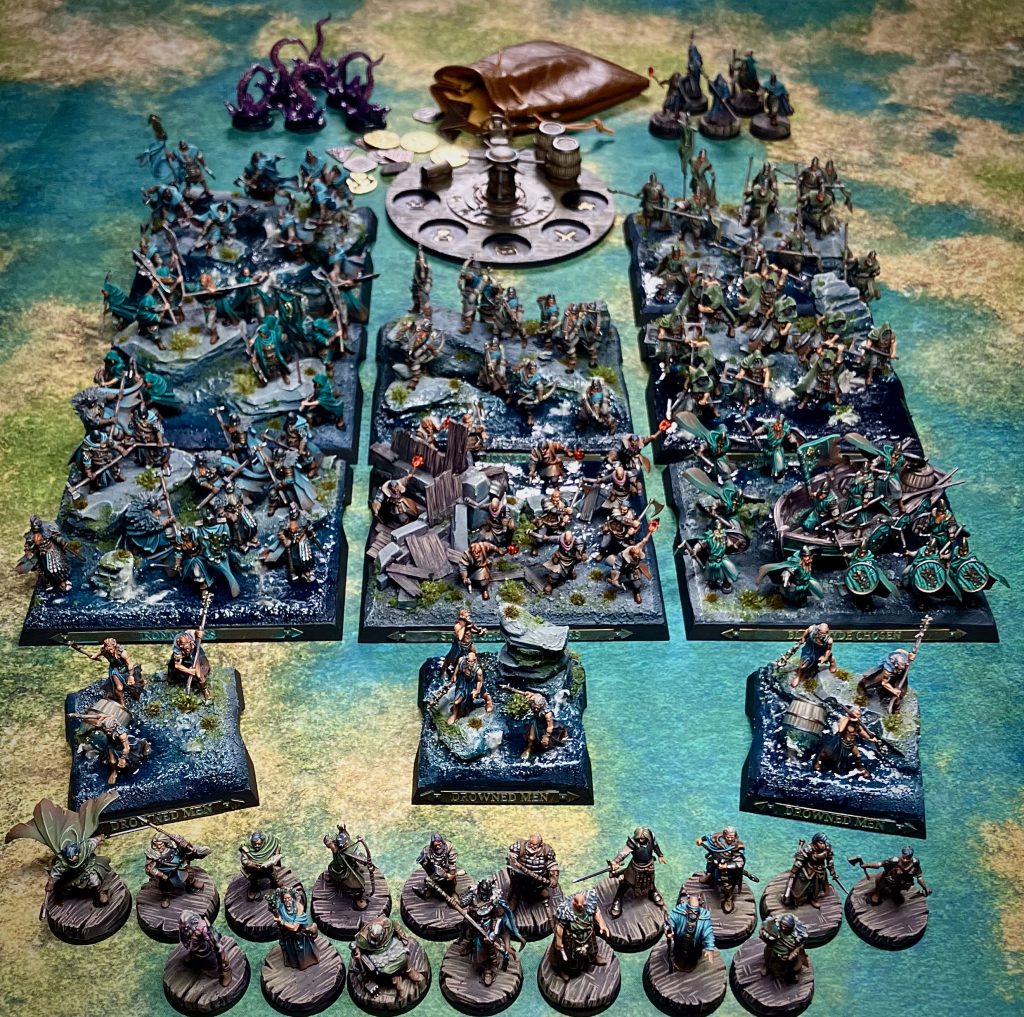
Community Spotlight – Mitch Scribbles
I love Vikings! The 13th Warrior, The Vikings TV Show, The Northlanders comics by Brian Wood, the band Danheim, and many more. I know the image of the Vikings is very romanticised, but at the end of the day, it is so entertaining. For several years I had been playing with the idea of building a Viking army. At some point I had so many ideas in my head that I had to start the project, otherwise I would have gone crazy!
Since I already have some ASOIAF armies and really like the system, I thought it should be a Greyjoy army. The ASOIAF Greyjoy miniature sculpts are simple, and beautiful but not too overloaded. That suits me – I want to decide for myself whether I invest a lot of work in a miniature or not. If the miniature is overloaded with details, I have to invest a lot of time, which I don’t always like. Especially not in an army project.
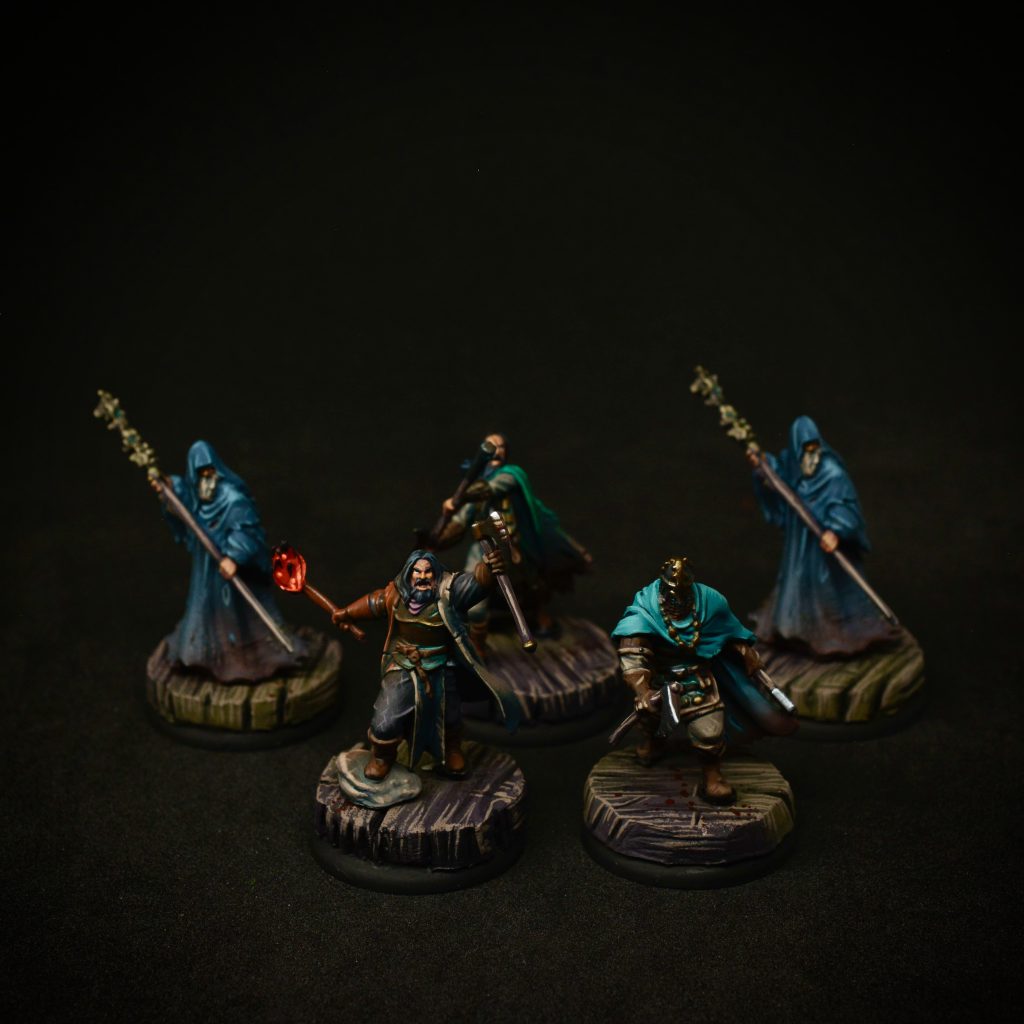
Concept for the Force
The miniatures are to be painted in my style, which is not a realistic style, but more of a comic look.
I love brushstrokes, whether the color transition is clean or not. I also like to mix colors and test things out. I think you can see that in my painting style.
My other armies have always used the ASOIAF trays without too much modification. I magnetised the pieces, but left them on the bases. It all looks very flat and there are no differences in height. However, the differences in height can be quite exciting for the viewer, so this time I wanted to try my hand at scenic bases. The miniatures are cut from the bases, magnetised, and you can position them more freely on the tray. You can also play with height differences, almost creating a small diorama. I’ve never done that before, but you grow with your tasks!
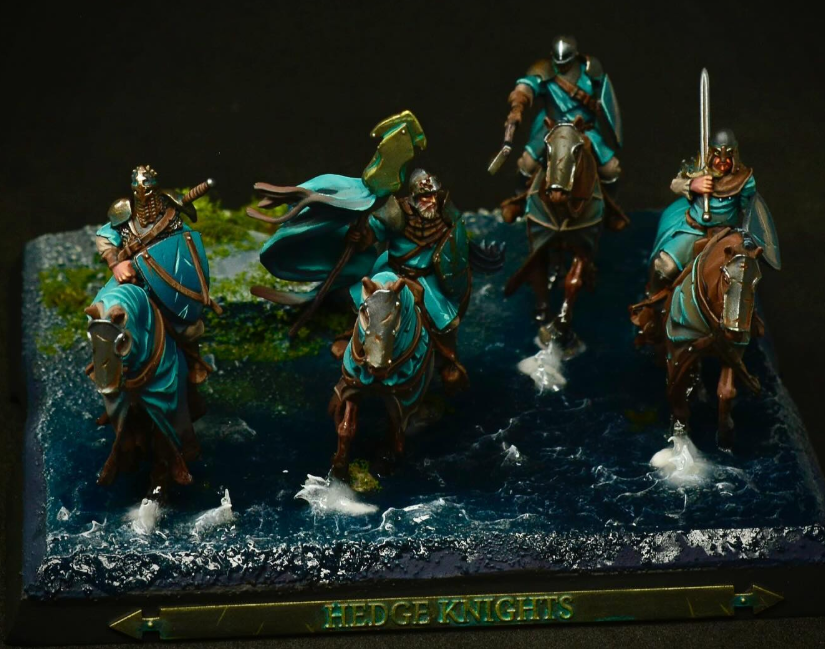
Since this was not enough of a challenge, I wanted to try my hand at water effects. When I think of the Greyjoys, I think of rocky coasts and water. This is what my bases should look like. I see the water effect in particular as a special challenge, which requires good planning and a lot of patience.
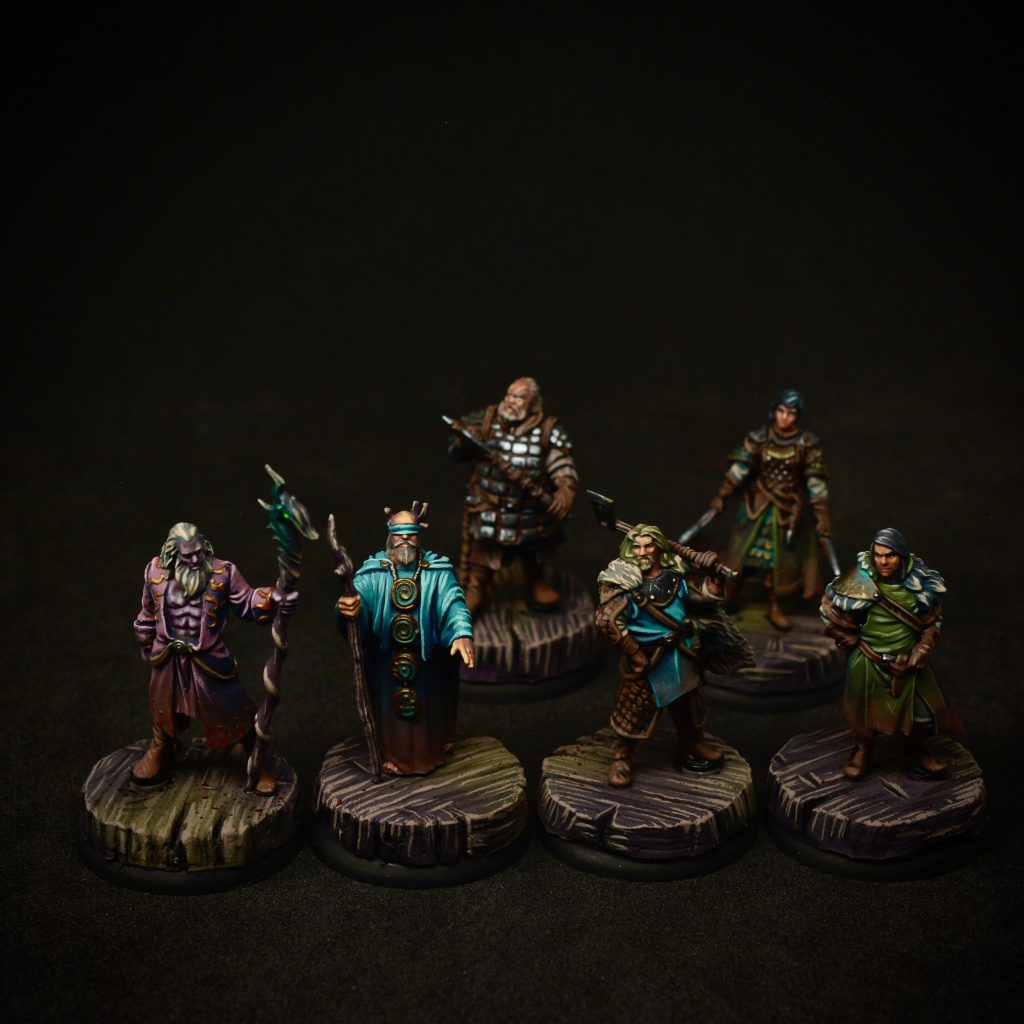
Planning the Time
I usually just make a rough plan to see what I’m actually getting myself into. If I notice during the project that I don’t like certain aspects, I change them – that’s very important to me. The army must please me, no one else.
I paint 5-6 days a week, mostly in the evenings, but on the weekends I sometimes paint in the afternoon with my eight-year-old son. He then tinkers and I paint, 2-3 hours per session. That makes at least 10 hours a week, in which I get about one unit done.
At the time, there were nine playable Greyjoy Units, which makes nine weeks. In addition, two Heroes Boxes, and the heroes of the Starter Set. Another three weeks. Furthermore, I make somewhat more complex bases, so I’ll add another two weeks onto that.
If I don’t feel like painting in the evening, I do something with my wife, play Diablo 4, or read. In the past a lot of Joe Abercrombie, now a lot of Harry Dresden. So, another two weeks on top – three months for the project in total.
I have a buddy who has several ASOIAF armies at home and we’ve talked about me loving Greyjoys before, so I bought the entire unpainted army from him. So I now had a sports bag full of Vikings and was ready to go. Unfortunately, I had to give him the sports bag back.
Then I just started with the miniatures. Here the idea was to paint one unit after the other and take care of the bases later. In Germany we say: “Strike the iron while it’s still hot”.
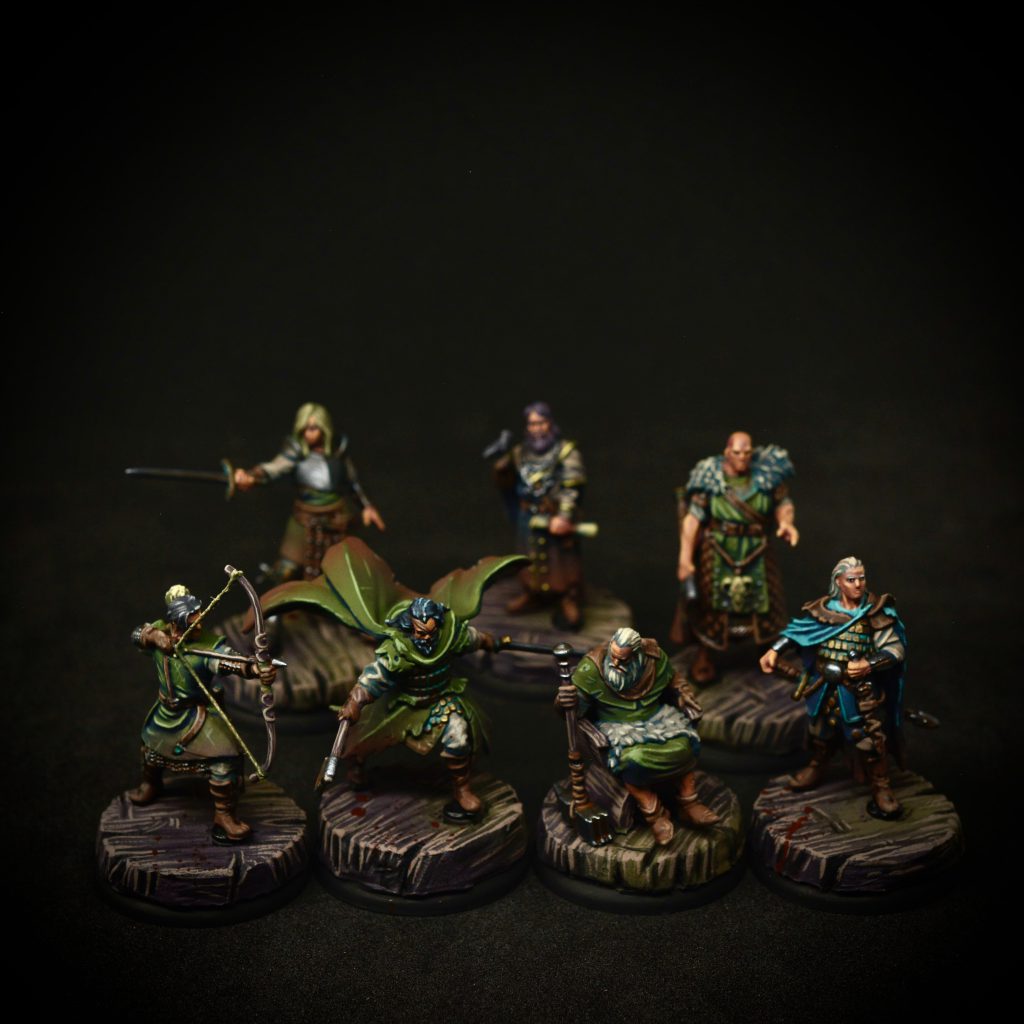
Tackling the Painting
I chose a middle ground between speed and cleanliness. I only removed really visible mold lines from the Units, but put a little more effort into the character models. The bottom line, however, was that there was not really much to do here. I primed everything with black primer, then followed up with a zenital white ink on top. So I already had a rough idea of light and shadow.
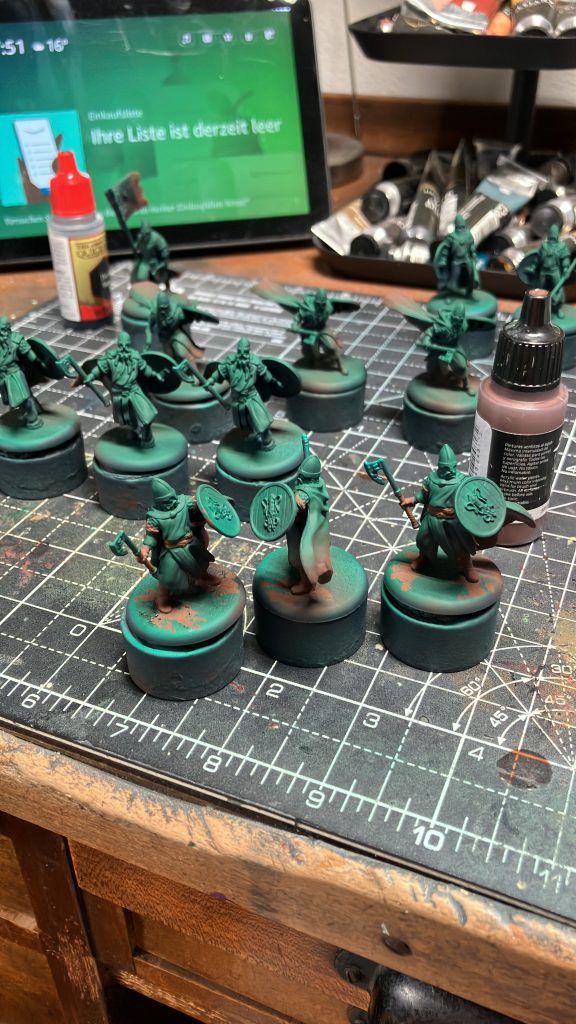
Airbrush Work – First off, I think about what the largest area on the miniature is. For the Greyjoys, it was almost always the coats. Before I put paint on the miniatures, I think about what my shadow tone and highlight tone should be. For the Greyjoys I chose dark blue for the shades and a yellowish white for the highlights. Why dark blue and yellowish white? Because blue is a cold color that goes well with shadows. On the other hand, water is always associated with blue. So the water theme has been taken up again with the colors. I always try to support the theme of the miniature through the choice of colors.
From below I sprayed the miniatures with the pure dark blue. From above, the mid tone of the coats. I made the coats in different colors so that the Grejoys don’t look too uniformy. Here I borrowed a Viking children’s book from my son as a template. Coloured children’s books are also a good inspiration, because they are often drawn very simply and reduced to the essentials. There the fabrics were depicted in many desaturated shades of green, gray-blue, etc. The highlights are set later with the brush, because I simply have more control with the brush.
During the execution it looked somehow too boring for me, so I added another interesting shade to the end of the coats. A reddish brown as a beautiful contrast to the cold shades. That could be dirt or something. Here the realism stops and my style shines through. A simple brown would have been more realistic, not a reddish one, but this way I have a nicer cold/warm contrast. This idea came up while working, I had never planned it in the long term. In the end, I pulled it off for the whole army and I’m very happy with it.
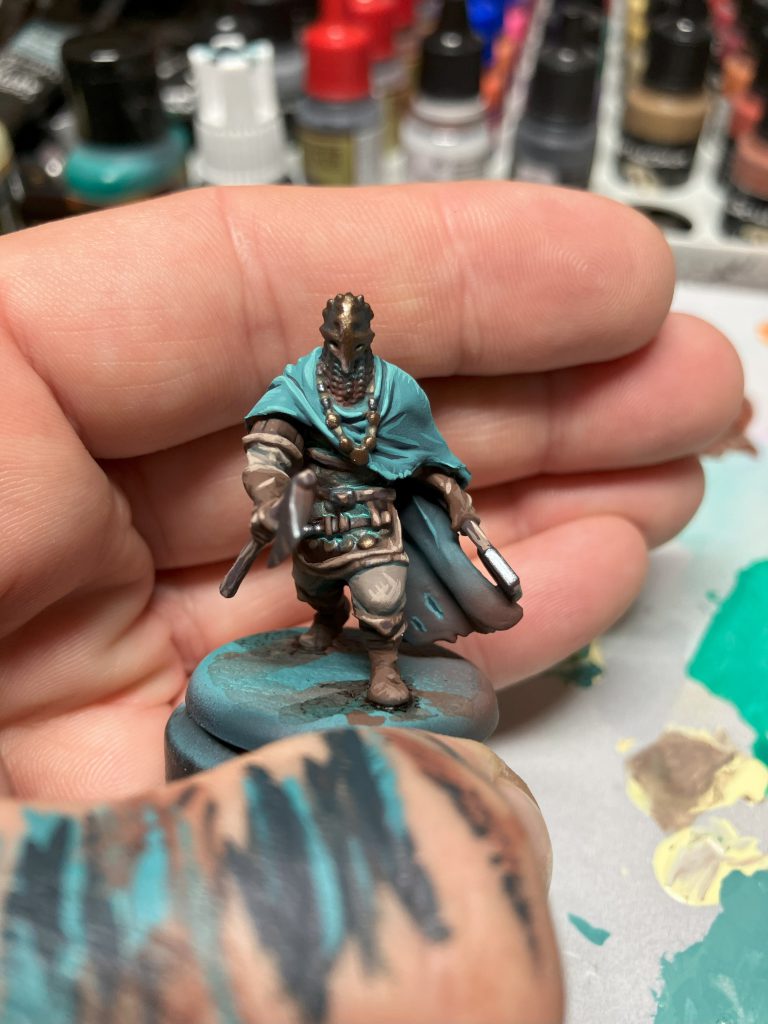
Brush Work – Roughly simplified, I choose a nice matching midtone for each material (fabric, wood, etc.) that I like. For the shadows, I mix my shadow tone in the midtones. (here a dark blue) I’ll do shadows and midtone for all miniatures first. If I like it, I mix my highlight color into the midtones and paint highlights. (here a yellowish white) I take a different approach to some materials. For example, metal, skin or leather.
Skin – You could also mix blue into the shadows of the skin and work your way up to the skin midtone, but with the skin I want to have a nice contrast to the rest. This makes the skin pop more. Lots of warm colors, which is why I start here from a reddish brown and then work my way into a classic skin tone. A good base for a skin tone is Bugman’s Glow from Citadel. From there I work my way with layering to Cork from AK. Later again for the highlights my yellowish white into the cork. Many people have problems with skin. I think that’s because you start too bright. For example, with a “Basic Flesh Tone” as the first layer. Of course – it’s written on the bottle! But then you have the problem that you can’t highlight it properly anymore because it’s already too bright.
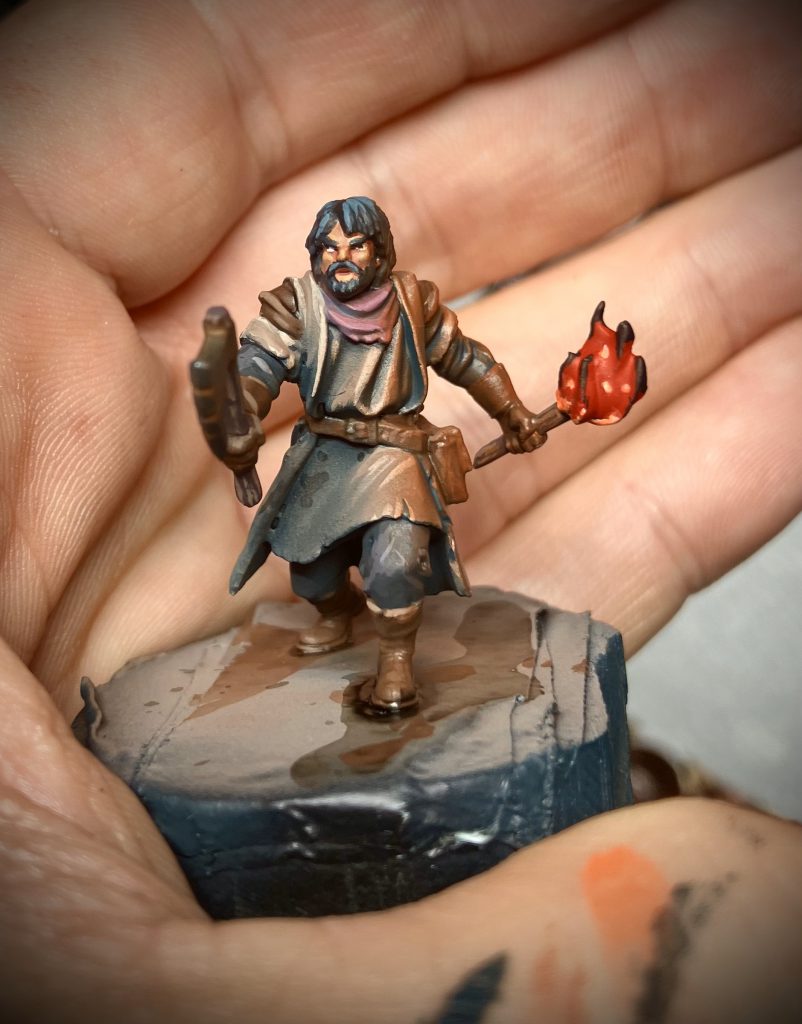
Leather – For the leather, I simply rattled off a recipe. Rarely does someone look at a 28mm army and say – you painted great leather! So let’s go – leather brown, dark wash with some dark blue in it. To do this, I simply mix the different washes together. As a result, I have my shadow tone in the leather again. After that has dried, again leather brown and a few scratches with light gray-brown. Actually, I don’t like washes because it often looks dirty, messy or greasy and you have little control, but that’s exactly the look I want to have in leather! Leather is a natural product.
Metal – With metal, I like to start with a metal tone into which I mix black and then work my way up to pure metal tone. Of course, I can no longer use my white highlight tone, but use a lighter metal tone.
Details – As I said before, I’m painting the Mini so far finished except for the highlights and details, like rust, the eyes, etc. For rust and verdigris, I used watercolors. A turquoise for the verdigris, a reddish brown for the rust. Both are cheap paints from the artists’ supplies. With watercolors, I can reactivate the rust at any time with a wet brush and continue to play around with it until it suits me. When the whole thing is completely dry, the colors still hold, you don’t have to be afraid.
I had four units of Greyjoys to dry outside when the rain caught me by surprise. The complete units were soaking wet. The Styrodur bases were soaked with water – the watercolors held. So you really have to rub it intentionally with a wet brush if you want to get it off. When all the units were finished, I started working on the Movement Trays or Scenic Bases.
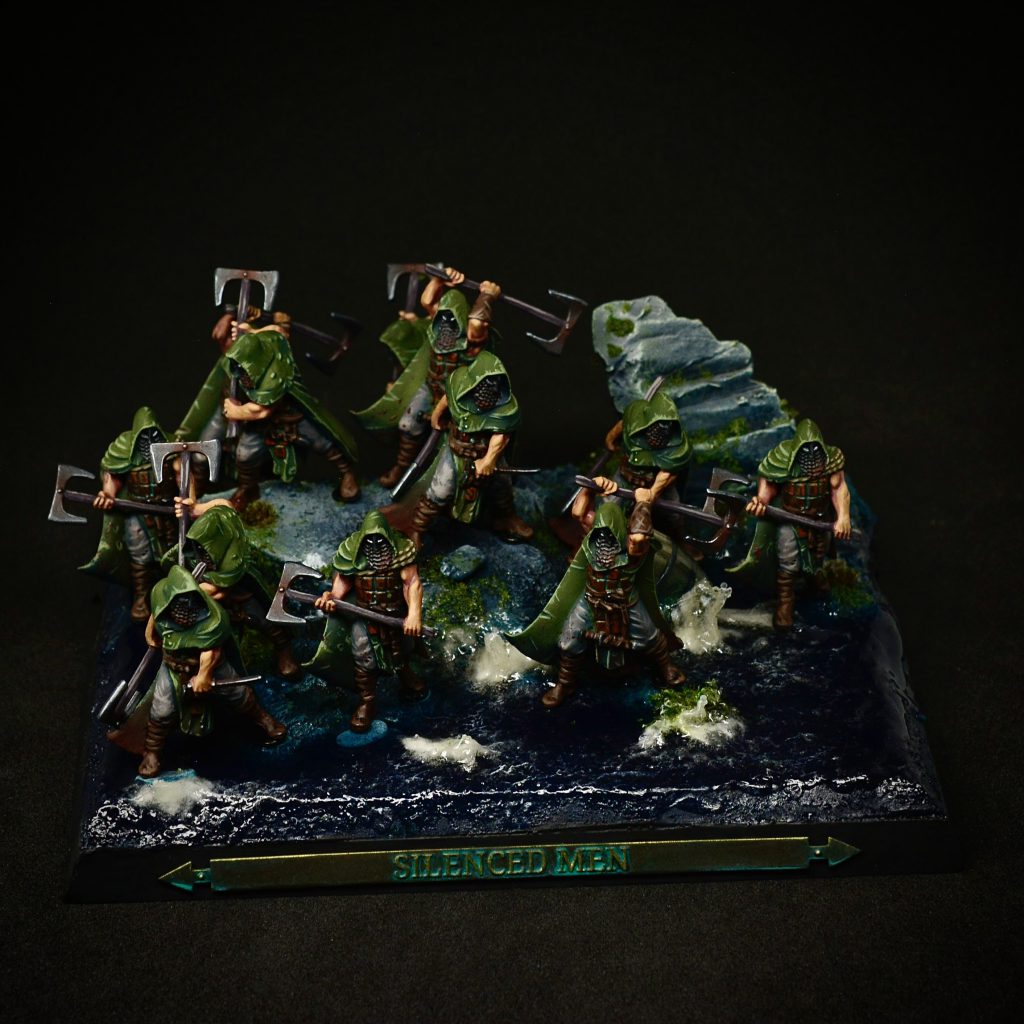
Magnetising – First I detached the minis from the bases. I removed the pegs under the base with a side cutter, then I cut down the minis with a sharp craft knife. If you want tips, don’t ask me! I totally cut my finger. But my wife managed it quite well again with wound closure strips and a bandage. She used to work in a hospital. Because that worked so well, I went straight on with the cordless screwdriver for the magnets.
For the NCUs, I used the round bases that I no longer needed. With a texture roller I pressed a wooden structure into the rest of the 5mm styrodur plates. I glued this to the round bases and cut off the overhang. Then I drilled holes in here as well and sunk magnets. The wood of these NCU bases could represent ship planks. I painted the whole thing relatively boring. Finally, I can now either place a magnetized NCU on a movement tray in the unit as an attachment, or on a round base as an NCU.
Scenic Bases
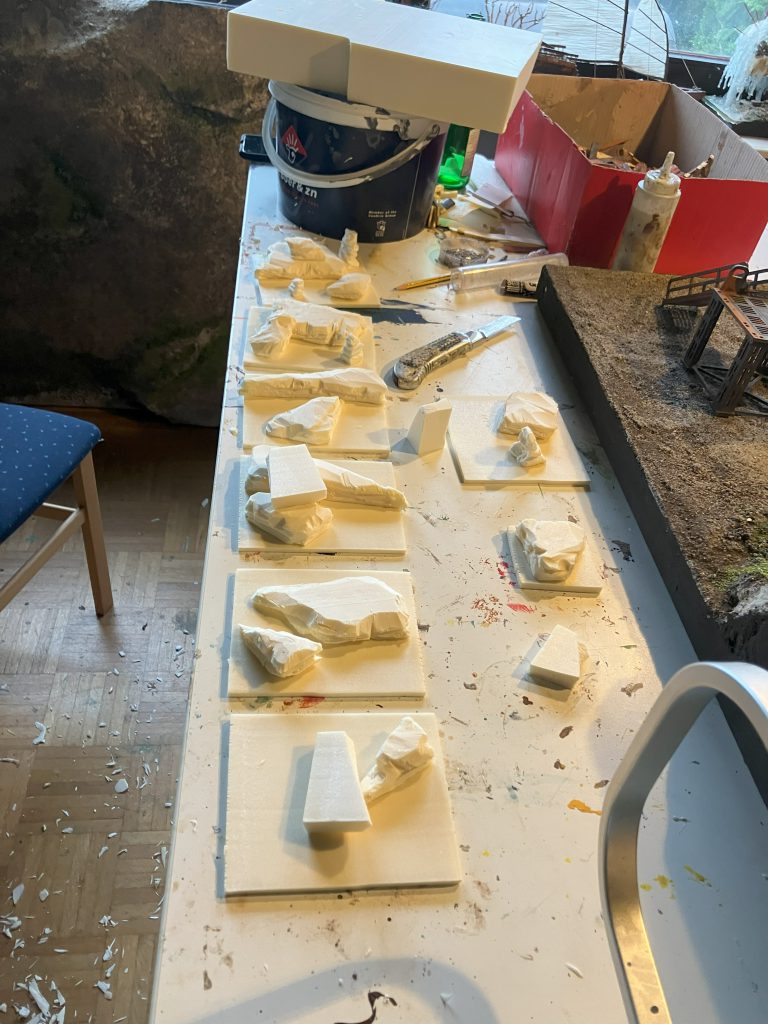
A buddy helped me here. Sigurd aka weltenbauer.club. He is an enthusiastic tabletop terrain craftsman and has a strong influence on me when building terrain. He also has a Styrodur cutter and a lot of Styrodur, so I asked him if he would like to help me. Sure – so we cut Styrodur first. 5 mm thick plates for the whole bases as a foundation. 5mm so that I could still sink magnets and the material does not bend too much. Then we carved rocks from Styrodur. Of course, we both cut ourselves.
The Styrodur plates were glued to the trays, on top of which the stones were placed. So the rough shape was ready for the time being. I haven’t thought about where the minis should be here. Then I primed everything with glue and paint so that the later colors adhere well to the styrodur. I threw sand and small stones into the wet paint-glue mud. That had to dry first.
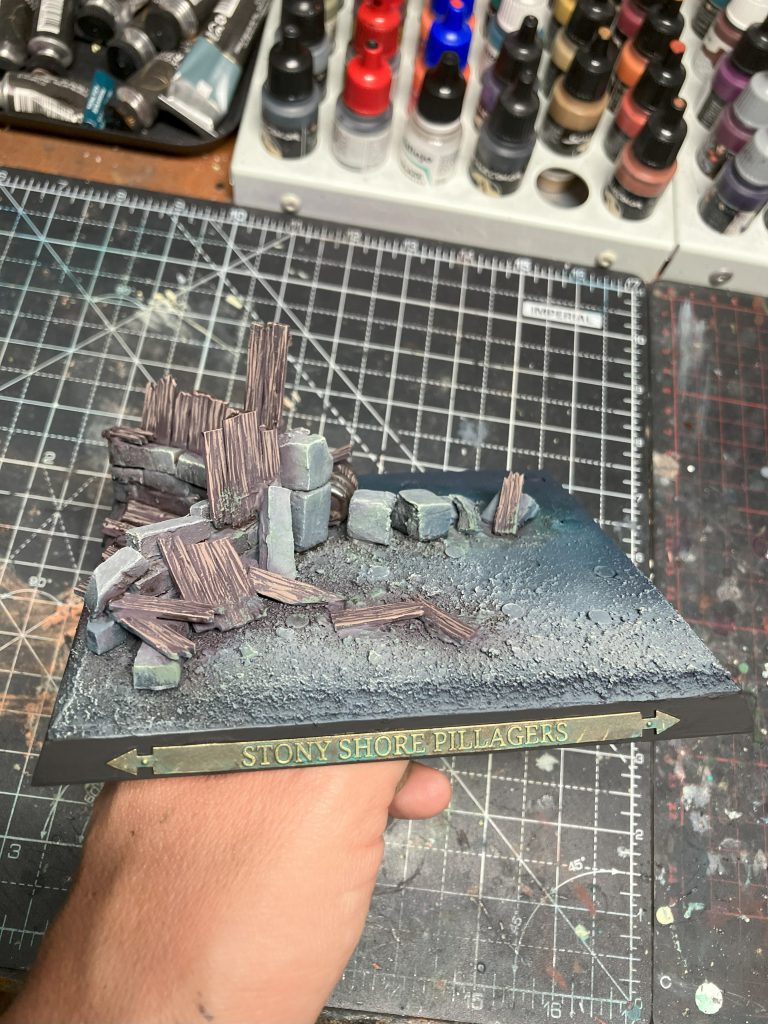
3D Printing – I’m not really a huge fan of 3D printed bits, but with such small parts as basing accessories, I think 3d printing is really awesome. Furthermore, I wanted to have name tags for my regiments. So I annoyed my buddy Tobi with it. He designed me some beautiful name tags with the corresponding names!
When everything was magnetized, I glued on the printed name tags and primed the bases. I first painted the bases roughly with the airbrush. Again, I used my dark blue for the shadows and ivory as an edge highlight for the rocks. For the intermediate tones of the rocks I used dark and lighter shades of gray.
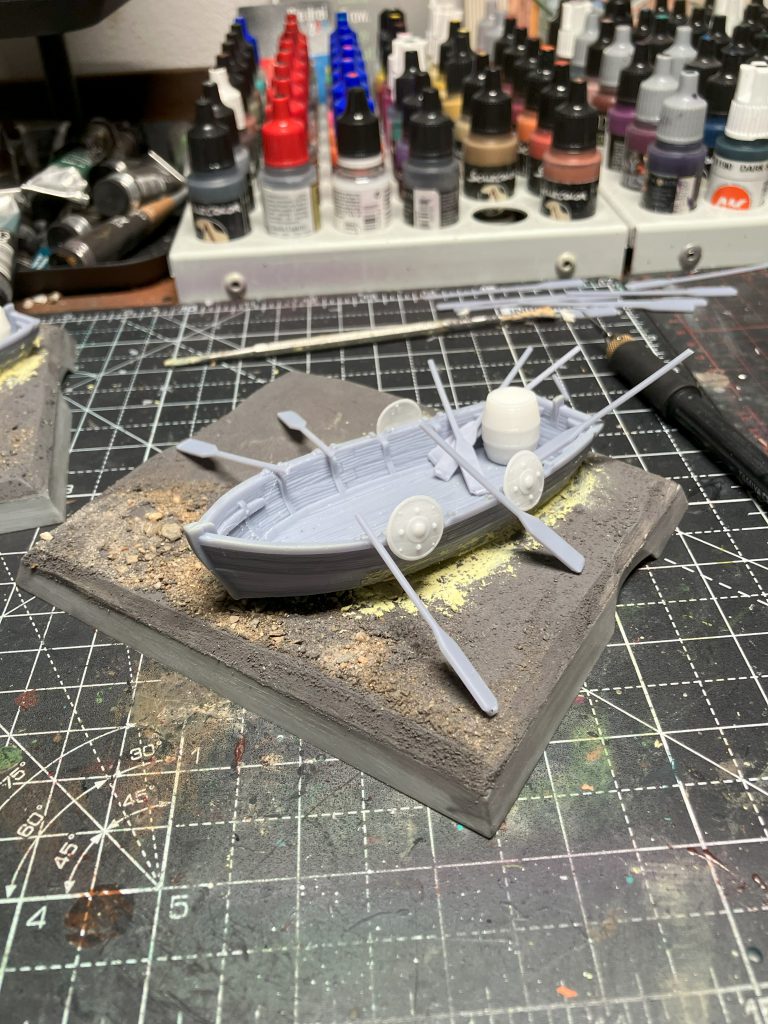
Often you can see some yellow and green lichens on real rocks. I often noticed this on vacation in Austria. I found that very interesting. So the rocks don’t look too boring. I made the lichens with a gray-green paint and a sponge. This was followed by dark brown washes and simple drybrushing. For the water effect, I first mixed a layer of UV resin with some dark blue paint and spread it over the areas where the water should be. After that, I modeled waves here and there. For this I used acrylic paste and some small scraps of Q-tips. When it dried, I drybrushed white around the waves to blend these areas. Then gloss varnish over the paint to make it shine again and here and there I put small 1mm glass balls on top of the wet gloss varnish. It looks like water droplets. But I only used it very selectively.
I decorated the rocks with different tufts. For the moss effect I mixed PVA glue with water, brushed it on here and there and sprinkled microflock over it. Finally, the nameplates were painted with metal paints, weathered with watercolors and the base edges were painted black.
Highlighted Units
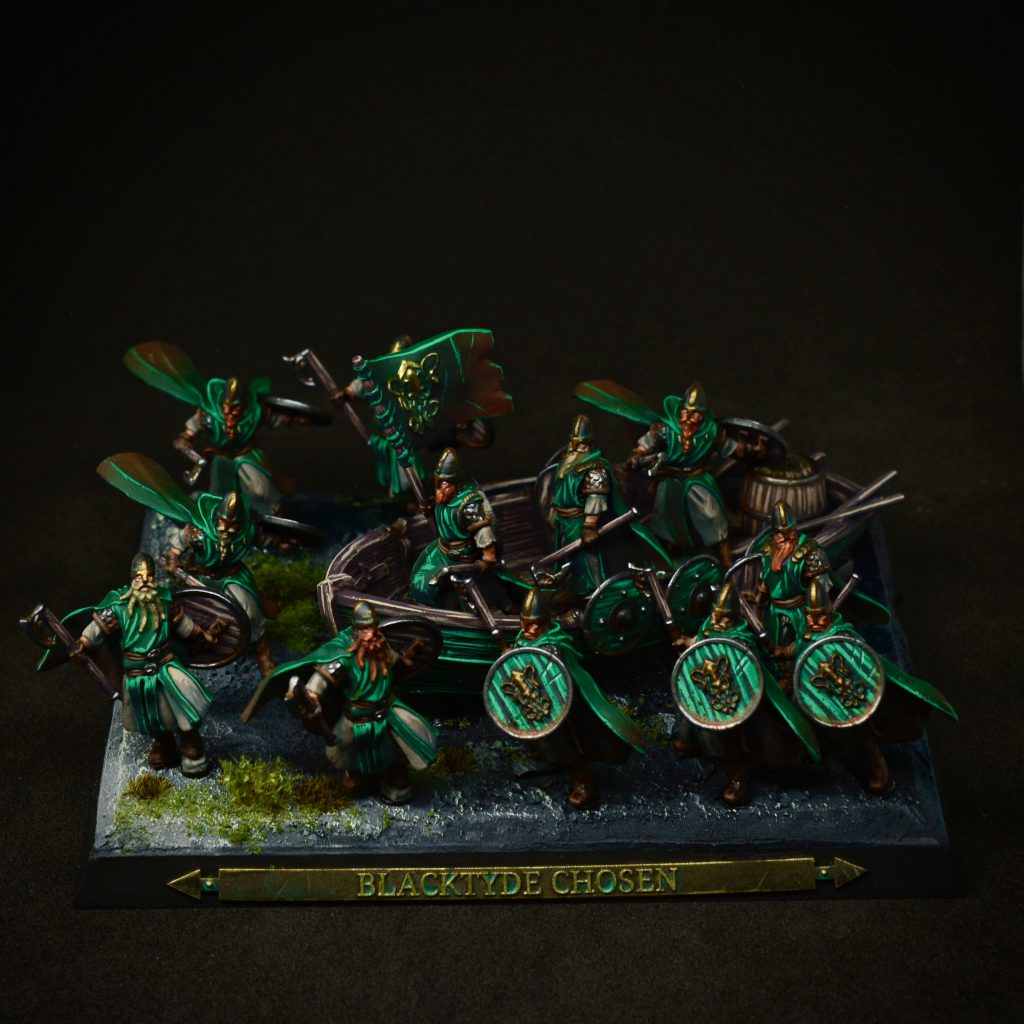
Blacktyde Chosen
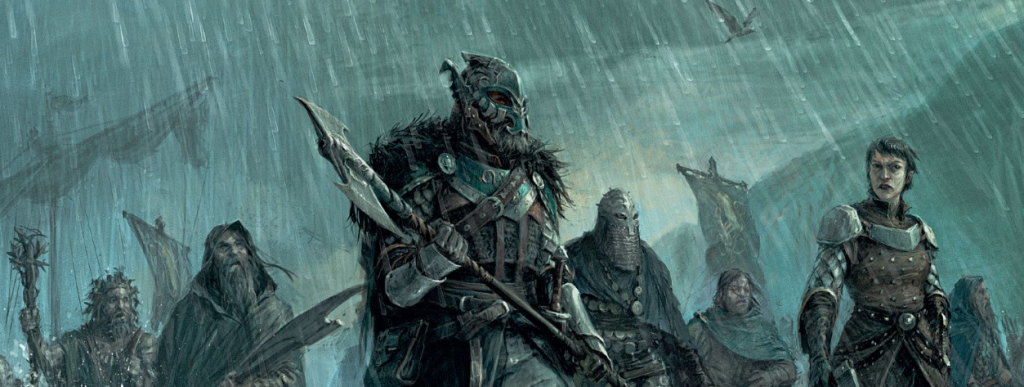
The artwork from the Blacktyde Chosen inspired me to build the scene with the boat. On the artwork, the Blacktyde Chosen stand inside the water and form a shield wall. So I created a scene in which the Blacktyde Chosen jump out of the boat, go ashore and form a shield wall against archers.
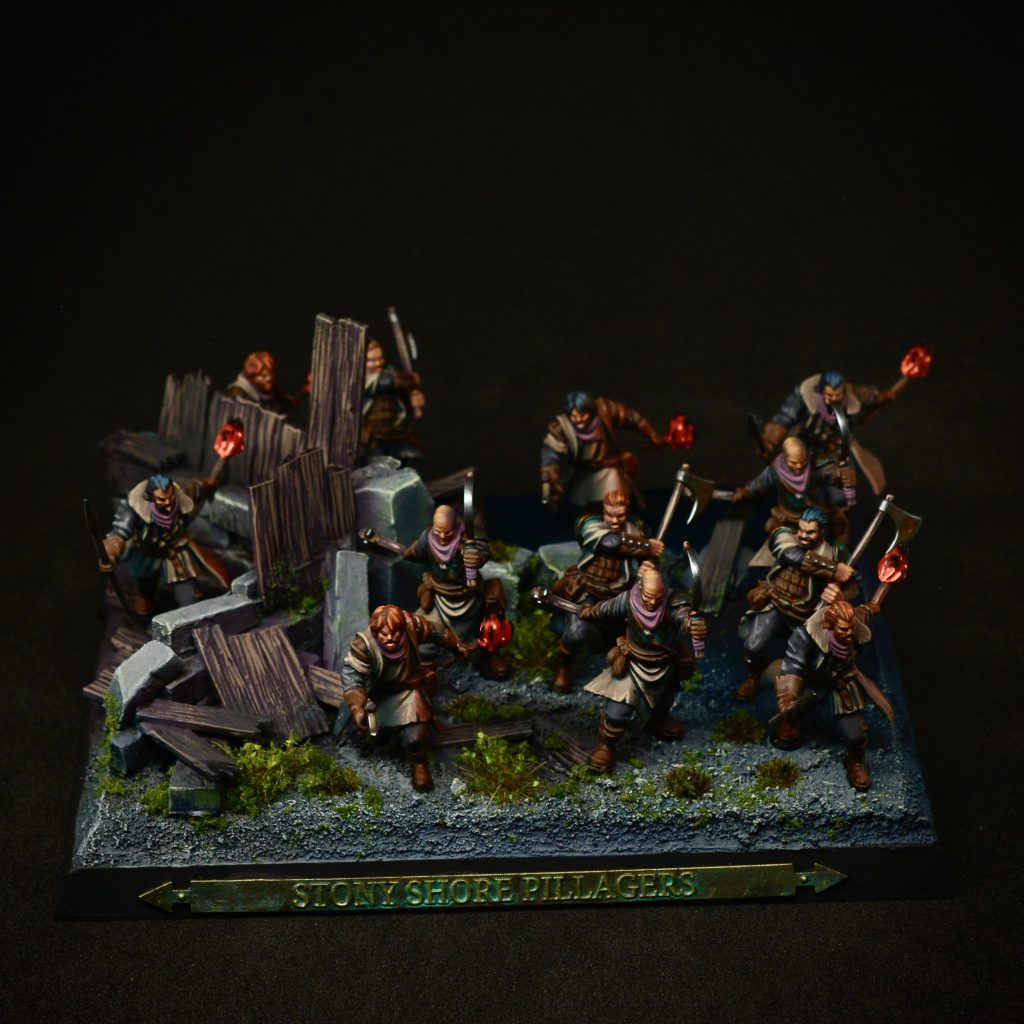
Stony Shore Pillagers
The Stony Shore Pillagers have some models with torches. These models inspired me to create the scene with the house. The pillagers are pillaging and burning down houses, etc. so I included a burnt ruined house in this scene.
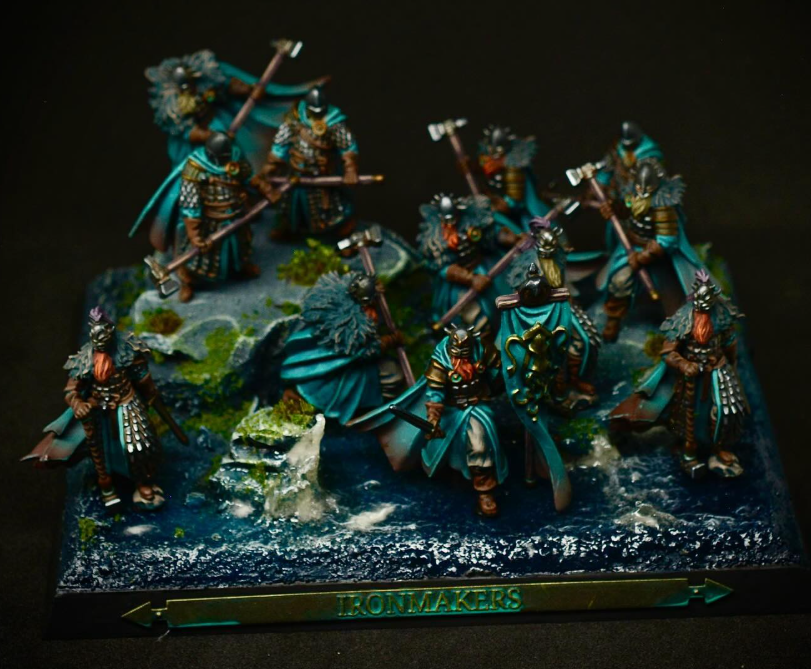
Ironmakers
The Ironmakers – one of my favorite units in the Greyjoys. They are the rock in the surf, as we say in Germany. No matter how high the waves hit, they remain calm. That’s why I chose rocks and water for my ironmakers.
On the internet I call myself mitch.scribbles. You can see my painted stuff on Instagram. I usually paint entire armies. here and there a bust or a diorama. my next project will be the Brotherhood without Banners. I’ll probably build some forest scenes for this. like Robin Hood for example – but that’s something for another article. possibly in the future.
Summary
In total, it took me about 10 weeks. 122 Minis. That’s 1.7 minis per day… Quite ok for the fact that I didn’t choose the easiest way with the scenic bases and the water effects. At this point I would also like to thank all supporters. My Wife, my Son, Sigurd, Tobi, Gidti – without you, the army would not be the same.
I didn’t go into everything so that the article wouldn’t be too long. I know. It is long. I didn’t talk much about my painting techniques, how I paint skin variety and also not about my tools like paints, brushes, etc Maybe that’s something for another article.
Did you like the article? Do you have any questions? Feel free to put that in the comments, then I’ll try to answer everything.
Take care and see you soon,
Stefan aka Mitch.scribbles
—
Thank you Mitch for sharing how you achieved such a phenomenal project. The talent on display here is next level and it is something we would all love to see more of in the future. You can find Mitch on Instagram under Mitch.scribbles and see other awesome pieces from the ASOIAF range but also other systems.
Have any questions or feedback? Drop us a note in the comments below or email us at contact@goonhammer.com. Want articles like this linked in your inbox every Monday morning? Sign up for our newsletter. And don’t forget that you can support us on Patreon for backer rewards like early video content, Administratum access, an ad-free experience on our website and more.
