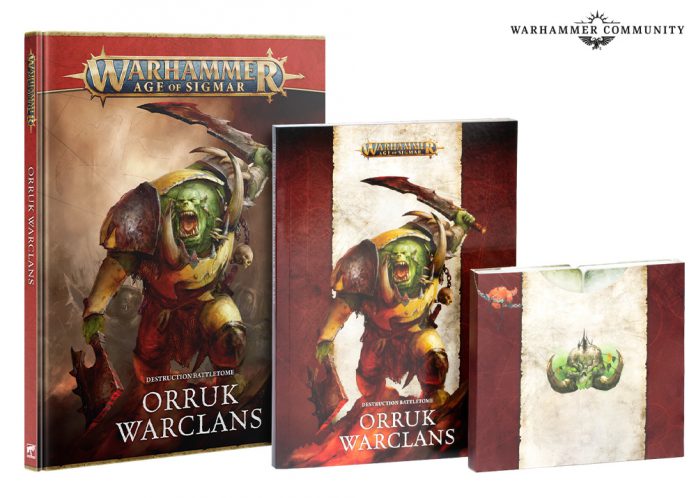
Please note: The Battletome doesn’t come with printed points; we’ve operated on the assumption that the very recent battlescroll is indicative of what those will be.
Back once again with the renegade book setup, Orruk Warclans returns as the only Battletome with two completely discrete armies in it, leading Destruction players everywhere to ponder, “Why isn’t there a Duardin Warclans book?”
With Bonesplitterz hurtling towards the grave like a 2002 Xbox advert, we’re left with the two main warclans: Ironjawz and Kruleboys. Ironjawz are a nice honest combat army with lots of armoured orruks; Kruleboys are the exact opposite, being squishy and tricksy. As with the Faction Packs, each of these is a fully fledged army in its own right, but the Battletome also heralds the return of an old favourite (or a terrible bit of design, depending on who you ask) in the Big Waaagh! which lets you jam the warscrolls from both armies together with a new set of battle traits. It was such a popular option previously (mostly due to its power level relative to the other options) that Big Waaagh! being back is no shock, and its implementation as an army of renown makes a lot of sense.
Changes from the Faction Pack
I need to preface this by saying I spent a lot of the third and early fourth editions of Age of Sigmar playing Ironjawz, so I’ve done the time in the mines. I’ve been looking forward to this Battletome for a while, hoping that it would finally be time for a significant change and a chance at decent performance, rather than a reprint of the Faction Pack with some minor tweaks. The Slaves to Darkness release gave me a decent chunk of hope here, with some very real and interesting changes between index and Battletome releases.

Spoiler alert: It’s very much the latter here, unfortunately. Ironjawz Battle Traits remain exactly the same as the faction pack, with the added sting that the Ironjawz Waaagh! reverts to its pre-FAQ limit of once per game. Understandably, printing timelines might be to blame here, and it’s probably reasonably likely that we’ll see an early FAQ to bring this back in line to its current implementation of once per turn (and once per character per game). Otherwise, the Ironjawz faction rules are unchanged save for an increase in range from 9″ to 12″ for Da Great Big Hand of Gork, making those teleports slightly easier to set up.
On the swampier side of the fence, Kruleboyz had a change to their Battle Traits, with the Sneaky Sneakin’ Dirty Trick now happening in the Hero phase rather than the Movement phase. As only one Dirty Trick can be used per phase, this now means that you can’t both teleport something and also give a unit Crit (5+) with Venom-Encrusted Weapons in the same turn. This feels like quite a major blow to the army, and it’s not really clear why the rules writers felt it was necessary to restrict the army in this way. It feels like the most likely answer is that the design team were concerned that the buff from the new terrain piece would make it too powerful, effectively getting guaranteed Crit (5+) on a 1+ roll, then still only needing a 2+ to teleport in the following movement phase.
Otherwise for the Kruleboyz it’s just a reduction in range of Choking Mist from 18″ to 12″. This really is the Faction Pack with the most minor of tweaks.
It’s worth noting that alongside the Waaagh!, pretty much every change from recent FAQs/Battlescrolls is not present in this book. It’s reasonable to assume they’ll be added back in.
Warscroll Changes
It’s minor changes here, too, simple enough that we’ll just list them all below.
Megaboss on Maw-Krusha: the rampage and 2d6″ pile-in are combined into the new Destructive Bulk, keeping the same effects overall except that the extra pile-in is also tied into rolling a 2+ on a D3.
Megaboss: loses the 2+ roll to give Brutes an extra attack, but in exchange gets to drag Brutes with him when he fights, and gives them +1 attack when he does so. Although he could previously dish out +2 attacks, this feels like an upgrade given that his previous post-combat boost was never used, because why would you ever fight with this guy before a stacked unit of Brutes got picked?
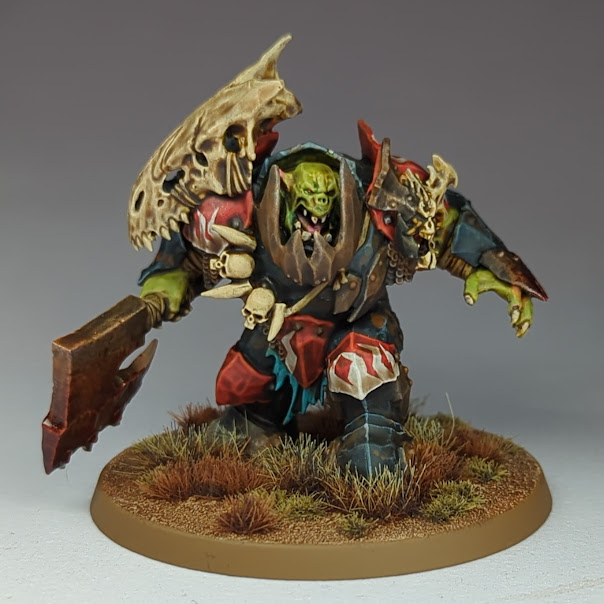
Ardboyz: The Shield Bash has changed – it’s now 1″ range rather than combat range, but only models within 3″ of the target unit get to bash now. However, this can now be used every combat phase regardless of whether the target has charged, meaning it can be used much more aggressively and the Ironjawz player can try to maximise the models in bash range with their charge move. If you want to spend a lot of time measuring 3″ and trying to maximise rolls, there’s some potential here.
Tuskboss on Maw-Grunta: The main weapon now hits on a 3+ instead of a 2+.
Gore-Gruntas: One extra attack on the Orruks’ weapons, but the Tusks now hit on a 5+ as penance. Awful trade given that the tusks are the source of almost all the damage you might really expect this unit to put out.
Gobsprakk: His Daemonfinga Staff is now called a Bogbark Staff, for some reason.
Killaboss on Great Gnashtoof: An extra attack on the Boss-stikka, but now hits on a 4+ down from a 3+. Heaven forbid an orruk is good at combat. To be fair, this does now match all other Killabosses.
Swampcalla Shaman with Pot-Grot: Foul Elixirs now works on a 2+, and the mortals on a 1 can now be warded. Minor upgrade.
Breaka-boss on Mirebrute Troggoth: Damage from the Breaka-Harness can now be warded, but maybe that’s bad actually? You don’t want to spike your ward saves at a moment where you’d really like 6 extra attacks.
Snatchaboss on Sludgeraker Beast: What feels like quite a major downgrade here. Instead of buffing a unit’s damage characteristic, Sludgeraker Venom now gives the unit the Sludgeraker Venom keyword for the turn. Festering Wounds now triggers on up to 3 units damaged by this model or it’s chosen venom recipient, with the same effect of doing D3 mortal damage on a 2+ and giving them -1 to wound. The debuff is nice for your fragile army, but you’re trading a complete doubling of Gutrippaz damage output for a chance to do a few mortal damage on a dice roll.
What’s New?
Warclans got off light, with no warscrolls retired with this book. Instead, we get one new unit, faction terrain for each army, and a new lore of orruk-specific endless spells.
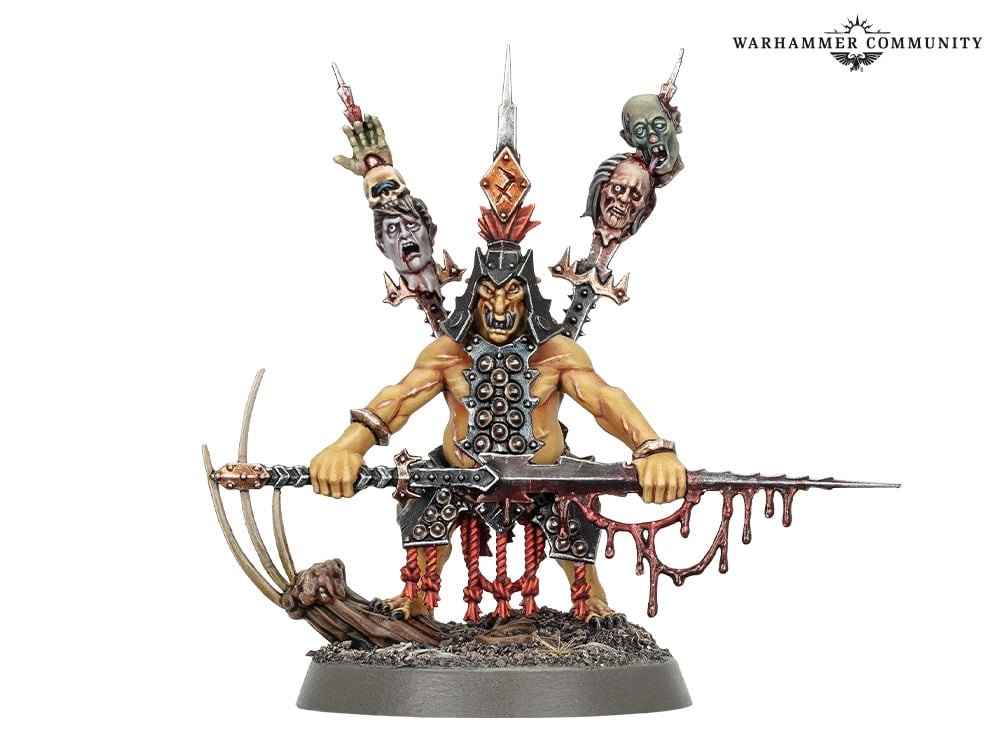
Hobgrot Slittaboss: A new year dawns, and another army is receiving a 5-health foot hero. This guy is nothing to write home about for the most part, with a distinctly bad melee profile and the ability to drag Hobgrot Slittaz with him when he fights – hardly a hammer and anvil combo. His Toxic Stash ability is fun though; once per battle, he can pick an infantry hero he’s in combat with and roll 2D6, and if the roll beats the target’s health characteristic it is automatically destroyed. This is slightly better than your average model destroying ability, although probably not one you’ll want to invest points in given that most infantry heroes aren’t exactly hard to shift. It is very conceptually funny to imagine him exploding the Celestant-Prime, though.
Bossrokk Tower: The Ironjawz tower lets you pick an enemy unit within 18″ and give them -3 control, -1 to cast/pray, or -1 dice to charge (the standout choice). Unfortunately this only happens on a 4+, or a 3+ if you choose to garrison the tower with an infantry hero. That’s still failing one in three times, and pretty much every Ironjawz hero wants to be keeping friendly units at short range to hand out buffs. It’ll come in clutch occasionally, but it’s far from exciting.
Skaregob Totem: Kruleboyz, on the other hand, should get a lot of mileage out of their new faction terrain. In your hero phase you pick a friendly Kruleboyz unit wholly within 12″ (or 18″ if garrisoned) and they get a +1 to all of their Dirty Trick rolls until the start of your next turn. Compared to the Bossrok Tower this is excellent – there’s no roll to make it happen, and it’s genuinely useful. As mentioned earlier this can give a unit a guaranteed Dirty Trick if it’s your first one of the turn, and just makes the ability a bit more reliable as long as you can keep your intended target in range of the tower.
The manifestation lore is shared between both factions, and consists of three spells.
Foot of Gork: This is the rare combination of thematically fun and also great. This pair of fantastical feet stomps across the battlefield turn by turn, with one piece moving each time. Each enemy unit within 3″ of the stomping foot gets a D3 roll and on a 2+ takes that many mortal wounds, and loses a dice from its charge rolls until the start of your next turn. Great for controlling the flow of the battle.
Gork-Roara: Has a push-your-luck kind of mechanic where you roll either one or two dice after choosing to buff a wizard or priest’s casting/chanting rolls by the same number. Each 1-2 does a damage to the target, but each 5+ adds 1 to charge rolls for units wholly within 12″ of the manifestation. It’s a bit random, but the armies’ priests and wizards will appreciate the help with getting those important spells and prayers off.
Morkspit Marsh: Nice and simple – no running and -3 control for enemies while within 6″ of the marsh. The spell has 18″ range and does not have to be placed away from enemies, so this will be situationally great for turning the balance of control on an objective or denying your opponent a late-game run to score a battle tactic.
Armies of Renown
You’ll get three new Armies of Renown in this Battletome – one each dedicated to Ironjawz and Kruleboyz, and the return of the combined Orruk force in the form of Big Waaagh!
Big Waaagh!
This army can include any Ironjawz or Kruleboyz units (Kragnos has the keywords, so he can join), but there’s a catch – for each regiment led by a Kruleboyz hero you must include one led by an Ironjawz hero, and vice-versa. This could make filling in the end of a list quite difficult, and realistically means you’ll be running 2 or 4 regiments most of the time.
Battle traits wise, you can give two heroes (one Ironjawz, one Kruleboyz) an extra heroic trait in the deployment phase, in addition to the one chosen at list building. More on those traits in a moment. Additionally, in your hero phase you can choose an Ironjawz and Kruleboyz unit to have the Power of the Waaagh! for the rest of the battle round, which gives them +1 to run and charge, or Crit (5+), respectively. No word yet on how this works if you’re going second in the round – as written it’ll expire and if you go second in the next round you’ll be devoid of the buff. It doesn’t feel like such an advantage that it needed to be tuned down, so maybe this will be FAQed to “until the start of your next turn” if the designers feel the army is lacking impact after release.
Rounding out the battle traits is Rally The Warclans, allowing you to bring back a destroyed unit each turn with half the models, rounding up. Great for a bit of longevity in an army that often falls apart quickly.
There are four Heroic Traits to pick from, of which you’ll feasibly be using three in any given game. Takin’ Names lets the bearer gain permanent Power of the Waaagh! if it kills a hero, A Proper Sneak gives a 5+ ward bubble for the rest of the battle round, Da Old One-Two gives a 12″ aura of Crit (2 Hits), and Get Krumpin’! gives a bubble of +1 to wound. These are all pretty great, but it’s worth noting some restrictions on the three active abilities – they’re all once per battle, the hero has to have the Power of the Waaagh! on the turn they use it, and you can only use one of them in any given turn. Still, they’re all worth having, and you should have a good amount of flexibility on when to use them.
Elsewhere everything is just a single choice: one artefact (bouncing mortals on a 6 to save), one manifestation (Foot of Gork), one spell (buffing Ironjawz when they’re near Kruleboyz, and vice versa), and one Prayer. The Prayer is of note, as it gives a unit in combat fights twice this turn, with the usual caveat of the second combat being Strike-last. Great for giving your opponent a bit of a worry if they’ve charged into your lines hoping to bog a unit down.
Overall, Big Waaagh! definitely feels playable. As with previous iterations, I’m sure we’ll see the obvious choices for units float to the top over the next couple of months – our money is on Ardboyz and Brutes for Ironjawz, backed up by some Kruleboyz shooting units now that the obvious “block of Gutrippaz around a Sludgeraker” strategy has been dialed back.
Zoggrok’s Ironmongerz
This one’s all Ironjawz. Unsurprisingly, given the name, this horde of lads has to be led by Zoggrok Anvilsmasha, and alongside him you can include any Ironjawz infantry models. No cavalry support needed here.
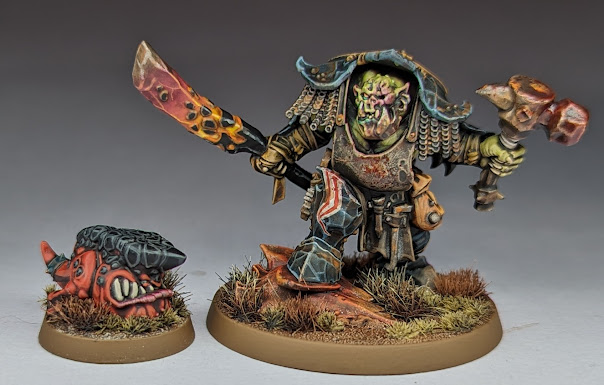
Up first, everything in the army gets +1 rend against Faction Terrain and War Machines. This is situational at best, but becomes very upsetting for your opponent if you happen to match into a Kharadron player (or a Steam Tank enthusiast). The army also gets some movement tech in the form of Into Da Breach at the end of every turn, with a unit getting a D6″ move if it’s more than 9″ from enemies and suffered any damage this turn. Great for closing down those pesky shooting units with your footslogging orruks. Zoggrok also gains a 4+ ward when he’s within combat range of any Ardboyz, although all warded damage is passed onto the Ardboyz unit (and cannot then be warded by them).
Finally, Ardboyz units get a 5+ ward while they’re wholly within 12″ of another Ardboyz unit. Given the glow-up to Ardboyz Shield Bash, this makes walking a pair of units up the centre of the board quite an appealing proposition. A block of 20 has 40 wounds behind a 3+ save, and a 5+ ward makes them truly unbearable to try and shift. This is backed up by a single heroic trait that gives 3 extra rally rolls to Ardboyz or Brutes within 12″ of the character – outrageous when stacked with the Ardboy Big Boss’s bonus 3 dice from his warscroll, for a total of 12.
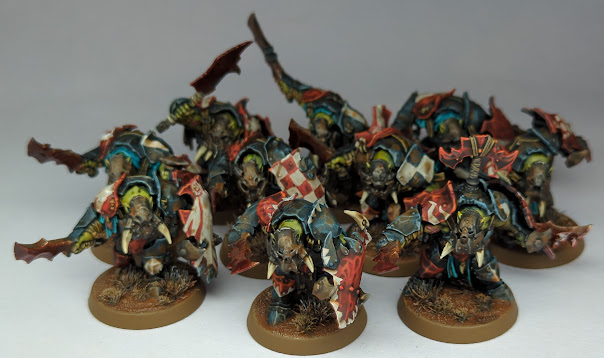
There’s one endless spell (the Gork-Roara), one spell (+1 dice to charge), one artefact (chance to give -1 to save and ignore modifiers to an enemy) and one prayer (make a terrain piece inflict mortal damage for the rest of the battle).
All in all, this feels like it might be the best way to play Ironjawz in the book. it leans into the stronger parts of the army, and gives you extra ways to improve survivability. On the downside, you do lose out on most of the usual ways of improving damage output and rend, and an army composed of entirely footslogging orruks is going to struggle to score Take The Flanks this season. Still, only being able to take infantry should mean you’re ending up with quite a lot of pretty survivable wounds on the table.
Murkvast Menagerie
A monster-focused offering for the Kruleboyz, and it’s blessedly simple compared to the previous two. Skumdrekk has to be your general, and otherwise you can include Kruleboyz monsters (except for Gobsprakk and Kragnos), one Swampcalla Shaman per hero monster, and one non-hero infantry unit per hero monster. So expect to see a lot of monsters on the table, backed up by a few screening units or Boltboyz.
Units are -1 to hit when they’re wholly within 12″ of a friendly monster, monsters get access to a 3″ move into combat (which can be used after a normal move), and monsters get an alternative Rampage where they roll a number of dice equal to their own health characteristic, and do mortal damage for each 6+. Decent, but it also prevents any other rampages in the same turn, which means you’re getting no benefit from a Sludgeraker’s venom.
The Grim Diet heroic trait gives a hero a 5+ ward with no caveats, and the Skinwriggla Larvae artefact lets you permanently pick an objective to debuff units’ control and saves while they are contesting it. The Foot of Gork appears in this army too, and the Morkish Mist spell gives an infantry unit a 5+ ward.
Overall this feels like a fun army build, although it’s hard to see it really achieving much that a regular Kruleboyz list couldn’t. The loss of Gobsprakk when so many other monsters are in play is a particular shame.
Regiments of Renown
Two regiments of renown here, one that’s all about pigs and one that’s all about…gambling?
Da Hurtlin’ Hogz
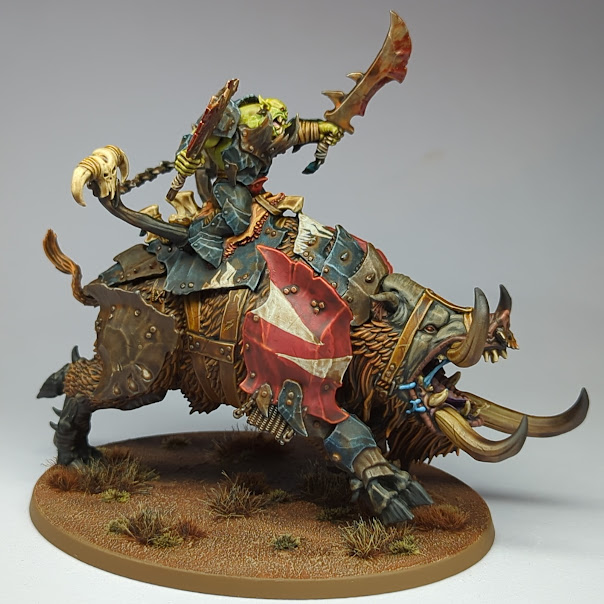
Ever wanted to add a pair of Maw-gruntas to another Destruction army? Well now you can. You get a Tuskboss and a Gouger, and the hero gets a mini Waaagh! once per battle to get each pig doing D3 mortal wounds on a 2+ against everything it gets close to on a charge, with a buff against infantry. Additionally both pigs get access to a once-per-turn (army) rampage to move D6″ after a charge, and gain one momentum point. This really helps to make sure you’re getting the most out of those momentum-dependent tusk attacks.
Overall this feels like a fun regiment, but it’s a bit unclear where you’d choose to take it. Ogors already have big charging beasts, Gitz probably can’t justify it compared to Squig Herds or Bounders, and you’re almost certainly better off taking more Gargants in Sons of Behemat. It might find some play with a Kruleboyz army, but they’re hardly short of monsters. Unfortunately it seems like the best customers for these pigs might be the Bonesplitterz, for the next six months.
Da Kountin’ Krew
Swampboss Skumdrekk is here, and he’s brought two units of Hobgrots. They can run and shoot while they stay near Skumdrekk, and in the enemy hero phase Skumdrekk can try and snatch up a model he’s in combat with if he rolls double their health characteristic. Model-targeting abilities are quite rare in the current game, but the timing in the enemy hero phase means they’ll have a move to get back into coherency – no magically killing half a unit with a carefully-targeted grab, alas.
This regiment doesn’t feel like anything particularly special – perhaps Gargants might feel like they benefit from a couple of cheap screens, but again that’s points that may well be better spent on just getting more Gargants on the table.
Big Wehhh 
To sum up: Broadly, this is not an exciting or revolutionary book for either Ironjawz or Kruleboyz players. Both armies have been struggling for a while this edition, and unfortunately it feels fair to say that post-Battletome Ironjawz are probably firmly the worst army in the game, with Kruleboyz close behind in second place.
Fortunately, Destruction players will carry on regardless, as they always do. Whilst it’s almost certainly going to struggle to hit the top tables at events any time soon, there is definitely fun to be had in the book with the Armies of Renown, and the manifestation lore feels thematic, fun and definitely useful. There’s also finally a Spearhead for the Ironjawz players, and some well-themed Path to Glory rules if you prefer to play the game that way.
After the powerhouse that was the Slaves to Darkness book, it’s a shame to be back to Battletomes that aren’t addressing fundamental issues from the faction packs that preceded them.
Have any questions or feedback? Drop us a note in the comments below or email us at contact@goonhammer.com. Want articles like this linked in your inbox every Monday morning? Sign up for our newsletter. And don’t forget that you can support us on Patreon for backer rewards like early video content, Administratum access, an ad-free experience on our website and more.



![[40k] Competitive Innovations in 10th: Death Beckons pt.1](https://d1w82usnq70pt2.cloudfront.net/wp-content/uploads/2020/01/Analysis_Banner.png)
