
Table of Contents
A “Bandit Camp” in Copia Wildwood
The Backstory
So the premise for this map is that the militia movements and war in the nation to the North of the woods have made some smuggling and thievery of the southern Menagari Coast quite profitable. To protect their operations the bandits, against all warnings, have created a small camp in Copia Wildwoods. The difficulty of travelling there is worth the risk for the protection it offers.
Unfortunately for the bandits something unexpected has slipped into their cargo and they unwittingly bring in a small rabble of mimics, who are then joined by a Shambling Mound! Sneaky monsters abound in the Copia Wildwood.
The Real Life Reasoning
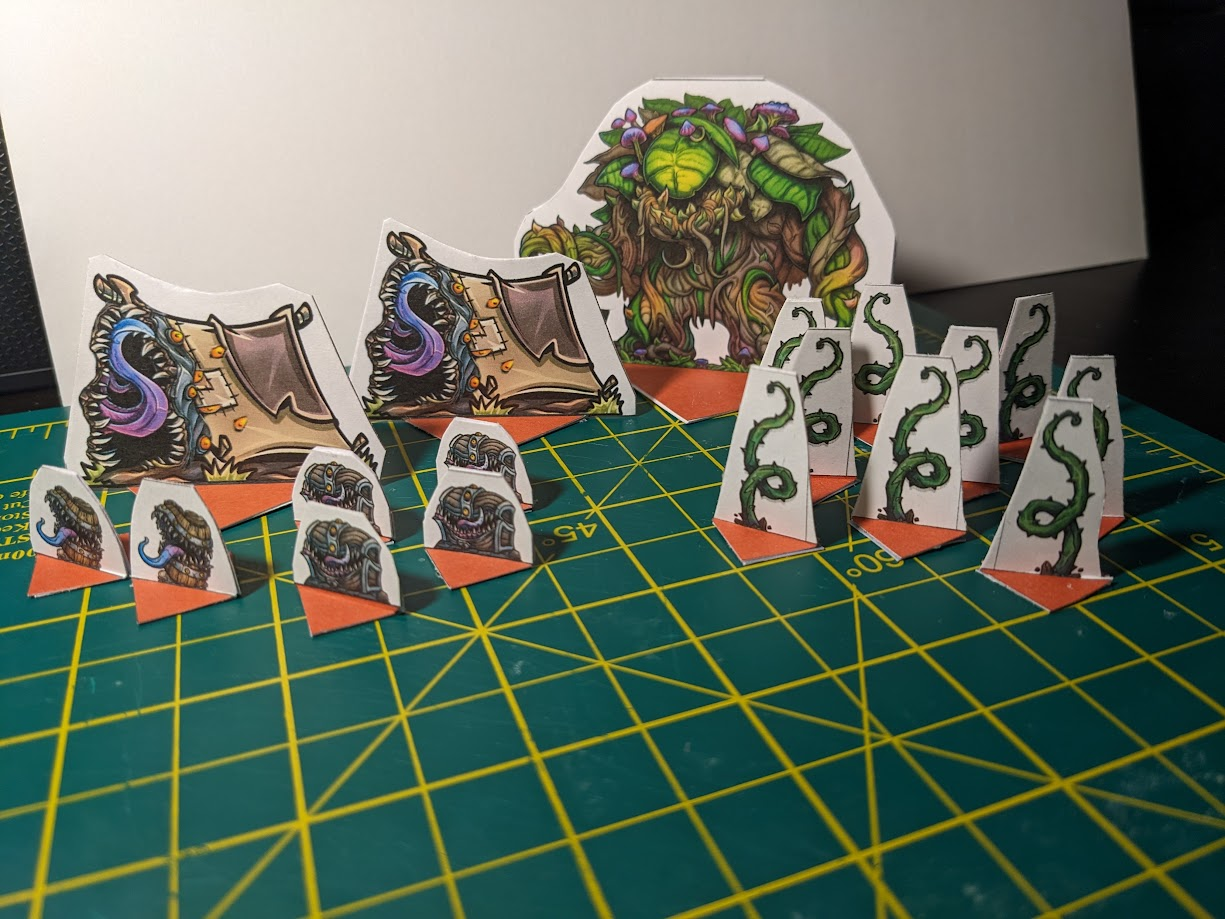
Originally this combat was going to be bandits in the woods: Clear them out, report it to a local town on the other side, and get a big reward. Standard adventurer stuff. However between that set up and reaching this point in the campaign a half dozen sessions later, human enemies are like more than half what I’ve made my party fight. It’s D&D; let’s fight some monsters. So I started to think about what monster a camp might be hiding for my party of players to stumble across. My party loves “pre-looted” things (the idea being that stolen property can be stolen without issue), so mimics would be an interesting surprise. Maybe a few different types of mimics. For my monster I’m using a combination of Printable Heroes and Paper Forge with stat lines from MCDM’s Flee Mortals (the Tents are Large Mimics with slightly increased stats that I have adapted using the Mimi and Tent minis from Printable Heroes).
The Camp
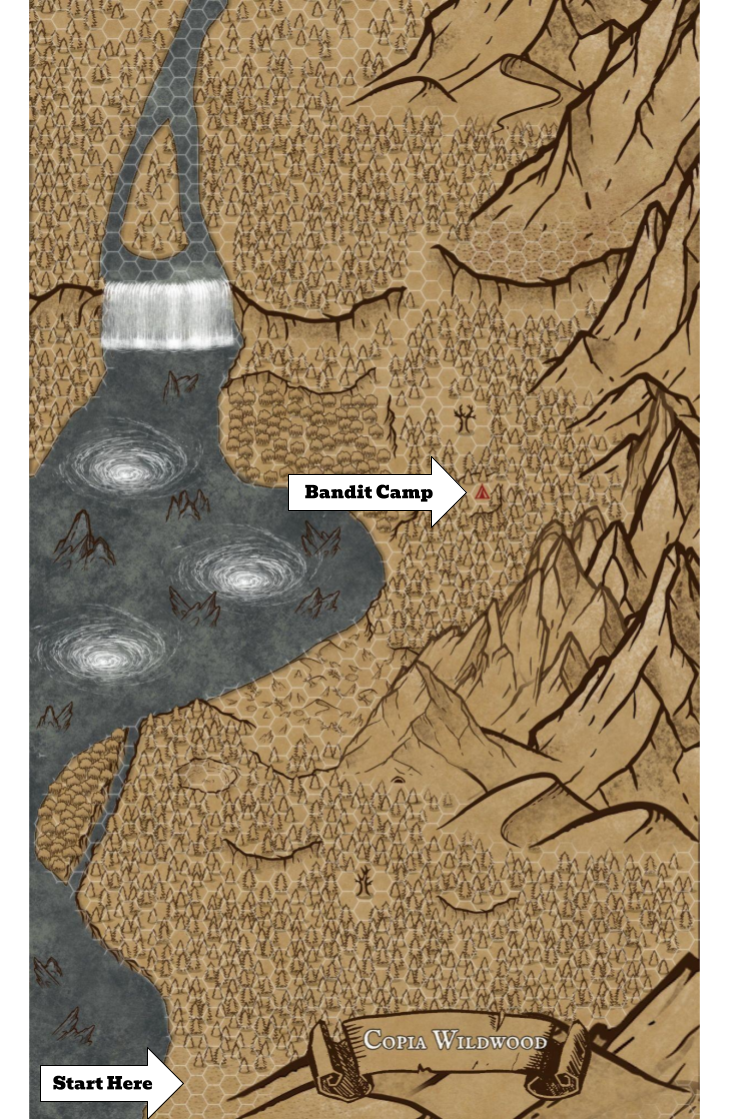
This encounter map is part of a large hex crawl through Copia Wildwoods that the party will be embarking on, their aim being to cross the 100 mile thick woods to reach the river north of Copia Falls and row/sail up river from there on into the Dwendalian Empire and their long term goal of getting one of my PCs home safely.
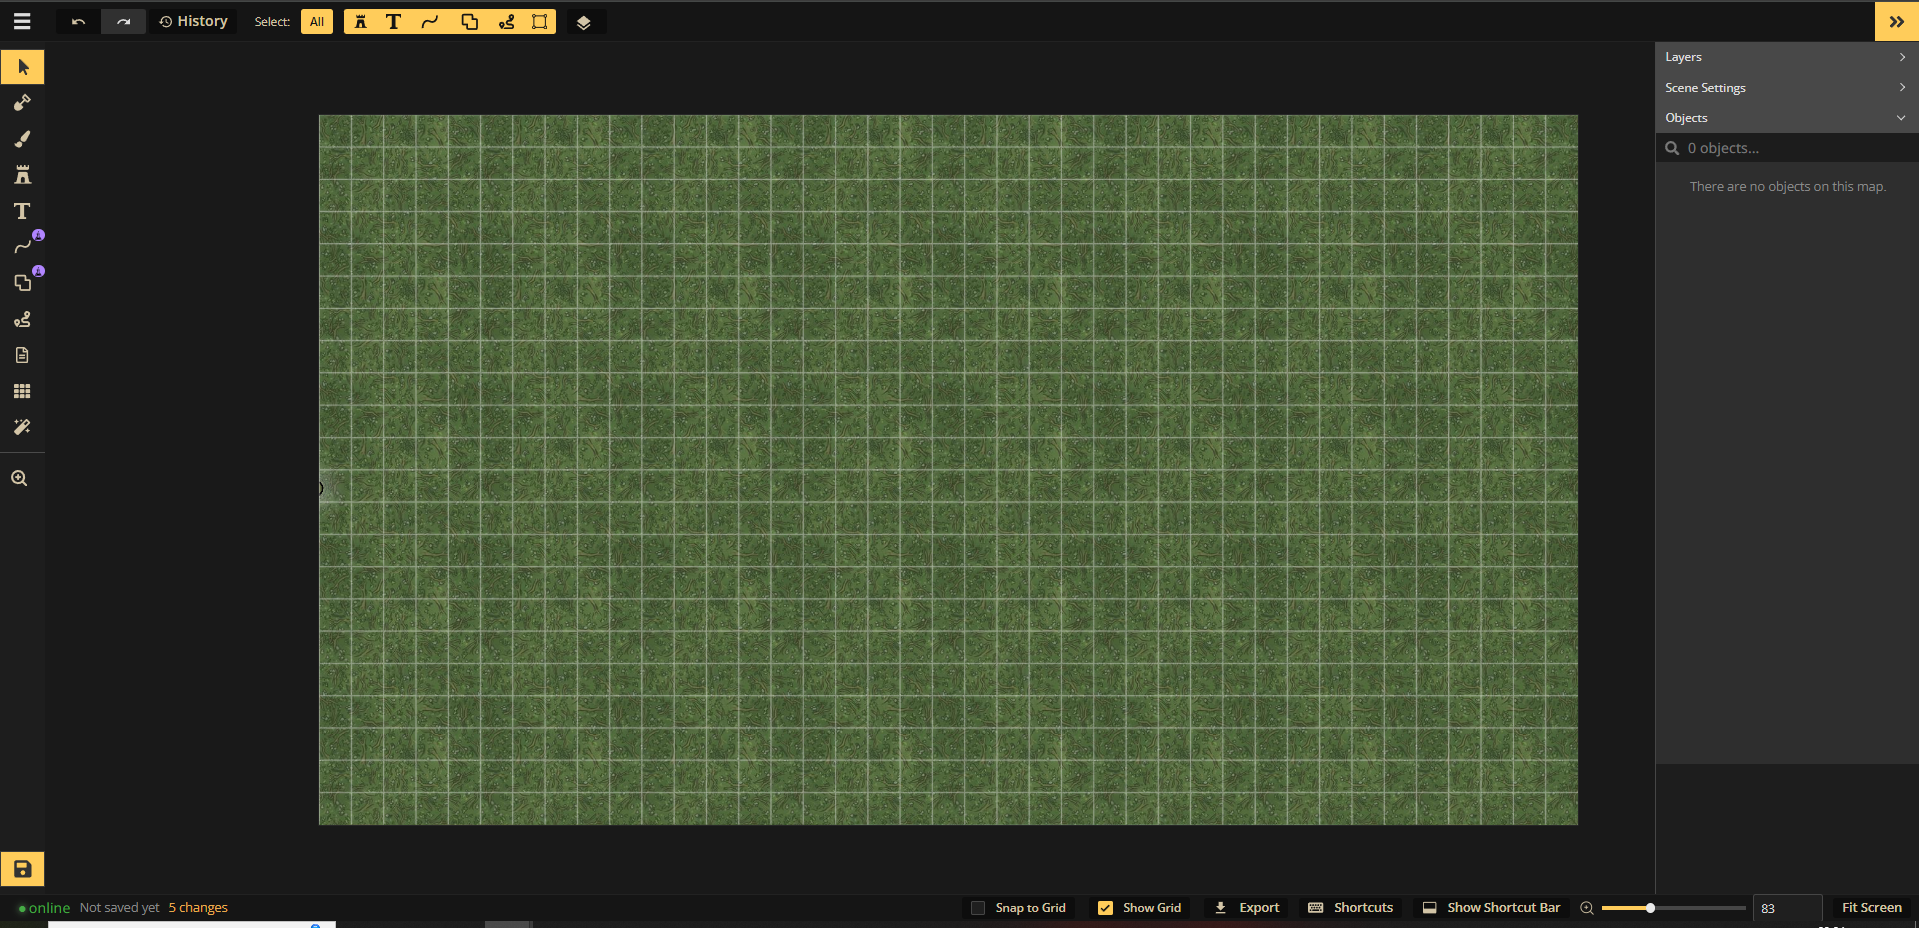
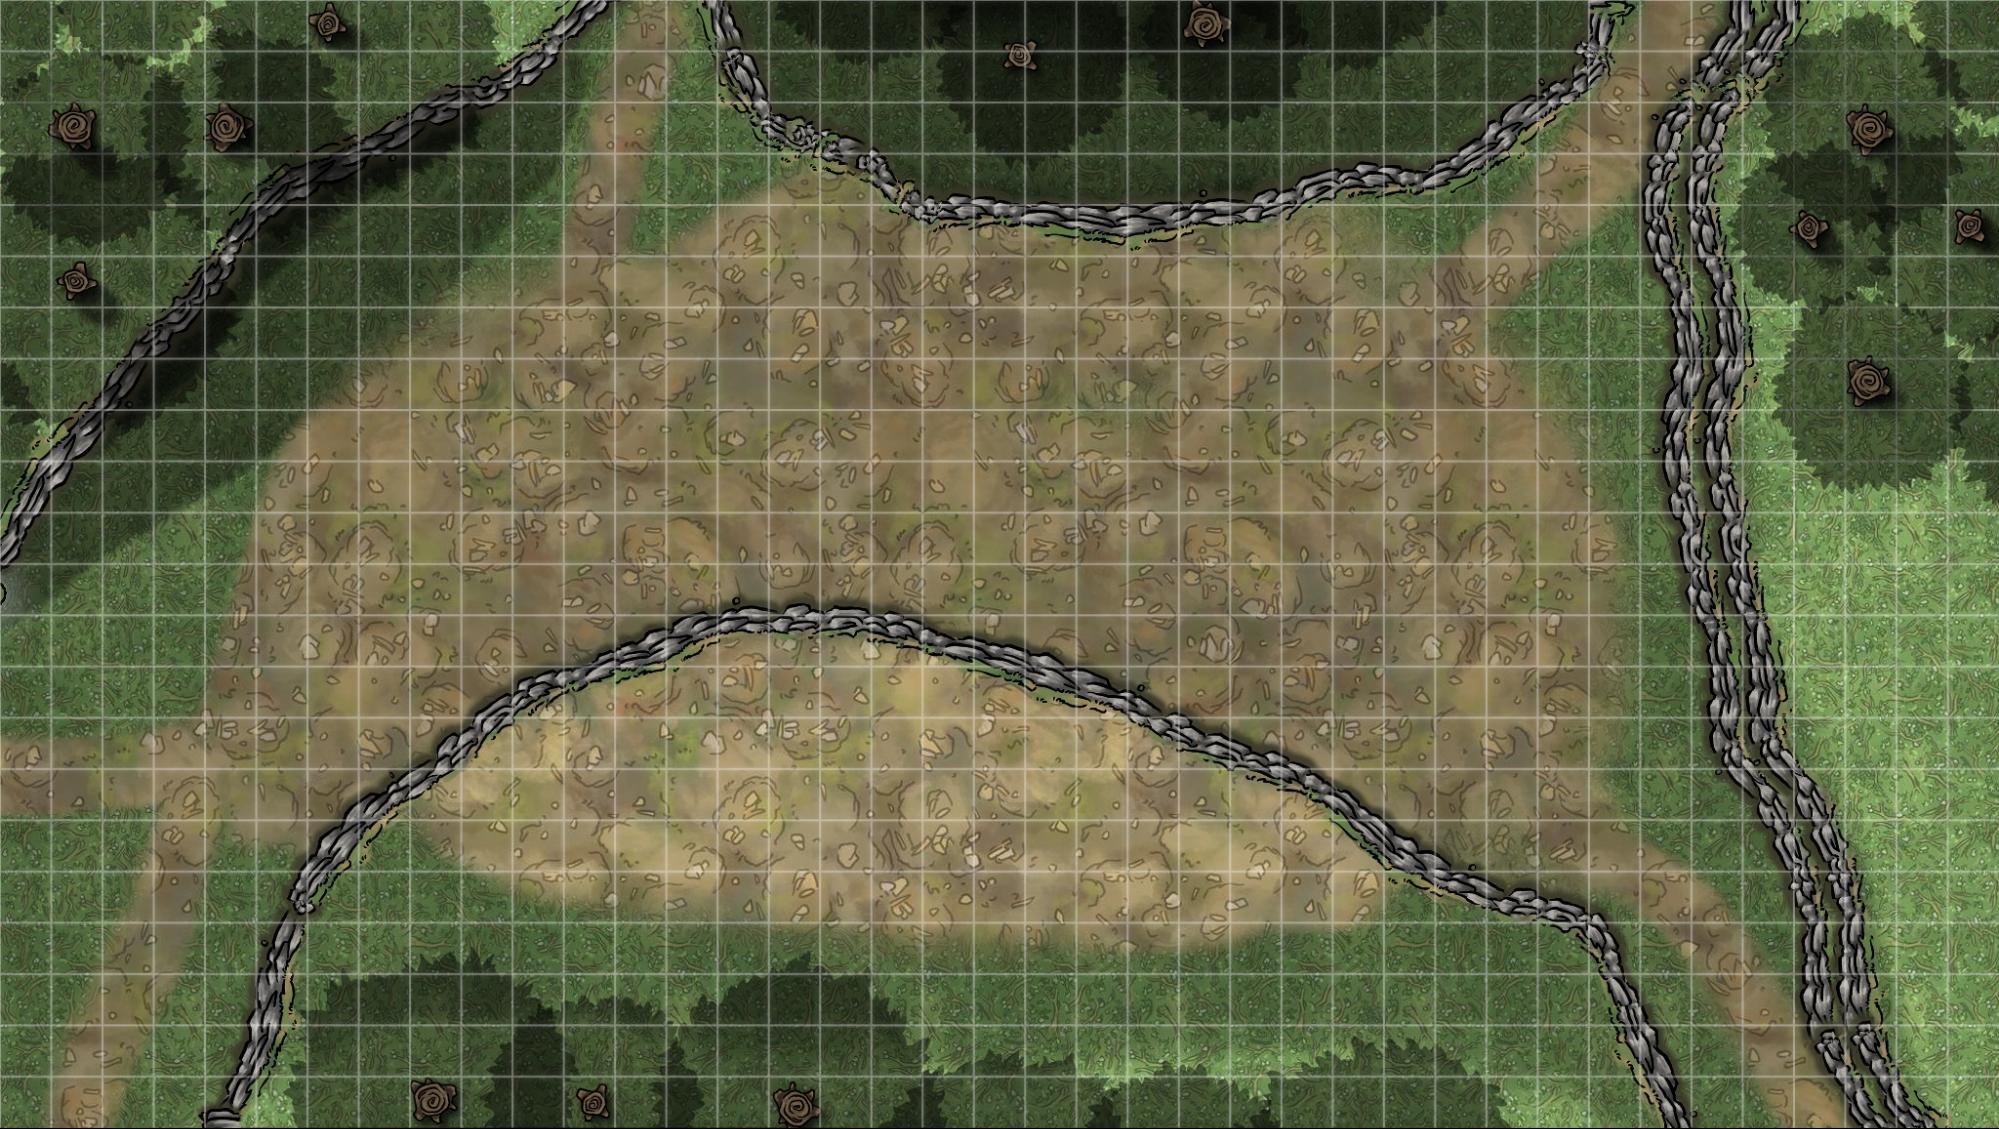
Once again I need the map to work from several approach angles, as they can move into this hex from almost any direction. So here’s my blank map; I’m using the same forest floor texture as I’ve used in other Copia Maps to keep the area consistent. This map is 39×22 because for this special group of sessions I’m pulling out all the stops and running my maps on a 27” monitor. I’m making my map in using an online map making service called Inkarnate; some of my tips and tricks will be specific to this software but most should apply to any similar tool.
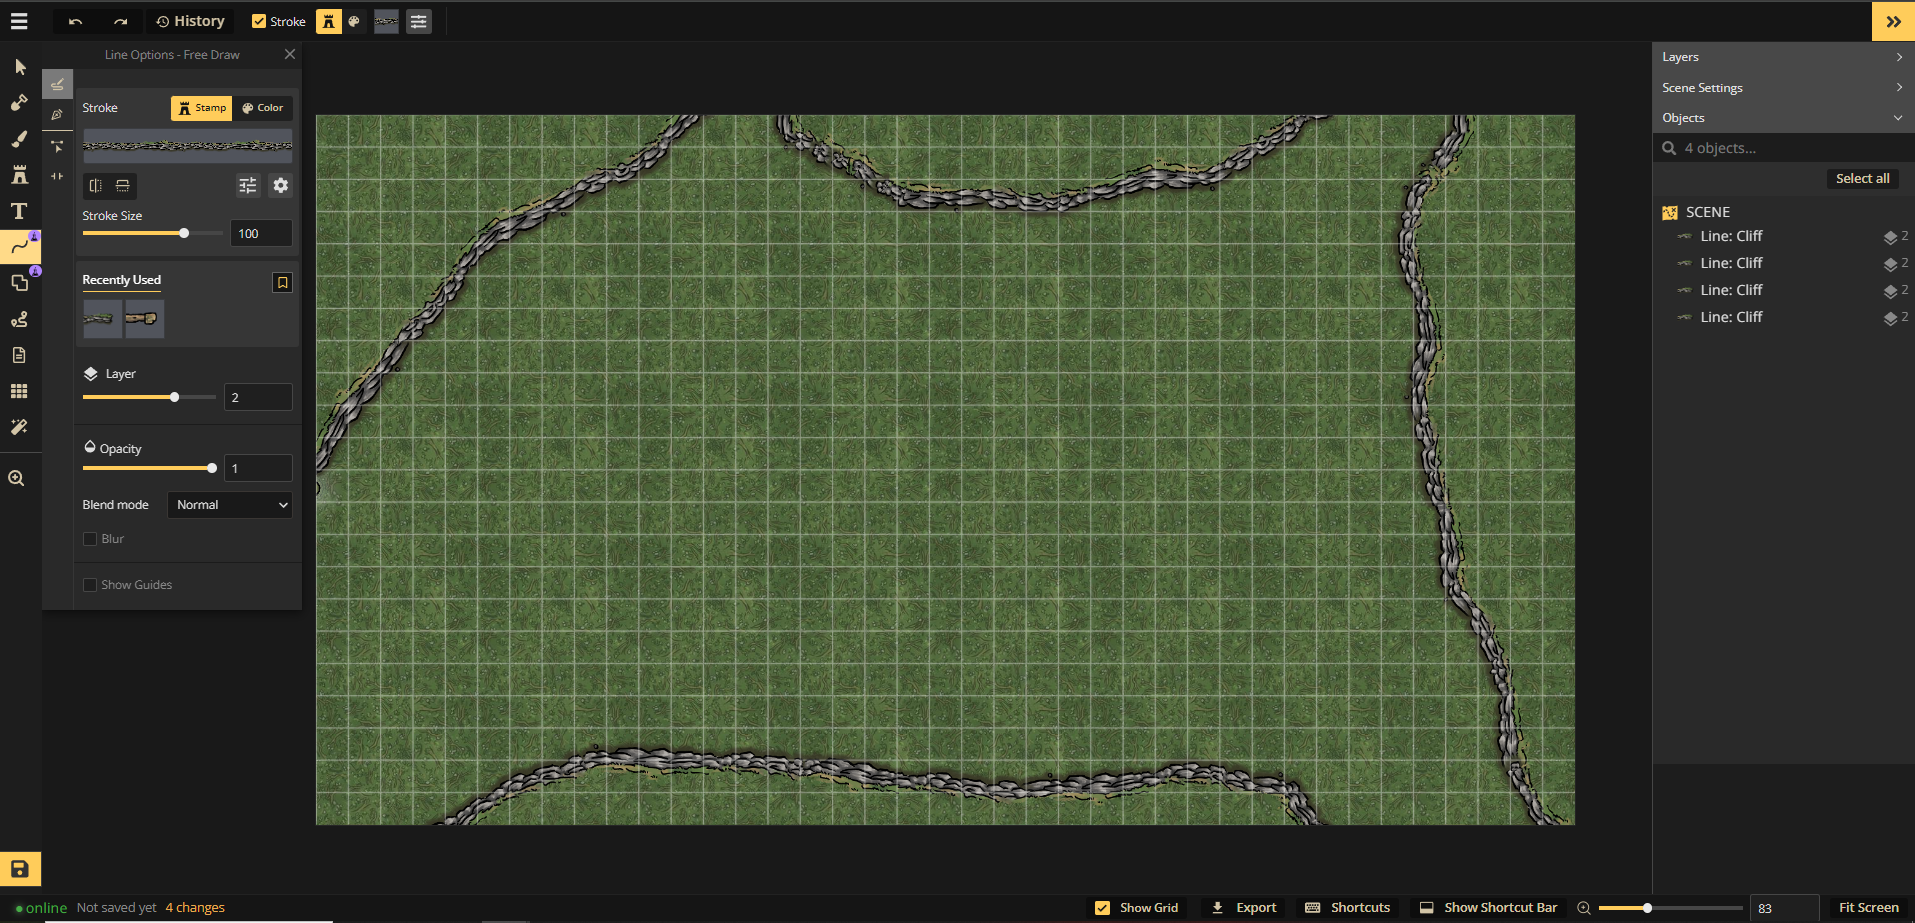
The area on the overworld map shows cliffs and some elevation so we should represent a bit of that on the map. Cliffs in Inkarnate are super easy to draw quickly with the latest beta version. The Line Tool with an appropriate cliff stamp can give us nice quick breaking up of the space into a lower central area surrounded by raised areas.
It’s still a forest, though, so we’ll add in some trees to the upper areas. I like to represent trees with an under-the-canopy view by first placing some Tree Stumps around the map; these will represent the movement and sight blocking part of the tree during the encounter.
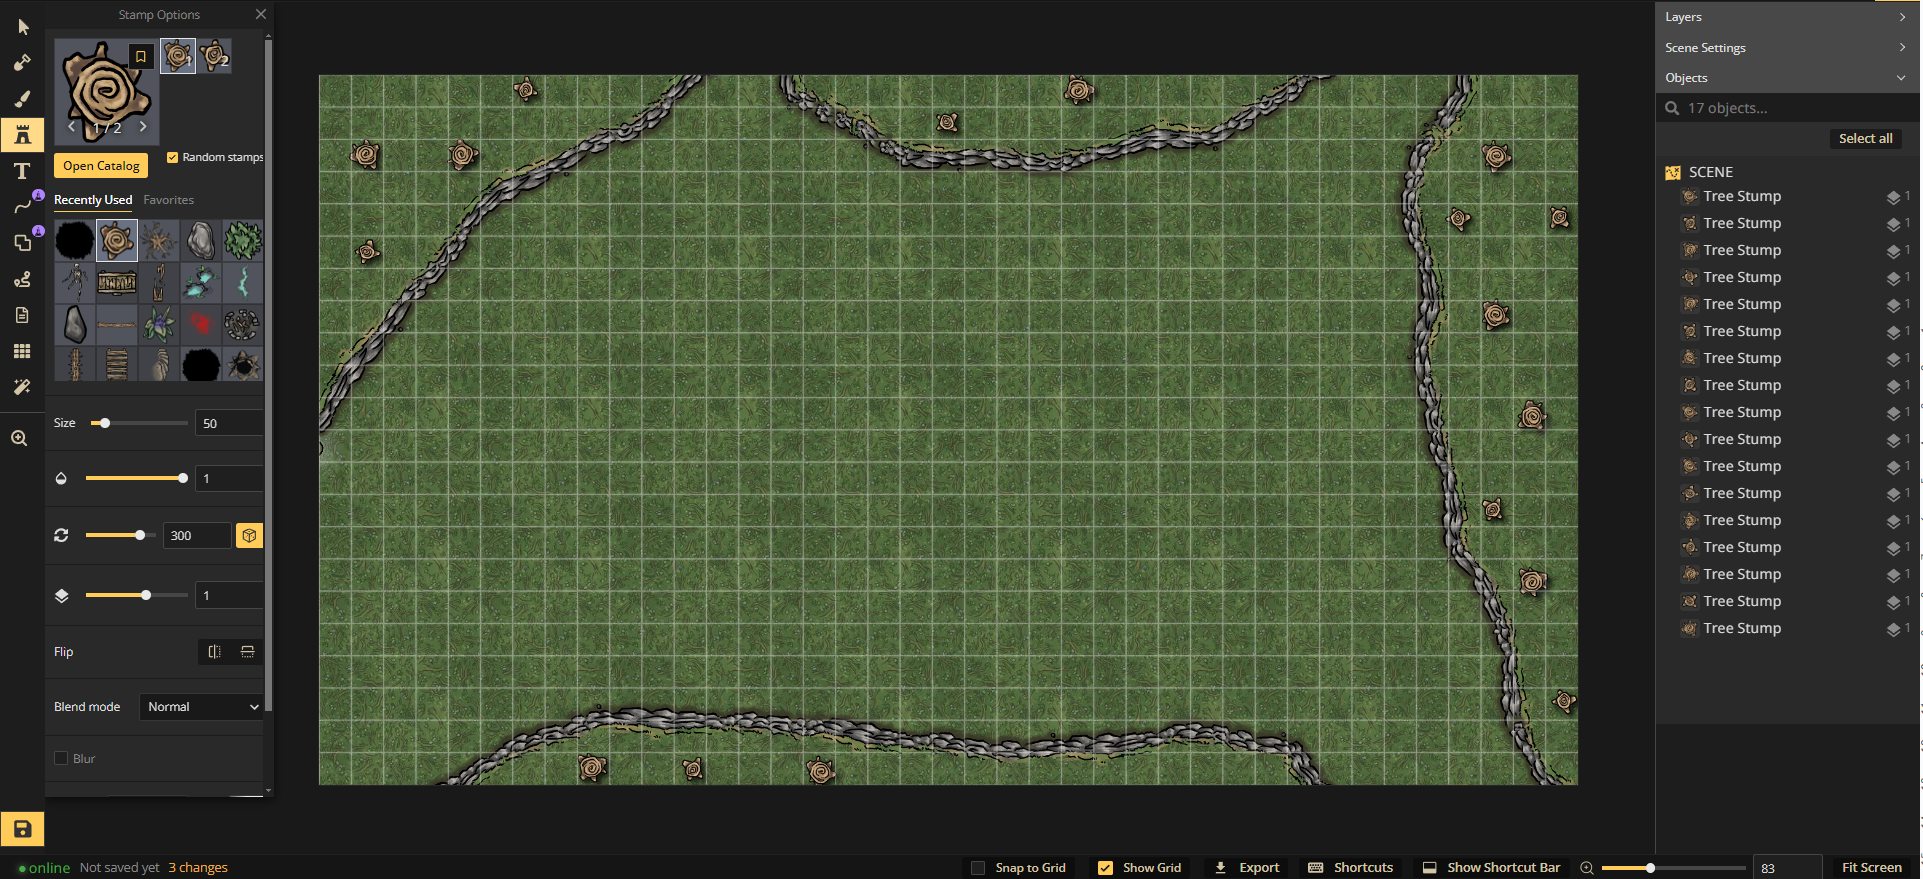
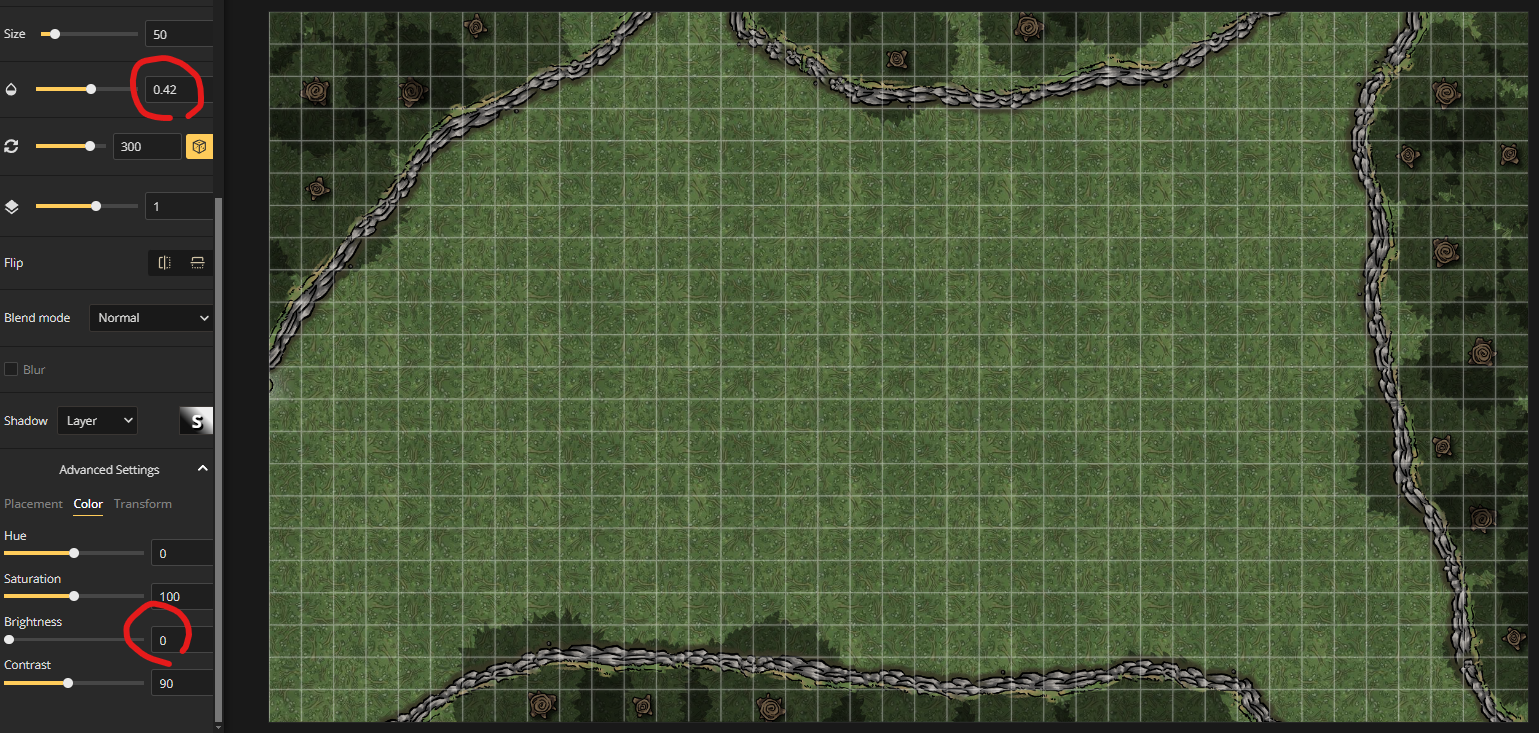
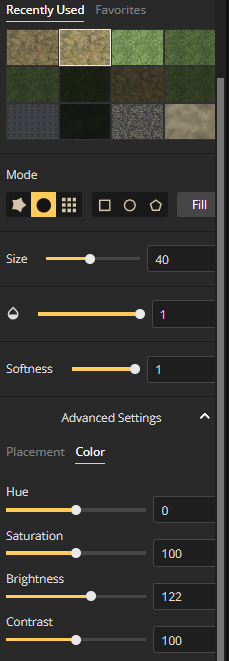
Then over the top of these stumps, we’ll add the foliage but just as a shadow, as our players will be below the canopy during the fight. We can do this in Inkarnate by selecting the Tree stamp we’d like to use, and then tweaking with its colour settings in the advanced section. By reducing the stamps’ opacity and brightness, we can make the stamp appear to be the shadow of the leaves above.
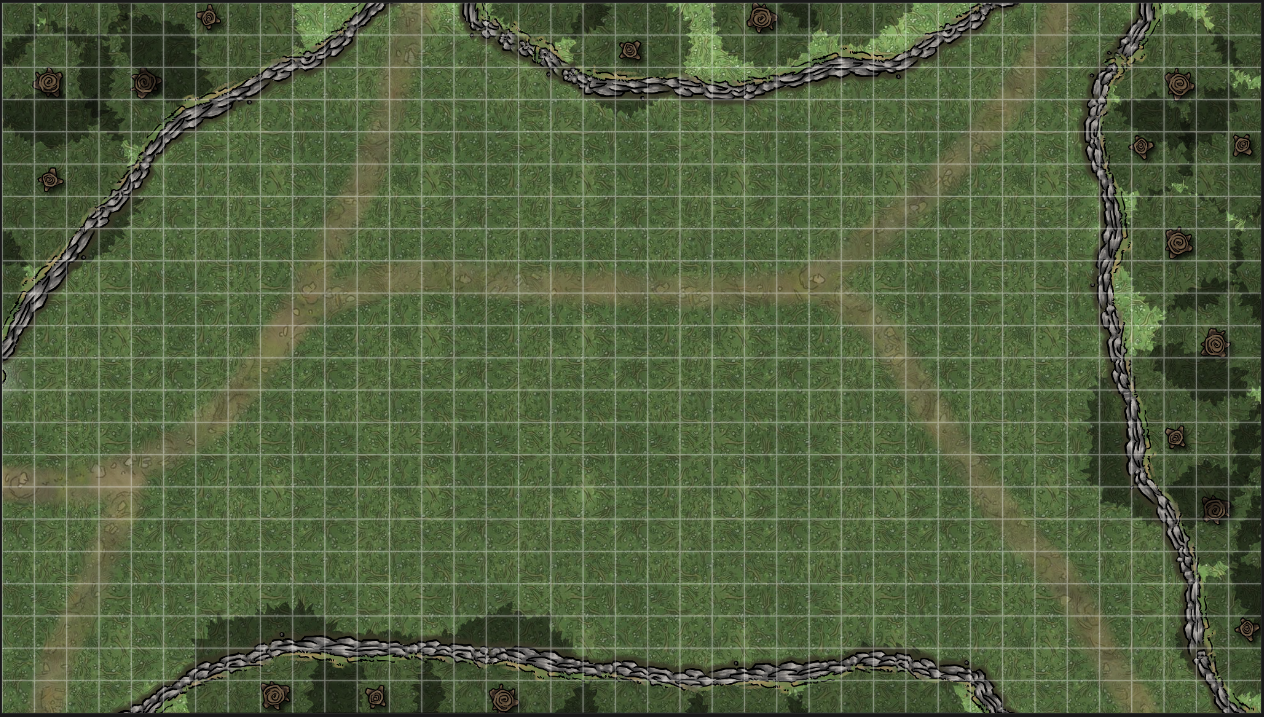
I want this camp to feel well-used and established before filling it with tents and details. So I’m going to draw down some desire-paths, well trodden routes in and out of the camp that its residents have worn down before their untimely demise.
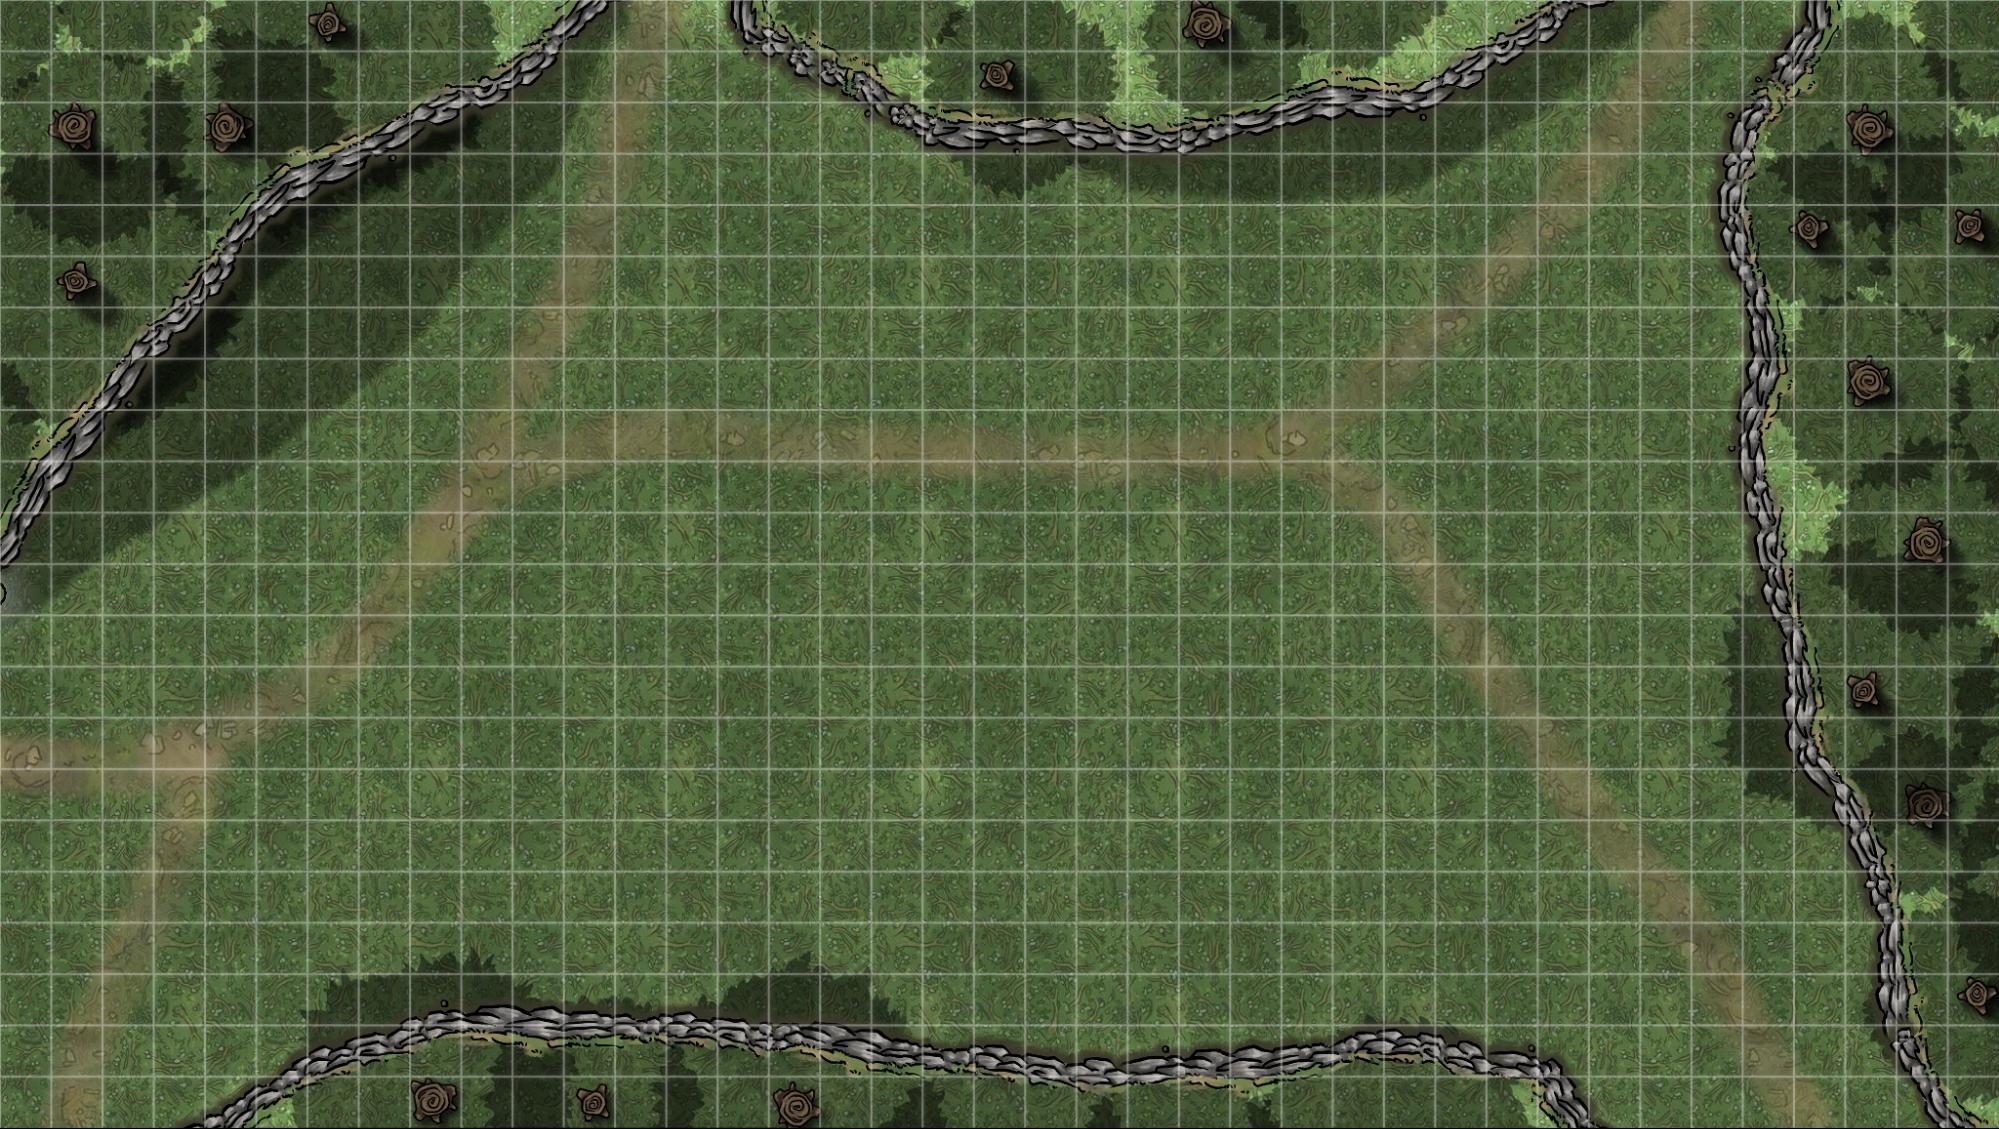
Lighting in Inkarnate is one area that still relies on a bit of artistry rather than the fancy systems that some map makers offer. I want to add a bit of shadow to a few of my cliffs to make them feel a bit taller. The easiest way I know to do this is to take the texture we’re using for our ground and lower its brightness a little to serve as an “in shadow” version. Then we can decide on a direction for the sun to be, say the top left and adjust our canopy stamps and paint in some shadows.
Reviewing the Elevated Areas
Right now the map looks like this:
But the first questions I have now is: What purpose are the elevated areas serving? Can the players or enemies use them to do much; is there space to set up anything? I want this camp to feel quite established in its environment so maybe it needs to make more use of the terrain; some rope bridges and perhaps a high lookout? Revising this in Inkarnate is pretty simple though, right now I only have two levels of elevation but I could easily increase that to four by having some lower and some even higher spaces.
I’m not sure if my approach is actually realistic or not but I tend to highlight elevation with the brightness of the ground texture. Higher up places closer to the light and less obstructed will have a brighter version of the texture than lower areas more in shadow.
Every texture you use in Inkarnate can be made darker or brighter as required; I do recommend favoriting a few of these tweaked textures though as your recently used panel only has a limited size and you might want to switch back to them later. I’ve also clearly made the right-hand area higher by doubling up the amount of cliff edges.
Connecting Areas Up for PCs and Mobs
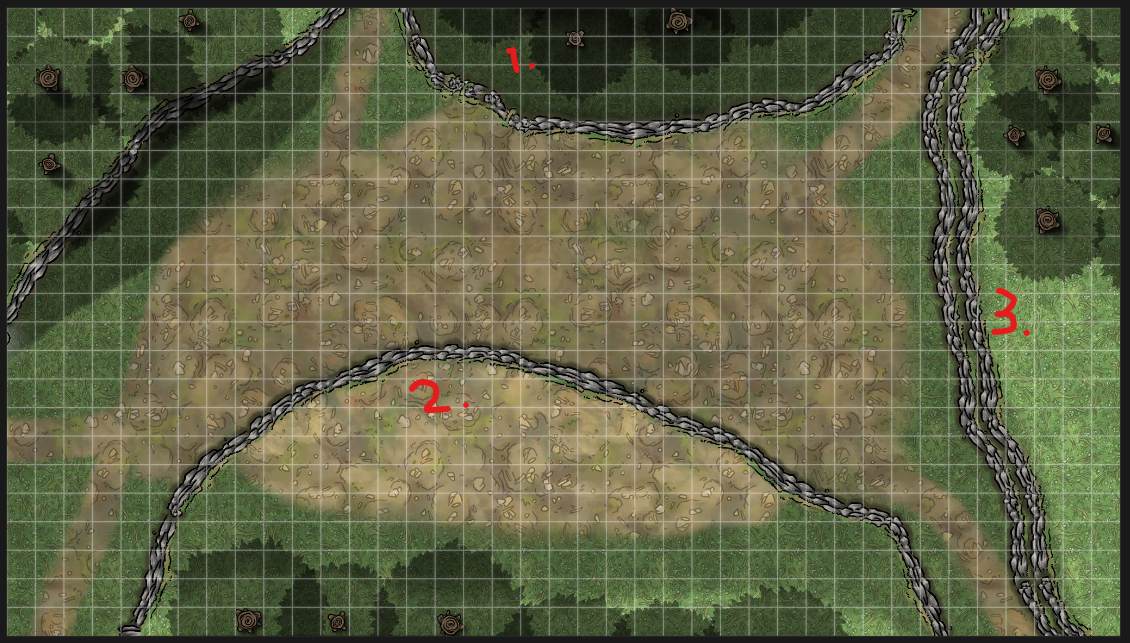
I think Area 1 seems like a good place for my Shambling Mound to start from, and makes sense as a place the Bandits left without easy access, being able to look down from here at things approaching from the north. Areas 2 and 3 seem like ideal locations for my Tent Mimics to begin from, having taken the places of real tents they’ve destroyed, sleeping off their large meal waiting for more bandits to return. These areas should be connected for humans though, so I’ll add in some bridges and ladders to do that.
One of the features I love at this point in map design is the lock feature. I can essentially consider everything I have now to be the background of my map and I’m going to start putting items in. It’s a lot easier to do this and to be able to use drag select to move these items, if the whole rest of the map stays static. To do this in Inkarnate you can hit Ctrl A to select everything on the map, and then right click on one item in that selection and hit Lock. Now we can start laying down items without constantly moving our trees and cliffs by accident. I’m not going to go item by item with images here, but instead explain my reasoning for what will be close to the finished map.
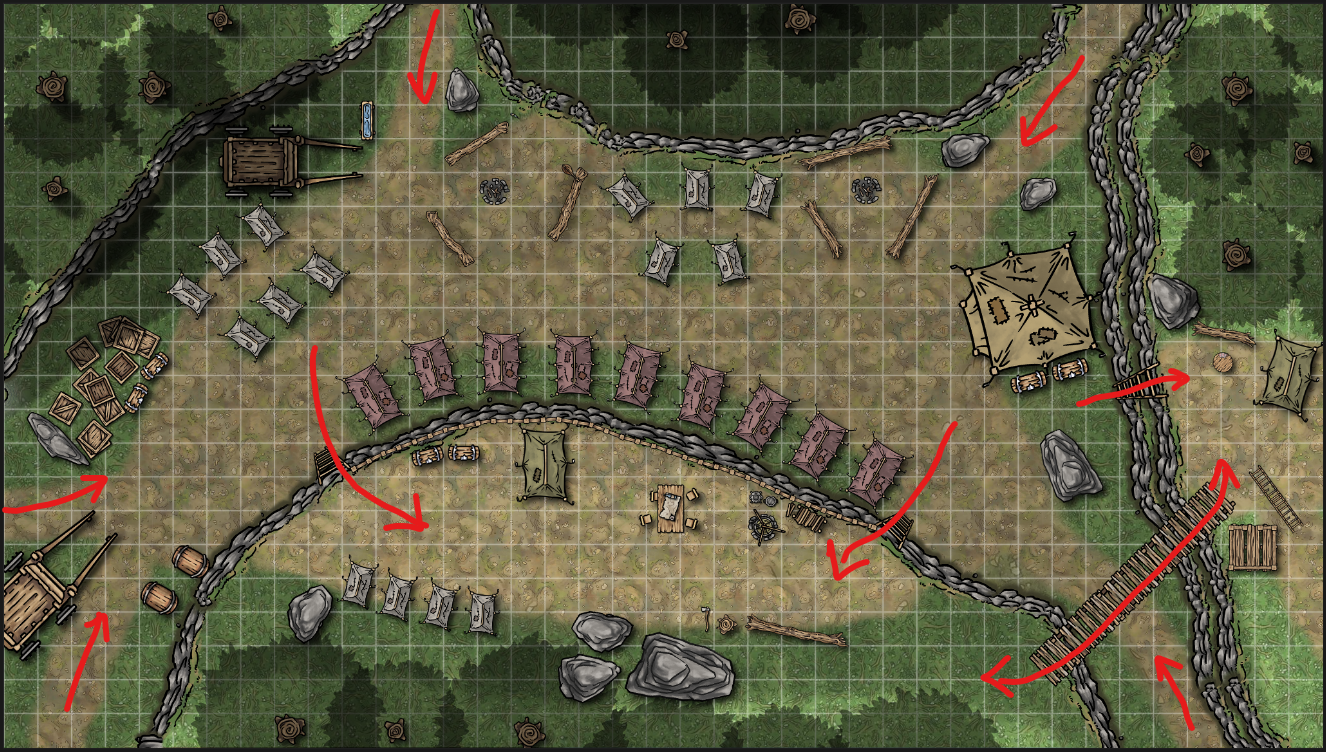
Filling In the Camp
The map is almost finished at this stage. The camp is looking sufficiently stocked with tents and wares. I want the map to give off Mary Celeste vibes. The pot will be clean. The crates closed. The tents pitched as expected.
How the encounter breaks down from here will depend on a couple of factors. Where the party comes in from will depend partially on the hex they leave to arrive here, and at least partially their own choice.
Triggering the Mimic attack will rely on them looking to search the area and interacting with a few choice chests or tents.
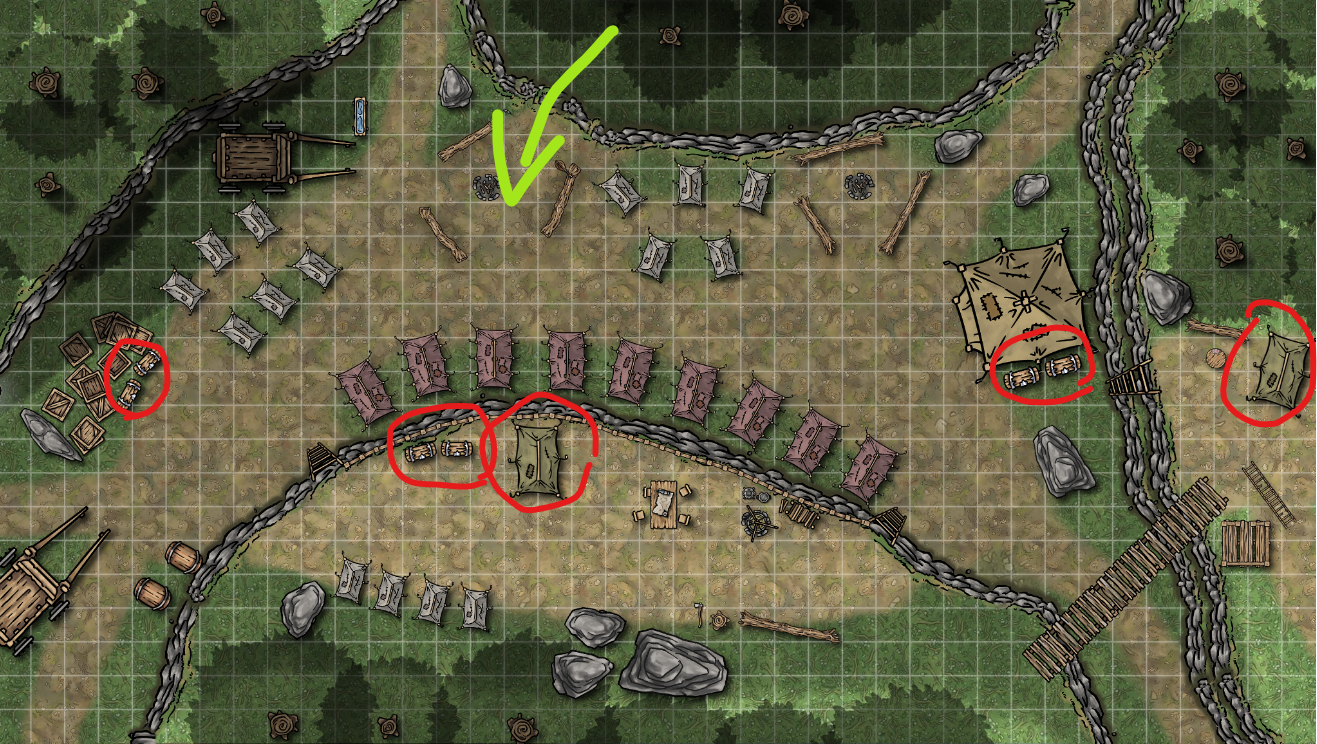
So I will make a version of the map with these missing when I swap in the minis. The Shambling mound will lumber up from the lower area. All that’s left for me to do is a bit of a plant life greebling pass.

That’s All for This Map
This encounter is a still a while away from writing this; if you have any questions about how I did parts of this map, feel free to reach out on our Discord!
Have any questions or feedback? Drop us a note in the comments below or email us at contact@goonhammer.com. Want articles like this linked in your inbox every Monday morning? Sign up for our newsletter. And don’t forget that you can support us on Patreon for backer rewards like early video content, Administratum access, an ad-free experience on our website and more.
