
From the Desk of the Grand Imperial Army
Welcome, cadet, to the Imperial Academy. During your training here we will cover many subjects to help you achieve victory on the battlefield and bring glory to the Empire. Our mission is to expand your mind and hone your Star Wars: Shatterpoint skills.
My name is Kevin and I will instruct you throughout your time at the Academy. I have been a part of the community since Spring of last year, long before the official launch. The Hello There Podcast is where my adventure began and I have had the privilege of getting to know many incredible members. I have battled with top players in the Shatterpoint community. I even attended Adepticon, where my fellow officer Brady and I achieved Second Place in the Team Tournament. (You may have seen us dressed as Krennic and an Imperial Officer in the Adepticon recap article.)
I am devoted to Shatterpoint and the Empire, which is why I am here with you today. My goal is to share my experience in order to provide value to you as we navigate this game’s depth and greatness. Any faction can use this manual and training material, so you must keep this information safe from Rebel hands. We cannot allow our tactics to become a weapon to serve the goals of our enemies.
To give you some insight into a few of the coming lessons, we will eventually be breaking down subjects such as:
- Keyword/Faction Breakdown and Strategy Guides
- A Newcomers Guide to Shatterpoint
- Conditions in Shatterpoint
- Current Meta Breakdowns
At the very end of this lesson, there will be a short exam for you to test what you’ve learned. Every few lessons, we will then have a comprehensive exam where you will test your knowledge. Now, cadet, onto your first assignment.
Lesson 1: Deployment
For our first lesson, we will examine the game’s opening stages. By this point, you will have already selected your Strike Teams and Squads and will have rolled for First Player.
We will approach this from the perspective of both First and Second Players, beginning with First.
First Player Perspective
Let’s pretend you have just won the roll for First Player. The decisions you make next are crucial and will often decide the game’s trajectory before you roll any other dice. Where do you begin, cadet?
The Rulebook states that you create the battlefield after choosing the Mission. However, for this lesson, we will be looking at it through the lens of a tournament where tables will generally be pre-built.
First, you must make a quick assessment of the board. Pay close attention to terrain, Ingress Points, etc. A good commander must understand the lay of the land and quickly point out what advantages will best serve them. Is a bunker or other terrain feature compromising an optimal starting setup for one of your Squads? Take the other side and force your opponent to deal with the consequences of rolling poorly and not being the First Player. Does one side have more Ingress Points than the other? If so, it belongs to you. There should be no reason you don’t take every starting advantage you can.
Obstructive terrain and ease of access to Ingress Points are just some of the elements at play here. What Squads has your opponent chosen to take? Do they have multiple units that give extra mobility to themselves or allies? Do they have access to jumps to get around various elevations with ease? These are just a few of the many questions you must ask yourself when deciding what board side to take.
Before you begin a game, take a moment to check with your opponent so you are both clear on the Ingress Points. It is better to communicate clearly and agree beforehand rather than wait until an issue arises mid-game.
Now that you have weighed the advantages and disadvantages of either side and agreed with your opponent about all accessible Ingress Points, you are ready to make the next critical decision.
Mission Selection
As a First Player, selecting the Mission Pack falls to you. You will likely choose the pack you brought. A fairly easy decision, correct? That is incorrect!
Most of the time, you will likely build your Squads to perform on your chosen Mission Pack, but we must consider a few things. Is this a casual game with a friend or a tournament? Furthermore, if it is a tournament, is it using the Showdown or Premier Showdown Event Rules?
Casual Game/Showdown Event
You likely want to stick with the Mission Pack you brought because common sense would suggest you build your Squad around that particular Mission.
Premier Showdown Event
There may be a corner case where it is advantageous for you to select your Opponents Mission Pack. Your chosen Objective set will depend entirely on how far into the event you are and which combinations of squads both players have run leading up to your game. We will dive into formats in a future article.
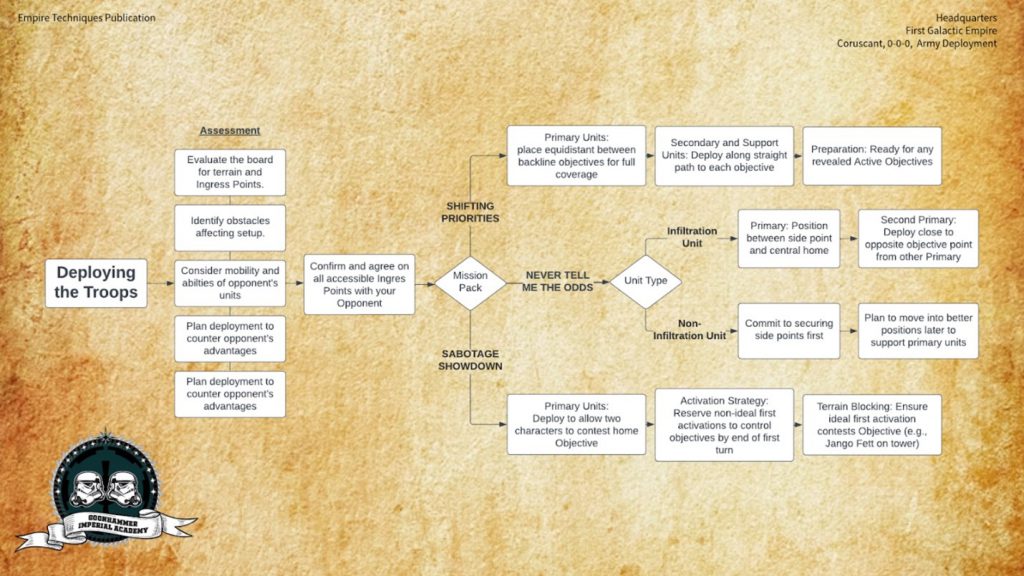
Deploying the Troops
Once you have selected your Mission, it is time to deploy. This category is more advantageous to the Second Player, as they can counter-deploy with their Squad.
While you can do little to counteract this, you must hold to your convictions and stay focused on your game plan. A canny opponent will deploy the more favorable Squad across from your first deployed one– only a minor inconvenience to the commander who is sure of themselves. We will expand on some strategies when we take a look from the Second Player’s perspective.
Now, we must consider the Mission Pack for optimal starting positions. The goal is to have characters contesting each of your back points before the game begins. I cannot stress enough how important this is. We will break down the optimal deployment techniques for each Mission Pack.
Mission Pack Deployments
Shifting Priorities
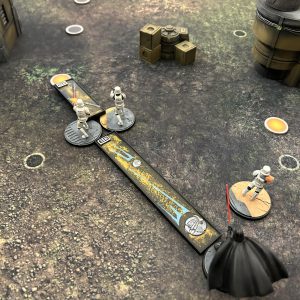
Your primary units should be equidistant between your back line objectives. This will ensure full coverage when placing your Secondary and Support Units.
When you place the Range 1 ruler and deploy your other units, you should follow a straight path toward each of the objectives you are positioned between. That way, when the Active Objectives are revealed, you will be prepared for any possibility.
Sabotage Showdown
Deployment will look a bit different in this Mission. Deploy your Primary Unit in such a way as to allow two other characters in their Squad to each contest your home Objective
If terrain prevents this from happening, make sure the character you have contested is one you DO NOT want as your first activation. For example, Jango Fett is typically not the ideal first activation you want. If you pull him first, you can Reserve him, and rest assured he will control that Objective for you at the end of the first turn.
Never Tell Me The Odds
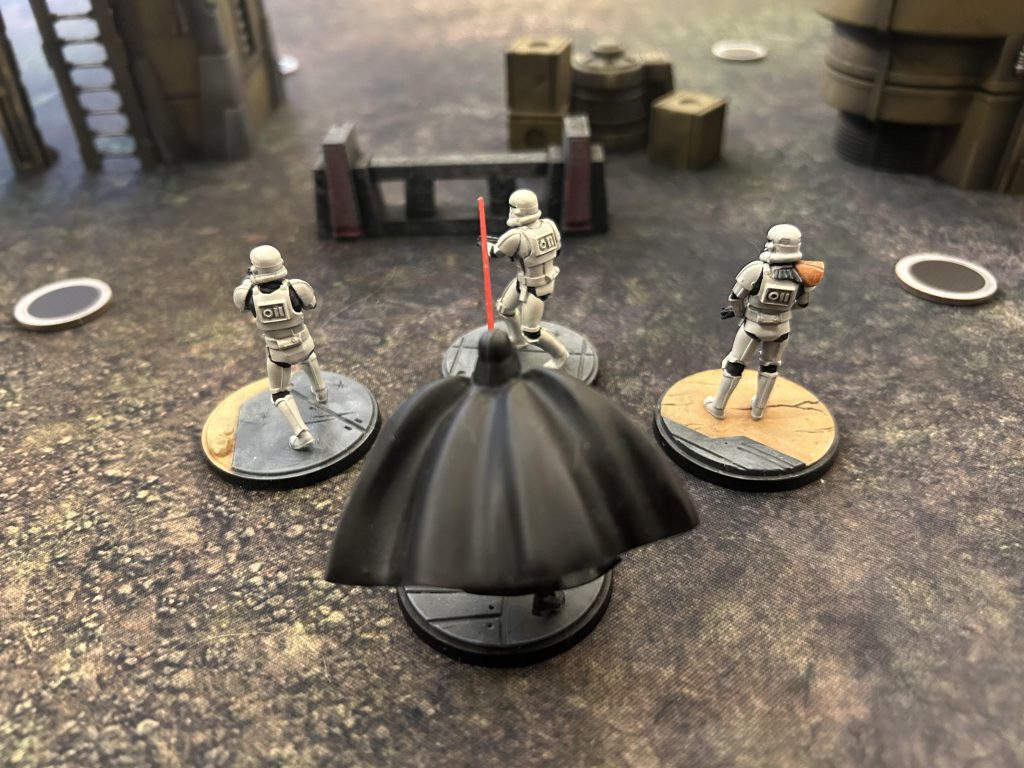
The newest mission pack presents exciting questions. The standard method of deployment used with the previous Mission Packs will not be the same here. Most Strike Teams can only contest some of the home points. The one exception is units with Infiltration. For this exercise, we will pretend that Lord Vader’s Stormtrooper Units have the Infiltration ability (this currently belongs to the Imperial Special Forces and Rebel Commando Units).
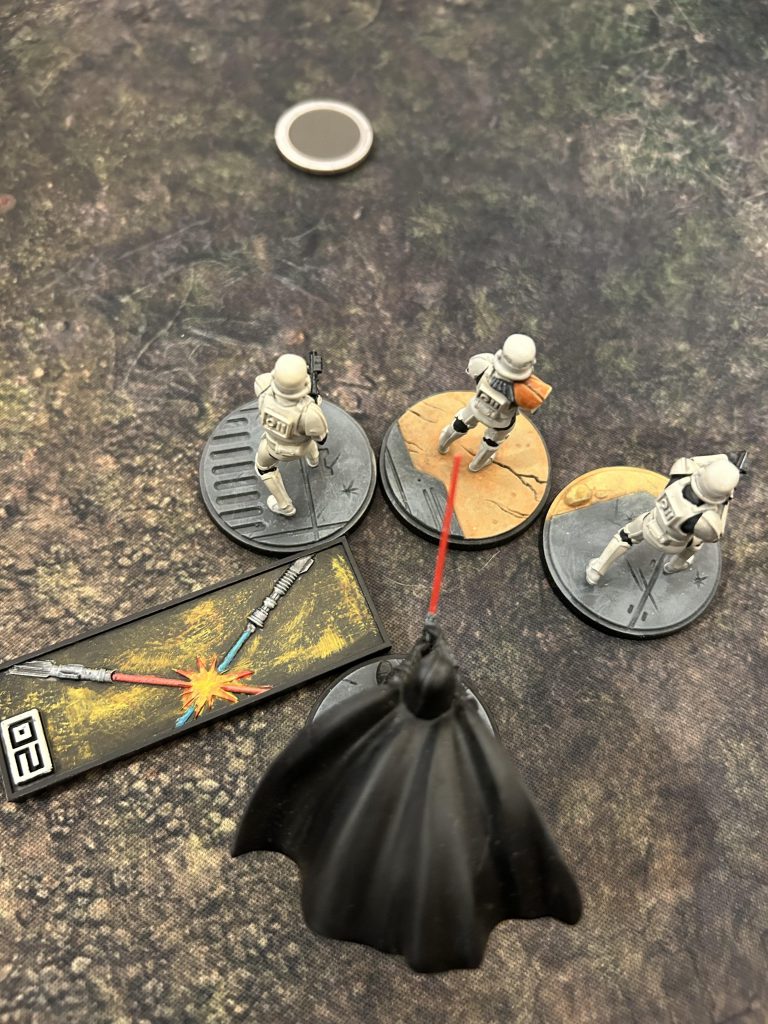
Suppose you have a unit with this ability. In that case, you can place your Primary between a side point and the central home point and deploy the Infiltration Characters within Range 3 of the Primary, putting them into the Objectives range. Then, your other Primary can deploy close to the opposite point to deploy a character in range.
If you do not have a unit with Infiltration, you will need to commit to the side points and secure those. Later, you will have time to move up into a better position.
Now that we have briefly touched on the optimal deployment for each Mission, you are ready to begin. Let’s take a quick look at this from the Second Player’s perspective.
Second Player
Well, cadet, it seems your adversary got the drop on you. Not only have you disgraced this Academy by losing the advantageous position of choosing sides, but you have also compromised the choice of Mission.
There are, however, two advantages you will have. It would be best to seize this opportunity, as you are already on the back foot.
Your opponent will deploy their forces first, allowing you to counter-deploy. To maximize the benefit of this, you will need a deeper understanding of your foe’s forces as well as your own.
Has your opponent just deployed the fearsome General Grievous or Lord Maul first? It is time to deploy your attrition pieces to match them. You will want sturdy and mobile characters to face them. Only a fool would deploy a sluggish and fragile squad across from them.
Or has your opponent deployed powerful Ranged characters such as Iden Versio or Crosshair? Send in your mobile and hard-hitting fighters to bring the fight to them. You must not allow them to skulk about the back lines playing their desired game. They must be crushed.
The second benefit you have is being the first player to score points. Most of the time, you will be making the game’s opening attacks. The first player must move a Unit into position for their opening move, allowing you to draw first blood. There are a few situations where this is not the case, and your opponent can shoot Units in your Deployment Zone. But we will save the discussion of those tactics for another lesson. These are the advantages afforded to you as a Second Player. Do not squander this opportunity, cadet.
Path to Graduation
We have reached the end of today’s lesson.
I cannot stress how vital the deployment phase is. I have seen many games lost due to poor positioning and decision-making during setup and have had my share of personal failings. The lessons discussed here are from many victories and defeats over the past year.
Now, it is time to test your knowledge. This quiz will serve as a small piece of a much larger picture. After this course, there will be more quizzes, culminating in a midterm and final exam. These quizzes will get you one step closer to earning an official Goonhammer Imperial Academy Certificate. That is all for today, cadet. Long live the Empire!

Have any questions or feedback? Drop us a note in the comments below or email us at contact@goonhammer.com. Want articles like this linked in your inbox every Monday morning? Sign up for our newsletter. And don’t forget that you can support us on Patreon for backer rewards like early video content, Administratum access, an ad-free experience on our website and more.
