
Star Wars: Shatterpoint, like most skirmish games, gives players the opportunity to post a variety of models and color schemes. It’s one of the things that is so attractive to me about skirmish level games these days. But with so many of the releases so far featuring clone troopers I was finding myself burnt out even with those.
Then I got the opportunity to shake things up a bit with the soon to be released Clone Force 99 Squad Pack, courtesy an early review copy from Atomic Mass Games. Yes, it’s still a bunch of clones in armor (plus Omega), but the color schemes are (mostly) different and each model is highly individualized. For those with a groggy, historical mindbent, consider that you can dive deep into researching each member of the unit- individualized armor markings, etc. I recommend the 501st cosplaying group’s Costume Reference Library, as well as this article from StarWars.com
Here’s how I approached this unit.
Grey Armor
My painting style relies heavily on white primer (the objectively best primer color) with midtone basecoats that I shade down heavily. Depending on how much effort I’m feeling, I then highlight sparingly back up. For most of my previous clones, I made generous use of GW’s Apothecary White paint (though I’ve now switched to Soulblight Grey directly over white primer).
I haven’t used Contrast paints much outside of that, so I thought I’d experiment with making my own grey with Black Legion and Apothecary White. As others may have discovered, this didn’t work well. So, it was on to Plan B, and it needed to be something that would cover and even out the messy Contrast work. I settled on the following:
- Basecoat with 1-2 thinned layers of GW Eshin Grey. I wanted a relatively uniform base here.
- I then washed all the armor with GW Nuln Oil. I go fairly heavy with my washes, but you still want to make sure it doesn’t pool. It can dry in a weird, whitish dusty mess that will need fixed.
- Once the wash was dried, I drybrushed the whole model with a roughly 1:1 mix of Eshin Grey and VMC Dark Sea Grey.
- I then drybrushed more sparingly with just VMC Dark Sea Grey.
- After all the drybrushing, I did a little cleanup with Eshin Grey, and some edge highlights here and there with the VMC Dark Sea Grey
Red Armor Trim
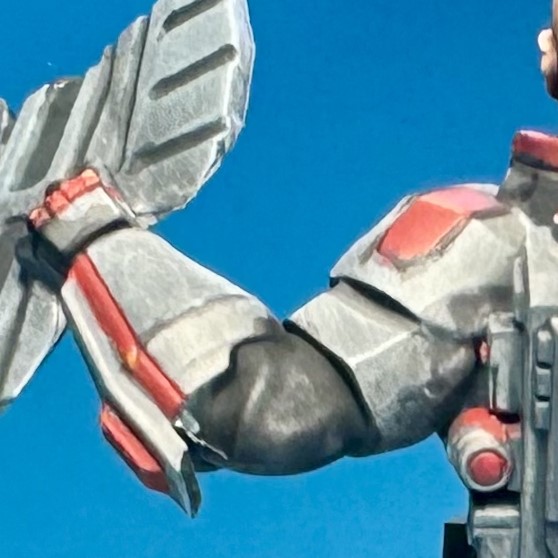
The red markings on the armor called for a rich, not too dark red but not super bright, either.
- I based red areas with a thinned GW Mephiston Red. I did 1-2 layers as needed to get good coverage.
- I washed all the red areas with GW Carroburg Crimson. Be careful with this as you don’t want it to tint other areas of the armor. Luckily it’s easy to cover mistakes if needed.
- I then highlighted red areas by mixing in first Pro Acryl Bold Pyrrole Red, then later P3 Khador Highlight. Substitute your own bright red and orange, but be careful. A little goes a long way. I dotted pure orange in a few spots for extreme highlights.
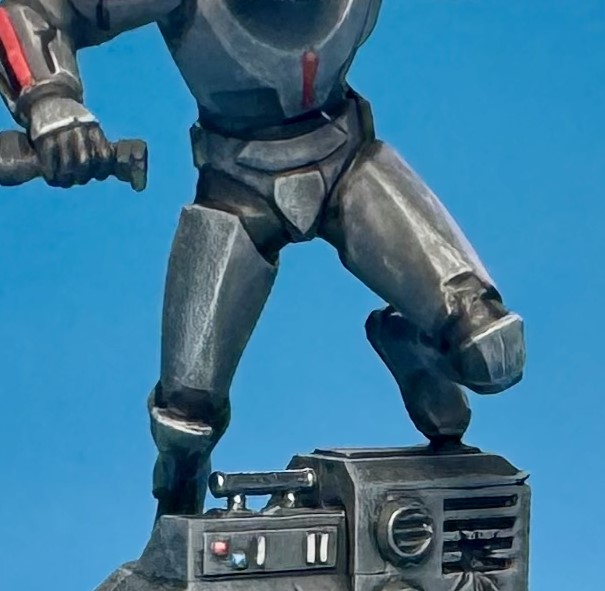
Bodyglove
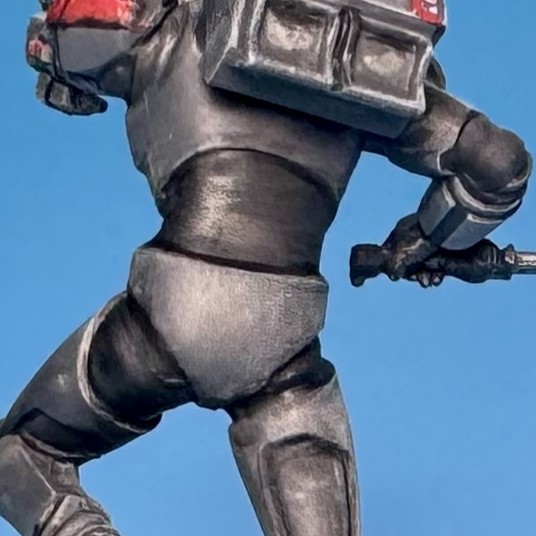
The bodygloves are meant to be an actual black vs. dark grey, which can be hard to do with both next to each other and still needed shading and highlights on each.
- I based all these parts with Scale75 Eclipse Grey- a very dark and cool toned grey.
- I washed these with Nuln Oil (the same time I did the armor).
- I highlighted up by mixing in somewhat lighter, cool toned greys including Eshin Grey.
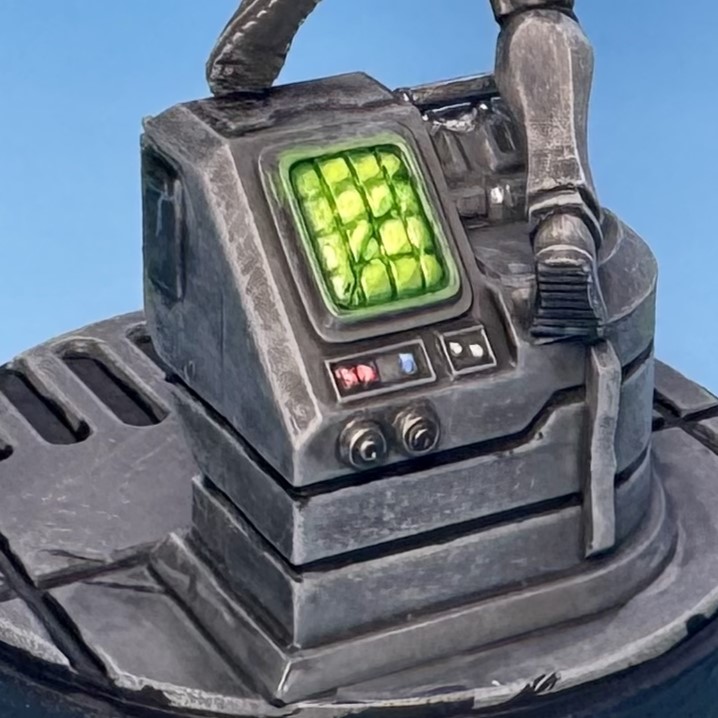
Tech’s White Armor + Visor
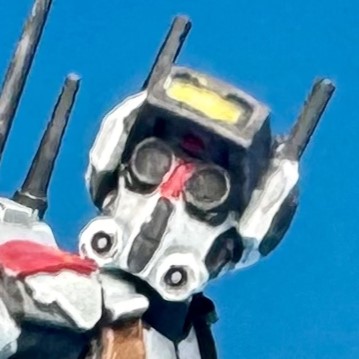
Tech is the snowflake of the group, I guess, with his white armor. Luckily I had a good recipe for this from previous models.
- Wash Soulblight Grey over white primer.
- Drybrush VMC Offwhite.
- That’s it. No really, just that gets some pretty good results. I generally do some edge highlights to complement the drybrush, but even stopping before those will look pretty good.
- Tech’s visor was based GW Elysian Green.
- I then highlighted the green by mixing in some P3 Sulfuric Yellow, painting this mostly in the center.
Clone Pouches
- The various pouches on the clones were all based with P3 Bootstrap Leather, or insert your own light tan or brown of choice.
- I washed them all with GW Agrax Earthshade.
- I then highlighted them by mixing in an ochre shade (probably Tau Light Ochre, my notes failed me here) and placing some edge highlights.
Wrecker
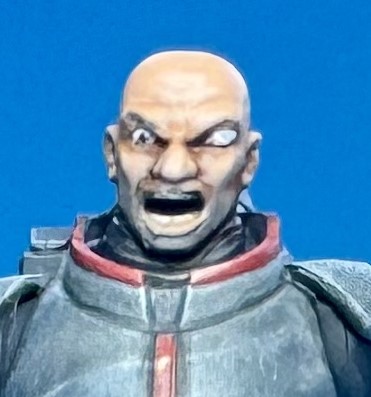
Wrecker’s bare head was too ridiculous to not use. Here’s how I approached it.
- Base the skin with GW Cadian Fleshtone.
- Wash with GW Reikland Fleshshade.
- Highlight increasingly smaller areas by mixing P3 Ryn Flesh into the base color.
- To create the stubble, I mixed a grey shade with the base shade (Cadian Fleshtone) and stippled that around his chin and cheeks. Stipple the stubble. Fun to say and do.
Omega
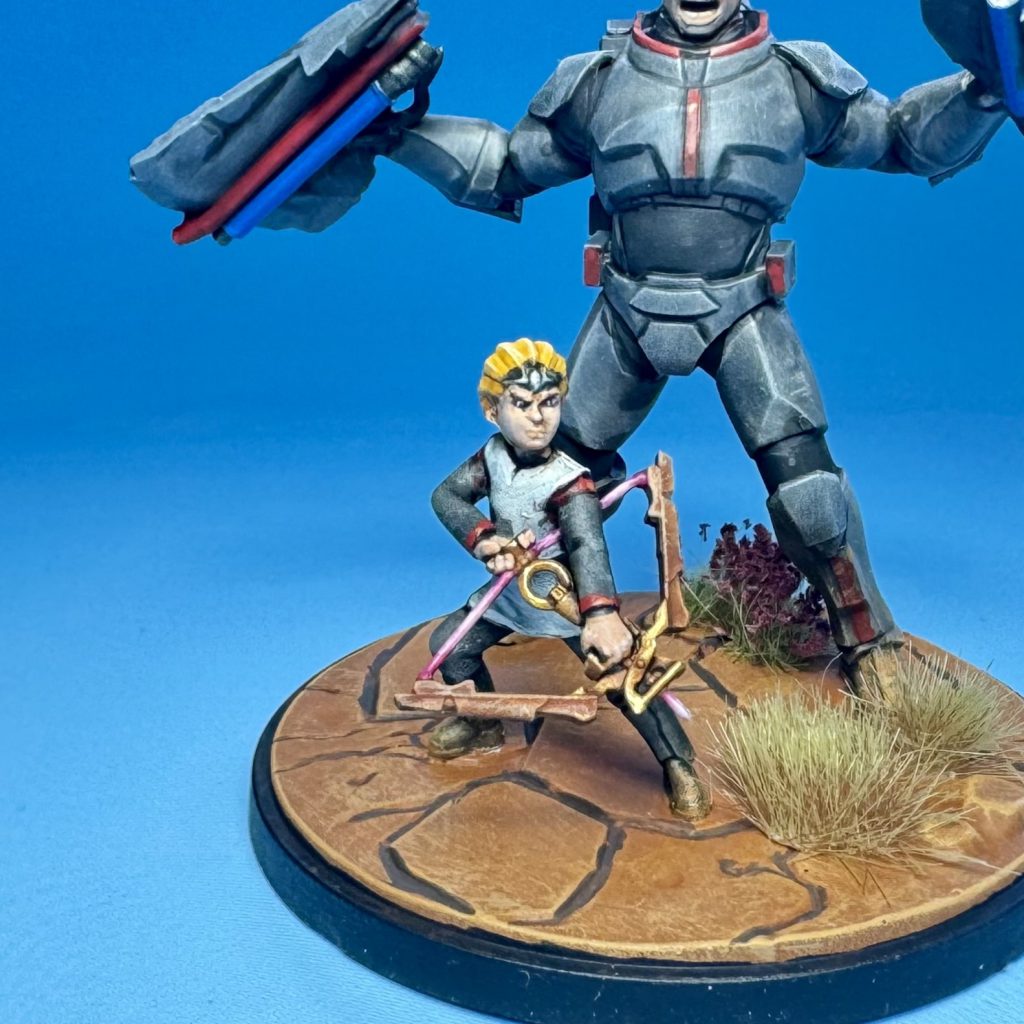
- Omega’s uniform is painted using the same colors and techniques used on the clones.
- I basecoated the skin with P3 Midlund Flesh.
- I then washed this with GW Reikland Fleshshade.
- I then highlighted up by mixing P3 Ryn Flesh into the basecoat, with a few dots of pure Ryn Flesh as extreme highlights.
- The hair was basecoated with Pro Acryl Yellow Ochre. This is definitely more on the yellow side of things if you’re looking for a comparable paint. GW Tau Light Ochre would probably work well here if you want a darker blond color.
- I washed the hair with GW Casandora Yellow.
- I then drybrushed the hair with VMC Ice Yellow. This is a big value jump, so go lightly or consider mixing this with some of your basecoat.
- Her circlet was painted with a bright silver then washed with GW Drakenhof Nightshade. I’m a big fan of using a dark blue was on silver metallics. Just go light with it as you don’t want to turn her hair green.
- The energy on the bow was basecoated VGC Warlord Purple, which is a nice saturated fuchsia.
- I then mixed into the base color increasing amounts of first GW Emperor’s Children, then VGC Offwhite. I painted increasingly smaller areas of the energy with the lighter colors to give a glow effect.
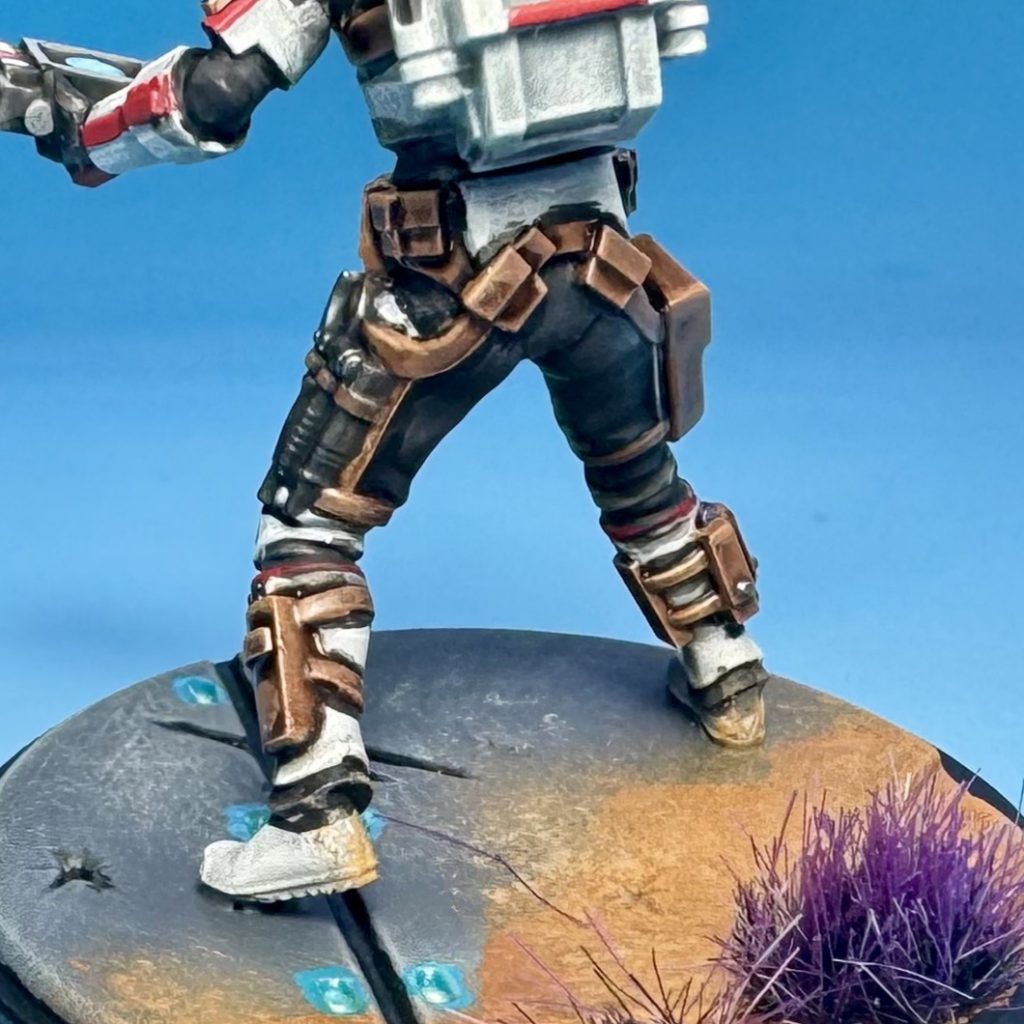
Bases
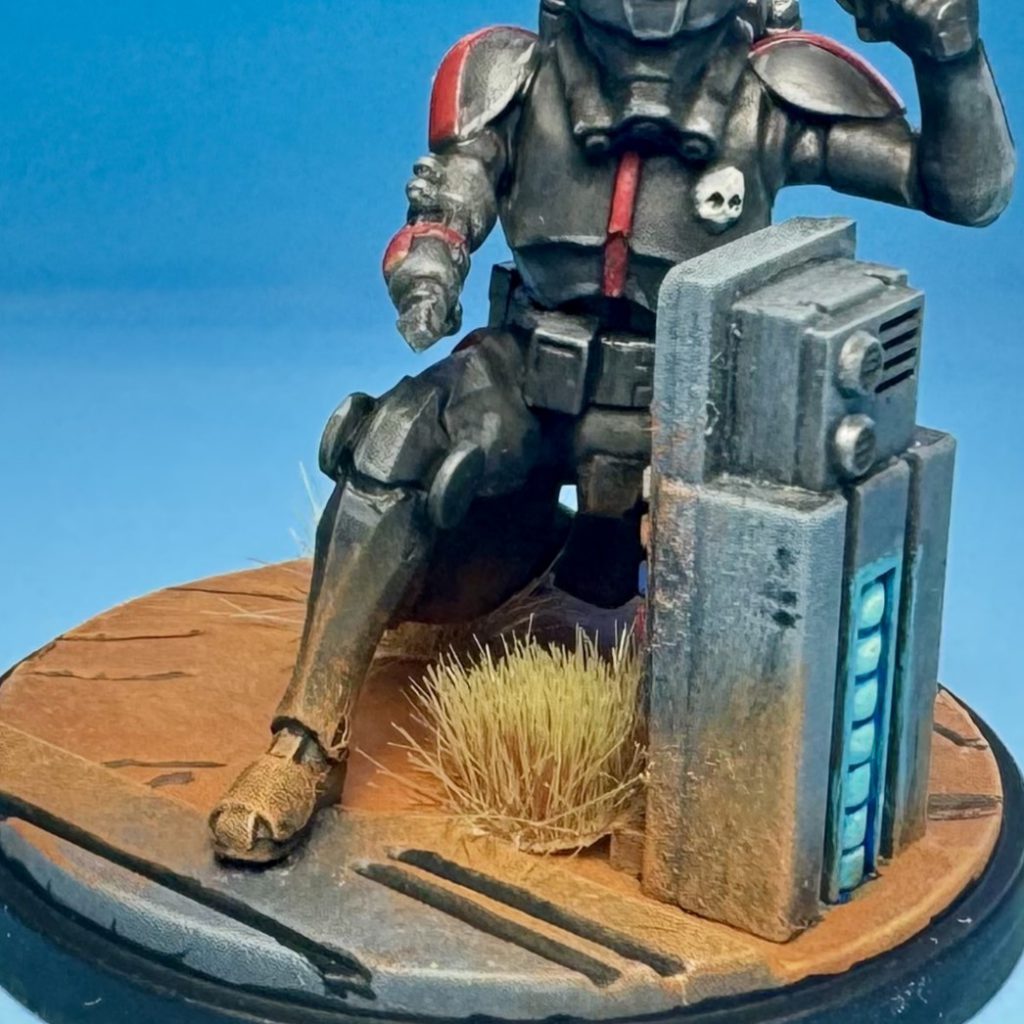
- The grey, walkway type bases are all all basecoated with GW Eshin Grey.
- I then heavily drybrush and stipple with GW Mechanicum Standard Grey.
- I then do a lighter drybrush of VGC Stonewall Grey.
- Cracks and crevices get painted in pure black. I’m currently using Pro Acryl’s Coal Black but you have plenty of options here of course.
- Sand/soil areas get basecoated with GW Skrag Brown.
- I then do successively lighter drybrushes of GW Deathclaw Brown, GW Tau Light Ochre, and P3 Menoth White Base. Feel free to be sloppy with this and weather the feet and legs of models or scenic bits on bases. On bases with both soil and walkway elements, I like to extend the soil onto the walkways with some drybrushing and stippling.
- I’m corny and like to put blue lighting on ‘good guy’ bases and red on ‘bad guy’ bases. For the blue here, I put down some P3 Arcane Blue (amazing color by the way), intentionally sloppy so you get spillover onto the surface of the base. When that dries, put a dot in the center using that base color mixed with an offwhite (P3 Menoth White Highlight is the best paint I’ve ever used for this). If you’re really spicy you can try to do another tiny dot of just the white, but that’s overkill.
- Other glowy bits on the bases use this same basic concept of sloppy basecoat to make the glow, then mixing in Menoth White Highlight to brighten the source of the light. You can see this on the bases for Hunter and Echo. (Echo even uses the P3 Arcane Blue again.)
And that’s that. Hope this helps you paint this new squad box and get it on the table on style!
