
Over the years the Goonhammer crew have put together a vast and expansive library of painting guides. Appropriately titled “How to Paint Everything” we’ve got schemes and recipes for 100s of models. They all, however, assume you know the difference between wet blending and glazing or what the hell “zenithal” means. Welcome to Hobby 101. This series will lay the groundwork to teach you the fundamentals and best practices to make your models shine.
The Hobby 101 series is sponsored by The Army Painter.
Welcome back to Hobby 101, your one stop shop for all the things you’ll need to start hobbying like a pro. Today’s article revists a previous topic: One-Coat Paints. If you haven’t read our 101 article on this topic, you should check it out here as we’ll be building on concepts covered there. For this article we’ll be covering more advanced methods of using one coat paints and how to push their flexibility using standard acrylic paints.
101 Recap
To recap what we already know, one-coat paints refer to paints that are generally translucent and apply a shading and highlight effect when applied in just a single coat. These paints all act somewhat differently even within the same ranges, so experimentation is key. We also covered that you generally want to apply these over a bright surface to let the color of the paint come through as cleanly as possible. With that all established let’s dive into what we can do with this outside of just applying single colors
Nurglings, Three Ways
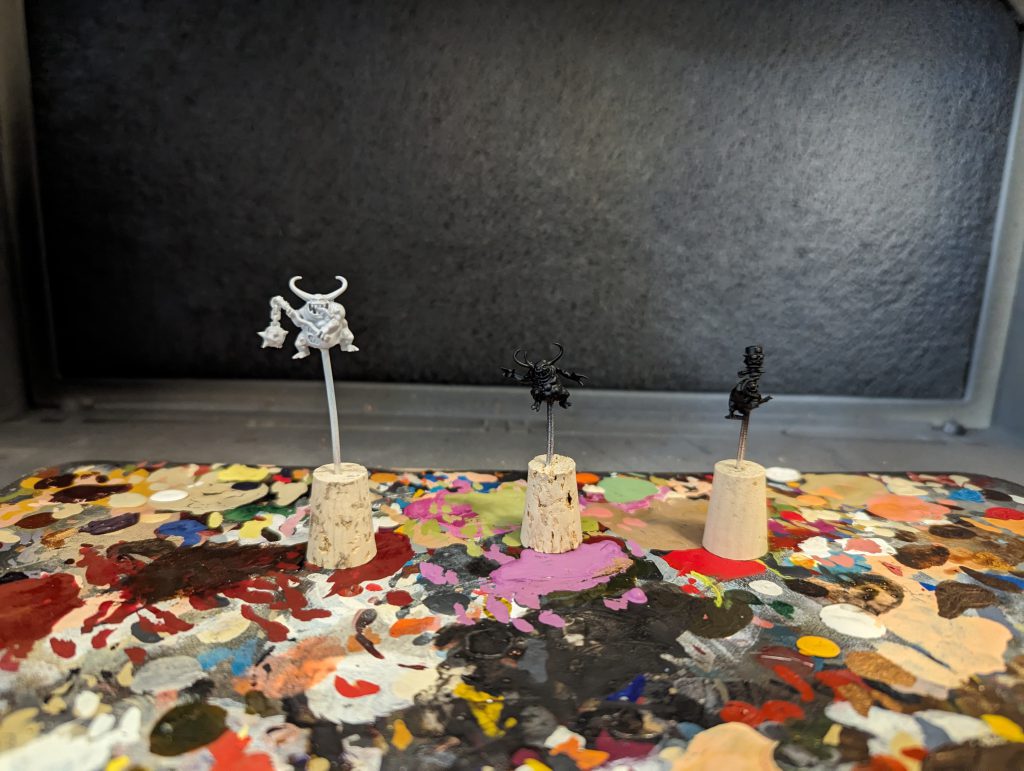
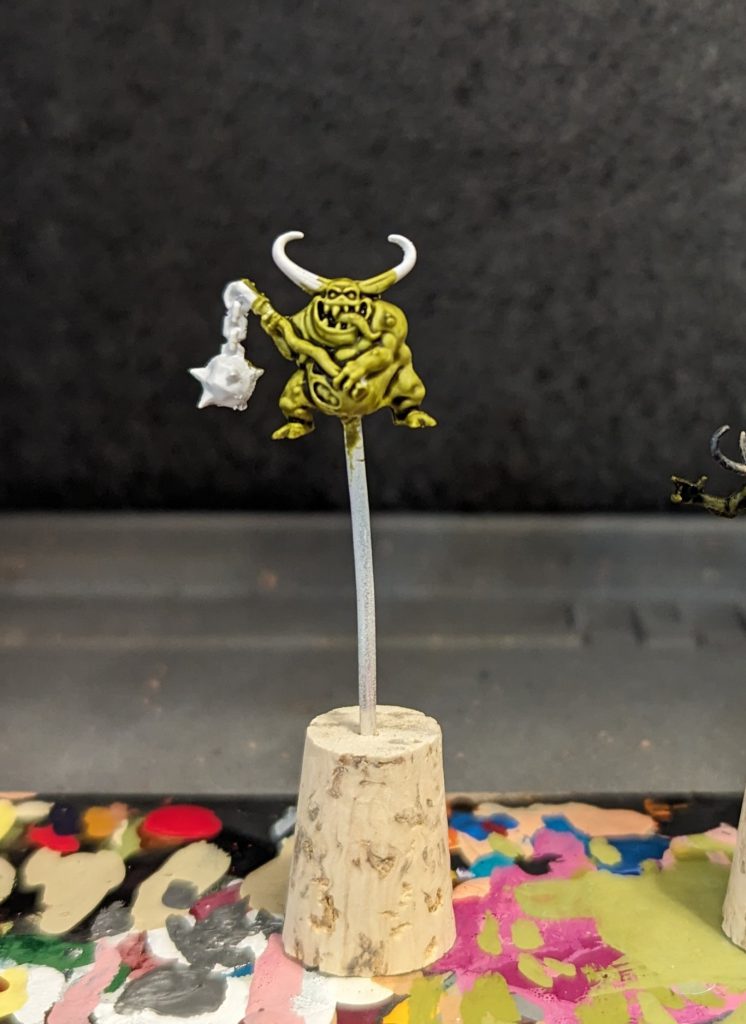
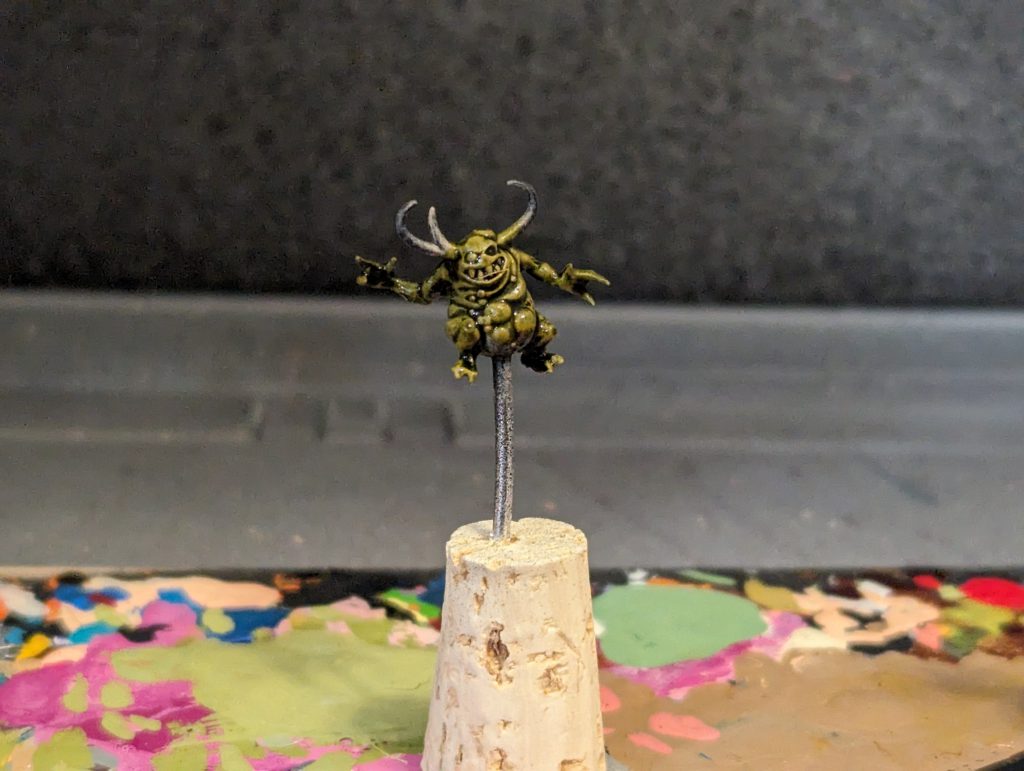
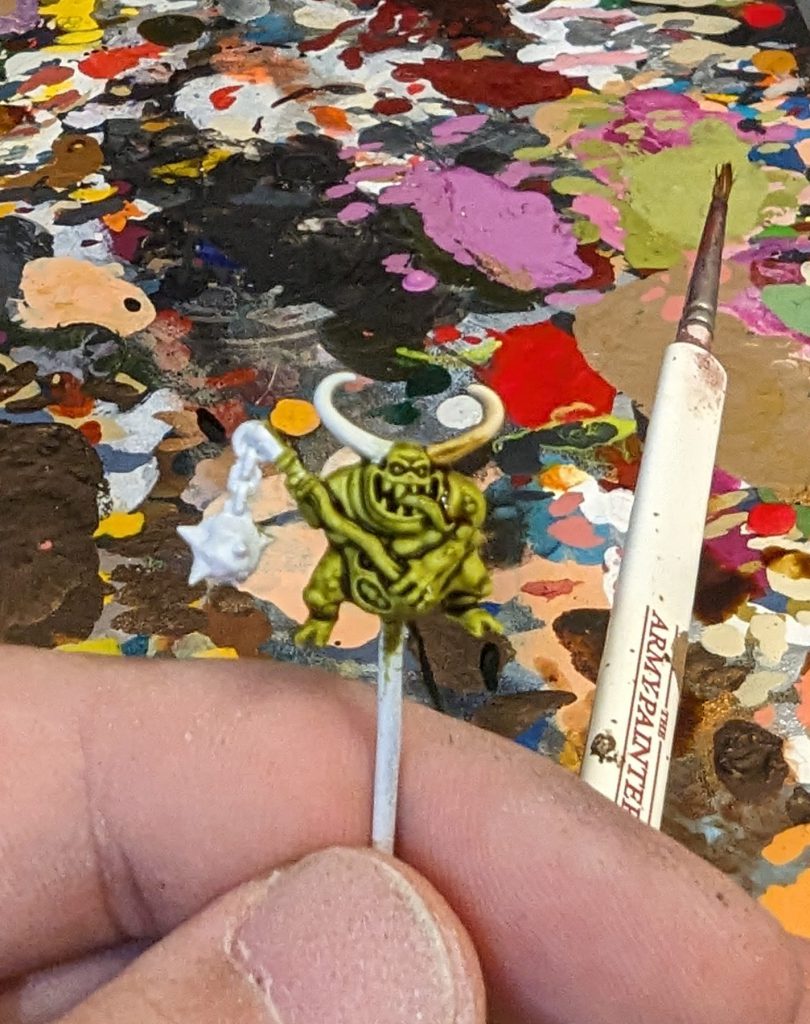
Here we have three Nurglings I primed for this article. You’ll notice one is primed as you’d expect, but the other two are primed black. we’ll get to those two in a second but first lets establish a baseline for our lessons. Here’s the white primed nurgling hit with Army Painter Charming Chartreuse.
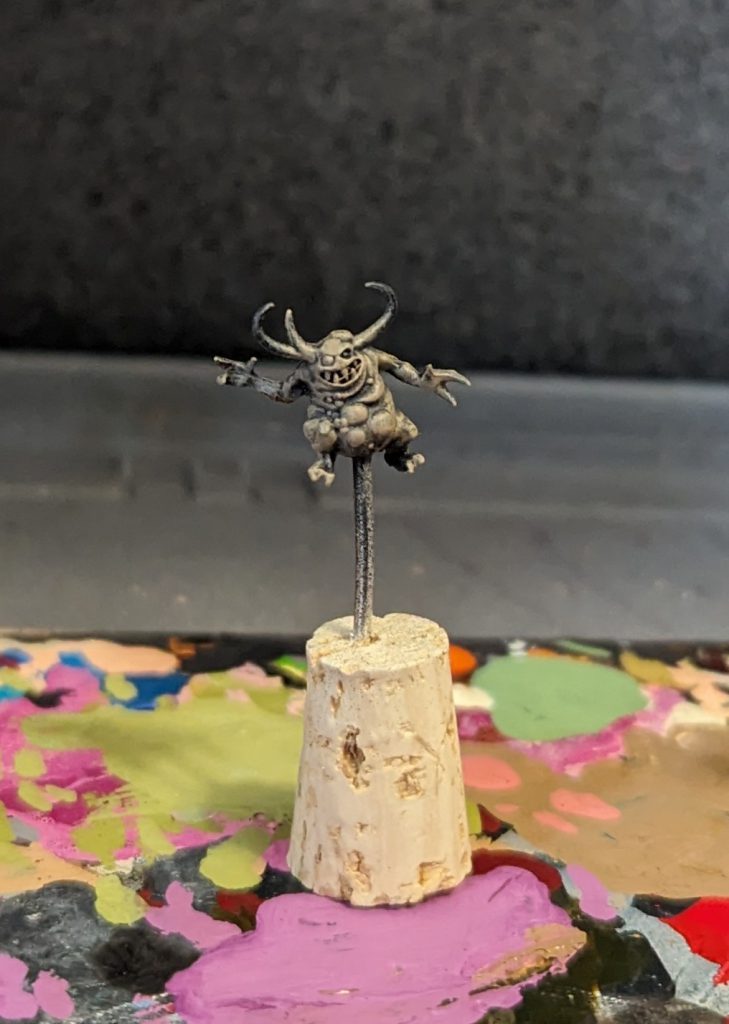
Now to the two I primed black. You may recall that generally you want your one-coat paints going over bright colors, so why prime black? This is because I’ll be using them to cover Underpainting. The idea behind underpainting is that you leave the recesses of your model black and try to get the highest point of the model white. For a very advanced read on this topic, check out our art school level article on Underpainting.
What this does is pushes the effects of your one coat paints to be a bit more rich and varied in its shading and highlighting effect. In order to do this follow these simple steps
- Prime black
- Overbrush white (think drybrushing but you don’t remove all the excess)
- Apply your one coat paint
And that’s it. When you do you should get a model that looks kinda like this.
![]()
![]()
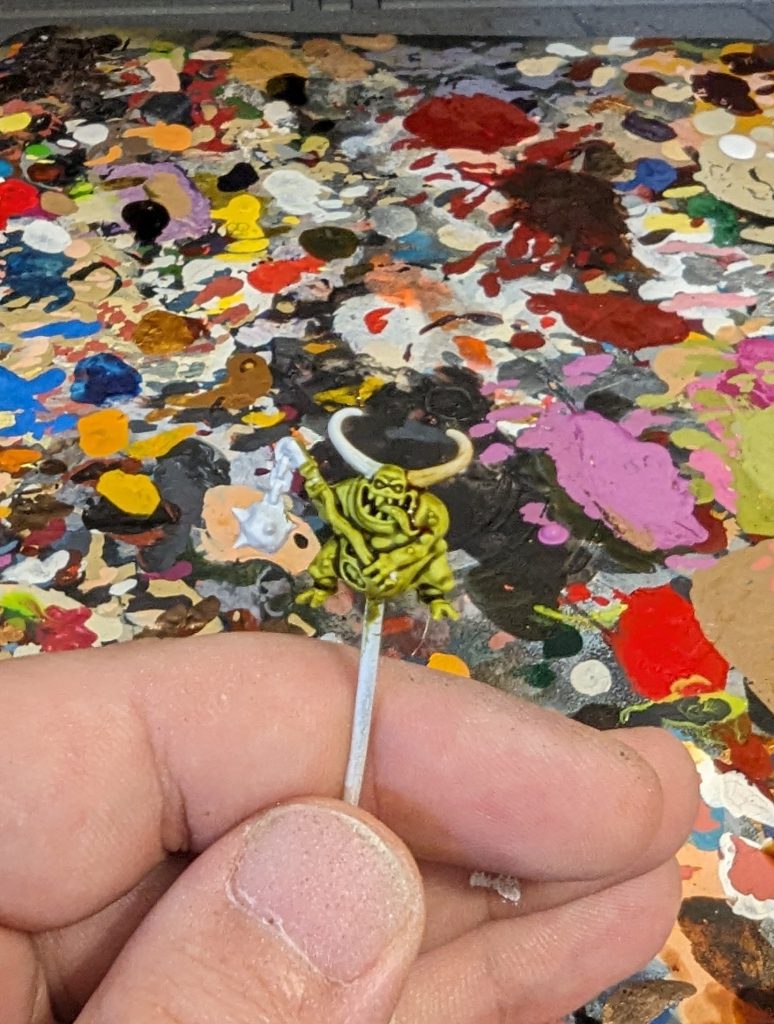
After we apply some of Army Painter’s Charming Chartreuse you’ll see we have much darker recesses than the model we just primed white.
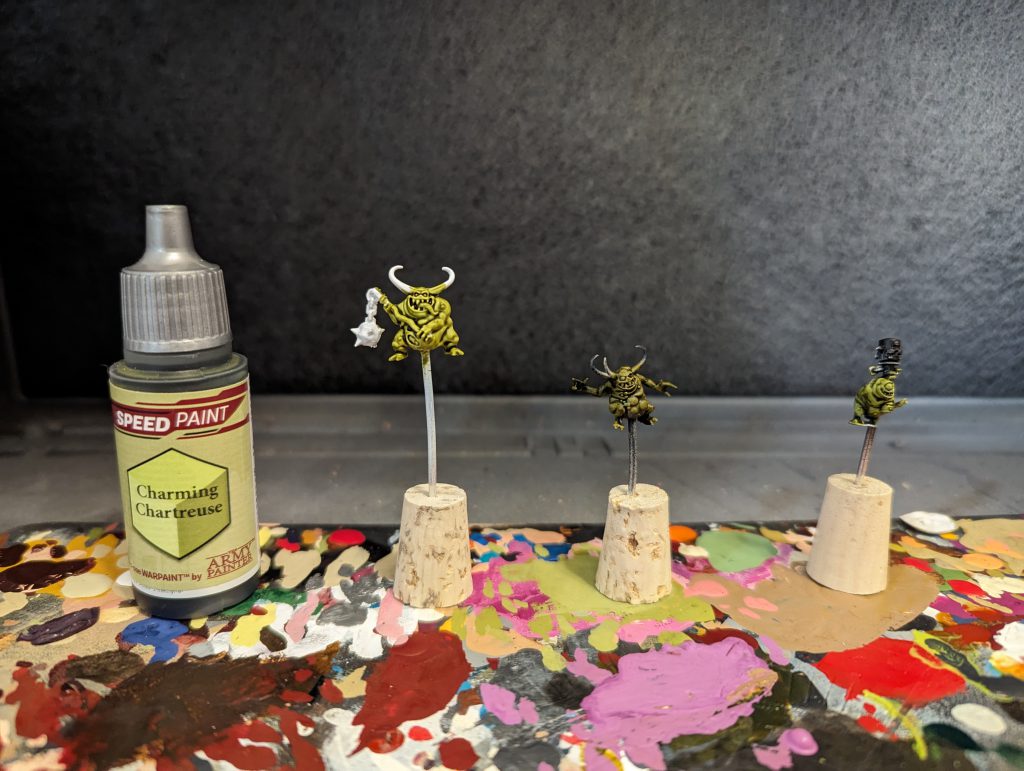
So what about that third nurgling? Well now let’s talk Filtering. A filter is when you take a color other than white and layer your one coat paint over it thereby adjusting the tone of the color. In this case I’m going to follow the same steps as above for underpainting but use Army Painter Burnt Turf instead of white for the overbrush.
Once we apply the Charming Chartreuse you’ll see while it is green, the model looks a bit more grody with a much darker skin tone since that khaki color is coming through a bit on the raised and flat parts of the model. While this adds more depth, this led to the model being a lot darker than the others, so it may need some acrylics to pop stuff back up if you want to.
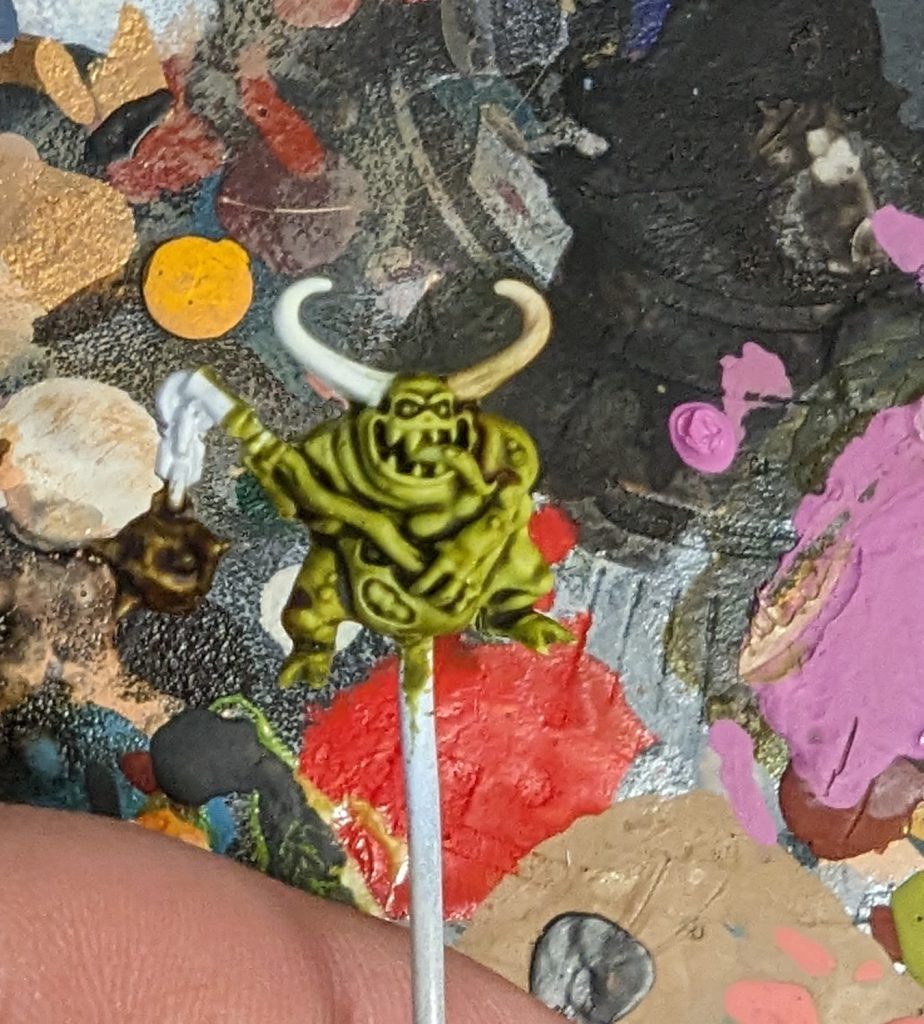
So let’s compare the three. On the left we have our “traditional” method. In the middle underpainting with Burnt Turf. On the right our underpainting with a standard white paint. Personally, I actually like the traditional method model more for how I usually paint nurglings, but thats all about style. For the Burnt turf one, I think next time I’d mix that paint with some white so that the speedpaint shines through a bit more, but like I said a lot of working with this paint is about experimentation.
Blending
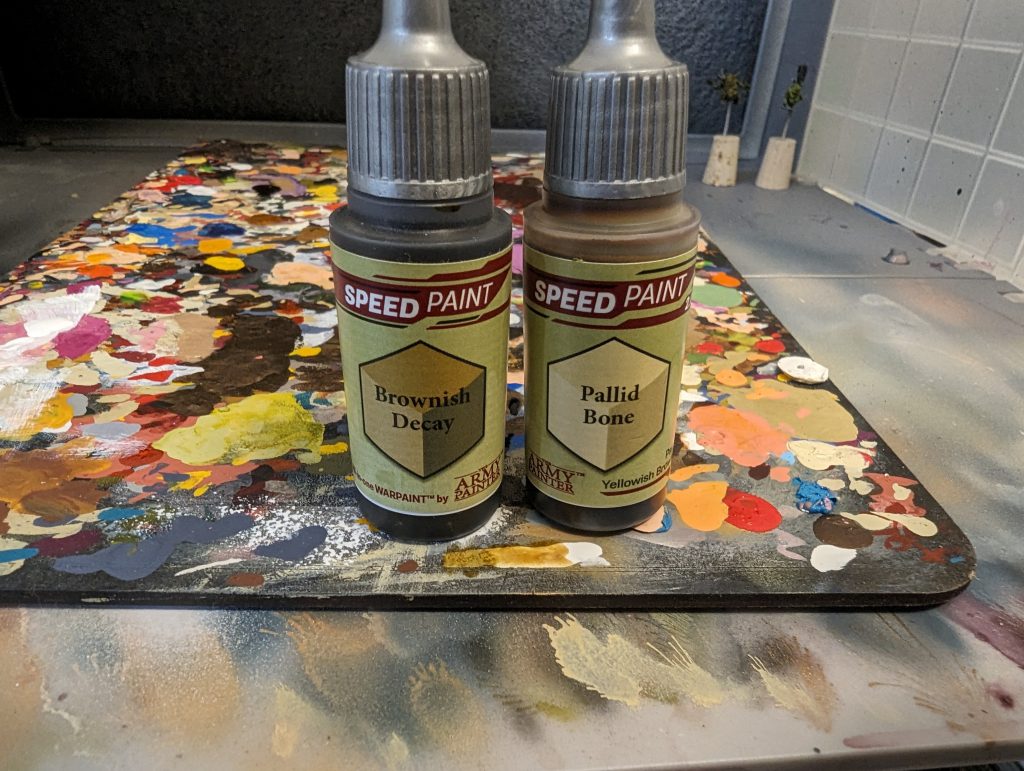
One more thing one coat paints are great for is creating smooth transitions between two colors. For this example I’ll be painting this nurgling’s horn using Army Painter’s Brownish Decay and Pallid Bone. Pallid Bone is way less intense than Brownish Decay and makes for a great subtle one stop shop for bone. However I want the roots of the bone to look more decayed and diseased closer to the nurgling and Brownish Decay is great for this. So I’ll be painting a gradient using the two speedpaints.
First we apply our Pallid Bone all over the horn since it’s brighter than the brownish decay and will allow the brownish decay to show up as normal.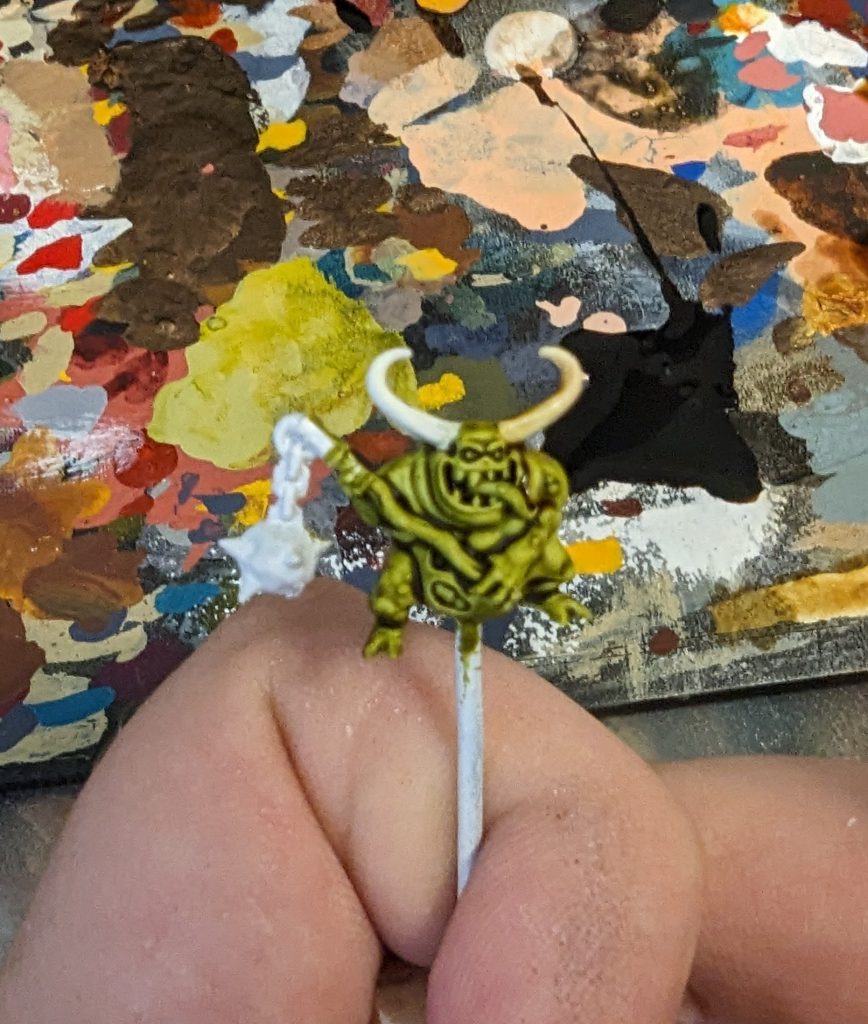 Then we’re going to quickly, while the Pallid Bone is still wet, apply the Brownish Decay at the root closest to the nurgling.
From there, we’re just gonna get a little water on the brush and add it to where the two paints meet. Because the paints take a while to dry (usually referred to as a paint being “active”) we can work subtly to mix the two colors in the middle where they meet until we’re satisfied. If either paint gets more diluted than you want, feel free to add a bit more and keep blending.
And that’s it. It’s a subtle effect but this can be used in more complex and interesting ways to create large gradients of wildly different colors.
Non-Standard Undercoats
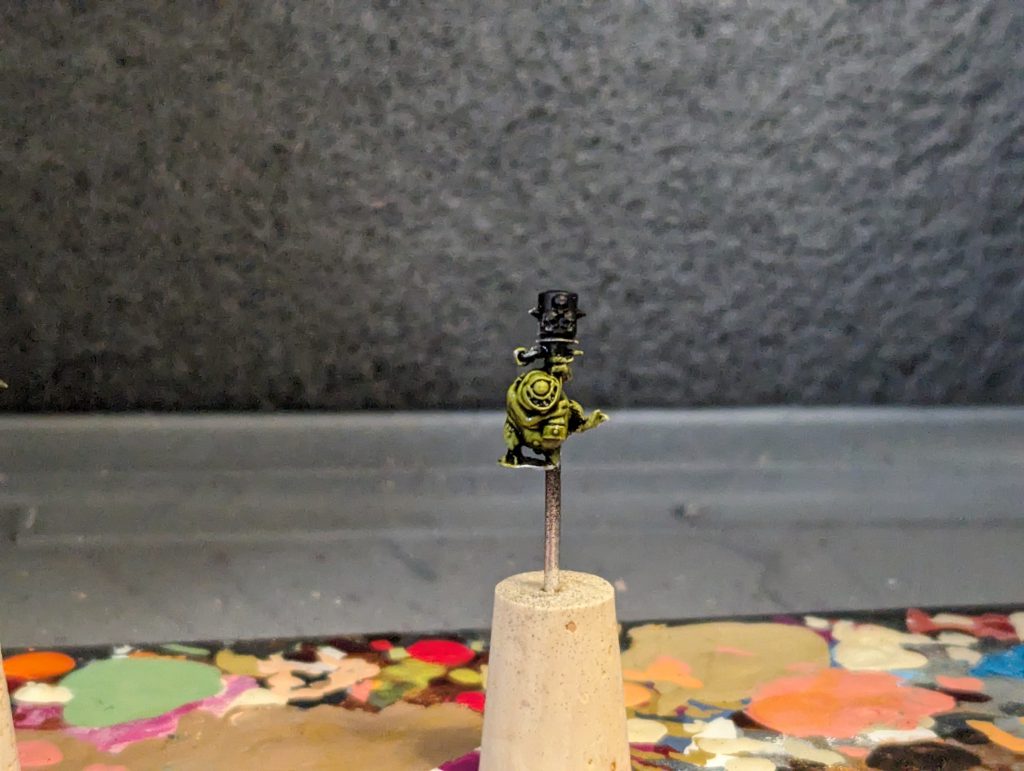
Last up I want to talk about using contrasts over paints other than white or flat colors. Here I have the flail on the nurgling we’ve been working on. I want to make this flail a dirty bronze while keeping that silver sheen. This is another great application for one coat paints. After simply applying two coats of Brownish Decay I can get the color I’m looking for. If it’s too overpowering or intense, I can just add some water, and use the brush to soak up the excess.
This is just one example, but you can use this technique in a variety of ways for a variety of uses. One of my go to recipes for power swords combines uses Army Painter’s Magic Blue and a combination of this technique over silver and the blending technique just blending with water so that the farthest edges of the sword are silver. The possibilities are endless for this sort of thing
That covers our 102 article on one coat paints, but really there are infinite cool things you can do with these that I could cover forever. The key though, is these are all lessons that I’ve found by experimenting and testing over time. One of the great things about one coat paints is they’re generally very thin, so if you get a result you don’t like, just prime over it and try again. I do this all the time, sometimes priming a model upwards of 4 times until I get the result I’m looking for (or settle on good enough and try again later). Also remember, there is no “correct” way to use these paints, if something looks good to you, go with it even if it happens to be the simplest approach.
Have any questions or feedback? Drop us a note in the comments below or email us at contact@goonhammer.com. Want articles like this linked in your inbox every Monday morning? Sign up for our newsletter. And don’t forget that you can support us on Patreon for backer rewards like early video content, Administratum access, an ad-free experience on our website and more.
