
Over the years the Goonhammer crew have put together a vast and expansive library of painting guides. Appropriately titled “How to Paint Everything” we’ve got schemes and recipes for 100s of models. They all, however, assume you know the difference between wet blending and glazing or what the hell “zenithal” means. Welcome to Hobby 101. This series will lay the groundwork to teach you the fundamentals and best practices to make your models shine.
The Hobby 101 series is sponsored by The Army Painter.
The highlighting step of model painting is both the most intimidating step of miniature painting as well as the most crucial step from taking a model from looking “good” to “great”. Most methods for highlighting require precision, practice, and patience, such as edge highlighting, blending, and glazing.
This is what makes Drybrushing such an unusual yet ubiquitous method of highlighting: Drybrushing is quick, easy to learn, and imprecise. Its why it’s the most beginner friendly method of highlighting models. Its also why drybrushing sometimes gets hate from idiots. Don’t let any holier-than-thou painters who are maligning drybrushing because they just learned how to wet blend dissuade you, drybrushing is a useful tool for painters of all skill levels.
What Is Drybrushing?
Drybrushing is a highlighting technique that uses a dry brush in order to apply highlights to raised details on a model.
Let’s compare this to traditional painting. Normally when model painting with acrylic paints, you put some paint on a pallet and thin it down with some water or thinning medium. Then you take a brush with some moisture on it and add paint to the bristles, dabbing off excess. When it is time to paint, the paint flows freely from the brush onto the model wherever you place the brush, only needing gentle pressure with each brushstroke. Breaking this down, the critical bits to pull out is wet brush, flowing paint, gentle brushstrokes.
Drybrushing is pretty much the opposite of the traditional method. To drybrush, we take a brush with no moisture and put some paint on a textured absorbent surface (paper towels are perfect for this). We apply paint to the drybrush, and use the paper towel to remove excess paint. When we drybrush the model, rather than traditional brushstrokes, we quickly move the brush back and forth over the model as if we are using a feather duster to coat the surface with paint.
With this method, rather than paint flowing freely from the brush onto the surface of the model, the dried paint particles from the brush gradually stain the model with each pass. The dried paint gets left behind on whatever parts of the model had the most contact with the brush, like raised details, and leaves very little to no paint on recessed areas where the brush doesn’t make contact. Just like that, we highlighted raised details, and the recessed details are lowlighted. Couldn’t be easier if we tried.
Drybrushing isn’t the perfect technique. Famously, drybrushing tends to leave a particular texture that looks different than the smooth texture of traditional painting. Drybrushing often looks grainy in comparison. Drybrushing also tends to be difficult to do on large, flat surfaces, since the paint has no raised details to stick on to. When used correctly though, drybrushing is a powerful tool that can speed up your painting process while making models look great!
What We Need for Drybrushing
A Drybrush
As with any painting technique, we need to pick the right kind of brush for the job. Drybrushing is a particularly unusual kind of painting technique, and the normal pine-tipped brush used in miniature painting won’t work well here. Firstly, drybrushing is hell on most brushes, since the drying paint and rough strokes will bend and fray the brush quickly. We also want a brush with a large surface area, in order to maximize the paint we leave on the model with each pass of the brush.
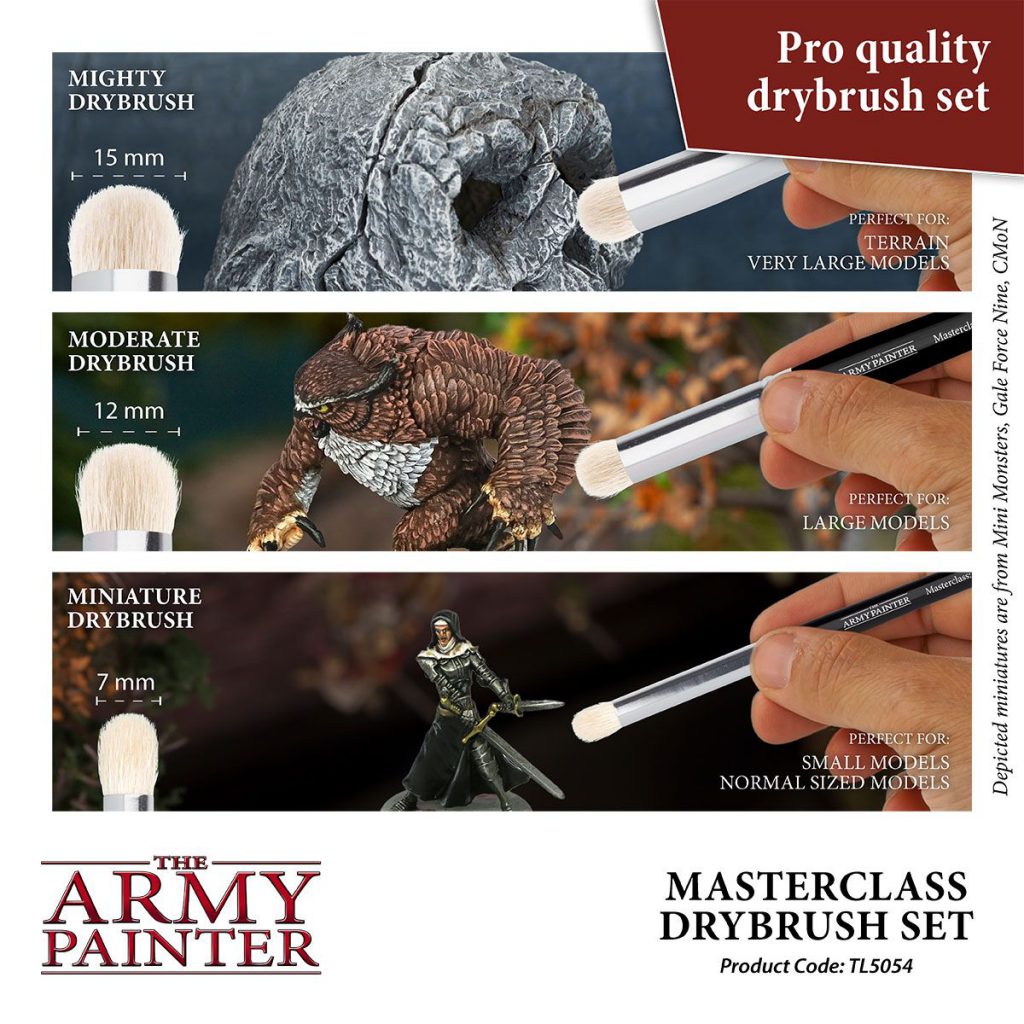
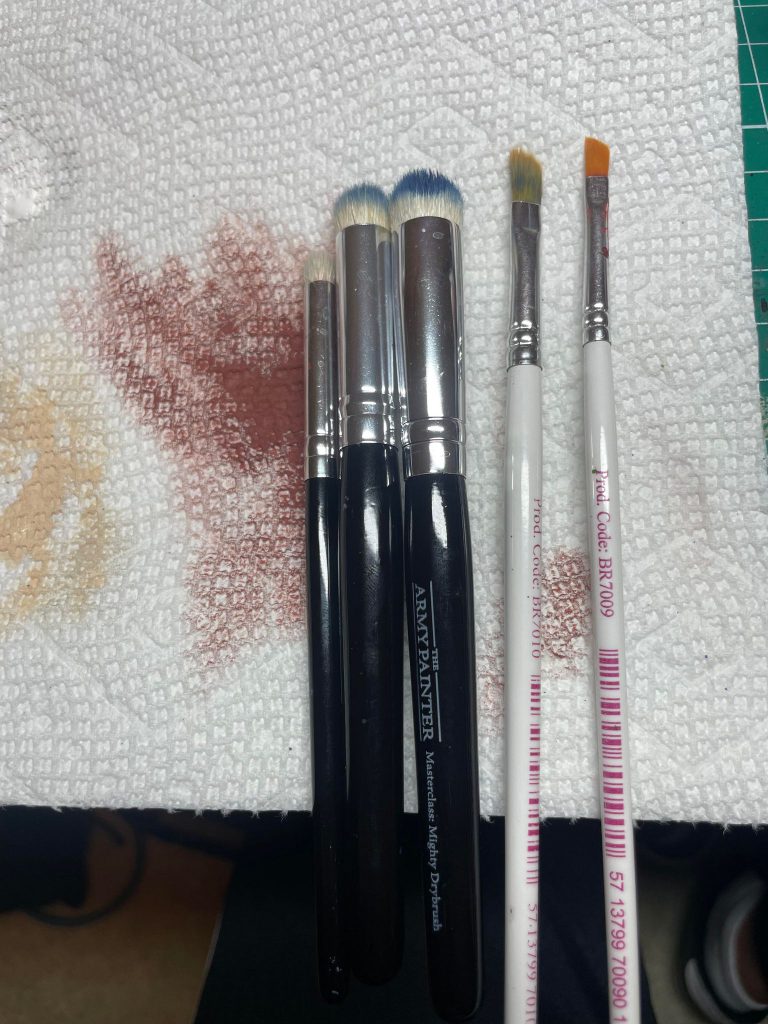
Enter the drybrush. A good drybrush has a large surface area and sturdy bristles to get the job done right. Army Painter’s Masterclass Drybrush collection is the perfect example of an ideal drybrush. The large rounded surface of the brush can hold plenty of paint for drybrushing, and the rounded shape means these bristles really wont bend and fray like those of a normal brush. Army Painter’s Wargamer Dry Brushes are another example of a good drybrush, since they have the same thick bristles and large surface area, while the diagonal shape of the brush makes it easy to get into hard-to-reach areas when drybrushing.
Paper Towel
Paper towels are already essential parts of the toolkit of most mini painters. Paper Towels are excellent for absorbing excess water from a brush when we paint, as well as for cleaning brushes when we are done with them.
In drybrushing, the paper towel is our palette. Paper towels can absorb the excess paint from our drybrush when we drag the brush across the paper towel, making sure that we don’t have too much paint on the brush before we start. Drybrush paint also doesnt need to be thinned, its actually better thick in most cases. So putting out paint right on the paper towel keeps it thick for the drybrush without making a mess.
Our Paints
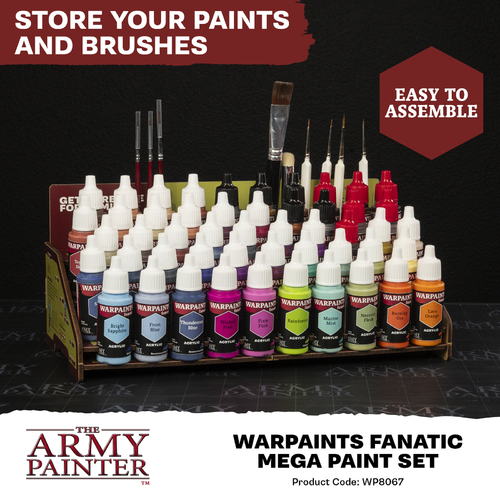
Drybrushing works best with highly pigmented paints that really pop on a model. Keep this in mind when you’re making paint selections when drybrushing for the best effect.
Army Painter Fanatic Warpaints are an excellent choice for drybrushing, since these paints have a very high pigment concentration and will look great coming off the drybrush.
How to Drybrush
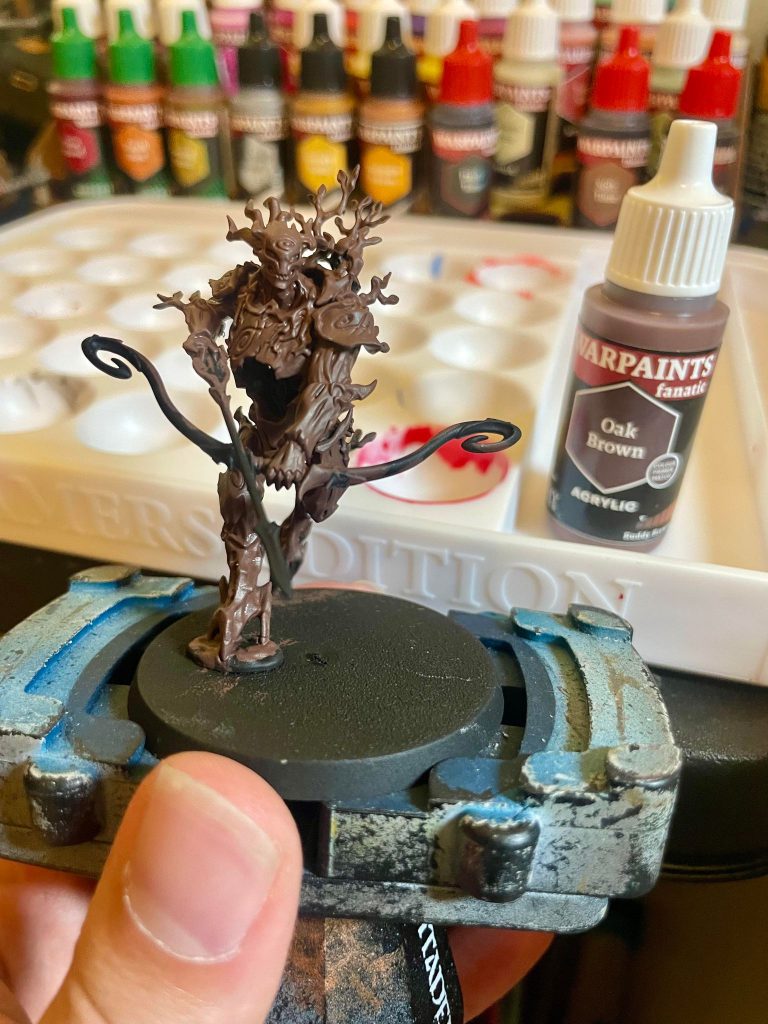
I’m going to use painting the oaken skin of this Kurnoth Hunter from Games Workshop as my example for how to drybrush. This model has lots of raised details for the dry paint from my drybrush to dust on to, and the stereotypical drybrush texture works well for Sylvaneth, who are made of wood.
To start drybrushing, we will need a basecoat. For this, I apply a coat of Army Painter’s Oak Brown all over the model.
Following this, I’m going to shade the model with Army Painter Dark Tone. Drybrushing catches the highlights, so using a shade here helps build lowlights on the model to contrast. I wait for the shade to dry completely before moving on.

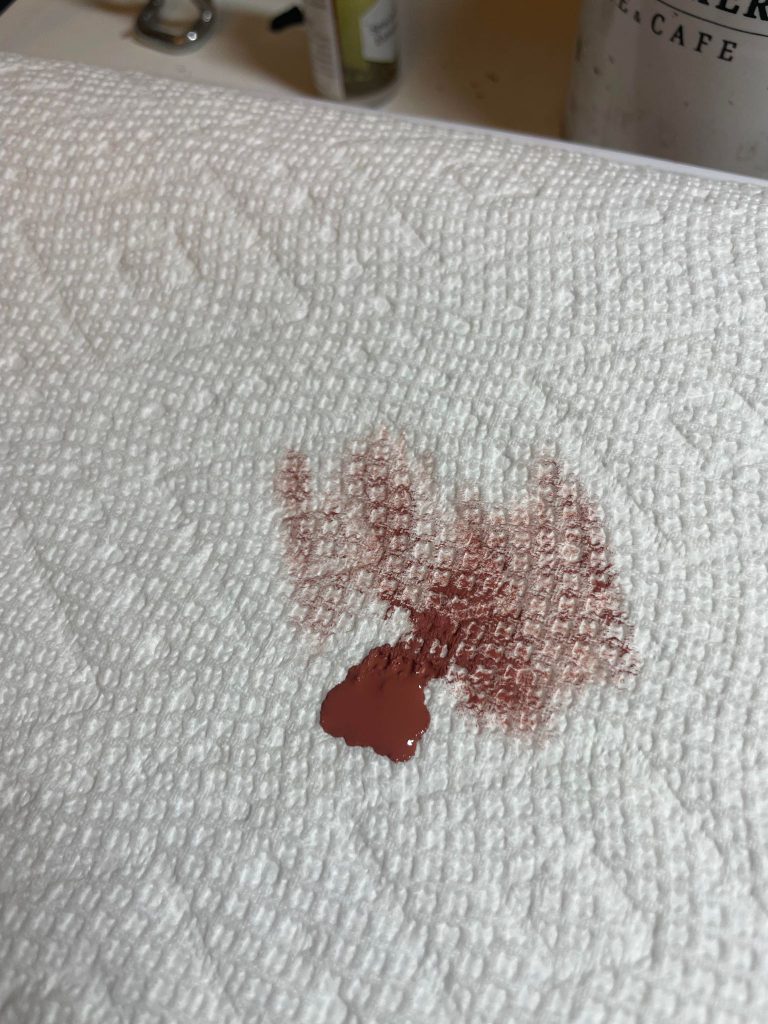
Now, I’m going to put on a first layer of drybrushed highlights with Army Painter’s Fur Brown. I apply some paint from the bottle right onto my paper towel.
Now that I have my paper towel drybrush pallet, I will take my masterclass miniature drybrush and apply Fur Brown to it. Now, I dont want too much paint on my drybrush, otherwise I’m going to leave ugly streaks and clumps on my model when I drybrush. So, I use the paper towel to remove excess paint until only a little bit of paint is coming off the brush each time I drag it over the paper towel.
Now onto the model itself. I take my drybrush and lightly dust the model, just like I would a feather duster. With each pass from the brush, the paint will slowly build up on the raised details of the Kurnoth Hunter. I carefully drybrush all over the bark, and switch to the Wargamer drybrush when I need to get into the tight spaces around the branches of the model.
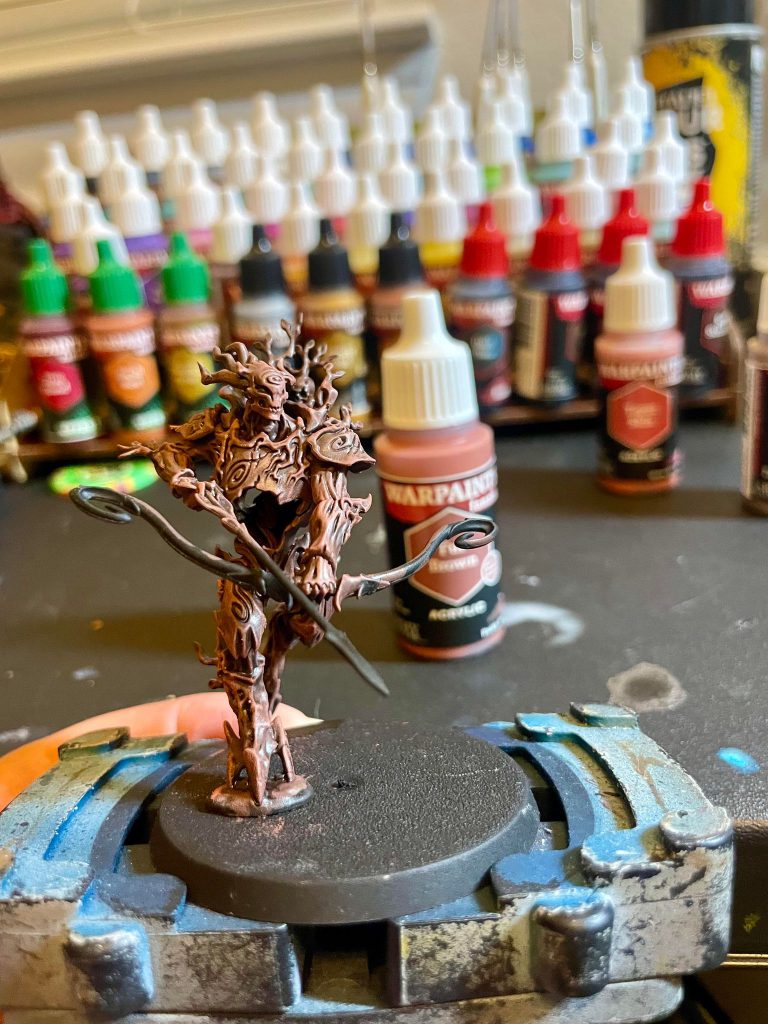
Now, I clean my drybrush with water and rub it on the paper towel until it is completely dry before I apply one more stage of highlights. This time I’m using Army Painter’s Dorado Skin to add fine highlights to the model. I apply the paint again on my masterclass drybrush, and I’m careful to only apply the drybrush to the highest raised parts of the model for an extreme highlight.
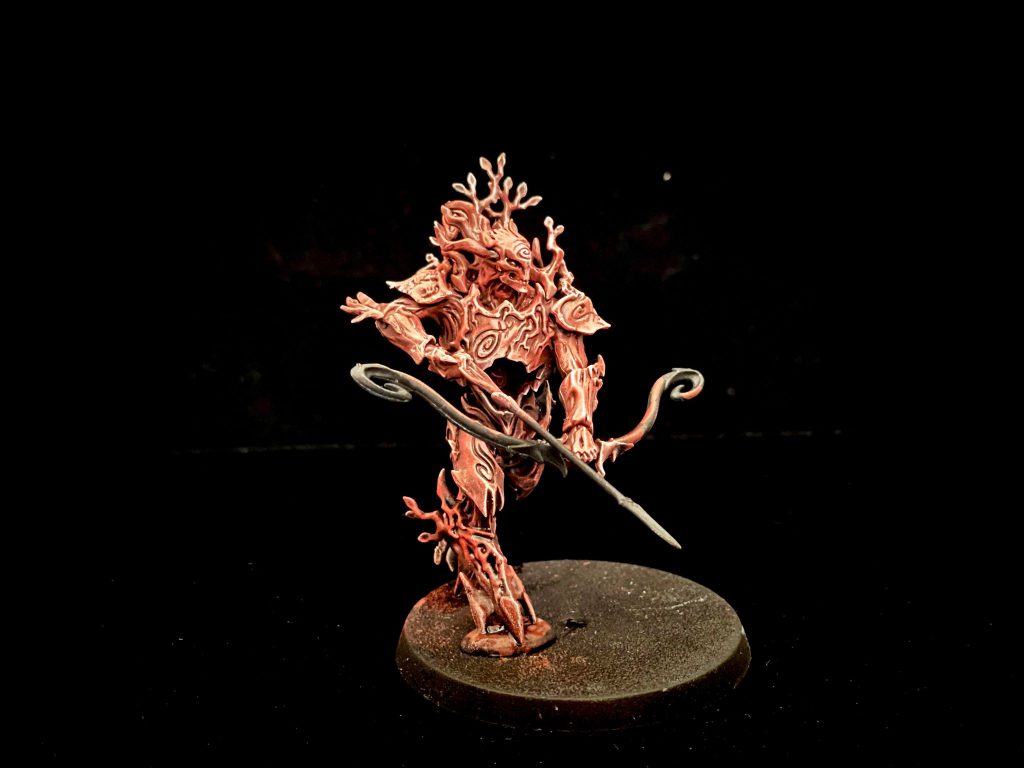
And there we have it! The bark skin of our Kurnoth Hunter is ready, and quickly too.
Undercoating
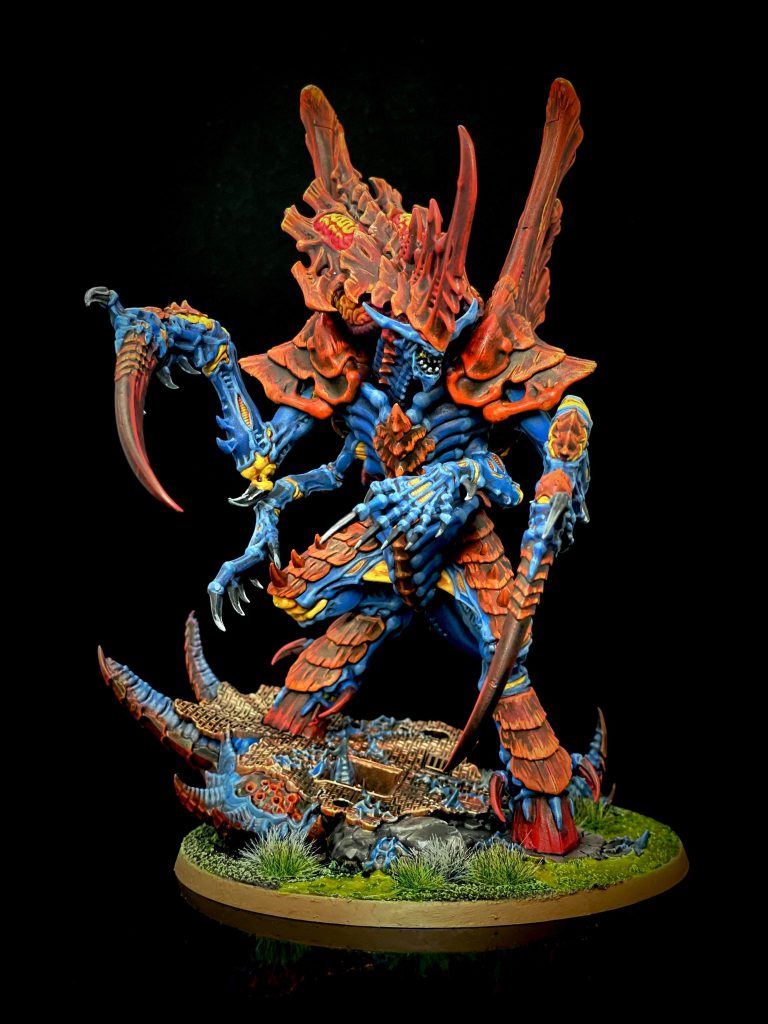
Drybrushing is often used in undercoating, which is a fantastic way to paint models quickly using thin paints like Army Painter Speed Paints. We have more articles here on Goonhammer that go into more detail on how to use these paints, so I’ll hit just the basics here with this Tyranid Lictor.
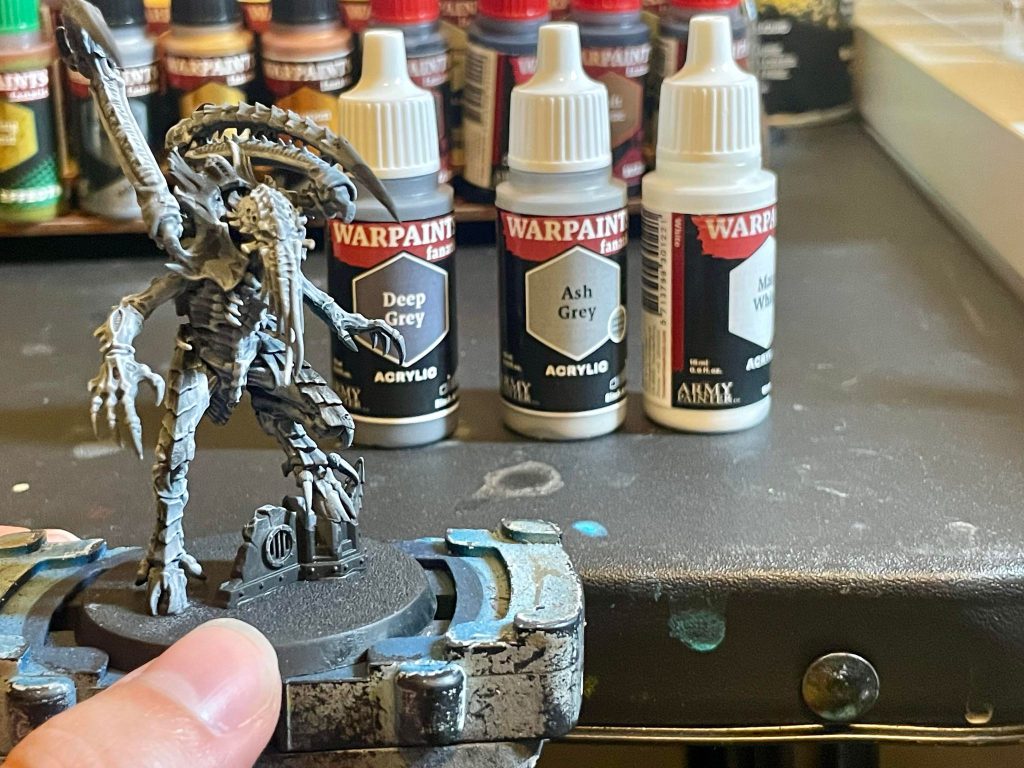
I’m going to paint this guy a deep blue to match the rest of my homebrew hive fleet, Hive Fleet Astro. I’ll be applying some speed paint to him to get that perfect color, and in order to make the highlights really pop I’m going to drybrush some underpants. First, I’ll apply a basecoat of Army Painter Deep Grey all over the model. After this, I’ll drybrush on Ash Grey to add highlights to the model, followed by Matte White. Speed paints are already designed to add natural highlights when applied, but when we underpaint like this it makes those highlights really pop!
Now the model is ready for a coat of Highlord Blue Speed Paint, and the skin of this Lictor is all done!

Using Drybrushing: When is it Good, and When is it Bad?
To review, Drybrushing is a very effective tool that lets us apply highlights quickly to raised details on models by using a brush filled with dried paint to dust the model with pigment. Generally, these paint brushes are very large compared to a traditional brush, and drybrushing usually leaves a textured pattern on models. Still, it is a very powerful tool in the belt of any mini painter!
With this review in mind, lets go over some bullet points on when drybrushing is best used, and when not to use it.
Drybrushing is good when…
- Painting models or details on models with lots of raised areas.
Good examples of some details that are great for drybrushing is hair, fur, stone, cloaks, wood, bones, metal, carapaces, and flesh.
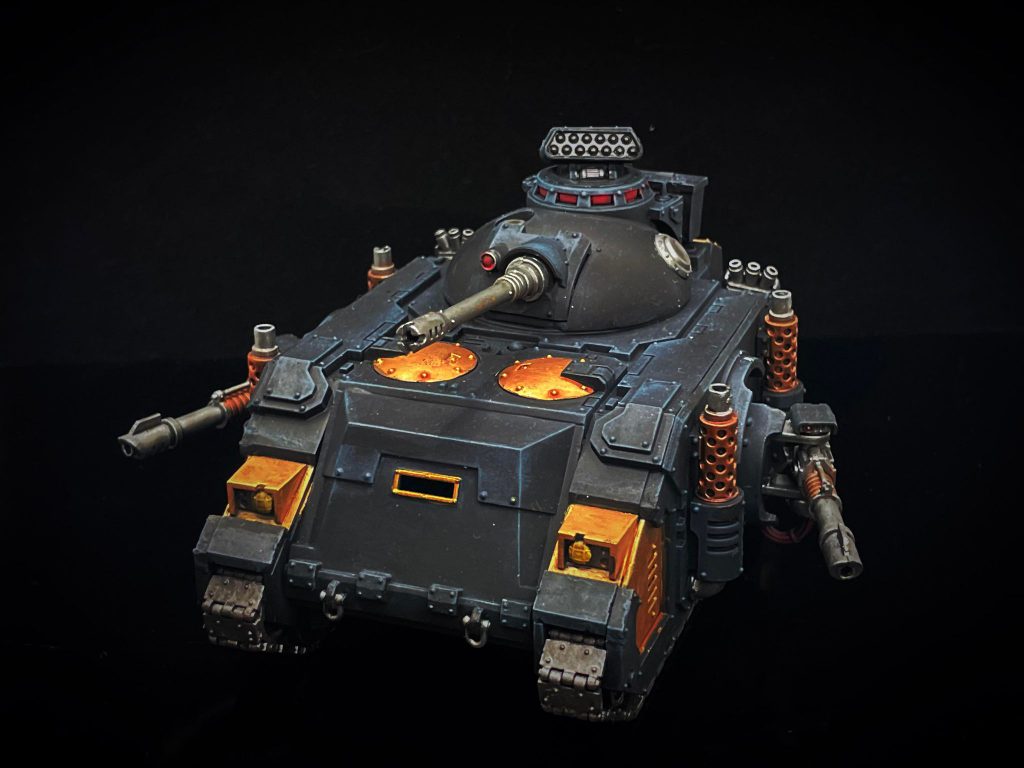
- You need to paint something fast!
Sometimes, you just need to paint something quickly, and you don’t get faster than drybrushing without using something like Speed Paints! For example, I needed to paint this Predator quickly, so I used a drybrush to catch the raised details on the tank’s hull. It’s less precise than traditionally edge highlighting the tank, but boy is it much faster.
- Cool effects like OSL and Weathering
It takes a little while to get used too, but the textured effect left behind by drybrushing is great for some nifty techniques like object source lighting (OSL) and weathering.
- Painting Terrain and Bases
Terrain and bases are usually composed of the materials that take well to drybrushing, and often you don’t want to get bogged down painting it. Break out the biggest drybrush you have and you’ll be done with that Zone Mortalis terrain set in no time!
- Undercoating
Drybrushing on a brighter color during undercoating means that one coat style paints will really pop when you apply them.
Drybrushing is bad when…
- You need to paint precise details
Drybrushing is not a very precise technique, so anything that calls for precision while painting (such as those pesky eyes and lenses) are ill-suited for drybrushing.
- You are painting large flat surfaces
Drybrushing works best when you’re using it to catch raised details on a model. When you try to drushbrush large, flat surfaces, you’ll often do more work drybrushing for a worse result.
- You want to avoid that textured look
You can do things to tone down the textured look of drybrushing, and it often really is only an issue on larger flat surfaces of a model. Still, if you nooed everything on the model to look crisp and smooth, drybrushing may not be the best choice.
And there we have it! All the ins and outs of drybrushing. I’ve been miniature painting for years, and with those years I’ve become pretty good at painting nice looking models if I do say so myself. No matter how good I get though, I love keeping a good drybrush around, as its a very handy technique that makes models look great quickly when done right!
Have any questions or feedback? Drop us a note in the comments below or email us at contact@goonhammer.com. Want articles like this linked in your inbox every Monday morning? Sign up for our newsletter. And don’t forget that you can support us on Patreon for backer rewards like early video content, Administratum access, an ad-free experience on our website and more.
